change time MAZDA MODEL CX-9 2020 (in English) Owner's Manual
[x] Cancel search | Manufacturer: MAZDA, Model Year: 2020, Model line: MODEL CX-9, Model: MAZDA MODEL CX-9 2020Pages: 706
Page 236 of 706
CAUTION
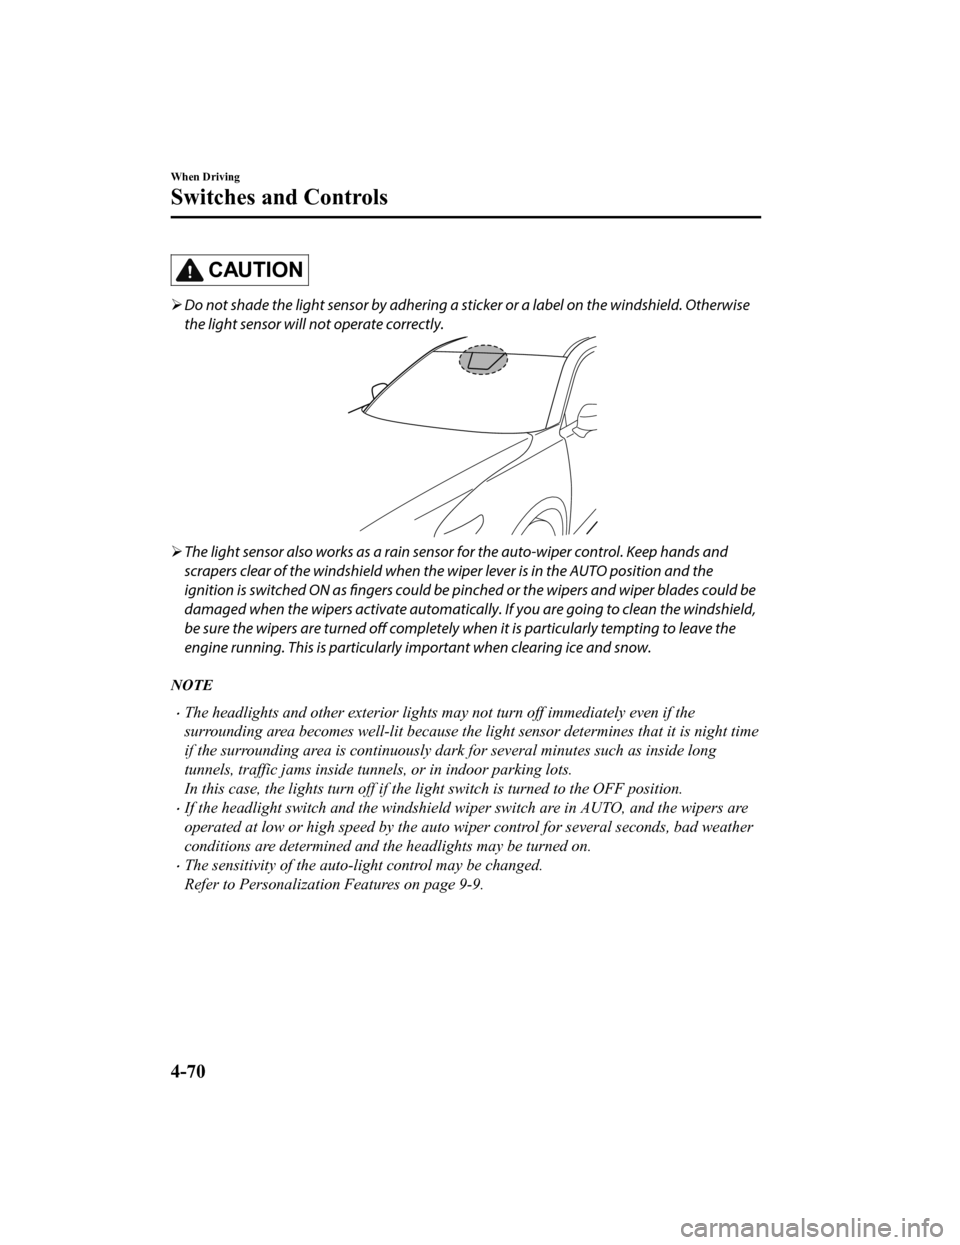
Do not shade the light sensor by adhering a st icker or a label on the windshield. Otherwise
the light sensor will not operate correctly.
The light sensor also works as a rain sensor for the auto-wiper control. Keep hands and
scrapers clear of the windshield when the wiper lever is in the AUTO position and the
ignition is switched ON as fingers could be pinched or the wipers and wiper blades could be
damaged when the wipers activate automaticall y. If you are going to clean the windshield,
be sure the wipers are turned off completely wh en it is particularly tempting to leave the
engine running. This is particularly important when clearing ice and snow.
NOTE
The headlights and other exterior lights may not turn off immediately even if the
surrounding area becomes well-lit because the light sensor determines that it is night time
if the surrounding area is continuously dark for several minutes such as inside long
tunnels, traffic jams inside tunnels, or in indoor parking lots.
In this case, the lights turn off if the li ght switch is turned to the OFF position.
If the headlight switch and the windshield wiper switch are in AUTO, and the wipers are
operated at low or high speed by the auto wiper control for several seconds, bad weather
conditions are determined and the headlights may be turned on.
The sensitivity of the auto-light control may be changed.
Refer to Personalization Features on page 9-9.
When Driving
Switches and Controls
4-70
CX-9_8HT8-EA-19I_Edition2_old 2019-9-24 13:14:55
Page 237 of 706
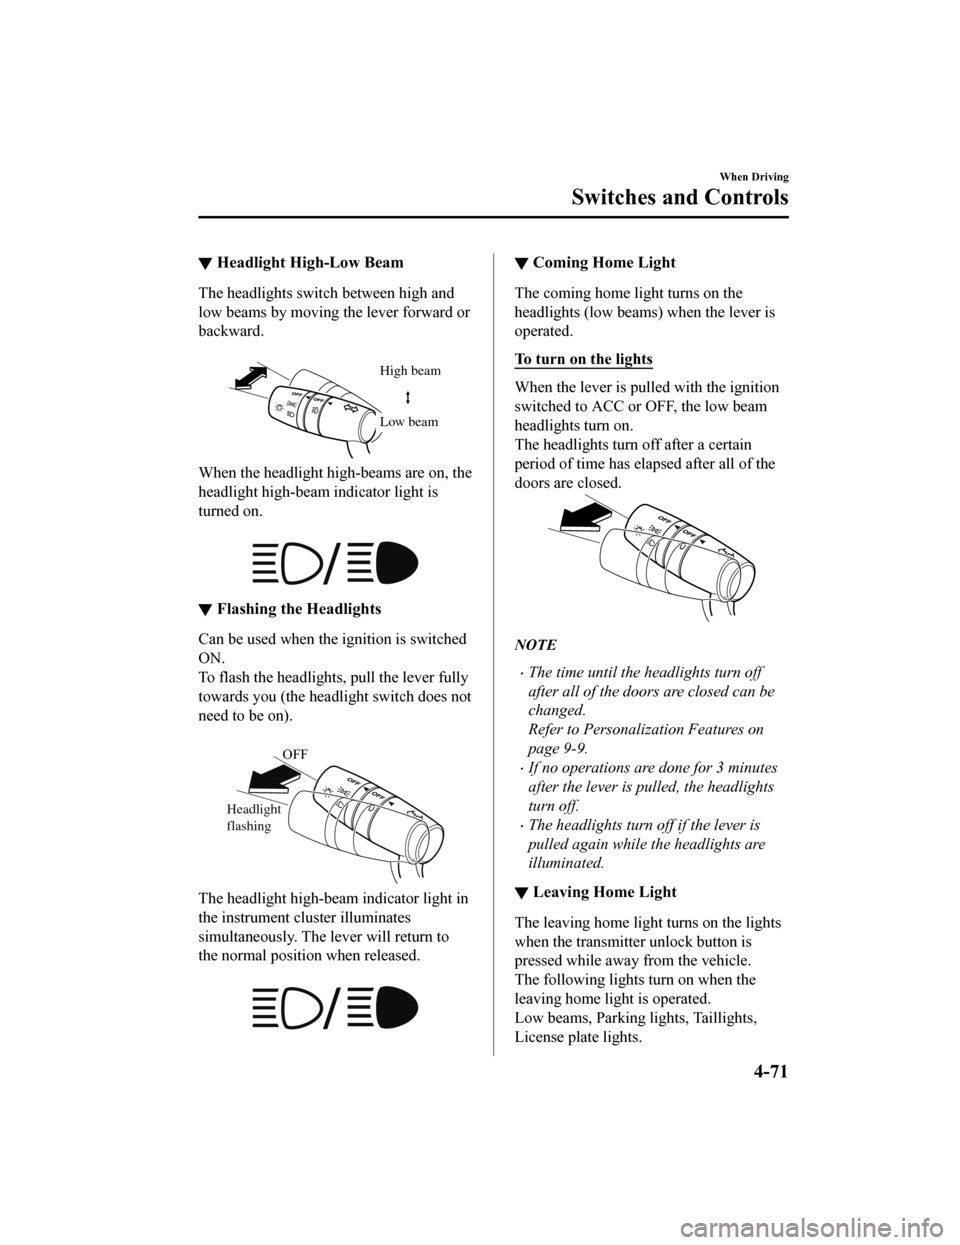
▼Headlight High-Low Beam
The headlights switch between high and
low beams by moving the lever forward or
backward.
High beam
Low beam
When the headlight high-beams are on, the
headlight high-beam indicator light is
turned on.
▼Flashing the Headlights
Can be used when the ignition is switched
ON.
To flash the headlights, pull the lever fully
towards you (the headli
ght switch does not
need to be on).
OFF
Headlight
flashing
The headlight high-bea m indicator light in
the instrument cluster illuminates
simultaneously. The lever will return to
the normal position when released.
▼ Coming Home Light
The coming home light turns on the
headlights (low beams) when the lever is
operated.
To turn on the lights
When the lever is pulled with the ignition
switched to ACC or OFF, the low beam
headlights turn on.
The headlights turn off after a certain
period of time has elapsed after all of the
doors are closed.
NOTE
The time until the headlights turn off
after all of the doors are closed can be
changed.
Refer to Personalization Features on
page 9-9.
If no operations are done for 3 minutes
after the lever is pulled, the headlights
turn off.
The headlights turn off if the lever is
pulled again while the headlights are
illuminated.
▼Leaving Home Light
The leaving home light turns on the lights
when the transmitter unlock button is
pressed while away from the vehicle.
The following lights turn on when the
leaving home light is operated.
Low beams, Parking lights, Taillights,
License plate lights.
When Driving
Switches and Controls
4-71
CX-9_8HT8-EA-19I_Edition2_old
2019-9-24 13:14:55
Page 238 of 706
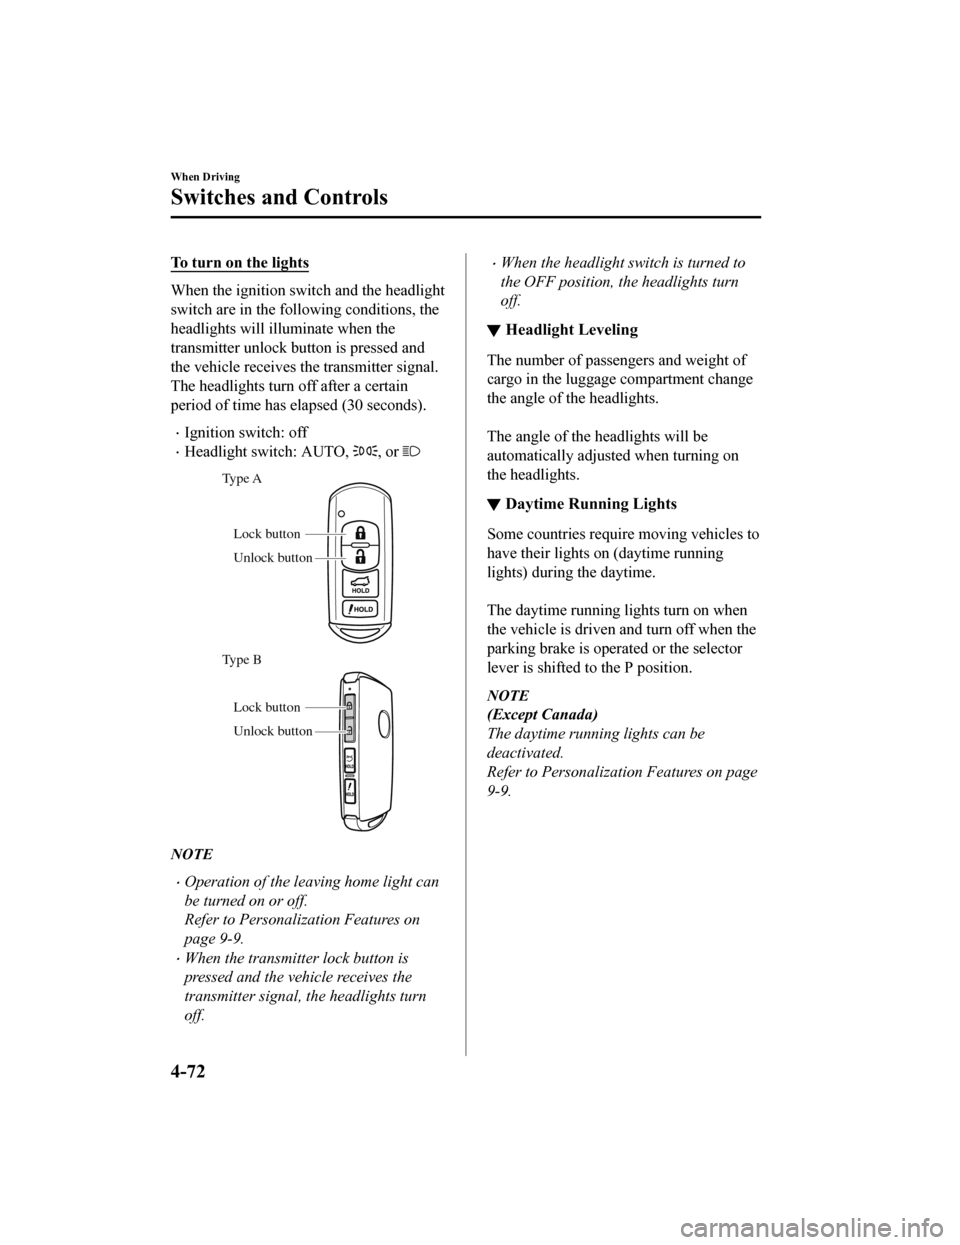
To turn on the lights
When the ignition switch and the headlight
switch are in the following conditions, the
headlights will illu minate when the
transmitter unlock bu tton is pressed and
the vehicle receives the transmitter signal.
The headlights turn off after a certain
period of time has elapsed (30 seconds).
Ignition switch: off
Headlight switch: AUTO, , or
Unlock button Lock button
Type B Type A
Unlock button Lock button
NOTE
Operation of the leaving home light can
be turned on or off.
Refer to Personalization Features on
page 9-9.
When the transmitter lock button is
pressed and the vehicle receives the
transmitter signal, the headlights turn
off.
When the headlight switch is turned to
the OFF position, the headlights turn
off.
▼
Headlight Leveling
The number of passengers and weight of
cargo in the luggage compartment change
the angle of the headlights.
The angle of the headlights will be
automatically adjusted when turning on
the headlights.
▼Daytime Running Lights
Some countries require moving vehicles to
have their lights on (daytime running
lights) during the daytime.
The daytime running lights turn on when
the vehicle is driven and turn off when the
parking brake is operated or the selector
lever is shifted to the P position.
NOTE
(Except Canada)
The daytime running lights can be
deactivated.
Refer to Personalization Features on page
9-9.
When Driving
Switches and Controls
4-72
CX-9_8HT8-EA-19I_Edition2_old
2019-9-24 13:14:55
Page 240 of 706
▼Lane-Change Signals
Move the lever halfway toward the
direction of the lane change
―until the
indicator flashes ― and hold it there. It
will return to the off position when
released.
▼ Three-Flash Turn Signal
After releasing the turn
signal lever, the
turn signal indicator flashes 3 times. The
operation can be canceled by moving the
lever in the direction opposite to which it
was operated.
NOTE
The three-flash turn signal function can be
switched to operable/inoperable using the
personalization function.
Refer to Personalization Features on page
9-9.
Windshield Wipers and Wa s h e r
The ignition must be switched ON to use
the wipers.
WA R N I N G
Use only windshield washer fluid or plain
water in the reservoir:
Using radiator antifreeze as washer fluid is
dangerous. If sprayed on the windshield, it
will dirty the windshield, affect your
visibility, and could result in an accident.
Only use windshield washer fluid mixed
with anti-freeze protection in freezing
weather conditions:
Using windshield washer fluid without
anti-freeze protection in freezing weather
conditions is dangerous as it could freeze
on the windshield and block your vision
which could cause an accident. In addition,
make sure the windshield is sufficiently
warmed using the defroster before
spraying the washer fluid.
When Driving
Switches and Controls
4-74
CX-9_8HT8-EA-19I_Edition2_old 2019-9-24 13:14:55
Page 248 of 706

▼Programming the HomeLink
System
CAUTION
When programming a garage door opener
or a gate, disconnect the power to these
devices before performing programming.
Continuous operation of the devices could
damage the motor.
The HomeLink system provides 3 buttons
which can be individually selected and
programmed using the transmitters for
current, on-market devices as follows:
1. Disconnect the power to the garage
door opener or gate programmed to the
hand-held transmitter.
2. Position the end of your hand-held transmitter 2.5 ―7.5 cm (1―3 inches)
away from the HomeLink button you
wish to program while keeping the
indicator light in view.
3. Simultaneously press and hold both the chosen HomeLink and hand-held
transmitter buttons. Do not release the
buttons until step 3 has been
completed.
NOTE
Some gate operators and garage door
openers may require you to replace
this Programming Step 2 with
procedures noted in the “Gate
Operator/Canadian Programming”
section.
4. After the HomeLink indicator light changes from a slow to a rapidly
blinking light, release both the
HomeLink and hand-held transmitter
buttons.
NOTE
If the HomeLink indicator light does
not change to a rapidly blinking light,
contact HomeLink at
www.homelink.com or call
1-800-355-3515 for assistance.
5. Connect the power to the garage door
opener or gate programmed to the
hand-held transmitter.
6. Firmly press and hold the programmed
HomeLink button for five seconds, and
then release it. Perform this operation
two times to activate the door or gate.
If the door or gate does not activate,
press and hold the just-trained
HomeLink button and observe the
indicator light.
If the indicator light stays on
constantly, programming is complete
and your device should activate when
the HomeLink button is pressed and
released.
NOTE
To program the remaining two
HomeLink buttons, begin with
“Programming” ― step 1
If the indicator light blinks rapidly for
two seconds and then turns to a
constant light, continue with
“Programming” steps 7 ―9 to
complete the programming of a rolling
code equipped device (most commonly
a garage door opener).
7. At the garage door opener receiver (motor-head unit) in the garage, locate
the “learn” or “smart” button. This can
usually be found where the hanging
antenna wire is attached to the
motor-head unit.
8. Firmly press and release the “learn” or
“smart” button. (The name and color
When Driving
Switches and Controls
4-82
CX-9_8HT8-EA-19I_Edition2_old 2019-9-24 13:14:55
Page 253 of 706
repeatedly until the indicator light changes
from amber to green.
Go back to Step 4 of Programming the
HomeLink System to complete the
procedure.
▼ Operating the HomeLink System
Press the programmed HomeLink button
to operate a programmed device.
▼Reprogramming the HomeLink
system
To program a device to HomeLink using a
HomeLink button previously trained,
follow these steps:
1. Press and hold the desired HomeLink
button. DO NOT release the button.
2. After 20 seconds, the indicator light flashes in amber. After the indicator
light flashes, release the HomeLink
button.
3. Go back to Step 2 of Programming the HomeLink System to complete the
procedure.
NOTE
If the programming has not been
completed, the syst em returns to the
previous programming.
▼ Erasing Programmed HomeLink
Buttons
NOTE
All of the programmed HomeLink
buttons are reset. Individual buttons
cannot be reset, however, individual
buttons can be reprogrammed. For
individual button reprogramming, refer
to Reprogramming the HomeLink
System (page 4-87).
Verify that the programming has been
erased if you resell the vehicle.
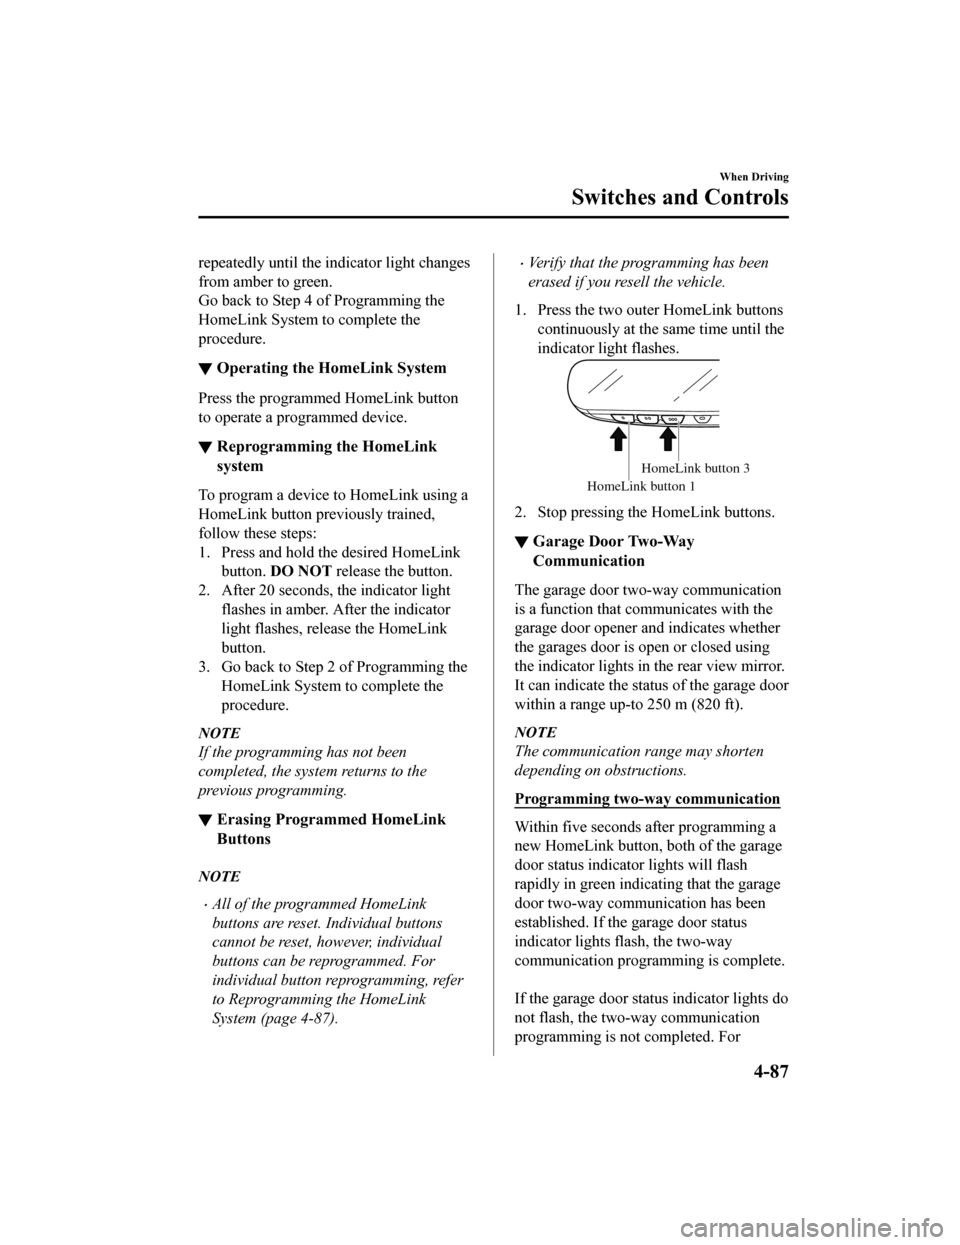
1. Press the two outer HomeLink buttons continuously at the same time until the
indicator light flashes.
HomeLink button 1
HomeLink button 3
2. Stop pressing the HomeLink buttons.
▼Garage Door Two-Way
Communication
The garage door two-way communication
is a function that communicates with the
garage door opener and indicates whether
the garages door is open or closed using
the indicator lights in the rear view mirror.
It can indicate the status of the garage door
within a range up-to 250 m (820 ft).
NOTE
The communication range may shorten
depending on obstructions.
Programming two-way communication
Within five seconds after programming a
new HomeLink button, both of the garage
door status indicator lights will flash
rapidly in green indicating that the garage
door two-way communication has been
established. If the garage door status
indicator lights flash, the two-way
communication programming is complete.
If the garage door status indicator lights do
not flash, the two-way communication
programming is not completed. For
When Driving
Switches and Controls
4-87
CX-9_8HT8-EA-19I_Edition2_old
2019-9-24 13:14:55
Page 272 of 706

Fuel Economy Monitor
The Fuel Consumption information is displayed by operating each icon in the display.
In addition, after completing a trip, the total energy efficiency to date is displayed in the
ending display when the ending display is turned on.
1. Select the
icon on the home screen to display the Applications screen.
2. Select the “Fuel Economy Monitor”.
3. Select the
icon at the bottom left of the screen to display the menu in the lower part
of the screen.
4. Select the icon in the menu and perform th e operation. Each icon operates as follows:
Indication on display Control status
Hides the menu display.
Displays the Applications screen.
Resets the fuel economy data.
Displays the following setting screen.
Ending display on/off switching(With Type C instrument cluster)
On/off switching for function which synchronizes
(links) reset of fuel economy data with trip meter
(TRIP A)
NOTE
The fuel economy monitor screen after the ignition is switched from ON to OFF is changed
to the original fuel economy monitor screen when the ignition is switched ON the next time.
▼ Fuel Consumption Display
Information regarding the fuel economy is displayed.
Indication on display
Control status
Displays the fuel economy for the past 60 minutes.
Displays the fuel economy every minute for the past
1 to 10 minutes.
Displays the fuel economy every 10 minutes for the
past 10 to 60 minutes.
Displays the average fuel economy over the past 5
resets and after the current reset.
Calculates the average fuel economy every minute
after vehicle travel begins, and displays it.
When Driving
Fuel Economy Monitor
4-106
CX-9_8HT8-EA-19I_Edition2_old 2019-9-24 13:14:55
Page 285 of 706

NOTE
The timing in which the system switches the headlights changes under the following
conditions. If the system does not switch the headlights appropriately, manually switch
between high and low beams according to the visibility as well as road and traffic
conditions.
When there are sources of light in the area such as street lamps, illuminated signboards,
and traffic signals.
When there are reflective objects in the surrounding area such as reflective plates and
signs.
When visibility is reduced under rain, snow and foggy conditions.
When driving on roads with sharp turn or hilly terrain.
When the headlights/rear lamps of vehicles in front of you or in the opposite lane are dim
or not illuminated.
When there is sufficient darkness such as at dawn or dusk.
When the luggage compartment is loaded with heavy objects or the rear passenger seats
are occupied.
When visibility is reduced due to a vehicle in front of you spraying water from its tires
onto your windshield.
▼ To Operate the System
The HBC operates to switch the headlights
automatically between high and low
beams after the igniti
on is switched ON
and the headlight switch is in the AUTO
and high beam position.
The HBC determines that it is dark based
on the brightness of the surrounding area.
At the same time, the HBC indicator light
(green) in the in strument cluster
illuminates.
NOTE
When the vehicle speed is about 30 km/h
(19 mph) or more, the headlights
automatically switch to high beams
when there are no vehicles ahead or
approaching in the opposite direction.
When the vehicle speed is less than
about 20 km/h (12 mph), the HBC
switches the headlights to low beams.
The low beams may not switch to high
beams when cornering.
Operation of the HBC function can be
disabled. Refer to Personalization
Features on page 9-9.
▼ Manual Switching
Switching to low beams
Shift the lever to th
e low beam position.
The HBC indicator light (green) turns off.
When Driving
i-ACTIVSENSE
4-119
CX-9_8HT8-EA-19I_Edition2_old 2019-9-24 13:14:55
Page 288 of 706

NOTE
The BSM will operate when all of the following conditions are met:
The ignition is switched ON.
The BSM OFF indicator light in the instrument cluster is turned off.
The vehicle speed is about 10 km/h (6.3 mph) or faster.
The BSM will not operate under the following circumstances.
The vehicle speed falls below about 10 km/h (6.3 mph) even though the BSM OFF
switch indicator light is turned off.
The selector lever is shifted to R position and the vehicle is reversing.
The turning radius is small (making a sharp turn, turning at intersections).
In the following cases, the BSM OFF indicator light turns on and operation of the system
is stopped. If the BSM OFF indicator light re mains illuminated, have the vehicle inspected
at an Authorized Mazda Dealer as soon as possible.
Some problem with the system including the BSM warning indicator lights is detected.
A large deviation in the installation position of a radar sensor (rear) on the vehicle has
occurred.
There is a large accumulation of snow or ice on the rear bumper near a radar sensor
(rear). Remove any snow, ice or mud on the rear bumper.
Driving on snow-covered roads for long periods.
The temperature near the radar sensors (rear) becomes extremely hot due to driving for
long periods on slopes during the summer.
The battery voltage has decreased.
Under the following conditions, the radar sensors (rear) cannot detect target objects or it
may be difficult to detect them.
A vehicle is in the detection area at the rear in an adjacent driving lane but it does not
approach. The BSM determines the condition based on radar detection data.
A vehicle is traveling alongside your vehicle at nearly the same speed for an extended
period of time.
Vehicles approaching in the opposite direction.
A vehicle in an adjacent driving lane is attempting to pass your vehicle.
A vehicle is in an adjacent lane on a road with extremely wide driving lanes. The
detection area of the radar sensors (rear) is set at the road width of expressways.
In the following case, the flashing of the BS M warning indicator light, and the activation
of the warning sound and the warning screen indicator display may not occur or they may
be delayed.
A vehicle makes a lane change from a driving lane 2 lanes over to an adjacent lane.
Driving on steep slopes.
Crossing the summit of a hill or mountain pass.
When Driving
i-ACTIVSENSE
4-122
CX-9_8HT8-EA-19I_Edition2_old 2019-9-24 13:14:55
Page 294 of 706

Stop sign
40
Sign recognized and
displayed at same time
Active driving display indication
WA R N I N G
Always check the traffic signs visually while driving.
The TSR helps prevent the driver from overlookin g traffic signs and provides support for safer
driving. Depending on the weather conditions or problems with traffic signs, a traffic sign
may not be recognized or a traffic sign different from the actual traffic sign may be displayed.
Always make it your responsibility as a driver to check the actual traffic signs. Otherwise, it
could result in an accident.
NOTE
The TSR does not operate if there is a malfunction in the Forward Sensing Camera (FSC).
Under the following conditions, the TSR may not operate normally.
An object placed on the dashboard is reflected in the windshield and picked up by the
camera.
Heavy luggage is loaded in the luggage compartment or on the rear seat and the
vehicle is tilted.
The tire pressures are not adjusted to the specified pressure.
Tires other than standard tires are equipped.
The vehicle is driven on the ramp and surrounding area to or from a rest area or a
tollgate on a highway.
When surrounding brightness suddenly changes such as when entering or exiting a
tunnel.
When Driving
i-ACTIVSENSE
4-128
CX-9_8HT8-EA-19I_Edition2_old 2019-9-24 13:14:55