trunk MAZDA MODEL MAZDASPEED 3 2008 (in English) User Guide
[x] Cancel search | Manufacturer: MAZDA, Model Year: 2008, Model line: MODEL MAZDASPEED 3, Model: MAZDA MODEL MAZDASPEED 3 2008Pages: 394, PDF Size: 7.62 MB
Page 100 of 394
Black plate (100,1)
qHow to Arm the System
1. Remove the key from the ignition
switch.
2. Make sure the hood is closed. Close
and lock all doors and the liftgate/trunk
lid from the outside using the key. If
you have the keyless entry system,
press the lock button on the transmitter.
The hazard warning lights will flash
once to indicate that the system is
armed.
The following method will also arm the
theft-deterrent system:
Close the hood and the liftgate/trunk
lid . Press the area on the door-lock
switch marked“LOCK”once. Close all
doors.
NOTE
Locking the doors with the inside door-lock
knob will not arm the system.
qTo Turn off an Armed System
An armed system can be turned off by any
one of the following methods:
lUnlock a door or the trunk lid with the
key.
lPress the unlock button on the keyless
entry system transmitter.
lInsert the key into the ignition switch
and turn it to the ON position.
qTo Stop an Alarm
A triggered alarm can be turned off by
any one of the following methods:
lUnlock a door or the trunk lid with the
key.
lPress the unlock button on the keyless
entry system transmitter.NOTE
If you have any problem with the theft-
deterrent system, consult an Authorized Mazda
Dealer.
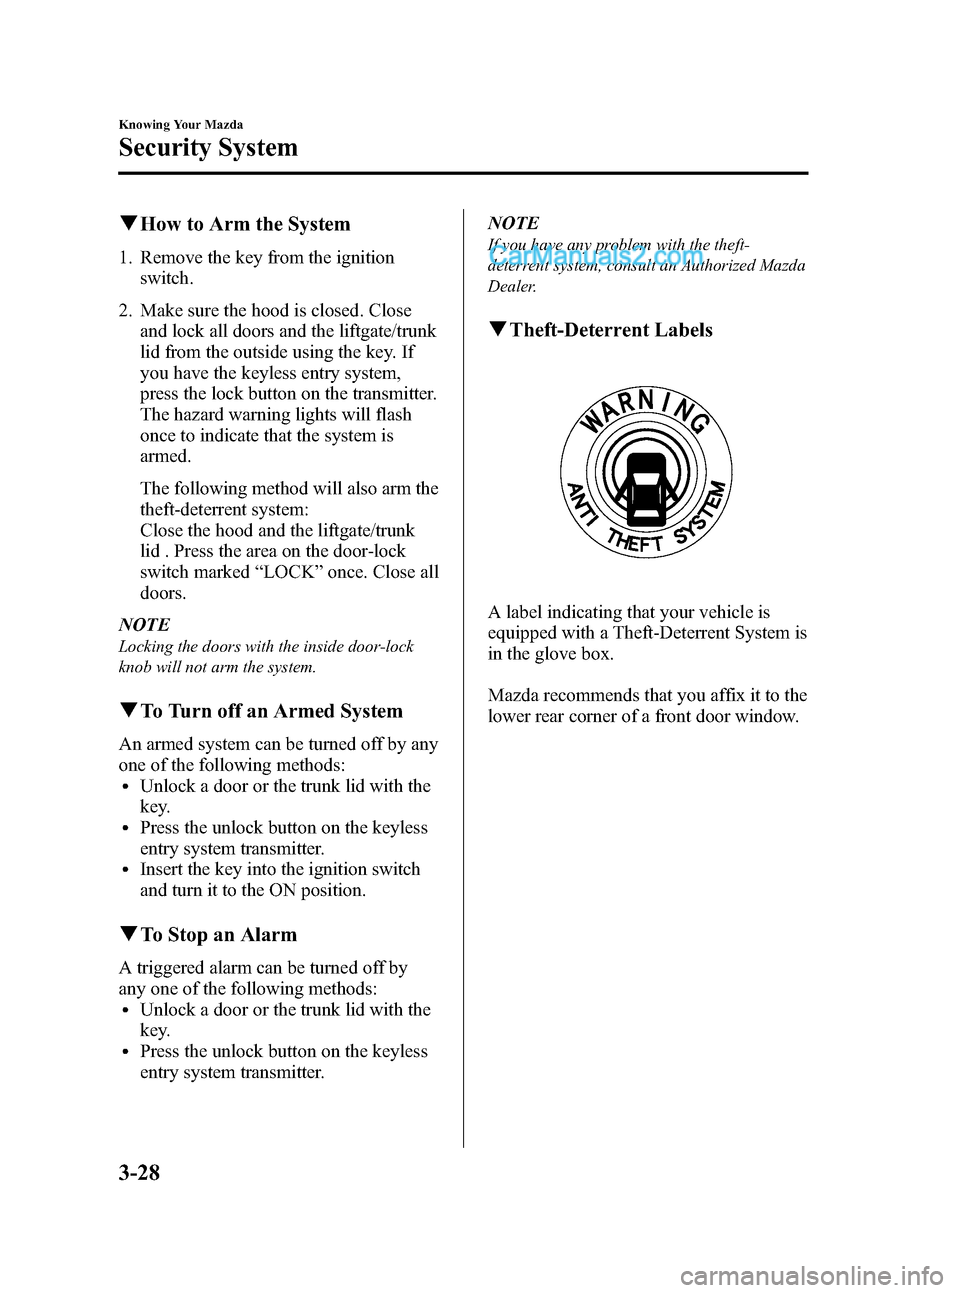
qTheft-Deterrent Labels
A label indicating that your vehicle is
equipped with a Theft-Deterrent System is
in the glove box.
Mazda recommends that you affix it to the
lower rear corner of a front door window.
3-28
Knowing Your Mazda
Security System
Mazda3_8X41-EA-07F_Edition1 Page100
Wednesday, April 25 2007 1:4 PM
Form No.8X41-EA-07F
Page 239 of 394
Black plate (239,1)
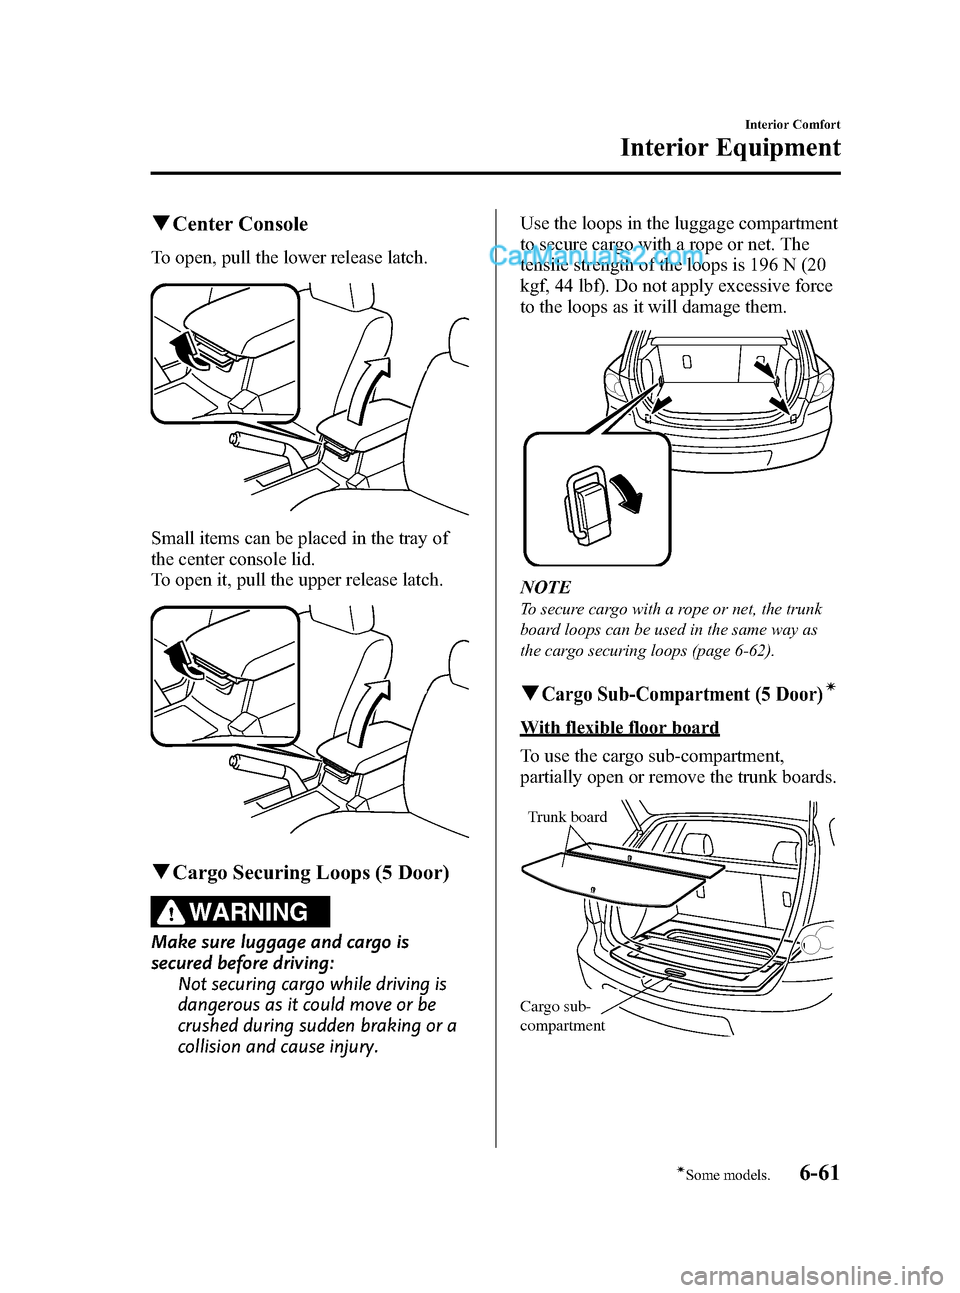
qCenter Console
To open, pull the lower release latch.
Small items can be placed in the tray of
the center console lid.
To open it, pull the upper release latch.
qCargo Securing Loops (5 Door)
WARNING
Make sure luggage and cargo is
secured before driving:
Not securing cargo while driving is
dangerous as it could move or be
crushed during sudden braking or a
collision and cause injury.Use the loops in the luggage compartment
to secure cargo with a rope or net. The
tensile strength of the loops is 196 N (20
kgf, 44 lbf). Do not apply excessive force
to the loops as it will damage them.
NOTE
To secure cargo with a rope or net, the trunk
board loops can be used in the same way as
the cargo securing loops (page 6-62).
qCargo Sub-Compartment (5 Door)í
With flexible floor board
To use the cargo sub-compartment,
partially open or remove the trunk boards.
Trunk board
Cargo sub-
compartment
Interior Comfort
Interior Equipment
6-61íSome models. Mazda3_8X41-EA-07F_Edition1 Page239
Wednesday, April 25 2007 1:6 PM
Form No.8X41-EA-07F
Page 240 of 394

Black plate (240,1)
Without flexible floor board
To use the cargo sub-compartment,
remove or lift the trunk board.
Cargo sub-
compartmentTrunk board
qFlexible Floor Board (5 Door)í
The luggage compartment can be
separated vertically and/or horizontally,
using the trunk board and the trunk board
loops.
CAUTION
Make sure the trunk board is firmly
secured when it is fitted into the
trunk board loops. If it is not firmly
secured, it could unexpectedly
disengage causing damage to the
trunk board loops or the trunk
board.NOTE
The trunk board loops can be used in the same
way as the cargo securing loops. The tensile
strength of the loops is 147 N (15 kgf, 33 lbf).
Do not apply excessive force to the trunk board
loops as it will damage them (page 6-61).
Compartment
divider loops
Rear trunk boardFront trunk board
To separate vertically
Use the rear trunk board to separate the
luggage compartment vertically.
1. Pull the trunk board loops out.
Compartment
divider loop
6-62
Interior Comfort
íSome models.
Interior Equipment
Mazda3_8X41-EA-07F_Edition1 Page240
Wednesday, April 25 2007 1:6 PM
Form No.8X41-EA-07F
Page 241 of 394

Black plate (241,1)
2. Insert the trunk board loops into the
trunk board slits.
Front
Trunk
board
NOTE
To facilitate insertion of the trunk board loops
into the trunk board slits, first insert the
bottom of the rear trunk board into the groove
of the luggage sub-compartment.
GrooveCargo sub-
compartment
3. Rock the trunk board to make sure the
board is installed securely.
To separate horizontally
Use the front trunk board to separate the
luggage compartment horizontally.
CAUTION
ØDo not place heavy objects on the
trunk board or apply excessive
force as they could damage the
trunk board. The permissible
weight is about 5 kg (11 lb).
ØDo not use the rear trunk board to
separate the luggage
compartment horizontally. The
rear trunk board cannot be locked
to the trunk board loops and it
could move and cause injury while
the vehicle is moving.
1. Pull the trunk board loops out.
Compartment
divider loop
2. Insert the trunk board loop into slit A.
Slit A
Interior Comfort
Interior Equipment
6-63
Mazda3_8X41-EA-07F_Edition1 Page241
Wednesday, April 25 2007 1:6 PM
Form No.8X41-EA-07F
Page 242 of 394
Black plate (242,1)
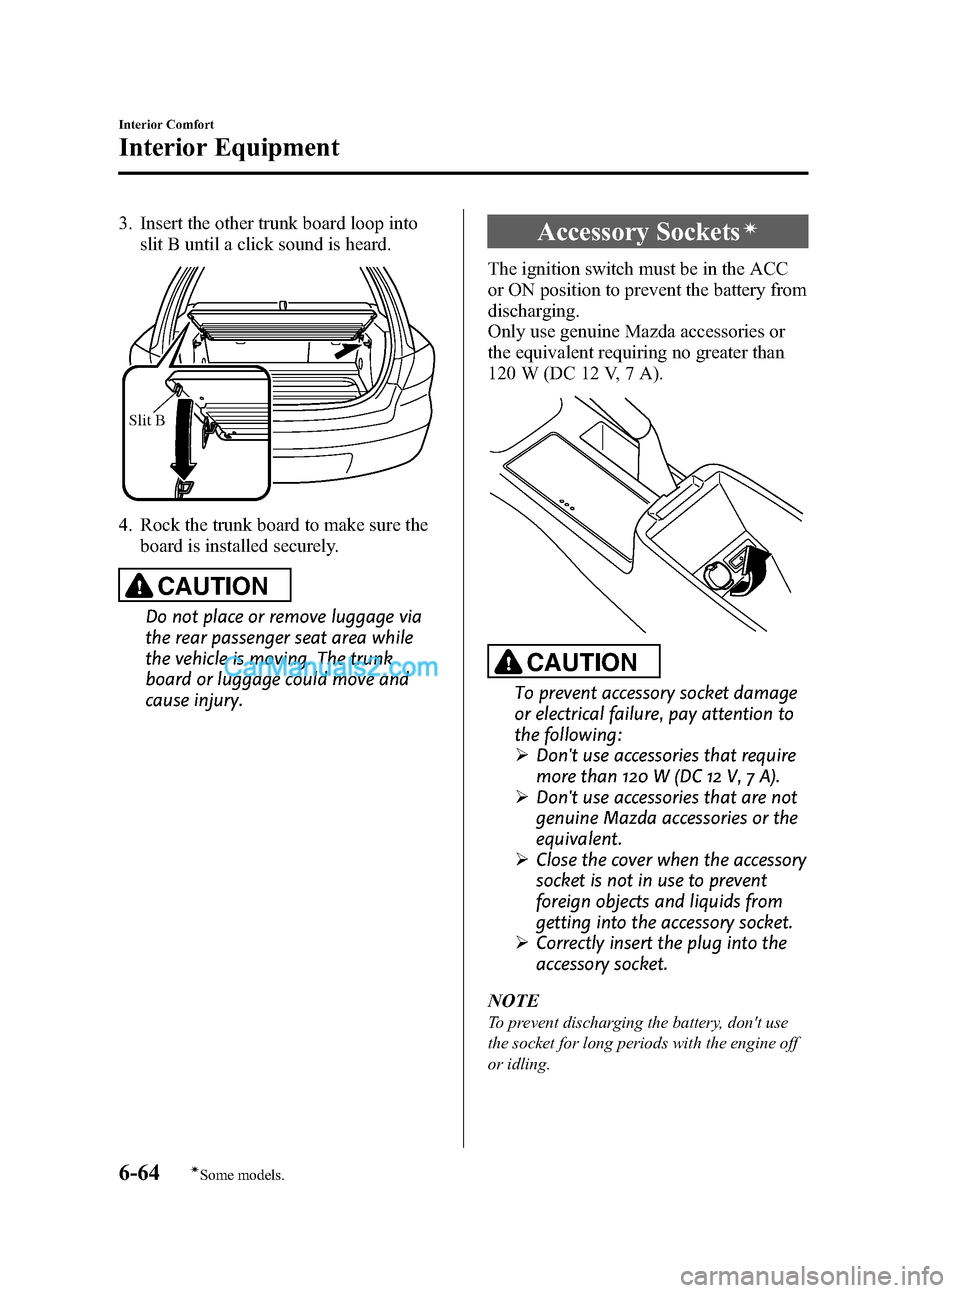
3. Insert the other trunk board loop into
slit B until a click sound is heard.
Slit B
4. Rock the trunk board to make sure the
board is installed securely.
CAUTION
Do not place or remove luggage via
the rear passenger seat area while
the vehicle is moving. The trunk
board or luggage could move and
cause injury.
Accessory Socketsí
The ignition switch must be in the ACC
or ON position to prevent the battery from
discharging.
Only use genuine Mazda accessories or
the equivalent requiring no greater than
120 W (DC 12 V, 7 A).
CAUTION
To prevent accessory socket damage
or electrical failure, pay attention to
the following:
ØDon't use accessories that require
more than 120 W (DC 12 V, 7 A).
ØDon't use accessories that are not
genuine Mazda accessories or the
equivalent.
ØClose the cover when the accessory
socket is not in use to prevent
foreign objects and liquids from
getting into the accessory socket.
ØCorrectly insert the plug into the
accessory socket.
NOTE
To prevent discharging the battery, don't use
the socket for long periods with the engine off
or idling.
6-64
Interior Comfort
íSome models.
Interior Equipment
Mazda3_8X41-EA-07F_Edition1 Page242
Wednesday, April 25 2007 1:6 PM
Form No.8X41-EA-07F
Page 251 of 394
Black plate (251,1)
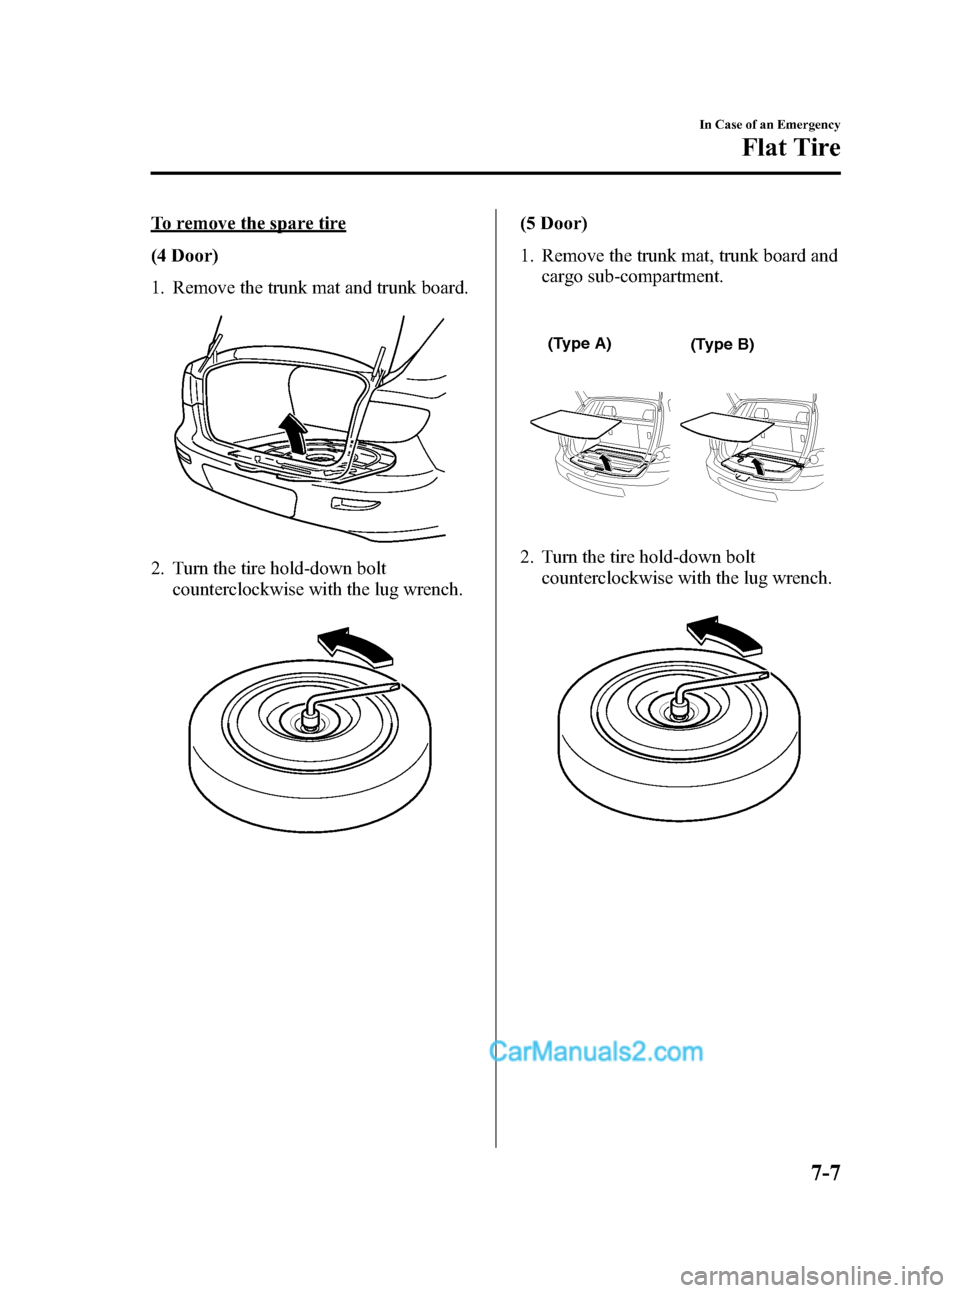
To remove the spare tire
(4 Door)
1. Remove the trunk mat and trunk board.
2. Turn the tire hold-down bolt
counterclockwise with the lug wrench.
(5 Door)
1. Remove the trunk mat, trunk board and
cargo sub-compartment.
(Type A)(Type B)
2. Turn the tire hold-down bolt
counterclockwise with the lug wrench.
In Case of an Emergency
Flat Tire
7-7
Mazda3_8X41-EA-07F_Edition1 Page251
Wednesday, April 25 2007 1:6 PM
Form No.8X41-EA-07F
Page 266 of 394
Black plate (266,1)
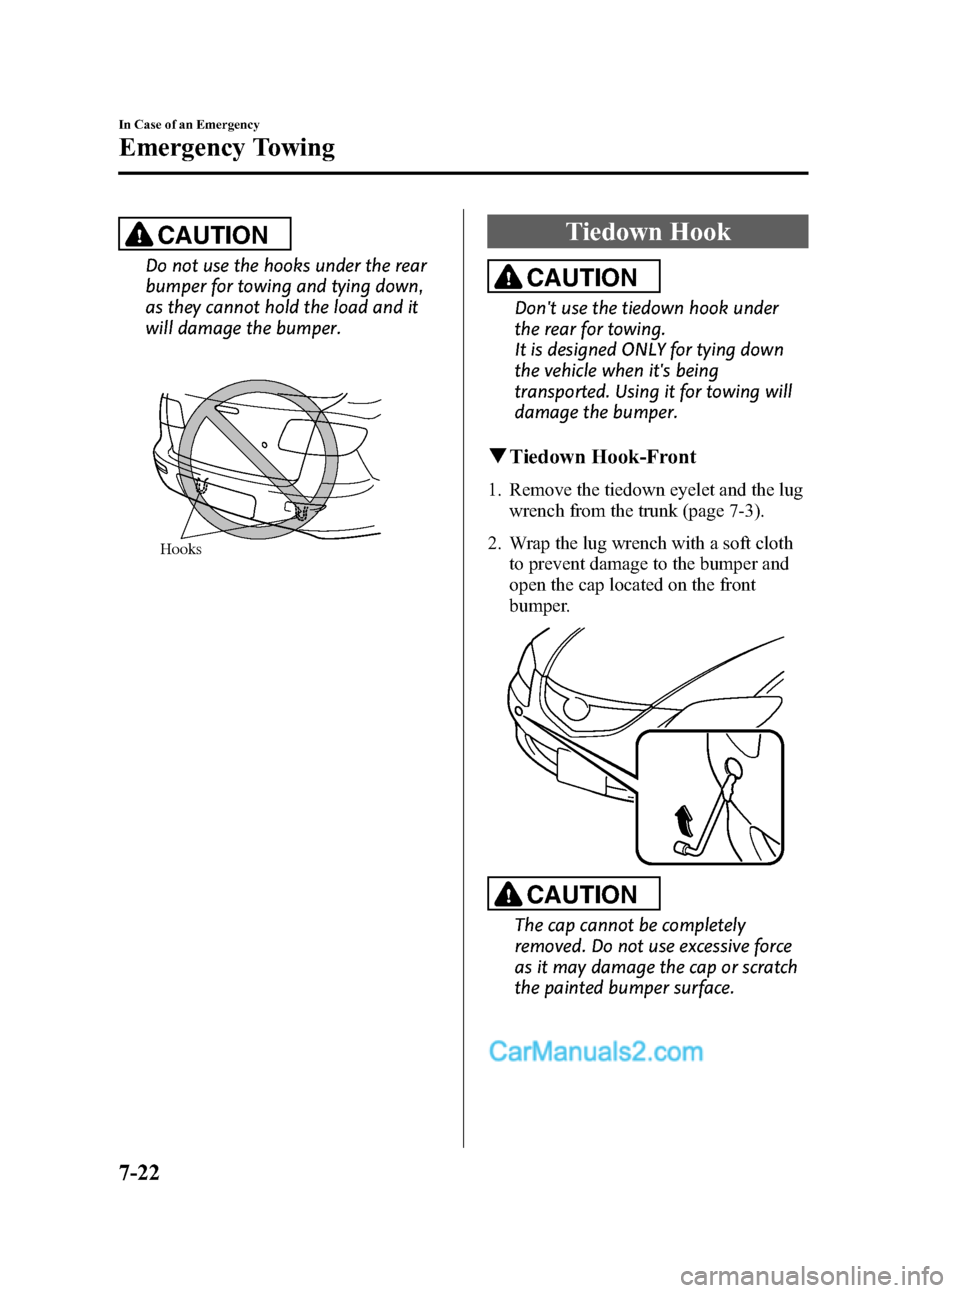
CAUTION
Do not use the hooks under the rear
bumper for towing and tying down,
as they cannot hold the load and it
will damage the bumper.
Hooks
Tiedown Hook
CAUTION
Don't use the tiedown hook under
the rear for towing.
It is designed ONLY for tying down
the vehicle when it's being
transported. Using it for towing will
damage the bumper.
qTiedown Hook-Front
1. Remove the tiedown eyelet and the lug
wrench from the trunk (page 7-3).
2. Wrap the lug wrench with a soft cloth
to prevent damage to the bumper and
open the cap located on the front
bumper.
CAUTION
The cap cannot be completely
removed. Do not use excessive force
as it may damage the cap or scratch
the painted bumper surface.
7-22
In Case of an Emergency
Emergency Towing
Mazda3_8X41-EA-07F_Edition1 Page266
Wednesday, April 25 2007 1:6 PM
Form No.8X41-EA-07F
Page 307 of 394
Black plate (307,1)
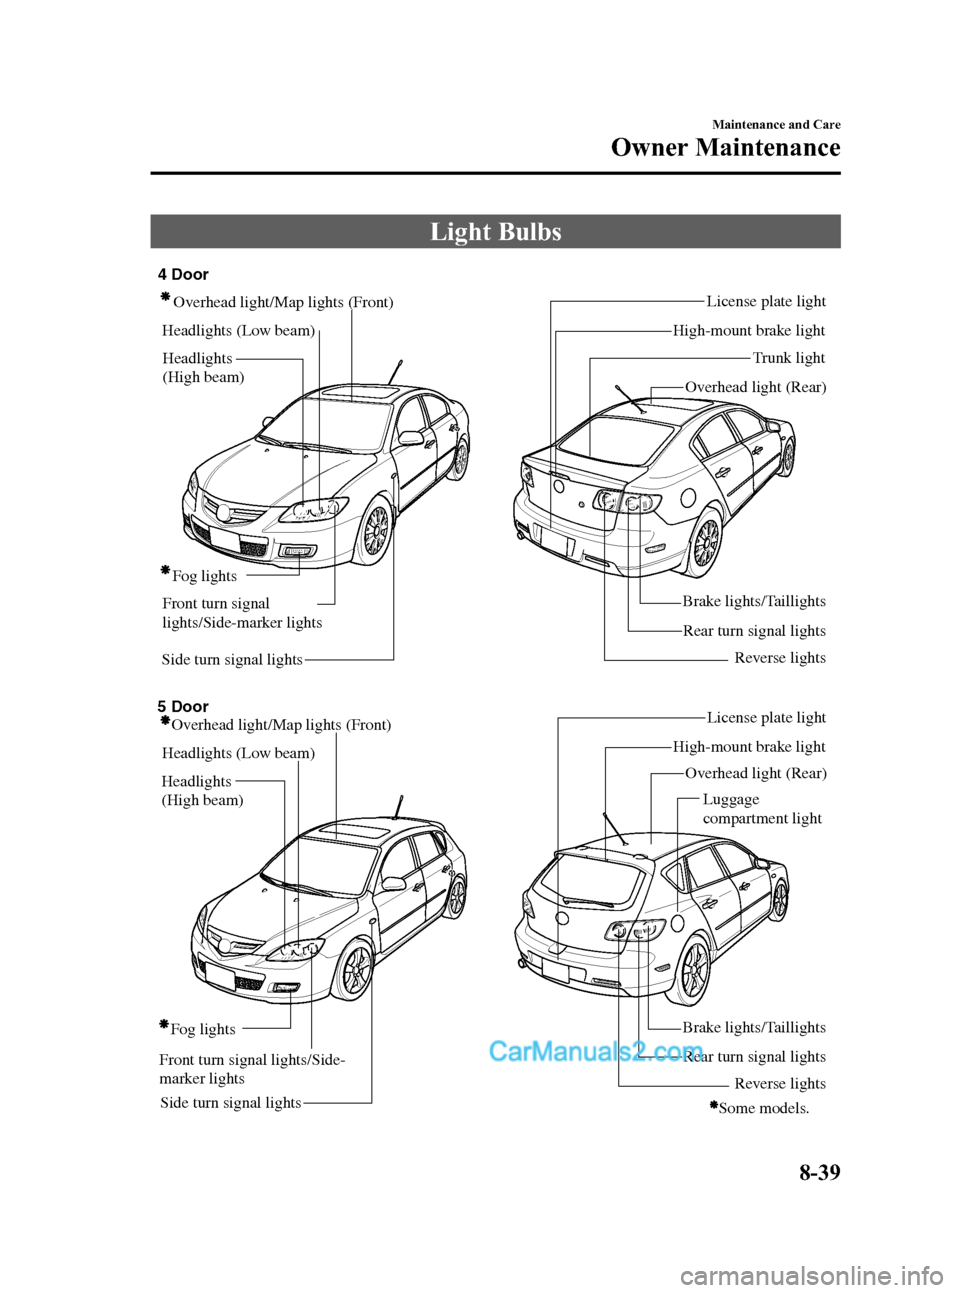
Light Bulbs
Side turn signal lightsRear turn signal lightsLicense plate light
Overhead light/Map lights (Front)
Headlights (Low beam)
Fog lights
Brake lights/Taillights
Reverse lights High-mount brake light
Trunk light 4 Door
5 DoorOverhead light (Rear)
Overhead light/Map lights (Front)
Headlights (Low beam)
Side turn signal lightsFog lights
License plate light
High-mount brake light
Overhead light (Rear)
Rear turn signal lights Brake lights/Taillights
Reverse lights
Some models.
Front turn signal lights/Side-
marker lightsHeadlights
(High beam)
Front turn signal
lights/Side-marker lights
Headlights
(High beam)Luggage
compartment light
Maintenance and Care
Owner Maintenance
8-39
Mazda3_8X41-EA-07F_Edition1 Page307
Wednesday, April 25 2007 1:7 PM
Form No.8X41-EA-07F
Page 312 of 394

Black plate (312,1)
Brake lights/Taillights (4 Door)
With LED bulb
Due to the complexity and difficulty of
the procedure, the LED bulbs should be
replaced by an Authorized Mazda Dealer.
NOTE
LED bulb replacement is not possible. The
rear combination component must be replaced.
With Non-LED bulb
1. Pull the center of each plastic retainer
and remove the retainers and the trunk
end trim.
Removal
Installation
2. Pull the center of each plastic retainer,
then remove the retainers, and then
partially open the trunk side trim.
Removal
Installation
3. Turn the socket and bulb assembly
counterclockwise and remove it.
4. Disconnect the bulb from the socket.
5. Install the new bulb in the reverse order
of removal.
NOTE
To replace the bulb, contact an Authorized
Mazda Dealer.
Brake lights/Taillights (5 Door)
With LED bulb
Due to the complexity and difficulty of
the procedure, the LED bulbs should be
replaced by an Authorized Mazda Dealer.
NOTE
LED bulb replacement is not possible. The
rear combination component must be replaced.
8-44
Maintenance and Care
Owner Maintenance
Mazda3_8X41-EA-07F_Edition1 Page312
Wednesday, April 25 2007 1:7 PM
Form No.8X41-EA-07F
Page 313 of 394
Black plate (313,1)
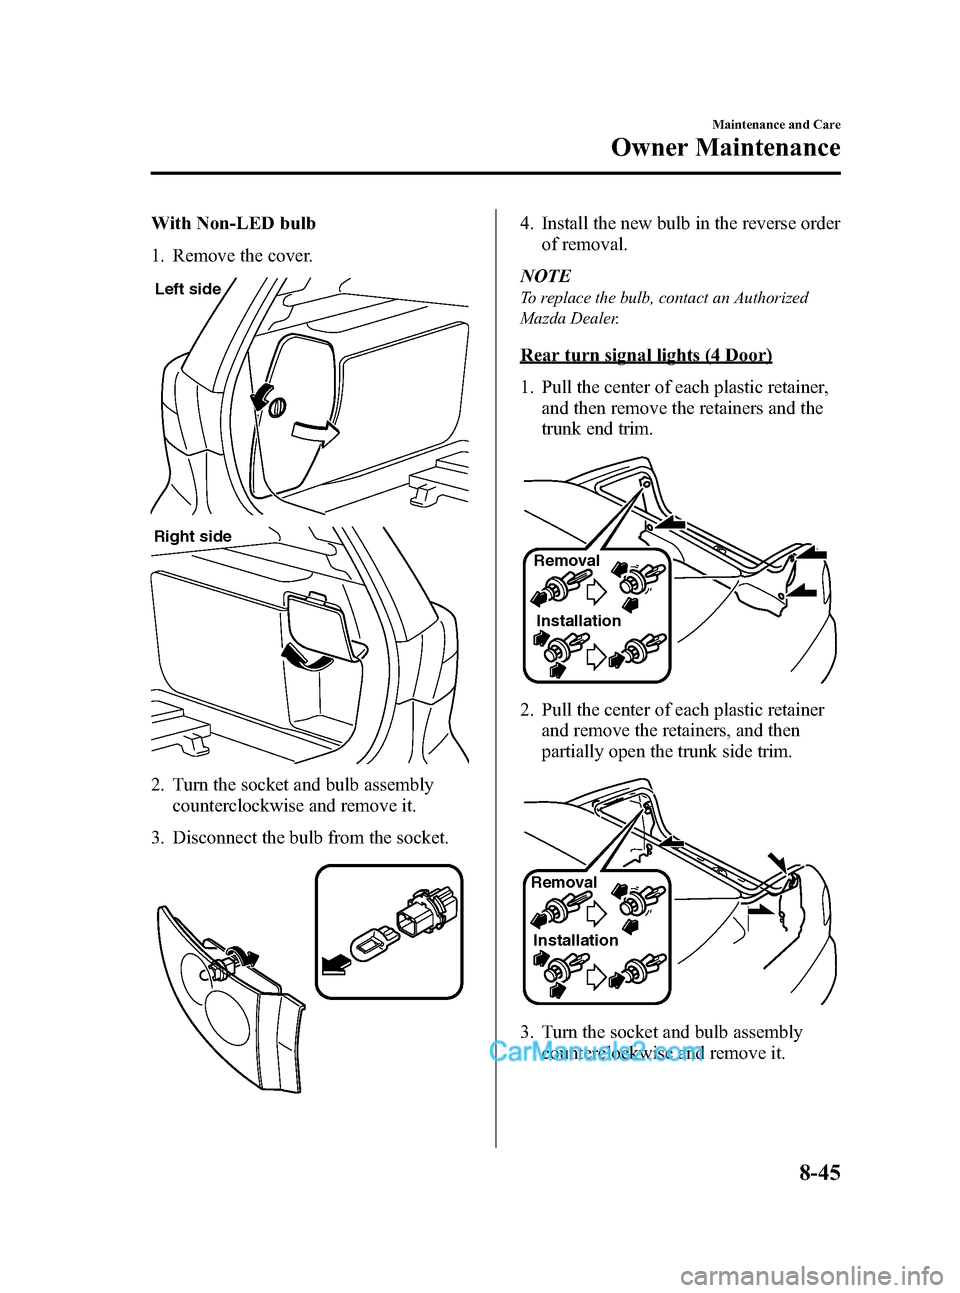
With Non-LED bulb
1. Remove the cover.
Left side
Right side
2. Turn the socket and bulb assembly
counterclockwise and remove it.
3. Disconnect the bulb from the socket.
4. Install the new bulb in the reverse order
of removal.
NOTE
To replace the bulb, contact an Authorized
Mazda Dealer.
Rear turn signal lights (4 Door)
1. Pull the center of each plastic retainer,
and then remove the retainers and the
trunk end trim.
Removal
Installation
2. Pull the center of each plastic retainer
and remove the retainers, and then
partially open the trunk side trim.
Removal
Installation
3. Turn the socket and bulb assembly
counterclockwise and remove it.
Maintenance and Care
Owner Maintenance
8-45
Mazda3_8X41-EA-07F_Edition1 Page313
Wednesday, April 25 2007 1:7 PM
Form No.8X41-EA-07F