change time MAZDA MODEL MX-5 MIATA RF 2021 User Guide
[x] Cancel search | Manufacturer: MAZDA, Model Year: 2021, Model line: MODEL MX-5 MIATA RF, Model: MAZDA MODEL MX-5 MIATA RF 2021Pages: 499, PDF Size: 6.83 MB
Page 147 of 499

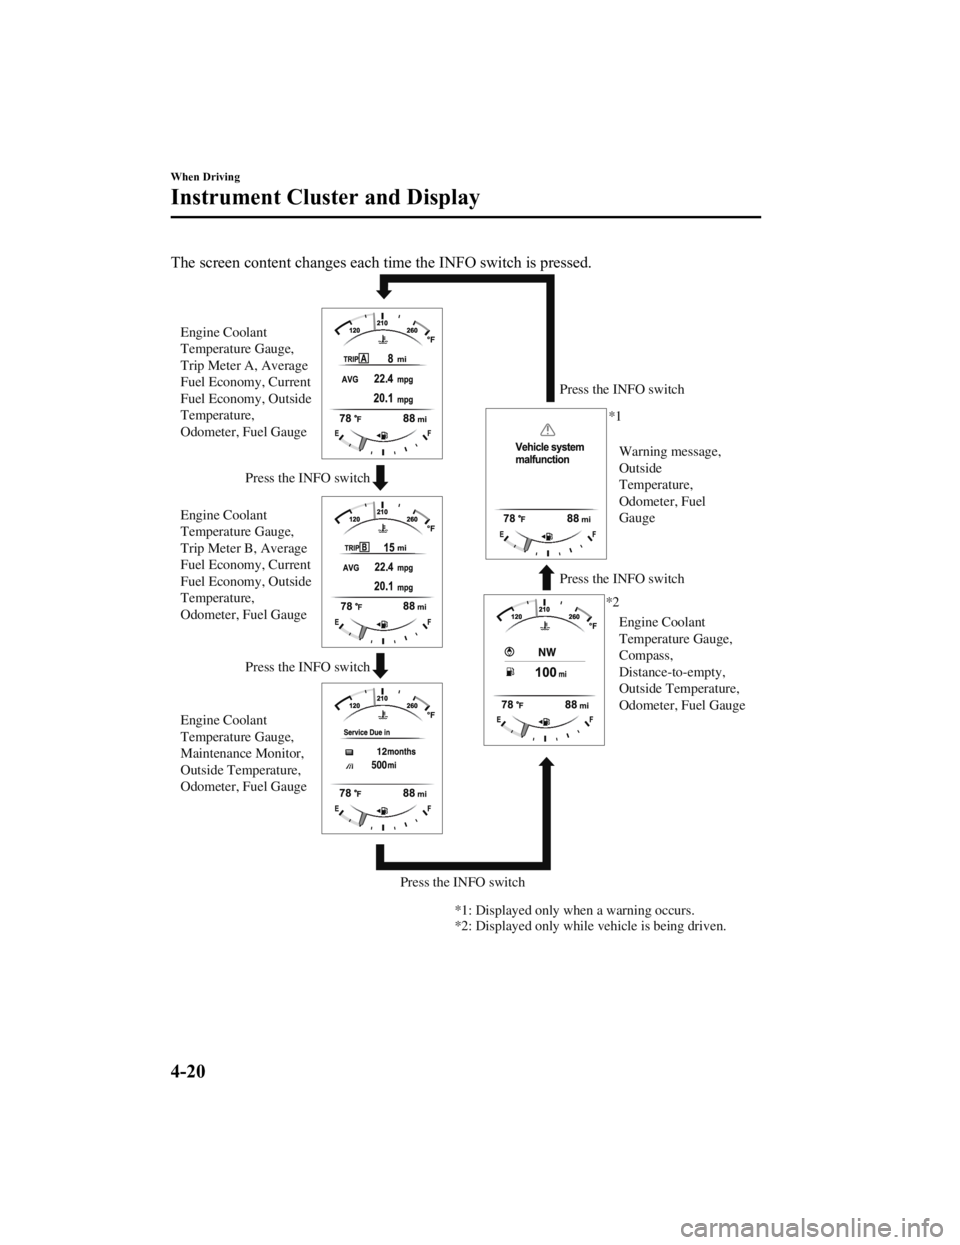
The screen content changes each time the INFO switch is pressed.
Press the INFO switchPress the INFO switch
Press the INFO switch
Press the INFO switch
Press the INFO switch
Engine Coolant
Temperature Gauge,
Maintenance Monitor,
Outside Temperature,
Odometer, Fuel Gauge Engine Coolant
Temperature Gauge,
Compass,
Distance-to-empty,
Outside Temperature,
Odometer, Fuel Gauge Warning message,
Outside
Temperature,
Odometer, Fuel
Gauge
Engine Coolant
Temperature Gauge,
Trip Meter A, Average
Fuel Economy, Current
Fuel Economy, Outside
Temperature,
Odometer, Fuel Gauge
Engine Coolant
Temperature Gauge,
Trip Meter B, Average
Fuel Economy, Current
Fuel Economy, Outside
Temperature,
Odometer, Fuel Gauge *1
*2
*1: Displayed only when a warning occurs.
*2: Displayed only while vehicle is being driven.
When Driving
Instrument Cluster and Display
4-20
MX-5_8JS9-EA-20K_Edition1_old 2020-8-28 13:50:01
Page 150 of 499

NOTE
After refueling, it may require some time
for the indicator to stabilize. In addition,
the indicator may deviate while driving
on a slope or curve since the fuel moves
in the tank.
The display indicating a quarter or less
remaining fuel has more segments to
show the remaining fuel level in greater
detail.
The direction of the arrow () indicates
that the fuel-filler lid is on the left side
of the vehicle.
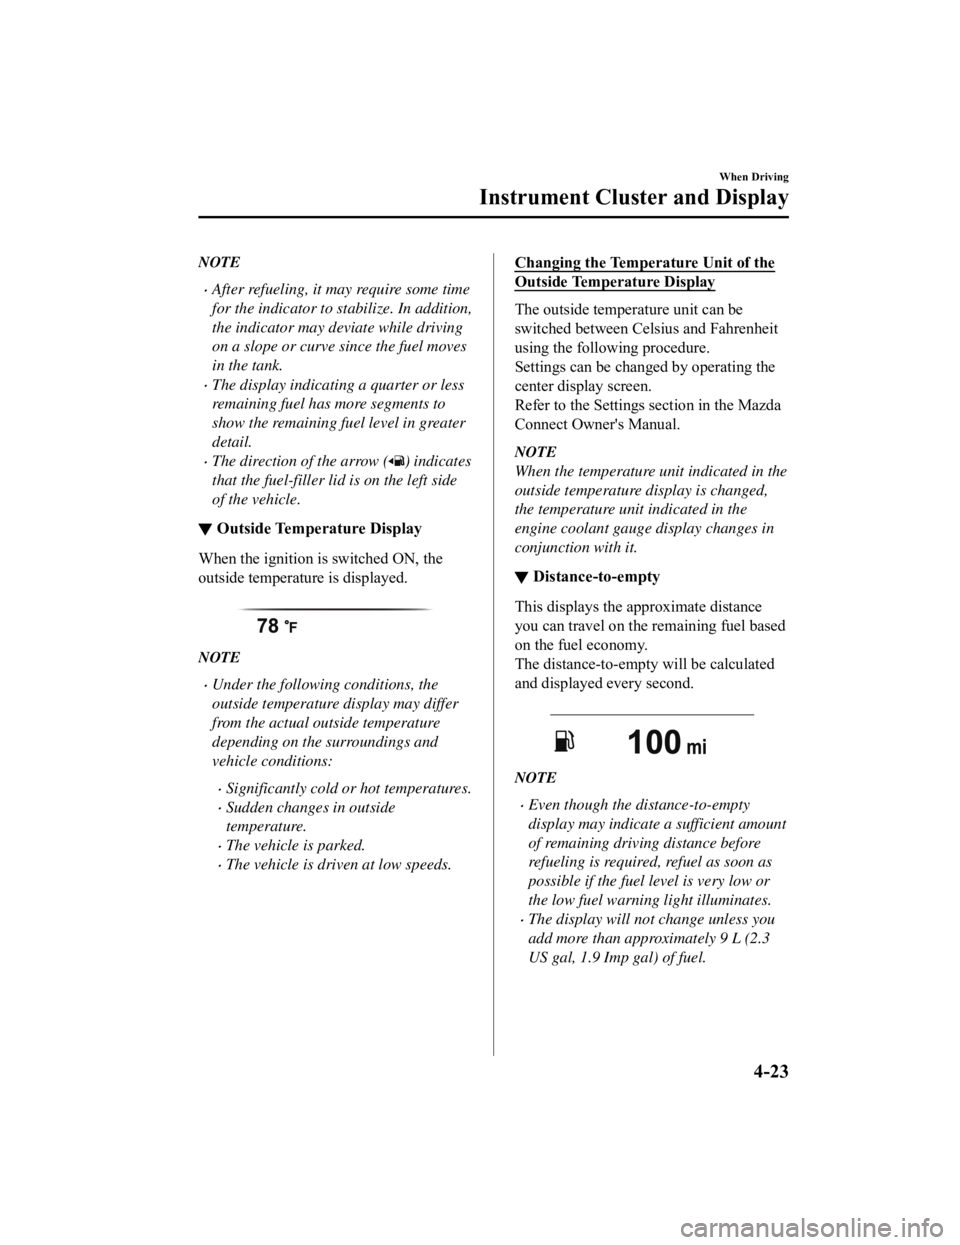
▼ Outside Temperature Display
When the ignition is switched ON, the
outside temperatur
e is displayed.
NOTE
Under the following conditions, the
outside temperature display may differ
from the actual outside temperature
depending on the surroundings and
vehicle conditions:
Significantly cold or hot temperatures.
Sudden changes in outside
temperature.
The vehicle is parked.
The vehicle is driven at low speeds.
Changing the Temperature Unit of the
Outside Temperature Display
The outside temperature unit can be
switched between Celsius and Fahrenheit
using the following procedure.
Settings can be changed by operating the
center display screen.
Refer to the Settings section in the Mazda
Connect Owner's Manual.
NOTE
When the temperature unit indicated in the
outside temperature display is changed,
the temperature unit indicated in the
engine coolant gauge display changes in
conjunction with it.
▼ Distance-to-empty
This displays the approximate distance
you can travel on the remaining fuel based
on the fuel economy.
The distance-to-empty will be calculated
and displayed every second.
NOTE
Even though the distance-to-empty
display may indicate a sufficient amount
of remaining driving distance before
refueling is required
, refuel as soon as
possible if the fuel level is very low or
the low fuel warning light illuminates.
The display will not change unless you
add more than approximately 9 L (2.3
US gal, 1.9 Imp gal) of fuel.
When Driving
Instrument Cluster and Display
4-23
MX-5_8JS9-EA-20K_Edition1_old 2020-8-28 13:50:01
Page 172 of 499

Lighting Control
▼Headlights
Turn the headlight switch to turn
the headlights and other exterior lights on or off.
When the lights are turned on, the lights-on indicator light in the instrument cluster turns on.
NOTE
If the light switch is left on, the lights will automatically switch off approximately 30
seconds after switching the ignition off.
The time setting can be changed.
Refer to the Mazda Connect Owner's Manual.
To prevent discharging the battery, do not leave the lights on while the engine is off unless
safety requires them.
Without auto-light control
Switch Position OFF
Ignition PositionONACC or
OFF ONACC or
OFF ONACC or
OFF
Headlights Off Off Off Off On
On
*2
Daytime running lightsOn*1OffOn*1Off Off Off
Taillights
Parking lights
License plate lights
Side-marker lights Off Off On
On
*2OnOn*2
*1 The lights are turned on wh ile the vehicle is driven.*2 The lights are turned on for the specified period by the auto headlight off function.
When Driving
Switches and Controls
4-45
MX-5_8JS9-EA-20K_Edition1_old 2020-8-28 13:50:01
Page 175 of 499

CAUTION
Do not shade the light sensor by adhering a st icker or a label on the windshield. Otherwise
the light sensor will not operate correctly.
The light sensor also works as a rain sensor for the auto-wiper control. Keep hands and
scrapers clear of the windshield when the wiper lever is in the AUTO position and the
ignition is switched ON as fingers could be pinched or the wipers and wiper blades could be
damaged when the wipers activate automaticall y. If you are going to clean the windshield,
be sure the wipers are turned off completely wh en it is particularly tempting to leave the
engine running. This is particularly important when clearing ice and snow.
NOTE
The headlights, other exterior lights and dashboard illumination may not turn off
immediately even if the surrounding area becomes well-lit because the light sensor
determines that it is night time if the surrounding area is continuously dark for several
minutes such as inside long tunnels, traffic jams inside tunnels, or in indoor parking lots.
In this case, the lights turn off if the li ght switch is turned to the OFF position.
If the headlight switch and the windshield wiper switch are in AUTO, and the wipers are
operated at low or high speed by the auto wiper control for several seconds, bad weather
conditions are determined and the headlights may be turned on.
The sensitivity of the auto-light control may be changed.
Refer to the Mazda Connect Owner's Manual.
When Driving
Switches and Controls
4-48
MX-5_8JS9-EA-20K_Edition1_old 2020-8-28 13:50:01
Page 177 of 499

NOTE
The time until the headlights turn off
after all of the doors are closed can be
changed.
Refer to the Settings section in the
Mazda Connect Owner's Manual.
If no operations are done for 3 minutes
after the lever is pulled, the headlights
turn off.
The headlights turn off if the lever is
pulled again while the headlights are
illuminated.
▼ Leaving Home Light
The leaving home light turns on the lights
when the transmitte
r unlock button is
pressed while away from the vehicle.
The following light s turn on when the
leaving home light is operated.
Low beams, Parking lights, Taillights,
License plate lights.
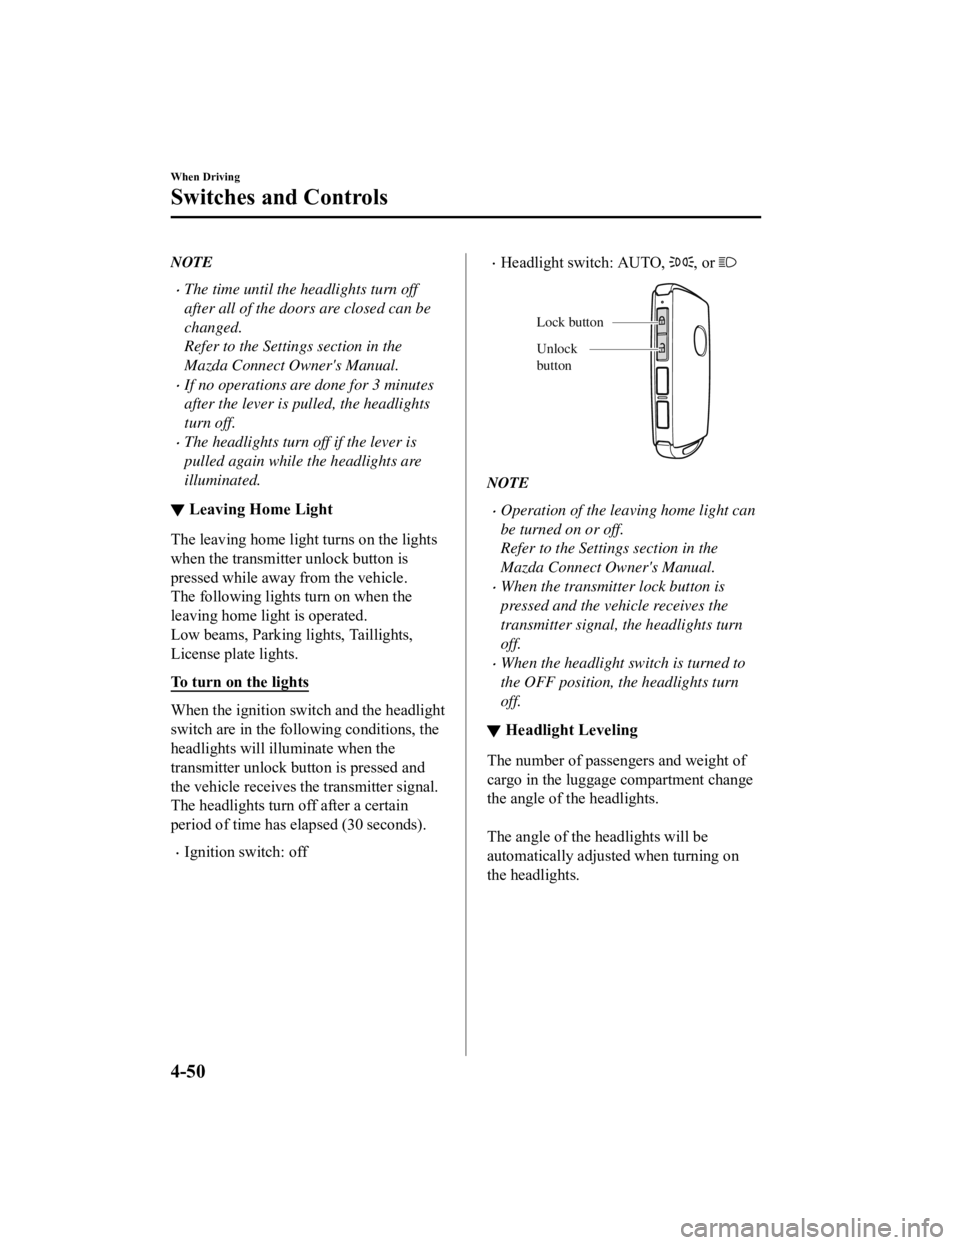
To turn on the lights
When the ignition switch and the headlight
switch are in the following conditions, the
headlights will il luminate when the
transmitter unlock button is pressed and
the vehicle receives the transmitter signal.
The headlights turn off after a certain
period of time has elapsed (30 seconds).
Ignition switch: off
Headlight switch: AUTO, , or
Unlock
b utton
Lock b
utton
NOTE
Operation of the leaving home light can
be turned on or off.
Refer to the Settings section in the
Mazda Connect Owner's Manual.
When the transmitter lock button is
pressed and the vehicle receives the
transmitter signal, the headlights turn
off.
When the headlight switch is turned to
the OFF position, the headlights turn
off.
▼Headlight Leveling
The number of passengers and weight of
cargo in the luggage compartment change
the angle of the headlights.
The angle of the headlights will be
automatically adjusted when turning on
the headlights.
When Driving
Switches and Controls
4-50
MX-5_8JS9-EA-20K_Edition1_old
2020-8-28 13:50:01
Page 178 of 499

▼Daytime Running Lights
Some countries require moving vehicles to
have their lights on (daytime running
lights) during the daytime.
The daytime running lights turn on
automatically when the vehicle starts
moving.
They turn off when the parking brake is
operated or the selector lever is shifted to
the P position (automatic transmission
vehicle).
NOTE
(Except Canada
)
The daytime running lights can be
deactivated.
Refer to the Settings section in the Mazda
Connect Owner's Manual.
Turn and Lane-Change Signals
The ignition must be switched ON to use
the turn and lane-change signals.
▼Turn Signals
Move the signal leve
r down (for a left
turn) or up (for a righ t turn) to the stop
position. The signal will self-cancel after
the turn is completed.
If the indicator light continues to flash
after a turn, manually return the lever to its
original position.
Right turn
Left turn
Right lane change
Left lane change OFF
The turn signal indicators in the
instrument cluster flash according to the
operation of the turn signal lever to show
which signal is working.
When Driving
Switches and Controls
4-51
MX-5_8JS9-EA-20K_Edition1_old
2020-8-28 13:50:01
Page 179 of 499

NOTE
If an indicator light stays on without
flashing or if it flashes abnormally, one
of the turn signal bulbs may be burned
out.
A personalized function is available to
change the turn indicator sound volume.
Refer to the Settings section in the
Mazda Connect Owner's Manual.
▼Lane-Change Signals
Move the lever halfway toward the
direction of the lane change―until the
indicator flashes― and hold it there. It
will return to the off position when
released.
▼Three-Flash Turn Signal
After releasing the tu
rn signal lever, the
turn signal indicator flashes 3 times. The
operation can be canceled by moving the
lever in the direction opposite to which it
was operated.
NOTE
The three-flash turn signal function can be
switched to operable/inoperable using the
personalization function.
Refer to the Settings section in the Mazda
Connect Owner's Manual.
Windshield Wipers and Wa s h e r
The ignition must be switched ON to use
the wipers.
WA R N I N G
Use only windshield washer fluid or plain
water in the reservoir:
Using radiator antifreeze as washer fluid is
dangerous. If sprayed on the windshield, it
will dirty the windshield, affect your
visibility, and could result in an accident.
Only use windshield washer fluid mixed
with anti-freeze protection in freezing
weather conditions:
Using windshield washer fluid without
anti-freeze protection in freezing weather
conditions is dangerous as it could freeze
on the windshield and block your vision
which could cause an accident. In addition,
make sure the windshield is sufficiently
warmed using the defroster before
spraying the washer fluid.
CAUTION
When the wipers are not used during
freezing temperatures or for a long time,
the wiper rubber may adhere to the
glass. If the wipers are operated while
adhered to the glass, it could damage
the wiper rubber and motor.
If the wipers are operated while the glass
is dry, the glass could be scratched and
the wiper rubber damaged. When the
glass is dry, spray washer fluid before
operating the wipers.
When Driving
Switches and Controls
4-52
MX-5_8JS9-EA-20K_Edition1_old 2020-8-28 13:50:01
Page 187 of 499

NOTE
If the HomeLink indicator light does
not change to a rapidly blinking light,
contact HomeLink at
www.homelink.com or call
1-800-355-3515 for assistance.
5. Connect the power to the garage door
opener or gate programmed to the
hand-held transmitter.
6. Firmly press and hold the programmed
HomeLink button for five seconds, and
then release it. Perform this operation
two times to activate the door or gate.
If the door or gate does not activate,
press and hold the just-trained
HomeLink button and observe the
indicator light.
If the indicator light stays on
constantly, programming is complete
and your device should activate when
the HomeLink button is pressed and
released.
NOTE
To program the remaining two
HomeLink buttons, begin with
“Programming” ― step 1
If the indicator light blinks rapidly for
two seconds and then turns to a
constant light, continue with
“Programming” steps 7―9 to
complete the programming of a rolling
code equipped device (most commonly
a garage door opener).
7. At the garage door opener receiver (motor-head unit) in the garage, locate
the “learn” or “smart” button. This can
usually be found where the hanging
antenna wire is attached to the
motor-head unit.
8. Firmly press and release the “learn” or
“smart” button. (The name and color
of the button may vary by
manufacturer.)
NOTE
Complete the programming within 30
seconds.
9. Return to the ve hicle and firmly press,
hold for two seco nds and release the
programmed HomeLink button. Repeat
the “ press/hold/release ” sequence a
second time, and, depending on the
brand of the garage door opener (or
other rolling code equipped device),
repeat this sequence a third time to
complete the programming process.
HomeLink should now activate your
rolling code equipped device.
NOTE
To program the remaining two HomeLink
buttons, begin with “Programming” ―
step 1
For questions or comm ents, please contact
HomeLink at www.homelink.com or
1-800-355-3515 .
When Driving
Switches and Controls
4-60
MX-5_8JS9-EA-20K_Edition1_old 2020-8-28 13:50:01
Page 204 of 499

NOTE
The timing in which the system switches the headlights changes under the following
conditions. If the system does not switch the headlights appropriately, manually switch
between high and low beams according to the visibility as well as road and traffic
conditions.
When there are sources of light in the area such as street lamps, illuminated signboards,
and traffic signals.
When there are reflective objects in the surrounding area such as reflective plates and
signs.
When visibility is reduced under rain, snow and foggy conditions.
When driving on roads with sharp turn or hilly terrain.
When the headlights/rear lamps of vehicles in front of you or in the opposite lane are dim
or not illuminated.
When there is sufficient darkness such as at dawn or dusk.
When the luggage compartment is loaded with heavy objects.
When visibility is reduced due to a vehicle in front of you spraying water from its tires
onto your windshield.
▼ To Operate the System
The HBC operates to s
witch the headlights
automatically between high and low
beams after the igni tion is switched ON
and the headlight sw itch is in the AUTO
and high beam position.
The HBC determines that it is dark based
on the brightness of the surrounding area.
At the same time, the HBC indicator light
(green) in the instrument cluster
illuminates.
NOTE
When the vehicle speed is about 30 km/h
(19 mph) or more, the headlights
automatically switch to high beams
when there are no vehicles ahead or
approaching in the opposite direction.
When the vehicle speed is less than
about 20 km/h (12 mph), the HBC
switches the headlights to low beams.
The low beams may not switch to high
beams when cornering.
Operation of the HBC function can be
disabled. Refer to th e Settings section in
the Mazda Connect Owner's Manual.
When Driving
i-ACTIVSENSE
4-77
MX-5_8JS9-EA-20K_Edition1_old 2020-8-28 13:50:01
Page 207 of 499

The functions of the LDWS have limitations:
Always stay on course using the steering wheel and drive with care. The system is not
designed to compensate for a driver’s lack of caution and if you rely too much on the LDWS it
could lead to an accident. The driver is res ponsible for assuring lane changes and other
maneuvers. Always pay attention to the direction in which the vehicle is traveling and the
vehicle’s surroundings.
CAUTION
Do not modify the suspension. If the vehicle height or the damping force of the suspensions is
changed, the LDWS may not operate correctly.
NOTE
If your vehicle deviates from its traffi c lane, the LDWS operates (warning sound and
indicator light). Steer the vehicle adequately to drive the vehicle to the center of the lane.
When the turn signal lever is operated for a lane change, the LDWS warning is
automatically canceled. The LDWS warning becomes operable when the turn signal lever
is returned and the system detects the white or yellow lines.
If the steering wheel, accelerator pedal, or brake pedal is operated abruptly and the
vehicle moves close to a white or yellow line, the system determines that the driver is
making a lane change and the LDWS warning is automatically canceled.
The LDWS may not operate during the period immediately after the vehicle has deviated
from its lane and the LDWS has operated, or the vehicle deviates from its lane repeatedly
within a short period of time.
The LDWS does not operate if it does not dete ct the white or yellow lines of the traffic
lane.
Under the following conditions, the LDWS may not be able to detect white or yellow lines
correctly and the LDWS may not operate correctly.
If an object placed on the dashboard is reflected in the windshield and picked up by the
camera.
Heavy luggage is loaded in the luggage compartment the vehicle is inclined.
The tire pressures are not adjusted to the specified pressure.
When the vehicle is driven on the entry and exit to or from the rest area or tollgate of a
highway.
The white or yellow lines are less visible because of dirt or paint flaking.
The vehicle ahead is running near a white or yellow line and the line is less visible.
A white or yellow line is less visible because of bad weather (rain, fog, or snow).
The vehicle is driven on a temporary lane or section with a closed lane due to
construction.
When Driving
i-ACTIVSENSE
4-80
MX-5_8JS9-EA-20K_Edition1_old 2020-8-28 13:50:01