instrument panel MAZDA MODEL RX 8 2004 Quick Tips (in English)
[x] Cancel search | Manufacturer: MAZDA, Model Year: 2004, Model line: MODEL RX 8, Model: MAZDA MODEL RX 8 2004Pages: 12, PDF Size: 0.99 MB
Page 2 of 12

DRIVER’S VIEW
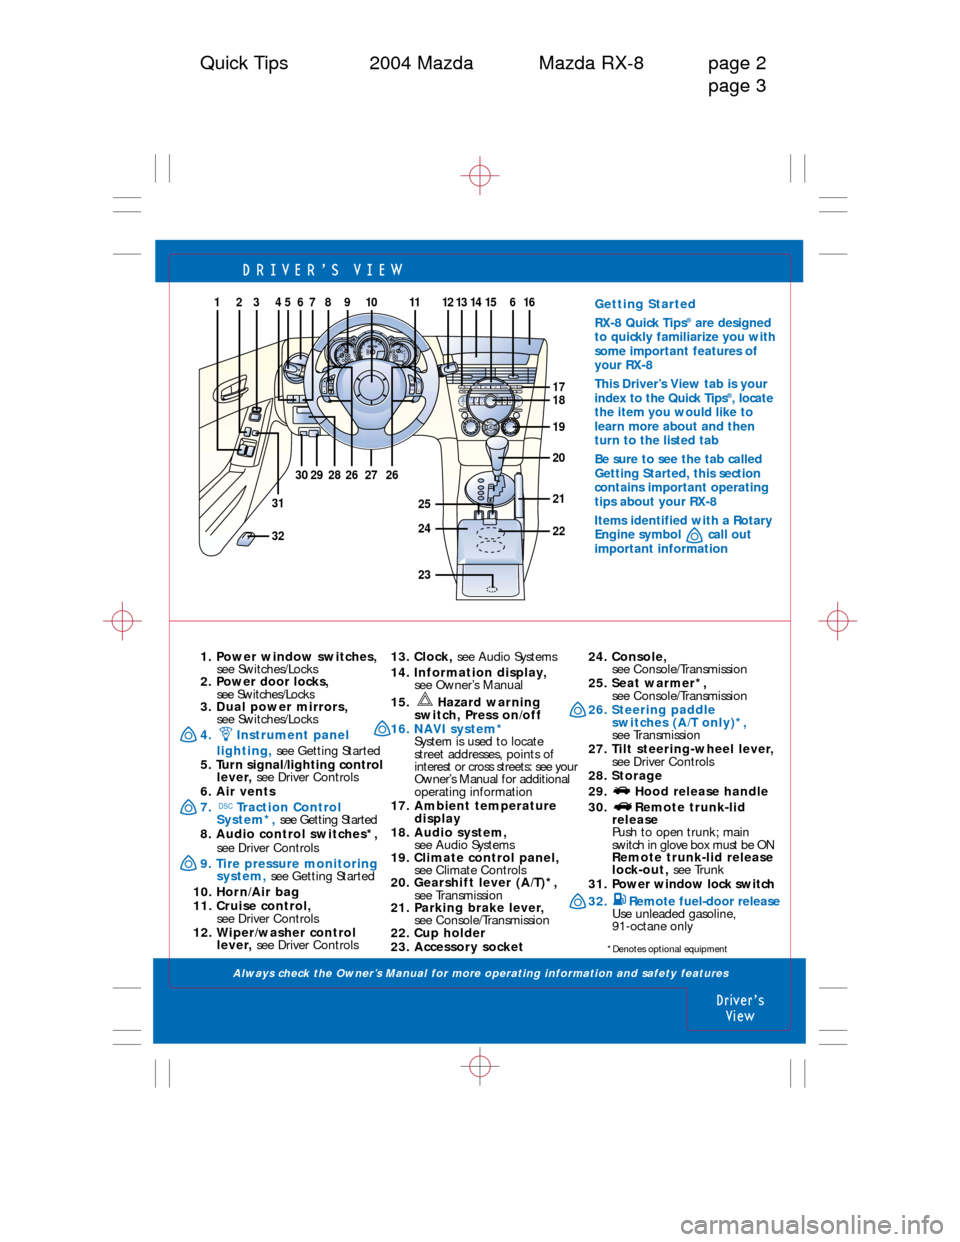
1. Power window switches,
see Switches/Locks
2. Power door locks,
see Switches/Locks
3. Dual power mirrors,
see Switches/Locks
4. Instrument panel
lighting,see Getting Started
5. Turn signal/lighting control
lever, see Driver Controls
6. Air vents
7. Traction Control
System*,see Getting Started
8. Audio control switches*,
see Driver Controls
9. Tire pressure monitoring
system,see Getting Started
10. Horn/Air bag
11. Cruise control,
see Driver Controls
12. Wiper/washer control
lever, see Driver Controls
DSC
13. Clock, see Audio Systems
14. Information display,
see Owner’s Manual
15. Hazard warning
switch, Press on/off
16. NAVI system*
System is used to locate
street addresses, points of
interest or cross streets: see your
Owner’s Manual for additional
operating information
17. Ambient temperature
display
18. Audio system,
see Audio Systems
19. Climate control panel,
see Climate Controls
20. Gearshift lever (A/T)*,
see Transmission
21. Parking brake lever,
see Console/Transmission
22. Cup holder
23. Accessory socket24. Console,
see Console/Transmission
25. Seat warmer*,
see Console/Transmission
26. Steering paddle
switches (A/T only)*,
see Transmission
27. Tilt steering-wheel lever,
see Driver Controls
28. Storage
29. Hood release handle
30. Remote trunk-lid
release
Push to open trunk; main
switch in glove box must be ON
Remote trunk-lid release
lock-out, see Trunk
31. Power window lock switch
32. Remote fuel-door release
Use unleaded gasoline,
91-octane only
Driver’s
View
Quick Tips 2004 Mazda Mazda RX-8 page 2
page 3
Getting Started
RX-8 Quick Tips®are designed
to quickly familiarize you with
some important features of
your RX-8
This Driver’s View tab is your
index to the Quick Tips
®, locate
the item you would like to
learn more about and then
turn to the listed tab
Be sure to see the tab called
Getting Started, this section
contains important operating
tips about your RX-8
Items identified with a Rotary
Engine symbol call out
important information
27
H C
F
EHP
R
N
D
MC4
0 1 2 3 5678
910
6 5 4 3 2 1RPTPROG
RDM
DISC DISC SEEK
TRACK
APCSETDISP AMB
LOADCLK AM CD
VOLTAPE/MD FM 1/2SCANTEXT/AUDIO CONT TUNE/AUTO-MPUSH POWER
A/C01
2
34MODE
MODEVO
LON
OFF
SET
ACCEL
CANCELSET
COAST
2826262930
31
3109811567214
1817
20
32
21
19
25
2422
23
15121416136
*Denotes optional equipment
Always check the Owner’s Manual for more operating information and safety features
Page 3 of 12

GETTING STARTED
Always check the Owner’s Manual for more operating information and safety features
Getting
Started
Getting
Started
Quick Tips 2004 Mazda Mazda RX-8 page 4
page 5
Instant Mobility System
emergency flat tire
repair kit (IMS)
Temporary spare tire is not
equipped with your Mazda, if
tire repair is required, repair tire
with emergency flat tire repair
kit, see Owner’s Manual
If a temporary spare tire is
required, consult your
Authorized Mazda Dealer
Tire pressure
monitoring system
Warning light illuminates for a
few seconds when ignition is on
If tire pressure is too high or low,
or tire temperature is too high
warning light will illuminate
Short trip driving procedure
Any trip that is too short for the
engine to reach normal operating
temperature; needle in middle
of temperature gauge indicates
normal temperature
The following procedure should
be followed when moving vehicle
a short distance**:
1. Start engine
2. Move vehicle
3. Warm engine for 5-minutes
at idle
4. Raise engine speed to 3000
RPM for 10-seconds
5. Return to idle
6. Turn off engine
Tip: Warming up engine
improves engine life
Traction Control
System (TCS)*/Dynamic
Stability Control (DSC)*
DSC light may occasionally flash
while driving, this indicates
that the DSC was performing a
correction to help maintain your
best vehicle control, if DSC light
remains on, see your Mazda Dealer
If DSC light remains on after
disconnecting battery or jump-
starting, you will need to perform
a Steering Angle Sensor calibration
procedure, after battery power is
restored: Ignition ON; turn steering
wheel to full left lock position;
then full right lock position; turn
ignition OFF, then ONTips: Close rear door first,
then front door; damage may
occur otherwise
To prevent alarm arming with
passenger inside vehicle, driver
must manually lock door by
pressing lock knob
RX-8 rotary engine
precautions
Check engine oil level when refueling
Rotary engine design uses an oil
injection system in addition to
lubrication of internal parts
It is important to maintain
proper oil level
Engine oil level
warning light
Indicates low engine oil if
illuminated; pull over to a safe
location; turn engine off and
check engine oil level when
engine is cool, add engine
oil if necessary
Instrument panel
lighting
With headlights on:
To brighten/dim turn thumbwheel
up/down
Maximum illumination:
Rotate thumbwheel upward
until click is heard; instrument
cluster and information display
illumination color goes from
red to white
Headlights/parking lights OFF:
Instrument panel lighting defaults
to maximum brightness
Headlights/parking lights ON:
Illumination changes brightness
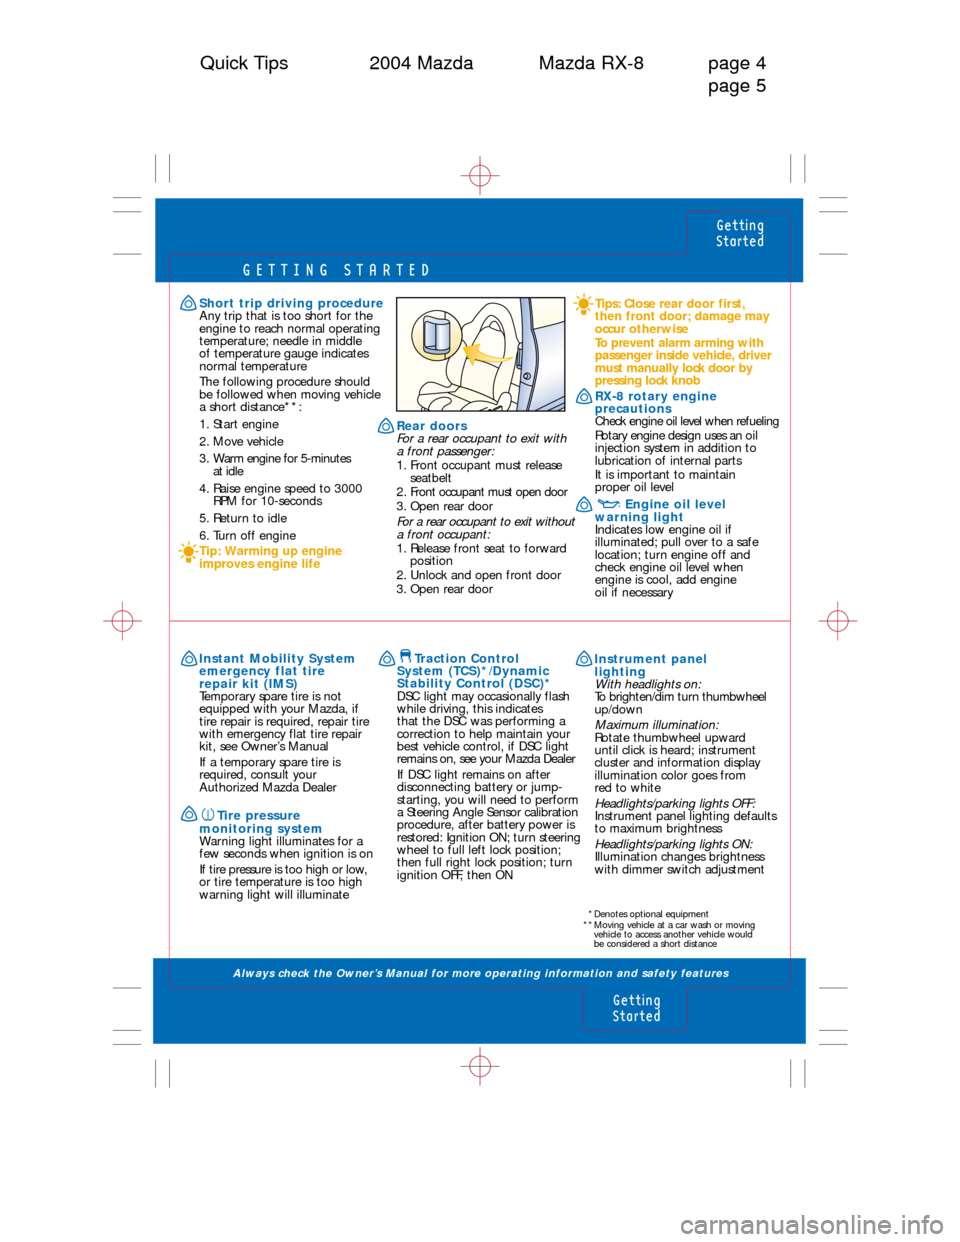
with dimmer switch adjustment Rear doors
For a rear occupant to exit with
a front passenger:
1. Front occupant must release
seatbelt
2. Front occupant must open door
3. Open rear door
For a rear occupant to exit without
a front occupant:
1. Release front seat to forward
position
2. Unlock and open front door
3. Open rear door
*Denotes optional equipment
**Moving vehicle at a car wash or moving
vehicle to access another vehicle would
be considered a short distance
Page 8 of 12

CONSOLE/TRANSMISSION
Always check the Owner’s Manual for more operating information and safety features
Console/
Transmission
Transmission
Quick Tips 2004 Mazda Mazda RX-8 page 14
page 15
Automatic transmission*
P =Park
To move gearshift from Park:Press
firmly on brake pedal, then move
gearshift to gear selection
R =Reverse
N =Neutral No gear engaged
D (Overdrive)
For normal driving: Shifts
through four forward
gears automaticallyTip: Torque converter lock-up
improves fuel economy and can
feel like an additional gear change
WARNING: Placing shift lever
in P position without setting
parking brake may not hold
vehicle, always set parking brake
Sport AT manual
shift mode*
Move shift lever
return from D to M;
then M to D for
automatic mode
M (Manual)
Manual gear selection is achieved
by moving shifter back to upshift
and forward to downshift
Shift and gear position indicator
located in the instrument panel,
M will be illuminated for manual
mode, numeral for gear position
will be shown next to shift
position indicatorSteering shift switches
(A/T only)*
Upshift/downshift; pull
either switch up/down,
see Owner’s Manual
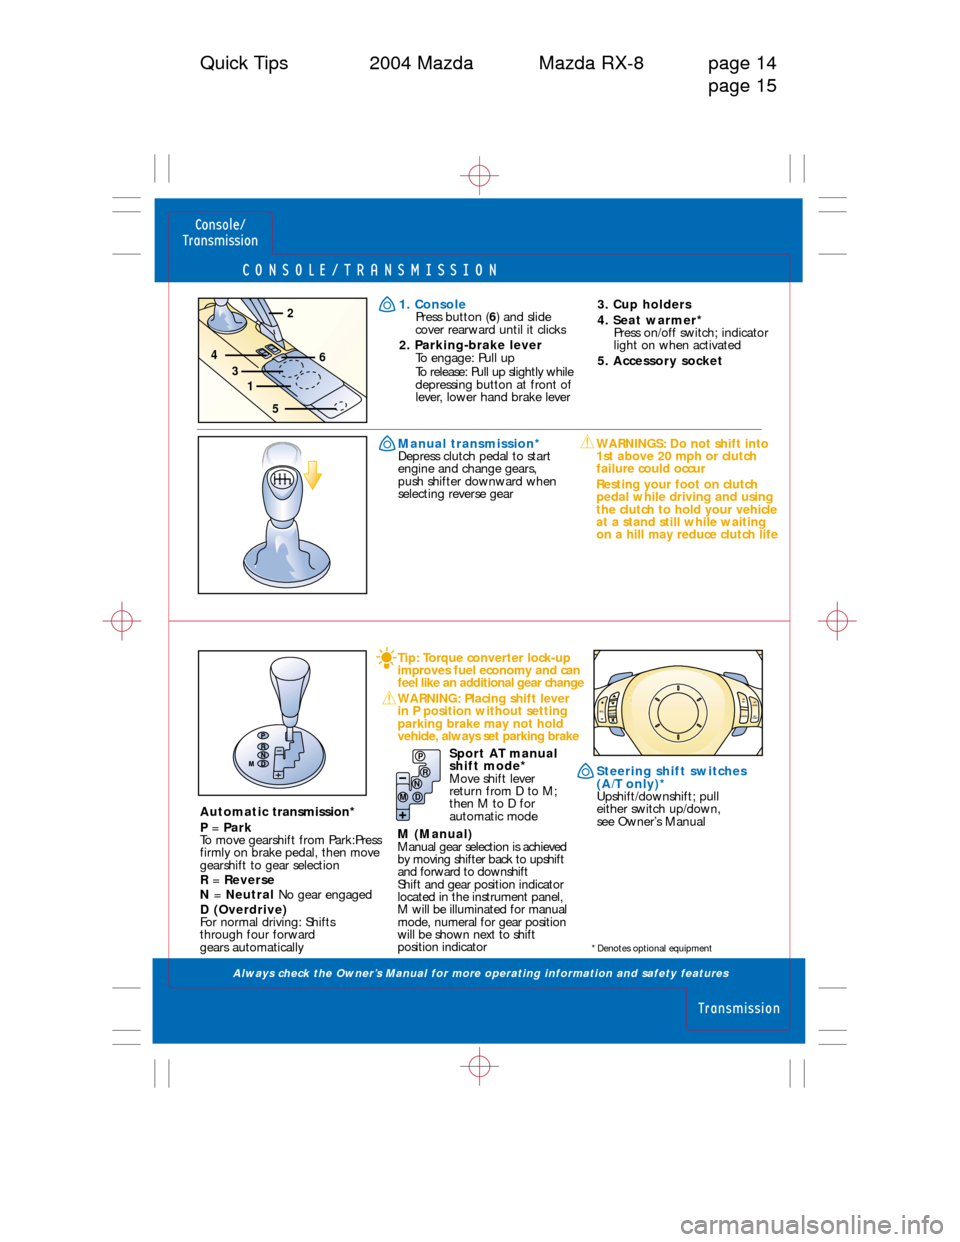
1. Console
Press button (6) and slide
cover rearward until it clicks
2. Parking-brake lever
To engage: Pull up
To release: Pull up slightly while
depressing button at front of
lever, lower hand brake lever3. Cup holders
4. Seat warmer*
Press on/off switch; indicator
light on when activated
5. Accessory socket
Manual transmission*
Depress clutch pedal to start
engine and change gears,
push shifter downward when
selecting reverse gearWARNINGS: Do not shift into
1st above 20 mph or clutch
failure could occur
Resting your foot on clutch
pedal while driving and using
the clutch to hold your vehicle
at a stand still while waiting
on a hill may reduce clutch life
P
R
N
D M
M
O
D
EVOLON
OFF
SET
ACCEL
CANCEL
SET
COAST
*Denotes optional equipment
2
4
1
5
36