set clock MAZDA MODEL RX 8 2006 Owners Manual (in English)
[x] Cancel search | Manufacturer: MAZDA, Model Year: 2006, Model line: MODEL RX 8, Model: MAZDA MODEL RX 8 2006Pages: 434
Page 180 of 434

Black plate (180,1)
qTCS/DSC Indicator Lightí
This indicator light stays on for a few
seconds when the ignition switch is turned
to the ON position. If the TCS or DSC is
operating, the indicator light flashes.
If the light stays on, the TCS or DSC may
have a malfunction and they may not
operate correctly. Take your vehicle to an
Authorized Mazda Dealer.
qDSC OFF Indicator Lightí
This indicator light stays on for a few
seconds when the ignition switch is turned
to the ON position.
It also comes on when the DSC OFF
switch is pressed and TCS/DSC is
switched off (page 5-25).
If the light stays on when the TCS/DSC is
not switched off, take your vehicle to an
Authorized Mazda Dealer. The dynamic
stability control may have a malfunction.
NOTE
If the battery is disconnected or a fuse is
replaced, the DSC will be inoperable. In
this case, the DSC OFF indicator light
flashes and the TCS/DSC indicator light
illuminates.
To make the DSC operable, do the
following procedure with the battery
connected.
1. Turn the ignition switch to the ON
position.
2. Turn the steering clockwise fully,
then turn it counterclockwise fully.
3. Make sure the DSC OFF indicator
goes off.
4. Turn the ignition switch to the OFF
position, then turn it to the ON
position again.
5. Make sure the TCS/DSC indicator
light goes off.
If the TCS/DSC indicator light and the
DSC OFF indicator light remain
illuminated even after turning the
ignition switch to the ON position,
consult an Authorized Mazda Dealer.
qCruise Main Indicator Light
(Amber)/Cruise Set Indicator
Light (Green)
The indicator light has two colors.
5-50
Driving Your Mazda
íSome models.
Warning/Indicator Lights and Beep Sounds
RX-8_8U58-EA-05J_Edition1 Page180
Thursday, August 25 2005 4:56 PM
Form No.8U58-EA-05J
Page 238 of 434

Black plate (238,1)
qClock
When the ignition switch is in the ACC or
ON position, the time is displayed.
Time setting
1. Press the CLK button until a beep
sounds, and“12Hr”and“24Hr”will be
displayed.
2. Press the SET button to switch between
“12Hr”and“24Hr”displays. The
selected display will flash.
To select the desired clock setting,
press the CLK button again while the
preferred setting is flashing.
3.“Hr. ADJUST”will be displayed next,
and the hour portion of the display will
flash. Press the SET button to set the
hour, then press the CLK button.
4.“Min. ADJUST”will be displayed
next, and the minutes portion of the
display will flash. Press the SET button
to set the minutes, then press the CLK
button.
Time resetting
While the clock is displayed, press the
SET button 1.5 seconds or more. When
the button is released, a beep will sound
and the clock will be reset as follows:
(Example)12:01―12:29→12:00
12:30―12:59→1:00
NOTE
When the SET button is released, the
seconds are reset to“00”.
qAmbient Temperature Display
When the ignition switch is in the ON
position, press the AMB button to display
the ambient temperature.
NOTE
lThe displayed ambient temperature
may vary from the actual ambient
temperature depending on the
surrounding area and vehicle
conditions.
lPress the AMB button 2 seconds or
more to switch the display from
Fahrenheit to Centigrade or vice
versa.
6-42
Interior Comfort
Interior Equipment
RX-8_8U58-EA-05J_Edition1 Page238
Thursday, August 25 2005 4:58 PM
Form No.8U58-EA-05J
Page 259 of 434

Black plate (259,1)
NOTE
lMake sure the jack is well lubricated
before using it.
(With Tire Pressure Monitoring
System)
lBe sure to register the tire pressure
sensor ID signal code whenever tires
or wheels are changed (page 5-30).
1. Park on a level surface off the right-of-
way and firmly set the parking brake.
2. Put a vehicle with an automatic
transmission in Park (P), a manual
transmission in Reverse (R) or 1, and
turn off the engine.
3. Turn on the hazard warning flasher.
4. Have everyone get out of the vehicle
and away from the vehicle and traffic.
5. Remove the jack, and tool (page 7-3).
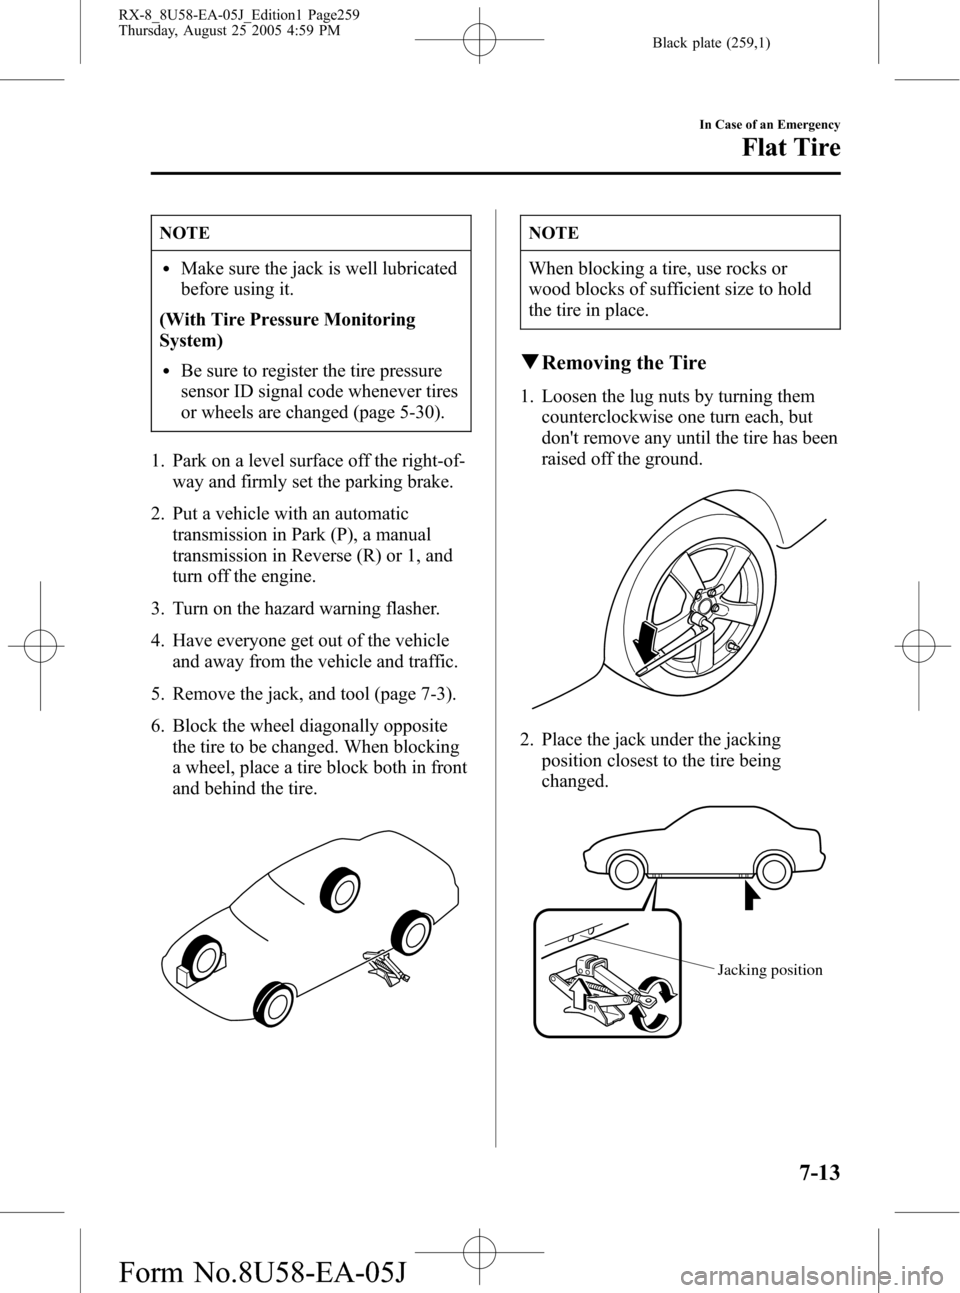
6. Block the wheel diagonally opposite
the tire to be changed. When blocking
a wheel, place a tire block both in front
and behind the tire.
NOTE
When blocking a tire, use rocks or
wood blocks of sufficient size to hold
the tire in place.
qRemoving the Tire
1. Loosen the lug nuts by turning them
counterclockwise one turn each, but
don't remove any until the tire has been
raised off the ground.
2. Place the jack under the jacking
position closest to the tire being
changed.
Jacking position
In Case of an Emergency
Flat Tire
7-13
RX-8_8U58-EA-05J_Edition1 Page259
Thursday, August 25 2005 4:59 PM
Form No.8U58-EA-05J