buttons MAZDA MODEL RX 8 2007 (in English) User Guide
[x] Cancel search | Manufacturer: MAZDA, Model Year: 2007, Model line: MODEL RX 8, Model: MAZDA MODEL RX 8 2007Pages: 443
Page 200 of 443
Black plate (199,1)
7. Firmly press and release the“learn”or
“smart”button. (The name and color of
the button may vary by manufacturer.)
NOTE
There are 30 seconds in which to
initiate step 8.
8. Return to the vehicle and firmlypress,
hold for two seconds and releasethe
programmed HomeLink button. Repeat
the“press/hold/release”sequence a
second time, and, depending on the
brand of the garage door opener (or
other rolling code equipped device),
repeat this sequence a third time to
complete the programming process.
HomeLink should now activate your
rolling code equipped device.
NOTE
To program the remaining two
HomeLink buttons, begin with
“Programming”―step 2. Do not
repeat step 1.
For questions or comments, please contact
HomeLink atwww.homelink.comor1-
800-355-3515.
qGate operator/Canadian
Programming
Canadian radio-frequency laws require
transmitter signals to“time-out”(or quit)
after several seconds of transmission―
which may not be long enough for
HomeLink to pick up the signal during
programming. Similar to this Canadian
law, some U.S. gate operators are
designed to“time-out”in the same
manner.
If you live in Canada or you are having
difficulties programming a gate operator
by using the“Programming”procedures
(regardless of where you live),replace
“Programming HomeLink”step 3with
the following:
NOTE
If programming a garage door opener or
gate operator, it is advised to unplug the
device during the“cycling”process to
prevent possible overheating.
Continue to press and hold the HomeLink
button while youpress and release―
every two seconds(“cycle”) your hand-
held transmitter until the frequency signal
has successfully been accepted by
HomeLink. (The indicator light will flash
slowly and then rapidly.)
Proceed with“Programming”step 4 to
complete.
qOperating the HomeLink System
Press the programmed HomeLink button
to operate a programmed device. The
code will continue being transmitted for a
maximum of 20 seconds.
Driving Your Mazda
Switches and Controls
5-65
RX-8_8V89-EA-06F_Edition1 Page199
Friday, May 19 2006 9:51 AM
Form No.8V89-EA-06F
Page 201 of 443
Black plate (200,1)
qReprogramming the HomeLink
system
To program a device to HomeLink using a
HomeLink button previously trained,
follow these steps:
1. Press and hold the desired HomeLink
button.DO NOTrelease the button.
2. The indicator light will begin to flash
after 20 seconds. Without releasing the
HomeLink button, proceed with
“Programming”- step 2.
qErasing Programmed HomeLink
Buttons
To erase the existing programming from
all three operating channels, press and
hold the two outside buttons (
,)
on the auto-dimming mirror until the
HomeLink indicator light begins to flash
after approximately 20 seconds.
Verify that the programming has been
erased when you resell the vehicle.
5-66
Driving Your Mazda
Switches and Controls
RX-8_8V89-EA-06F_Edition1 Page200
Friday, May 19 2006 9:51 AM
Form No.8V89-EA-06F
Page 227 of 443
Black plate (226,1)
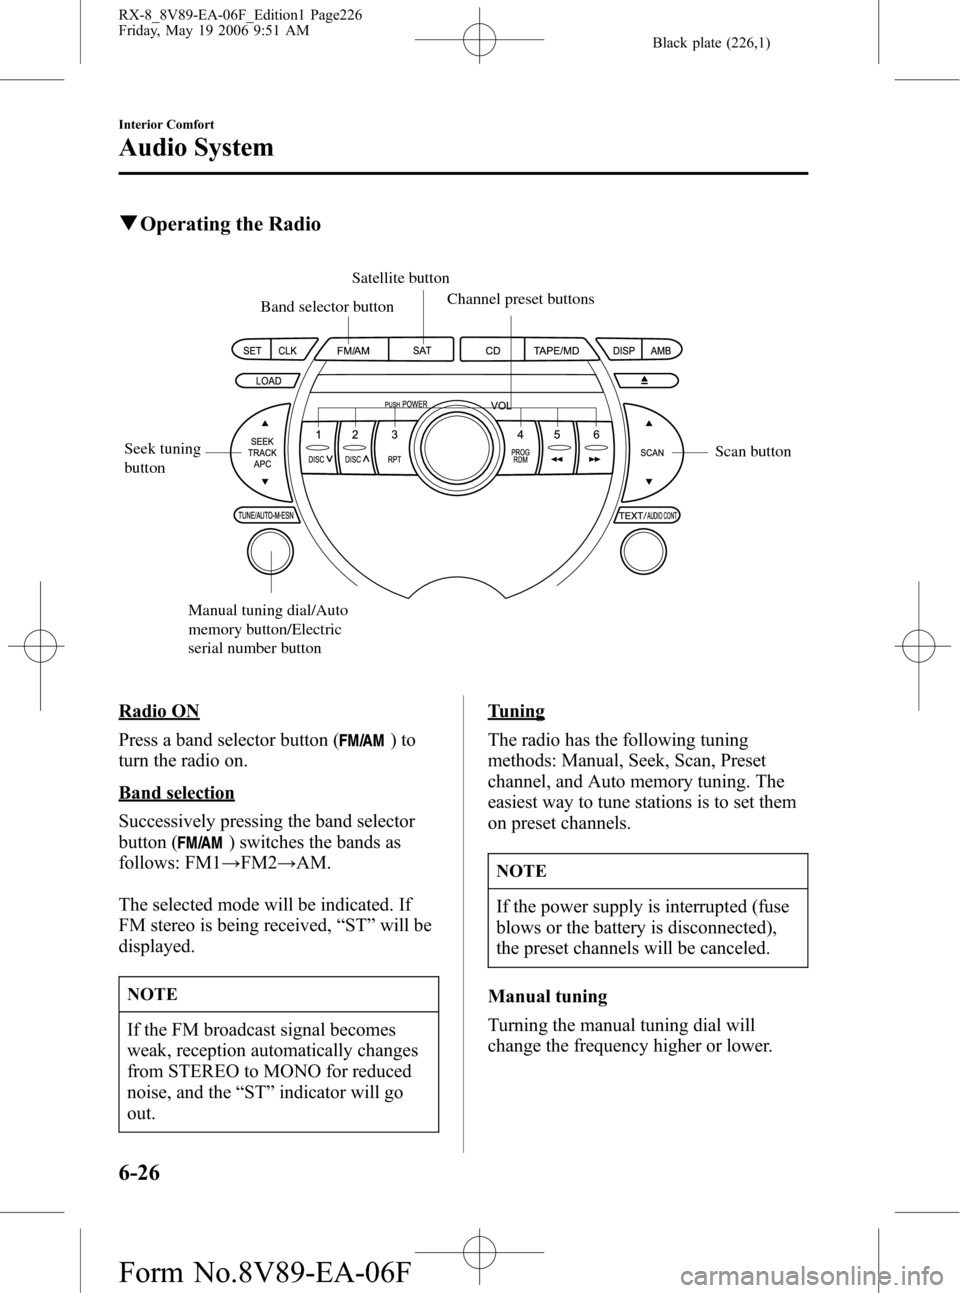
qOperating the Radio
Seek tuning
buttonScan button
Manual tuning dial/Auto
memory button/Electric
serial number buttonSatellite button
Band selector buttonChannel preset buttons
Radio ON
Press a band selector button (
)to
turn the radio on.
Band selection
Successively pressing the band selector
button (
) switches the bands as
follows: FM1→FM2→AM.
The selected mode will be indicated. If
FM stereo is being received,“ST”will be
displayed.
NOTE
If the FM broadcast signal becomes
weak, reception automatically changes
from STEREO to MONO for reduced
noise, and the“ST”indicator will go
out.
Tuning
The radio has the following tuning
methods: Manual, Seek, Scan, Preset
channel, and Auto memory tuning. The
easiest way to tune stations is to set them
on preset channels.
NOTE
If the power supply is interrupted (fuse
blows or the battery is disconnected),
the preset channels will be canceled.
Manual tuning
Turning the manual tuning dial will
change the frequency higher or lower.
6-26
Interior Comfort
Audio System
RX-8_8V89-EA-06F_Edition1 Page226
Friday, May 19 2006 9:51 AM
Form No.8V89-EA-06F
Page 237 of 443
Black plate (236,1)
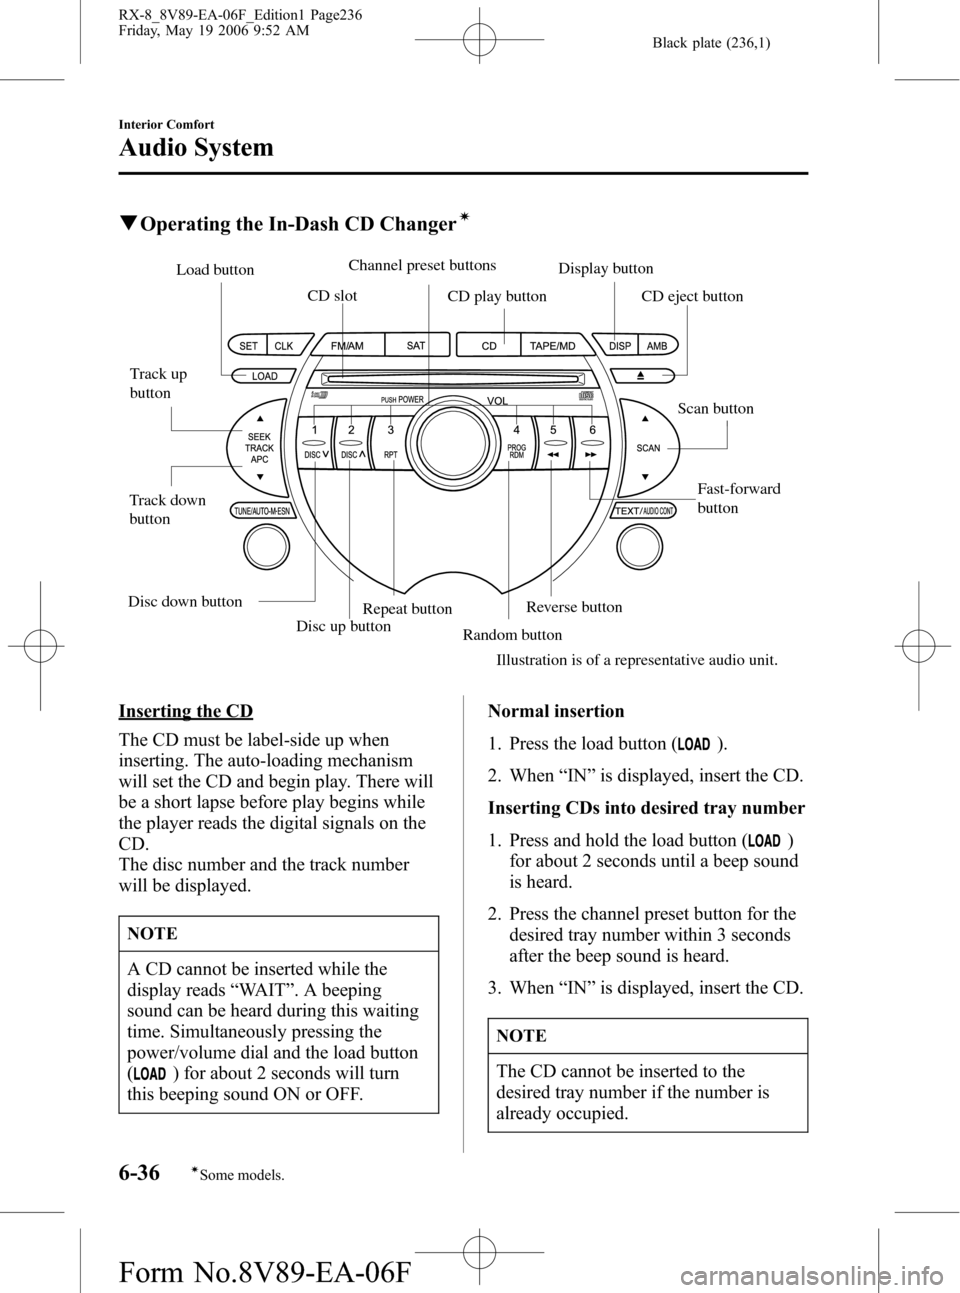
qOperating the In-Dash CD Changerí
Disc up button
Fast-forward
button Track up
button
Track down
buttonLoad button
CD slot
CD play buttonDisplay button
Repeat button
Random buttonReverse button
Illustration is of a representative audio unit.Scan button CD eject button Channel preset buttons
Disc down button
Inserting the CD
The CD must be label-side up when
inserting. The auto-loading mechanism
will set the CD and begin play. There will
be a short lapse before play begins while
the player reads the digital signals on the
CD.
The disc number and the track number
will be displayed.
NOTE
A CD cannot be inserted while the
display reads“WAIT”. A beeping
sound can be heard during this waiting
time. Simultaneously pressing the
power/volume dial and the load button
(
) for about 2 seconds will turn
this beeping sound ON or OFF.Normal insertion
1. Press the load button (
).
2. When“IN”is displayed, insert the CD.
Inserting CDs into desired tray number
1. Press and hold the load button (
)
for about 2 seconds until a beep sound
is heard.
2. Press the channel preset button for the
desired tray number within 3 seconds
after the beep sound is heard.
3. When“IN”is displayed, insert the CD.
NOTE
The CD cannot be inserted to the
desired tray number if the number is
already occupied.
6-36
Interior Comfort
íSome models.
Audio System
RX-8_8V89-EA-06F_Edition1 Page236
Friday, May 19 2006 9:52 AM
Form No.8V89-EA-06F
Page 391 of 443
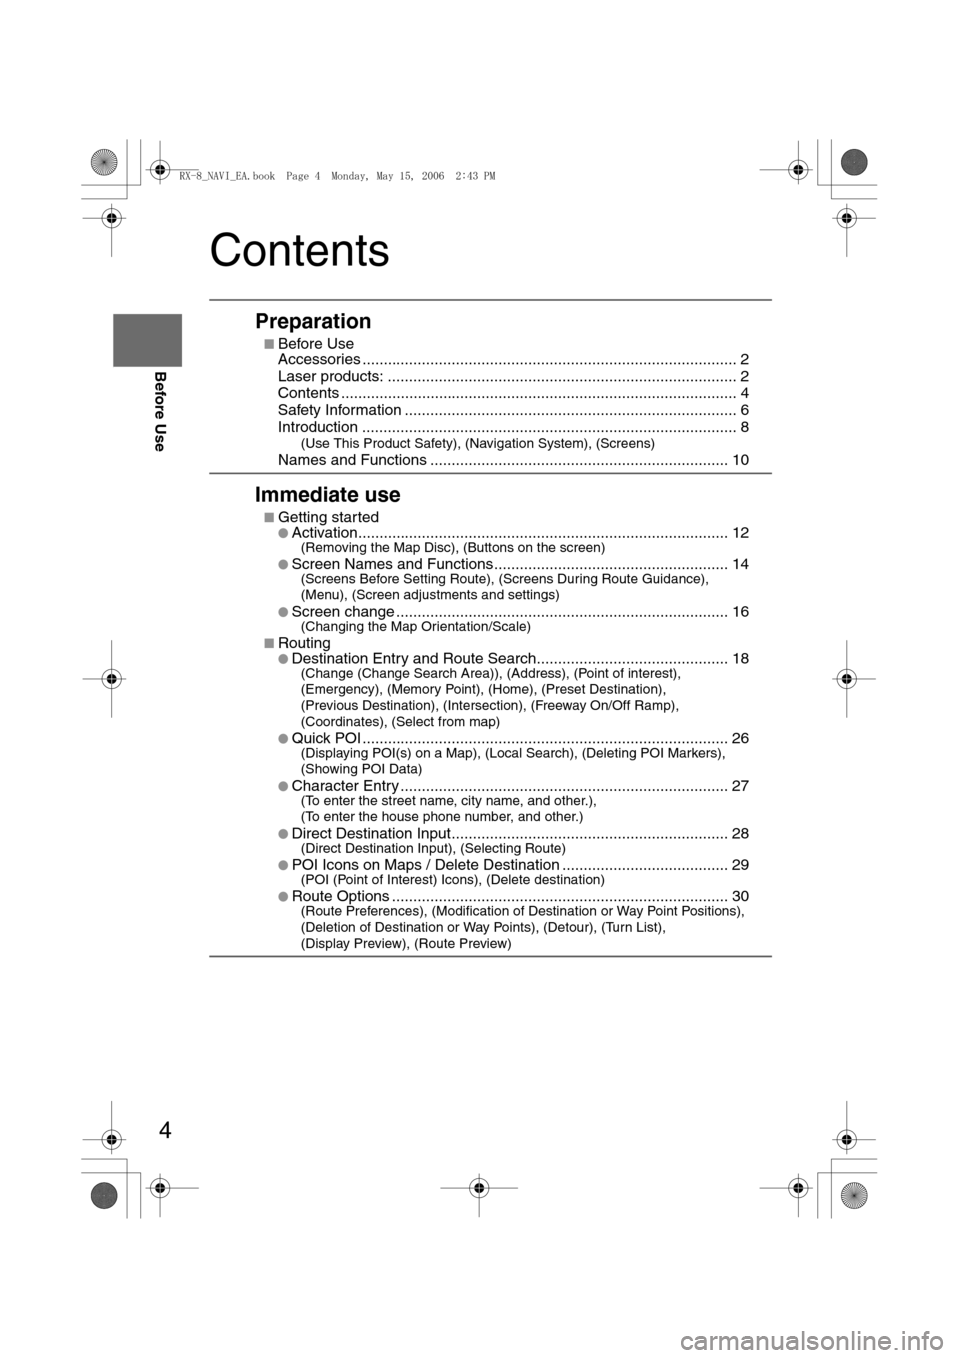
4
Before Use
Navigation
Set Up
RDM-TMCIf
necessary
Rear View
Monitor
Contents
Preparation
nBefore Use
Accessories ........................................................................................ 2
Laser products: .................................................................................. 2
Contents ............................................................................................. 4
Safety Information .............................................................................. 6
Introduction ........................................................................................ 8
(Use This Product Safety), (Navigation System), (Screens)
Names and Functions ...................................................................... 10
Immediate use
nGetting startedlActivation....................................................................................... 12(Removing the Map Disc), (Buttons on the screen)
l
Screen Names and Functions....................................................... 14(Screens Before Setting Route), (Screens During Route Guidance),
(Menu), (Screen adjustments and settings)
l
Screen change .............................................................................. 16(Changing the Map Orientation/Scale)
n
RoutinglDestination Entry and Route Search............................................. 18(Change (Change Search Area)), (Address), (Point of interest),
(Emergency), (Memory Point), (Home), (Preset Destination),
(Previous Destination), (Intersection), (Freeway On/Off Ramp),
(Coordinates), (Select from map)
l
Quick POI ...................................................................................... 26(Displaying POI(s) on a Map), (Local Search), (Deleting POI Markers),
(Showing POI Data)
l
Character Entry ............................................................................. 27(To enter the street name, city name, and other.),
(To enter the house phone number, and other.)
l
Direct Destination Input................................................................. 28(Direct Destination Input), (Selecting Route)
l
POI Icons on Maps / Delete Destination ....................................... 29(POI (Point of Interest) Icons), (Delete destination)
l
Route Options ............................................................................... 30(Route Preferences), (Modification of Destination or Way Point Positions),
(Deletion of Destination or Way Points), (Detour), (Turn List),
(Display Preview), (Route Preview)
<0034003a000f001a0041003000230038002b0041002700230010004400510051004d0002000200320043004900470002001600020002002f0051005000460043005b000e0002002f0043005b000200130017000e0002001400120012001800020002001400
1c0016001500020032002f>
Page 400 of 443
13
Getting started
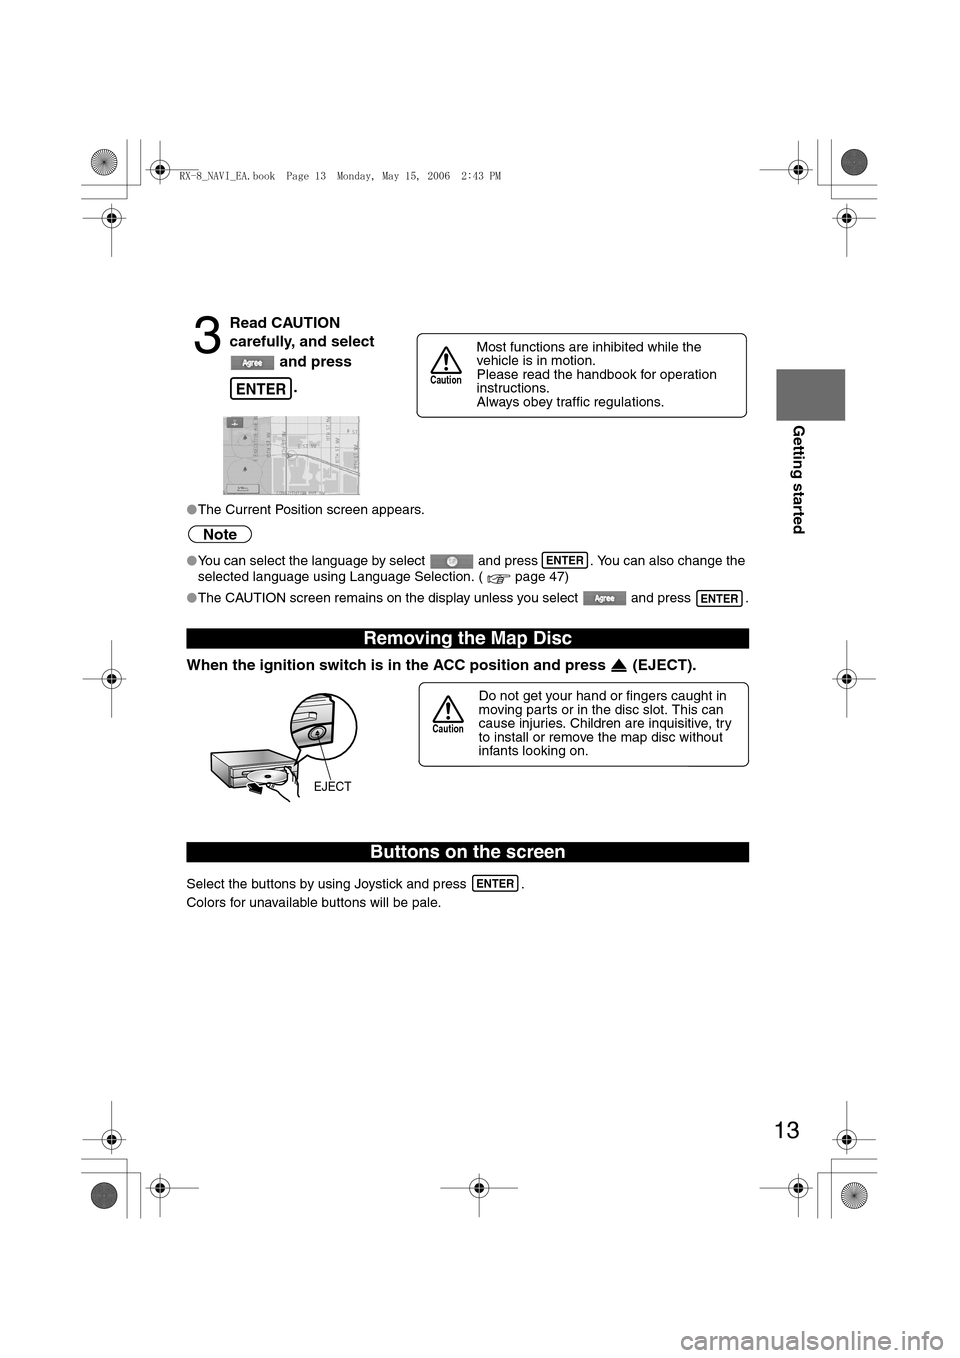
lThe Current Position screen appears.
Note
lYou can select the language by select and press . You can also change the
selected language using Language Selection. ( page 47)
lThe CAUTION screen remains on the display unless you select and press .
When the ignition switch is in the ACC position and press (EJECT).
Select the buttons by using Joystick and press .
Colors for unavailable buttons will be pale.
3
Read CAUTION
carefully, and select
and press
.
Removing the Map Disc
Buttons on the screen
ENTER
Most functions are inhibited while the
vehicle is in motion.
Please read the handbook for operation
instructions.
Always obey traffic regulations.
Caution
ENTER
ENTER
Do not get your hand or fingers caught in
moving parts or in the disc slot. This can
cause injuries. Children are inquisitive, try
to install or remove the map disc without
infants looking on.
Caution
EJECT
ENTER
<0034003a000f001a0041003000230038002b0041002700230010004400510051004d00020002003200430049004700020013001500020002002f0051005000460043005b000e0002002f0043005b000200130017000e000200140012001200180002000200
14001c0016001500020032002f>
Page 402 of 443
15
Getting started
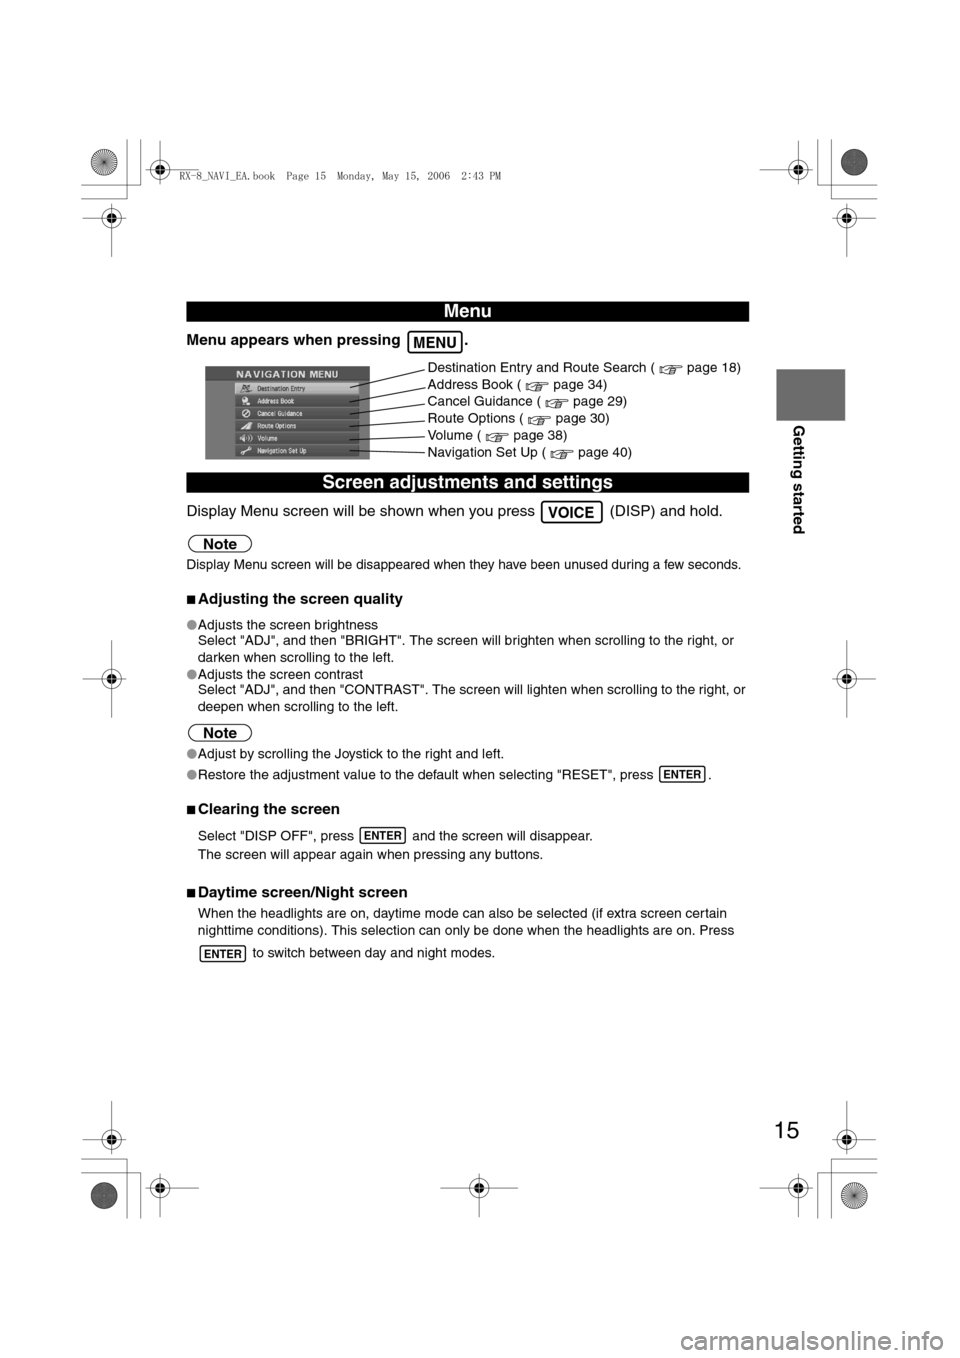
Menu appears when pressing .
Display Menu screen will be shown when you press (DISP) and hold.
Note
Display Menu screen will be disappeared when they have been unused during a few seconds.
nAdjusting the screen quality
lAdjusts the screen brightness
Select "ADJ", and then "BRIGHT". The screen will brighten when scrolling to the right, or
darken when scrolling to the left.
lAdjusts the screen contrast
Select "ADJ", and then "CONTRAST". The screen will lighten when scrolling to the right, or
deepen when scrolling to the left.
Note
lAdjust by scrolling the Joystick to the right and left.
lRestore the adjustment value to the default when selecting "RESET", press .
nClearing the screen
Select "DISP OFF", press and the screen will disappear.
The screen will appear again when pressing any buttons.
nDaytime screen/Night screen
When the headlights are on, daytime mode can also be selected (if extra screen certain
nighttime conditions). This selection can only be done when the headlights are on. Press
to switch between day and night modes.
Menu
Screen adjustments and settings
MENU
Destination Entry and Route Search ( page 18)
Address Book ( page 34)
Cancel Guidance ( page 29)
Route Options ( page 30)
Volume ( page 38)
Navigation Set Up ( page 40)
VOICE
ENTER
ENTER
ENTER
<0034003a000f001a0041003000230038002b0041002700230010004400510051004d00020002003200430049004700020013001700020002002f0051005000460043005b000e0002002f0043005b000200130017000e000200140012001200180002000200
14001c0016001500020032002f>
Page 420 of 443
33
Before
UseGetting
started
Routing
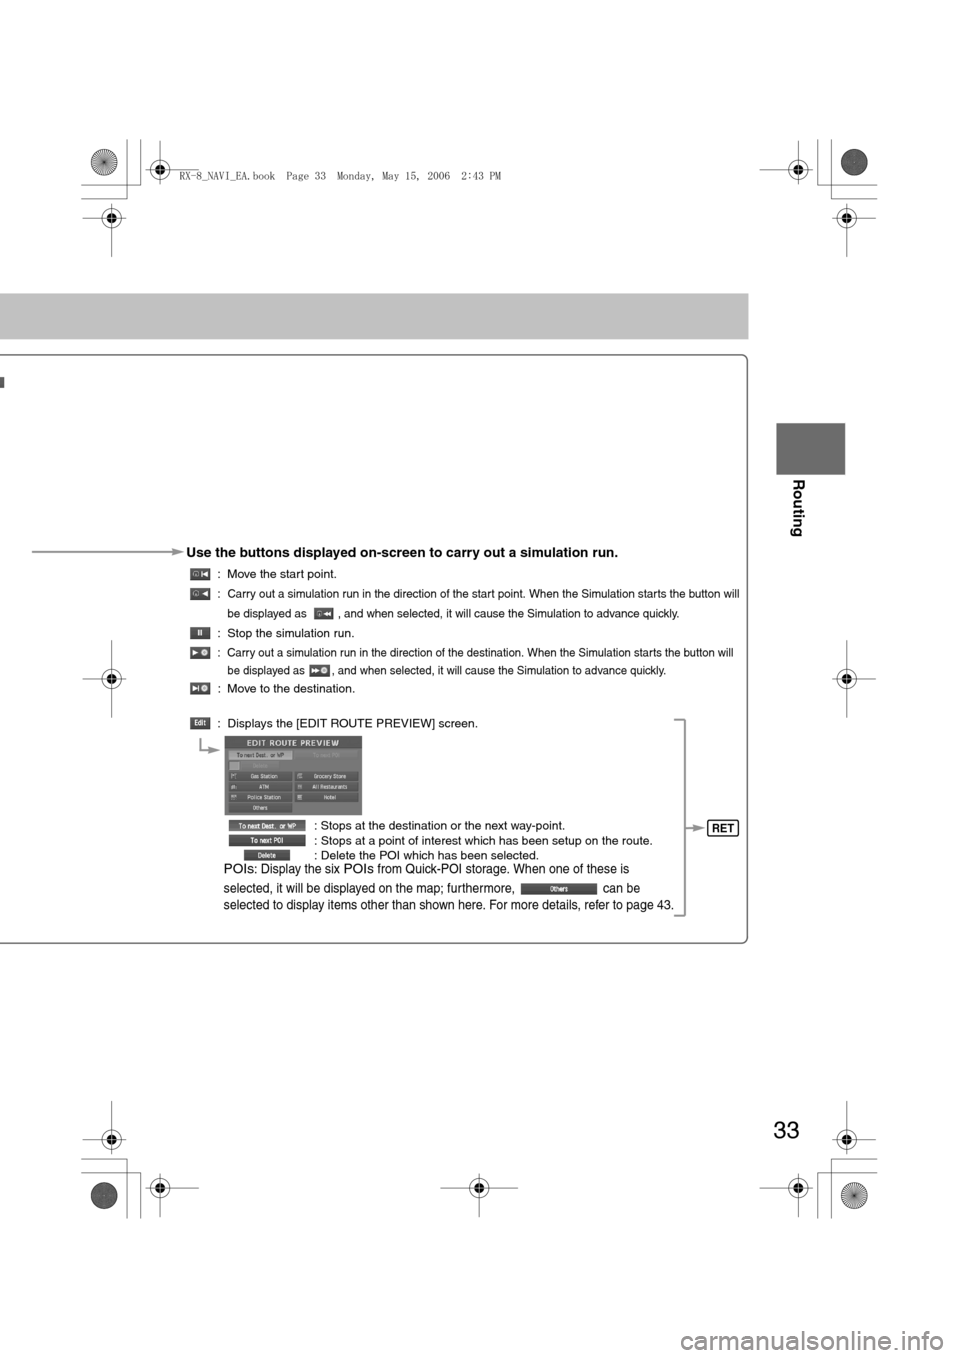
Use the buttons displayed on-screen to carry out a simulation run.
: Move the start point.
: Carry out a simulation run in the direction of the start point. When the Simulation starts the button will
be displayed as , and when selected, it will cause the Simulation to advance quickly.
: Stop the simulation run.
: Carry out a simulation run in the direction of the destination. When the Simulation starts the button will
be displayed as , and when selected, it will cause the Simulation to advance quickly.
: Move to the destination.
: Displays the [EDIT ROUTE PREVIEW] screen.
: Stops at the destination or the next way-point.
: Stops at a point of interest which has been setup on the route.
: Delete the POI which has been selected.
POIs: Display the six POIs from Quick-POI storage. When one of these is
selected, it will be displayed on the map; furthermore, can be
selected to display items other than shown here. For more details, refer to page 43.
RET
<0034003a000f001a0041003000230038002b0041002700230010004400510051004d00020002003200430049004700020015001500020002002f0051005000460043005b000e0002002f0043005b000200130017000e000200140012001200180002000200
14001c0016001500020032002f>
Page 441 of 443
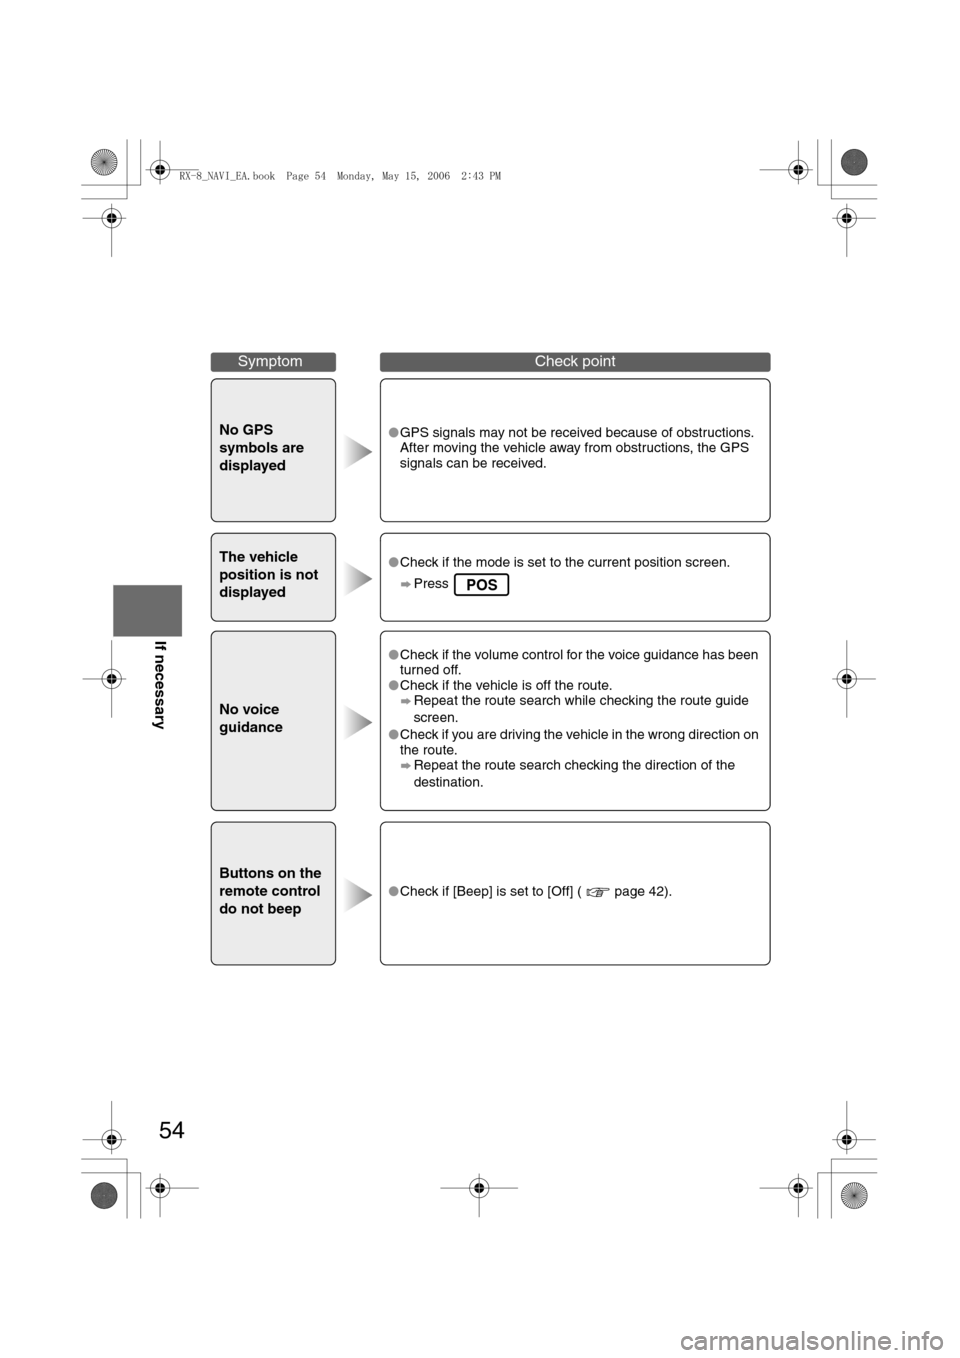
54
Before
UseGetting
startedRoutingAddress
Book
Vo i c e Recognition
If necessary
No GPS
symbols are
displayedlGPS signals may not be received because of obstructions.
After moving the vehicle away from obstructions, the GPS
signals can be received.
The vehicle
position is not
displayedlCheck if the mode is set to the current position screen.
Press
No voice
guidance
lCheck if the volume control for the voice guidance has been
turned off.
lCheck if the vehicle is off the route.
Repeat the route search while checking the route guide
screen.
lCheck if you are driving the vehicle in the wrong direction on
the route.
Repeat the route search checking the direction of the
destination.
Buttons on the
remote control
do not beep
lCheck if [Beep] is set to [Off] ( page 42).
SymptomCheck point
POS
<0034003a000f001a0041003000230038002b0041002700230010004400510051004d00020002003200430049004700020017001600020002002f0051005000460043005b000e0002002f0043005b000200130017000e000200140012001200180002000200
14001c0016001500020032002f>