change time MAZDA MODEL RX 8 2007 (in English) User Guide
[x] Cancel search | Manufacturer: MAZDA, Model Year: 2007, Model line: MODEL RX 8, Model: MAZDA MODEL RX 8 2007Pages: 443
Page 215 of 443

Black plate (214,1)
qOperating Tips for CD Player/In-
Dash CD Changer
Condensation phenomenon
Immediately after turning on the heater
when the vehicle is cold, the CD or
optical components (prism and lens) in the
CD player/In-dash CD changer may
become clouded with condensation. At
this time, the CD will eject immediately
when placed in the unit. A clouded CD
can be corrected simply by wiping it with
a soft cloth. Clouded optical components
will clear naturally in about an hour. Wait
for normal operation to return before
attempting to use the unit.
Handling the CD player/In-dash CD
changer
The following precautions should be
observed.
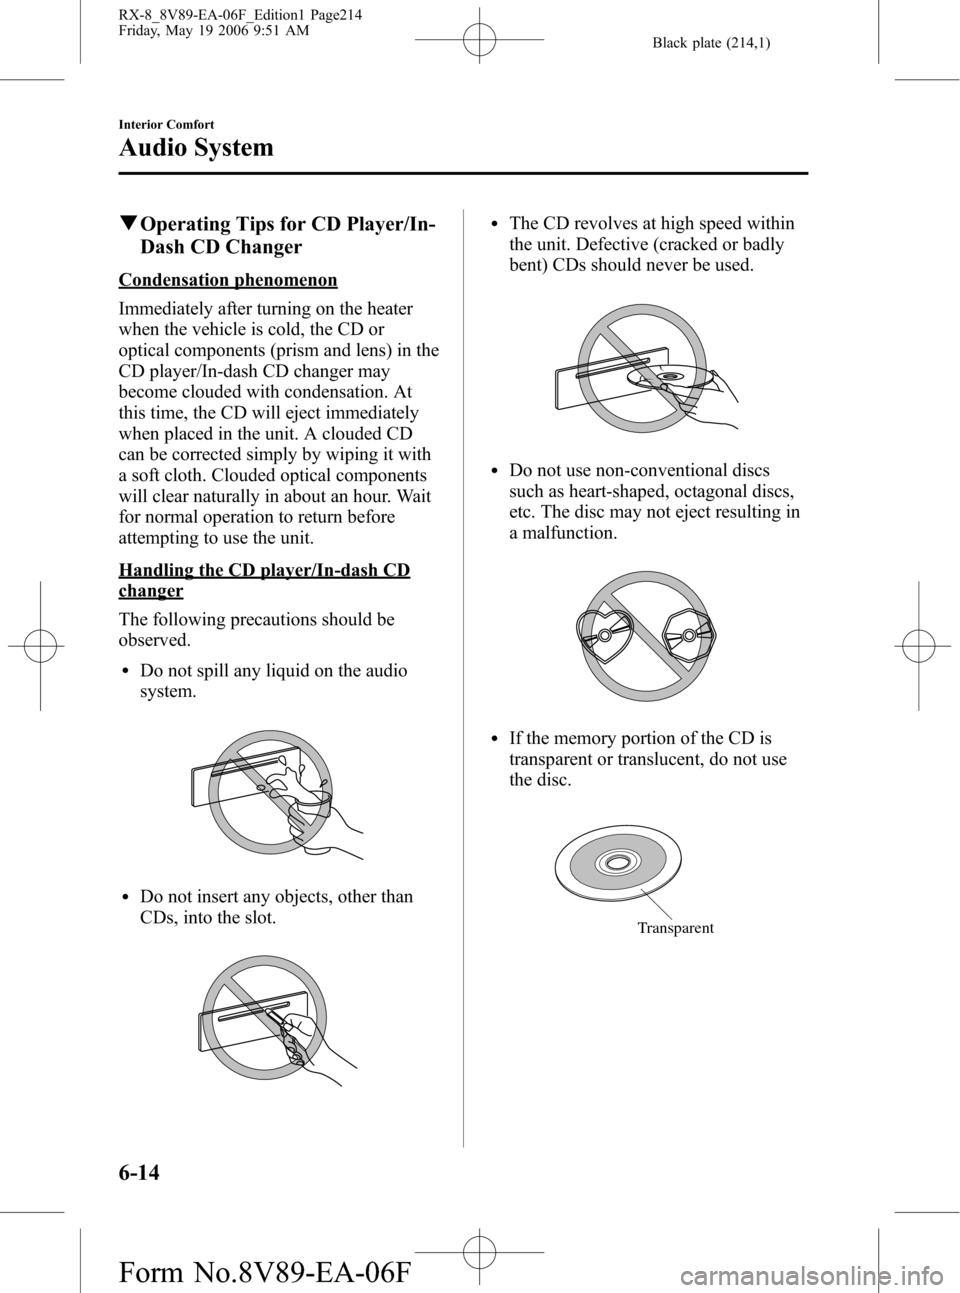
lDo not spill any liquid on the audio
system.
lDo not insert any objects, other than
CDs, into the slot.
lThe CD revolves at high speed within
the unit. Defective (cracked or badly
bent) CDs should never be used.
lDo not use non-conventional discs
such as heart-shaped, octagonal discs,
etc. The disc may not eject resulting in
a malfunction.
lIf the memory portion of the CD is
transparent or translucent, do not use
the disc.
Transparent
6-14
Interior Comfort
Audio System
RX-8_8V89-EA-06F_Edition1 Page214
Friday, May 19 2006 9:51 AM
Form No.8V89-EA-06F
Page 217 of 443

Black plate (216,1)
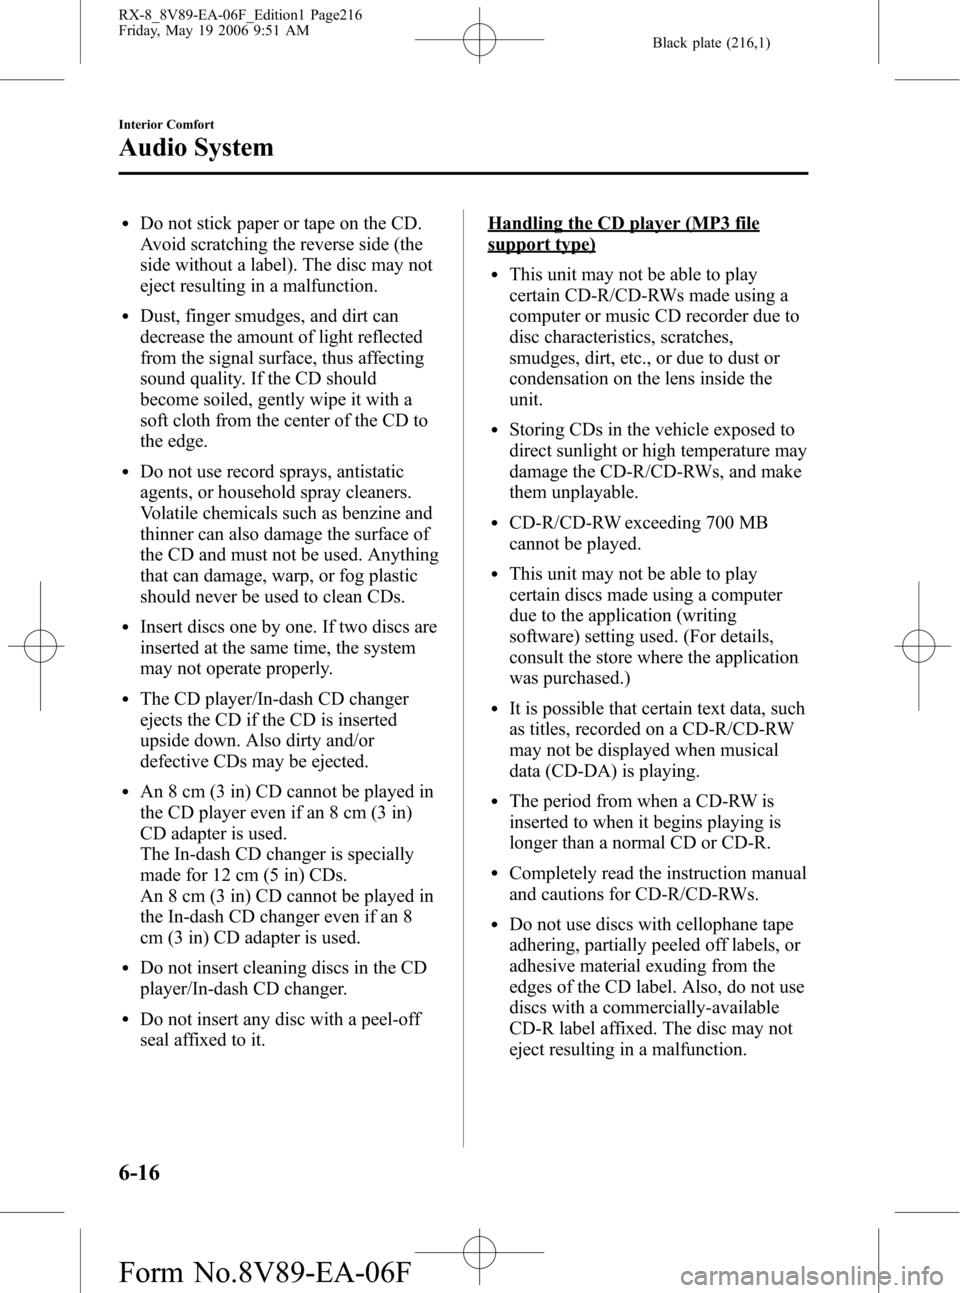
lDo not stick paper or tape on the CD.
Avoid scratching the reverse side (the
side without a label). The disc may not
eject resulting in a malfunction.
lDust, finger smudges, and dirt can
decrease the amount of light reflected
from the signal surface, thus affecting
sound quality. If the CD should
become soiled, gently wipe it with a
soft cloth from the center of the CD to
the edge.
lDo not use record sprays, antistatic
agents, or household spray cleaners.
Volatile chemicals such as benzine and
thinner can also damage the surface of
the CD and must not be used. Anything
that can damage, warp, or fog plastic
should never be used to clean CDs.
lInsert discs one by one. If two discs are
inserted at the same time, the system
may not operate properly.
lThe CD player/In-dash CD changer
ejects the CD if the CD is inserted
upside down. Also dirty and/or
defective CDs may be ejected.
lAn 8 cm (3 in) CD cannot be played in
the CD player even if an 8 cm (3 in)
CD adapter is used.
The In-dash CD changer is specially
made for 12 cm (5 in) CDs.
An 8 cm (3 in) CD cannot be played in
the In-dash CD changer even if an 8
cm (3 in) CD adapter is used.
lDo not insert cleaning discs in the CD
player/In-dash CD changer.
lDo not insert any disc with a peel-off
seal affixed to it.
Handling the CD player (MP3 file
support type)
lThis unit may not be able to play
certain CD-R/CD-RWs made using a
computer or music CD recorder due to
disc characteristics, scratches,
smudges, dirt, etc., or due to dust or
condensation on the lens inside the
unit.
lStoring CDs in the vehicle exposed to
direct sunlight or high temperature may
damage the CD-R/CD-RWs, and make
them unplayable.
lCD-R/CD-RW exceeding 700 MB
cannot be played.
lThis unit may not be able to play
certain discs made using a computer
due to the application (writing
software) setting used. (For details,
consult the store where the application
was purchased.)
lIt is possible that certain text data, such
as titles, recorded on a CD-R/CD-RW
may not be displayed when musical
data (CD-DA) is playing.
lThe period from when a CD-RW is
inserted to when it begins playing is
longer than a normal CD or CD-R.
lCompletely read the instruction manual
and cautions for CD-R/CD-RWs.
lDo not use discs with cellophane tape
adhering, partially peeled off labels, or
adhesive material exuding from the
edges of the CD label. Also, do not use
discs with a commercially-available
CD-R label affixed. The disc may not
eject resulting in a malfunction.
6-16
Interior Comfort
Audio System
RX-8_8V89-EA-06F_Edition1 Page216
Friday, May 19 2006 9:51 AM
Form No.8V89-EA-06F
Page 234 of 443

Black plate (233,1)
NOTE
When the load button () is pressed,
the CD will load and play even if the
CD eject button (
) had been
previously pressed.
Fast-forward/Reverse
Press and hold the fast-forward button
(
) to advance through a track at high
speed.
Press and hold the reverse button (
)
to reverse through a track at high speed.
Track search
Press the track up button (
) once to
skip forward to the beginning of the next
track.
Press the track down button (
) once to
skip back to the beginning of the current
track.
Folder search (during MP3 CD
playback)
To change to the previous folder, press the
folder down button (
), or press the
folder up button (
) to advance to
the next folder.
Music scan
This feature helps to find a program by
playing about the first 10 seconds of each
track.
Press the scan button (
,) during
play to start scan play operation (the track
number will flash).
Press the scan button (
,) once again
to cancel scan play.
NOTE
If the unit is left in scan, normal play
will resume where scan was selected.
Repeat play
This feature makes it possible to listen to
a selection repeatedly.
Press the repeat button (
) during play.
The current selection will be repeated
(“RPT”will be displayed).
Press the repeat button (
) once again
to cancel repeat play.
Random play
This feature allows the CD player to
randomly select the order of the songs.
Press the random button (
) during
play. The next selection will be randomly
selected (“RDM”will be displayed).
Press the random button (
) once
again to cancel random play.
Switching the display (Music CD/MP3
CD player)
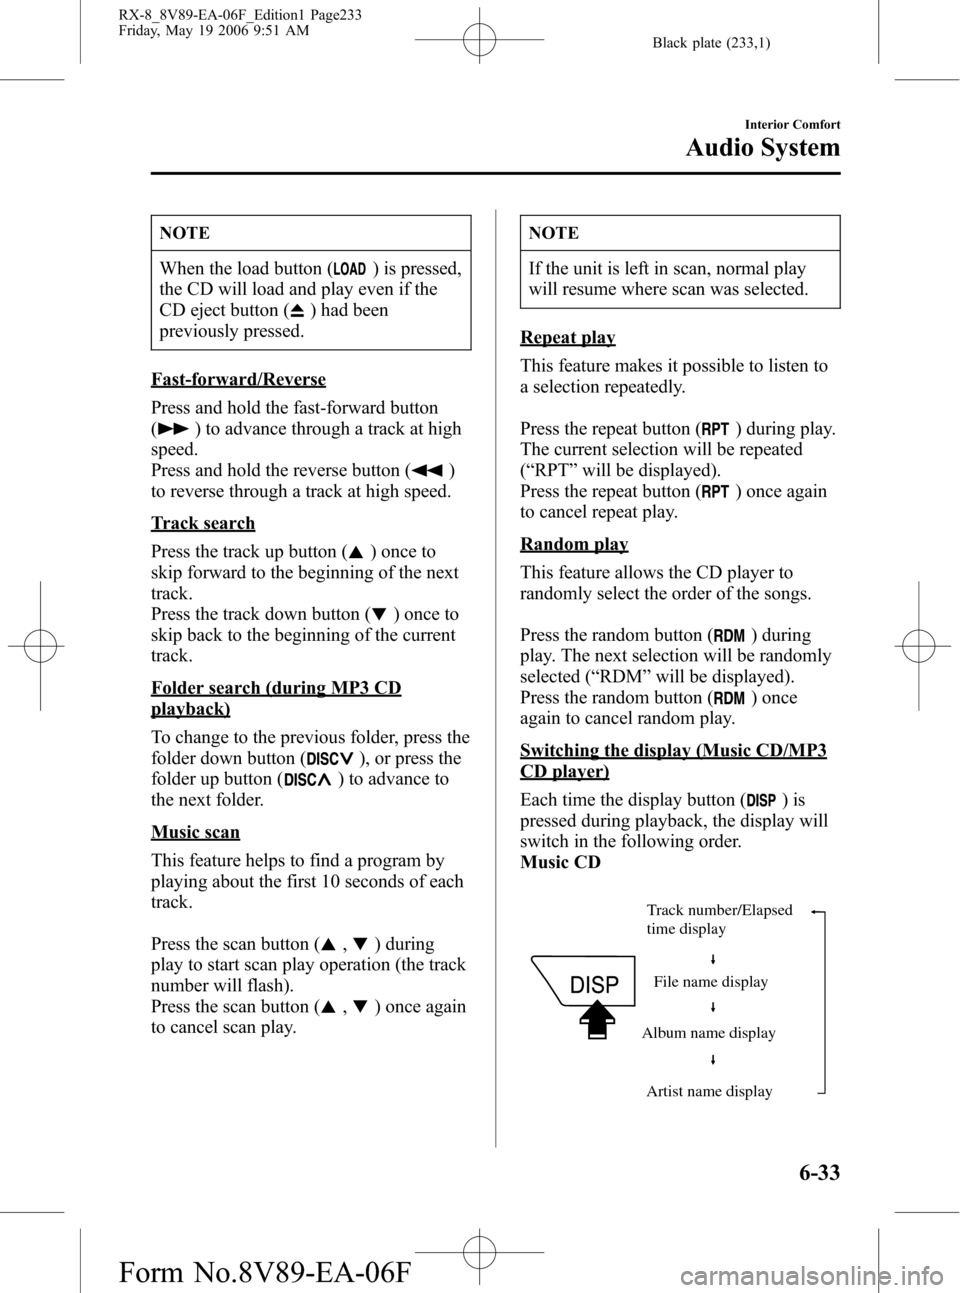
Each time the display button (
)is
pressed during playback, the display will
switch in the following order.
Music CD
Track number/Elapsed
time display
File name display
Album name display
Artist name display
Interior Comfort
Audio System
6-33
RX-8_8V89-EA-06F_Edition1 Page233
Friday, May 19 2006 9:51 AM
Form No.8V89-EA-06F
Page 237 of 443

Black plate (236,1)
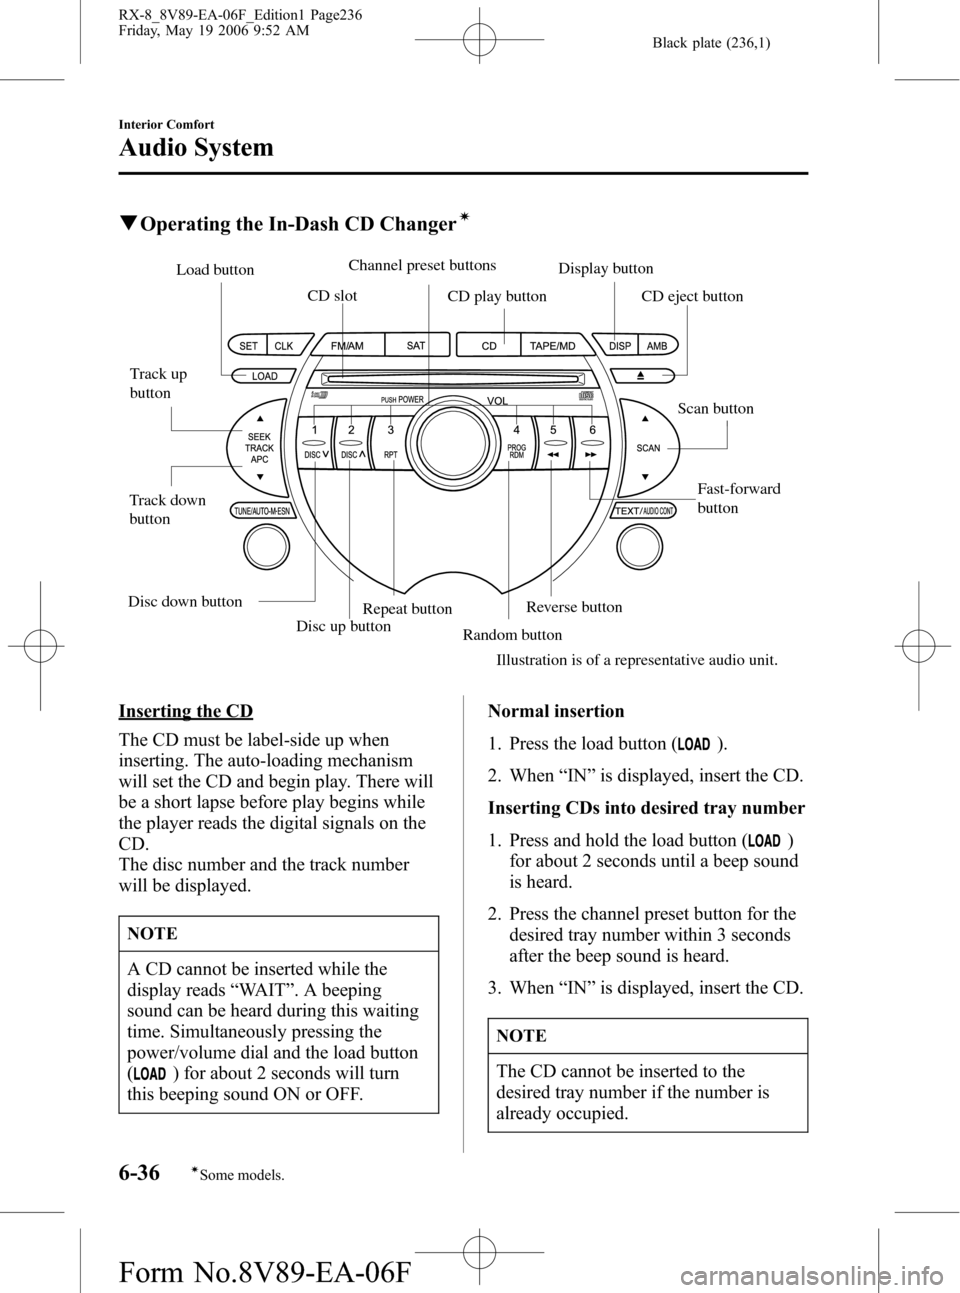
qOperating the In-Dash CD Changerí
Disc up button
Fast-forward
button Track up
button
Track down
buttonLoad button
CD slot
CD play buttonDisplay button
Repeat button
Random buttonReverse button
Illustration is of a representative audio unit.Scan button CD eject button Channel preset buttons
Disc down button
Inserting the CD
The CD must be label-side up when
inserting. The auto-loading mechanism
will set the CD and begin play. There will
be a short lapse before play begins while
the player reads the digital signals on the
CD.
The disc number and the track number
will be displayed.
NOTE
A CD cannot be inserted while the
display reads“WAIT”. A beeping
sound can be heard during this waiting
time. Simultaneously pressing the
power/volume dial and the load button
(
) for about 2 seconds will turn
this beeping sound ON or OFF.Normal insertion
1. Press the load button (
).
2. When“IN”is displayed, insert the CD.
Inserting CDs into desired tray number
1. Press and hold the load button (
)
for about 2 seconds until a beep sound
is heard.
2. Press the channel preset button for the
desired tray number within 3 seconds
after the beep sound is heard.
3. When“IN”is displayed, insert the CD.
NOTE
The CD cannot be inserted to the
desired tray number if the number is
already occupied.
6-36
Interior Comfort
íSome models.
Audio System
RX-8_8V89-EA-06F_Edition1 Page236
Friday, May 19 2006 9:52 AM
Form No.8V89-EA-06F
Page 301 of 443

Black plate (300,1)
Inspect fluid level in the washer fluid
reservoir; add fluid if necessary.
Full
LowOK
Use plain water if washer fluid is
unavailable.
But use only washer fluid in cold weather
to prevent it from freezing.
Body Lubrication
All moving points of the body, such as
door and hood hinges and locks, should
be lubricated each time the engine oil is
changed. Use a nonfreezing lubricant on
locks during cold weather.
Make sure the hood's secondary latch
keeps the hood from opening when the
primary latch is released.
8-18
Maintenance and Care
Owner Maintenance
RX-8_8V89-EA-06F_Edition1 Page300
Friday, May 19 2006 9:52 AM
Form No.8V89-EA-06F
Page 393 of 443

6
Before Use
Navigation
Set Up
RDM-TMCIf
necessary
Rear View
Monitor
Safety Information
nRead this owner’s manual for your Navigation System carefully before using the system.
It contains instructions about how to use the system in a safe and effective manner.
Mazda assumes no responsibility for any problems resulting from failure to observe the instructions
given in this manual.
nThis manual uses pictographs to show you how to use the product safely and to alert you to potential
dangers resulting from improper connections and operation. The meanings of the pictographs are
explained below. It is important that you fully understand the pictographs and explanations in order to
use this manual and the system properly.
Warning
Warning
The presence of this Warning symbol in the text is intended to
alert you to the importance of heeding the operation
instructions. Failure to heed the instructions may result in
severe injury or death.
nDo not keep your eyes fixed on the monitor screen or operate the system
while driving.
Do not change the settings and destination locations while driving. Minimize the time
spent on viewing the monitor screen and listening to the voice guidance while driving.
Operating the system will distract the driver from looking ahead of the vehicle and can
cause accidents. Always stop the vehicle in a safe location and use the parking brake
before operating the system.
n
Always obey local traffic regulations. Your guided route may include roads that are not open to vehicles or are closed due to
traffic regulations. Comply with the local traffic regulations and take another route.
n
Do not use the unit when it is out of order.If the unit is out of order (no image, no sound) or in an abnormal state (has foreign matter
in it, is exposed to water, is smoking, or smells), then turn it off immediately and consult
with an Expert dealer, we recommend an Authorized Mazda Dealer. Using the unit in an
out-of-order condition may lead to accidents, fires, or electric shocks.
n
Use the proper power supply. This product is designed for operation with a negative grounded 12 V DC battery system.
n
Do not disassemble. Do not disassemble the product or attempt to repair it yourself. If the product needs to be
repaired, take it to an Expert dealer, we recommend an Authorized Mazda Dealer.
Warnings
<0034003a000f001a0041003000230038002b0041002700230010004400510051004d0002000200320043004900470002001800020002002f0051005000460043005b000e0002002f0043005b000200130017000e0002001400120012001800020002001400
1c0016001500020032002f>
Page 399 of 443

12
RoutingAddress
Book
Getting started
Activation
Insert the map disc into the unit to start the Mobile Navigation System.
Note
lThe map disc cannot be inserted or ejected while the ignition switch is in the OFF position.
lRemember that the battery can run down if the ignition switch is kept in the ON or ACC
position for a long time while the engine not running.
nMap Disc
lRefer to “Handling and Care of Map Discs” to know how to handle a map
disc (
page 56).
1
Turn the ignition switch
to the ON position and
press to open
the display.Note
lThis display angle can be adjusted by pressing .
When the is
pressed, the display
angle changes in
stages.
lPress to close the display.
2
Insert the map disc
with the printed side
facing up.Note
lThe main unit is located in the Center Console (Rear).lCondensation may form on the optical lens or the
map disc inside the unit when the temperature in
the vehicle increases in a short time such as when
heating the car on a cold day. This condensation
may cause malfunctions. If so, unload the map disc
and do not operate the unit for approximately 1
hour. Wipe the condensation off the map disc with a
soft cloth.
If the unit does not operate correctly after 1 hour,
consult an Authorized Mazda Dealer.
Cautions
OPENTILT
TILT
OPEN
(CAUTION) screen
<0034003a000f001a0041003000230038002b0041002700230010004400510051004d00020002003200430049004700020013001400020002002f0051005000460043005b000e0002002f0043005b000200130017000e000200140012001200180002000200
14001c0016001500020032002f>
Page 403 of 443

16
RoutingAddress
Book
Getting started
Screen change
nDo not keep your eyes fixed on the monitor screen or operate the system
while driving
Do not change the settings and destination locations while driving. Minimize the time
spent viewing the monitor screen and listening to the voice guidance while driving.
Operating the system will distract the driver from looking ahead of the vehicle and may
cause an accident. Always stop the vehicle in a safe location and use the parking brake
before operating the system.
Map
orientation
Map scale
Changing the Map Orientation/Scale
Warning
1
Press
2
Select , and
press
lNorth Up: Geographic north is up.
lHead Up: The direction you are
heading is up.
ENTER
ENTER
1lThe map can be displayed in
13 steps with scales from
to .l
ZOOM OUT: Enlarges the map.
lZOOM IN: Reduces the map.
(more detail.)
ZOOM
Position before change
Imperial
display1/32 mi
(mile)1/4 mi
(mile)2 mi
(mile)16 mi
(mile)128 mi
(mile)
Metric
display50 m 500 m 4 km 32 km 256 km
ZOOM
<0034003a000f001a0041003000230038002b0041002700230010004400510051004d00020002003200430049004700020013001800020002002f0051005000460043005b000e0002002f0043005b000200130017000e000200140012001200180002000200
14001c0016001500020032002f>
Page 406 of 443

19
Before
UseGetting
started
Routing
lFor Character Entry, please refer to page 27.
lDo not keep your eyes fixed on the monitor screen or operate the system while driving.Do not change the settings and destination locations while driving. Minimize the time spent
viewing the monitor screen and listening to the voice guidance while driving. Operating the system
will distract the driver from looking ahead of the vehicle and may cause an accident. Always stop
the vehicle in a safe location before operating the system.
lRoute searches with the navigation system can include roads that you cannot drive on and roads that you
are prohibited from driving on due to traffic regulations. Please comply with the traffic regulations.
Warnings
Select the desired Search Area : ID, OR, WA, : AR, AL, LA, MS, TN
: CA, NV : CT, MA, ME, NH, NJ, NY, RI, VT
: AZ, CO, MT, NM, UT, WY : DC, DE, MD, PA, VA, WV
: IA, KS, MN, MO, ND, NE, SD : FL, GA, NC, SC
: OK, TX : CANADA
: IL, IN, KY, MI, OH, WIENTERRET
narrowing
to city name
narrowing
to street nameEnter the
street
name and
select
:
Cancel the
city selection.
:
Displays list of
5 city name
s
nearest the
current
position.
:
Displays the
city name
input screen.
Select the
street name
from the list
Select
the
city
name
from
the
list
Enter
the
city
name
and
selectEnter
the
street
name
and
select
Select
the
city
name
from
the
list
Select the city
name from the
list
Select
the
street
name
from
the
list
Enter
the
street
name
and
select
Select the
street name
from the list
Enter
the
house
no. Enter
the
house
no.
Select
SelectDirect
destination
input
(
page 28)
<0034003a000f001a0041003000230038002b0041002700230010004400510051004d00020002003200430049004700020013001b00020002002f0051005000460043005b000e0002002f0043005b000200130017000e000200140012001200180002000200
14001c0016001500020032002f>
Page 415 of 443

28
Before
UseGetting
started
Routing
Direct Destination Input
Direct
Destination
Input
Selecting
Route
1
Position the
cursor on your
destination on
the map
Scroll the map and change the map
scale if necessary.
2 Select
3
Select .
Route calculation will be carried out and the entire route
will be displayed on the map.
Select (Way point) to set the address as a way point
on your route ( page 34). You can set up to 5 way-
points per trip.
4
Select .Route guidance begins using displayed route.
Note
lIf your desired route cannot be found, (Route
Options) allows the route option settings to be changed.
( page 30)
lSelecting for five seconds or more will launch the
Demo mode.
Operate after Step 3 of [Direct Destination Input]
4
The calculation route can be selected from one of three
types namely, Quick (the fastest route), Altern. (the
standard route), or Short (the shortest route).
5
Select (Information).Details regarding the individual routes (i.e., required time
total distance, roads used, etc.)
Select either , , or
, and then select
when you have decided
on the route to be used.
ENTER
ENTER
ENTER
<0034003a000f001a0041003000230038002b0041002700230010004400510051004d00020002003200430049004700020014001a00020002002f0051005000460043005b000e0002002f0043005b000200130017000e000200140012001200180002000200
14001c0016001500020032002f>