set clock MAZDA MODEL RX 8 2007 Owners Manual (in English)
[x] Cancel search | Manufacturer: MAZDA, Model Year: 2007, Model line: MODEL RX 8, Model: MAZDA MODEL RX 8 2007Pages: 443
Page 186 of 443
Black plate (185,1)
Gear position indicator
When the shift lever is in the D or M
position, the numeral for the selected gear
displays.
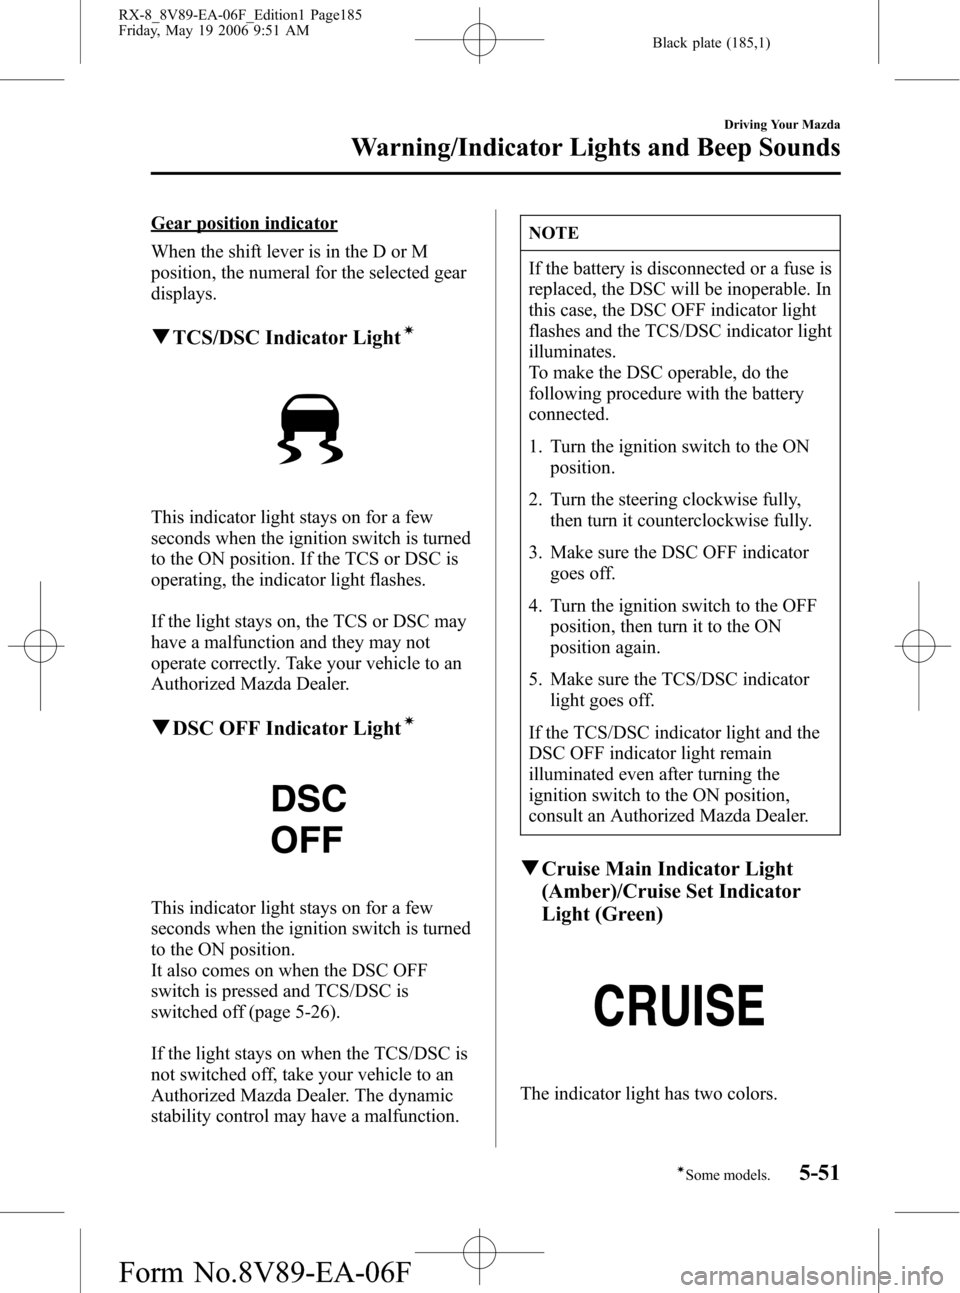
qTCS/DSC Indicator Lightí
This indicator light stays on for a few
seconds when the ignition switch is turned
to the ON position. If the TCS or DSC is
operating, the indicator light flashes.
If the light stays on, the TCS or DSC may
have a malfunction and they may not
operate correctly. Take your vehicle to an
Authorized Mazda Dealer.
qDSC OFF Indicator Lightí
This indicator light stays on for a few
seconds when the ignition switch is turned
to the ON position.
It also comes on when the DSC OFF
switch is pressed and TCS/DSC is
switched off (page 5-26).
If the light stays on when the TCS/DSC is
not switched off, take your vehicle to an
Authorized Mazda Dealer. The dynamic
stability control may have a malfunction.
NOTE
If the battery is disconnected or a fuse is
replaced, the DSC will be inoperable. In
this case, the DSC OFF indicator light
flashes and the TCS/DSC indicator light
illuminates.
To make the DSC operable, do the
following procedure with the battery
connected.
1. Turn the ignition switch to the ON
position.
2. Turn the steering clockwise fully,
then turn it counterclockwise fully.
3. Make sure the DSC OFF indicator
goes off.
4. Turn the ignition switch to the OFF
position, then turn it to the ON
position again.
5. Make sure the TCS/DSC indicator
light goes off.
If the TCS/DSC indicator light and the
DSC OFF indicator light remain
illuminated even after turning the
ignition switch to the ON position,
consult an Authorized Mazda Dealer.
qCruise Main Indicator Light
(Amber)/Cruise Set Indicator
Light (Green)
The indicator light has two colors.
Driving Your Mazda
Warning/Indicator Lights and Beep Sounds
5-51íSome models. RX-8_8V89-EA-06F_Edition1 Page185
Friday, May 19 2006 9:51 AM
Form No.8V89-EA-06F
Page 248 of 443
Black plate (247,1)
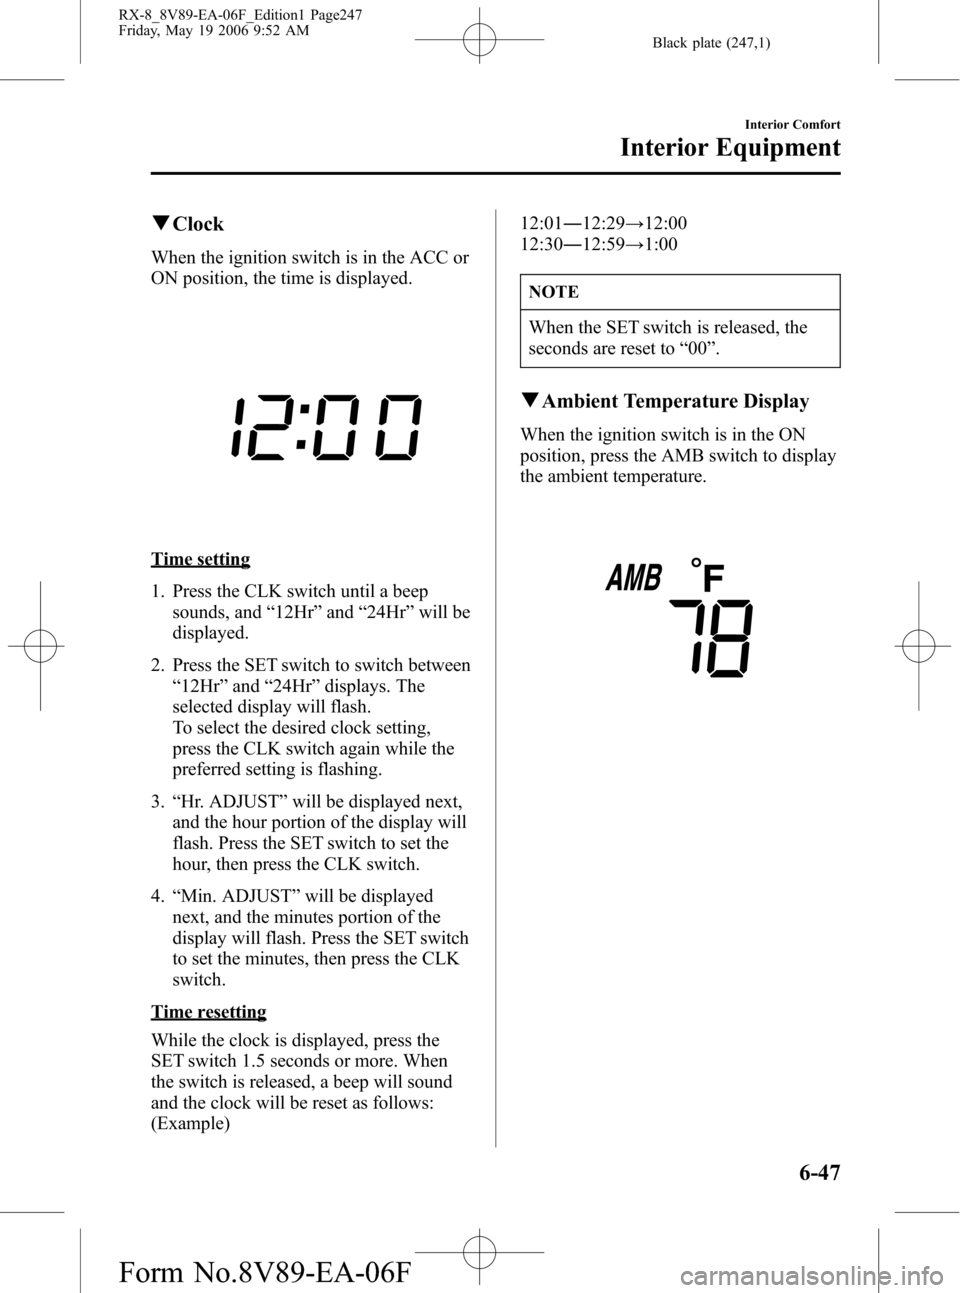
qClock
When the ignition switch is in the ACC or
ON position, the time is displayed.
Time setting
1. Press the CLK switch until a beep
sounds, and“12Hr”and“24Hr”will be
displayed.
2. Press the SET switch to switch between
“12Hr”and“24Hr”displays. The
selected display will flash.
To select the desired clock setting,
press the CLK switch again while the
preferred setting is flashing.
3.“Hr. ADJUST”will be displayed next,
and the hour portion of the display will
flash. Press the SET switch to set the
hour, then press the CLK switch.
4.“Min. ADJUST”will be displayed
next, and the minutes portion of the
display will flash. Press the SET switch
to set the minutes, then press the CLK
switch.
Time resetting
While the clock is displayed, press the
SET switch 1.5 seconds or more. When
the switch is released, a beep will sound
and the clock will be reset as follows:
(Example)12:01―12:29→12:00
12:30―12:59→1:00
NOTE
When the SET switch is released, the
seconds are reset to“00”.
qAmbient Temperature Display
When the ignition switch is in the ON
position, press the AMB switch to display
the ambient temperature.
Interior Comfort
Interior Equipment
6-47
RX-8_8V89-EA-06F_Edition1 Page247
Friday, May 19 2006 9:52 AM
Form No.8V89-EA-06F
Page 268 of 443
Black plate (267,1)
1. Park on a level surface off the right-of-
way and firmly set the parking brake.
2. Put a vehicle with an automatic
transmission in Park (P), a manual
transmission in Reverse (R) or 1, and
turn off the engine.
3. Turn on the hazard warning flasher.
4. Have everyone get out of the vehicle
and away from the vehicle and traffic.
5. Remove the jack, and tool (page 7-3).
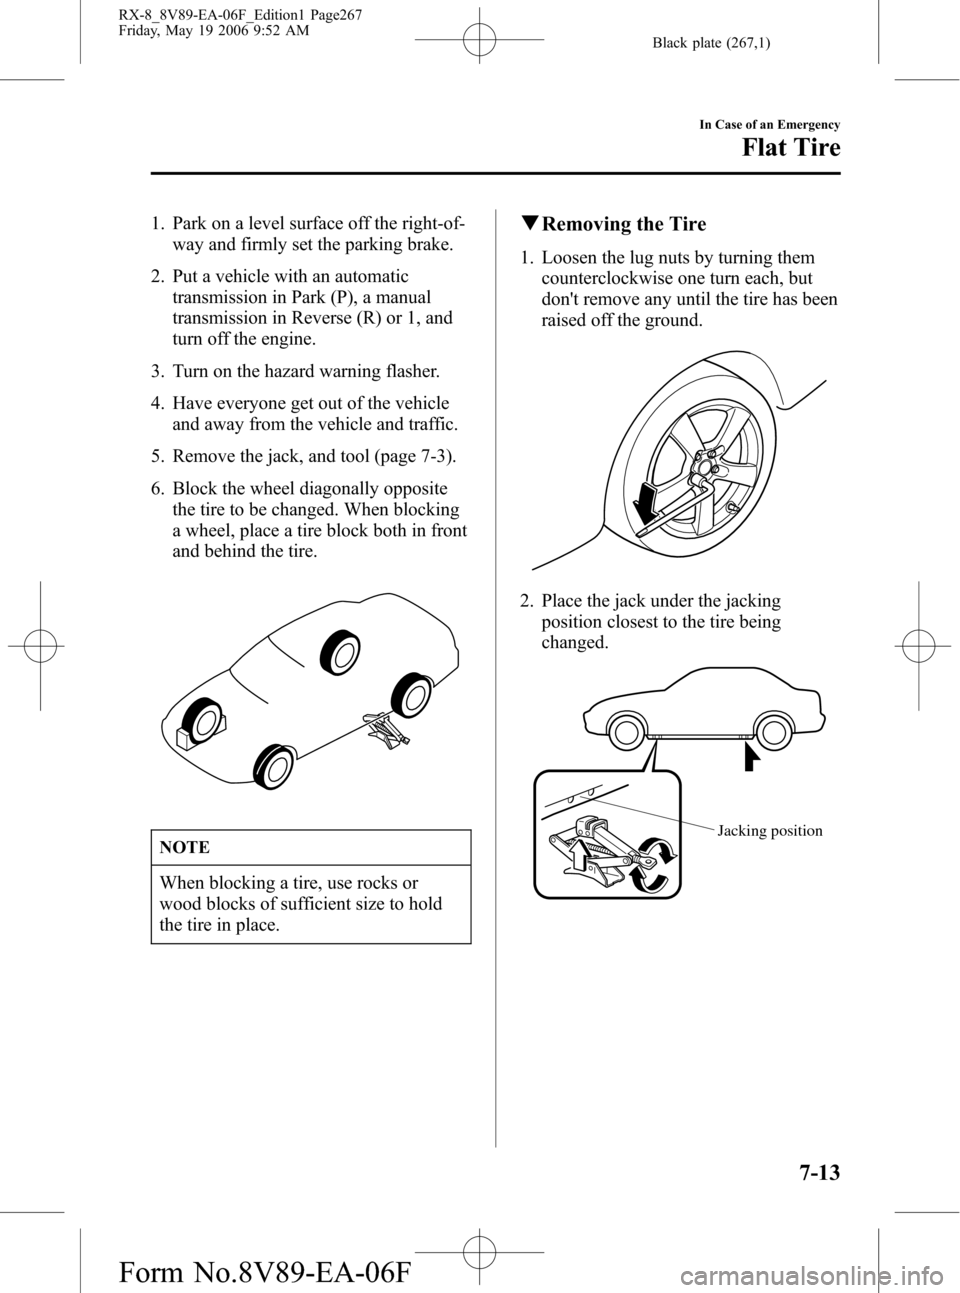
6. Block the wheel diagonally opposite
the tire to be changed. When blocking
a wheel, place a tire block both in front
and behind the tire.
NOTE
When blocking a tire, use rocks or
wood blocks of sufficient size to hold
the tire in place.
qRemoving the Tire
1. Loosen the lug nuts by turning them
counterclockwise one turn each, but
don't remove any until the tire has been
raised off the ground.
2. Place the jack under the jacking
position closest to the tire being
changed.
Jacking position
In Case of an Emergency
Flat Tire
7-13
RX-8_8V89-EA-06F_Edition1 Page267
Friday, May 19 2006 9:52 AM
Form No.8V89-EA-06F
Page 401 of 443
14
RoutingAddress
Book
Getting started
Screen Names and Functions
Screens Before Setting Route
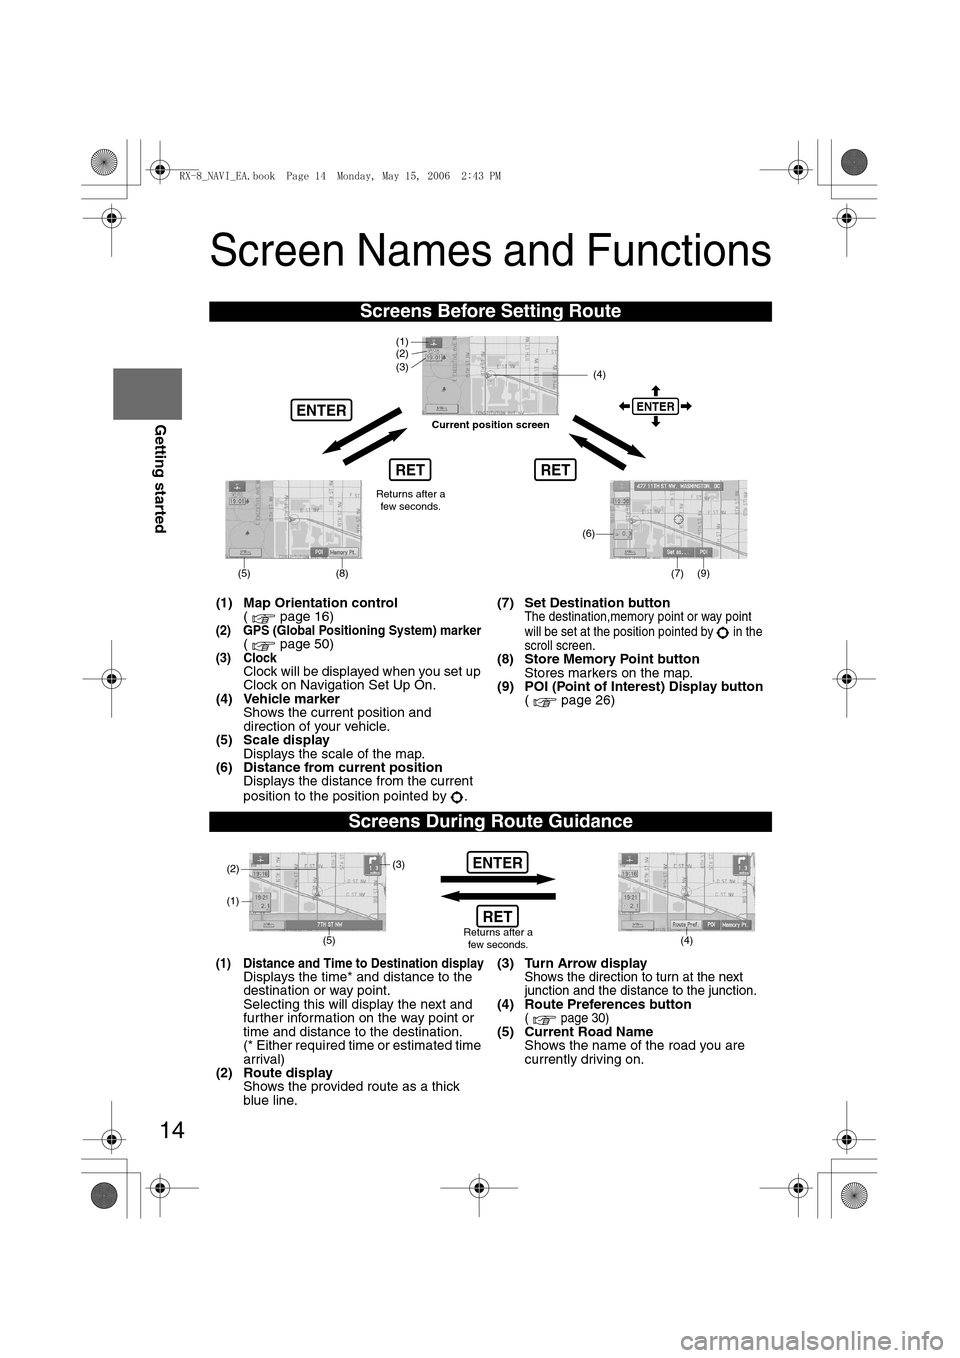
(1) Map Orientation control
( page 16)
(2) GPS (Global Positioning System) marker( page 50)(3) ClockClock will be displayed when you set up
Clock on Navigation Set Up On.
(4) Vehicle marker
Shows the current position and
direction of your vehicle.
(5) Scale display
Displays the scale of the map.
(6) Distance from current position
Displays the distance from the current
position to the position pointed by .(7) Set Destination button
The destination,memory point or way point
will be set at the position pointed by in the
scroll screen.
(8) Store Memory Point button
Stores markers on the map.
(9) POI (Point of Interest) Display button
( page 26)
Screens During Route Guidance
(1) Distance and Time to Destination displayDisplays the time* and distance to the
destination or way point.
Selecting this will display the next and
further information on the way point or
time and distance to the destination.
(* Either required time or estimated time
arrival)
(2) Route display
Shows the provided route as a thick
blue line.(3) Turn Arrow displayShows the direction to turn at the next
junction and the distance to the junction.
(4) Route Preferences button( page 30)(5) Current Road Name
Shows the name of the road you are
currently driving on.
RET
ENTERENTER
(6)
(7) (9)
(4) (3)
(1)(2)
(8)
RET
(5)
Current position screen
Returns after a
few seconds.
ENTER
(4) (3)
(1)
(2)
Returns after a
few seconds.RET
(5)
<0034003a000f001a0041003000230038002b0041002700230010004400510051004d00020002003200430049004700020013001600020002002f0051005000460043005b000e0002002f0043005b000200130017000e000200140012001200180002000200
14001c0016001500020032002f>
Page 429 of 443
![MAZDA MODEL RX 8 2007 Owners Manual (in English) 42
Before
UseGetting
startedRoutingAddress
Book
Navigation Set Up
Navigation Set Up
Before Steps
select
select
User Setting
MENUENTERENTER
ENTERENTER
Open the
[USER SETTINGS]
screen
nA MAZDA MODEL RX 8 2007 Owners Manual (in English) 42
Before
UseGetting
startedRoutingAddress
Book
Navigation Set Up
Navigation Set Up
Before Steps
select
select
User Setting
MENUENTERENTER
ENTERENTER
Open the
[USER SETTINGS]
screen
nA](/img/28/15611/w960_15611-428.png)
42
Before
UseGetting
startedRoutingAddress
Book
Navigation Set Up
Navigation Set Up
Before Steps
select
select
User Setting
MENUENTERENTER
ENTERENTER
Open the
[USER SETTINGS]
screen
nArrival Time
The time which is displayed until reaching the destination or a
way point can be set as an estimated arrival time or the
remaining time.
Select to display the estimated arrival time, or to
display the remaining time.
nKeyboard Layout
The layout of input keys can be selected as or .
nClock
Allows selection of whether clock is to be displayed.
nBeep
Allows selection of whether beep will sound.
<0034003a000f001a0041003000230038002b0041002700230010004400510051004d00020002003200430049004700020016001400020002002f0051005000460043005b000e0002002f0043005b000200130017000e000200140012001200180002000200
14001c0016001500020032002f>
Page 432 of 443
45
Before
UseGetting
startedRoutingAddress
Book
Navigation Set Up
select
.
u are heading, and
rent position that
on is complete.
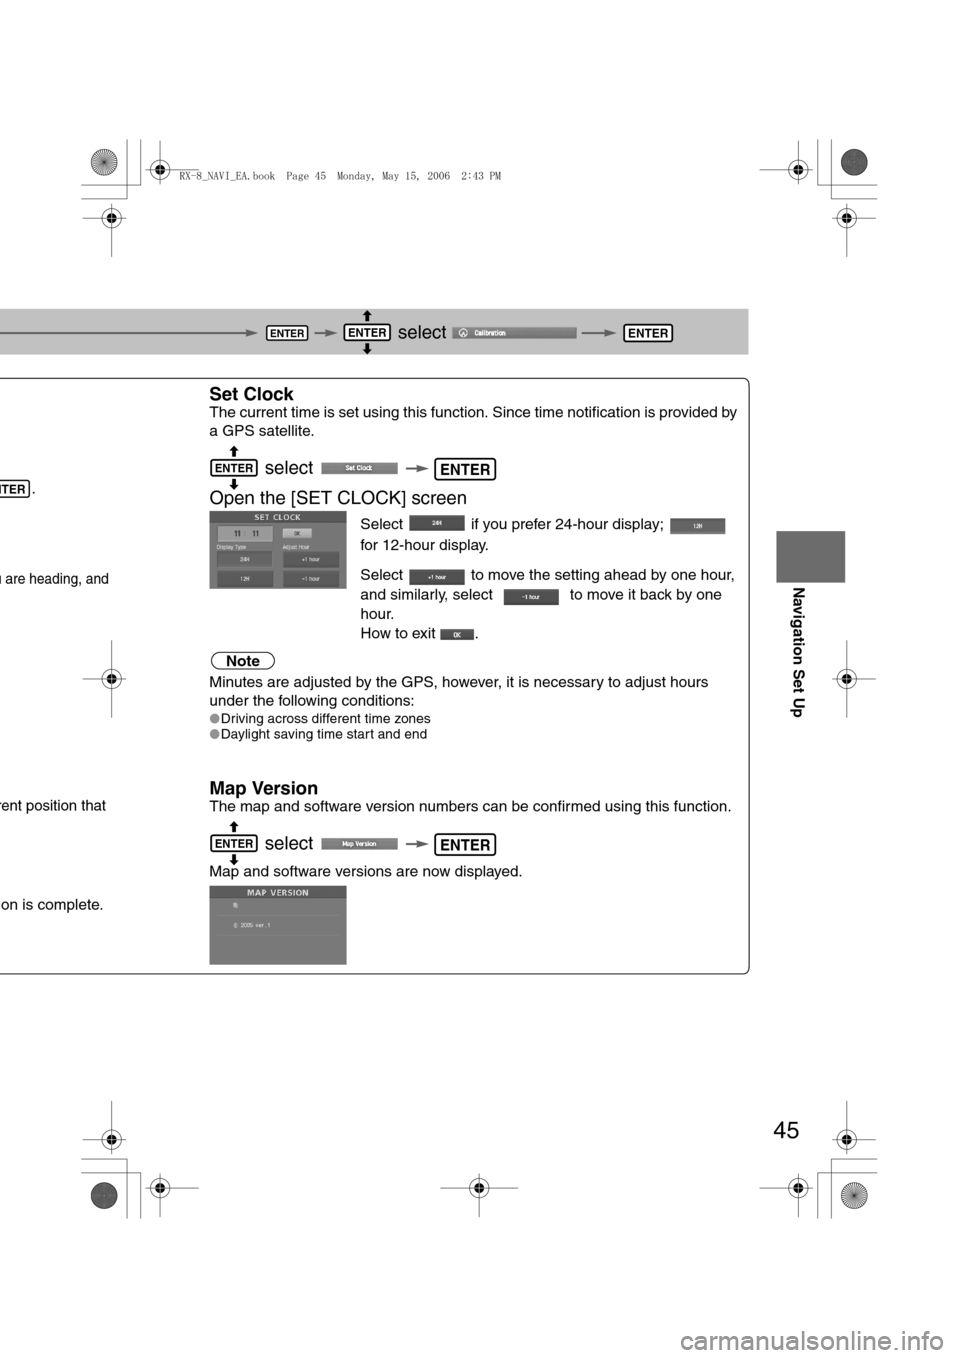
Set Clock
The current time is set using this function. Since time notification is provided by
a GPS satellite.
select
Open the [SET CLOCK] screen
Select if you prefer 24-hour display;
for 12-hour display.
Select to move the setting ahead by one hour,
and similarly, select to move it back by one
hour.
How to exit .
Note
Minutes are adjusted by the GPS, however, it is necessary to adjust hours
under the following conditions:
lDriving across different time zones
lDaylight saving time start and end
Map Version
The map and software version numbers can be confirmed using this function.
select
Map and software versions are now displayed.
ENTERENTERENTER
NTER
ENTERENTER
ENTERENTER
<0034003a000f001a0041003000230038002b0041002700230010004400510051004d00020002003200430049004700020016001700020002002f0051005000460043005b000e0002002f0043005b000200130017000e000200140012001200180002000200
14001c0016001500020032002f>
Page 433 of 443
46
Before
UseGetting
startedRoutingAddress
Book
Navigation Set Up
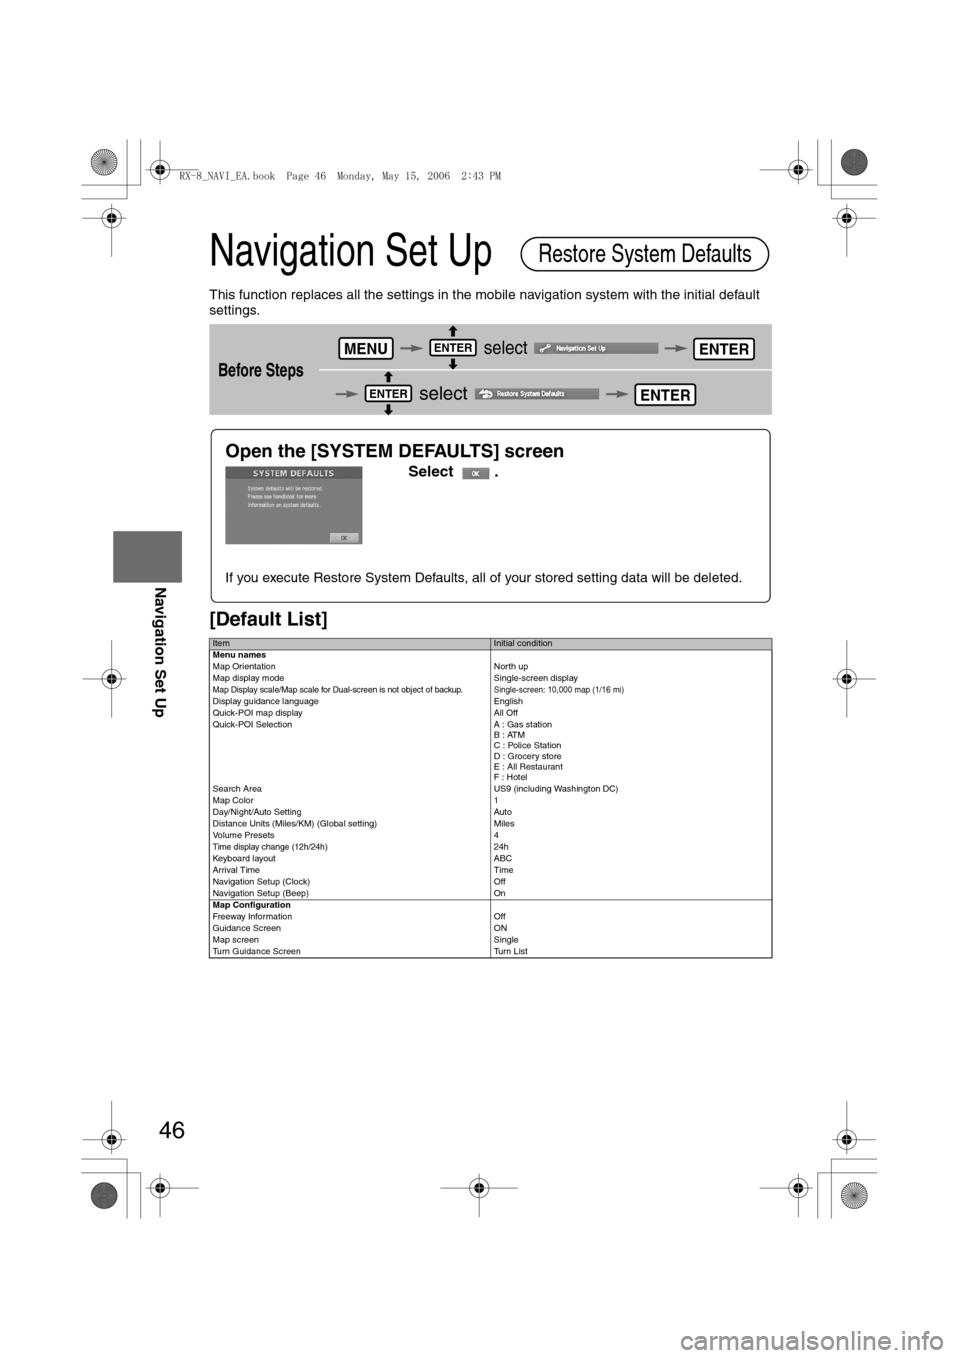
Navigation Set Up
This function replaces all the settings in the mobile navigation system with the initial default
settings.
[Default List]
Before Steps
select
select
ItemInitial condition
Menu names
Map Orientation North up
Map display mode Single-screen display
Map Display scale/Map scale for Dual-screen is not object of backup.Single-screen: 10,000 map (1/16 mi)Display guidance language English
Quick-POI map display All Off
Quick-POI Selection A : Gas station
B : ATM
C : Police Station
D : Grocery store
E : All Restaurant
F : Hotel
Search Area US9 (including Washington DC)
Map Color 1
Day/Night/Auto Setting Auto
Distance Units (Miles/KM) (Global setting) Miles
Volume Presets 4
Time display change (12h/24h)24h
Keyboard layout ABC
Arrival Time Time
Navigation Setup (Clock) Off
Navigation Setup (Beep) On
Map Configuration
Freeway Infor m ati on O ff
Guidance Screen ON
Map screen Single
Turn Guidance Screen Turn List
Restore System Defaults
MENUENTERENTER
ENTERENTER
Open the [SYSTEM DEFAULTS] screen
Select .
If you execute Restore System Defaults, all of your stored setting data will be deleted.
<0034003a000f001a0041003000230038002b0041002700230010004400510051004d00020002003200430049004700020016001800020002002f0051005000460043005b000e0002002f0043005b000200130017000e000200140012001200180002000200
14001c0016001500020032002f>