change wheel MAZDA MODEL RX 8 2010 (in English) User Guide
[x] Cancel search | Manufacturer: MAZDA, Model Year: 2010, Model line: MODEL RX 8, Model: MAZDA MODEL RX 8 2010Pages: 438, PDF Size: 7.02 MB
Page 180 of 438

Black plate (180,1)
CAUTION
Do not run the engine with the
tachometer needle in the RED ZONE.
This may cause severe engine
damage.
NOTE
lThe beep sounds to indicate engine overrev
when the tachometer needle enters the
striped zone.
lThe display of the variable red zone in the
tachometer changes according to the
temperature of the engine coolant. To
protect the engine, when the engine coolant
temperature is low, the engine does not run
at high speeds. The fuel supply will be cut
at an rpm lower than the red zone.
qEngine Coolant Temperature Gauge
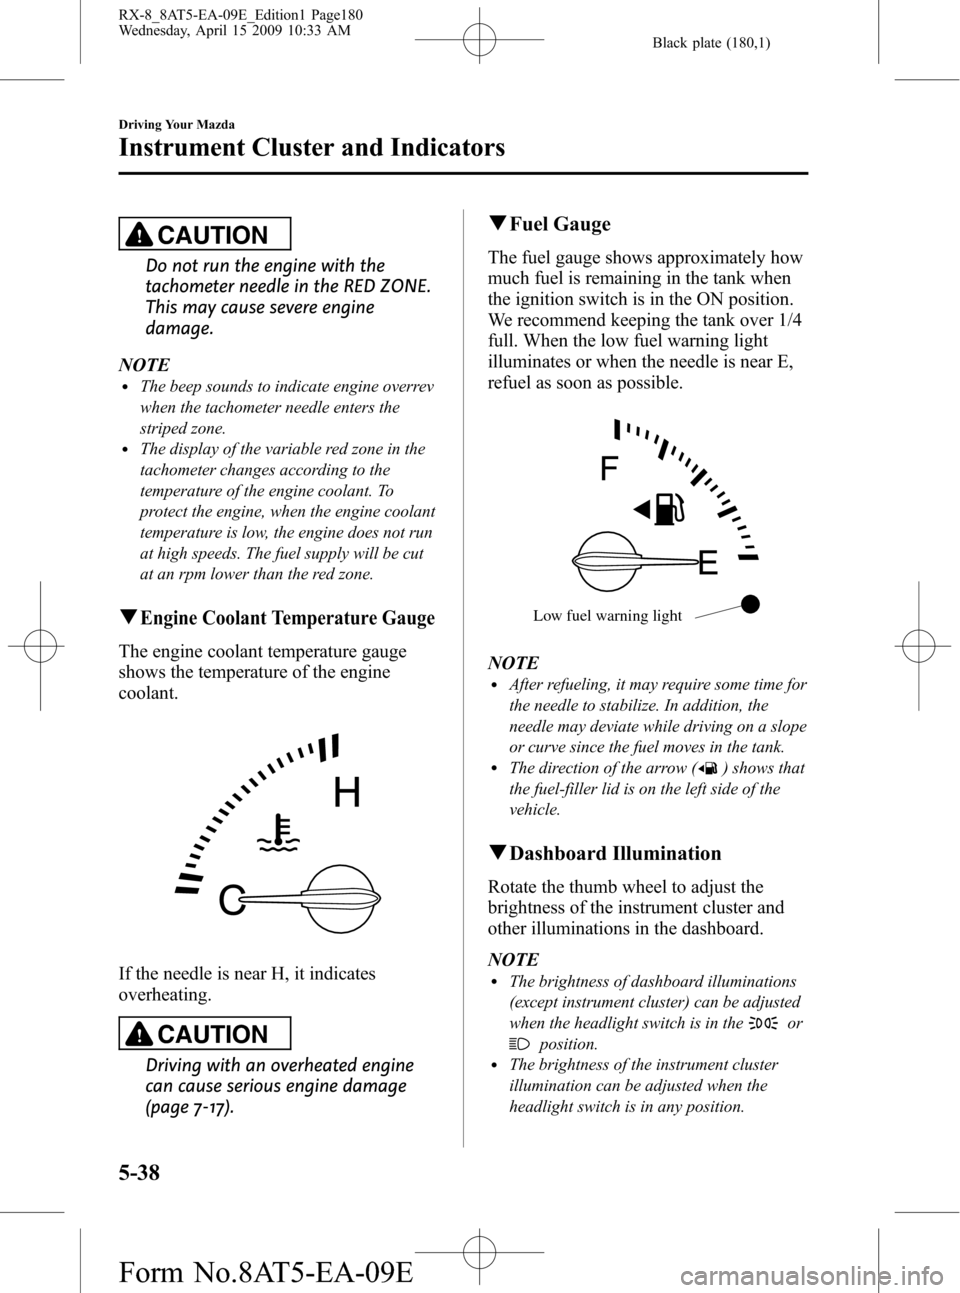
The engine coolant temperature gauge
shows the temperature of the engine
coolant.
If the needle is near H, it indicates
overheating.
CAUTION
Driving with an overheated engine
can cause serious engine damage
(page 7-17).
qFuel Gauge
The fuel gauge shows approximately how
much fuel is remaining in the tank when
the ignition switch is in the ON position.
We recommend keeping the tank over 1/4
full. When the low fuel warning light
illuminates or when the needle is near E,
refuel as soon as possible.
Low fuel warning light
NOTElAfter refueling, it may require some time for
the needle to stabilize. In addition, the
needle may deviate while driving on a slope
or curve since the fuel moves in the tank.
lThe direction of the arrow () shows that
the fuel-filler lid is on the left side of the
vehicle.
qDashboard Illumination
Rotate the thumb wheel to adjust the
brightness of the instrument cluster and
other illuminations in the dashboard.
NOTE
lThe brightness of dashboard illuminations
(except instrument cluster) can be adjusted
when the headlight switch is in the
or
position.lThe brightness of the instrument cluster
illumination can be adjusted when the
headlight switch is in any position.
5-38
Driving Your Mazda
Instrument Cluster and Indicators
RX-8_8AT5-EA-09E_Edition1 Page180
Wednesday, April 15 2009 10:33 AM
Form No.8AT5-EA-09E
Page 269 of 438

Black plate (269,1)
CAUTION
ØClose the cover when the auxiliary
jack is not in use to prevent
foreign objects and liquids from
penetrating the auxiliary jack.
ØDo not place objects or apply force
to the auxiliary jack with the plug
connected.
ØNoise may occur during playback
if the accessory socket equipped
on the vehicle is used. (If noise
occurs, do not use the accessory
socket.)
NOTE
lBefore using the auxiliary jack, read the
manufacturer's instructions for the product
being connected.
lUse a commercially-available, non-
impedance (3.5
) stereo mini plug for
connecting the portable audio unit to the
auxiliary jack. Before using the auxiliary
jack, read the manufacture's instructions
for connecting a portable audio unit to the
auxiliary jack.
lTo prevent discharging of the battery, do
not use the auxiliary input for long periods
with the engine off or idling.
lNoise may occur depending on the product
connected to the auxiliary jack.
lWith regard to connecting a portable audio
or similar device to a power source, use the
battery for the device, not the accessory
socket.
lInsert the plug to the auxiliary jack
securely.
lInsert or remove the plug with the plug
perpendicular to the auxiliary jack hole.
lInsert or remove the plug by holding its
base.
To listen to a portable audio unit
1. Turn the ignition switch to the ACC or
ON position.
2. Insert the connection plug into the
auxiliary jack.
3. Press the power/volume dial to turn the
audio system on.
4. Press the source change button
(
) of the audio unit or the mode
switch (
) of the audio control
switches on the steering wheel to
change to the AUX mode.
Audio Unit Audio Control
Switches
NOTElSet the volume of the portable audio unit to
the maximum within the range that the
sound does not become distorted, then
adjust the volume using the power/volume
dial of the audio unit or the volume switch
(
,) of the audio control switch.lUse your portable audio unit for operations
other than volume adjustment.
lIf the connection plug is pulled out from the
auxiliary jack while in AUX mode, noise
may occur.
Interior Comfort
Audio System
6-55
RX-8_8AT5-EA-09E_Edition1 Page269
Wednesday, April 15 2009 10:33 AM
Form No.8AT5-EA-09E
Page 272 of 438

Black plate (272,1)
NOTElThe Bluetooth Hands-Free system is
operable several seconds after turning the
ignition switch to the ACC or ON position
(requires less than 15 seconds).
lIf the ignition switch is turned off during a
hands-free call, the line is transferred to the
mobile telephone automatically.
lIf the mobile telephone is in a location
where radio reception is difficult such as a
metal container or in the trunk, the call may
not be connected using Bluetooth. If
communication is not possible, change the
location of the mobile telephone.
qComponent Parts
Bluetooth Hands-Free consists of the
following items:
lVoice Recognition/Hands-Free switchlInformation displaylMicrophonelAudio unit/Navigation system
Voice Recognition/Hands-Free switch
Basic functions of Bluetooth Hands-Free
can be used for such things as making
calls or hanging up using the voice
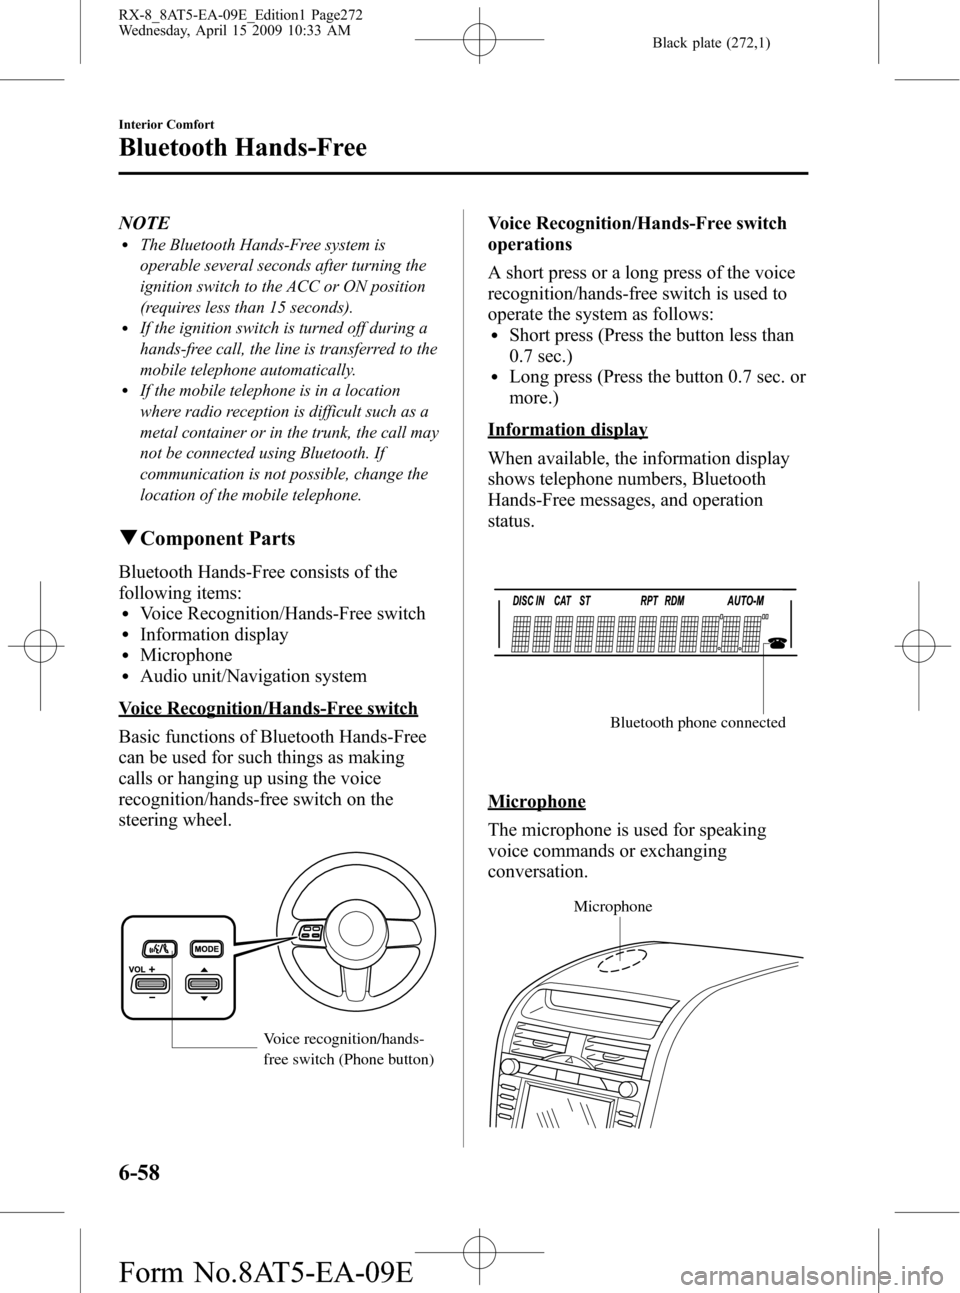
recognition/hands-free switch on the
steering wheel.
Voice recognition/hands-
free switch (Phone button)
Voice Recognition/Hands-Free switch
operations
A short press or a long press of the voice
recognition/hands-free switch is used to
operate the system as follows:
lShort press (Press the button less than
0.7 sec.)
lLong press (Press the button 0.7 sec. or
more.)
Information display
When available, the information display
shows telephone numbers, Bluetooth
Hands-Free messages, and operation
status.
Bluetooth phone connected
Microphone
The microphone is used for speaking
voice commands or exchanging
conversation.
Microphone
6-58
Interior Comfort
Bluetooth Hands-Free
RX-8_8AT5-EA-09E_Edition1 Page272
Wednesday, April 15 2009 10:33 AM
Form No.8AT5-EA-09E
Page 313 of 438

Black plate (313,1)
NOTE
When checking the tire inflation pressure with
the tire pressure gauge on the compressor unit,
make sure the compressor switch is turned off.
21. If the tire inflation pressure remains
stable, the tire repair is complete.
Drive the vehicle with care to an
Authorized Mazda Dealer to have the
tire replaced.
CAUTION
ØA tire that has been temporarily
repaired with the tire sealant
cannot be reused. Mazda
recommends replacing the tire
with a new one.
ØThe wheel can be reused after any
sealant adhering to it is wiped off
and carefully inspected. However,
replace the tire valve with a new
one.
qInspecting the IMS Emergency
Flat Tire Repair Kit
Inspect the emergency tire repair kit at
regular intervals.
lCheck the tire sealant period of
effective use.
lCheck the operation of the tire
compressor.
NOTE
The tire sealant has a period of effective use.
Check the period of effective use indicated on
the bottle label and do not use it if it has
expired. Have the tire sealant replaced at an
Authorized Mazda Dealer before the period of
effective use has expired.
Changing the Tire
WARNING
Be sure to follow the directions for
changing a tire, and never get under a
vehicle that is supported only by a jack:
Changing a tire is dangerous if not
done properly. The vehicle can slip off
the jack and seriously injure
someone.
Never allow anyone inside a vehicle
supported by a jack:
Allowing someone to remain in a
vehicle supported by a jack is
dangerous. The occupant could cause
the vehicle to fall resulting in serious
injury.
CAUTION
(With Tire Pressure Monitoring
System)
The wheels equipped on your Mazda
are specially designed for installation
of the tire pressure sensors. Do not
use non-genuine wheels, otherwise it
may not be possible to install the tire
pressure sensors.
NOTE
lMake sure the jack is well lubricated before
using it.
(With Tire Pressure Monitoring System)
lBe sure to register the tire pressure sensor
ID signal code whenever tires or wheels are
changed (page 5-33).
1. Park on a level surface off the right-of-
way and firmly set the parking brake.
2. Put a vehicle with an automatic
transmission in Park (P), a manual
transmission in Reverse (R) or 1, and
turn off the engine.
In Case of an Emergency
Flat Tire
7-11
RX-8_8AT5-EA-09E_Edition1 Page313
Wednesday, April 15 2009 10:34 AM
Form No.8AT5-EA-09E
Page 314 of 438

Black plate (314,1)
3. Turn on the hazard warning flasher.
4. Have everyone get out of the vehicle
and away from the vehicle and traffic.
5. Remove the jack, and tool (page 7-3).
6. Block the wheel diagonally opposite
the tire to be changed. When blocking
a wheel, place a tire block both in front
and behind the tire.
NOTE
When blocking a tire, use rocks or wood blocks
of sufficient size if possible to hold the tire in
place.
qRemoving the Tire
1. Loosen the lug nuts by turning them
counterclockwise one turn each, but do
not remove any until the tire has been
raised off the ground.
2. Place the jack under the jacking
position closest to the tire being
changed.
Jacking position
7-12
In Case of an Emergency
Flat Tire
RX-8_8AT5-EA-09E_Edition1 Page314
Wednesday, April 15 2009 10:34 AM
Form No.8AT5-EA-09E
Page 437 of 438

Black plate (437,1)
T
Towing
Description ................................. 7-24
Emergency towing ..................... 7-24
Recreational towing ................... 7-27
Trailer towing ............................. 4-13
Traction Control System (TCS) ........ 5-25
TCS/DSC indicator light ............ 5-26
Trailer Towing .................................. 4-13
Trip Meter ......................................... 5-36
Trunk Lid .......................................... 3-33
Inside trunk release lever ............ 3-35
Trunk Light ....................................... 3-34
Turn and Lane-Change Signals ......... 5-60
V
Vanity Mirrors ................................... 6-77
Vehicle Information Labels ............... 10-2
W
Warning Lights ................................. 5-40
ABS ............................................ 5-43
Air bag system ........................... 5-46
Automatic transmission .............. 5-48
Brake system .............................. 5-42
Charging system ......................... 5-44
Check engine .............................. 5-45
Door-ajar .................................... 5-48
Engine coolant level ................... 5-45
Engine oil level .......................... 5-44
Front seat belt pretensioner
system ........................................ 5-46
KEY Warning Light
(Red)/KEY Indicator Light
(Green) ....................................... 5-51
Low fuel ..................................... 5-46
Low washer fluid level ............... 5-48
Seat belt ...................................... 5-46
Tire pressure monitoring
system ........................................ 5-48
Warranty ............................................ 9-11
Washer Fluid ..................................... 8-17
Weights ............................................. 10-5
Wheel Replacement .......................... 8-26
Windows
Power windows .......................... 3-36
Rear quarter windows ................ 3-43
Windshield Washer ........................... 5-65
Windshield Wipers ............................ 5-62
Blades replacement .................... 8-19
Winter Driving .................................... 4-9
Index
11-7
RX-8_8AT5-EA-09E_Edition1 Page437
Wednesday, April 15 2009 10:34 AM
Form No.8AT5-EA-09E