window MAZDA MODEL TRIBUTE 2006 Quick Tips (in English)
[x] Cancel search | Manufacturer: MAZDA, Model Year: 2006, Model line: MODEL TRIBUTE, Model: MAZDA MODEL TRIBUTE 2006Pages: 12, PDF Size: 1.19 MB
Page 2 of 12

DRIVER’S VIEW
Always check the Owner’s Manual for more operating information and safety features
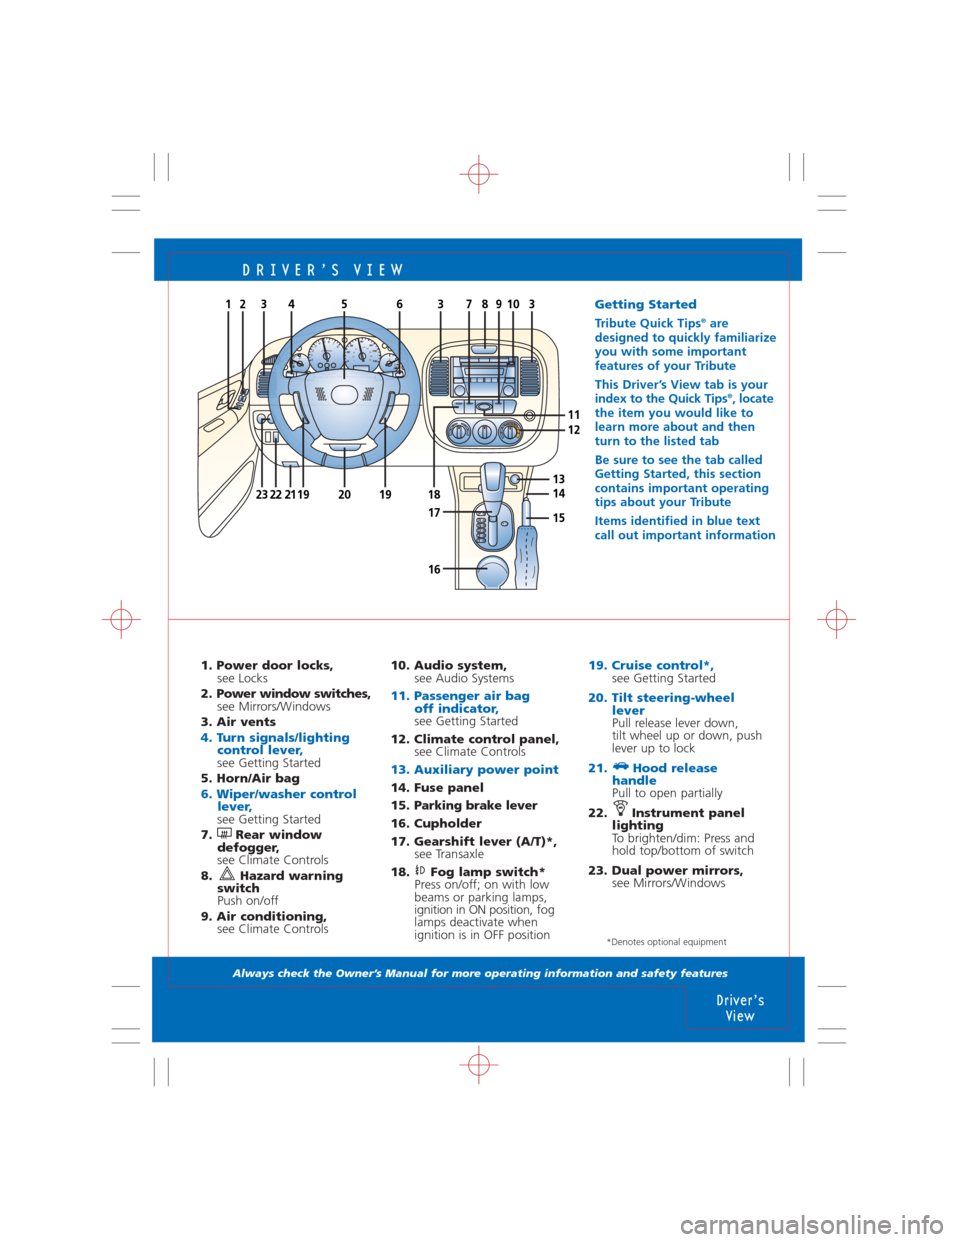
1. Power door locks,
see Locks
2. Power window switches,
see Mirrors/Windows
3. Air vents
4. Turn signals/lighting
control lever,
see Getting Started
5. Horn/Air bag
6. Wiper/washer control
lever,
see Getting Started
7. Rear window
defogger,
see Climate Controls
8. Hazard warning
switch
Push on/off
9. Air conditioning,
see Climate Controls
10. Audio system,
see Audio Systems
11. Passenger air bag
off indicator,
see Getting Started
12. Climate control panel,
see Climate Controls
13. Auxiliary power point
14. Fuse panel
15. Parking brake lever
16. Cupholder
17. Gearshift lever (A/T)*,
see Transaxle
18. Fog lamp switch*
Press on/off; on with low
beams or parking lamps,
ignition in ON position, fog
lamps deactivate when
ignition is in OFF position
19. Cruise control*,see Getting Started
20. Tilt steering-wheel
lever
Pull release lever down,
tilt wheel up or down, push
lever up to lock
21. Hood release
handle
Pull to open partially
22. Instrument panel
lighting
To brighten/dim: Press and
hold top/bottom of switch
23. Dual power mirrors,
see Mirrors/Windows
Driver’s
View
*Denotes optional equipment
0 20406080100
120
140
160
180x1000r/min80 204060
80
100
120
7 6 5
4
3
2
1
0
F
E CH
4563
19
19212223
13
1820
9731038
1211
1 2 D N R P
14
16
1715
21Getting Started
Tribute Quick Tips®are
designed to quickly familiarize
you with some important
features of your Tribute
This Driver’s View tab is your
index to the Quick Tips
®, locate
the item you would like to
learn more about and then
turn to the listed tab
Be sure to see the tab called
Getting Started, this section
contains important operating
tips about your Tribute
Items identified in blue text
call out important information
Page 5 of 12

LOCKS
Always check the Owner’s Manual for more operating information and safety features
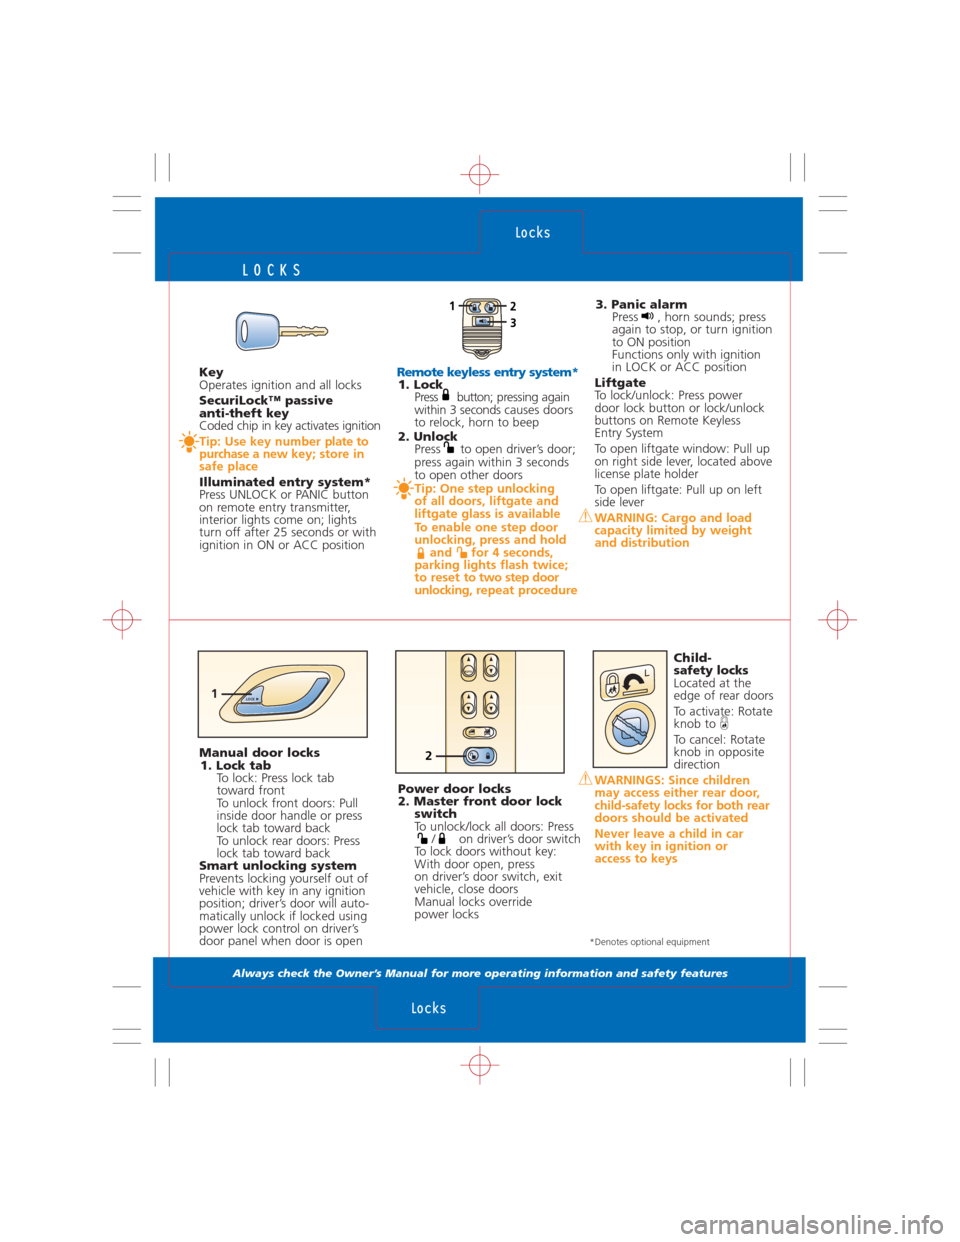
Remote keyless entry system*1. Lock
Press button; pressing again
within 3 secondscauses doors
to relock, horn to beep
2. Unlock
Press to open driver’s door;
press again within 3 seconds
to open other doors
Tip: One step unlocking
of all doors, liftgate and
liftgate glass is available
To enable one step door
unlocking, press and hold
and for 4 seconds,
parking lights flash twice;
to reset to two step door
unlocking, repeat procedure
3. Panic alarm
Press , horn sounds; press
again to stop, or turn ignition
to ON position
Functions only with ignition
in LOCK or ACC position
Liftgate
To lock/unlock: Press power
door lock button or lock/unlock
buttons on Remote Keyless
Entry System
To open liftgate window: Pull up
on right side lever, located above
license plate holder
To open liftgate: Pull up on left
side lever
WARNING: Cargo and load
capacity limited by weight
and distribution
Child-
safety locks
Located at the
edge of rear doors
To activate: Rotate
knob to
To cancel: Rotate
knob in opposite
direction
WARNINGS: Since children
may access either rear door,
child-safety locks for both rear
doors should be activated
Never leave a child in car
with key in ignition or
access to keys
Locks
Locks
*Denotes optional equipment
Manual door locks
1. Lock tab
To lock: Press lock tab
toward front
To unlock front doors: Pull
inside door handle or press
lock tab toward back
To unlock rear doors: Press
lock tab toward back
Smart unlocking system
Prevents locking yourself out of
vehicle with key in any ignition
position; driver’s door will auto-
matically unlock if locked using
power lock control on driver’s
door panel when door is open Key
Operates ignition and all locks
SecuriLock™ passive
anti-theft key
Coded chip in key activates ignition
Tip: Use key number plate to
purchase a newkey; store in
safe place
Illuminated entry system*
Press UNLOCK or PANIC button
on remote entry transmitter,
interior lights come on; lights
turn off after 25 seconds or with
ignition in ON or ACC position
Power door locks
2. Master front door lock
switch
To unlock/lock all doors: Press
/ on driver’s door switch
To lock doors without key:
With door open, press
on driver’s door switch, exit
vehicle, close doors
Manual locks override
power locks
AUTO
2
12
3
LOCK1
Page 6 of 12

MIRRORS/WINDOWS
Always check the Owner’s Manual for more operating information and safety features
Mirrors/
Windows
Child-Safety
Seats
*Denotes optional equipment
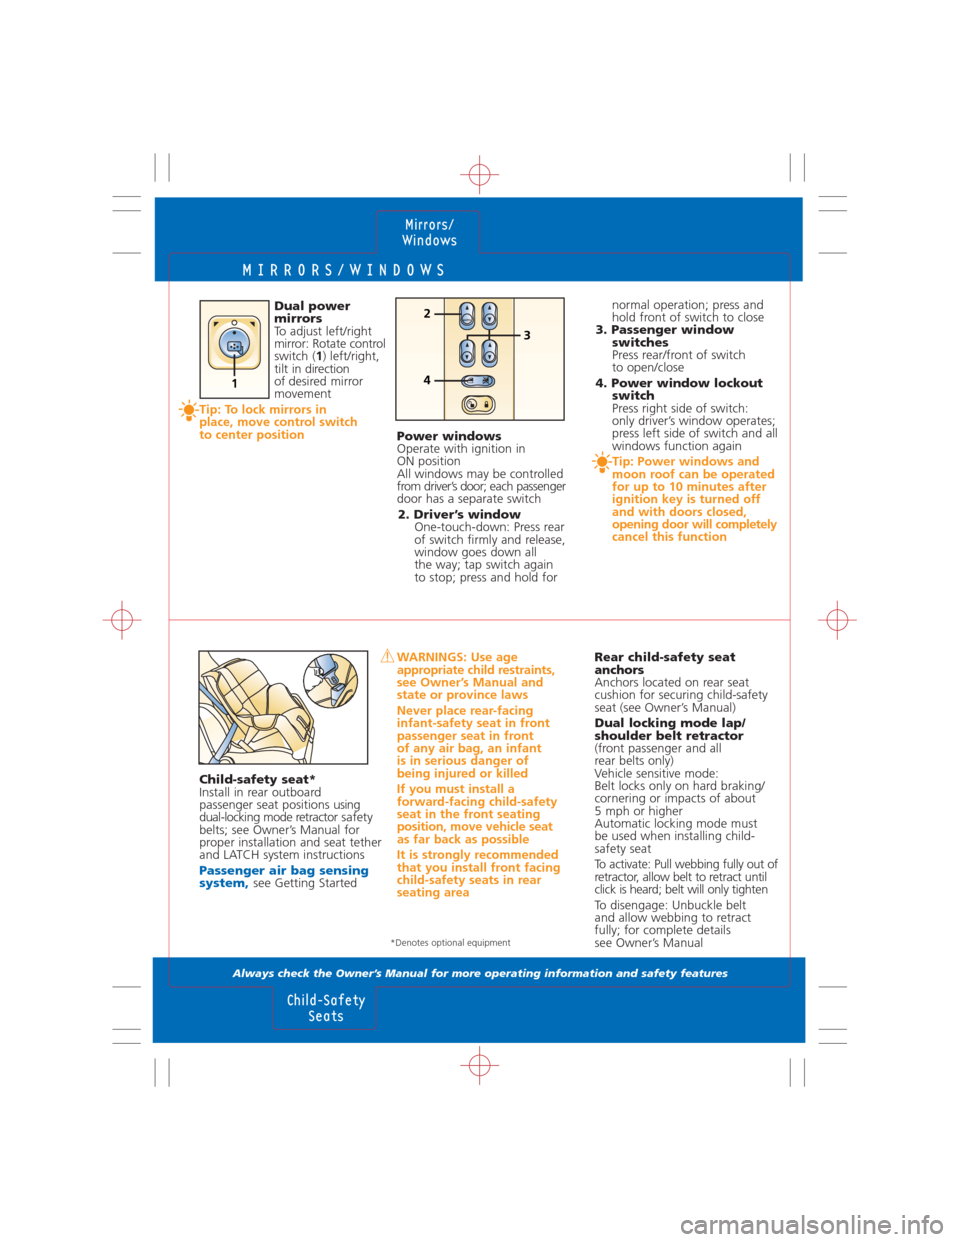
Child-safety seat*
Install in rear outboard
passenger seat positions using
dual-locking mode retractorsafety
belts; see Owner’s Manual for
proper installation and seat tether
and LATCH system instructions
Passenger air bag sensing
system,see Getting Started
WARNINGS: Use age
appropriate child restraints,
see Owner’s Manual and
state or province laws
Never place rear-facing
infant-safety seat in front
passenger seat in front
of any air bag, an infant
is in serious danger of
being injured or killed
If you must install a
forward-facing child-safety
seat in the front seating
position, move vehicle seat
as far back as possible
It is strongly recommended
that you install front facing
child-safety seats in rear
seating areaRear child-safety seat
anchors
Anchors located on rear seat
cushion for securing child-safety
seat (see Owner’s Manual)
Dual locking mode lap/
shoulder belt retractor
(front passenger and all
rear belts only)
Vehicle sensitive mode:
Belt locks only on hard braking/
cornering or impacts of about
5 mph or higher
Automatic locking mode must
be used when installing child-
safety seat
To activate: Pull webbing fully out of
retractor, allow belt to retract until
click is heard; belt will only tighten
To disengage: Unbuckle belt
and allow webbing to retract
fully; for complete details
see Owner’s Manual Dual power
mirrors
To adjust left/right
mirror: Rotate control
switch (1) left/right,
tilt in direction
of desired mirror
movement
Tip: To lock mirrors in
place, move control switch
to center position
Power windows
Operate with ignition in
ON position
All windows may be controlled
from driver’s door; each passenger
door has a separate switch
2. Driver’s window
One-touch-down: Press rear
of switch firmly and release,
window goes down all
the way; tap switch again
to stop; press and hold for normal operation; press and
hold front of switch to close
3. Passenger window
switches
Press rear/front of switch
to open/close
4. Power window lockout
switch
Press right side of switch:
only driver’s window operates;
press left side of switch and all
windows function again
Tip: Power windows and
moon roof can be operated
for up to 10 minutes after
ignition key is turned off
and with doors closed,
opening door will completely
cancel this function
1
AUTO
3 2
4