check engine MERCEDES-BENZ A-CLASS HATCHBACK 2008 Owner's Manual
[x] Cancel search | Manufacturer: MERCEDES-BENZ, Model Year: 2008, Model line: A-CLASS HATCHBACK, Model: MERCEDES-BENZ A-CLASS HATCHBACK 2008Pages: 305, PDF Size: 5.43 MB
Page 242 of 305

Troubleshooting
239Key
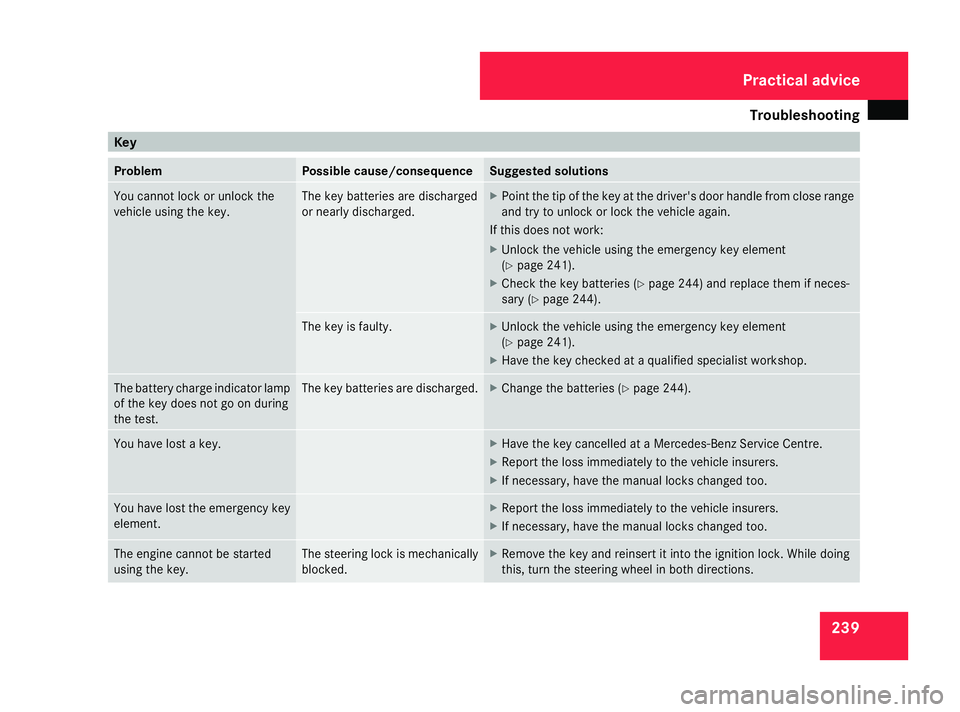
Problem Possible cause/consequence Suggested solutions
You cannot lock or unlock the
vehicle using the key. The key batteries are discharged
or nearl
y discharged. X
Point the tip of the key at the driver's door handle from close range
and try to unlock or lock the vehicle again.
If this does not work:
X Unlock the vehicle using the emergency key element
(Y page 241).
X Check the key batteries (Y page 244) and replace them if neces-
sary ( Ypage 244). The key is faulty. X
Unlock the vehicle using the emergency key element
(Y page 241).
X Have the key checked at a qualified specialist workshop. The battery charge indicator lamp
of the key does not go on during
the test. The key batteries are discharged. X
Change the batteries ( Ypage 244). You have lost a key. X
Have the key cancelled at a Mercedes-Benz Service Centre.
X Report the loss immediately to the vehicle insurers.
X If necessary, have the manual locks changed too. You have lost the emergency key
element. X
Report the loss immediately to the vehicle insurers.
X If necessary, have the manual locks changed too. The engine cannot be started
using the key. The steering lock is mechanically
blocked. X
Remove the key and reinsert it into the ignition lock. While doing
this, turn the steering wheel in both directions. Practical advice
169_AKB; 2; 4, en-GB
wdomann
,V ersion: 2.10.6
2008-07-16T08:52:06+02:00 - Seite 239 ZDateiname: 6515_0315_02_buchblock.pdf; preflight
Page 250 of 305

Changing the bulbs
247
i
Due to the location of the bulbs in the
front headlamps, it is best to have these
changed at a qualified specialist workshop,
e.g. a Mercedes-Benz Service Centre.
i Have the headlamp setting checked reg-
ularly at a qualified specialist workshop,
e.g. a Mercedes-Benz Service Centre. Changing the front bulbs
Opening/closing the cover in the front
wheel arch X
To open: turn the front wheels inwards.
X Unscrew retaining screw 1.
X Fold the cover down. X
To close: fold the cover upwards.
X Screw in retaining screw 1.
Removing/fitting the washer fluid res-
ervoir You must remove the washer fluid reservoir
from the engine compartment before you can
replace the bulbs in the front left-hand head-
lamp. X
To remove: turn retaining screw 1anti-
clockwise.
X Remove washer fluid reservoir 2from
bracket 3.
X Put washer fluid reservoir 2to one side
and leave the lines and hoses connected.
Make sure that no washer fluid escapes. X
To fit: guide the lower retaining lug into the
rubber grommet on the longitudinal mem-
ber and fit washer fluid reservoir 2into
bracket 3.
X Turn retaining screw 1clockwise.
Replacing the bulbs in the dipped-beam
headlamp (halogen headlamps) X
Switch off the lights.
X Open the cover in the front wheel arch
(Y page 247).
X Open the bonnet.
X Left-hand headlamps: remove the washer
fluid reservoir (Y page 247).
X Press retaining lug :down and remove
housing cover 2.
X Pull connector =from bulb holder 4. Practical advice
169_AKB; 2; 4, en-GB
wdomann
,V ersion: 2.10.6
2008-07-16T08:52:06+02:00 - Seite 247 ZDateiname: 6515_0315_02_buchblock.pdf; preflight
Page 270 of 305

Jump-starting
267G
Risk of injury
There is a risk of acid burns when jump-
starting a vehicle due to the gases which
escape from the battery. Do not lean over
the battery while the engine is being jump-
started. G
Risk of explosion
Gases escaping from the battery during
jump-starting may cause minor explosions.
Avoid creating sparks. Keep naked flames
away from the battery, and do not smoke.
Comply with safety precautions and take
protective measures when handling batter-
ies. You will find these under "Battery" in
the index.
X Make sure that the two vehicles do not
touch.
X Apply the parking brake.
X Manual transmission: engage neutral.
X AUTOTRONIC*: move the DIRECT SELECT
selector lever to P.
X Switch off all electrical consumers.
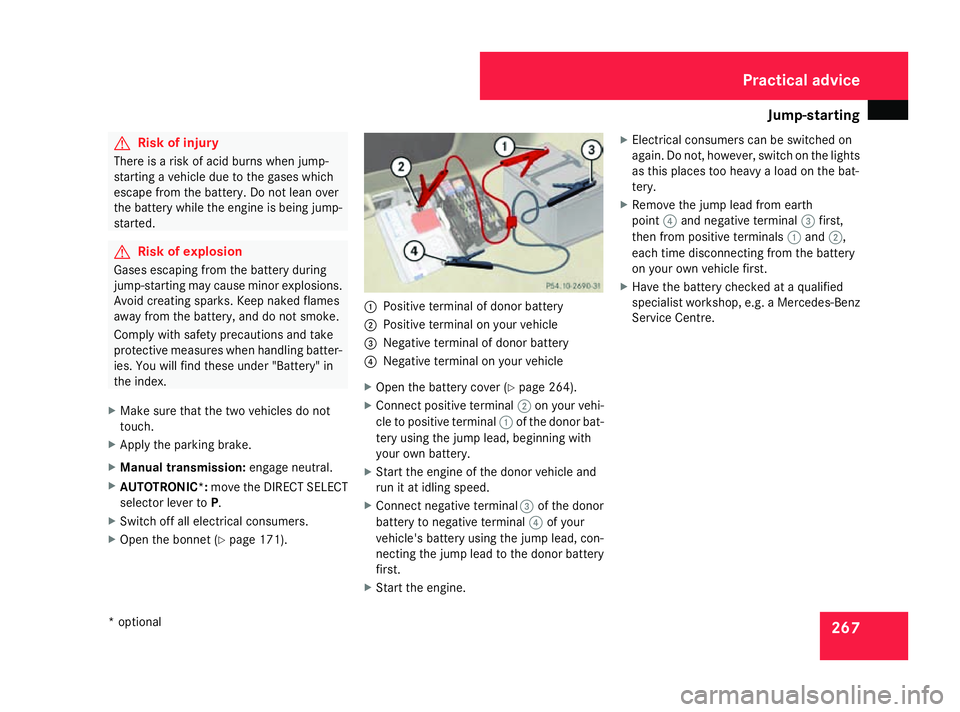
X Open the bonnet (Y page 171). 1
Positive terminal of donor battery
2 Positive terminal on your vehicle
3 Negative terminal of donor battery
4 Negative terminal on your vehicle
X Open the battery cover (Y page 264).
X Connect positive terminal 2on your vehi-
cle to positive terminal 1of the donor bat-
tery using the jump lead, beginning with
your own battery.
X Start the engine of the donor vehicle and
run it at idling speed.
X Connect negative terminal 3of the donor
battery to negative terminal 4of your
vehicle's battery using the jump lead, con-
necting the jump lead to the donor battery
first.
X Start the engine. X
Electrical consumers can be switched on
again. Do not, however, switch on the lights
as this places too heavy a load on the bat-
tery.
X Remove the jump lead from earth
point 4and negative terminal 3first,
then from positive terminals 1and 2,
each time disconnecting from the battery
on your own vehicle first.
X Have the battery checked at a qualified
specialist workshop, e.g. a Mercedes-Benz
Service Centre. Practical advice
* optional
169_AKB; 2; 4, en-GB
wdomann,
Version: 2.10.6 2008-07-16T08:52:06+02:00 - Seite 267 ZDateiname: 6515_0315_02_buchblock.pdf; preflight