fog light MERCEDES-BENZ AMG GT ROADSTER 2016 Owners Manual
[x] Cancel search | Manufacturer: MERCEDES-BENZ, Model Year: 2016, Model line: AMG GT ROADSTER, Model: MERCEDES-BENZ AMG GT ROADSTER 2016Pages: 289, PDF Size: 5.97 MB
Page 15 of 289
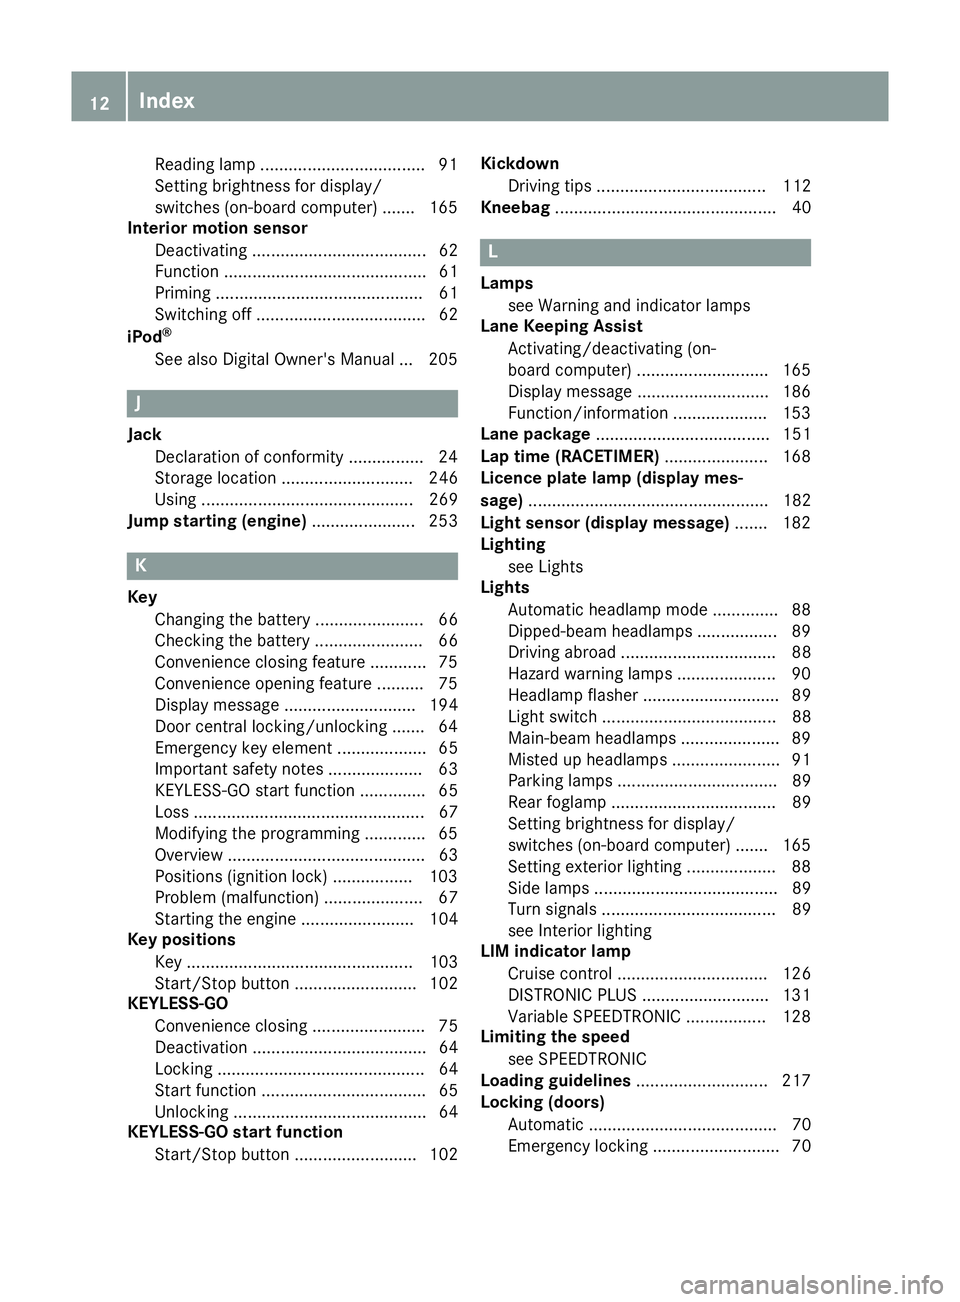
Reading lamp ..................................
.91
Setting brightness for display/
switches (on-board computer) ....... 165
Interior motion sensor
Deactivating ..................................... 62
Function ........................................... 61
Priming ............................................ 61
Switching off .................................... 62
iPod ®
See also Digital Owner's Manua l... 205 J
Jack Declaration of conformity ................ 24
Storage location ............................ 246
Using ............................................. 269
Jump starting (engine) ...................... 253K
Key Changing the battery ....................... 66
Checking the battery ....................... 66
Convenience closing feature ............ 75
Convenience opening feature .......... 75
Display message ............................ 194
Door central locking/unlocking ....... 64
Emergency key element ................... 65
Important safety notes .................... 63
KEYLESS-GO start function .............. 65
Loss ................................................. 67
Modifying the programming ............. 65
Overview .......................................... 63
Positions (ignition lock) ................. 103
Problem (malfunction) ..................... 67
Starting the engine ........................ 104
Key positions
Key ................................................ 103
Start/Stop button .......................... 102
KEYLESS-GO
Convenience closing ........................ 75
Deactivation ..................................... 64
Locking ............................................ 64
Start function ................................... 65
Unlocking ......................................... 64
KEYLESS-GO start function
Start/Stop button .......................... 102 Kickdown
Driving tips .................................... 112
Kneebag ............................................... 40 L
Lamps see Warning and indicator lamps
Lane Keeping Assist
Activating/deactivating (on-
board computer) ............................ 165
Display message ............................ 186
Function/information .................... 153
Lane package ..................................... 151
Lap time (RACETIMER) ...................... 168
Licence plate lamp (display mes-
sage) ................................................... 182
Light sensor (display message) ....... 182
Lighting
see Lights
Lights
Automatic headlamp mod e.............. 88
Dipped-beam headlamp s................. 89
Driving abroad ................................. 88
Hazard warning lamps ..................... 90
Headlamp flashe r............................. 89
Light switch ..................................... 88
Main-beam headlamp s..................... 89
Misted up headlamp s....................... 91
Parking lamps .................................. 89
Rear foglamp ................................... 89
Setting brightness for display/
switches (on-board computer) ....... 165
Setting exterior lighting ................... 88
Side lamps ....................................... 89
Turn signals ..................................... 89
see Interior lighting
LIM indicator lamp
Cruise control ................................ 126
DISTRONIC PLUS ........................... 131
Variable SPEEDTRONIC ................. 128
Limiting the speed
see SPEEDTRONIC
Loading guidelines ............................ 217
Locking (doors)
Automatic ........................................ 70
Emergency locking ........................... 70 12
Index
Page 18 of 289
PRE-SAFE
®
(anticipatory occupant
protection)
Operation ......................................... 48
PRE-SAFE ®
(preventive occupant
safety system)
Display message ............................1 77
Protection against theft
ATA (Anti-Theft Alarm system) ......... 60
Immobiliser ...................................... 60
Interior motion sensor ..................... 61
Tow-away protectio n ........................61
Protection of the environment
General notes .................................. 22
Pulling away
Automatic transmission ................. 104
General notes ................................ 104
Hill start assist ............................... 104 Q
QR code Mercedes-Benz Guide App ................. 1
Rescue card ..................................... 26
Qualified specialist workshop ........... 25
Quick access for audio and tele-
phone
Changing the station/music
track .............................................. 208 R
RACE START Activating ....................................... 139
important safety notes ................... 139
RACETIMER (on-board computer) .... 168
Radio
Selecting a station ......................... 160
Radio mode
See also Digital Owner's Manual ... 205
Radio-based vehicle components
Declaration of conformity ................ 24
Reading lamp ....................................... 91
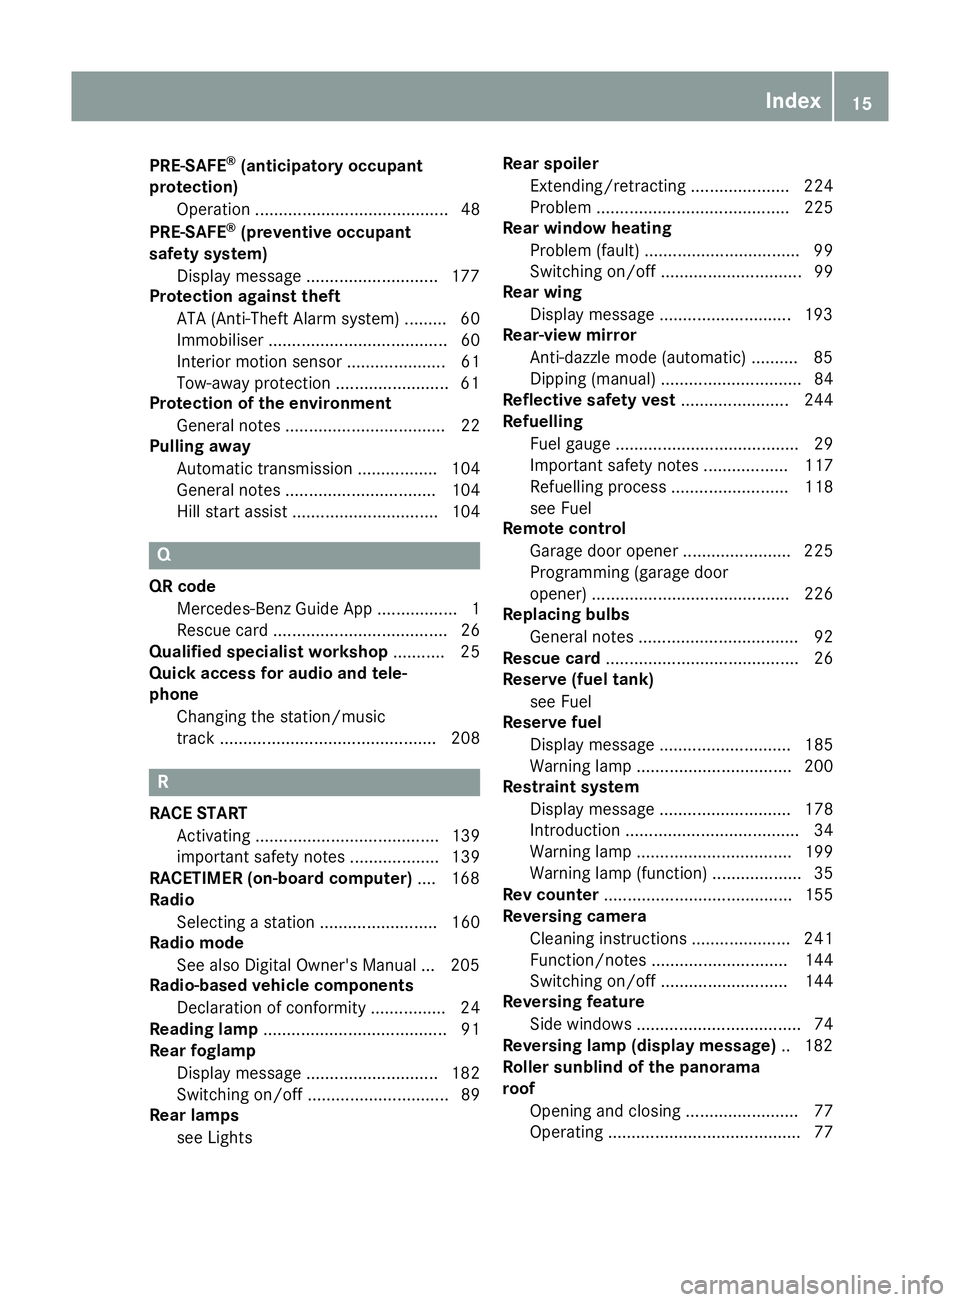
Rear foglamp
Display message ............................ 182
Switching on/off .............................. 89
Rear lamps
see Lights Rear spoiler
Extending/retracting ..................... 224
Problem ......................................... 225
Rear window heating
Problem (fault) ................................. 99
Switching on/off .............................. 99
Rear wing
Display message ............................ 193
Rear-view mirror
Anti-dazzle mode (automatic) .......... 85
Dipping (manual ).............................. 84
Reflective safety vest ....................... 244
Refuelling
Fuel gaug e....................................... 29
Important safety notes .................. 117
Refuelling process ......................... 118
see Fuel
Remote control
Garage door opener ....................... 225
Programming (garage door
opener) .......................................... 226
Replacing bulbs
General notes .................................. 92
Rescue card ......................................... 26
Reserve (fuel tank)
see Fuel
Reserve fuel
Display message ............................ 185
Warning lamp ................................. 200
Restraint system
Display message ............................ 178
Introduction ..................................... 34
Warning lamp ................................. 199
Warning lamp (function) ................... 35
Rev counter ........................................ 155
Reversing camera
Cleaning instructions ..................... 241
Function/note s............................. 144
Switching on/of f........................... 144
Reversing feature
Side window s................................... 74
Reversing lamp (display message) .. 182
Roller sunblind of the panorama
roof
Opening and closing ........................ 77
Operating ......................................... 77 Index
15
Page 30 of 289

Cockpit
Function Page
:
Combination switch 89
;
Steering wheel gearshift pad-
dles 113
=
Instrument cluster 29
?
Overhead control panel 32
A
Climate control systems 96
B
Horn
C
Adjusts the steering wheel
electrically 83 Function Page
D
Cruise control lever 126
E
Unlocks the tailgate 73
F
Electric parking brake 121
G
Diagnostics connection 25
H
Opens the bonnet 232
I
Rear fog lamp 89
J
Light switch 88Cockpit
27At a glance
Page 31 of 289

Function Page
:
Overhead control panel 32
;
Combination switch 89
=
Steering wheel gearshift pad-
dles 113
?
Instrument cluster 29
A
Rear fog lamp 89
B
Light switch 88
C
Opens the bonnet 232 Function Page
D
Diagnostics connection 25
E
Electric parking brake 121
F
Unlocks the tailgate 73
G
Horn
H
Adjusts the steering wheel
electrically
83
I
Cruise control lever 126
J
Climate control systems 9628
CockpitAt a glance
Page 32 of 289
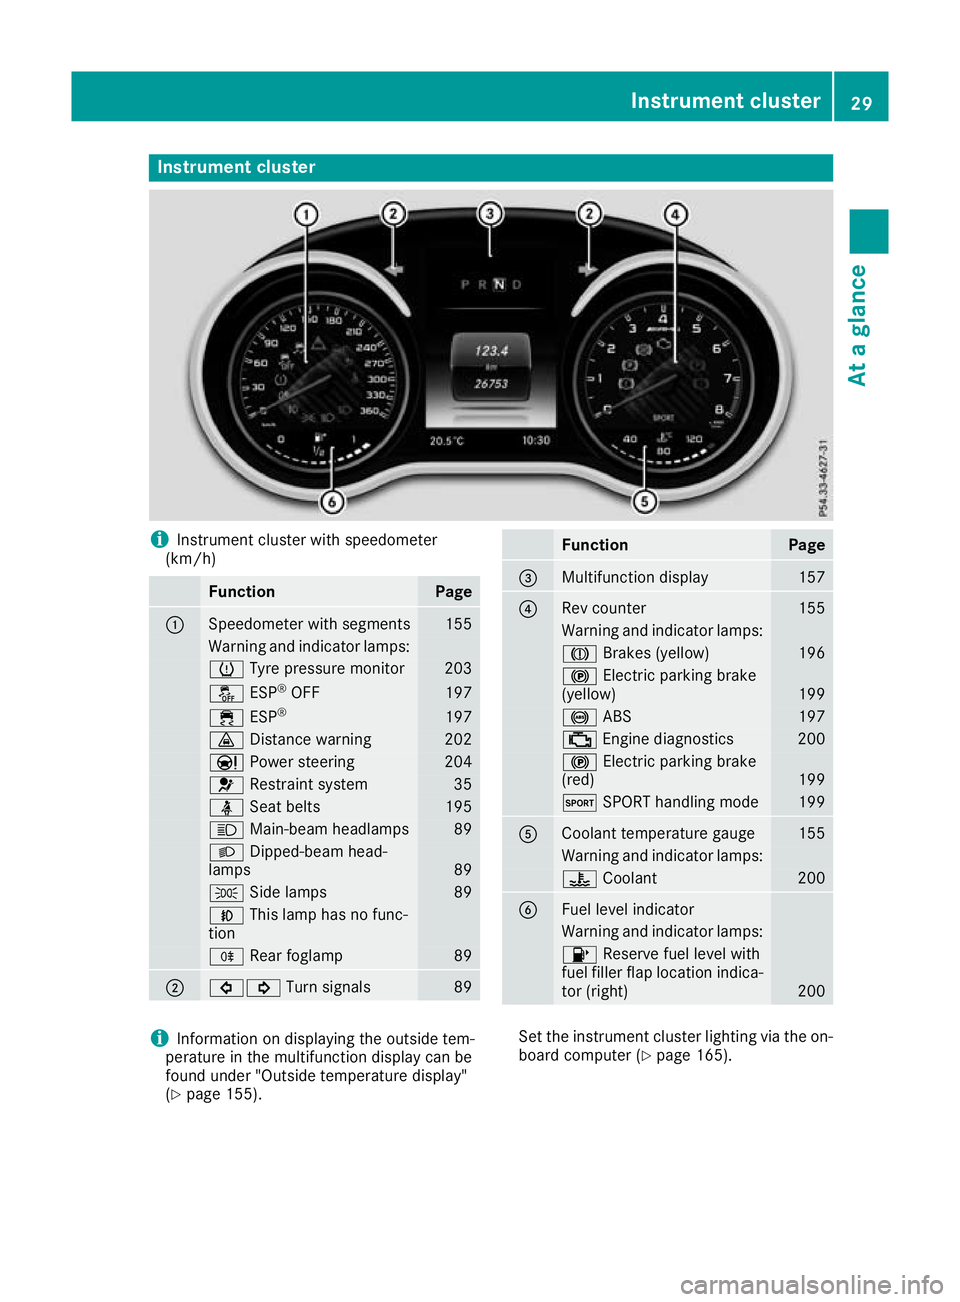
Instrument cluster
i
Instrument cluster with speedometer
(km/h) Function Page
:
Speedometer with segments 155
Warning and indicator lamps:
h
Tyre pressure monitor 203
å
ESP®
OFF 197
÷
ESP® 197
·
Distance warning 202
Ð
Power steering 204
6
Restraint system 35
ü
Seat belts 195
K
Main-beam headlamps 89
L
Dipped-beam head-
lamps 89
T
Side lamps 89
N
This lamp has no func-
tion R
Rear foglamp 89
;
#!
Turn signals 89 Function Page
=
Multifunction display 157
?
Rev counter 155
Warning and indicator lamps:
J
Brakes (yellow) 196
!
Electric parking brake
(yellow) 199
!
ABS 197
;
Engine diagnostics 200
!
Electric parking brake
(red) 199
M
SPORT handling mode 199
A
Coolant temperature gauge 155
Warning and indicator lamps:
?
Coolant 200
B
Fuel level indicator
Warning and indicator lamps:
8
Reserve fuel level with
fuel filler flap location indica-
tor (right) 200
i
Information on displaying the outside tem-
perature in the multifunction display can be
found under "Outside temperature display"
(Y page 155). Set the instrument cluster lighting via the on-
board computer (Y page 165). Instrument cluster
29At a glance
Page 91 of 289
Exterior lighting
General notes
For reasons of safety, Mercedes-Benz recom-
mends that you drive with the lights switched on even during the daytime. In some countries,
operation of the headlamps varies due to legal
requirements and self-imposed obligations. Driving abroad
It is not necessary to switch your headlamps to symmetrical dipped beam when driving in coun-
tries where vehicles are driven on the opposite
side of the road to the country in which the vehi- cle is registered. Legal requirements are fulfilled
without switching the headlamps to symmetri-
cal dipped beam. Setting the exterior lighting
Setting options Exterior lighting can be set by:
R the light switch
R the combination switch (Y page 89)
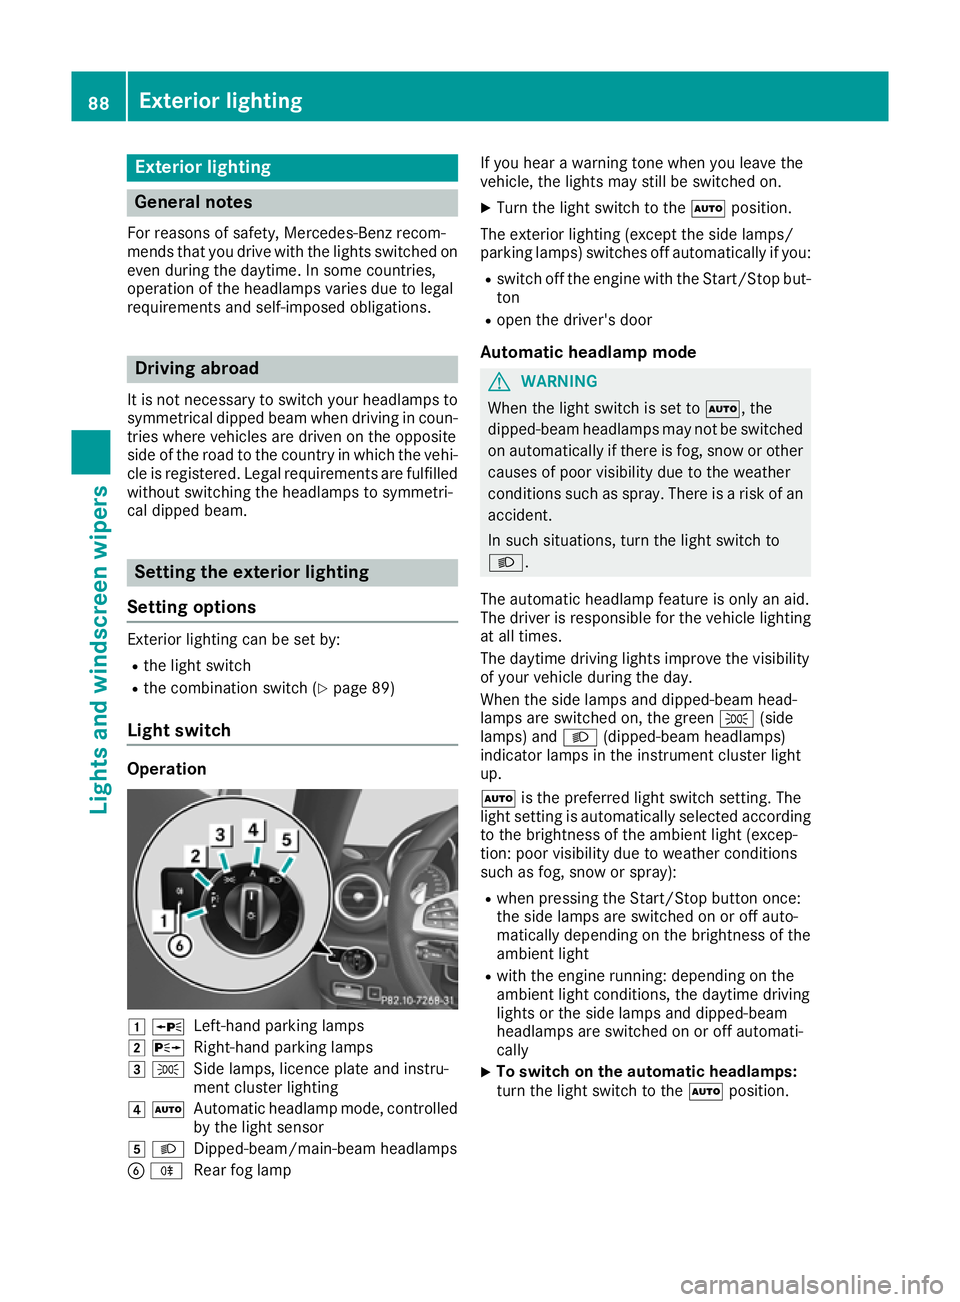
Light switch Operation
1
W
Left-hand parking lamps
2 X
Right-hand parking lamps
3 T
Side lamps, licence plate and instru-
ment cluster lighting
4 Ã
Automatic headlamp mode, controlled
by the light sensor
5 L
Dipped-beam/main-beam headlamps
B R
Rear fog lamp If you hear a warning tone when you leave the
vehicle, the lights may still be switched on.
X Turn the light switch to the Ãposition.
The exterior lighting (except the side lamps/
parking lamps) switches off automatically if you: R switch off the engine with the Start/Stop but-
ton
R open the driver's door
Automatic headlamp mode G
WARNING
When the light switch is set to Ã, the
dipped-beam headlamps may not be switched on automatically if there is fog, snow or othercauses of poor visibility due to the weather
conditions such as spray. There is a risk of an
accident.
In such situations, turn the light switch to
L.
The automatic headlamp feature is only an aid.
The driver is responsible for the vehicle lighting at all times.
The daytime driving lights improve the visibility
of your vehicle during the day.
When the side lamps and dipped-beam head-
lamps are switched on, the green T(side
lamps) and L(dipped-beam headlamps)
indicator lamps in the instrument cluster light
up.
à is the preferred light switch setting. The
light setting is automatically selected according to the brightness of the ambient light (excep-
tion: poor visibility due to weather conditions
such as fog, snow or spray):
R when pressing the Start/Stop button once:
the side lamps are switched on or off auto-
matically depending on the brightness of the
ambient light
R with the engine running: depending on the
ambient light conditions, the daytime driving
lights or the side lamps and dipped-beam
headlamps are switched on or off automati-
cally
X To switch on the automatic headlamps:
turn the light switch to the
Ãposition. 88
Exterior lightingLights and windscreen wipers
Page 92 of 289
Dipped-beam headlamps
G
WARNING
When the light switch is set to Ã, the
dipped-beam headlamps may not be switched on automatically if there is fog, snow or othercauses of poor visibility due to the weather
conditions such as spray. There is a risk of an
accident.
In such situations, turn the light switch to
L.
When the ignition is switched on and the light
switch is in the Lposition, the side lamps
and dipped-beam headlamps are switched on
even if the light sensor does not sense dark
ambient light conditions. This is advantageous
when there is fog or rain.
X To switch on the dipped-beam headlamps:
select key position 2with the Start/Stop but-
ton or start the engine.
X Turn the light switch to the Lposition.
The green Lindicator lamp on the instru-
ment cluster lights up.
Rear fog lamp
The rear fog lamp improves the visibility of your vehicle for the traffic behind in the event of
heavy fog. Please observe the country-specific
laws on the use of rear foglamps.
X To switch on the rear foglamp: select key
position 2with the Start/Stop button or start
the engine.
X Turn the light switch to the LorÃ
position.
X Press the Rbutton.
The yellow Rindicator lamp in the instru-
ment cluster lights up.
X To switch off the rear foglamp:press the
R button.
The yellow Rindicator lamp in the instru-
ment cluster goes out.
Side lamps ! When the battery is discharged heavily, the
side lamps or parking lamps are automatically
switched off to facilitate an engine start.
Always park your vehicle safely and in a well lit area, in accordance with the relevant legal
stipulations. Avoid using the Tside lamps
for periods lasting several hours. Where pos- sible, switch on the right
Xor left W
parking lamp.
X To switch on: turn the light switch to the
T position.
The green Tindicator lamp in the instru-
ment cluster lights up.
Parking lamps
Switching on the parking lamps ensures that the
corresponding side of the vehicle is illuminated.
X To switch on the parking lamps: switch off
the engine with the Start/Stop button.
X Turn the light switch to the W(left-hand
side of the vehicle) or X(right-hand side of
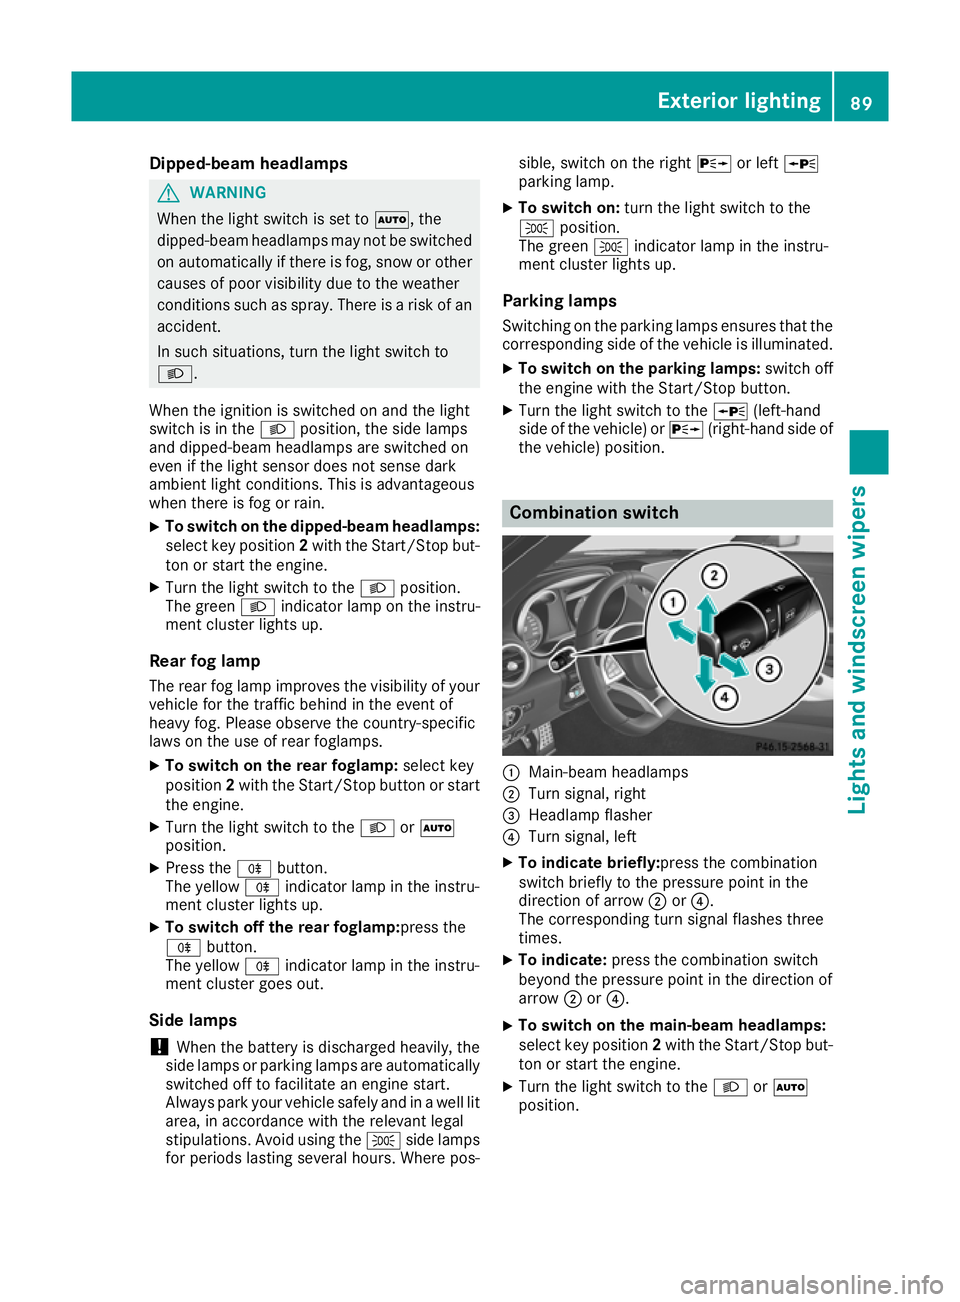
the vehicle) position. Combination switch
:
Main-beam headlamps
; Turn signal, right
= Headlamp flasher
? Turn signal, left
X To indicate briefly: press the combination
switch briefly to the pressure point in the
direction of arrow ;or?.
The corresponding turn signal flashes three
times.
X To indicate: press the combination switch
beyond the pressure point in the direction of
arrow ;or?.
X To switch on the main-beam headlamps:
select key position 2with the Start/Stop but-
ton or start the engine.
X Turn the light switch to the LorÃ
position. Exterior lighting
89Lights and windscreen wipers Z
Page 94 of 289
In particular, the detection of obstacles can be
restricted if there is:
R poor visibility, e.g. due to fog, heavy rain or
snow
R dirt on the sensors or if the sensors are
obscured
Switching Adaptive Highbeam Assist
on/off X
To switch on: turn the light switch to the
à position.
X Press the combination switch beyond the
pressure point in the direction of arrow :.
The _ indicator lamp in the multifunction
display lights up when it is dark and the light
sensor switches on the dipped-beam head-
lamps.
If you are driving at speeds above approx-
imately 25 km/h:
The headlamp range is set automatically
depending on the distance between the vehi-
cle and other road users.
If you are driving at speeds above approx-
imately 30 km/h and no other road users are detected:
The main-beam headlamps are switched on
automatically. The Kindicator lamp in the
instrument cluster also lights up.
If you are driving at speeds below approx-
imately 25 km/h or other road users are
detected or the roads are adequately lit:
The main-beam headlamps are switched off
automatically. The Kindicator lamp in the
instrument cluster goes out. The _indi-
cator lamp in the multifunction display
remains lit.
X To switch off:move the combination switch
back to its normal position or move the light
switch to another position.
The _ indicator lamp in the instrument
cluster goes out. Headlamps misted up on the inside
Certain climatic and physical conditions may
cause moisture to form in the headlamp. This
moisture does not affect the functionality of the headlamp. Interior lighting
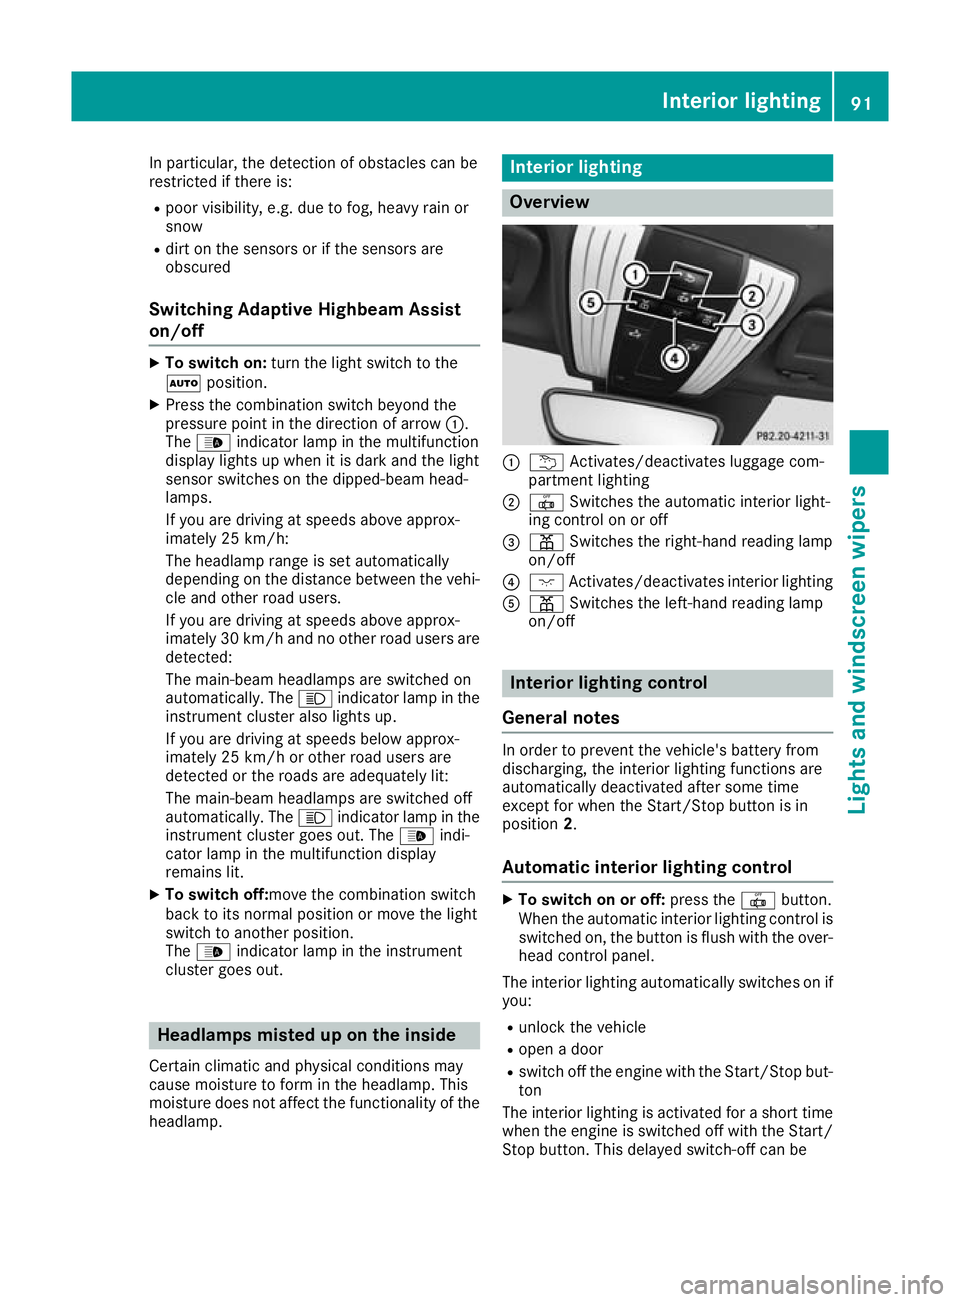
Overview
:
u Activates/deactivates luggage com-
partment lighting
; | Switches the automatic interior light-
ing control on or off
= p Switches the right-hand reading lamp
on/off
? c Activates/deactivates interior lighting
A p Switches the left-hand reading lamp
on/off Interior lighting control
General notes In order to prevent the vehicle's battery from
discharging, the interior lighting functions are
automatically deactivated after some time
except for when the Start/Stop button is in
position
2.
Automatic interior lighting control X
To switch on or off: press the|button.
When the automatic interior lighting control is
switched on, the button is flush with the over- head control panel.
The interior lighting automatically switches on if
you:
R unlock the vehicle
R open a door
R switch off the engine with the Start/Stop but-
ton
The interior lighting is activated for a short time when the engine is switched off with the Start/
Stop button. This delayed switch-off can be Interior lighting
91Lights and windscreen wipers Z
Page 147 of 289
Reversing camera
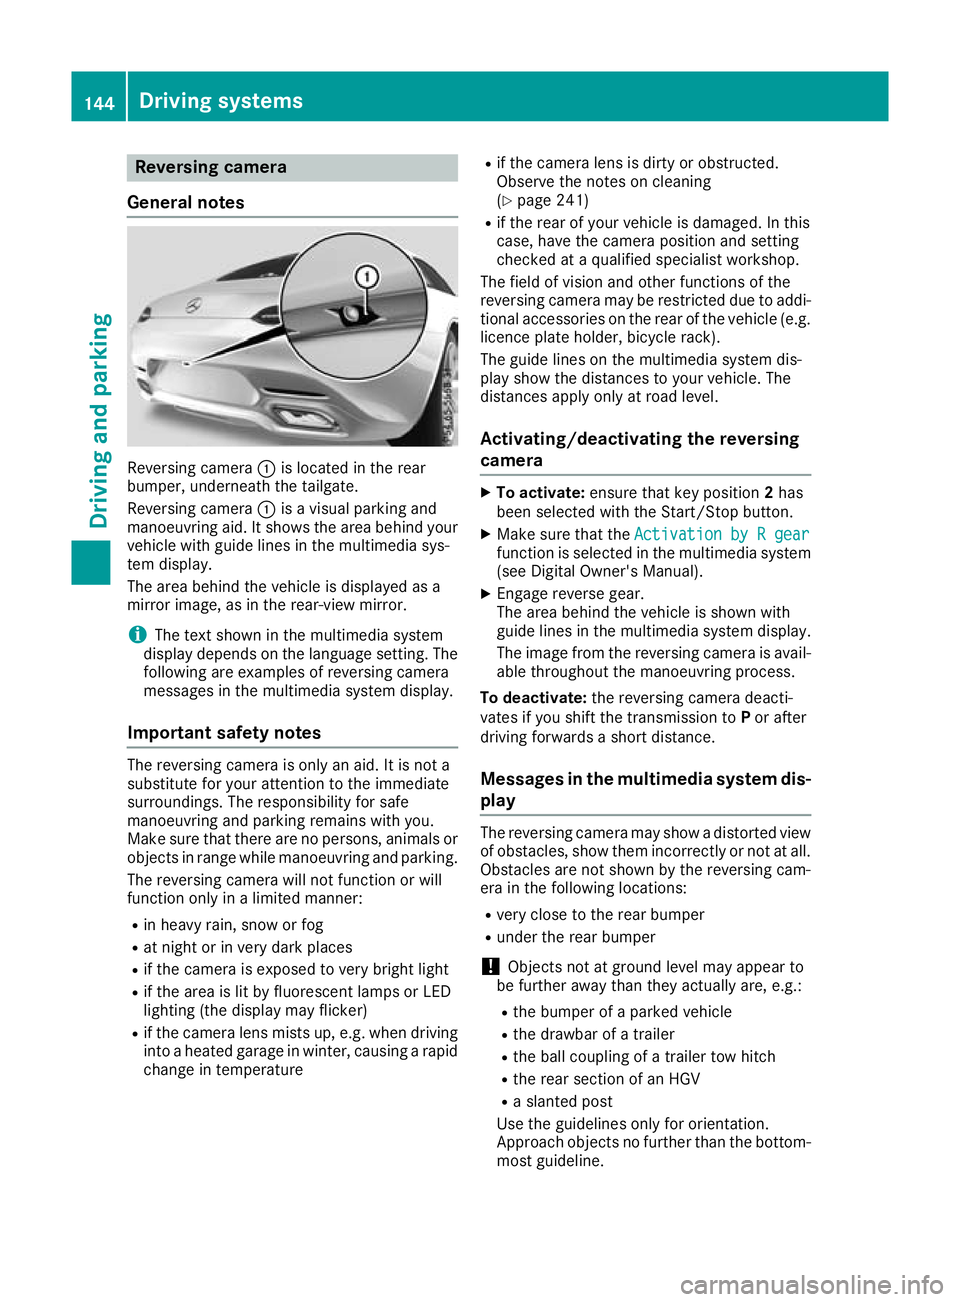
General notes Reversing camera
:is located in the rear
bumper, underneath the tailgate.
Reversing camera :is a visual parking and
manoeuvring aid. It shows the area behind your vehicle with guide lines in the multimedia sys-
tem display.
The area behind the vehicle is displayed as a
mirror image, as in the rear-view mirror.
i The text shown in the multimedia system
display depends on the language setting. The following are examples of reversing camera
messages in the multimedia system display.
Important safety notes The reversing camera is only an aid. It is not a
substitute for your attention to the immediate
surroundings. The responsibility for safe
manoeuvring and parking remains with you.
Make sure that there are no persons, animals or
objects in range while manoeuvring and parking.
The reversing camera will not function or will
function only in a limited manner:
R in heavy rain, snow or fog
R at night or in very dark places
R if the camera is exposed to very bright light
R if the area is lit by fluorescent lamps or LED
lighting (the display may flicker)
R if the camera lens mists up, e.g. when driving
into a heated garage in winter, causing a rapid
change in temperature R
if the camera lens is dirty or obstructed.
Observe the notes on cleaning
(Y page 241)
R if the rear of your vehicle is damaged. In this
case, have the camera position and setting
checked at a qualified specialist workshop.
The field of vision and other functions of the
reversing camera may be restricted due to addi-
tional accessories on the rear of the vehicle (e.g. licence plate holder, bicycle rack).
The guide lines on the multimedia system dis-
play show the distances to your vehicle. The
distances apply only at road level.
Activating/deactivating the reversing
camera X
To activate: ensure that key position 2has
been selected with the Start/Stop button.
X Make sure that the Activation by R gear Activation by R gear
function is selected in the multimedia system (see Digital Owner's Manual).
X Engage reverse gear.
The area behind the vehicle is shown with
guide lines in the multimedia system display.
The image from the reversing camera is avail-
able throughout the manoeuvring process.
To deactivate: the reversing camera deacti-
vates if you shift the transmission to Por after
driving forwards a short distance.
Messages in the multimedia system dis-
play The reversing camera may show a distorted view
of obstacles, show them incorrectly or not at all. Obstacles are not shown by the reversing cam-
era in the following locations:
R very close to the rear bumper
R under the rear bumper
! Objects not at ground level may appear to
be further away than they actually are, e.g.:
R the bumper of a parked vehicle
R the drawbar of a trailer
R the ball coupling of a trailer tow hitch
R the rear section of an HGV
R a slanted post
Use the guidelines only for orientation.
Approach objects no further than the bottom- most guideline. 144
Driving systemsDriving and parking
Page 185 of 289
Display messages
Possible causes/consequences and
M
MSolutions X
Consult a qualified specialist workshop immediately.
Further information on the automatic front-passenger front airbag
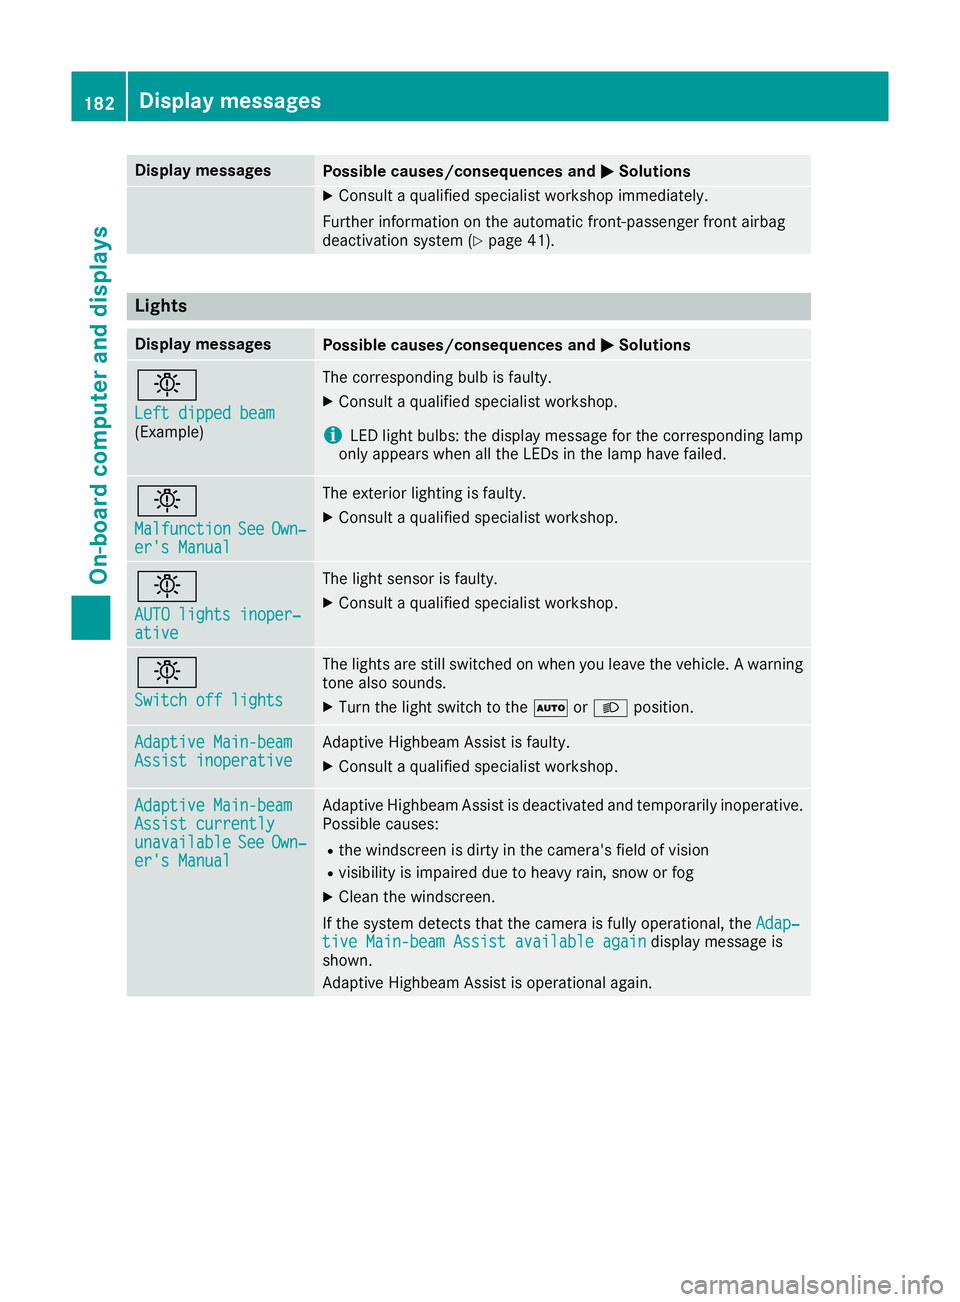
deactivation system (Y page 41).Lights
Display messages
Possible causes/consequences and
M
MSolutions b
Left dipped beam Left dipped beam
(Example) The corresponding bulb is faulty.
X Consult a qualified specialist workshop.
i LED light bulbs: the display message for the corresponding lamp
only appears when all the LEDs in the lamp have failed. b
Malfunction Malfunction
See
SeeOwn‐
Own‐
er's Manual
er's Manual The exterior lighting is faulty.
X Consult a qualified specialist workshop. b
AUTO lights inoper‐ AUTO lights inoper‐
ative ative The light sensor is faulty.
X
Consult a qualified specialist workshop. b
Switch off lights Switch off lights The lights are still switched on when you leave the vehicle. A warning
tone also sounds.
X Turn the light switch to the ÃorL position. Adaptive Main-beam
Adaptive Main-beam
Assist inoperative Assist inoperative Adaptive Highbeam Assist is faulty.
X
Consult a qualified specialist workshop. Adaptive Main-beam Adaptive Main-beam
Assist currently Assist currently
unavailable unavailable
See
SeeOwn‐
Own‐
er's Manual
er's Manual Adaptive Highbeam Assist is deactivated and temporarily inoperative.
Possible causes:
R the windscreen is dirty in the camera's field of vision
R visibility is impaired due to heavy rain, snow or fog
X Clean the windscreen.
If the system detects that the camera is fully operational, the Adap‐
Adap‐
tive Main-beam Assist available again
tive Main-beam Assist available again display message is
shown.
Adaptive Highbeam Assist is operational again. 182
Display
messagesOn-board computer and displays