tire pressure MERCEDES-BENZ AMG GT ROADSTER 2018 Owner's Manual
[x] Cancel search | Manufacturer: MERCEDES-BENZ, Model Year: 2018, Model line: AMG GT ROADSTER, Model: MERCEDES-BENZ AMG GT ROADSTER 2018Pages: 294, PDF Size: 4.8 MB
Page 5 of 294
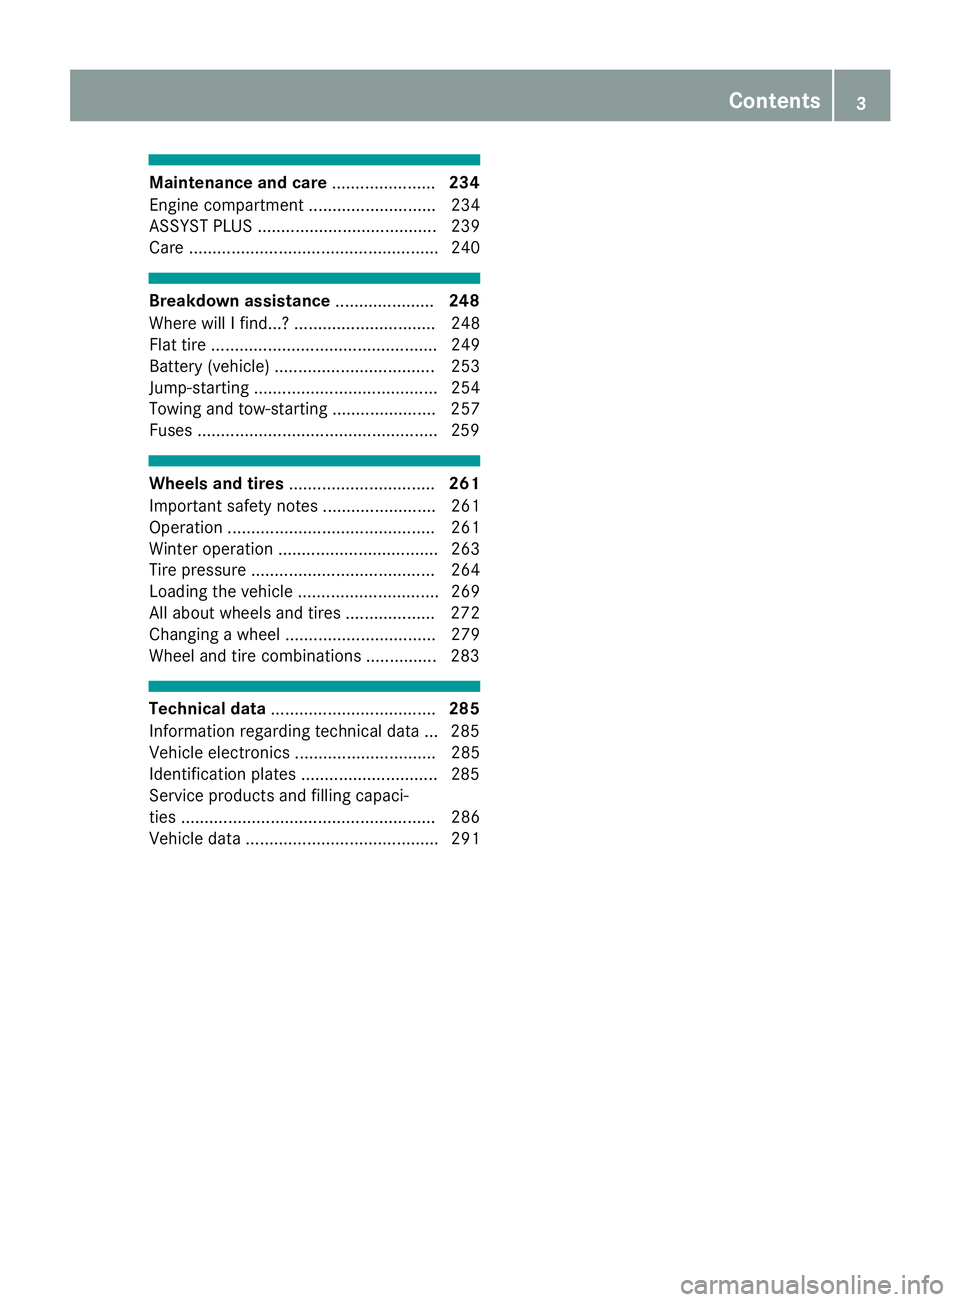
Maintenance and care......................234
Engine compartment ........................... 234
ASSYST PLUS ...................................... 239
Care ..................................................... 240
Breakdown assistance .....................248
Where will I find...? .............................. 248
Flat tire ................................................ 249
Battery (vehicle) .................................. 253
Jump-starting ....................................... 254
Towing and tow-starting ...................... 257
Fuses ...................................................2 59
Wheels and tires............................... 261
Important safety notes ........................ 261
Operation ............................................ 261
Winter operation .................................. 263
Tire pressure ....................................... 264
Loading the vehicle .............................. 269
All about wheels and tires ................... 272
Changing a wheel ................................ 279
Wheel and tire combinations ...............2 83
Technical data................................... 285
Information regarding technical data ... 285
Vehicle electronics .............................. 285
Identification plates .............................2 85
Service products and filling capaci-
ties ...................................................... 286
Vehicle data ......................................... 291
Contents3
Page 21 of 294
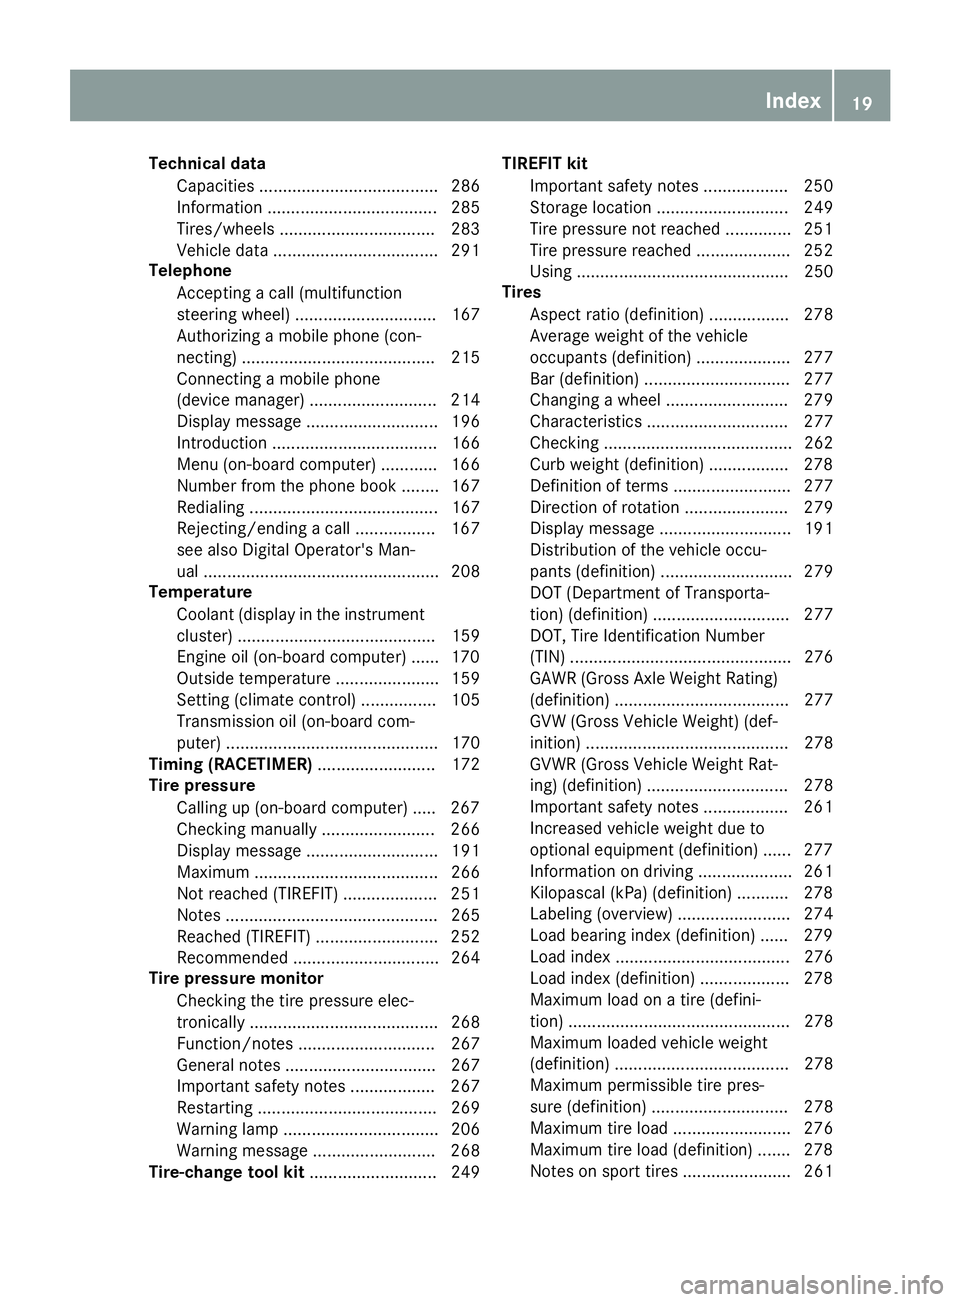
Technical dataCapacities ...................................... 286
Information .................................... 285
Tires/wheels ................................. 283
Vehicle data ................................... 291
Telephone
Accepting a call (multifunction
steering wheel) .............................. 167
Authorizing a mobile phone (con-
necting) ......................................... 215
Connecting a mobile phone
(device manager) ........................... 214
Display message ............................ 196
Introduction ................................... 166
Menu (on-board computer) ............ 166
Number from the phone book ........ 167
Redialing ........................................ 167
Rejecting/ending a call ................. 167
see also Digital Operator's Man-
ual .................................................. 208
Temperature
Coolant (display in the instrument
cluster) .......................................... 159
Engine oil (on-board computer) ...... 170
Outside temperature ...................... 159
Setting (climate control) ................ 105
Transmission oil (on-board com-
puter) ............................................. 170
Timing (RACETIMER) ......................... 172
Tire pressure
Calling up (on-board computer) ..... 267
Checking manually ........................ 266
Display message ............................ 191
Maximum ....................................... 266
Not reached (TIREFIT) .................... 251
Notes ............................................. 265
Reached (TIREFIT) .......................... 252
Recommended ............................... 264
Tire pressure monitor
Checking the tire pressure elec-
tronically ........................................ 268
Function/notes ............................. 267
General notes ................................ 267
Important safety notes .................. 267
Restarting ...................................... 269
Warning lamp ................................. 206
Warning message .......................... 268
Tire-change tool kit ........................... 249 TIREFIT kit
Important safety notes .................. 250
Storage location ............................ 249
Tire pressure not reached .............. 251
Tire pressu re re
ached .................... 252
Using ............................................. 250
Tires
Aspect ratio (definition) ................. 278
Average weight of the vehicle
occupants (definition) .................... 277
Bar (definition) ............................... 277
Changing a wheel .......................... 279
Characteristics .............................. 277
Checking ........................................ 262
Curb weight (definition) ................. 278
Definition of terms ......................... 277
Direction of rotation ...................... 279
Display message ............................ 191
Distribution of the vehicle occu-
pants (definition) ............................ 279
DOT (Department of Transporta-
tion) (definition) ............................. 277
DOT, Tire Identification Number
(TIN) ............................................... 276
GAWR (Gross Axle Weight Rating)
(definition) ..................................... 277
GVW (Gross Vehicle Weight) (def-
inition) ........................................... 278
GVWR (Gross Vehicle Weight Rat-
ing) (definition) .............................. 278
Important safety notes .................. 261
Increased vehicle weight due to
optional equipment (definition) ...... 277
Information on driving .................... 261
Kilopascal (kPa) (definition) ........... 278
Labeling (overview) ........................ 274
Load bearing index (definition) ...... 279
Load index ..................................... 276
Load index (definition) ................... 278
Maximum load on a tire (defini-
tion) ............................................... 278
Maximum loaded vehicle weight
(definition) ..................................... 278
Maximum permissible tire pres-
sure (definition) ............................. 278
Maximum tire load ......................... 276
Maximum tire load (definition) ....... 278
Notes on sport tires ....................... 261
Index19
Page 22 of 294
Optional equipment weight (defi-
nition) ............................................ 279
PSI (pounds per square inch) (def-
inition) ...........................................278
Replacing ....................................... 279
Service life ..................................... 262
Sidewall (definition) ....................... 278
Speed rating (definition) ................ 278
Storing ...........................................2 80
Structure and characteristics
(definition) ..................................... 277
Summer tires in winter .................. 263
Temperature .................................. 273
TIN (Tire Identification Number)
(definition) ..................................... 279
Tire bead (definition) ......................2 78
Tire pressure (definition) ................ 278
Tire pressures (recommended) ...... 277
Tire size (data) ............................... 283
Tire size designation, load-bearing
capacity, speed rating .................... 274
Tire tread ....................................... 262
Tire tread (definition) ..................... 278
Total load limit (definition) ............. 279
Traction ......................................... 273
Traction (definition) ....................... 279
Tread wear ..................................... 273
Uniform Tire Quality Grading
Standards ...................................... 272
Uniform Tire Quality Grading
Standards (definition) .................... 277
Wear indicator (definition) ............. 279
Wheel and tire combination ........... 283
Wheel rim (definition) .................... 277
see Flat tire
Tool
see Vehicle tool kit
Touchpad
Changing the station/music
track .............................................. 211
Character suggestions ................... 210
Deleting characters ....................... 210
Entering a space ............................ 210
Entering characters ....................... 210
Gesture control .............................. 210
Handwriting recognition ................ 210
Operating the touchpad ................. 210
Overview ........................................ 210 Quick access for Audio .................. 211
Switching ....................................... 210
Switching input line ....................... 210
Tow-starting
Emergency engine starting ............ 259
Towing away
Important safety guidelines ........... 257
Installing the towing eye ................ 258
Removing the towing eye ............... 258
Transporting the vehicle ................ 259
With both axles on the ground ....... 258
Towing eye ......................................... 248
Traction system
see ETS (Electronic Traction System)
Traffic reports
see also Digital Operator's Man-
ual .................................................. 208
Transmission
Driving tips .................................... 120
Selector lever ................................ 117
see Automatic transmission
Transmission position display ......... 119
Transmission positions
General notes ................................ 117
Overview ........................................ 118
Transporting the vehicle .................. 259
Trim pieces (cleaning instruc-
tions) .................................................. 246
Trip computer (on-board com-
puter) .................................................. 162
Trip odometer
Calling up ....................................... 161
Resetting (on-board computer) ...... 162
Trunk lid
Display message ............................ 195
Important safety notes .................... 73
Locking separately ........................... 76
Opening (automatically from
inside) .............................................. 75
Opening dimensions ...................... 291
Opening/closing (from the out-
side) ................................................. 74
Unlocking with KEYLESS-GO ............ 74
Trunk load (maximum) ...................... 291
Turn signals
Display message ............................ 185
Switching on/off .............................. 97
20Index
Page 23 of 294
Two-way radioFrequencies ................................... 285
Installation ..................................... 285
Transmission output (maximum) .... 285
Type identification plate
see Vehicle identification plate
U
UnlockingEmergency unlocking ....................... 73
From inside the vehicle (central
unlocking button) ............................. 72
USB devices
Connecting to the Media Inter-
face ...............................................2 16
V
Vanity mirror (in the sun visor)........220
Vehicle
Correct use ...................................... 28
Data acquisition ............................... 29
Display message ............................ 193
Electronics ..................................... 285
Equipment ....................................... 25
Individual settings .......................... 168
Limited Warranty .............................2 9
Loading .......................................... 269
Locking (in an emergency) ............... 73
Locking (SmartKey) .......................... 66
Lowering ........................................ 283
Maintenance .................................... 26
Operating safety .............................. 27
Parking .......................................... 127
Parking for a long period ................ 130
Pulling away ................................... 112
Raising ........................................... 280
Reporting problems ......................... 28
Securing from rolling away ............ 280
Towing away .................................. 257
Transporting .................................. 259
Unlocking (in an emergency) ........... 73
Unlocking (SmartKey) ...................... 66
Vehicle data ................................... 291
Vehicle battery
see Battery (vehicle)
Vehicle data
Trunk load (maximum) ................... 291 Vehicle dimensions
........................... 291
Vehicle emergency locking ................ 73
Vehicle identification number
see VIN
Vehicle identification plate .............. 285
Vehicle maintenance
see ASSYST PLUS
Vehicle tool kit .................................. 248
Ventilation
see Climate control
Video
Operating the DVD ......................... 166
see also Digital Operator's Man-
ual .................................................. 208
VIN
Seat ............................................... 286
Type plate ...................................... 285W
Warning and indicator lampsABS ................................................ 200
Active Brake Assist ........................ 205
Brakes ........................................... 199
Check Engine ................................. 203
Coolant .......................................... 203
Distance warning ........................... 205
ESP
®.............................................. 200
ESP®OFF ....................................... 201
Fuel tank ........................................ 203
Overview .......................................... 34
Parking brake ................................ 202
PASSENGER AIR BAG ...................... 41
Reserve fuel ................................... 203
Restraint system ............................ 202
Seat belt ........................................ 198
SPORT handling mode ................... 202
Steering ......................................... 207
Tire pressure monitor .................... 206
Warranty .............................................. 25
Washer fluid
Display message ............................ 196
Weather display (COMAND)
see also Digital Operator's Man-
ual .................................................. 208
Wheel and tire combinations
Tires ............................................... 283
Wheel bolt tightening torque ........... 283
Index21
Page 26 of 294
Protecting the environment
General notes
HEnvironmental note
Daimler's declared policy is one of compre-
hensive environmental protection.
The objectives are for the natural resources
that form the basis of our existence on this
planet to be used sparingly and in a manner
that takes the requirements of both nature
and humanity into account.
You too can help to protect the environment
by operating your vehicle in an environmen-
tally responsible manner.
Fuel consumption and the rate of engine,
transmission, brake and tire wear are affected by these factors:
Roperating conditions of your vehicle
Ryour personal driving style
You can influence both factors. You should
bear the following in mind:
Operating conditions:
Ravoid short trips as these increase fuel con-
sumption.
Ralways make sure that the tire pressures
are correct.
Rdo not carry any unnecessary weight.
Rremove roof racks once you no longer need
them.
Ra regularly serviced vehicle will contribute
to environmental protection. You should
therefore adhere to the service intervals.
Ralways have service work carried out at a
qualified specialist workshop.
Personal driving style:
Rdo not depress the accelerator pedal when
starting the engine.
Rdo not warm up the engine when the vehicle
is stationary.
Rdrive carefully and maintain a safe distance
from the vehicle in front.
Ravoid frequent, sudden acceleration and
braking.
Rchange gear in good time and use each gear
only up to Ôof its maximum engine speed.
Rswitch off the engine in stationary traffic.
Rkeep an eye on the vehicle's fuel consump-
tion.
Environmental concerns and recom-
mendations
Wherever the Operator's Manual requires you to
dispose of materials, first try to regenerate or re-
use them. Observe the relevant environmental
rules and regulations when disposing of materi-
als. In this way you will help to protect the envi-
ronment.
Genuine Mercedes-Benz parts
HEnvironmental note
Daimler AG also supplies reconditioned major
assemblies and parts which are of the same
quality as new parts. They are covered by the
same Limited Warranty entitlements as new
parts.
!Air bags and Emergency Tensioning Devi-
ces, as well as control units and sensors for
these restraint systems, may be installed in
the following areas of your vehicle:
Rdoors
Rdoor pillars
Rdoor sills
Rseats
Rcockpit
Rinstrument cluster
Rcenter console
Do not install accessories such as audio sys-
tems in these areas. Do not carry out repairs or welding. You could impair the operating
efficiency of the restraint systems.
Have aftermarket accessories installed at a
qualified specialist workshop.
You could jeopardize the operating safety of
your vehicle if you use parts, tires and wheels as
well as accessories relevant to safety which
have not been approved by Mercedes-Benz. This
could lead to malfunctions in safety-relevant
24Genuine Mercedes-Benz parts
Introduction
Page 31 of 294
The following text is published as required of
manufacturers under Title 49, Code of U.S. Fed-
eral Regulations, Part 575 pursuant to the
"National Traffic and Motor Vehicle Safety Act of
1966".
If you believe that your vehicle has a defect
which could cause a crash or could cause injury
or death, you should immediately inform the
National Highway Traffic Safety Administration
(NHTSA) in addition to notifying Mercedes-Benz USA, LLC.
If NHTSA receives similar complaints, it may
open an investigation, and if it finds that a safety
defect exists in a group of vehicles, it may order
a recall and remedy campaign. However, NHTSA
cannot become involved in individual problems
between you, your dealer, or Mercedes-Benz
USA, LLC.
To contact NHTSA, you may call the Vehicle
Safety Hotline toll-free at 1-888-327-4236
(TTY: 1-800-424-9153); go tohttp://
www.safercar.gov; or write to: Administrator,
NHTSA, 400 Seventh Street, SW., Washington,
DC 20590.
You can also obtain other information about
motor vehicle safety at:
http://www.safercar.gov
Limited Warranty
!
Observe the notes in this Operator's Manual
regarding the correct operation of your vehi-
cle and possible damage to the vehicle. Dam-
age to the vehicle which is caused by violation
of these notes is not covered by the
Mercedes-Benz implied warranty or the new
or used-vehicle warranty.
QR codes for the rescue card
The QR codes are secured in the fuel filler flap
and on the opposite side on the B-pillar. In the
event of an accident, rescue services can use
the QR code to quickly find the appropriate res-
cue card for your vehicle. The current rescue
card contains the most important information
about your vehicle in a compact form, e.g. the
routing of the electric cables.
You can find more information under
www.mercedes-benz.de/qr-code.
Data stored in the vehicle
Information from electronic control
units
There are electronic control units installed in
your vehicle. Some of these are necessary for
your vehicle to operate safely, while some offer
support during driving (driver assistance sys-
tems). In addition, your vehicle offers comfort
and entertainment functions that are also made
possible by electronic control units.
Electronic control units contain data storage
systems that can temporarily or permanently
save technical information concerning the vehi-
cle's condition, component stress and mainte-
nance requirements as well as technical events
and malfunctions.
This information generally documents the con-
dition of a component, a module, a system or the
surroundings, for example:
Roperating states of system components (e.g.
fill levels, battery status, tire pressure)
Rstatus messages concerning the vehicle or its
individual components (e.g. wheel rpm/
speed, deceleration, lateral acceleration, indi-
cation of whether seat belts are fastened)
Rmalfunctions and defects in important system
components (e.g. lights, brakes)
Rinformation about events leading to vehicle
damage
Rsystem responses in special driving situations
(e.g. air bag deployment, intervention of sta-
bility control systems)
Rambient conditions (e.g. temperature, rain
sensor)
In addition to performing the actual control unit function, these data are used by manufacturers
to detect and rectify malfunctions and to opti-
mize vehicle functions. Most of these data are
volatile and processed only in the vehicle itself.
Only a small part of the data is stored in event or malfunction memories.
When you use services, the technical data from
the vehicle can be read out by service network
employees or third parties. Services can include
repair services, maintenance processes, war-
ranty cases and quality assurance measures.
The data is read out via the legally prescribed
diagnostics connection in the vehicle. The rele-
vant offices in the service network or third par-
ties collect, process and use the data. These
data document the vehicle's technical states,
Data stored in the vehicle29
Introduction
Z
Page 60 of 294
Pets in the vehicle
GWARNING
If you leave animals unattended or unsecured
in the vehicle, they could press buttons or
switches, for example.
As a result, they could:
Ractivate vehicle equipment and become
trapped, for example
Ractivate or deactivate systems, thereby
endangering other road users
Unsecured animals could also be flung around
the vehicle in the event of an accident or sud-
den steering or braking, thereby injuring vehi-
cle occupants. There is a risk of an accident
and injury.
Never leave animals unattended in the vehi-
cle. Always secure animals properly during
the journey, e.g. use a suitable animal trans-
port box.
Driving safety systems
Overview of driving safety systems
In this section, you will find information about
the following driving safety systems:
RABS (Anti-lock BrakingSystem)
(Ypage 58)
RBAS ( Brake Assist System) (Ypage 59)
RActive Brake Assist (Ypage 59)
RESP®(Electronic StabilityProgram)
(Ypage 62)
REBD ( Electronic Brake force Distribution)
(Ypage 64)
RADAPTIVE BRAKE (Ypage 64)
Important safety notes
If you fail to adapt your driving style or if you are
inattentive, the driving safety systems can nei-
ther reduce the risk of an accident nor override the laws of physics. Driving safety systems are
merely aids designed to assist driving. You are
responsible for maintaining the distance to the
vehicle in front, for vehicle speed, for braking in good time, and for staying in lane. Always adapt
your driving style to suit the prevailing road and weather conditions and maintain a safe distance
from the vehicle in front. Drive carefully.
The driving safety systems described only work
as effectively as possible when there is ade-
quate contact between the tires and the road
surface. Please pay special attention to the
notes on tires, recommended minimum tire
tread depths, etc. (
Ypage 261).
In wintry driving conditions, always use winter
tires (M+S tires) and if necessary, snow chains.
Only in this way will the driving safety systems
described in this section work as effectively as
possible.
ABS (Anti-lock Braking System)
General information
ABS regulates brake pressure in such a way that
the wheels do not lock when you brake. This
allows you to continue steering the vehicle when
braking.
The ! ABS warning lamp in the instrument
cluster lights up when the ignition is switched
on. It goes out when the engine is running.
ABS works from a speed of about 5 mph
(8 km/h), regardless of road-surface conditions.
ABS works on slippery surfaces, even when you
only brake gently.
Important safety notes
iObserve the "Important safety notes" sec-
tion (Ypage 58).
GWARNING
If ABS is faulty, the wheels could lock when
braking. The steerability and braking charac-
teristics may be severely impaired. Addition-
ally, further driving safety systems are deac-
tivated. There is an increased danger of skid-
ding and accidents.
Drive on carefully. Have ABS checked imme-
diately at a qualified specialist workshop.
When ABS is malfunctioning, other systems,
including driving safety systems, will also
become inoperative. Observe the information
on the ABS warning lamp (
Ypage 200) and dis-
58Driving safety systems
Safety
Page 128 of 294
!Use a filter when adding fuel from a fuel can.
The fuel lines and/or the fuel injection system
could otherwise be blocked by particles from
the fuel can.
If you overfill the fuel tank, fuel could spray out
when the fuel pump nozzle is removed.
For further information on fuel and fuel quality
(
Ypage 286).
Refueling
General information
Pay attention to the important safety notes
(Ypage 125).
If you unlock/lock the vehicle from the outside, the fuel filler flap also unlocks/locks.
The position of the fuel filler cap is displayed
8 in the instrument cluster. The arrow next
to the filling pump indicates the side of the vehi-
cle.
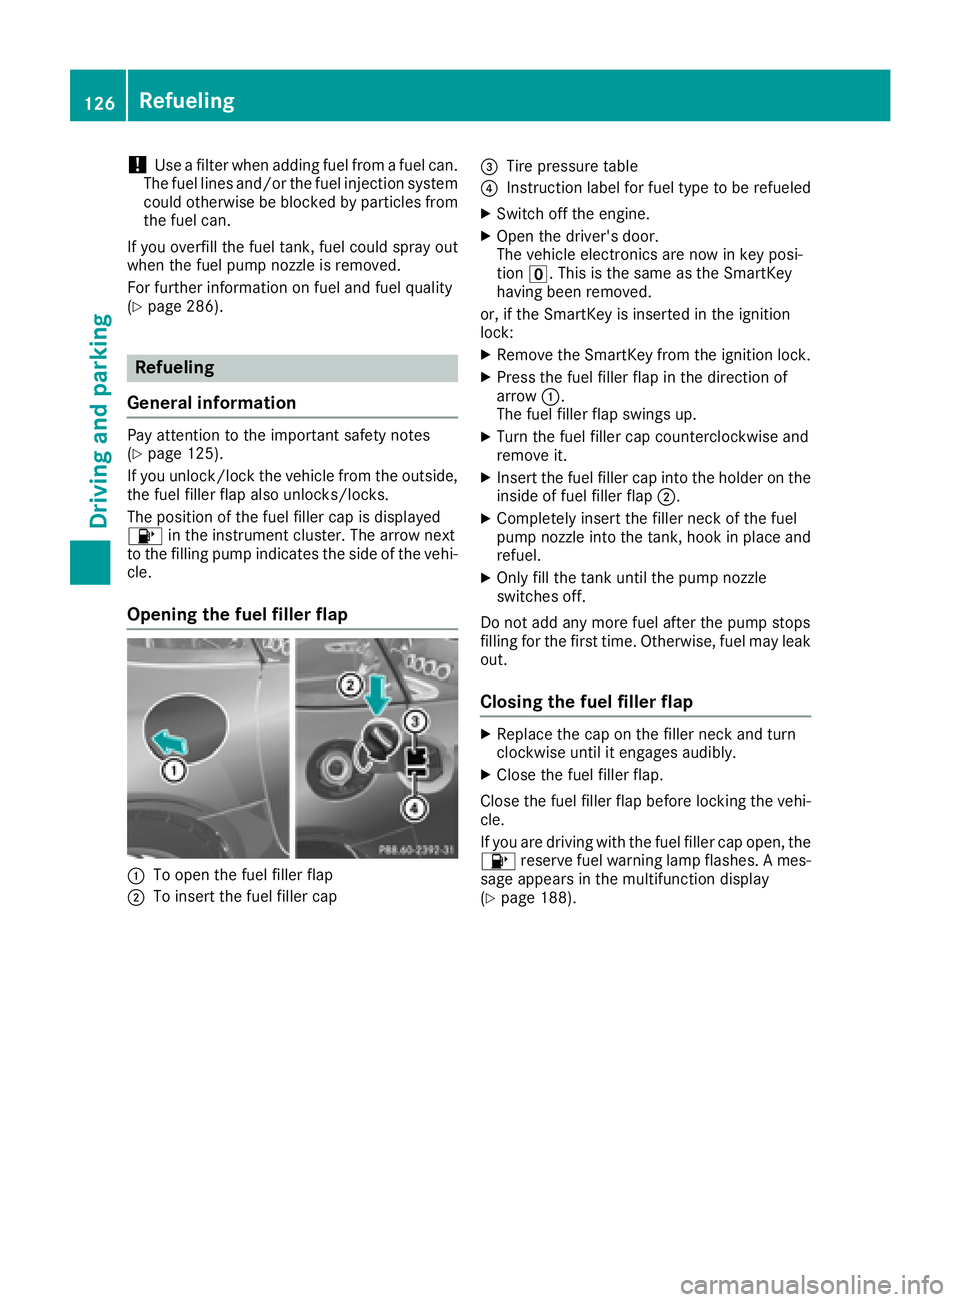
Opening the fuel filler flap
:To open the fuel filler flap
;To insert the fuel filler cap
=Tire pressure table
?Instruction label for fuel type to be refueled
XSwitch off the engine.
XOpen the driver's door.
The vehicle electronics are now in key posi-
tion u. This is the same as the SmartKey
having been removed.
or, if the SmartKey is inserted in the ignition
lock:
XRemove the SmartKey from the ignition lock.
XPress the fuel filler flap in the direction of
arrow :.
The fuel filler flap swings up.
XTurn the fuel filler cap counterclockwise and
remove it.
XInsert the fuel filler cap into the holder on the
inside of fuel filler flap ;.
XCompletely insert the filler neck of the fuel
pump nozzle into the tank, hook in place and
refuel.
XOnly fill the tank until the pump nozzle
switches off.
Do not add any more fuel after the pump stops
filling for the first time. Otherwise, fuel may leak
out.
Closing the fuel filler flap
XReplace the cap on the filler neck and turn
clockwise until it engages audibly.
XClose the fuel filler flap.
Close the fuel filler flap before locking the vehi-
cle.
If you are driving with the fuel filler cap open, the 8 reserve fuel warning lamp flashes. A mes-
sage appears in the multifunction display
(
Ypage 188).
126Refueling
Driving and parking
Page 133 of 294
XConnect the cable providedin the trunk to the
trick lecharger.
XConnect the trick lecharger to 12 V socket :.
Consult the manufacturer's operating instruc-
tions on how to doso.
The trunk lidcan beclosed, even ifa trick le
charger isconnected. Make sure that the con-
nector for both the connector cables isoutside
of the veh icle.
The connector can then separate ifthe veh icle is
moved, even ifyou forget to disconnect the con-
nector cables. This prevents damaging the
cables and the trick lecharger.
A trick lecharger connected to 12 V socket :
only maintains the current charge level of the
veh icle's electrical system battery. Ifthe veh i-
cle's electrical system battery is discharged, it
needs to becharged with a battery charger.
Driving tips
General driving tips
Important safety notes
GWAR NING
If you switch off the ignition while driving,
safety-relevant functions are only available
wit hlimit ations, or not at all.This could affect,
for example, the power steering and the brake
boosting effect. You willrequire cons iderably
more effort to steer and brake. There isa risk
of an acc ident.
Do not switch off the ignition while driving.
GWARNING
If you operate mob ilecommunication equip-
ment when driving, you may be distracted
from the traff icsituation. You could also lose
control of the veh icle. There isa risk of an
acc iden t.
Only operate th is equipment when the veh icle
is stationary.
Observe the legal requirements for the country
in whic h you are driving. Some jur isdictions pro-
hibit thedriver from using a mob ilephone while
driv ing a vehicle. If you make a call while driving, always use
hands-free mode. Only
operate the telephone
when the traff icsituation permits. Ifyou are
unsure, pull over to a safe location and stop
before operating the telephone.
Bear in mind that at a speed of only 30 mph
(approximately 50 km/h), the vehicle covers a
distance of 44 ft (approximately 14 m)per sec-
ond.
Drive sensibly – save fuel
Observe the following tips to save fuel:
XThe tires should always be inflated to the rec-
ommended tire pressure.
XRemove unnecessary loads.
XWarm up the engine at low engine speeds.
XAvoid frequent acceleration or braking.
XHave all service and maintenance work car-
ried out at the specified intervals.
Fuel consumption also increases when driving in
cold weather, in stop-start traffic and in hilly ter-
rain.
Drinking and driving
GWARNING
Drinking and driving and/or taking drugs and driving are very dangerous combinations.
Even a small amount of alcohol or drugs can
affect your reflexes, perceptions and judg-
ment.
The possibility of a serious or even fatal acci-
dent is greatly increased when you drink or
take drugs and drive.
Do not drink or take drugs and drive or allow
anyone to drive who has been drinking or tak-
ing drugs.
Emission control
GWARNING
Combustion engines emit poisonous exhaust
gases such as carbon monoxide. Inhaling
these exhaust gases leads to poisoning. There
is a risk of fatal injury. Therefore never leave
the engine running in enclosed spaces with-
out sufficient ventilation.
Driving tips131
Driving and parking
Z
Page 147 of 294
Deactivating theHOL Dfunction
The HOLD function is deactivated if:
Ryou depress th eaccelerator and th etrans -
missio nis in position hork
Ryou shift th etransmissio nto position j
Ryou apply th ebrake sagain wit h acertain
amount of pressure until th eHOL Ddisplay dis -
appears from th emultifunction display
Ryou secure th evehicle usin gth eelectric park-
in g brake
iAfte r atime, th eelectric parking brake
secure sth evehicle and relieves th eservic e
brake .
The electric parking brake secure sth evehicle
automatically if th eHOLD function is activated
when th evehicle is stationary and :
Rthedriver's seat belt is no tfastene dand th e
driver's doo ris ope n
Rtheengin eis switched off, unless it is auto-
matically switched of fby th eEC Ostart/sto p
function
Ra syste mmalfunction occur s
Rthepowe rsupply is no tsufficien t
If th eelectric parking brake is no toperational, a
hor nwill soun dat regular intervals. The HOLD
function mus tthen be deactivated.
If amalfunction occurs, th etransmissio nmay
also be shifted to position jautomatically.
The Brake Immediately
messag emay also
appear in th emultifunction display.
XImmediately depress th ebrake firmly until th e
warnin gmessag ein th emultifunction display
goe sout .
The HOLD function is deactivated. If you turn of f
th eengine, take of fyour seat belt or ope nth e
driver's doo rwhen th eHOLD function is activa-
ted, ahor nwill soun dat regular intervals. The
soundin gof th ehor nalerts you to th efac tthat
th eHOLD function is still activated. If you
attempt to loc kth evehicle, th etone becomes
louder. The vehicle canno tbe locke duntil you
hav edeactivated th eHOLD function .
iAfterswitchin gof fth eengine, it can only be
started again once you hav edeactivated th e
HOLD function .
RACE START
Important safet ynotes
iRAC ESTART mus tno tbe used on normal
roads. RAC ESTART mus tonly be activated
and used on dedicated road circuits, outsid e
of publi croad use.
RAC ESTART enable soptimal acceleration from
a standin gstart .Fo rthis, asuitably high-grip
road surfac eis require dand th evehicle and tires
mus tbe in goo dworking order .
GWARNING
If you use RAC ESTART ,individual tires may
start to spi nand th evehicle could skid.
Dependin gon th eselecte dES P
®mode, there
is an increase dris kof skidding and havin gan
accident. Mak esur ethat no persons, animals
or obstacles are within range of th evehicle.
iObserv eth esafet ynote son drivin gsafet y
systems (Ypage 58).
Be sur eto rea dth esafet ynote sand informa-
tion on ES P
®(Ypage 62).
iObserveth especific servic erequirements
fo rracetrac kmode operation (Ypage 240).
Activation conditions
You can activateRAC ESTART under th efollow -
in g conditions:
Rth edoors are close d
Rtheengin eis running and th eengin eand
transmissio nare at operatin gtemperature .
Thi sis th ecas ewhen th eoil temperature dis -
play in th emultifunction display is shown in
whit e (
Ypage 170).
RESP®is functionin gcorrectl y (Ypage 62 )
Rthesteerin gwhee lis in th estraight-ahead
position
Rth evehicle is stationary and th ebrake peda lis
depressed sufficientl y(lef tfoot )
Rthetransmissio nis in position h
Rdrive program S,S+ orRAC Eis selecte d
(Ypage 116).
Driving systems14 5
Driving an d parking
Z