ECO mode MERCEDES-BENZ AMG GT ROADSTER 2020 Owners Manual
[x] Cancel search | Manufacturer: MERCEDES-BENZ, Model Year: 2020, Model line: AMG GT ROADSTER, Model: MERCEDES-BENZ AMG GT ROADSTER 2020Pages: 381, PDF Size: 7.37 MB
Page 23 of 381
Mercedes-Benz GenuineParts
+ ENVIRONMENTAL
NOTEEnvironmental
dama gecaused bynot using recycled
re conditioned components Mercedes-Benz
AGoffers recycled recondi‐
tioned components and pa rts with the same
qu ality as new parts. The same entitlement
from the implied warranty is valid as for new
parts. #
Recycled reconditioned components
and pa rts from Mercedes-Benz AG.*
NO
TEImpairment of the operating ef fi‐
ciency of there stra int sy stems from
ins talling accessory parts or from repairs
or we lding Airbags and seat belt
tensioners, as well as
control units and sensors forth ere stra int
sy stems, may be ins talled in thefo llowing
areas of your vehicle:
R doors R
door pillars
R door sills
R seats
R cockpit
R instrument clus ter
R centre console
R late ra lro of frame #
Do not ins tall accessory parts such as
audio sy stems in these areas. #
Do not car ryout repairs or welding. #
Have accesso ries retrofitted at a quali‐
fi ed specialist workshop. Yo
u could jeopardise the operating saf ety of your
ve hicle if you use parts, tyres and wheels as well
as accessories releva nt tosaf ety which ha venot
been appr ovedby Mercedes-Benz. Saf ety-re le‐
va nt sy stems, e.g. the brake sy stem, may mal‐
function. Only use Mercedes-Benz GenuineParts
or parts of equal qualit y.Only use tyres, wheels
and accessory parts that ha vebeen specifically
appr ovedfo ryo ur vehicle model. Mercedes-Benz
tests original parts and con ver‐
sion parts and accessory parts that ha vebeen
specifically appr ovedfo ryo ur vehicle model for
th eir reliability, saf ety and suitabilit y.Despite
ongoing ma rket resear ch, Mercedes-Benz is
unable toassess other parts. Mercedes-Benz
th erefore accepts no responsibility forth e use of
such parts in Mercedes-Benz vehicles, even if
th ey have been of ficially appr oved or independ‐
ently appr oved byate sting centre.
Cer tain parts are only of ficially appr ovedfor
ins tallation or modification if they comply wi th
legal requirements. All Mercedes-Benz Genuine‐
Pa rts meet the appr oval requ irements. The use
of non-appr oved parts may in validate theve hi‐
cle's general operating pe rmit.
This is the case in thefo llowing situations:
R theve hicle type is dif fere nt from that for
which theve hicle's general operating pe rmit
wa s granted.
R other road users could be endangered.
R theex haust gas or noise le velge ts wo rse. 20
General no tes
Page 55 of 381
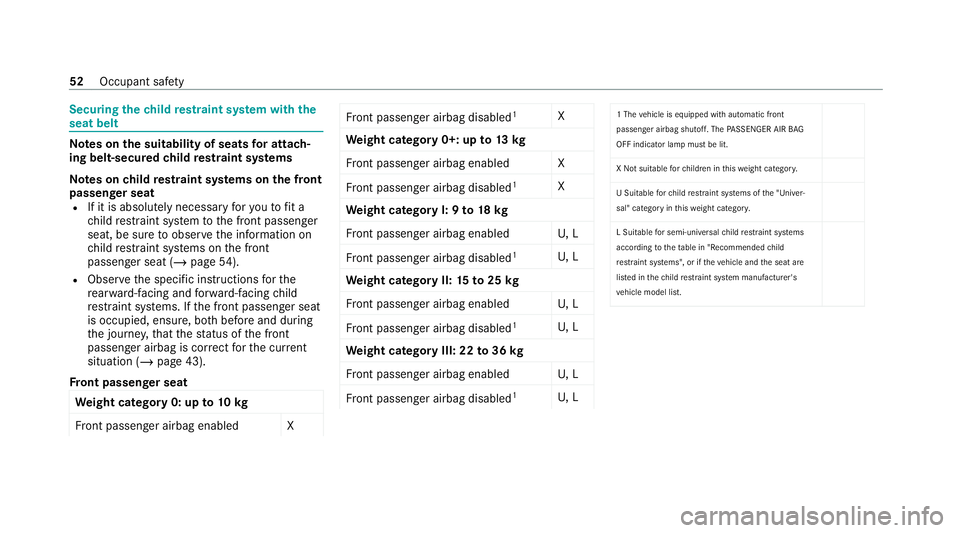
Securing
thech ild restra int sy stem with the
seat belt Note
s onthe suitability of seats for attach‐
ing belt-secured child restra int sy stems
Note s onchild restra int sy stems on the front
passenger seat
R If it is absolutely necessary foryo uto fit a
ch ild restra int sy stem tothe front passenger
seat, be sure toobser vethe information on
ch ild restra int sy stems on the front
passenger seat (/ page54).
R Obser vethe specific instructions forthe
re ar wa rd-facing and forw ard-facing child
re stra int sy stems. If the front passenger seat
is occupied, ensure, bo thbefore and during
th e journe y,that thest atus of the front
passenger airbag is cor rect forth e cur rent
situation (/ page 43).
Fr ont passenger seat
We ight category 0: up to10 kg
Fr ont passenger airbag enabled X Fr
ont passenger airbag disabled 1
X
We ight category 0+: up to13 kg
Fr ont passenger airbag enabled X
Fr ont passenger airbag disabled 1
X
We ight category I: 9 to18 kg
Fr ont passenger airbag enabled U, L
Fr ont passenger airbag disabled 1
U, L
We ight category II: 15to25 kg
Fr ont passenger airbag enabled U, L
Fr ont passenger airbag disabled 1
U, L
We ight category III: 22 to36 kg
Fr ont passenger airbag enabled U, L
Fr ont passenger airbag disabled 1
U, L 1 The
vehicle is equipped with automatic front
passenger airbag shutoff. The PASSENGER AIR BAG
OFF indicator lamp must be lit.
X Not suitable forch ildren in this we ight categor y.
U Suitable forch ild restra int sy stems of the "Univer‐
sal" category in this we ight categor y.
L Suitable for semi-universal child restra int sy stems
according totheta ble in "Recommended child
re stra int sy stems", or if theve hicle and the seat are
lis ted in thech ild restrai nt sy stem manufacturer's
ve hicle model list. 52
Occupant saf ety
Page 104 of 381
Overview of climate control sy
stems Note
s on climate control An interior air
filter in combination with the pre‐
fi lter in the engine compartment must alw ays be
used so that the air conditioning sy stem, pollu‐
tion le vel monitoring and the air filtration work
cor rectl y.Make sure that thefilter is ins talled
cor rectly and thefilter housing in the engine
compartment is closed cor rectly using the cap
and alw ays tightly sealed when in operation. Use
fi lters recommended and appr ovedby
Mercedes-Benz. Alw ays ha veservice workcar‐
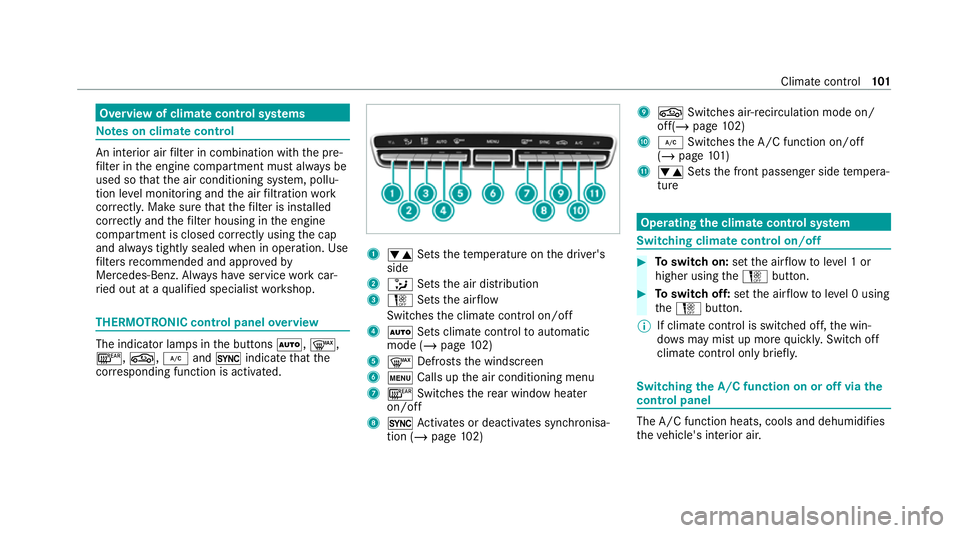
ri ed out at a qualified specialist workshop. THERMOTRONIC control panel
overview The indicator lamps in
the buttons Ã,¬,
¤, g,¿and0 indicate that the
cor responding function is activated. 1
w Setsthete mp erature on the driver's
side
2 _ Setsthe air distribution
3 H Setsthe air flow
Switches the climate control on/off
4 Ã Sets climate control toautomatic
mode (/ page102)
5 ¬ Defrosts the windscreen
6 t Calls up the air conditioning menu
7 ¤ Switches there ar wind owheater
on/off
8 0 Activates or deacti vates synchronisa‐
tion (/ page102) 9
g Switches ai r-re circulation mode on/
off(/ page 102)
A ¿ Switches the A/C function on/off
(/ page 101)
B w Setsthe front passenger side temp era‐
ture Operating
the clima tecont rol sy stem Switching clima
tecont rol on/off #
Toswitch on: setthe air flow toleve l 1 or
higher using theH button. #
Toswitch off: setthe air flow toleve l 0 using
th eH button.
% If climate control is switched off, the win‐
do ws may mist up more quickl y.Switch off
climate control only brie fly. Switching
the A/C function on or off via the
cont rol panel The A/C function heats, cools and dehumidifies
th
eve hicle's interior air. Climate control
101
Page 120 of 381
Check
the tyres for dama geand the cor rect tyre
tread dep thboth before and af ter use on a race‐
trac k.Only then is it safe todrive on a racetrack
and on public roads.
As a result of the driving style and at high ambi‐
ent temp eratures, when driving on a racetrack it
may be necessary tocompensate forthe
inc rease in pressure in warm tyres byreleasing
air. Even forwa rm tyres, the specified tyre pres‐
sure may only be exceeded bymax. 0.5 bar.
Af terth e tyres ha vecooled down again, you
must readjust the tyre pressure in accordance
with the specifications in order todrive on public
ro ads. Suspension
Suspension settings
The
factory setting pr ovides a good compromise
fo r driving on public roads and on a racetrac k.
Ve hicle measurements
Even small changes tothe suspension settings
alter the driving characteristics of theve hicle. To
ensure optimal driving characteristics, the speci‐ fi
ed values and tolerances of the individual sus‐
pension settings must be complied with. The
driving characteristics of theve hicle may other‐
wise be undesirable.
Ve hicle measurements are requ ired in thefo llow‐
ing situations:
R theve hicle height has changed in relation to
th e optimised setting.
R theve hicle is frequently subjected tovery
high loads, e.g. when driving over kerbs.
Therefore, check theve hicle height at regular
inter vals and, if necessar y,per form vehicle
measurements.
Note s on suspension components
Despite regular checks, and rega rdless of
whe ther there leva nt suspension components
are in good condition, thefo llowing components
must be replaced af ter a cer tain amount of use
on thera cetrack:
R Wheel bolts (/ page 116)
R Wheel hubs including the wheel bearings Note
s on engine oil Check
the engine oil le vel before operating in
ra cetrack mode. DY
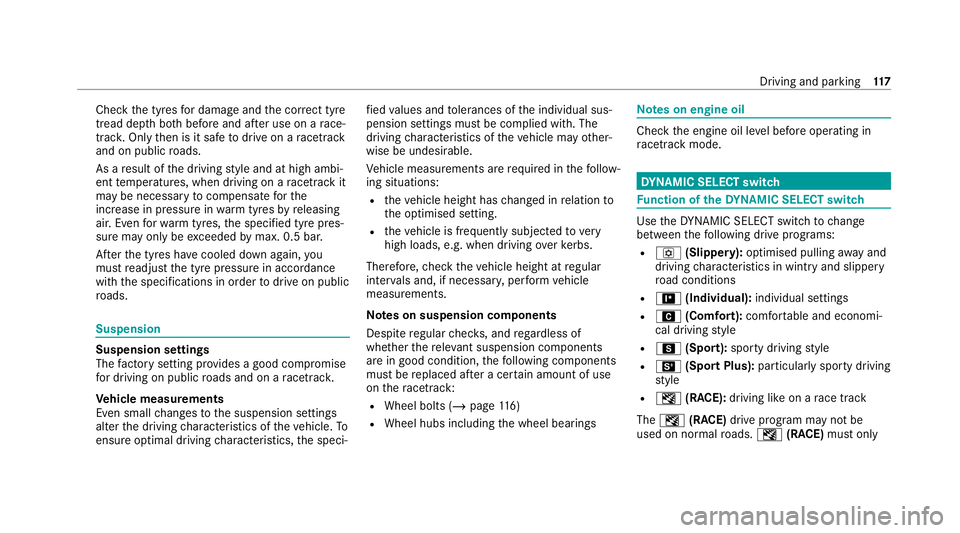
NA MIC SELECT switch Fu
nction of theDY NA MIC SELECT switch Use
theDY NA MIC SELECT switch tochange
between thefo llowing drive programs:
R o (Slippery): optimised pulling away and
driving characteristics in wint ryand slippe ry
ro ad conditions
R = (Individual): individual settings
R A (Comfort): comfortable and economi‐
cal driving style
R C (Sport): sporty driving style
R B (Sport Plus): particularly sporty driving
st yle
R I (RACE): driving like on a race track
The I (RACE) drive program may not be
used on normal roads. I (RACE) must on ly Driving
and parking 117
Page 121 of 381
be activated and used on dedicated
race cir‐
cuits, not on public roads.
Mercedes-AMG recommends selecting the drive
program Awhen in city tra ffic or stop-and-go
traf fic.
Depending on the drive prog ram selected, the
fo llowing vehicle characteristics will change:
R drive
- engine and transmission management
- Active Dis tance Assi stDISTRONIC
R AMG Dynamics
- thefo ur agility functions Basic, Advanced,
Pro and Ma ster are automatically selec‐
te d depending on the drive prog ram.
- thesteering, shift timing point and stabili‐
sation functions are adap tedto the selec‐
te d drive prog ram.
- when ESP ®
is activated, agility function
Pro is selected in drive program I
RACE. The Mas ter function is auto mati‐
cally selected when ESP ®
is deactivated.
R position of theex haust gasflaps R
Suspension
R steering
R availability of Glide mode
R The I(R ACE)drive program has thefo l‐
lowing properties:
- theve hicle exhibits driving characteristics
suited forth era cetrac k.
- allvehicle sy stems are set for maximum
sportiness.
- the automatic transmission shifts up
later.
- the suspension exhibits particular lyfirm
springing and damping settings.
- glide mode is not available.
- the sporty sound characteristic of the
ex haust sy stem is activated.
% You can call up vehicle characteristics via
th ePe rformance menu in the on-board com‐
puter .
% You can adjust the agility functions of AMG
Dynamics using the AMG steering-wheel but‐
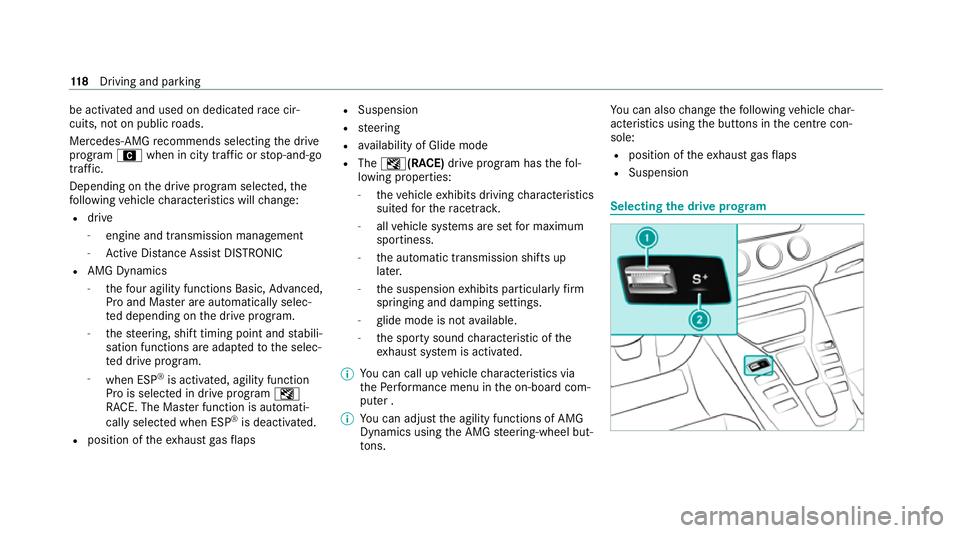
to ns. Yo
u can also change thefo llowing vehicle char‐
acteristics using the buttons in the cent recon‐
sole:
R position of theex haust gasflaps
R Suspension Selecting
the drive prog ram 11 8
Driving and pa rking
Page 125 of 381
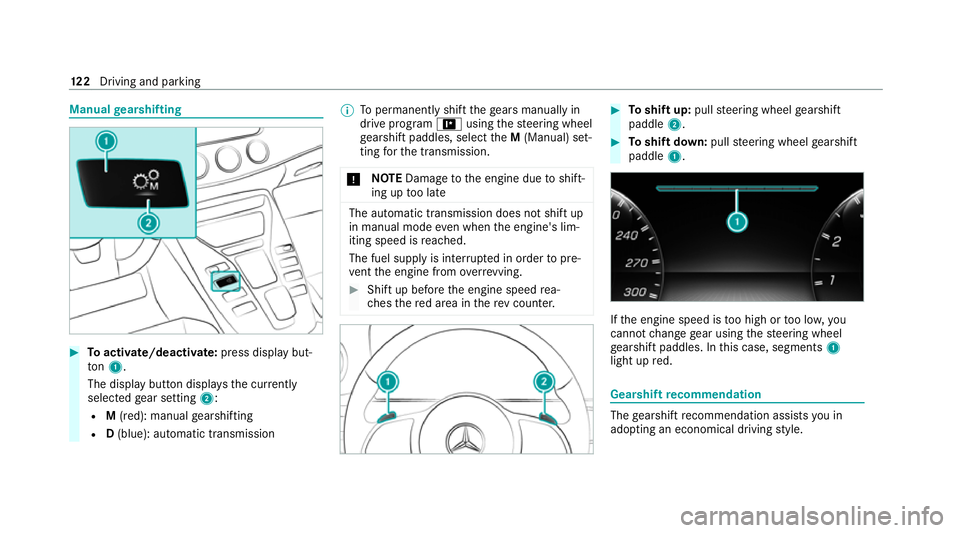
Manual
gearshifting #
Toactivate/deacti vate: press display but‐
to n1.
The displ aybutton displa ys the cur rently
selected gear setting 2:
R M(red): manual gearshifting
R D(blue): automatic transmission %
Topermanently shift thege ars manually in
drive prog ram = using thesteering wheel
ge arshift paddles, select theM (Manual) set‐
ting forth e transmission.
* NO
TEDama getothe engine due toshift‐
ing up too late The automatic transmission does not shift up
in manual mode
even when the engine's lim‐
iting speed is reached.
The fuel supply is inter rupte d in order topre‐
ve nt the engine from overrev ving. #
Shift up before the engine speed rea‐
ch es there d area in there v counter. #
Toshift up: pullsteering wheel gearshift
paddle 2. #
Toshift down: pullsteering wheel gearshift
paddle 1. If
th e engine speed is too high or too lo w,you
cannot change gear using thesteering wheel
ge arshift paddles. In this case, segments 1
light up red. Gearshift
recommendation The
gearshift recommendation assists you in
adopting an economical driving style. 12 2
Driving and pa rking
Page 126 of 381
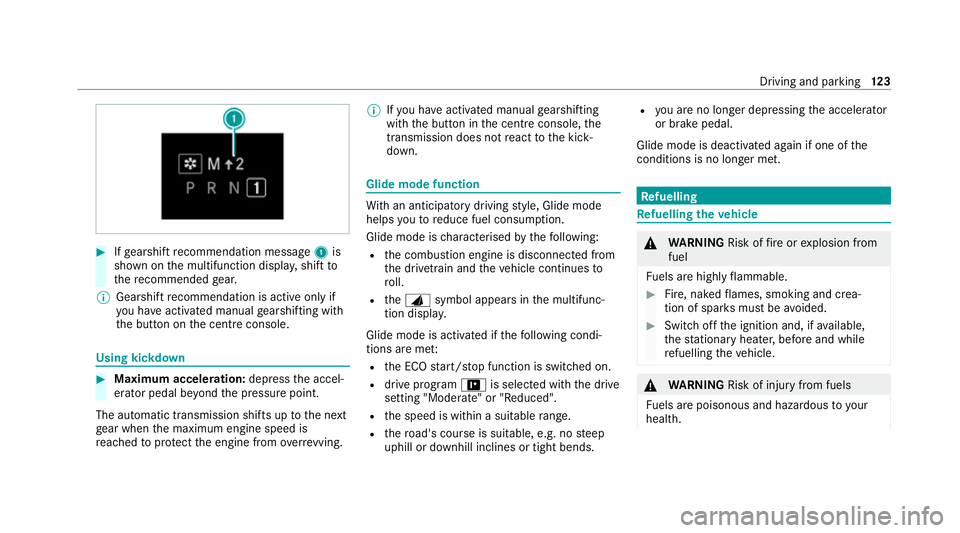
#
Ifge arshift recommendation message 1is
shown on the multifunction displa y,shift to
th ere commended gear.
% Gearshift recommendation is acti veonly if
yo u ha veactivated manual gearshifting with
th e button on the cent reconsole. Using kickdown
#
Maximum acceleration: depress the accel‐
erator pedal be yond the pressure point.
The automatic transmission shifts up tothe next
ge ar when the maximum engine speed is
re ached toprotect the engine from overrev ving. %
Ifyo u ha veactivated manual gearshifting
with the button in the cent reconsole, the
transmission does not react tothe kick‐
down. Glide mode function
Wi
th an anticipatory driving style, Glide mode
helps youto reduce fuel consum ption.
Glide mode is characterised bythefo llowing:
R the combustion engine is disconnected from
th e driv etra in and theve hicle continues to
ro ll.
R theJ symbol appears in the multifunc‐
tion displa y.
Glide mode is activated if thefo llowing condi‐
tions are me t:
R the ECO start/ stop function is switched on.
R drive program =is selected with the drive
setting "Moderate" or "Reduced".
R the speed is within a suitable range.
R thero ad's course is suitable, e.g. no steep
uphill or downhill inclines or tight bends. R
you are no lon ger depressing the accelerator
or brake pedal.
Glide mode is deactivated again if one of the
conditions is no longer met. Re
fuelling Re
fuelling theve hicle &
WARNING Risk offire or explosion from
fuel
Fu els are highly flammable. #
Fire, naked flames, smoking and crea‐
tion of spar ksmust be avoided. #
Swit choff the ignition and, if available,
th est ationary heater, before and while
re fuelling theve hicle. &
WARNING Risk of injury from fuels
Fu els are poisonous and hazardous to your
health. Driving and parking
12 3
Page 142 of 381
Obser
vethe no tes on driving sy stems and your
re sponsibility; you may otherwise failto recog‐
nise dangers (/ page 131).
Displa yson the multifunction display
R h (grey): cruise control is selected but
not yet acti vated.
R h (green): cruise control is active.
A stored speed appears along with theh dis‐
pla y.
% The segments extending from the cur rent
st ored speed tothe end of the scale, or to
th e set winter tyre limit, light up in the
speedome ter.
Sy stem limits
Cruise control may be unable tomaintain the
st ored speed on uphill gradients. The stored
speed is resumed when the gradient evens out.
Change into a lo werge ar in good time on long
and steep downhill gradients. Take particular
no te ofthis when driving a laden vehicle. By
doing so, you will make use of the engine's brak‐
ing ef fect. This relie vesth e load on the brake sy
stem and pr events the brakes from overheat‐
ing and wearing tooqu ickl y.
Do not use cruise control in thefo llowing situa‐
tions:
R In traf fic situations whi chrequ ire frequent
ch anges of speed, e.g. in heavy traf fic, on
winding roads.
R On slippe ryroads. Accelerating can cause
th e drive wheels tolose traction and the
ve hicle could then skid.
R Ifyo u are driving when visibility is poor.
Fu nction of the limi ter
The limiter restricts the speed of theve hicle. To
re duce the speed tothe set speed, the limiter
applies the brakes automaticall y.
Yo u can limit the speed as follo ws:
R Variable: for speed restrictions, e.g. in built-
up areas.
R Perm anen t:for long-term speed restrictions,
e.g. when driving in winter tyre mode.
The variable limiter is operated using the cor re‐
sponding steering wheel buttons. You can store any
road speed from 30 km/h to250 km/h or
up tothe set winter tyre limit. You can also per‐
fo rm settings while theve hicle is stationary if
th eve hicle has been star ted.
Obser vethe no tes on driving sy stems and your
re sponsibility; you may otherwise failto recog‐
nise dangers (/ page 131).
Dis playson the multifunction display
R È (gre y): variable limiter is selec ted but
not yet acti vated.
R È (flashes gr ey):va riable limiter is temp o‐
ra rily passive.
R È (green): variable limiter is activated.
A stored speed appears along with theÈ dis‐
pla y.The segments in the speedome ter light up,
up tothe cur rently stored speed.
% When the driving speed is greater than the
st ored speed, display Èflashes.
Kickd own
If yo u depress the accelerator pedal be yond the
pressure point (kickdown), theva riable limiter
swit ches topassive mode. The Limiter passive
message appears in the multifunction displa y. Driving and pa
rking 13 9
Page 144 of 381
%
When you swit choff theve hicle, the last
speed stored is cleared.
Increasing/decreasing thesto red speed #
1 km/h: press rocker switch 1upM or
down Ntothe pressure point, or press
and hold (increments of 1-km/h).
or #
10km/h: press and hold rock er switch 1
up M or down Nbeyond the pressure
point (increments of 10km/h).
or #
Accelerate theve hicle tothe desired speed
and press rocker switch 1upM.
Deactivating cruise control or theva riable
limi ter #
Select Owith th e left rock er switch.
% Ifyo u brake, deactivate ESP ®
or if ESP ®
inter venes, cruise control is deacti vated. The
va riable limiter is not deactivated. Pe
rm anent limi ter
If th eve hicle should ne verexc eed a specific
speed (e.g. for driving in winter tyre mode), you
can set this speed with the permanent limiter.
Yo u do this by limiting the speed toava lue
between 160 km/h and 240 km/h in the multi‐
media sy stem (/ page141).
Shortly before the set speed is reached, it
appears in the multifunction displa y.When you
confirm the message, display messages no lon‐
ge r appear until you swit choff theve hicle. The
speed will only be displa yed again once theve hi‐
cle has been restar ted or if the set speed is
ch anged.
The permanent limiter does not swit chtopas‐
sive mode even du ring kickdown and the driven
speed remains below the set speed.
Setting the speed limitation for winter tyres
Multimedia sy stem:
4 Vehicle 5
î Vehicle settings
5 Winter tyres limit #
Select a speed or deactivate the function. Ac
tive Di stance Assist DISTRO NIC Fu
nction of Active Di stance Assist
DISTRO NIC
Ac tive Dis tance Assi stDISTRONIC maintains the
set speed on free-flowing roads. If vehicles in
front are de tected, the set dis tance is main‐
ta ined, if necessar y,until theve hicle comes to a
halt. The vehicle accelerates or brakes depend‐
ing on the dis tance totheve hicle in front and
th e set speed. The speed (in thera nge between
30 km/h and 200 km/h) and the dis tance tothe
ve hicle in front are set and sa ved on thesteering
wheel.
Other features of Active Dis tance Assi st
DISTRONIC:
R Adjusts the driving style depending on the
selected drive program (fuel ef ficient, com‐
fo rtable or dynamic) (/ page117)
R Initiates ac celerationtothestored speed if
th e turn signal indicator is switched on to
ch ange totheove rtaking lane
Obse rveth e no tes on driving sy stems and your
re sponsibility; you may otherwise failto recog‐
nise dangers (/ page 131). Driving and parking
141
Page 149 of 381
R
The vehicle is stationar y.
R The driver's door is closed or the seat belt on
th e driver's side is fastened.
R The engine is running or has been au tomati‐
cally switched off bythe ECO start/ stop
function.
R The electric parking brake is released.
R Active Dis tance Assi stDISTRONIC is deacti‐
va ted.
R The transmission is in position h,kori.
Ac tivating the HOLD function #
Dep ress the brake pedal, and af ter a short
time quickly depress fur ther until theë
display appears in the multifunction displa y.#
Release the brake pedal.
Deactivating the HOLD function #
Depress the accelerator pedal topull away.
or #
Depress the brake pedal until theë dis‐
play disappears from the multifunction dis‐
pla y. The HOLD function is deactivated in
thefo llow‐
ing situations:
R Active Dis tance Assi stDISTRONIC is acti va‐
te d.
R The transmission is shif tedto position j.
R The vehicle is secured with the electric park‐
ing brake.
In thefo llowing situations, theve hicle is held by
transmission position jand/or bythe electric
parking brake:
R The seat belt is unfas tened and the driver's
door is opened.
R The vehicle is switched off.
R There is a malfunction in the sy stem or the
po we r supp lyis insuf ficient. RACE
START Fu
nction of RACE START
RACE START enables optimal vehicle accelera‐
tion from a standstill. Forth is, a suitably high-
gr ip road sur face is required, the tyres and vehi‐
cle must also be in good condition. %
RACE START is only available af terth eve hi‐
cle has been run in (/ page 107 ).
% RACE START may not be used on normal
ro ads. RACE START mu stonly be activated
and used on dedicated race circuits, not on
public roads.
Be sure toread the saf ety no tes and infor‐
mation on ESP ®
(/ page 133). &
WARNING Risk of skidding and having
an accident from wheels spinning
If yo u use RACE STAR T,depending on the
ESP ®
mode selected, there is an increased
ri sk of skidding and having an accident. #
Make sure that no persons or obs tacles
are in the close vicinity of your vehicle. Ac
tivating RACE START
Re quirements:
R the driver's door is closed.
R the engine is running and the transmission
and engine are at normal operating temp era‐
ture. 14 6
Driving and pa rking