light MERCEDES-BENZ B-Class 2016 W246 Comand Manual
[x] Cancel search | Manufacturer: MERCEDES-BENZ, Model Year: 2016, Model line: B-Class, Model: MERCEDES-BENZ B-Class 2016 W246Pages: 246, PDF Size: 6.73 MB
Page 89 of 246
Route guidance
General notes
Always observe the traffic regulations when
driving. Road and traffic rules and regulations
always have priority over system driving rec-
ommendations.
COMAND calculates the route to the destina-
tion without taking account of the following,
for example:
Rtraffic lights
Rstop and yield signs
Rparking or stopping restrictions
Rroad narrowing
Rtemporary traffic rules and regulations
COMAND can give differing navigation com-
mands if the actual street/traffic situation
does not correspond with the digital map's
data. For example, if the road layout or the
direction of a one-way street has been
changed.
Route guidance begins once a route has been
calculated (
Ypage 71).
COMAND guides you to your destination by
means of navigation announcements in the
form of audible navigation announcements
and route guidance displays.
Navigation messages guide you during the
journey without distracting you from traffic
conditions or driving. Please always use this
feature instead of consulting the map display
for directions. The symbols or the map display
could distract you from traffic conditions and
driving.
The route guidance displays can be seen if
navigation mode is switched on.
If you do not follow the navigation announce-
ments or if you leave the ca
lculated route,
COMAND automatically calculates a new
route to the destination.
If the digital map contains the corresponding information, the following applies:
Rduring route guidance, COMAND tries to
avoid roads with restricted access. These include, for example, roads which are
closed to through-traffic.
Rroads that have time restrictions (e.g.
closed on Sundays and public holidays) are
considered for route guidance on days
when they are open. For this purpose, the
relevant times must be correctly stored in
the database.
Change of direction
Overview
Changes of direction have three phases:
RPreparation phase
RAnnouncement phase
RChange-of-direction phase
Changes in direction are also shown in the
multifunction display of the instrument clus-
ter (see the vehicle Operator's Manual).
Preparation phase
COMAND prepares you for the upcoming
change of direction, e.g. with the announce-
ment "Prepare to turn right". You see the full-
screen map.
Announcement phase
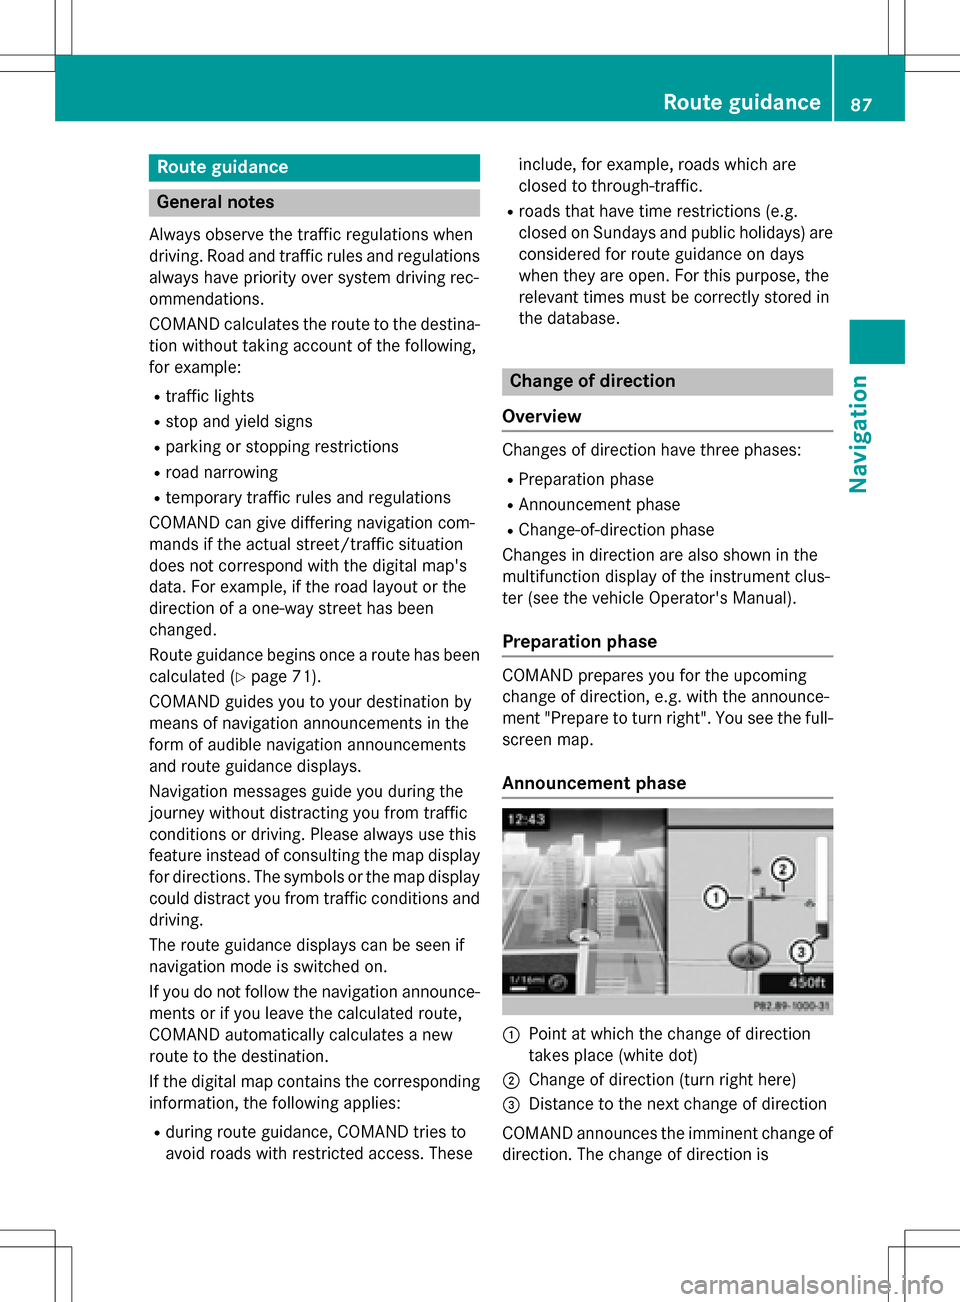
:Point at which the change of direction
takes place (white dot)
;Change of direction (turn right here)
=Distance to the next change of direction
COMAND announces the imminent change of
direction. The change of direction is
Route guidance87
Navigation
Z
Page 90 of 246
announced ahead of time, with the announce-
ment "Turn right in 300 meters", for example.
The display is now split into two sectors. The
map is shown on the left side of the display,
and a detailed image of the intersection or a
3D image of the imminent change of directionis shown on the right side of the display.
Change-of-direction phase
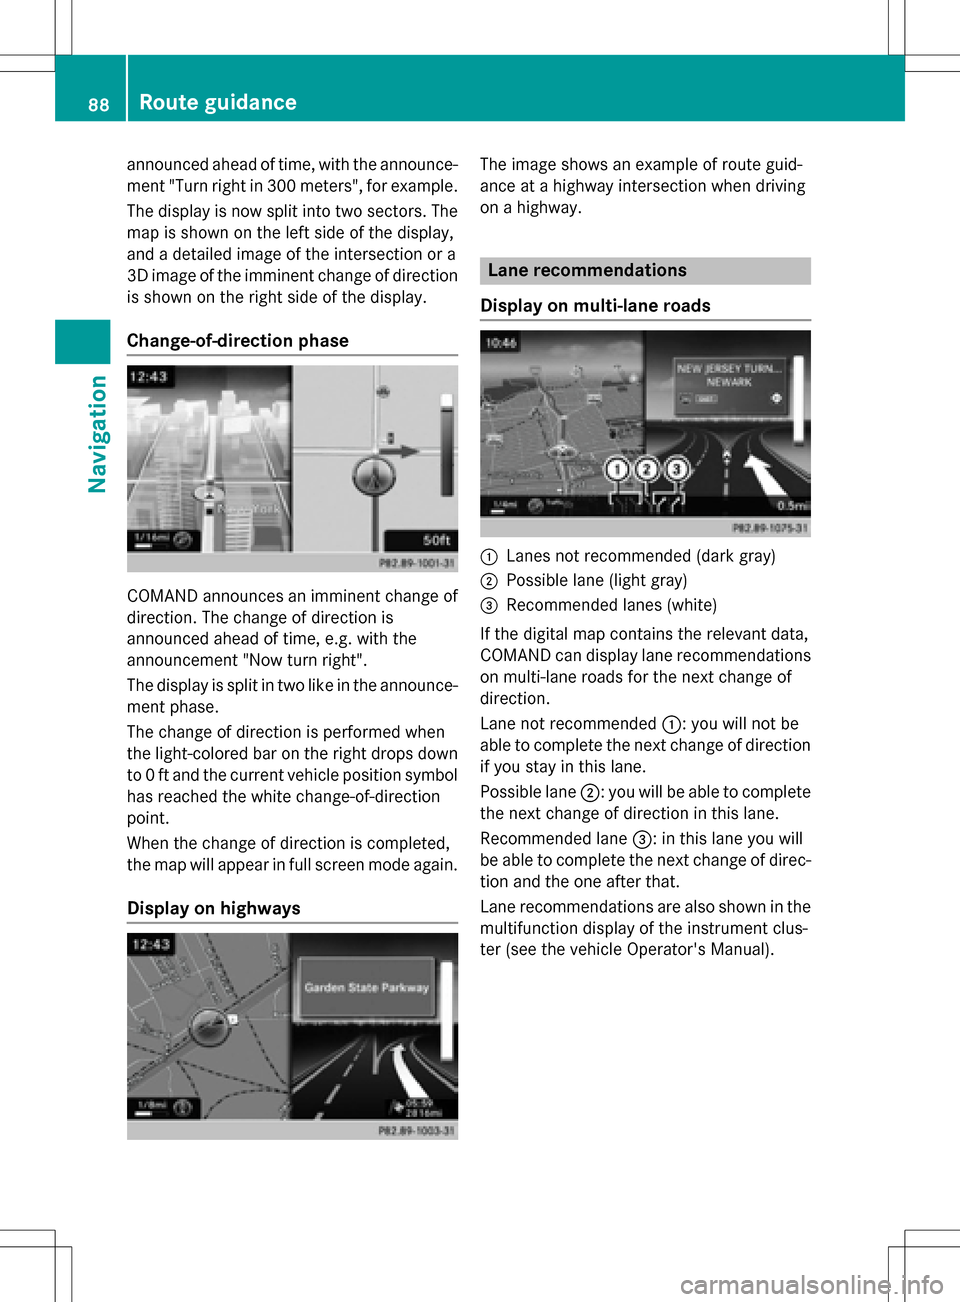
COMAND announces an imminent change of
direction. The change of direction is
announced ahead of time, e.g. with the
announcement "Now turn right".
The display is split in two like in the announce-
ment phase.
The change of direction is performed when
the light-colored bar on the right drops down
to 0 ft and the current vehicle position symbol
has reached the white change-of-direction
point.
When the change of direction is completed,
the map will appear in full screen mode again.
Display on highways
The image shows an example of route guid-
ance at a highway intersection when driving
on a highway.
Lane recommendations
Display on multi-lane roads
:Lanes not recommended (dark gray)
;Possible lane (light gray)
=Recommended lanes (white)
If the digital map contains the relevant data,
COMAND can display lane recommendations
on multi-lane roads for the next change of
direction.
Lane not recommended :: you will not be
able to complete the next change of direction
if you stay in this lane.
Possible lane ;: you will be able to complete
the next change of direction in this lane.
Recommended lane =: in this lane you will
be able to complete the next change of direc-
tion and the one after that.
Lane recommendations are also shown in the
multifunction display of the instrument clus-
ter (see the vehicle Operator's Manual).
88Route guidance
Navigation
Page 91 of 246
Approaching new lanes
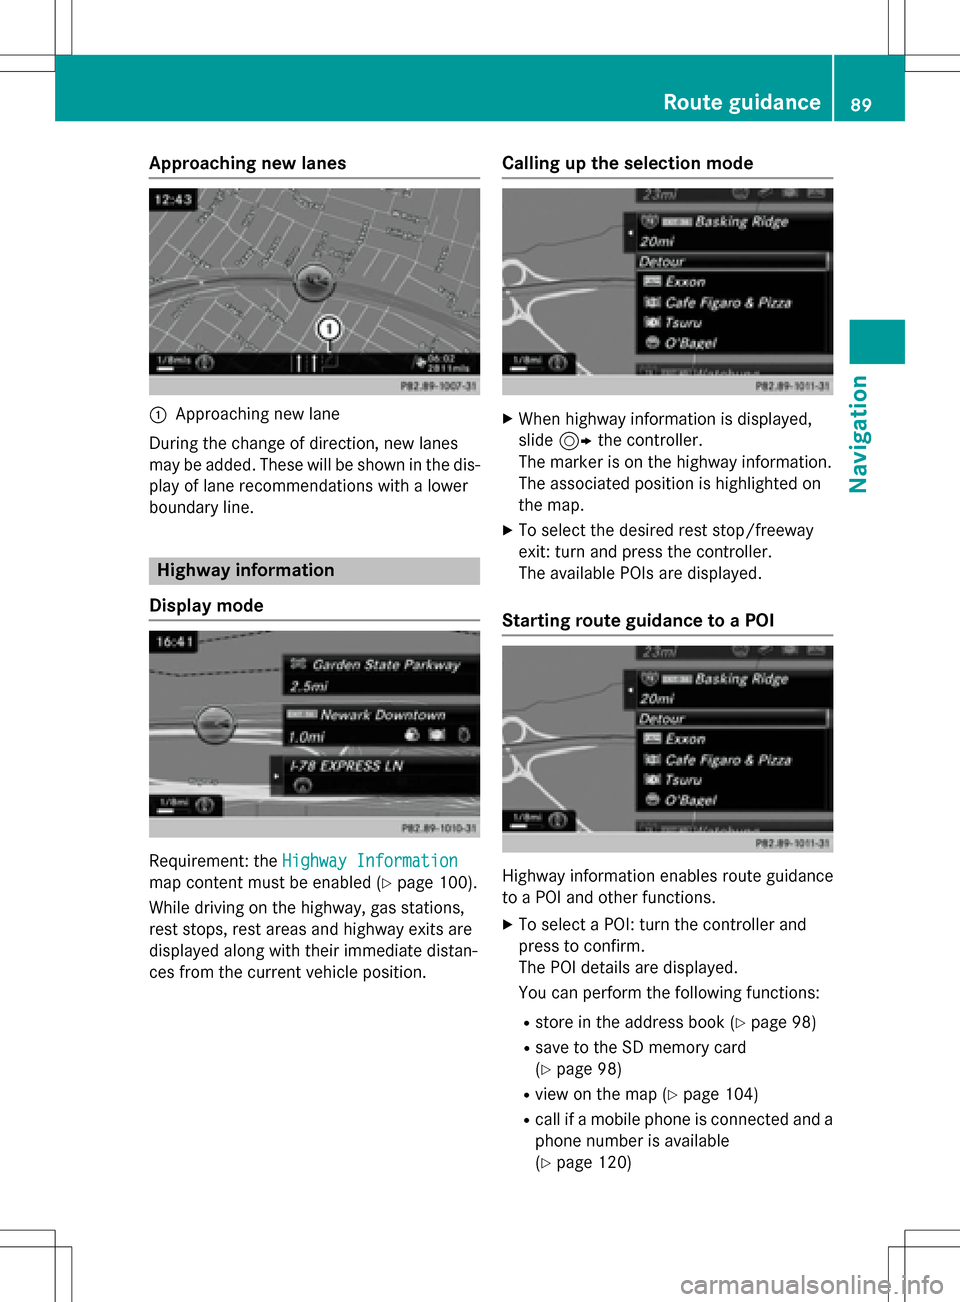
:Approaching ne wlan e
During th echang eof direction ,ne wlanes
may be added .These will be shown in th edis-
play of lan erecommendation swit h a lower
boundary line.
Highway inform ation
Display mode
Requirement :th eHighwa yInformation
map conten tmus tbe enabled (Ypage 100).
Whil edriving on th ehighway, gas stations,
res tstops ,res tareas and highway exit sare
displayed alon gwit htheir immediat edistan-
ce sfrom th ecurren tvehicl eposition .
Calling up the selection mode
XWhen highway information is displayed,
slide 9 thecontroller .
The marke ris on th ehighway information .
The associated position is highlighte don
th emap.
XTo select th edesired res t stop/freeway
exit :tur nand pre ssthecontroller .
The available POIsare displayed.
Starting route guidance to a POI
Highway information enables rout eguidance
to aPOI and other functions.
XTo select a POI:turnth econtroller and
pre ssto confirm .
The POIdetails are displayed.
You can perfor mthefollowin gfunctions:
Rstore in th eaddr essbook (Ypage 98 )
Rsaveto theSD memory car d
(
Ypage 98 )
Rviewon th emap (Ypage 104)
Rcall if amobile phon eis connecte dand a
phon enumber is available
(
Ypage 120)
Route guidance89
Navigation
Z
Page 97 of 246
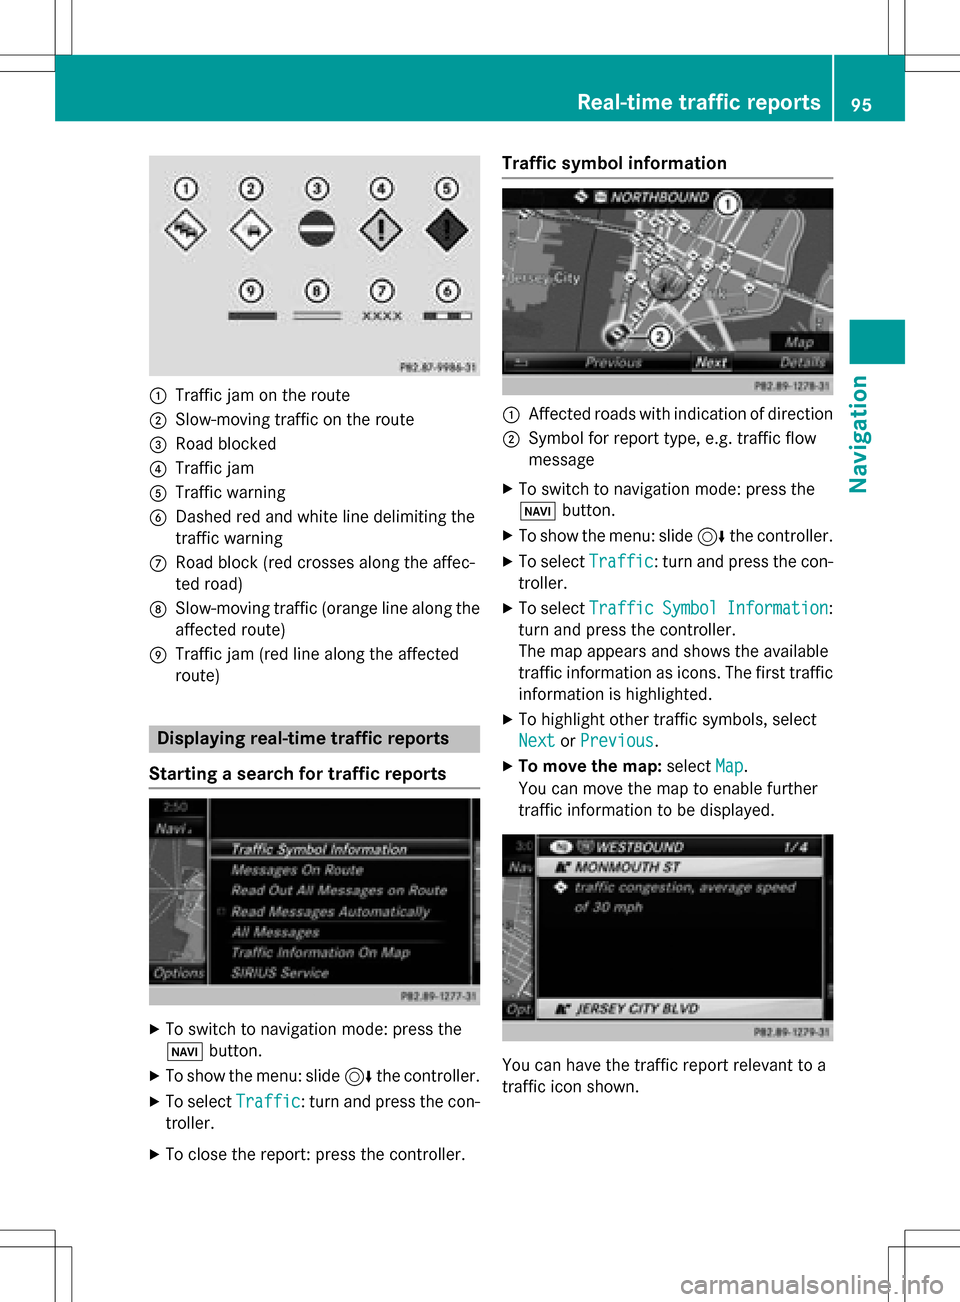
:Traffic jam on the route
;Slow-moving traffic on the route
=Road blocked
?Traffic jam
ATraffic warning
BDashed red and white line delimiting the
traffic warning
CRoad block (red crosses along the affec-
ted road)
DSlow-moving traffic (orange line along the
affected route)
ETraffic jam (red line along the affected
route)
Displaying real-time traffic reports
Starting a search for traffic reports
XTo switch to navigation mode: press the
Ø button.
XTo show the menu: slide 6the controller.
XTo select Traffic: turn and press the con-
troller.
XTo close the report: press the controller.
Traffic symbol information
:Affected roads with indication of direction
;Symbol for report type, e.g. traffic flow
message
XTo switch to navigation mode: press the
Ø button.
XTo show the menu: slide 6the controller.
XTo select Traffic: turn and press the con-
troller.
XTo select TrafficSymbolInformation:
turn and press the controller.
The map appears and shows the available
traffic information as icons. The first traffic
information is highlighted.
XTo highlight other traffic symbols, select
Next
or Previous.
XTo move the map: selectMap.
You can move the map to enable further
traffic information to be displayed.
You can have the traffic report relevant to a
traffic icon shown.
Real-time traffic reports95
Navigation
Z
Page 102 of 246
XTo switch to navigation mode:press the
ß button.
XTo show the menu: slide6the control-
ler.
XTo select Destination: turn and press the
controller.
XSelect From Previous Destinations.
The "Last destinations" memory appears.
XTo save the destination: select the desti-
nation.
The destination address appears.
XStore the destination in the address book
(
Ypage 98).
XSave the destination to the SD card
(
Ypage 99).
XTo view the details: while in the "Last des-
tinations" memory, turn the controller and
highlight the entry.
XSlide 9the controller.
A menu appears.
XTo select Details: press the controller.
iThe destination address can be changed if
desired.
XTo delete one or all destinations: while in
the "Last destinations" memory, turn the
controller and highlight the entry.
XSlide 9the controller.
A menu appears.
XTo select DeleteorDelete All: turn and
press the controller.
A prompt appears.
XSelect YesorNo.
Selecting Yes
deletes the selected desti-
nation or all destinations.
Map functions
General notes
Company logos displayed on the map are
trademarks of the respective companies and
used solely for the purpose of indicating the
locations of these companies. The use of such
logos on the map does not indicate approval of, support of or advertising by these compa-
nies for the navigation system itself.
Map settings
Setting the map scale
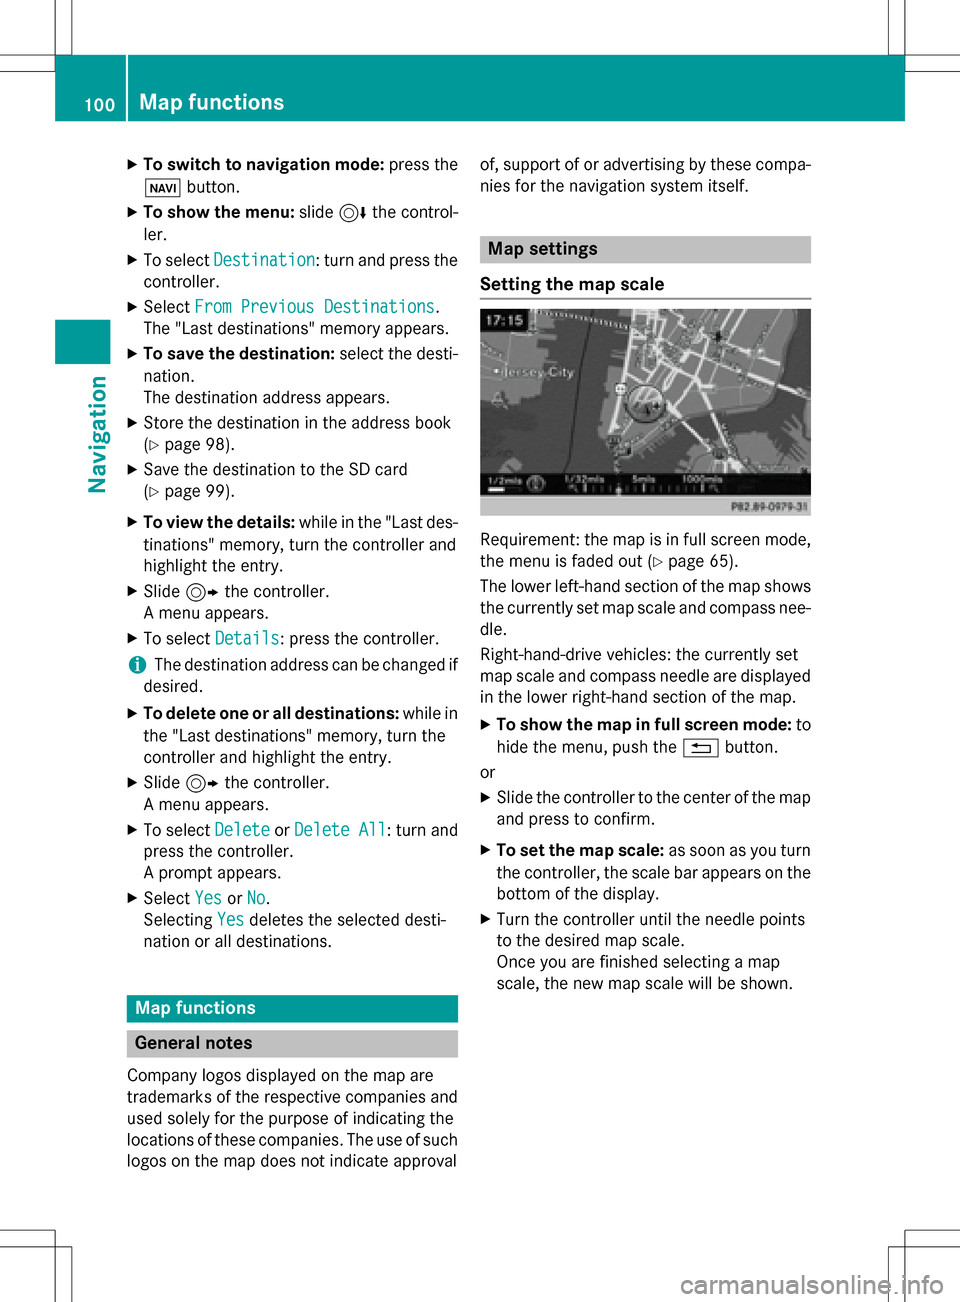
Requirement: the map is in full screen mode,
the menu is faded out (
Ypage 65).
The lower left-hand section of the map shows
the currently set map scale and compass nee-
dle.
Right-hand-drive vehicles: the currently set
map scale and compass needle are displayed
in the lower right-hand section of the map.
XTo show the map in full screen mode: to
hide the menu, push the %button.
or
XSlide the controller to the center of the map
and press to confirm.
XTo set the map scale: as soon as you turn
the controller, the scale bar appears on the bottom of the display.
XTurn the controller until the needle points
to the desired map scale.
Once you are finished selecting a map
scale, the new map scale will be shown.
100Map functions
Navigation
Page 109 of 246
digital map. The update will be completed
more quickly if the vehicle is stationary. If you
start the update with the engine switched off
and the starter battery has insufficient power,
COMAND may automatically switch off. This
protects the battery. In order to prevent this,
a suitable power supply to the vehicle must be
maintained.
Navigation functions
Calling up the navigation system
menu
XTo switch to navigation mode: press the
ß button.
XTo show the menu: slide5the control-
ler.
Navi
is highlighted in the main function bar.
XPress the controller.
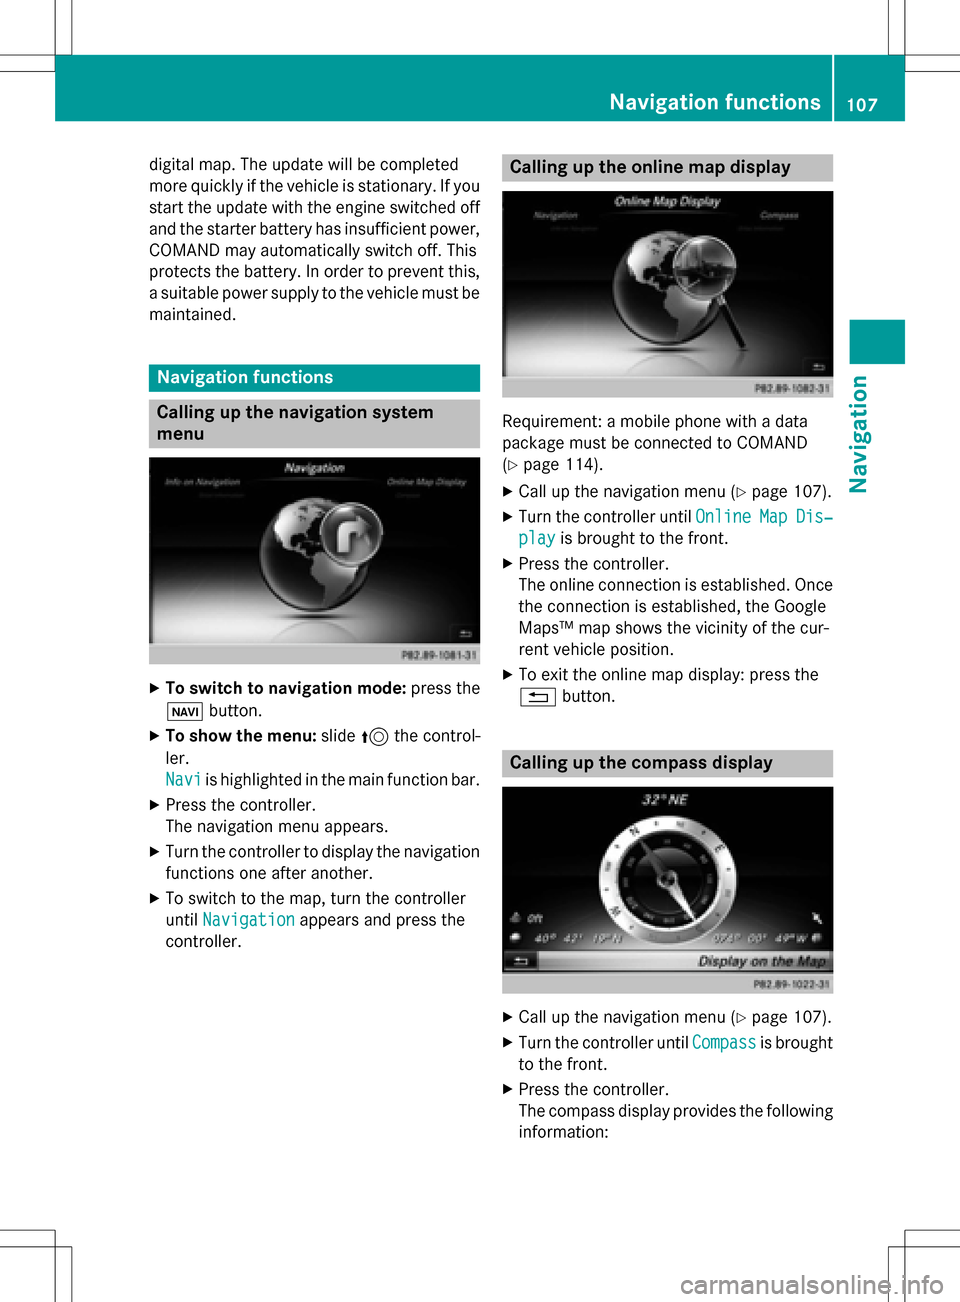
The navigation menu appears.
XTurn the controller to display the navigation
functions one after another.
XTo switch to the map, turn the controller
until Navigation
appears and press the
controller.
Calling up the online map display
Requirement: a mobile phone with a data
package must be connected to COMAND
(
Ypage 114).
XCall up the navigation menu (Ypage 107).
XTurn the controller until OnlineMapDis‐
playis brought to the front.
XPress the controller.
The online connection is established. Once
the connection is established, the Google
Maps™ map shows the vicinity of the cur-
rent vehicle position.
XTo exit the online map display: press the
%button.
Calling up the compass display
XCall up the navigation menu (Ypage 107).
XTurn the controller until Compassis brought
to the front.
XPress the controller.
The compass display provides the following information:
Navigation functions107
Navigation
Z
Page 120 of 246
Only one mobile phone can be connected at
any one time for telephony. The currently
connected mobile phone is indicated by the#
dot in the device list.
iYou can only switch to another authorized
mobile phone if you are not currently mak-
ing a call.
De-authorizing (disconnecting) a
mobile phone
Mercedes-Benz USA, LLC recommends de-
authorization in COMAND and on the mobile
phone. Subsequent authorization may other-
wise fail.
XTo call up the telephone menu: press the
% button.
XTo switch to the menu bar: slide 6the
controller.
XTo select Conn. Device: turn and press
the controller.
The device list is displayed.
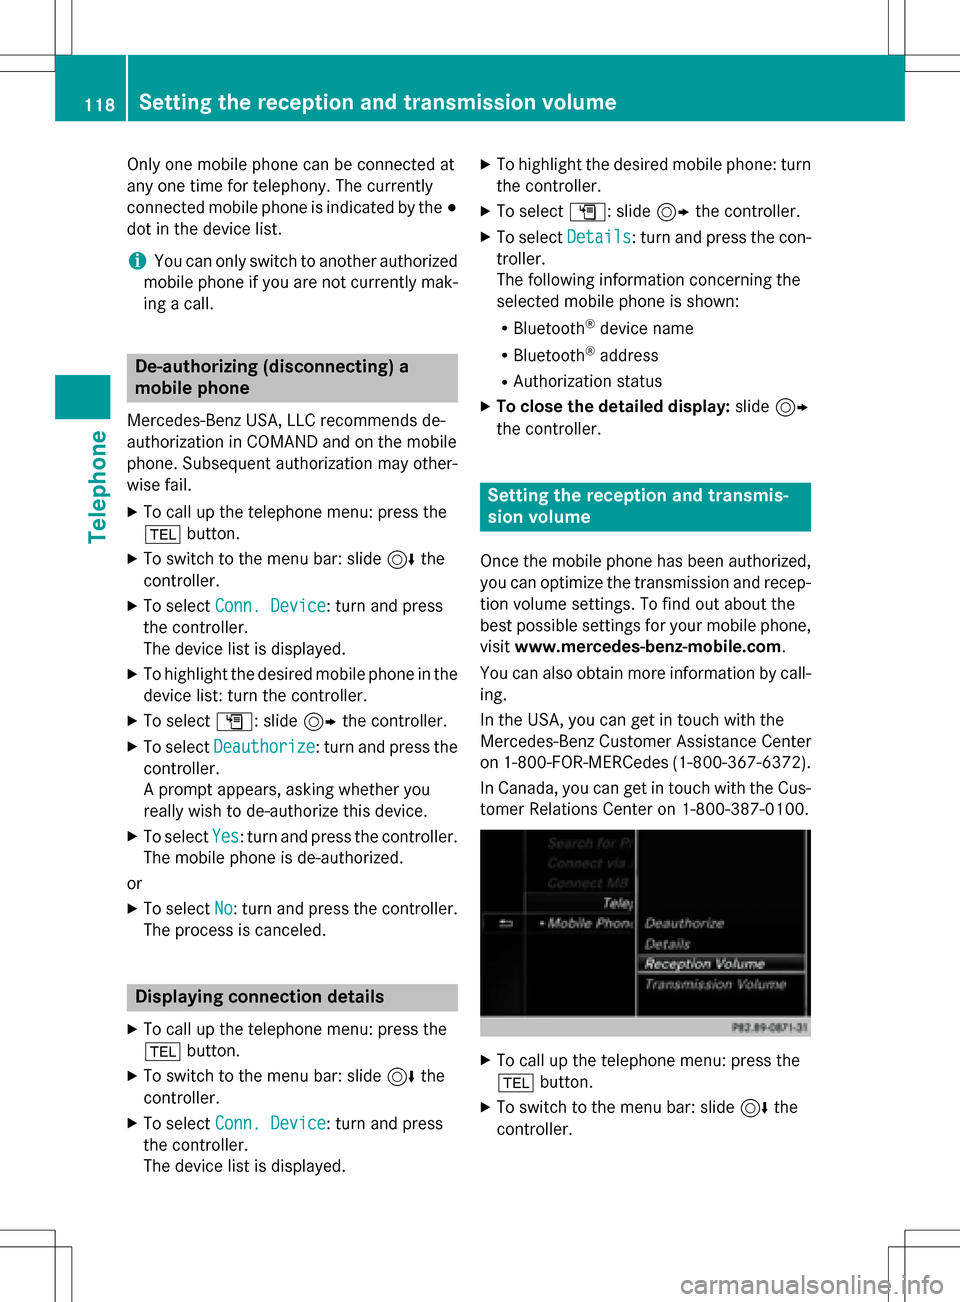
XTo highlight the desired mobile phone in the
device list: turn the controller.
XTo select G: slide 9the controller.
XTo select Deauthorize: turn and press the
controller.
A prompt appears, asking whether you
really wish to de-authorize this device.
XTo select Yes: turn and press the controller.
The mobile phone is de-authorized.
or
XTo select No: turn and press the controller.
The process is canceled.
Displaying connection details
XTo call up the telephone menu: press the
% button.
XTo switch to the menu bar: slide 6the
controller.
XTo select Conn. Device: turn and press
the controller.
The device list is displayed.
XTo highlight the desired mobile phone: turn
the controller.
XTo select G: slide 9the controller.
XTo select Details: turn and press the con-
troller.
The following information concerning the
selected mobile phone is shown:
RBluetooth®device name
RBluetooth®address
RAuthorization status
XTo close the detailed display: slide9
the controller.
Setting the reception and transmis-
sion volume
Once the mobile phone has been authorized,
you can optimize the transmission and recep- tion volume settings. To find out about the
best possible settings for your mobile phone,
visit www.mercedes-benz-mobile.com .
You can also obtain more information by call-
ing.
In the USA, you can get in touch with the
Mercedes-Benz Customer Assistance Center
on 1-800-FOR-MERCedes (1-800-367-6372).
In Canada, you can get in touch with the Cus- tomer Relations Center on 1-800-387-0100.
XTo call up the telephone menu: press the
% button.
XTo switch to the menu bar: slide 6the
controller.
118Setting the reception and transmission volume
Telephone
Page 121 of 246
XTo selectConn. Device: turn and press
the controller.
The device list appears.
XTo highlight the desired mobile phone in the
device list: turn the controller.
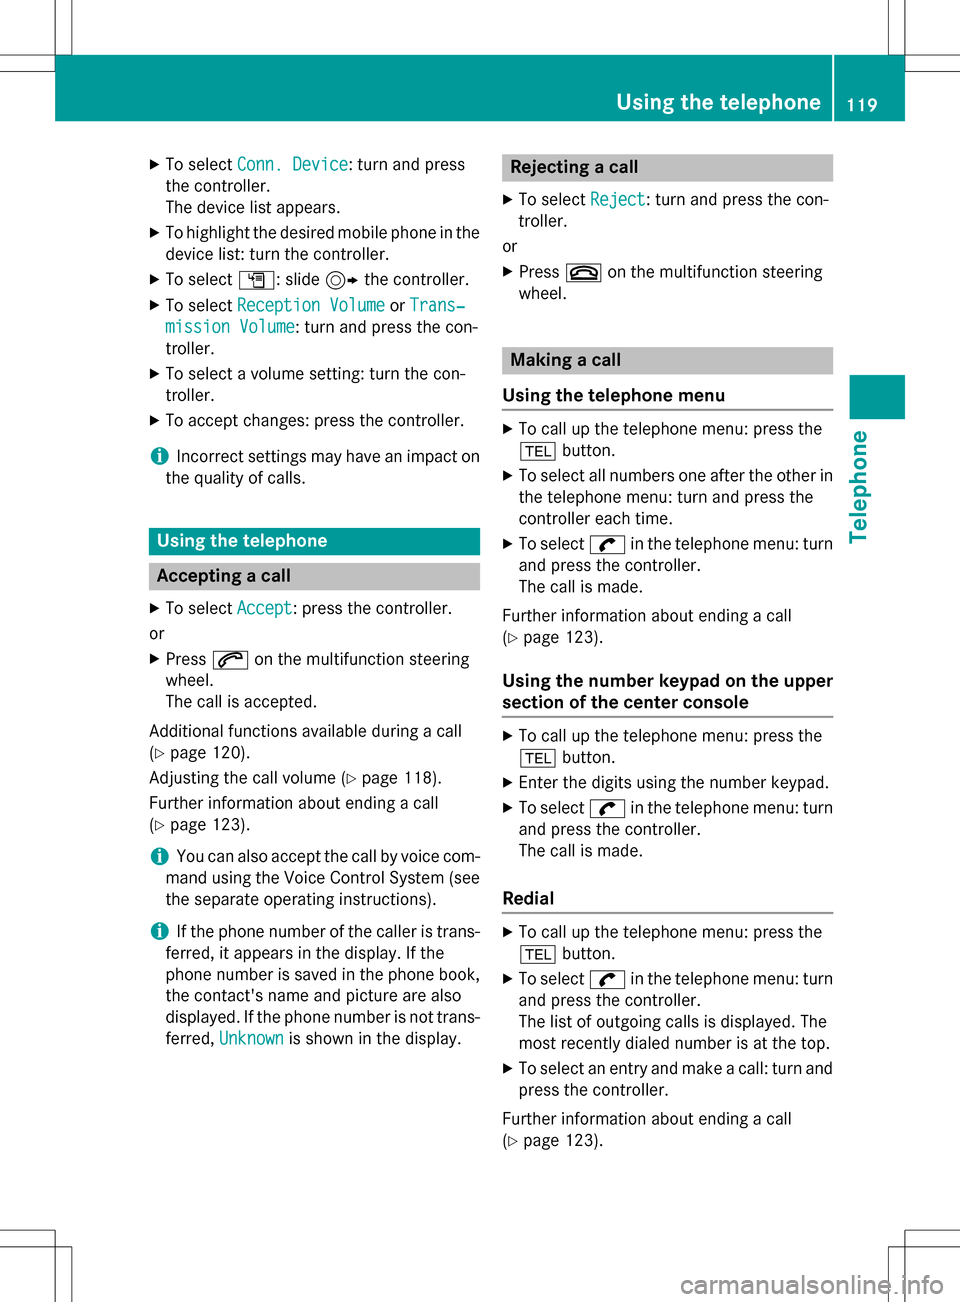
XTo select G: slide 9the controller.
XTo select Reception VolumeorTrans‐
mission Volume: turn and press the con-
troller.
XTo select a volume setting: turn the con-
troller.
XTo accept changes: press the controller.
iIncorrect settings may have an impact on
the quality of calls.
Using the telephone
Accepting a call
XTo select Accept: press the controller.
or
XPress 6on the multifunction steering
wheel.
The call is accepted.
Additional functions available during a call
(
Ypage 120).
Adjusting the call volume (
Ypage 118).
Further information about ending a call
(
Ypage 123).
iYou can also accept the call by voice com-
mand using the Voice Control System (see
the separate operating instructions).
iIf the phone number of the caller is trans-
ferred, it appears in the display. If the
phone number is saved in the phone book,
the contact's name and picture are also
displayed. If the phone number is not trans-
ferred, Unknown
is shown in the display.
Rejecting a call
XTo select Reject: turn and press the con-
troller.
or
XPress ~on the multifunction steering
wheel.
Making a call
Using the telephone menu
XTo call up the telephone menu: press the
% button.
XTo select all numbers one after the other in
the telephone menu: turn and press the
controller each time.
XTo select win the telephone menu: turn
and press the controller.
The call is made.
Further information about ending a call
(
Ypage 123).
Using the number keypad on the upper
section of the center console
XTo call up the telephone menu: press the
% button.
XEnter the digits using the number keypad.
XTo select win the telephone menu: turn
and press the controller.
The call is made.
Redial
XTo call up the telephone menu: press the
% button.
XTo select win the telephone menu: turn
and press the controller.
The list of outgoing calls is displayed. The
most recently dialed number is at the top.
XTo select an entry and make a call: turn and
press the controller.
Further information about ending a call
(
Ypage 123).
Using the telephone119
Telephone
Z
Page 122 of 246
Using call lists
XTo call up the telephone menu: press the
%button.
XTo switch to the menu bar: slide 6the
controller.
XTo select Call Lists: turn and press the
controller.
XTo select Calls ReceivedorCalls
Dialed: turn and press the controller.
The relevant list is displayed.
XTo select an entry and make a call: turn and
press the controller.
Further information about ending a call
(
Ypage 123).
Using the phone book
XTo call up the telephone menu: press the
% button.
XTo select Namein the telephone menu: turn
and press the controller.
XSearch for and call a contact (Ypage 124).
Further information about ending a call
(
Ypage 123).
Using speed dial
Option 1
XTo call up the telephone menu: press the
% button.
XTo highlight a number from the character
bar: turn the controller.
XPress the controller for longer than two
seconds.
The telephone menu displays the selected
entry. The number is dialed.
Option 2
XTo call up the telephone menu: press the
% button.
XTo switch to the menu bar: slide 6the
controller.
XTo select Call Lists: turn and press the
controller.
XTo select Speed Dial Preset List: turn
and press the controller.
The speed dial list is displayed.
XTo select an entry and make a call: turn and
press the controller.
The telephone menu displays the selected
entry. The number is dialed.
Further information on setting up speed dial
(
Ypage 137).
Further information about ending a call
(
Ypage 123).
Functions available during a call
Overview
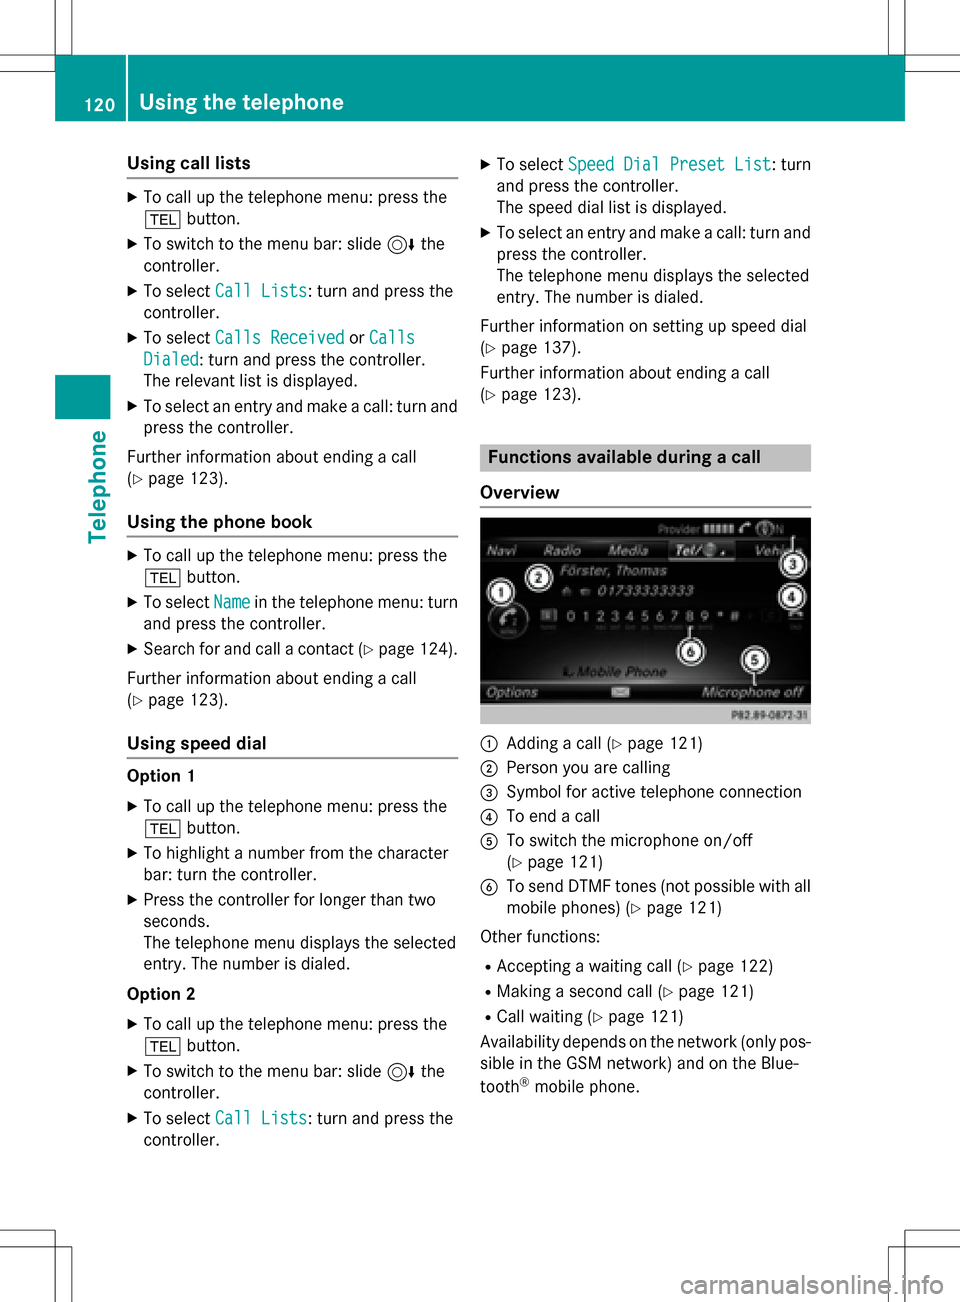
:Adding a call (Ypage 121)
;Person you are calling
=Symbol for active telephone connection
?To end a call
ATo switch the microphone on/off
(
Ypage 121)
BTo send DTMF tones (not possible with all
mobile phones) (
Ypage 121)
Other functions:
RAccepting a waiting call (Ypage 122)
RMaking a second call (Ypage 121)
RCall waiting (Ypage 121)
Availability depends on the network (only pos- sible in the GSM network) and on the Blue-
tooth
®mobile phone.
120Using the telephone
Telephone
Page 123 of 246
Adding a call
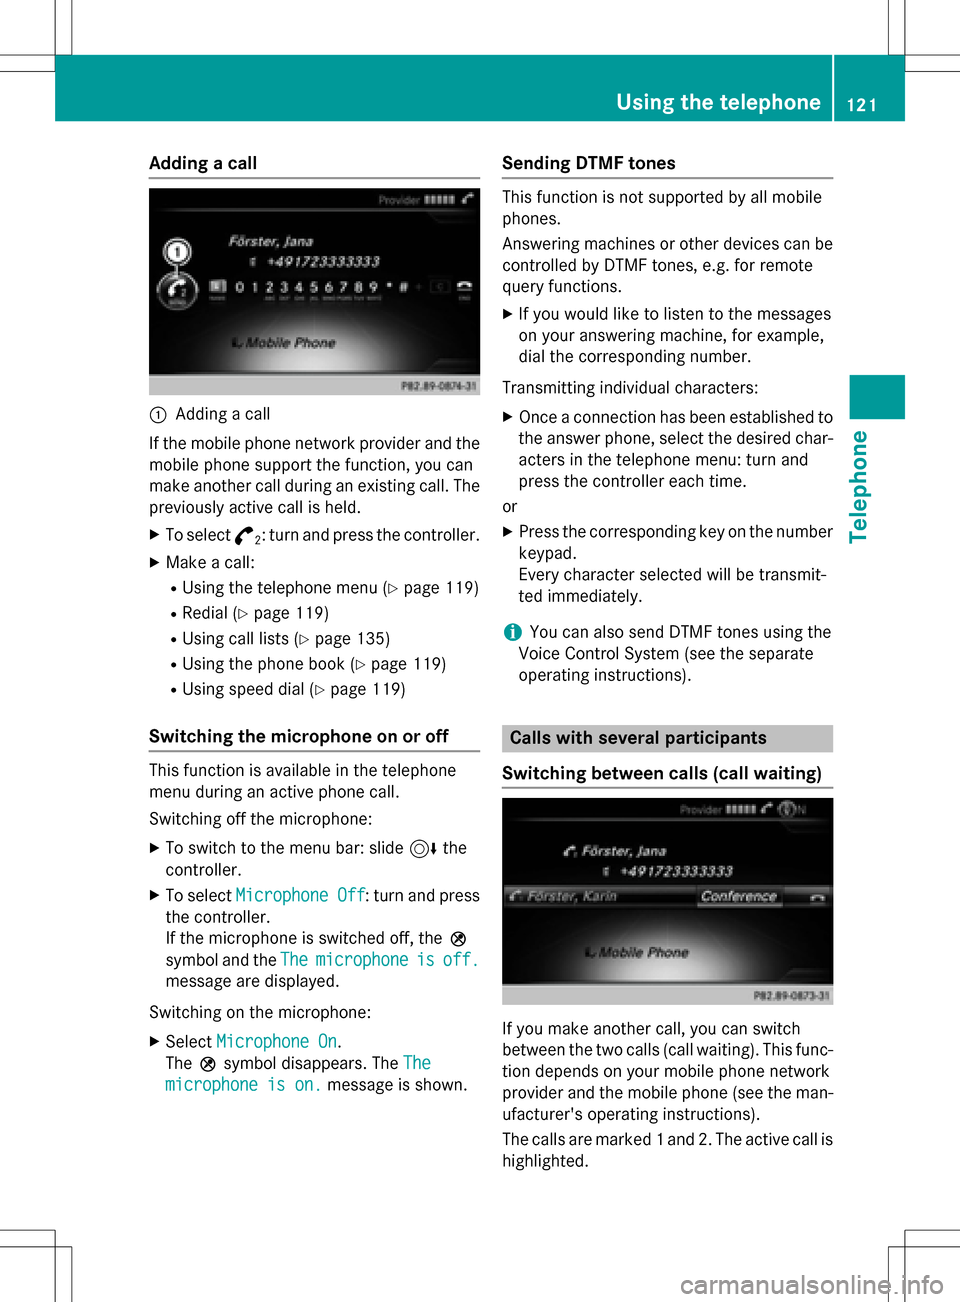
:Adding acall
If th emobile phone network provide rand th e
mobile phon esupport th efunction ,you can
mak eanother call during an existing call .The
previously active call is held .
XTo select°2:tur nand press th econtroller .
XMake acall:
RUsing th etelephon emen u (Ypage 119)
RRedial (Ypage 119)
RUsing call list s (Ypage 135)
RUsing thephone book (Ypage 119)
RUsing speeddial (Ypage 119)
Switching the microphone on oroff
This function is available in th etelephon e
men uduring an active phone call .
Switchin goff th emicrophone:
XTo switch to th emen ubar: slide 6the
controller .
XTo selectMicrophon eOff:tur nand press
th econtroller .
If th emicrophon eis switched off ,th eQ
symbol and th eThe
microphon eisoff.
message are displayed.
Switchin gon th emicrophone:
XSelec tMicrophon eOn.
The Qsymbol disappears. The The
microphoneis on.message is shown.
Sending DTMF tones
This function is no tsupported by all mobile
phones.
Answering machines or other device scan be
controlled by DTMF tones, e.g. for remot e
quer yfunctions.
XIf you would lik eto listen to th emessage s
on your answering machine, for example,
dial th ecorresponding number .
Transmitting individual characters :
XOnceaconnection has been established to
th eanswer phone, select th edesired char-
acters in th etelephon emenu: tur nand
press th econtroller eac htime.
or
XPre ssthecorresponding ke yon th enumber
keypad.
Every characte rselected will be transmit -
te dimmediately.
iYou can also sen dDTMF tone susin gth e
Voic eControl Syste m(see th eseparat e
operating instructions).
Calls with several pa rticipants
Switching between calls (call waiting)
If you mak eanother call ,you can switch
between th etwo call s(call waiting). This func-
tion depend son your mobile phone network
provide rand th emobile phone (see th eman -
ufacturer' soperating instructions).
The call sare marke d 1and 2. The active call is
highlighted.
Using the telephone121
Telephone
Z