Display off MERCEDES-BENZ B-Class 2017 W246 Comand Manual
[x] Cancel search | Manufacturer: MERCEDES-BENZ, Model Year: 2017, Model line: B-Class, Model: MERCEDES-BENZ B-Class 2017 W246Pages: 202, PDF Size: 6.35 MB
Page 149 of 202
Selecting an active partition
XSelect a USB storage device (Ypage 144).
XTo selectOptionsin the media menu bar:
turn and press the controller.
XSelect Select Active Partition.
Notes on copyright
Audio/video files that you create or reproduce
yourself for playback are generally subject to
copyright protection.
In many countries, reproductions, even for pri-
vate use, are not permitted without the prior
consent of the copyright holder.
Make sure that you know about the applicable
copyright regulations and that you comply with
these.
Notes on CDs/DVDs
!Do not affix stickers or labels to the discs.
They could peel off and damage the drive.
The drive is designed to receive EN 60908 standard discs. Therefore, you can
only use discs with a maximum thickness of
1.3 mm.
If you insert thicker discs, e.g. those that con-
tain data on both sides (DVD on one side and
audio data on the other), they cannot be ejec-
ted and can damage the drive.
Do not use discs with an 8 cm diameter, even
when using an adapter. Only use round discs
with a 12 cm diameter.
Discs with copy protection are not compatible
with the audio CD standard and therefore may
not be able to be played.
Playback problems may occur when playing
copied discs.
There may be playback problems if you play CDs
that you have copied yourself with a storage
capacity of more than 700 MB.
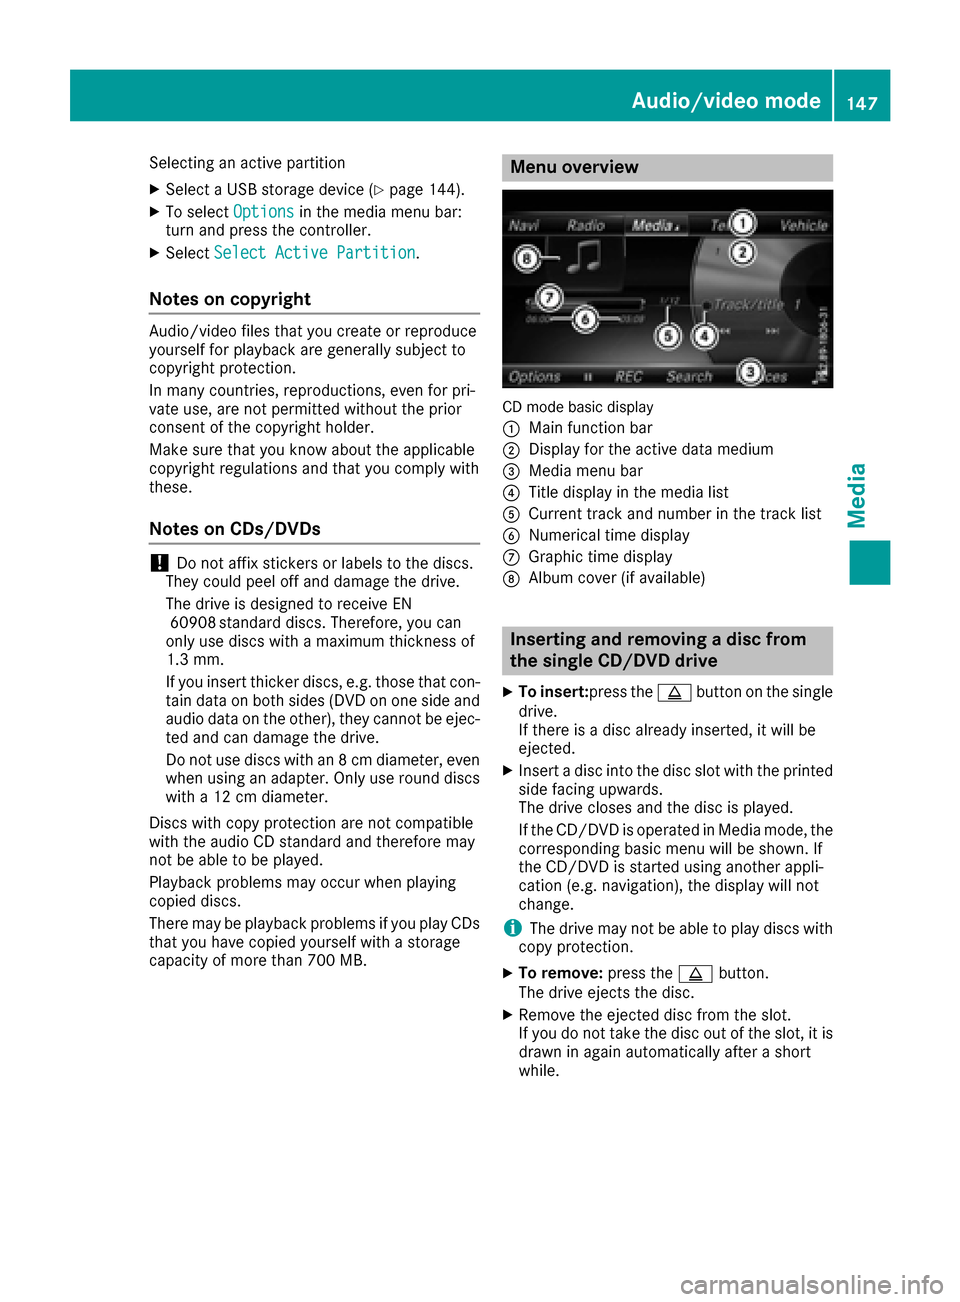
Menu overview
CD mode basic display
:
Main function bar
;Display for the active data medium
=Media menu bar
?Title display in the media list
ACurrent track and number in the track list
BNumerical time display
CGraphic time display
DAlbum cover (if available)
Inserting and removing a disc from
the single CD/DVD drive
XTo insert:press the þbutton on the single
drive.
If there is a disc already inserted, it will be
ejected.
XInsert a disc into the disc slot with the printed
side facing upwards.
The drive closes and the disc is played.
If the CD/DVD is operated in Media mode, the
corresponding basic menu will be shown. If
the CD/DVD is started using another appli-
cation (e.g. navigation), the display will not
change.
iThe drive may not be able to play discs with
copy protection.
XTo remove: press theþbutton.
The drive ejects the disc.
XRemove the ejected disc from the slot.
If you do not take the disc out of the slot, it is drawn in again automatically after a short
while.
Audio/video mode147
Media
Z
Page 152 of 202

The current track list is played in random
order.
XSelectRandom Medium.
All tracks on the data medium are played in
random order.
Skip to time
XTo select Skip to Time: turn and press the
controller.
A menu appears.
XTo set the time: turn the controller.
or
XSet the desired time using the number key-
pad.
Selecting an active partition
XTo select Select Active Partition: turn
and press the controller.
With the Select
ActivePartitionoption,
you can select a partition in the current USB
data medium.
Showing track information
XTo switch the Show Track Informationfunction onOor off ª: turn and press the
controller.
You display or hide information for Track,
Artist and Album in the main display field.
If the function is deactivated, the file name
and the folder name of the track are dis-
played.
Direct track entry
XTo enter the track number:press the g
button.
A menu appears.
XUse the number keypad to enter the desired
track number.
The track is played.
Pause and playback function
XTo pause playback: in audio/video mode,
slide 6the controller.
The media menu bar is shown.
XTo activate Ëin the media menu bar: turn
and press the controller.
Playback is interrupted here. The display
changes to Ì.
XTo continue playback: in audio/video mode,
slide 6the controller.
The media menu bar is shown.
XTo activate Ìin the media menu bar: turn
and press the controller.
Playback is continued from the point of inter- ruption. The symbol changes to Ë.
Selecting a track
Selecting using the current track list
XTo display the current track list: press the
controller in the basic display.
The category list appears.
Select the current track list.
XTo select a track: turn the controller and press
to confirm.
Selecting by skipping to a track
XTo skip forwards or backwards to a track: turn
or briefly slide 1the controller in the
media basic display.
or
XPress the EorF button.
Fast forwarding/rewinding
XIn the media basic display, press and hold the
EorF button until the desired position
is reached.
Search
XIn Media mode, slide 6the controller.
The media menu bar is shown.
XTo select Search: turn and press the control-
ler.
The category list is shown.
150Audio/video mode
Media
Page 163 of 202
XTo switch on full-screen mode: press the con-
troller in the basic display.
XTo show the video menu: slide6the con-
troller in full-screen mode.
The Media Interface menu bar appears.
XTo select Options: turn and press the con-
troller.
XSelect Video Settings.
Making settings (
Ypage 163)
Video DVD mode
Important safety notes
GWARNING
The CD/DVD drive is a class 1 laser product.
If you open the housing of the CD/DVD drive,
there is a risk of exposure to invisible laser
radiation. This laser radiation could damage
your retina. There is a risk of injury.
Never open the housing. Always have main-
tenance and repair work carried out at a quali- fied specialist workshop.
GWARNING
Handling discs while driving may distract you from traffic conditions. You could also lose
control of the vehicle. There is a risk of an
accident.
Handle discs only when the vehicle is station-
ary.
Bear in mind that at a speed of only 30 mph
(approximately 50 km/h) your vehicle covers a
distance of 44 feet (approximately 14 m) every
second.
General notes
Notes on discs
!Do not affix stickers or labels to the discs.
They could peel off and damage the drive.
The drive is designed to receive EN 60908s tandard discs. Therefore, you can
only use discs with a maximum thickness of
1.3 mm. If you insert thicker discs, e.g. those that con-
tain data on both sides (DVD on one side and
audio data on the other), they cannot be ejec-
ted and can damage the drive.
Do not use discs with an 8 cm diameter, even
when using an adapter. Only use round discs
with a 12 cm diameter.
The variety of discs, burners and burn software
available means there is no guarantee that the
multimedia system will be able to play discs that
you have burned yourself.
DVD playback conditions
The multimedia system can play back video
DVDs produced according to the following
standards:
RRegion code 1 or region code 0 (no region
code)
RPAL or NTSC standard
You will generally find the relevant details either
on the DVD itself or on the DVD case.
With DVDs that do not meet the standard
requirements, you may encounter playback
problems.
iObserve the following notes:
RIt is also possible to play video DVDs with a
different region code, provided that they
are produced in accordance with the PAL or
NTSC standard. If you insert a video DVD
with a different region code, a message to
this effect appears.
RThe multimedia system is set to region
code 1 at the factory. This setting can be
changed at an authorized Mercedes-Benz
Center. The region code can be changed up
to five times.
RIf a DVD cannot be played back according
to national color transfer methods (PAL or
NTSC standards), problems with the image,
sound or playback may occur.
Control options
There are various control menus available in
DVD video mode.
Most DVDs have their own control menu.
The DVD's control menu is operated directly
using the controller or DVD functions.
Video DVD mode161
Media
Z
Page 175 of 202
Your multimediasyste mequipment
These operatin ginstruction sdescribe all th e
standar dan doptional equipment of your multi-
media system, as available at th etime of going
to press. Country-specifi cdifference sare pos -
sible. Bear in min dthat your vehicle may no t
feature all function sdescribed here. Thi salso
applies to safety-relevan tsystems an dfunc-
tions.
Read th einformation on qualifie dspecialis t
workshop sin th evehicle Operator's Manual.
Weather forecasts
Introduction
Thi sfunction is currentl yno tavailable fo rCan -
ada.
Fo rth ereception of weather forecast svia sat -
ellite radio, you will need aSIRIU SXM Satellite
Weather subscription .
If th emessage: Please call SIRIUS to
activate the system at :888-539-7474ESN :SIRIUS IDappears alon gwit hth eID
number of th eSIRIU Sdevice, you will need to
hav eth eweather servic eactivated first .
XTo selectCal lorCancel:turn an dpress th e
controller .
If amobile phone is connecte dto th emulti-
media syste m (
Ypage 93), when you selec t
Cal l, acal lis placed to amember of th eSIR-
IU Sservic estaff .The ID number of th eSIRIU S
devic ewill be transferred to th etelephon e
display.
XThi swill be followed by instruction sfrom th e
servic eemployee.
The multimedia syste mcan receiv eweather
forecast sfo rth eUS A(includin gAlask aan d
Hawaii) via satellite radio.
The received weather dat acan be displaye das
an information chart (dail yforecast ,five-day
forecast ,detailed information )or on th e
weather map .
The weather dat areceived from th eweather
station is stored fo ron ehour in th emultimedia
system. It can therefore be displaye dagain
immediately after restartin gth eengin e(fo r
example after refueling). Dependin
gon whic hscale has bee nselected,
th eweather map can display th efollowin g
weather dat awit hsymbols :
Rprecipitation radar
The precipitation radar canno tbe displaye d
fo rAlaska, Hawaii an dPuerto Rico.
Rstor mcharacteristics
Rhig han dlow-pressure areas, weather fronts
Rcours eof tropical cyclones (hurricanes,
typhoons )
Rstormwarnings
Rwin ddirection an dspeeds
iHurricane: term used to describe th etropi-
cal cyclones th at primarily develo pin th e
Atlantic, North Pacifi can dSout hPacifi c
oceans. The win dspeeds are abov e74 mph
(11 8km/ h). Five categories are used to clas-
sify the strength of a hurricane.
Typhoon: term used to describe a tropical
cyclone that develops in the northwestern
Pacific. The wind speeds are in the category of
a hurricane.
Switching the SIRIUS Weather display
on/off
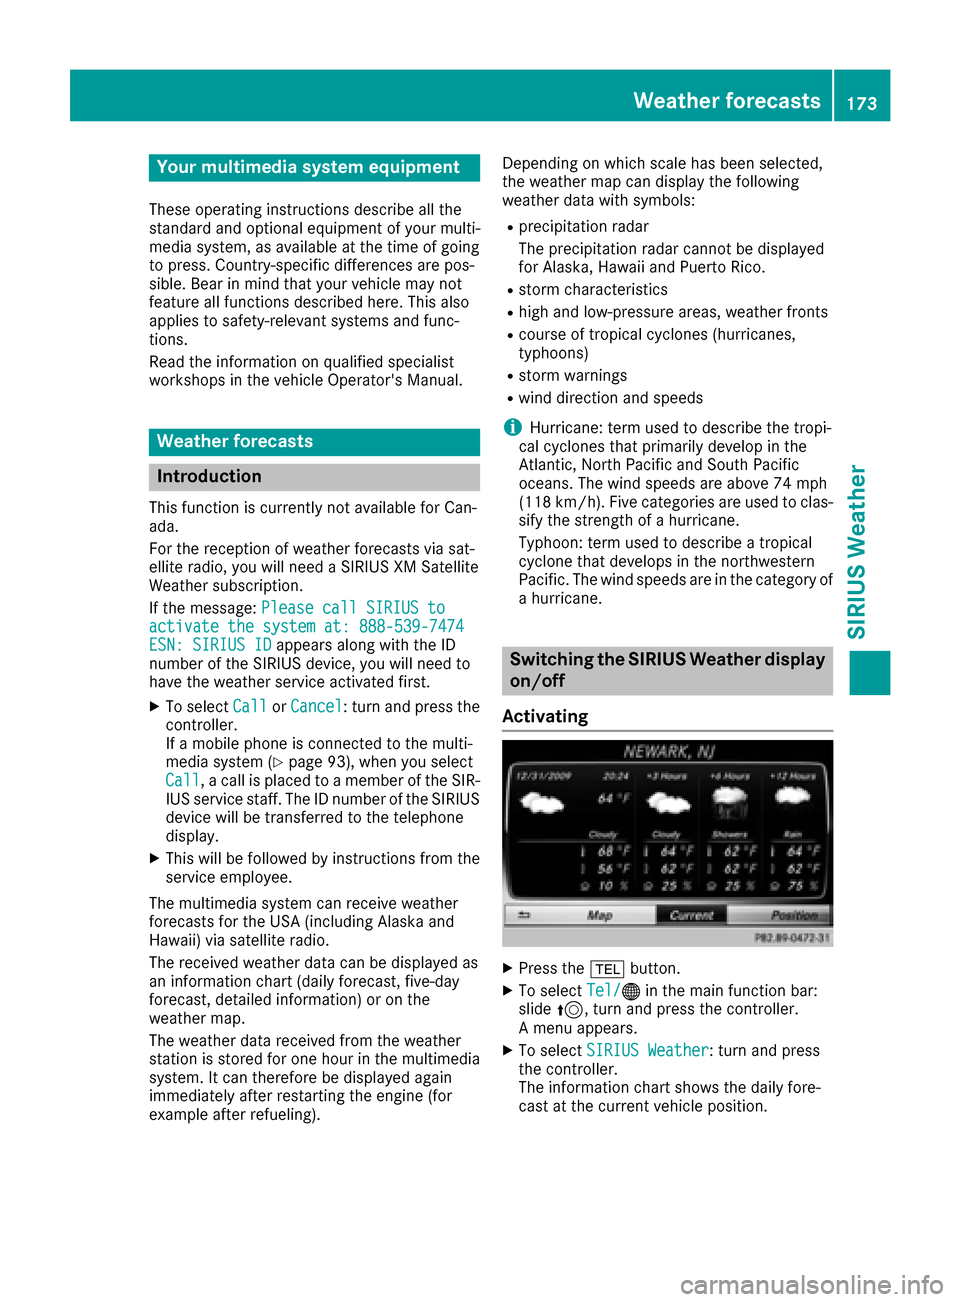
Activating
XPress the %button.
XTo select Tel/®in the main function bar:
slide 5, turn and press the controller.
A menu appears.
XTo select SIRIUS Weather: turn and press
the controller.
The information chart shows the daily fore-
cast at the current vehicle position.
Weather forecasts173
SIRIUS Weather
Page 179 of 202

Selecting a weather station in the map
XMove the weather map and crosshair to the
desired position (Ypage 176).
XTo show the menu: press the controller.
XTo selectWeather Table: press the control-
ler.
The multimedia system receives weather data
for the selected position from the nearest
weather station and displays the data as a
current-day forecast.
Switching layers on the map on/off
You can switch on different layers, for example
to display the rain radar, weather fronts and the
course of tropical storms on the map.
XDisplay the menu on the weather map
(Ypage 176).
XTo select View: turn and press the controller.
XSelect a layer.
Switch the display on Oor off ª.
Explanation of the layers on the
weather map
RMenu item Radar Map
Displays the precipitation radar as a color
area in all map scales. For an explanation of
the colors, see the legend (
Ypage 179).
RMenu itemStorm Characteristics
Displays the characteristics of a storm in all
map scales:
-tornadic storm:
storm cell with strong winds (super cell),
from which a tornado can develop. Torna-
does are also known as twisters.
-cyclone: storm cells from which a tornadic storm
can develop
-hailstorm
-the likelihood of a hailstorm
RStorm watch areas
Shows areas for which storm advisories have
been issued (red areas). It is shown in map
scales 50 mi (50 km), 200 mi (200 km) and
500 mi (500 km).
RMenu item Atmospheric Pressure
Shows the position of high and low-pressure
areas (H, L), weather fronts and isobars It is
shown in map scales 200 mi (200 km) and
500 mi (500 km).
RMenu itemTropical Storm Tracking
shows the direction and speed of propagation
of a tropical storm as a track in all map scales.
Information on times and strength is also
given.
RMenu itemWinds
Shows the wind direction and wind speed in
map scale of 5 mi (5 km).
Sample displays of weather data in the
map
XTo display the precipitation radar: activate
the Radar Map
display level (Ypage 177).
The precipitation radar is displayed if weather
data is available.
iYou can call up the legend for the precipita-
tion radar (Ypage 179).
The transparency of the precipitation radar
display level can be adjusted in five stages.
XTo display the storm characteristics: acti-
vate the Storm Characteristics
display
level (Ypage 177).
If weather data is available, the weather map
will then display the storm characteristics.
Weather forecasts177
SIRIUS Weather
Page 186 of 202
Indicator lamp on the cordless head-
phones
The color of theindicator lamp shows:
Rwhether th edevice is switched on or off
Rth econdition of th einserted batterie s
LED dis-
pla yStatus
Gree nThe batteries are fine.
RedThe batteries are almost dis-
charged.
Lit continu-
ouslyThe headphones are switched
on and connecte dto ascreen.
Flashin gThe headphones are searching
for theconnection to ascreen.
No display
(dark)The headphones are switched
off or th ebatteries are dis-
charged.
The function of th eheadphones may be
impaired by other radio-base delectronic devi-
ce ssuc has mobile phones or laptops .
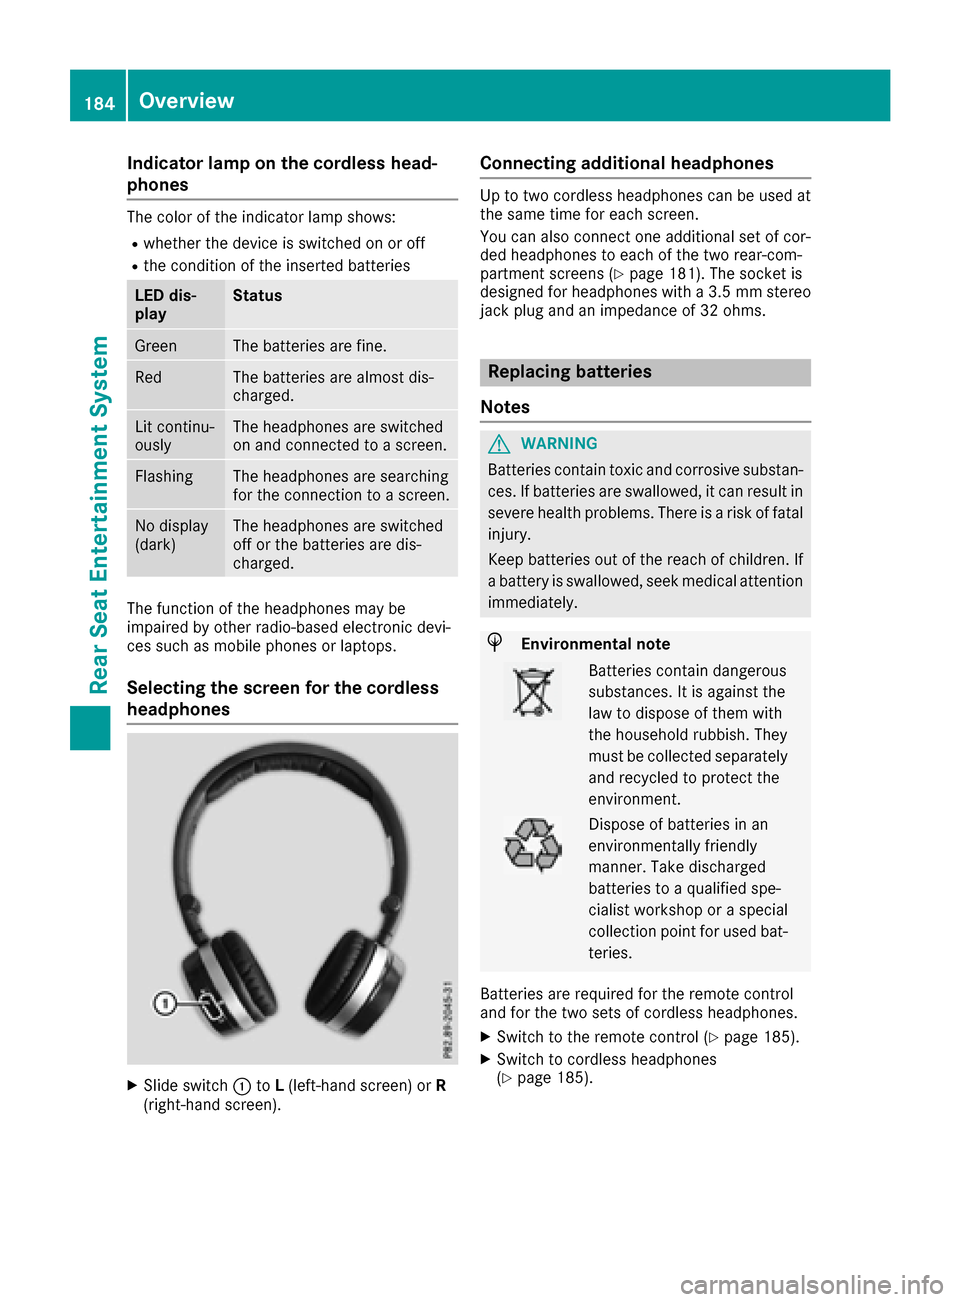
Selecting the screen for the cordless
headphones
XSlide switch:toL(left-han dscreen) or R
(right-hand screen) .
Connecting additional headphones
Up to two cordless headphones can be used at
thesam etime for eac hscreen.
You can also connec ton eadditional set of cor-
ded headphones to eac hof th etwo rear-com-
partmen tscreens (
Ypage 181). The socke tis
designed for headphones wit h a3.5mm stere o
jac kplug and an impedance of 32 ohms.
Replacing batteries
Notes
GWARNIN G
Batterie scontain toxic and corrosiv esubstan -
ces. If batterie sare swallowed, it can result in
severe healt hproblems. Ther eis aris kof fatal
injury.
Kee pbatterie sout of th ereac hof children .If
a battery is swallowed, seek medical attention
immediately.
HEnvironmental not e
Batteriescontain dangerous
substances. It is against th e
law to dispose of them wit h
th ehousehold rubbish. They
must be collecte dseparately
and recycle dto protect th e
environment.
Dispose of batterie sin an
environmentally friendly
manner. Tak edischarged
batterie sto aqualified spe-
cialist workshop or aspecial
collection poin tfor used bat -
teries.
Batterie sare require dfor th eremot econtrol
and for th etwo set sof cordless headphones.
XSwitc hto th eremot econtrol (Ypage 185).
XSwitchto cordless headphones
(Ypage 185).
184Overview
Rear Seat Entertainment System
Page 189 of 202
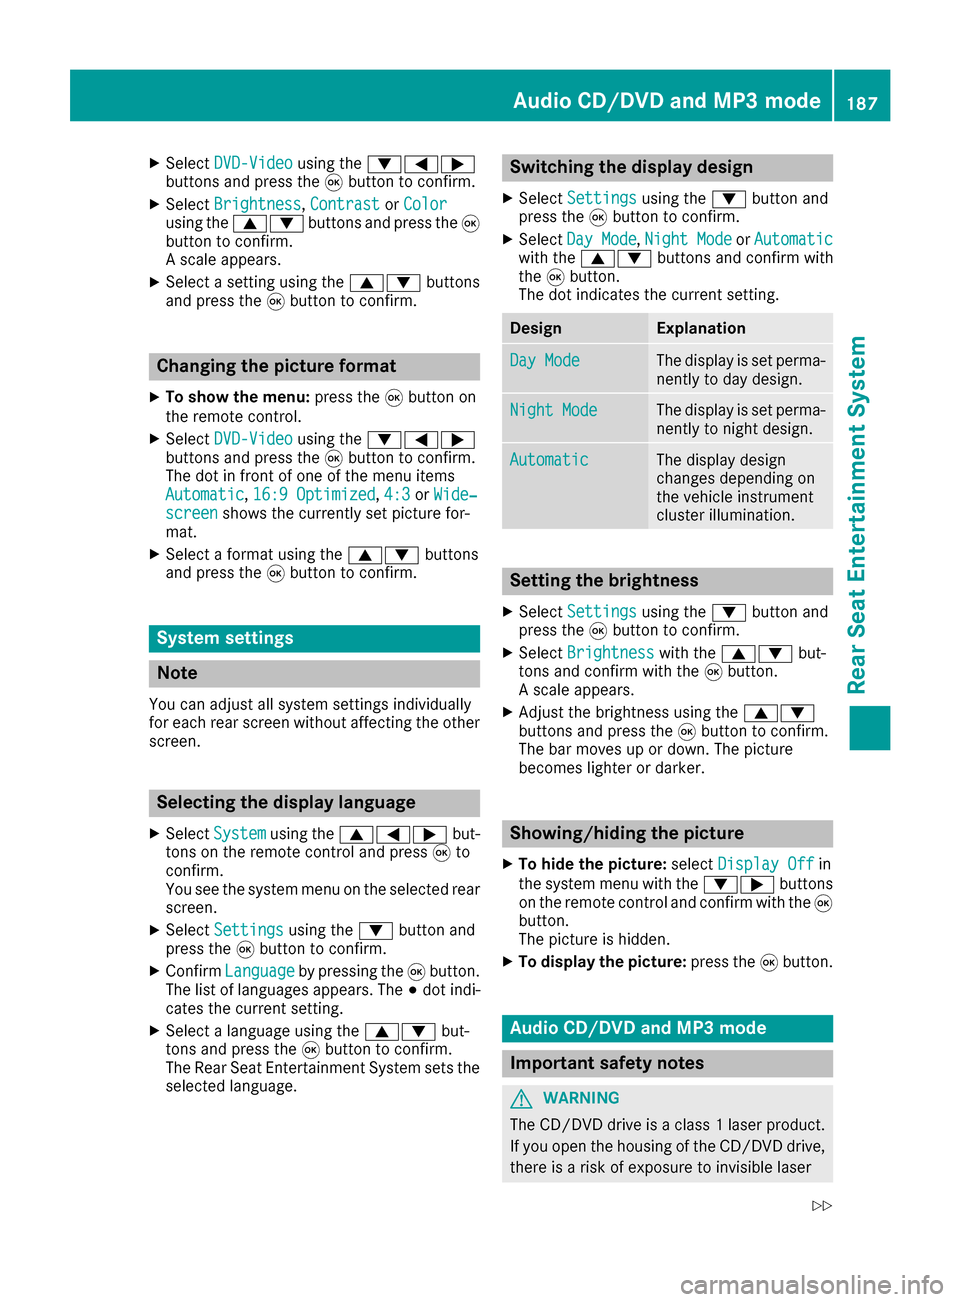
XSelectDVD-Videousing the :=;
buttons and press the 9button to confirm.
XSelect Brightness,Contrastor Colorusing the 9: buttons and press the 9
button to confirm.
A scale appears.
XSelect a setting using the 9:buttons
and press the 9button to confirm.
Changing the picture format
XTo show the menu: press the9button on
the remote control.
XSelect DVD-Videousing the :=;
buttons and press the 9button to confirm.
The dot in front of one of the menu items
Automatic
, 16:9 Optimized,4:3or Wide‐screenshows the currently set picture for-
mat.
XSelect a format using the 9:buttons
and press the 9button to confirm.
System settings
Note
You can adjust all system settings individually
for each rear screen without affecting the other
screen.
Selecting the display language
XSelect Systemusing the 9=; but-
tons on the remote control and press 9to
confirm.
You see the system menu on the selected rear screen.
XSelect Settingsusing the :button and
press the 9button to confirm.
XConfirm Languageby pressing the 9button.
The list of languages appears. The #dot indi-
cates the current setting.
XSelect a language using the 9:but-
tons and press the 9button to confirm.
The Rear Seat Entertainment System sets the
selected language.
Switching the display design
XSelect Settingsusing the :button and
press the 9button to confirm.
XSelect Day Mode,Night Modeor Automaticwith the 9: buttons and confirm with
the 9button.
The dot indicates the current setting.
DesignExplanation
Day ModeThe display is set perma-
nently to day design.
Night ModeThe display is set perma-
nently to night design.
AutomaticThe display design
changes depending on
the vehicle instrument
cluster illumination.
Setting the brightness
XSelect Settingsusing the :button and
press the 9button to confirm.
XSelect Brightnesswith the 9: but-
tons and confirm with the 9button.
A scale appears.
XAdjust the brightness using the 9:
buttons and press the 9button to confirm.
The bar moves up or down. The picture
becomes lighter or darker.
Showing/hiding the picture
XTo hide the picture: selectDisplay Offin
the system menu with the :;buttons
on the remote control and confirm with the 9
button.
The picture is hidden.
XTo display the picture: press the9button.
Audio CD/DVD and MP3 mode
Important safety notes
GWARNING
The CD/DVD drive is a class 1 laser product.
If you open the housing of the CD/DVD drive,
there is a risk of exposure to invisible laser
Audio CD/DVD and MP3 mode187
Rear Seat Entertainment System
Z
Page 192 of 202
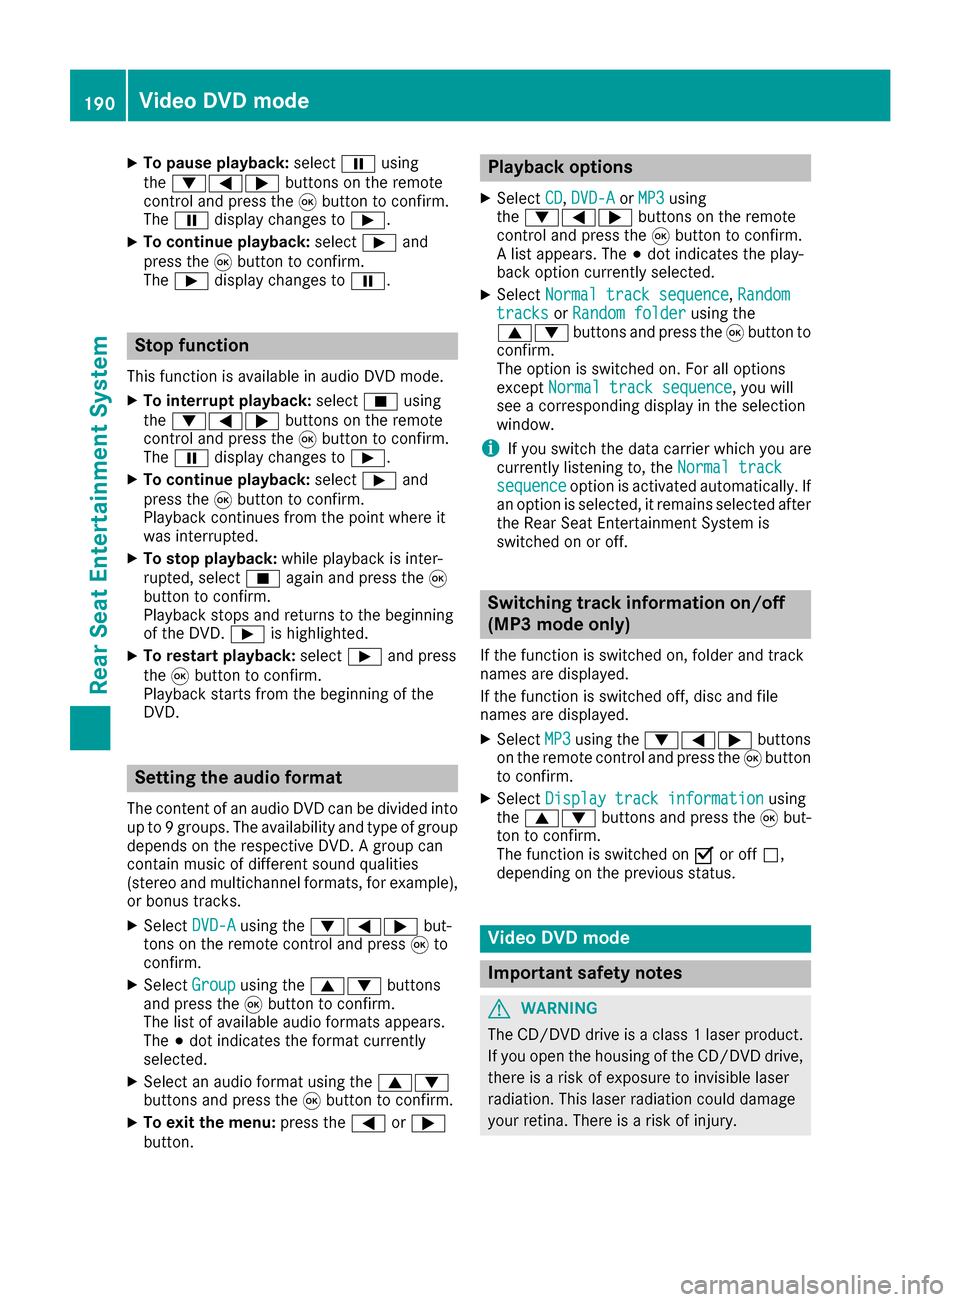
XTo pause playback:selectËusing
the :=; buttons on the remote
control and press the 9button to confirm.
The Ë display changes to Ì.
XTo continue playback: selectÌand
press the 9button to confirm.
The Ì display changes to Ë.
Stop function
This function is available in audio DVD mode.
XTo interrupt playback: selectÉusing
the :=; buttons on the remote
control and press the 9button to confirm.
The Ë display changes to Ì.
XTo continue playback: selectÌand
press the 9button to confirm.
Playback continues from the point where it
was interrupted.
XTo stop playback: while playback is inter-
rupted, select Éagain and press the 9
button to confirm.
Playback stops and returns to the beginning
of the DVD. Ìis highlighted.
XTo restart playback: selectÌand press
the 9button to confirm.
Playback starts from the beginning of the
DVD.
Setting the audio format
The content of an audio DVD can be divided into
up to 9 groups. The availability and type of group
depends on the respective DVD. A group can
contain music of different sound qualities
(stereo and multichannel formats, for example),
or bonus tracks.
XSelect DVD-Ausing the :=; but-
tons on the remote control and press 9to
confirm.
XSelect Groupusing the 9: buttons
and press the 9button to confirm.
The list of available audio formats appears.
The #dot indicates the format currently
selected.
XSelect an audio format using the 9:
buttons and press the 9button to confirm.
XTo exit the menu: press the=or;
button.
Playback options
XSelect CD,DVD-Aor MP3using
the :=; buttons on the remote
control and press the 9button to confirm.
A list appears. The #dot indicates the play-
back option currently selected.
XSelect Normal track sequence,Randomtracksor Random folderusing the
9: buttons and press the 9button to
confirm.
The option is switched on. For all options
except Normal track sequence
, you will
see a corresponding display in the selection
window.
iIf you switch the data carrier which you are
currently listening to, the Normal track
sequenceoption is activated automatically. If
an option is selected, it remains selected after
the Rear Seat Entertainment System is
switched on or off.
Switching track information on/off
(MP3 mode only)
If the function is switched on, folder and track
names are displayed.
If the function is switched off, disc and file
names are displayed.
XSelect MP3using the :=; buttons
on the remote control and press the 9button
to confirm.
XSelect Display track informationusing
the 9: buttons and press the 9but-
ton to confirm.
The function is switched on Oor off ª,
depending on the previous status.
Video DVD mode
Important safety notes
GWARNING
The CD/DVD drive is a class 1 laser product.
If you open the housing of the CD/DVD drive,
there is a risk of exposure to invisible laser
radiation. This laser radiation could damage
your retina. There is a risk of injury.
190Video DVD mode
Rear Seat Entertainment System
Page 197 of 202

3. Loading the active media source to
the Rear Seat Entertainment System
XSelectCOMANDusing the 9=; but-
tons on the remote control and press 9to
confirm.
A message appears stating that the desired
audio or video source needs to be activated in
the multimedia system. If the media source is
activated in the multimedia system, it is loa-
ded on the Rear Seat Entertainment System
and is then played.
If Rear Off
is activated in the multimedia sys-
tem, the COMAND is off or there is no
active COMAND source.message appears.
Radio mode functions
XTo select a station: press the=or;
button.
or
XPress the EorF button.
The radio selects the previous or next station in the alphabetical station list.
DAB stations are displayed first, followed by
stations with available station names. Sta-
tions showing station frequency are shown
last.
Additional setting option:
XAdjust the sound settings (Ypage 186).
Audio CD mode functions
XTo select by skipping to a track: press the
= or; button.
or
XPress the EorF button.
The skip forward function skips to the next
track. If more than 8 seconds of track time have
elapsed, the function skips back to the begin-
ning of the track.
If less than 8 seconds of track time have
elapsed, the function skips back to the begin-
ning of the previous track.
Additional setting option:
XAdjust the sound settings (Ypage 186).
Audio DVD mode functions
XTo skip to the next or previous group:
press the :button on the remote control.
XTo select KL, highlight using the =
or ; button and press 9.
Additional setting option:
XAdjust the sound settings (Ypage 186).
MP3 mode functions
XTo select a track by skipping to a track:
press the =or; button on the remote
control.
or
XPress the EorF button.
The skip forward function skips to the next
track.
If the elapsed track time has exceeded 8 sec-
onds, the function skips back to the beginning
of the track.
If the elapsed track time is less than 8 sec-
onds, the function skips back to the beginning of the previous track.
Additional setting option:
XAdjust the sound settings (Ypage 186).
DVD video mode functions
To hide the menu:
XPress the 9or: button on the remote
control.
or
XWait about eight seconds.
The menu is hidden.
Active COMAND media source mode195
Rear Seat Entertainment System
Z