sensor MERCEDES-BENZ B-Class 2017 W246 Owner's Guide
[x] Cancel search | Manufacturer: MERCEDES-BENZ, Model Year: 2017, Model line: B-Class, Model: MERCEDES-BENZ B-Class 2017 W246Pages: 290, PDF Size: 19.81 MB
Page 152 of 290
X
If necessary, take a break.
X Confirm the message by pressing the 0076
button on the steering wheel.
On long journeys, take regular breaks in good
time to allow yourself to rest properly. If you do
not take a break and ATTENTION ASSIST still
detects increasing lapses in concentration, you will be warned again after 15 minutes at the
earliest. This will only happen if ATTEN-
TION ASSIST still detects typical indicators of
fatigue or increasing lapses in concentration.
Vehicles with the COMAND multimedia sys-
tem: if a warning is output in the multifunction
display, a service station search is performed in the multimedia system. You can select a servicestation and navigation to this service station will
then begin. This function can be activated or
deactivated in the multimedia system; see the
Digital Operator's Manual. Blind Spot Assist
General notes Blind Spot Assist monitors the areas on either
side of the vehicle that are not visible to the
driver with two lateral, rear-facing radar sen-
sors. A warning display in the exterior mirrors
draws your attention to vehicles detected in the
monitored area. If you then switch on the cor-
responding turn signal to change lane, you will
also receive an optical and audible warning.
Blind Spot Assist supports you from a speed of
approximately 20 mph (30 km/h).
Important safety notes G
WARNING
Blind Spot Assist does not react to:
R vehicles overtaken too closely on the side,
placing them in the blind spot area
R vehicles which approach with a large speed
differential and overtake your vehicle
As a result, Blind Spot Assist may not give
warnings in such situations. There is a risk of an accident.
Always observe the traffic conditions care-
fully, and maintain a safe lateral distance. Blind Spot Assist is only an aid. It may fail to
detect some vehicles and is no substitute for
attentive driving. Always ensure that there is
sufficient distance to the side for other road
users and obstacles.
i USA only:
This device has been approved by the FCC as a "Vehicular Radar System". The radar sensor
is intended for use in an automotive radar
system only. Removing, tampering with, or
altering the device will void any warranties,
and is not permitted by the FCC. Do not tam-
per with, alter, or use in any non-approved
way.
Any unauthorized modification to this device
could void the user’s authority to operate the
equipment.
Radar sensors The radar sensors for Blind Spot Assist are inte-
grated into the rear bumper. Make sure that the
bumpers are free from dirt, ice or slush. The
sensors must not be covered, for example by
cycle racks or overhanging loads. Following a
severe impact or in the event of damage to the
bumpers, have the function of the radar sensors
checked at a qualified specialist workshop.
Blind Spot Assist may no longer work properly.
Monitoring range of the sensors In particular, the detection of obstacles can be
impaired if:
R there is dirt on the sensors or anything else
covering the sensors
R there is poor visibility, e.g. due to fog, heavy
rain or snow
R a narrow vehicle traveling in front, e.g. a
motorbike or bicycle
R the road has very wide lanes
R the road has narrow lanes
R you are not driving in the middle of the lane
R there are barriers or other road boundaries
Vehicles in the monitoring range are then not
indicated.
Blind Spot Assist monitors the area up to 10 ft
(3 m) behind your vehicle and directly next to it.
If the lanes are narrow, vehicles driving in the
lane beyond the lane next to your vehicle may be
indicated, especially if the vehicles are not driv-
ing in the middle of their lane. This may be the 150
Driving systemsDriving and parking
Page 154 of 290
Important safety notes
G
WARNING
If you operate information systems and com-
munication equipment integrated in the vehi- cle while driving, you will be distracted from
traffic conditions. You could also lose control of the vehicle. There is a risk of an accident.
Only operate the equipment when the traffic
situation permits. If you are not sure that this
is possible, park the vehicle paying attention
to traffic conditions and operate the equip-
ment when the vehicle is stationary.
You must observe the legal requirements for the country in which you are currently driving whenoperating the on-board computer. G
WARNING
If the instrument cluster has failed or mal-
functioned, you may not recognize function
restrictions in systems relevant to safety. The operating safety of your vehicle may be
impaired. There is a risk of an accident.
Drive on carefully. Have the vehicle checked
at a qualified specialist workshop immedi-
ately.
The on-board computer only shows messages or
warnings from certain systems in the multifunc- tion display. You should therefore make sure
your vehicle is operating safely at all times.
If the operating safety of your vehicle is
impaired, pull over as soon as it is safe to do so. Contact a qualified specialist workshop.
For an overview, see the instrument panel illus-
tration (Y page 32). Displays and operation
Instrument cluster lighting
The light sensor in the instrument cluster auto-
matically controls the brightness of the multi-
function display. In daylight, the displays in the
instrument cluster are not illuminated.
The lighting in the instrument cluster, in the dis-
plays and the controls in the vehicle interior can be adjusted using the brightness control knob. The brightness control knob is located on the
bottom left of the instrument cluster
(Y
page 32).
X Turn the brightness control knob clockwise or
counter-clockwise.
If the light switch is set to the 0058,0060or
0058 position, the brightness is dependent
upon the brightness of the ambient light. READY indicator
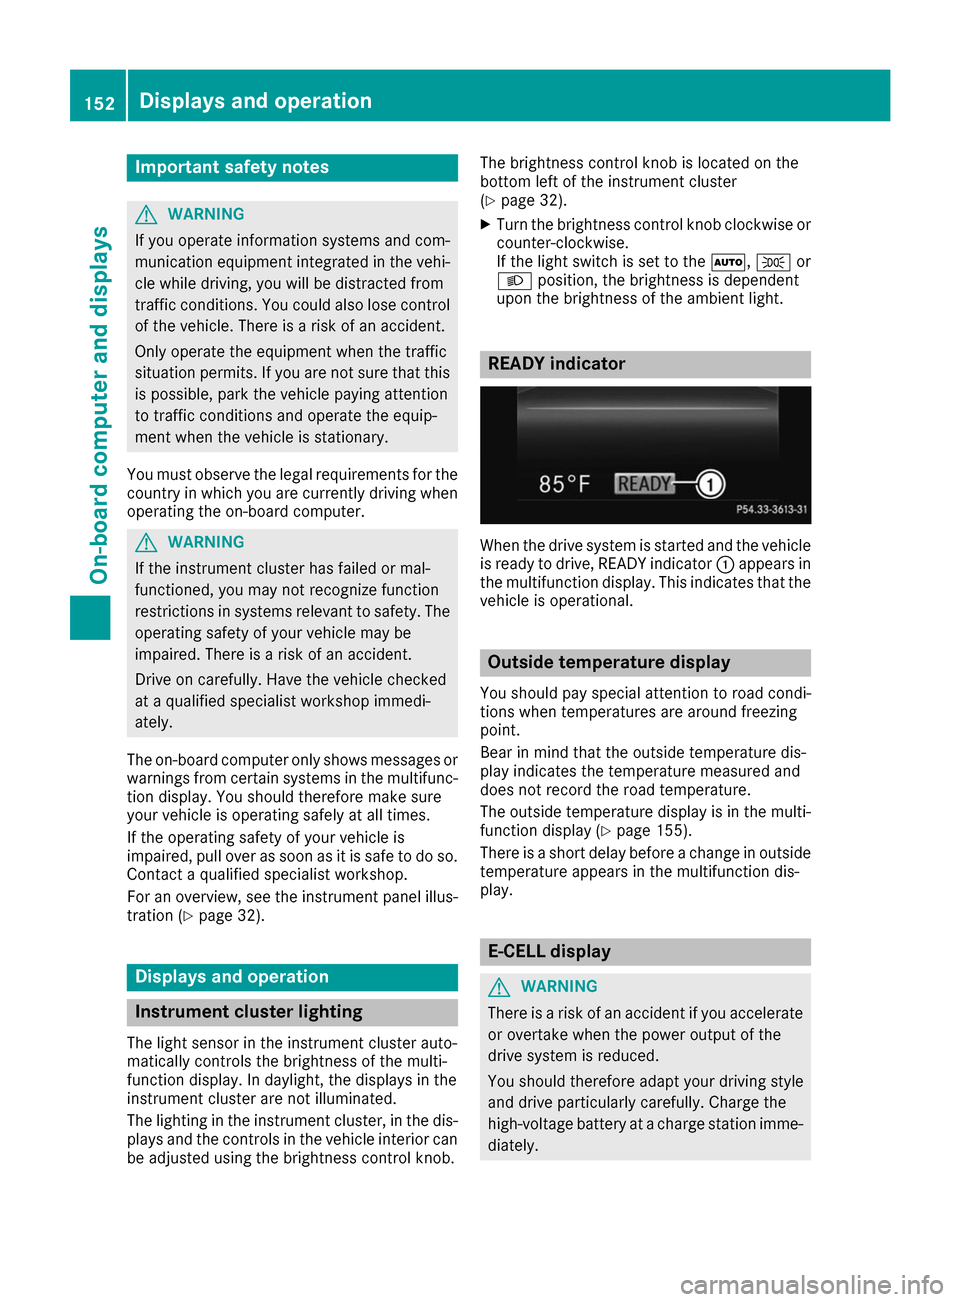
When the drive system is started and the vehicle
is ready to drive, READY indicator 0043appears in
the multifunction display. This indicates that the vehicle is operational. Outside temperature display
You should pay special attention to road condi-
tions when temperatures are around freezing
point.
Bear in mind that the outside temperature dis-
play indicates the temperature measured and
does not record the road temperature.
The outside temperature display is in the multi-
function display (Y page 155).
There is a short delay before a change in outside
temperature appears in the multifunction dis-
play. E-CELL display
G
WARNING
There is a risk of an accident if you accelerate or overtake when the power output of the
drive system is reduced.
You should therefore adapt your driving style
and drive particularly carefully. Charge the
high-voltage battery at a charge station imme- diately. 152
Displays and operationOn-board computer and displays
Page 176 of 290
Display messages
Possible causes/consequences and
0050
0050Solutions Active
Active
Brake
Brake Assist
Assist
Functions
Functions Currently
Currently
Limited See Opera‐
Limited See Opera‐
tor's Manual tor's Manual Active Brake Assist is temporarily inoperative.
Possible causes are:
R the radar sensor system is temporarily inoperative, e.g. due to elec-
tromagnetic radiation emitted by nearby TV or radio stations or
other sources of electromagnetic radiation
R the system is outside the operating temperature range
R the on-board voltage is too low
When the causes stated above no longer apply, the display message
disappears.
Active Brake Assist is operational again.
If the display message does not disappear:
X Pull over and stop the vehicle safely as soon as possible, paying
attention to road and traffic conditions.
X Secure the vehicle against rolling away (Y page 128).
X Start the drive system again. Active Brake Active Brake
Assist: Assist:
System
SystemInop‐
Inop‐
erative
erative Active Brake Assist is unavailable due to a malfunction. Situation-
dependent parking assistance may also have failed.
X Visit a qualified specialist workshop immediately. Radar
Radar
Sensors
Sensors Dirty
Dirty
See Operator's Man‐
See Operator's Man‐
ual ual The radar sensor system is malfunctioning.
Possible causes are:
R Dirt on sensors
R Heavy rain or snow
R When driving on inter-urban roads without traffic or infrastructure,
e.g. in desert-like areas
Active Brake Assist is malfunctioning or is temporarily unavailable.
A warning tone also sounds.
Active Brake Assist is available again once the cause of the problem is
no longer present. The display message disappears.
If the display message does not disappear:
X Pull over and stop the vehicle safely as soon as possible, paying
attention to road and traffic conditions.
X Secure the vehicle against rolling away (Y page 128).
X Switch off the drive system.
X Clean all sensors (Y page 237).
X Start the drive system again.
The display message disappears. ã
Acoustic Vehicle Acoustic Vehicle
Indication Inopera‐ Indication Inopera‐
tive tive The sound generator is not working. The vehicle can still be driven;
however, no vehicle sounds can be generated. As a result, your vehicle
may not be heard by other road users until it is very close to them, or
it may not be heard at all.
X Drive with particular care, allowing for the possibility that other road
users may behave unpredictably.
X Visit a qualified specialist workshop. 174
Display
messagesOn-board computer and displays
Page 182 of 290
Display messages
Possible causes/consequences and
0050
0050Solutions 0049
Check Rear Left Check Rear Left
Sidemarker Lamp Sidemarker Lamp
or
Check Rear Right
Check Rear Right
Sidemarker Lamp Sidemarker Lamp The rear left-hand or rear right-hand side marker lamp is faulty.
X Check whether you are permitted to replace the bulb yourself
(Y page 90).
or
X Visit a qualified specialist workshop. 0049
Check Left Daytime Check Left Daytime
Running Light Running Light
or
Check
Check Right
RightDaytime
Daytime
Running Light
Running Light The left or right-hand daytime running lamp is faulty.
X Visit a qualified specialist workshop. 0049
Active Headlamps Active Headlamps
Inoperative Inoperative The active light function is faulty.
X Visit a qualified specialist workshop. 0049
Malfunction See Malfunction See
Operator's Manual Operator's Manual The exterior lighting is malfunctioning.
X Visit a qualified specialist workshop. 0049
Auto Lamp Function Auto Lamp Function
Inoperative Inoperative The light sensor is defective.
X Visit a qualified specialist workshop. 0049
Switch Off Lights Switch Off Lights The lights are still switched on when you leave the vehicle. A warning
tone also sounds.
X Turn the light switch to the 0058position. 0049
Switch On Headlamps Switch On Headlamps You are driving with low-beam headlamps switched off.
X Turn the light switch to the 0058or0058 position. 180
Display
messagesOn-board computer and displays
Page 185 of 290
Display messages
Possible causes/consequences and
0050
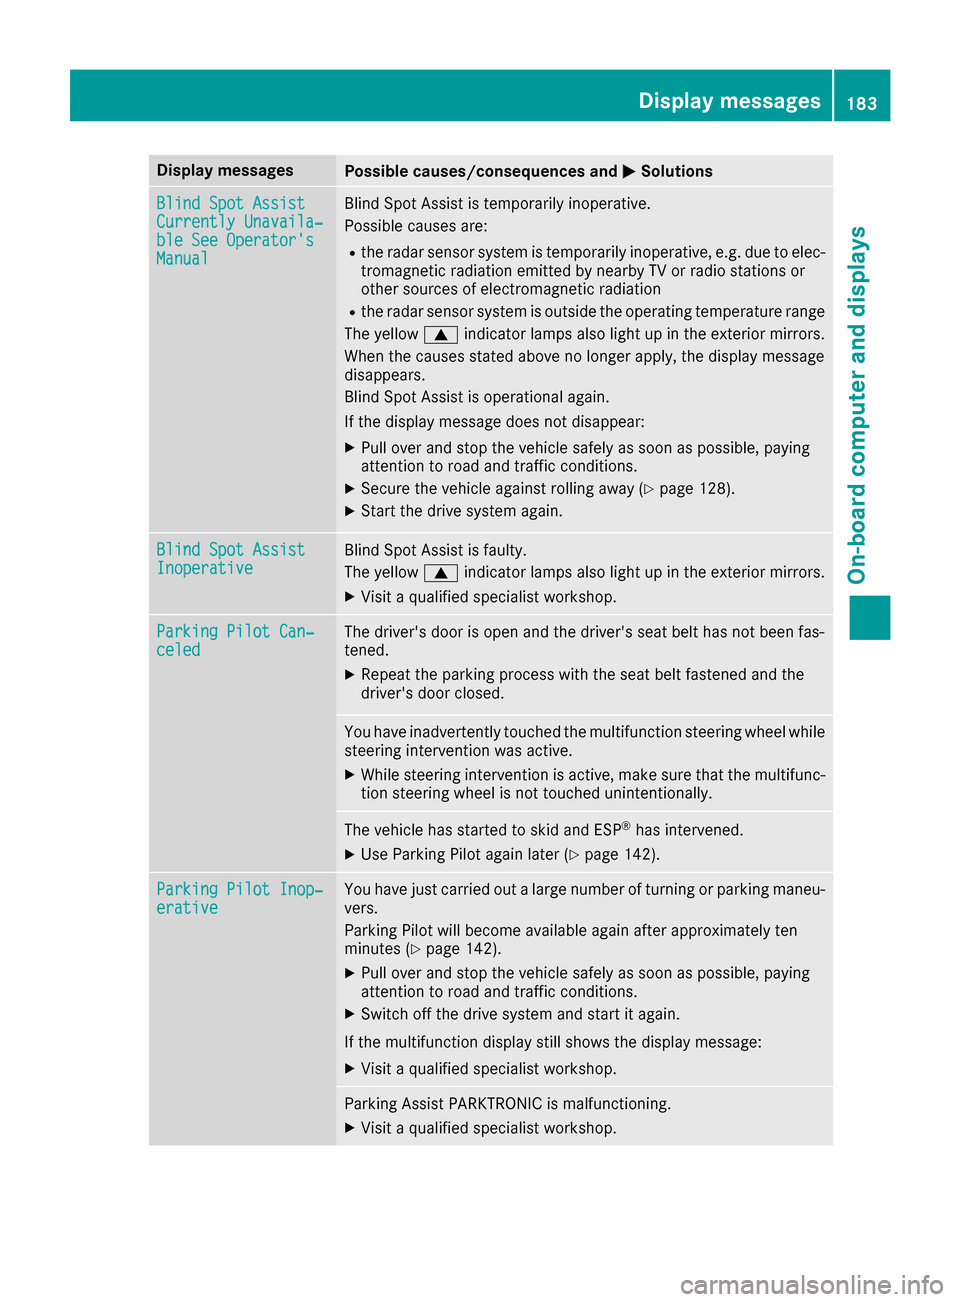
0050Solutions Blind Spot Assist
Blind Spot Assist
Currently Unavaila‐ Currently Unavaila‐
ble See Operator's ble See Operator's
Manual Manual Blind Spot Assist is temporarily inoperative.
Possible causes are:
R the radar sensor system is temporarily inoperative, e.g. due to elec-
tromagnetic radiation emitted by nearby TV or radio stations or
other sources of electromagnetic radiation
R the radar sensor system is outside the operating temperature range
The yellow 0063indicator lamps also light up in the exterior mirrors.
When the causes stated above no longer apply, the display message
disappears.
Blind Spot Assist is operational again.
If the display message does not disappear:
X Pull over and stop the vehicle safely as soon as possible, paying
attention to road and traffic conditions.
X Secure the vehicle against rolling away (Y page 128).
X Start the drive system again. Blind Spot Assist Blind Spot Assist
Inoperative Inoperative Blind Spot Assist is faulty.
The yellow
0063indicator lamps also light up in the exterior mirrors.
X Visit a qualified specialist workshop. Parking Pilot Can‐ Parking Pilot Can‐
celed celed The driver's door is open and the driver's seat belt has not been fas-
tened.
X Repeat the parking process with the seat belt fastened and the
driver's door closed. You have inadvertently touched the multifunction steering wheel while
steering intervention was active.
X While steering intervention is active, make sure that the multifunc-
tion steering wheel is not touched unintentionally. The vehicle has started to skid and ESP
®
has intervened.
X Use Parking Pilot again later (Y page 142).Parking Pilot Inop‐
Parking Pilot Inop‐
erative erative You have just carried out a large number of turning or parking maneu-
vers.
Parking Pilot will become available again after approximately ten
minutes (Y page 142).
X Pull over and stop the vehicle safely as soon as possible, paying
attention to road and traffic conditions.
X Switch off the drive system and start it again.
If the multifunction display still shows the display message: X Visit a qualified specialist workshop. Parking Assist PARKTRONIC is malfunctioning.
X Visit a qualified specialist workshop. Display
messages
183On-board computer and displays Z
Page 188 of 290
Display messages
Possible causes/consequences and
0050
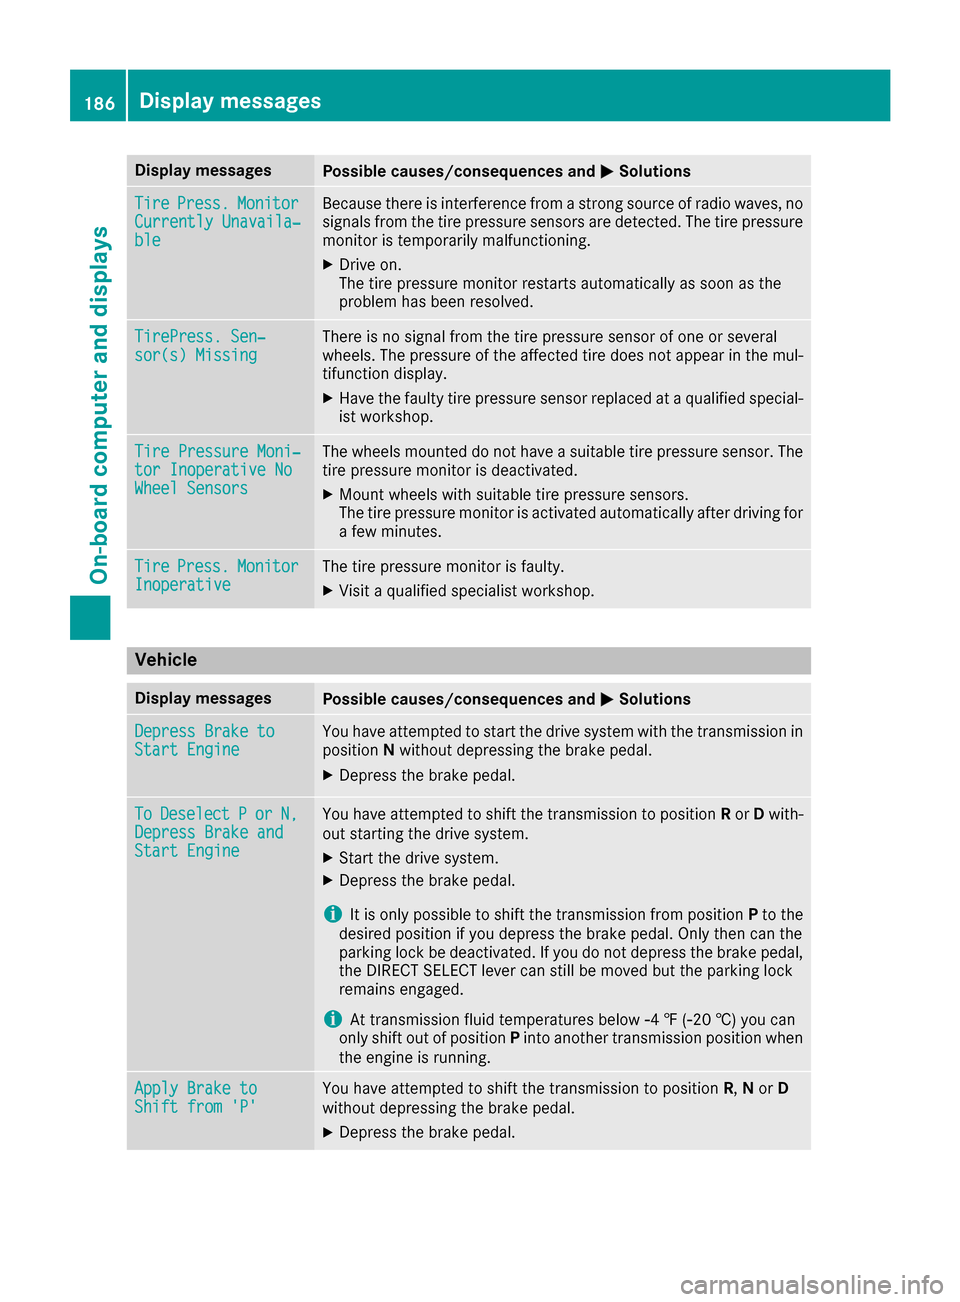
0050Solutions Tire
Tire
Press.
Press. Monitor
Monitor
Currently Unavaila‐
Currently Unavaila‐
ble ble Because there is interference from a strong source of radio waves, no
signals from the tire pressure sensors are detected. The tire pressure monitor is temporarily malfunctioning.
X Drive on.
The tire pressure monitor restarts automatically as soon as the
problem has been resolved. TirePress. Sen‐ TirePress. Sen‐
sor(s) Missing sor(s) Missing There is no signal from the tire pressure sensor of one or several
wheels. The pressure of the affected tire does not appear in the mul-
tifunction display.
X Have the faulty tire pressure sensor replaced at a qualified special-
ist workshop. Tire Pressure Moni‐ Tire Pressure Moni‐
tor Inoperative No tor Inoperative No
Wheel Sensors Wheel Sensors The wheels mounted do not have a suitable tire pressure sensor. The
tire pressure monitor is deactivated.
X Mount wheels with suitable tire pressure sensors.
The tire pressure monitor is activated automatically after driving for a few minutes. Tire
Tire
Press.
Press. Monitor
Monitor
Inoperative
Inoperative The tire pressure monitor is faulty.
X Visit a qualified specialist workshop. Vehicle
Display messages
Possible causes/consequences and
0050
0050Solutions Depress Brake to
Depress Brake to
Start Engine Start Engine You have attempted to start the drive system with the transmission in
position Nwithout depressing the brake pedal.
X Depress the brake pedal. To
To
Deselect
Deselect P
Por
or N,
N,
Depress Brake and
Depress Brake and
Start Engine Start Engine You have attempted to shift the transmission to position
Ror Dwith-
out starting the drive system.
X Start the drive system.
X Depress the brake pedal.
i It is only possible to shift the transmission from position
Pto the
desired position if you depress the brake pedal. Only then can the
parking lock be deactivated. If you do not depress the brake pedal,
the DIRECT SELECT lever can still be moved but the parking lock
remains engaged.
i At transmission fluid temperatures below
00F84 ‡ (00F820 †) you can
only shift out of position Pinto another transmission position when
the engine is running. Apply Brake to
Apply Brake to
Shift from 'P' Shift from 'P' You have attempted to shift the transmission to position
R,Nor D
without depressing the brake pedal.
X Depress the brake pedal. 186
Display
messagesOn-board computer and displays
Page 239 of 290
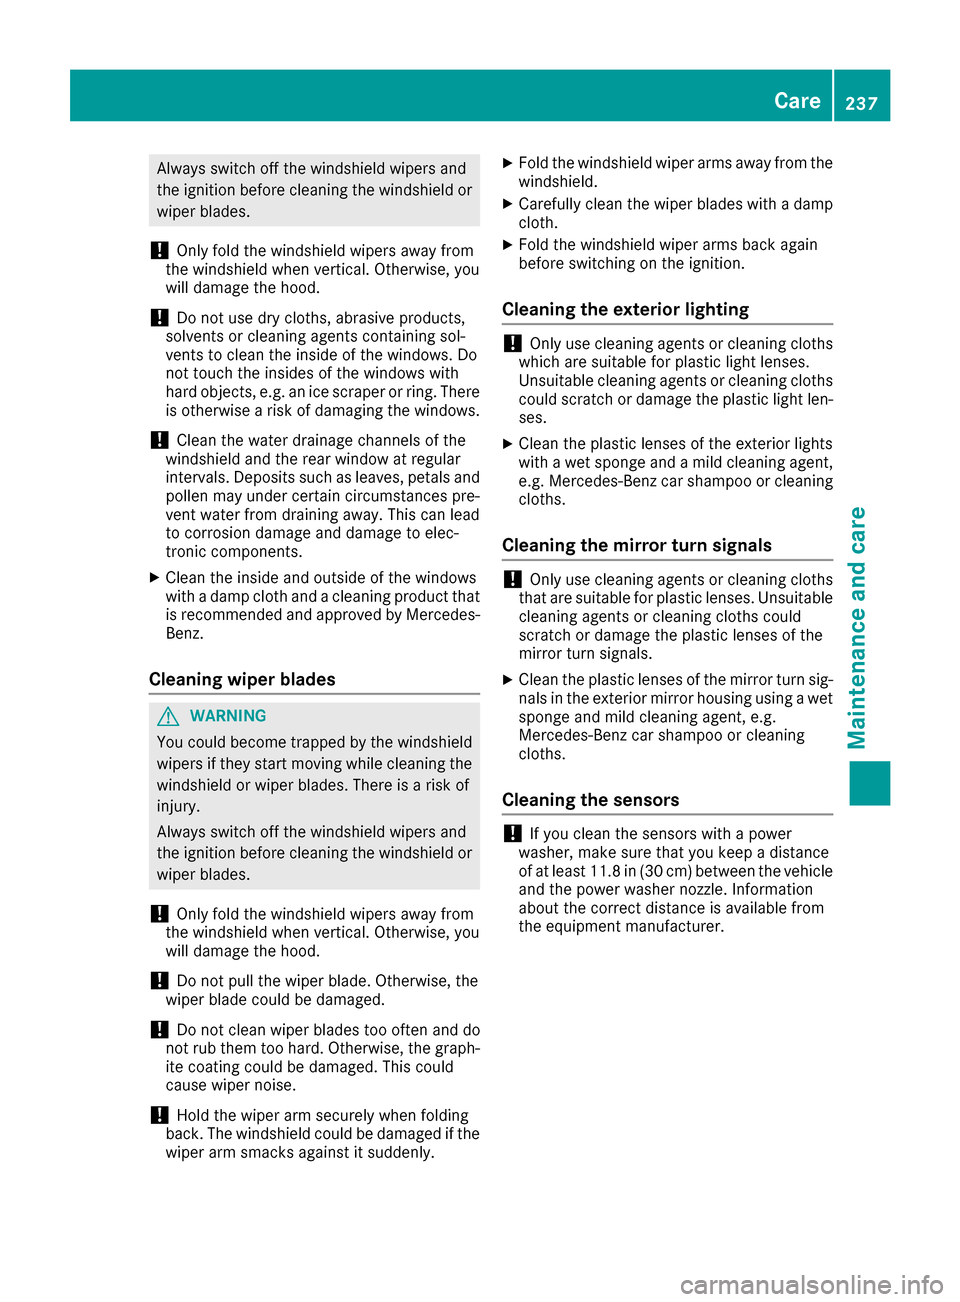
Always switch off the windshield wipers and
the ignition before cleaning the windshield or wiper blades.
! Only fold the windshield wipers away from
the windshield when vertical. Otherwise, you
will damage the hood.
! Do not use dry cloths, abrasive products,
solvents or cleaning agents containing sol-
vents to clean the inside of the windows. Do
not touch the insides of the windows with
hard objects, e.g. an ice scraper or ring. There is otherwise a risk of damaging the windows.
! Clean the water drainage channels of the
windshield and the rear window at regular
intervals. Deposits such as leaves, petals and
pollen may under certain circumstances pre-
vent water from draining away. This can lead
to corrosion damage and damage to elec-
tronic components.
X Clean the inside and outside of the windows
with a damp cloth and a cleaning product that is recommended and approved by Mercedes-
Benz.
Cleaning wiper blades G
WARNING
You could become trapped by the windshield wipers if they start moving while cleaning the
windshield or wiper blades. There is a risk of
injury.
Always switch off the windshield wipers and
the ignition before cleaning the windshield or
wiper blades.
! Only fold the windshield wipers away from
the windshield when vertical. Otherwise, you
will damage the hood.
! Do not pull the wiper blade. Otherwise, the
wiper blade could be damaged.
! Do not clean wiper blades too often and do
not rub them too hard. Otherwise, the graph- ite coating could be damaged. This could
cause wiper noise.
! Hold the wiper arm securely when folding
back. The windshield could be damaged if the wiper arm smacks against it suddenly. X
Fold the windshield wiper arms away from the
windshield.
X Carefully clean the wiper blades with a damp
cloth.
X Fold the windshield wiper arms back again
before switching on the ignition.
Cleaning the exterior lighting !
Only use cleaning agents or cleaning cloths
which are suitable for plastic light lenses.
Unsuitable cleaning agents or cleaning cloths
could scratch or damage the plastic light len- ses.
X Clean the plastic lenses of the exterior lights
with a wet sponge and a mild cleaning agent,
e.g. Mercedes-Benz car shampoo or cleaning
cloths.
Cleaning the mirror turn signals !
Only use cleaning agents or cleaning cloths
that are suitable for plastic lenses. Unsuitable
cleaning agents or cleaning cloths could
scratch or damage the plastic lenses of the
mirror turn signals.
X Clean the plastic lenses of the mirror turn sig-
nals in the exterior mirror housing using a wet sponge and mild cleaning agent, e.g.
Mercedes-Benz car shampoo or cleaning
cloths.
Cleaning the sensors !
If you clean the sensors with a power
washer, make sure that you keep a distance
of at least 11.8 in (30 cm) between the vehicle
and the power washer nozzle. Information
about the correct distance is available from
the equipment manufacturer. Care
237Maintenance and care Z
Page 240 of 290
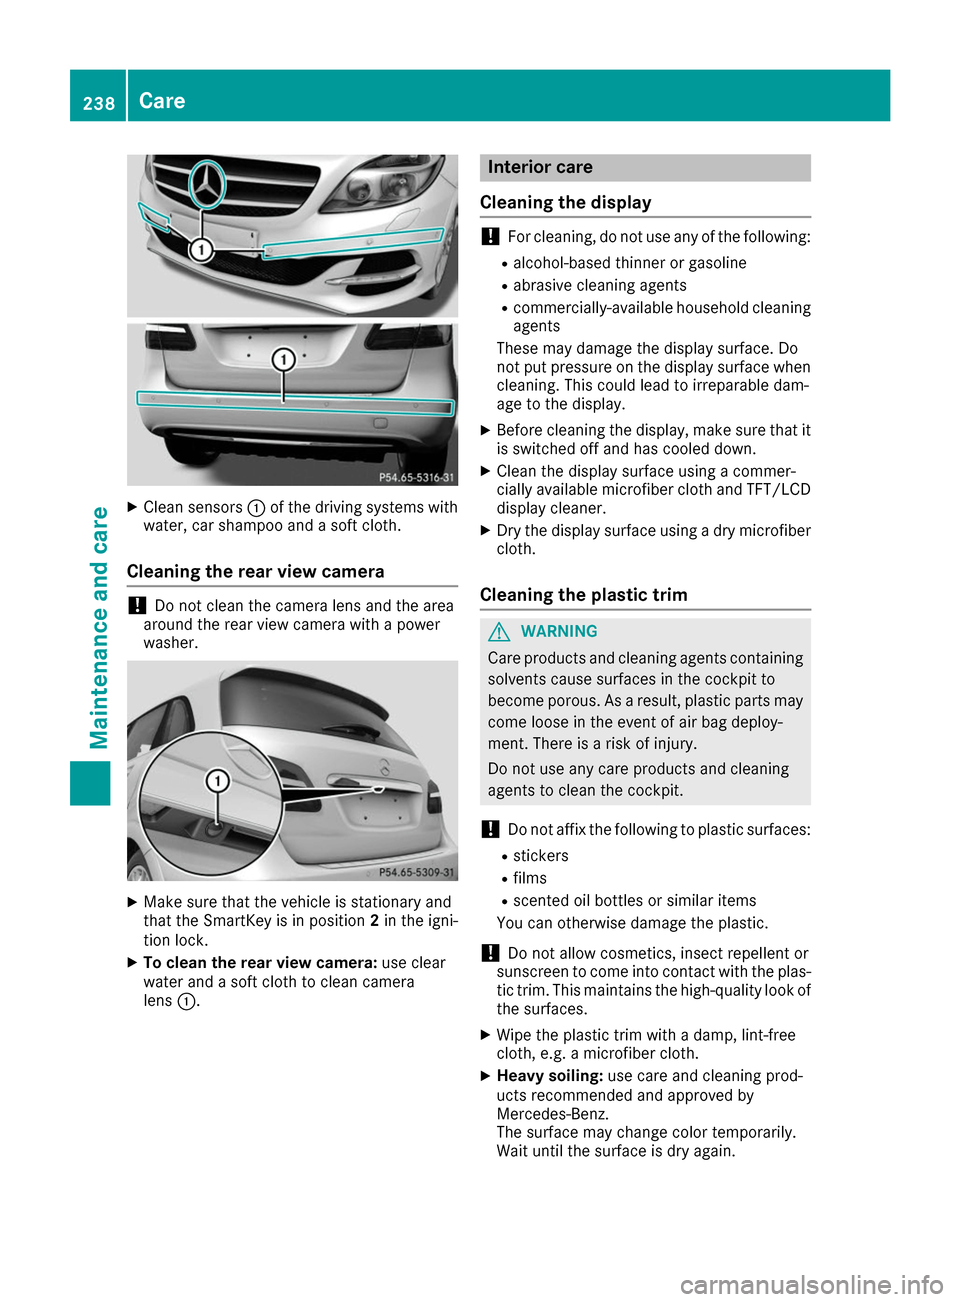
X
Clean sensors 0043of the driving systems with
water, car shampoo and a soft cloth.
Cleaning the rear view camera !
Do not clean the camera lens and the area
around the rear view camera with a power
washer. X
Make sure that the vehicle is stationary and
that the SmartKey is in position 2in the igni-
tion lock.
X To clean the rear view camera: use clear
water and a soft cloth to clean camera
lens 0043. Interior care
Cleaning the display !
For cleaning, do not use any of the following:
R alcohol-based thinner or gasoline
R abrasive cleaning agents
R commercially-available household cleaning
agents
These may damage the display surface. Do
not put pressure on the display surface when cleaning. This could lead to irreparable dam-
age to the display.
X Before cleaning the display, make sure that it
is switched off and has cooled down.
X Clean the display surface using a commer-
cially available microfiber cloth and TFT/LCD
display cleaner.
X Dry the display surface using a dry microfiber
cloth.
Cleaning the plastic trim G
WARNING
Care products and cleaning agents containing solvents cause surfaces in the cockpit to
become porous. As a result, plastic parts may
come loose in the event of air bag deploy-
ment. There is a risk of injury.
Do not use any care products and cleaning
agents to clean the cockpit.
! Do not affix the following to plastic surfaces:
R stickers
R films
R scented oil bottles or similar items
You can otherwise damage the plastic.
! Do not allow cosmetics, insect repellent or
sunscreen to come into contact with the plas-
tic trim. This maintains the high-quality look of the surfaces.
X Wipe the plastic trim with a damp, lint-free
cloth, e.g. a microfiber cloth.
X Heavy soiling: use care and cleaning prod-
ucts recommended and approved by
Mercedes-Benz.
The surface may change color temporarily.
Wait until the surface is dry again. 238
CareMaintenance and care
Page 265 of 290
Overinflated tires may:
R
increase the braking distance
R adversely affect handling
R wear excessively and/or unevenly
R have an adverse effect on ride comfort
R be more susceptible to damage
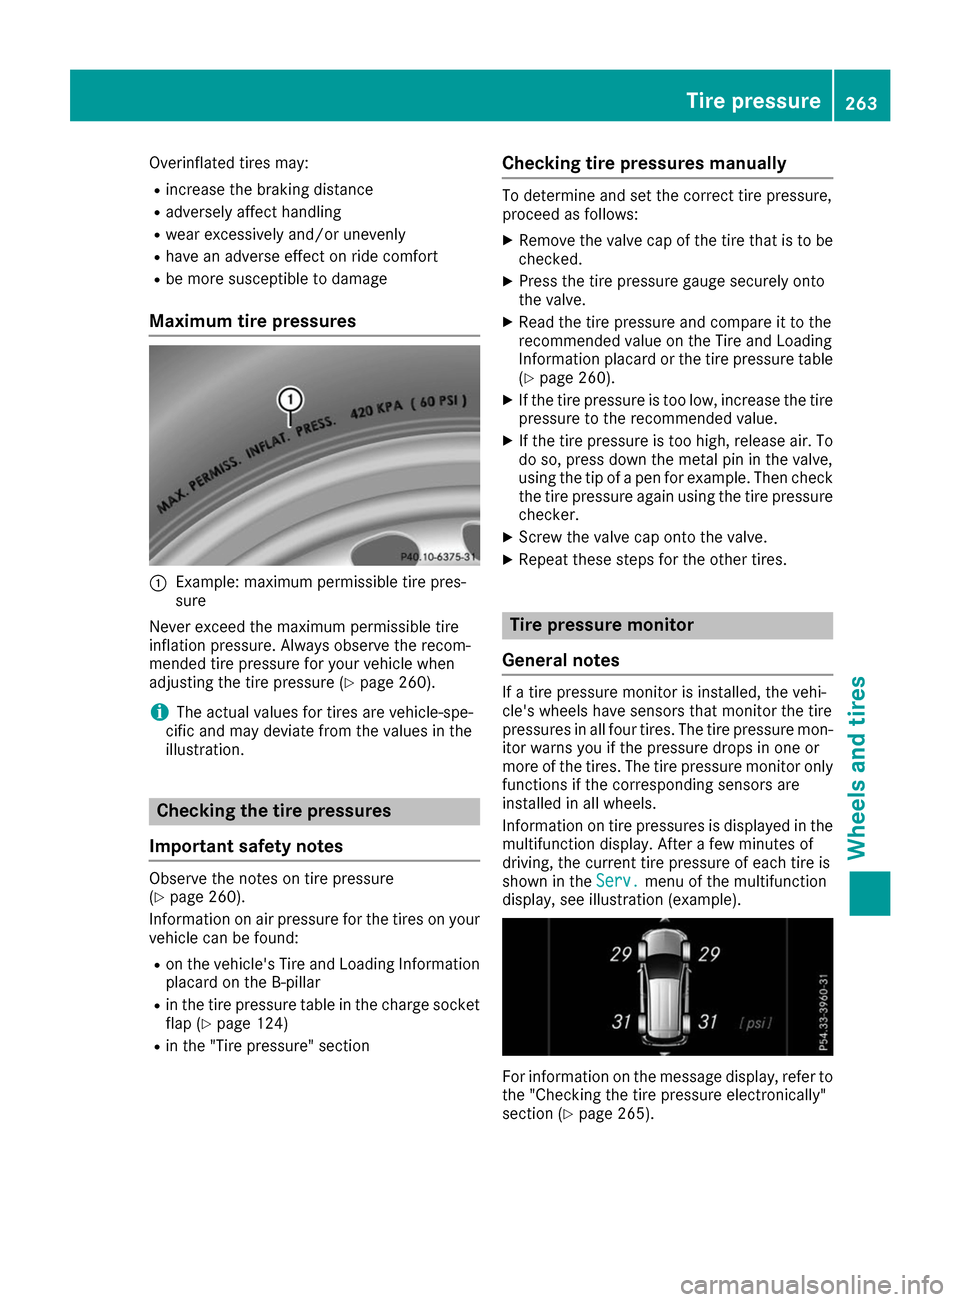
Maximum tire pressures 0043
Example: maximum permissible tire pres-
sure
Never exceed the maximum permissible tire
inflation pressure. Always observe the recom-
mended tire pressure for your vehicle when
adjusting the tire pressure (Y page 260).
i The actual values for tires are vehicle-spe-
cific and may deviate from the values in the
illustration. Checking the tire pressures
Important safety notes Observe the notes on tire pressure
(Y
page 260).
Information on air pressure for the tires on your vehicle can be found:
R on the vehicle's Tire and Loading Information
placard on the B-pillar
R in the tire pressure table in the charge socket
flap (Y page 124)
R in the "Tire pressure" section Checking tire pressures manually To determine and set the correct tire pressure,
proceed as follows:
X Remove the valve cap of the tire that is to be
checked.
X Press the tire pressure gauge securely onto
the valve.
X Read the tire pressure and compare it to the
recommended value on the Tire and Loading
Information placard or the tire pressure table
(Y page 260).
X If the tire pressure is too low, increase the tire
pressure to the recommended value.
X If the tire pressure is too high, release air. To
do so, press down the metal pin in the valve,
using the tip of a pen for example. Then check the tire pressure again using the tire pressure
checker.
X Screw the valve cap onto the valve.
X Repeat these steps for the other tires. Tire pressure monitor
General notes If a tire pressure monitor is installed, the vehi-
cle's wheels have sensors that monitor the tire
pressures in all four tires. The tire pressure mon-
itor warns you if the pressure drops in one or
more of the tires. The tire pressure monitor only functions if the corresponding sensors are
installed in all wheels.
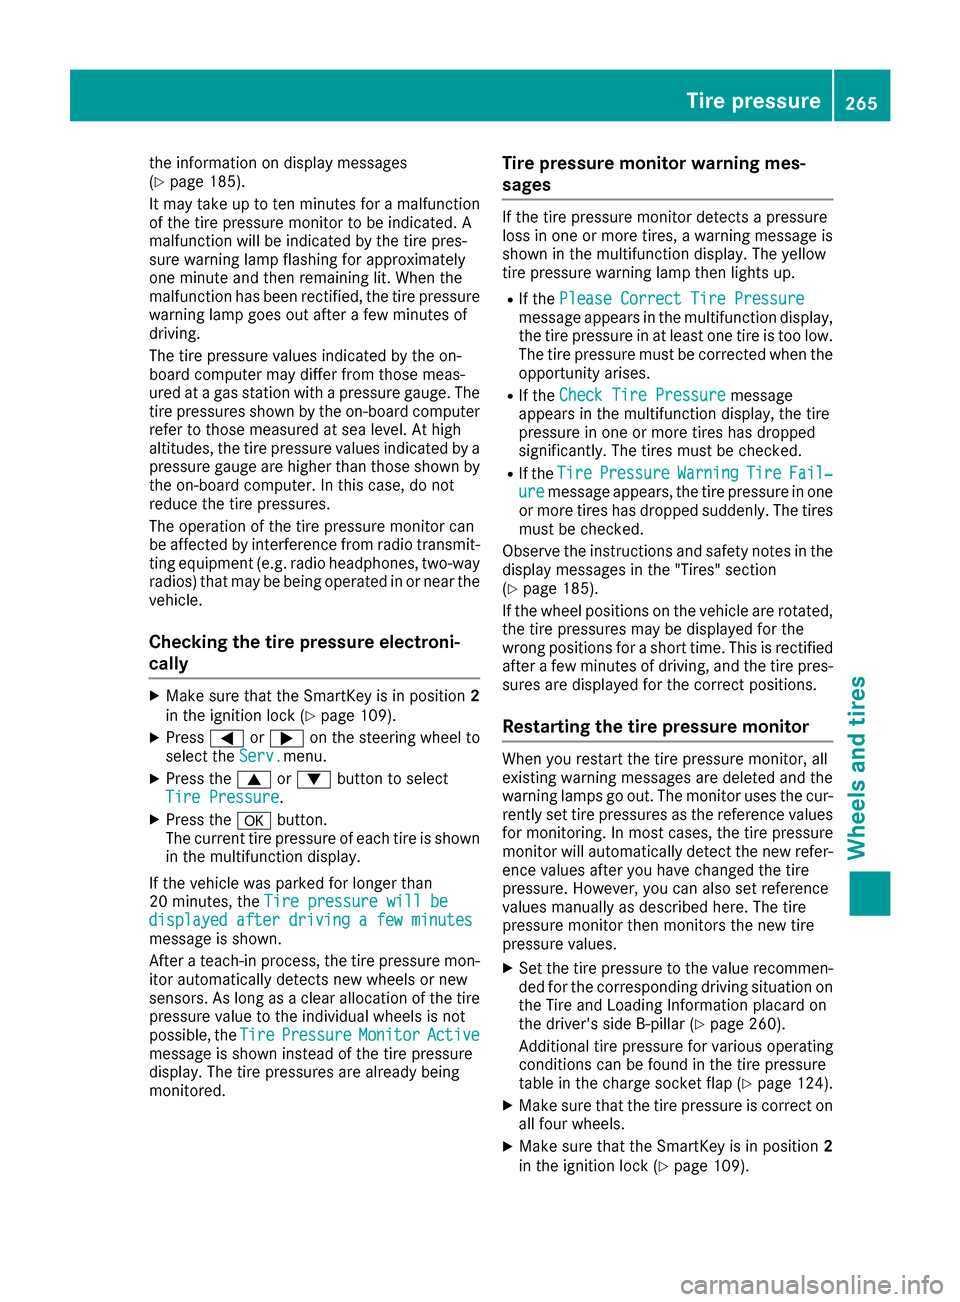
Information on tire pressures is displayed in the
multifunction display. After a few minutes of
driving, the current tire pressure of each tire is
shown in the Serv. Serv.menu of the multifunction
display, see illustration (example). For information on the message display, refer to
the "Checking the tire pressure electronically"
section (Y page 265). Tire pressure
263Wheels and tires Z
Page 267 of 290
the information on display messages
(Y page 185).
It may take up to ten minutes for a malfunction of the tire pressure monitor to be indicated. A
malfunction will be indicated by the tire pres-
sure warning lamp flashing for approximately
one minute and then remaining lit. When the
malfunction has been rectified, the tire pressure
warning lamp goes out after a few minutes of
driving.
The tire pressure values indicated by the on-
board computer may differ from those meas-
ured at a gas station with a pressure gauge. The
tire pressures shown by the on-board computer refer to those measured at sea level. At high
altitudes, the tire pressure values indicated by a
pressure gauge are higher than those shown by the on-board computer. In this case, do not
reduce the tire pressures.
The operation of the tire pressure monitor can
be affected by interference from radio transmit-
ting equipment (e.g. radio headphones, two-way radios) that may be being operated in or near the vehicle.
Checking the tire pressure electroni-
cally X
Make sure that the SmartKey is in position 2
in the ignition lock (Y page 109).
X Press 0059or0065 on the steering wheel to
select the Serv. Serv.menu.
X Press the 0063or0064 button to select
Tire Pressure
Tire Pressure.
X Press the 0076button.
The current tire pressure of each tire is shown
in the multifunction display.
If the vehicle was parked for longer than
20 minute s,the Tire pressure will be Tire pressure will be
displayed after driving a few minutes
displayed after driving a few minutes
message is shown.
After a teach-in process, the tire pressure mon- itor automatically detects new wheels or new
sensors. As long as a clear allocation of the tire
pressure value to the individual wheels is not
possible, the Tire TirePressure
Pressure Monitor
Monitor Active
Active
message is shown instead of the tire pressure
display. The tire pressures are already being
monitored. Tire pressure monitor warning mes-
sages If the tire pressure monitor detects a pressure
loss in one or more tires, a warning message is
shown in the multifunction display. The yellow
tire pressure warning lamp then lights up.
R If the Please Correct Tire Pressure Please Correct Tire Pressure
message appears in the multifunction display, the tire pressure in at least one tire is too low.
The tire pressure must be corrected when the
opportunity arises.
R If the Check Tire Pressure
Check Tire Pressure message
appears in the multifunction display, the tire
pressure in one or more tires has dropped
significantly. The tires must be checked.
R If the Tire Tire Pressure
Pressure Warning
WarningTire
TireFail‐
Fail‐
ure
ure message appears, the tire pressure in one
or more tires has dropped suddenly. The tires
must be checked.
Observe the instructions and safety notes in the display messages in the "Tires" section
(Y page 185).
If the wheel positions on the vehicle are rotated,
the tire pressures may be displayed for the
wrong positions for a short time. This is rectified after a few minutes of driving, and the tire pres-
sures are displayed for the correct positions.
Restarting the tire pressure monitor When you restart the tire pressure monitor, all
existing warning messages are deleted and the
warning lamps go out. The monitor uses the cur-
rently set tire pressures as the reference values for monitoring. In most cases, the tire pressure
monitor will automatically detect the new refer-
ence values after you have changed the tire
pressure. However, you can also set reference
values manually as described here. The tire
pressure monitor then monitors the new tire
pressure values.
X Set the tire pressure to the value recommen-
ded for the corresponding driving situation on
the Tire and Loading Information placard on
the driver's side B-pillar (Y page 260).
Additional tire pressure for various operating
conditions can be found in the tire pressure
table in the charge socket flap (Y page 124).
X Make sure that the tire pressure is correct on
all four wheels.
X Make sure that the SmartKey is in position 2
in the ignition lock (Y page 109). Tire pressure
265Wheels and tires Z