charging MERCEDES-BENZ B-CLASS HATCHBACK 2008 Owners Manual
[x] Cancel search | Manufacturer: MERCEDES-BENZ, Model Year: 2008, Model line: B-CLASS HATCHBACK, Model: MERCEDES-BENZ B-CLASS HATCHBACK 2008Pages: 305, PDF Size: 5.1 MB
Page 7 of 305

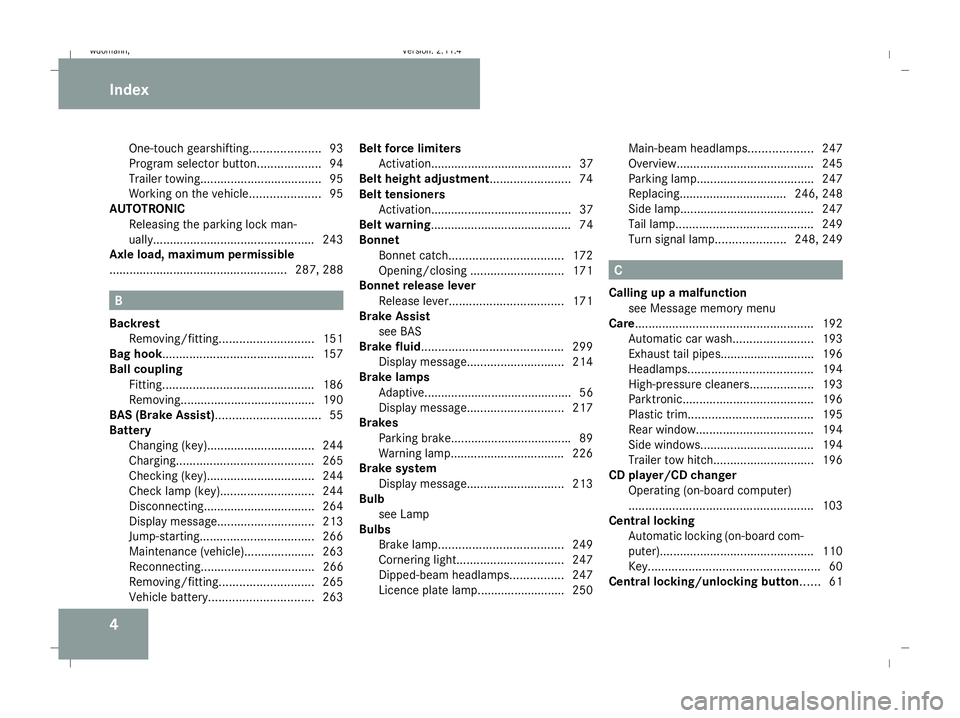
4One-touch gearshifting.
....................93
Program selector button ...................94
Trailer towing. ................................... 95
Working on the vehicle .....................95
AUTOTRONIC
Releasing the parking lock man-
ually. ............................................... 243
Axle load, maximum permissible
..................................................... 287, 288B
Backrest Removing/fitting. ........................... 151
Bag hook............................................. 157
Ball coupling Fitting ............................................. 186
Removing....................................... .190
BAS (Brake Assist)............................... 55
Battery Changing (key).. .............................. 244
Charging. ........................................ 265
Checking (key). ............................... 244
Check lamp (key). ........................... 244
Disconnecting ................................. 264
Display message ............................. 213
Jump-starting. ................................. 266
Maintenance (vehicle)..................... 263
Reconnecting.................................. 266
Removing/fitting. ........................... 265
Vehicle battery. .............................. 263Belt force limiters
Activation.......................................... 37
Belt height adjustment ........................74
Belt tensioners Activation.......................................... 37
Belt warning.......................................... 74
Bonnet Bonnet catch .................................. 172
Opening/closing ............................ 171
Bonnet release lever
Release leve r.................................. 171
Brake Assist
see BAS
Brake fluid .......................................... 299
Display message ............................. 214
Brake lamps
Adaptive............................................ 56
Display message ............................. 217
Brakes
Parking brake................................... .89
Warning lamp..................................2 26
Brake system
Display message ............................. 213
Bulb
see Lamp
Bulbs
Brake lamp. .................................... 249
Cornering light. ............................... 247
Dipped-beam headlamps ................247
Licence plate lamp.......................... 250 Main-beam headlamps
...................247
Overview. ........................................ 245
Parking lamp.................................. .247
Replacing............................... .246, 248
Side lamp....................................... .247
Tail lamp ......................................... 249
Turn signal lamp. ....................248, 249 C
Calling up a malfunction see Message memory menu
Care..................................................... 192
Automatic car wash. .......................193
Exhaust tail pipes............................ 196
Headlamps. .................................... 194
High-pressure cleaners. ..................193
Parktronic. ...................................... 196
Plastic trim. .................................... 195
Rear window. .................................. 194
Side windows.................................. 194
Trailer tow hitch. ............................. 196
CD player/CD changer
Operating (on-board computer)
....................................................... 103
Central locking
Automatic locking (on-board com-
puter). ............................................. 110
Key. .................................................. 60
Central locking/unlocking button ......61 Index
245_AKB; 2; 7, en-GB
wdomann,
Version: 2.11.4 2008-10-17T11:22:31+02:00 - Seite 4Dateiname: 6515_1640_02_buchblock.pdf; preflight
Page 80 of 305

Lights
77
while the ignition is switched off (ignition
key in position
0).
! Switch off the side lamps and parking
lamp when you leave the vehicle. This pre-
vents the battery from discharging.
Dipped-beam headlamps X
Turn the ignition key to position 2in the
ignition lock or start the engine.
X To switch on: turn the light switch to
B.
The B indicator lamp in the instrument
cluster lights up.
Constant headlamp mode In countries in which constant headlamp
mode is not a legal requirement, you can
make this a setting using the on-board com-
puter.
You can activate or deactivate "constant
headlamp mode" using the on-board com-
puter (Y
page 108).
X To switch on: turn the light switch to
M orU.
The dipped-beam headlamps are switched
on when the engine is running. i
When you turn the light switch to any
position other than MorU, the cor-
responding light goes on.
Automatic headlamp mode G
Risk of accident
If the light switch is set to the Ãposi-
tion, the light will not come on automati-
cally in foggy conditions. This could endan-
ger you and others. Therefore, turn the light
switch to Lin the dark or in fog.
The automatic headlamp feature is only an
aid. The driver is responsible for the vehi-
cle's lighting at all times. G
Risk of accident
When it is dark or foggy, turn the light
switch from ÃtoL in good time.
Otherwise, the headlamps could switch off
temporarily and you could cause an acci-
dent.
X To switch on: turn the light switch to
U.
Key in position 1in the ignition lock: the
side lamp is switched on or off automati-
cally, depending on the brightness of the
ambient light. Starting the engine: the dipped-beam head-
lamps are also switched on or off automat-
ically, depending on the brightness of the
ambient light.
When the dipped-beam headlamps are
switched on, the
Bindicator lamp in the
instrument cluster lights up.
Front foglamps*/Rear foglamp G
Risk of accident
If you suspect that driving conditions will be
foggy, turn the light switch to Lbefore
you start your journey. Otherwise, your
vehicle may not be visible and you could
endanger yourself and others.
When the light switch is set to Uyou can-
not switch on the front* or rear foglamps.
X Turn the key to position 2in the ignition
lock.
X To switch on the front foglamps*: turn
the light switch to the BorC posi-
tion.
X Pull the light switch out to the first detent.
The ¥ green indicator lamp next to the
light switch lights up. Controls
* optional
245_AKB; 2; 7, en-GB
wdomann
,V ersion: 2.11.4
2008-10-17T11:22:31+02:00 - Seite 77 ZDateiname: 6515_1640_02_buchblock.pdf; preflight
Page 267 of 305

Battery
264 step out of the vehicle first and touch the
bodywork.
R Do not wipe the battery using a cloth. The
battery could be destroyed as a result of
electrostatic charge or due to flying
sparks.
! Switch off the engine and remove the key
before disconnecting the terminal clamps
from the battery. Otherwise, you may
destroy electronic components, such as
the alternator.
i Mercedes-Benz recommends that you
have all work involving the battery, e.g.
removing, charging and replacing, carried
out at a qualified specialist workshop, e.g.
a Mercedes-Benz Service Centre.
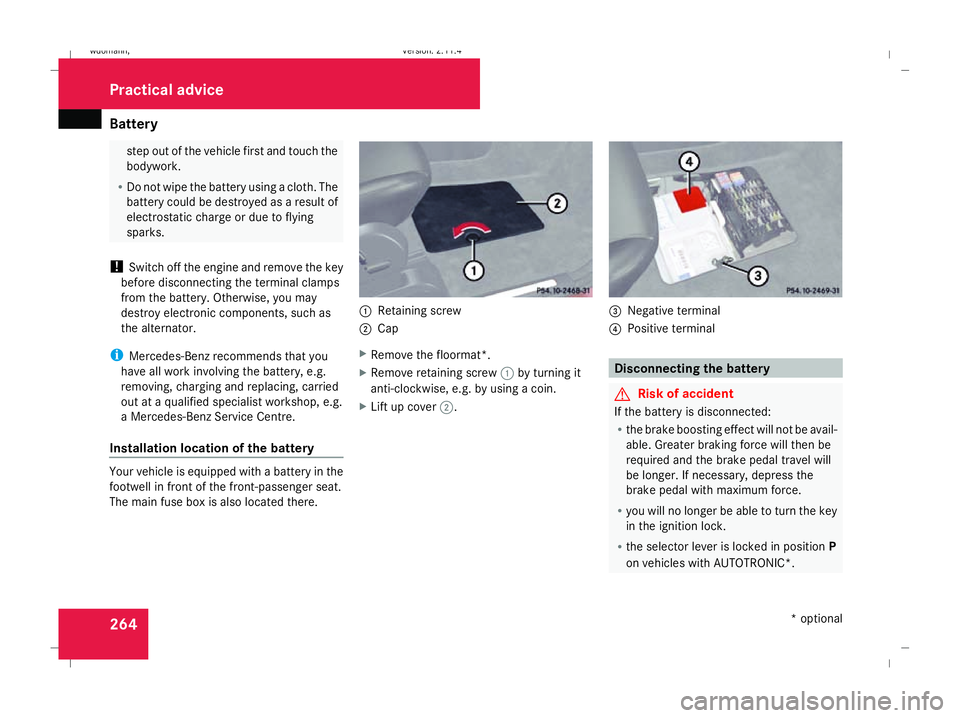
Installation location of the battery Your vehicle is equipped with a battery in the
footwell in front of the front-passenger seat.
The main fuse box is also located there. 1
Retaining screw
2 Cap
X Remove the floormat*.
X Remove retaining screw 1by turning it
anti-clockwise, e.g. by using a coin.
X Lift up cover 2. 3
Negative terminal
4 Positive terminal Disconnecting the battery
G
Risk of accident
If the battery is disconnected:
R the brake boosting effect will not be avail-
able. Greater braking force will then be
required and the brake pedal travel will
be longer. If necessary, depress the
brake pedal with maximum force.
R you will no longer be able to turn the key
in the ignition lock.
R the selector lever is locked in position P
on vehicles with AUTOTRONIC*. Practical advice
* optional
245_AKB; 2; 7, en-GB
wdomann,
Version: 2.11.4 2008-10-17T11:22:31+02:00 - Seite 264Dateiname: 6515_1640_02_buchblock.pdf; preflight
Page 268 of 305

Battery
265
!
Always disconnect the battery in
the order described below. Never swap the
terminal clamps. Otherwise, you may dam-
age the vehicle electronics.
X Apply the handbrake and shift the selector
lever to position Pon vehicles with AUTO-
TRONIC*.
X Switch off all electrical consumers.
X Turn the key to position 0(Y page 62) in
the ignition lock and remove it.
X Remove the negative terminal clamp from
the battery.
X Remove the cover from the positive termi-
nal clamp.
X Remove the positive terminal clamp from
the battery.
X Disconnect the breather hose. Removing the battery
X Disconnect the battery ( Ypage 264).
X Loosen the bolt which holds the battery in
place.
X Remove the battery. Charging and fitting the battery
G
Risk of injury
Only charge the battery in a well-ventilated
area. As the battery is being charged, gases
can escape and generate minor explosions.
This may injure you and other persons or
cause damage to the paintwork or acid cor-
rosion on the vehicle.
You can obtain information about battery
chargers which allow the battery to be
charged when still installed from a qualified
specialist workshop, e.g. a Mercedes-Benz
Service Centre. G
Risk of injury
There is a risk of acid burns during the
charging process due to the gases which
escape from the battery. Do not lean over
the battery during the charging process. G
Risk of injury
Battery acid is caustic. Avoid contact with
the skin, eyes or clothing.
! Only charge the installed battery with a
battery charger which has been tested and
approved by Mercedes-Benz. These battery
chargers allow the battery to be charged
while it is still installed. However, the bat-
tery must always be disconnected first.
! Only use battery chargers with a maxi-
mum charging voltage of 14.8 V.
X Charge the battery. Observe the notes in
the operating instructions for your battery
charger.
X Refit the charged battery.
To do this, follow the steps described in
"Removing the battery" (Y page 265) in
reverse order. Practical advice
* optional
245_AKB; 2; 7, en-GB
wdomann,
Version: 2.11.4
2008-10-17T11:22:31+02:00 - Seite 265 ZDateiname: 6515_1640_02_buchblock.pdf; preflight