low beam MERCEDES-BENZ B-CLASS HATCHBACK 2008 Owners Manual
[x] Cancel search | Manufacturer: MERCEDES-BENZ, Model Year: 2008, Model line: B-CLASS HATCHBACK, Model: MERCEDES-BENZ B-CLASS HATCHBACK 2008Pages: 305, PDF Size: 5.1 MB
Page 8 of 305
5
Central unlocking
Key................................................... 60
Centre console
Lower section. .................................. 32
Upper section. .................................. 31
Changing a wheel
see Flat tyre
Child-proof locks
Rear doors. ....................................... 54
Children
Fastening seat belts.......................... 51
In the vehicle. ................................... 42
Restraint systems. ............................ 43
Child seat
Automatic recognition ......................45
Automatic recognition (malfunc-
tion). ............................................... 223
Integrated ......................................... 50
ISOFIX............................................... 48
Recommendations. ...........................47
Suitable positions. ............................ 46
Cigarette lighter................................. 162
Cleaning the windscreen ..................194
Cockpit Overview. .......................................... 22
COMAND............................................. 100
On-board computer. .......................100
see separate operating instructions
Constant headlamp mode
Setting (on-board computer).......... .108 Consumption statistics (on-board
computer)...........................................
111
Convenience closing ............................85
Convenience opening ........................... 84
Coolant ................................................ 175
Checking the level. .........................175
Display message ............213, 214, 215
Mixture ratio ................................... 297
Temperature gauge ...........................97
Cornering lights
Display message ............................. 216
Cruise control..................................... 114
Cup holder.......................................... 143 D
Dashboard see Instrument cluster
Date
Setting (on-board computer).......... .108
Daytime driving lights
see Constant headlamp mode
Delayed switch-off
Exterior lighting (on-board com-
puter). ............................................. 109
Interior lighting (on-board com-
puter). ............................................. 109
Diesel
Low outside temperatures. .............170Diesel engine
Winter driving. ................................ 170
Digital speedometer.......................... 102
Dipped-beam headlamps Display message ............................. 216
Symmetrical. .................................. 185
Display message................................ 202
Display messages Service interval display. ..................191
Symbol messages. ..........................212
Text messages. ............................... 203
Distance recorder
see Total distance recorder
see Trip meter
Door
Automatic locking ............................. 61
Display message ............................. 212
Emergency locking .........................242
Emergency unlocking...................... 241
Opening (from the inside). ................61
Door control panel
Overview. .......................................... 34
Drinks holder
see Cup holder
Driver's airbag...................................... 40
Driver's seat position........................... 75
Driving abroad.................................... 185
Driving information Fording .......................................... 185 Index
245_AKB; 2; 7, en-GB
wdomann,
Version: 2.11.4
2008-10-17T11:22:31+02:00 - Seite 5 Dateiname: 6515_1640_02_buchblock.pdf; preflight
Page 30 of 305
Instrument cluster
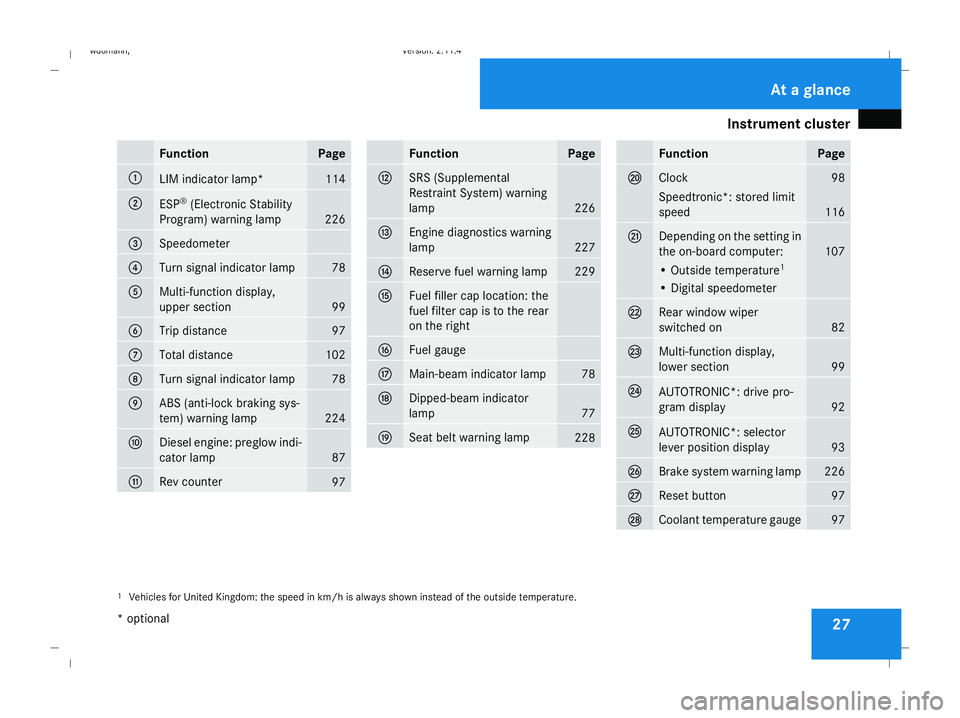
27Function Page
1
LIM indicator lamp* 114
2
ESP
®
(Electronic Stability
Program) warning lamp 226
3
Speedometer
4
Turn signal indicator lamp 78
5
Multi-function display,
upper section
99
6
Trip distance 97
7
Total distance 102
8
Turn signal indicator lamp 78
9
ABS (anti-lock braking sys-
tem) warning lamp
224
a
Diesel engine: preglow indi-
cator lamp
87
b
Rev counter
97 Function Page
c
SRS (Supplemental
Restraint System) warning
lamp
226
d
Engine diagnostics warning
lamp
227
e
Reserve fuel warning lamp 229
f
Fuel filler cap location: the
fuel filter cap is to the rear
on the right
g
Fuel gauge
h
Main-beam indicator lamp 78
j
Dipped-beam indicator
lamp
77
k
Seat belt warning lamp
228 Function Page
l
Clock 98
Speedtronic*: stored limit
speed
116
m
Depending on the setting in
the on-board computer:
107
• Outside temperature
1 • Digital speedometer
n
Rear window wiper
switched on
82
o
Multi-function display,
lower section
99
p
AUTOTRONIC*: drive pro-
gram display
92
q
AUTOTRONIC*: selector
lever position display
93
r
Brake system warning lamp 226
s
Reset button 97
t
Coolant temperature gauge 97
1
Vehicles for United Kingdom: the speed in km/h is always shown instead of the outside temperature. At a glance
* optional
245_AKB; 2; 7, en-GB
wdomann
,V ersion: 2.11.4
2008-10-17T11:22:31+02:00 - Seite 27 Dateiname: 6515_1640_02_buchblock.pdf; preflight
Page 32 of 305
Instrument cluster
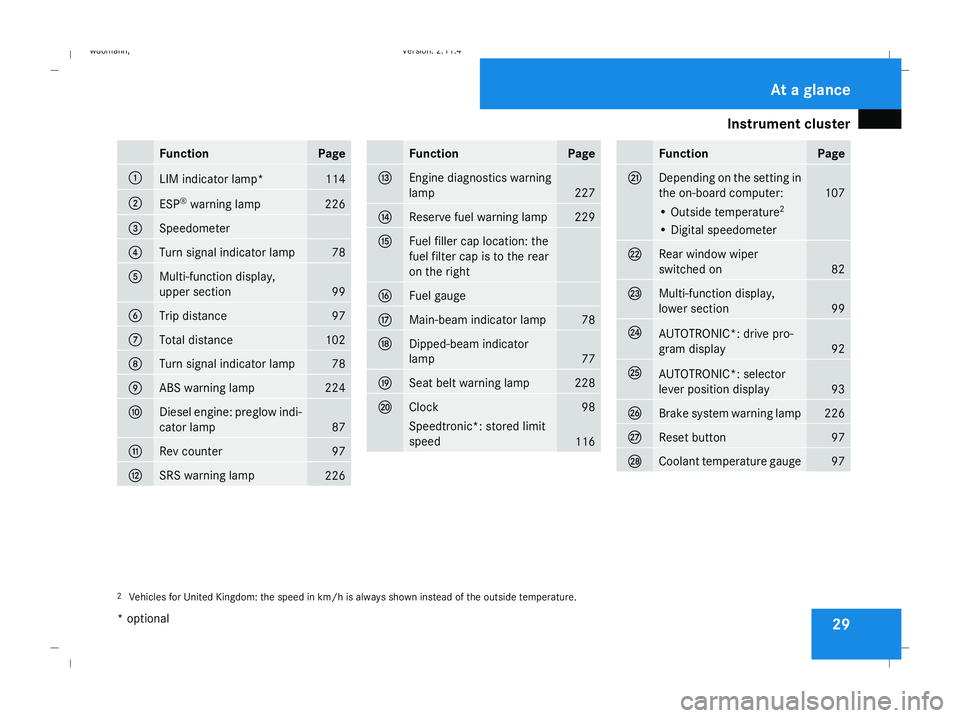
29Function Page
1
LIM indicator lamp* 114
2
ESP
®
warning lamp 226
3
Speedometer
4
Turn signal indicator lamp 78
5
Multi-function display,
upper section
99
6
Trip distance 97
7
Total distance 102
8
Turn signal indicator lamp 78
9
ABS warning lamp 224
a
Diesel engine: preglow indi-
cator lamp
87
b
Rev counter 97
c
SRS warning lamp
226 Function Page
d
Engine diagnostics warning
lamp
227
e
Reserve fuel warning lamp 229
f
Fuel filler cap location: the
fuel filter cap is to the rear
on the right
g
Fuel gauge
h
Main-beam indicator lamp 78
j
Dipped-beam indicator
lamp
77
k
Seat belt warning lamp 228
l
Clock 98
Speedtronic*: stored limit
speed
116 Function Page
m
Depending on the setting in
the on-board computer:
107
• Outside temperature
2 • Digital speedometer
n
Rear window wiper
switched on
82
o
Multi-function display,
lower section
99
p
AUTOTRONIC*: drive pro-
gram display
92
q
AUTOTRONIC*: selector
lever position display
93
r
Brake system warning lamp 226
s
Reset button 97
t
Coolant temperature gauge 97
2
Vehicles for United Kingdom: the speed in km/h is always shown instead of the outside temperature. At a glance
* optional
245_AKB; 2; 7, en-GB
wdomann
,V ersion: 2.11.4
2008-10-17T11:22:31+02:00 - Seite 29 Dateiname: 6515_1640_02_buchblock.pdf; preflight
Page 81 of 305

Lights
78
X
To switch on the rear foglamp: turn the
light switch to BorC.
X On vehicles with front foglamps*, pull the
light switch out to the second detent.
On vehicles without front foglamps*, pull
the light switch out to the detent.
The † yellow indicator lamp next to the
light switch lights up.
X To switch off the front foglamps*/rear
foglamp: push in the light switch to the
stop.
The corresponding indicator lamp goes out. Combination switch (turn signals,
main-beam headlamps and headlamp
flasher)
Turn signal lamp
X
To switch on: press the combination
switch in the direction of arrow 2or?.
The corresponding turn signal indicator
lamp K orL in the instrument clus-
ter flashes.
i If you only wish to indicate a minor change
of direction, press the combination switch
briefly in the appropriate direction. The cor-
responding turn signal flashes three times. Main-beam headlamps X
Turn the ignition key to position 2in the
ignition lock or start the engine.
X Turn the light switch to BorU 9
.
X To switch on: press the combination
switch in the direction of arrow 1.
The A main-beam indicator lamp in the
instrument cluster lights up.
X To switch off: move the combination
switch back to its normal position.
The A main-beam indicator lamp in the
instrument cluster goes out.
Headlamp flasher X
To switch on: briefly pull the combination
switch in the direction of arrow =.
9 In the Uposition, the main-beam headlamps are only switched on when it is dark. Controls
* optional
245_AKB; 2; 7, en-GB
wdomann,
Version: 2.11.4
2008-10-17T11:22:31+02:00 - Seite 78 Dateiname: 6515_1640_02_buchblock.pdf; preflight
Page 83 of 305
Lights
80 Cornering light function (bi-xenon
headlamps*)
Specially designed headlamps light up the
area into which you are driving when turning
corners.
If you are driving at speeds below 40 km/h,
the cornering light function is activated either
by the turn signals or when the steering wheel
is turned. At speeds between 40 km/h and
70 km/h, only a steering wheel movement
activates the cornering light function. If you
are driving at speeds above 70 km/h the cor-
nering light function is deactivated.
Activating X
Start the engine.
X Switch on the dipped-beam headlamps.
X Switch off the foglamps*.
X Switch on the turn signal.
The cornering lamp on the same side as the
turn signal comes on, even if you turn the
steering wheel in the opposite direction
after indicating.
or X
Turn the steering wheel in the desired
direction.
When in a forwards gear: the cornering
lamp on the inside of the bend comes on.
When in reverse gear: the cornering lamp
on the outside of the bend comes on.
Deactivating X
Turn the steering wheel back to the straight
ahead position.
The turn signal goes off. The cornering lamp
may remain lit for a short time.
or
X Switch off the turn signal.
The cornering lamp may remain lit for a
short time.
The cornering light will go out after a maxi-
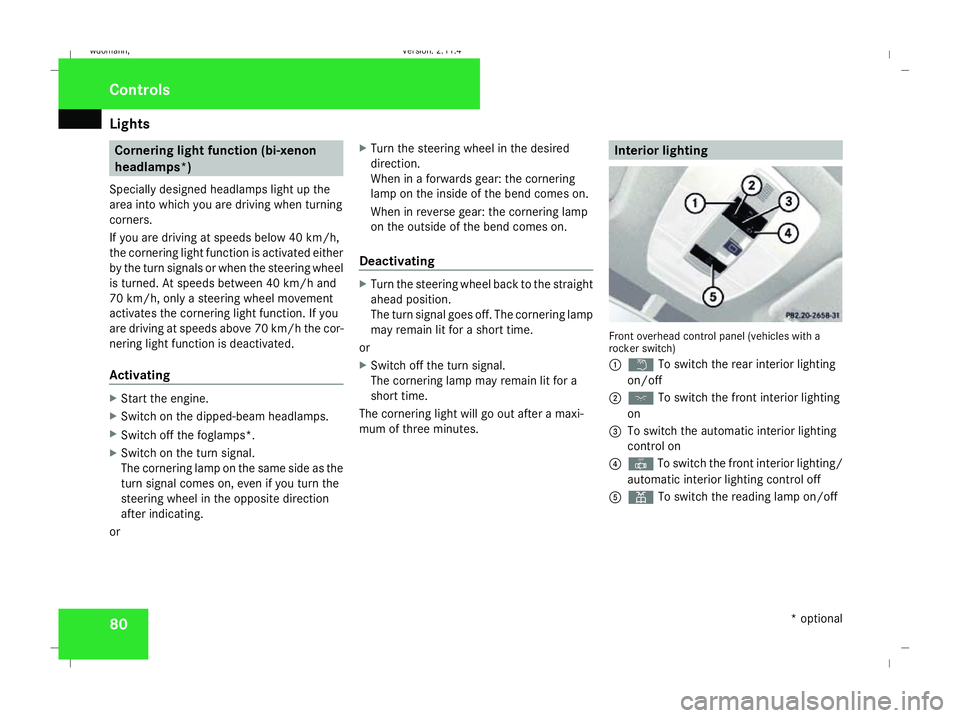
mum of three minutes. Interior lighting
Front overhead control panel (vehicles with a
rocker switch)
1
£ To switch the rear interior lighting
on/off
2 ð To switch the front interior lighting
on
3 To switch the automatic interior lighting
control on
4 ¥ To switch the front interior lighting/
automatic interior lighting control off
5 X To switch the reading lamp on/off Controls
* optional
245_AKB; 2; 7, en-GB
wdomann
,V ersion: 2.11.4
2008-10-17T11:22:31+02:00 - Seite 80 Dateiname: 6515_1640_02_buchblock.pdf; preflight
Page 111 of 305
On-board computer
108
X
Press the æorç button to select the
status line display: outside temperature
(Outside temp.) or speed ( Speed).
The selected display now appears con-
stantly in the lower multi-function display.
When you scroll through the Operation
menu (Y page 101), you will see the display
you have not selected.
X Press the j,èorÿ button to
select a different display.
Setting the date and time Your vehicle may be equipped with one of the
following audio systems *:
A: Audio 5* or Audio 20*
B: Audio 50 APS*
C: COMAND APS*
X You can see which audio system *is fitted
in your vehicle by referring to the separate
operating instructions.
Depending on the audio system*, the time
and date are received from GPS satellites and
cannot be set using the on-board computer
(see the following table). A B C
Set using the on-board com-
puter X
Automatic GPS satellite recep-
tion X X
X
Press the èor· button to select the
Settings menu.
X Press the jbutton to select submenus.
X Press the æorç button to select the
Time/Date submenu.
Setting the time
X Press the jbutton to select Time
Hours (orTime Minutes).
X Press the æorç button to set a
value. Setting the date
X
Press the jbutton to select Date Set
day (orDate Set month orDate Set
year ).
X Press the æorç button to set the
date.
X Press the j,èorÿ button to
select a different display.
Setting constant headlamp mode (day-
time driving lights) When you activate constant headlamp mode
and the light switch is set to
MorU,
the parking lamps, dipped-beam headlamps
and licence plate lighting are switched on
automatically when the engine is running.
Turning the light switch to a different position
switches on the corresponding lights. Turn
the light switch to BorU first if you
wish to switch off constant headlamp mode
while driving in the dark.
In countries in which constant headlamp
mode is a legal requirement, Constantis the
factory setting.
X Press the èor· button to select the
Settings menu.
X Press the jbutton to select submenus. Controls
* optional
245_AKB; 2; 7, en-GB
wdomann,
Version: 2.11.4 2008-10-17T11:22:31+02:00 - Seite 108Dateiname: 6515_1640_02_buchblock.pdf; preflight
Page 188 of 305
Driving ab
road 185Driving on wet roads
If water has accumulated to a certain depth
on the road surface, there is a danger of aqua-
planing occurring, even if:
R you drive at low speeds
R the tyres have adequate tread depth
For this reason, do not drive in tyre ruts, and
brake carefully. Driving on flooded roads
If you have to drive on stretches of road on
which water has collected, please bear in
mind that:
R the maximum permitted still water depth is
25 cm.
R you should drive no faster than at walking
pace.
! Bear in mind that vehicles travelling in
front or in the opposite direction create
waves. This may cause the maximum per-
missible water depth to be exceeded.
Failure to observe these notes may result
in damage to the engine, electrical systems
and transmission. Driving abroad
Points to remember
An extensive Mercedes-Benz Service network
is also available in other countries. The
Service Hotline's current telephone numbers
for use when you are abroad are to be found
in the "Service24h" chapter of the Service
Booklet.
Only low-octane fuel is available in certain
countries.
You can find further information about fuel
grades on (Y page 168). Symmetrical dipped beam
If your journey takes you to countries where
vehicles are driven on sides of the road oppo-
site to the country in which the vehicle is reg-
istered, your headlamps must be switched to
symmetrical dipped beam. Oncoming traffic
will be dazzled less.
X Have the headlamps switched over at a
qualified specialist workshop, e. g. a
Mercedes-Benz Service Centre. G
Risk of accident
Remember to set the headlamps back to
asymmetrical dipped beam when you return to driving on the same side of the
road as that of the country in which your
vehicle was registered. You may otherwise
dazzle the oncoming traffic and could cause
an accident. Operation
245_AKB; 2; 7, en-GB
wdomann,
Version: 2.11.4
2008-10-17T11:22:31+02:00 - Seite 185 ZDateiname: 6515_1640_02_buchblock.pdf; preflight
Page 249 of 305
Changing bulbs
246
Rear bulbs Bulb Type
7
Third brake
lamp LED
8
Turn signal lamp PY 21 W
9
Reversing lamp P 21 W
a
Licence plate
lamp C 5 W
b
Rear foglamp P 21 W
c
Tail lamp P 5 W
d
Brake lamp P 21 W
Before changing bulbs
You can replace the following bulbs:
R
Dipped-beam headlamps (halogen head-
lamps)
R Main-beam headlamps (halogen head-
lamps)
R Side lamp/parking lamp
R Cornering light* (vehicles with bi-xenon
headlamps *)
R Front turn signal lamp R
Brake lamp
R Tail lamp
R Turn signal lamp (rear)
R Licence plate lamp
Observe the following points:
R Use only the bulb types specified here.
R To prevent a short-circuit, switch off the
lights before changing a bulb.
R Only hold bulbs with a clean, lint-free cloth.
R Do not work with wet or greasy fingers.
R If the new bulb still does not light up, con-
sult a qualified specialist workshop, e.g. a
Mercedes-Benz Service Centre.
i Due to the location of the bulbs in the
front headlamps, it is best to have these
changed at a qualified specialist workshop,
e.g. a Mercedes-Benz Service Centre.
i Have the headlamp setting checked reg-
ularly at a qualified specialist workshop,
e.g. a Mercedes-Benz Service Centre. Changing the front bulbs
Removing/fitting the washer fluid res-
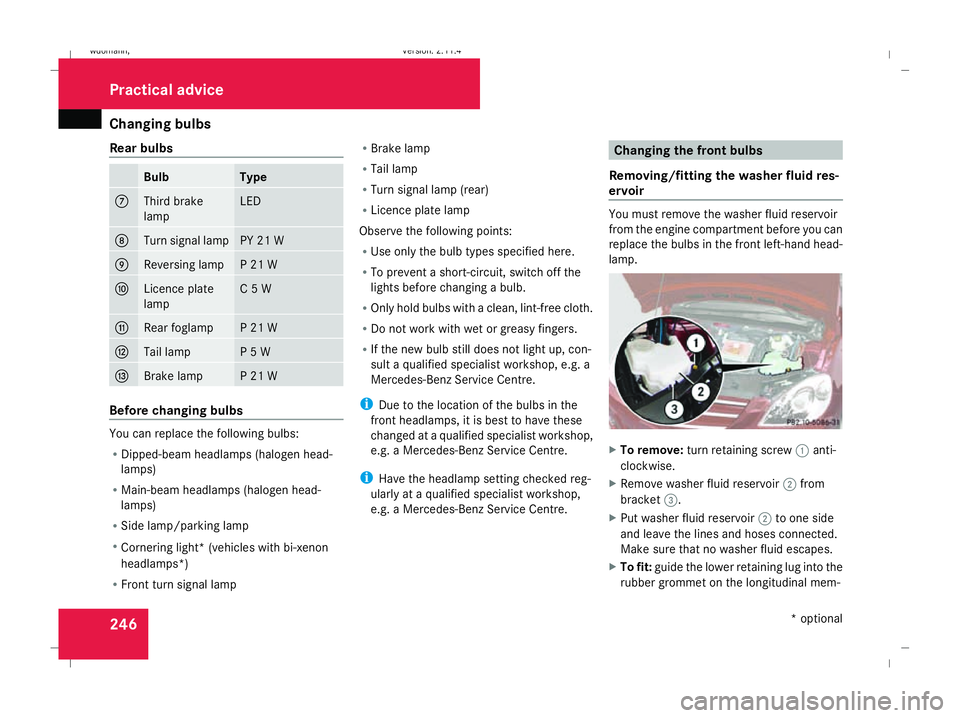
ervoir You must remove the washer fluid reservoir
from the engine compartment before you can
replace the bulbs in the front left-hand head-
lamp.
X
To remove: turn retaining screw 1anti-
clockwise.
X Remove washer fluid reservoir 2from
bracket 3.
X Put washer fluid reservoir 2to one side
and leave the lines and hoses connected.
Make sure that no washer fluid escapes.
X To fit: guide the lower retaining lug into the
rubber grommet on the longitudinal mem- Practical advice
* optional
245_AKB; 2; 7, en-GB
wdomann,
Version: 2.11.4 2008-10-17T11:22:31+02:00 - Seite 246Dateiname: 6515_1640_02_buchblock.pdf; preflight