oil level MERCEDES-BENZ B-CLASS HATCHBACK 2008 Owners Manual
[x] Cancel search | Manufacturer: MERCEDES-BENZ, Model Year: 2008, Model line: B-CLASS HATCHBACK, Model: MERCEDES-BENZ B-CLASS HATCHBACK 2008Pages: 305, PDF Size: 5.1 MB
Page 9 of 305
6
Driving safety system
..........................55
ABS. .................................................. 55
Adaptive brake lamps. ......................56
BAS. .................................................. 55
Steering assistant STEER CON-
TROL. ................................................ 56
Driving safety systems
ESP ®
................................................ 56
Driving system................................... 114
Active parking assist. ......................122
Cruise control. ................................ 114
ECO start/stop function .................126
Parktronic. ...................................... 119
Speedtronic. ................................... 116
Driving tip
Braking ........................................... 183
Trailer towing. ................................. 188
Winter ............................................. 182
Driving tips
Driving abroad ............................... 185
Driving on wet roads ......................185 E
EASY-VARIO system ...........................148
ECO start/stop function.................... 126
Electrical/electronic equipment Retrofitting ..................................... 275
Electronic Stability Program
see ESP ® e mark.................................................
275
Emergency key element Lost. ............................................... 239
Emergency locking
Vehicle............................................ 242
Emergency release
Fuel filler fla p.................................. 242
Emergency running mode
Automatic transmission ..................235
Emergency starting............................ 269
Emergency unlocking
Vehicle............................................ 241
Engine
Display message ............................. 212
Running irregularl y.......................... 234
Starting problems ........................... 233
Starting with ECO start/stop
function ............................................ 87
Starting with the key......................... 86
Switching off ..................................... 89
Switching off using the ECO Start-
Stop function .................................... 90
Technical data. ............................... 278
Engine diagnostics warning lamp
............................................................. 227
Engine electronics .............................. 275
Malfunction..................................... 233
Engine number................................... 277
Engine oil ........................................... 295
Capacities.. ..................................... 174Checking the oil level (dipstick).
.....174
Checking the oil level (on-board
computer). ...................................... 173
Consumption ................................. 172
Display message
....................................... 173, 219, 220
Filler neck. ...................................... 174
Topping up. ..................................... 174
ESP ®
(Electronic Stability Program)... 56
Display messages ...........207, 208, 209
Warning lamp. .......................... 56, 226
Exterior lighting
Delayed switch-off (on-board
computer). ...................................... 109
Exterior mirrors
Adjusting .......................................... 70
Folding in/out (automatically). .........71
Folding in/out (electrically). .............71
Folding in when locking (on-board
computer). ...................................... 110
Malfunction..................................... 238
Resetting. ......................................... 71
Exterior view
Overview. .......................................... 20 F
Fastening seat belts Childre n............................................ 51
Fire extinguisher................................ 201Index
245_AKB; 2; 7, en-GB
wdomann,
Version: 2.11.4 2008-10-17T11:22:31+02:00 - Seite 6Dateiname: 6515_1640_02_buchblock.pdf; preflight
Page 12 of 305
9
Malfunction memory
see Message memory menu
Manual transmission........................... 91
Maximum speed Technical data. ............................... 280
Memory card ...................................... 103
Operation (on-board computer). .....103
see separate operating instructions
Menu (on-board computer)................ 100
Audio. ............................................. 102
DVD. ............................................... 104
Message memory. .......................... 105
Navigation. ..................................... 104
Operating........................................ 101
Resetting to factory settings........... 105
Settings .......................................... 105
Submenu overview. ........................106
Telephone. ...................................... 112
Trip computer. ................................ 111
Messages
see Display messages
see Message memory menu
see Warning and indicator lamps
Minispare emergency spare wheel
Technical data. ............................... 285
Mirrors
Sun visor......................................... 161
Mobile phone...................................... 163
Display message..................... 210, 221 Installation.
..................................... 275
Telephone menu (on-board com-
puter). ............................................. 112
Modifying the programming
Key. .................................................. 60
MOExtended run-flat system* ..178, 262
MP3..................................................... 103
Operating (on-board computer)
....................................................... 103
see separate operating instructions
Multi-contour backrest........................ 68
Multi-function display ....................97, 99
Multi-function steering wheel............. 98
Overview. .......................................... 30 N
Navigation........................................... 104 Navigation menu (on-board com-
puter). ............................................. 104
see separate operating instructions O
Odometer Total distance recorder. ....................26
Trip meter. ........................................ 26
Oil
Consumption. ................................. 172
Topping up. ..................................... 174Oil level
Checking (dipstick). ........................174
Checking (on-board computer). ......173
On-board computer.............................. 98
Audio menu. ................................... 102
Convenience submenu. ..................107
Display messages ........................... 202
DVD menu ...................................... 104
Factory settings .............................. 105
Instrument cluster submenu ...........106
Lighting submenu. ..........................107
Message memory menu.................. 105
Navigation menu. ............................ 104
Operation menu. ............................. 101
Settings menu ................................ 105
Standard display menu. ..................102
Telephone menu. ............................ 112
Time/date submenu. ......................106
Trip computer menu. ......................111
Vehicle submenu. ........................... 107
On-board computer language ...........107
One-touch gearshifting........................ 93
Operating system see On-board computer
Outside temperature display .............98
On-board computer. .......................102
Override feature
Rear side windows ............................ 54 Index
245_AKB; 2; 7, en-GB
wdomann,
Version: 2.11.4
2008-10-17T11:22:31+02:00 - Seite 9 Dateiname: 6515_1640_02_buchblock.pdf; preflight
Page 104 of 305
On-board computer
101Function
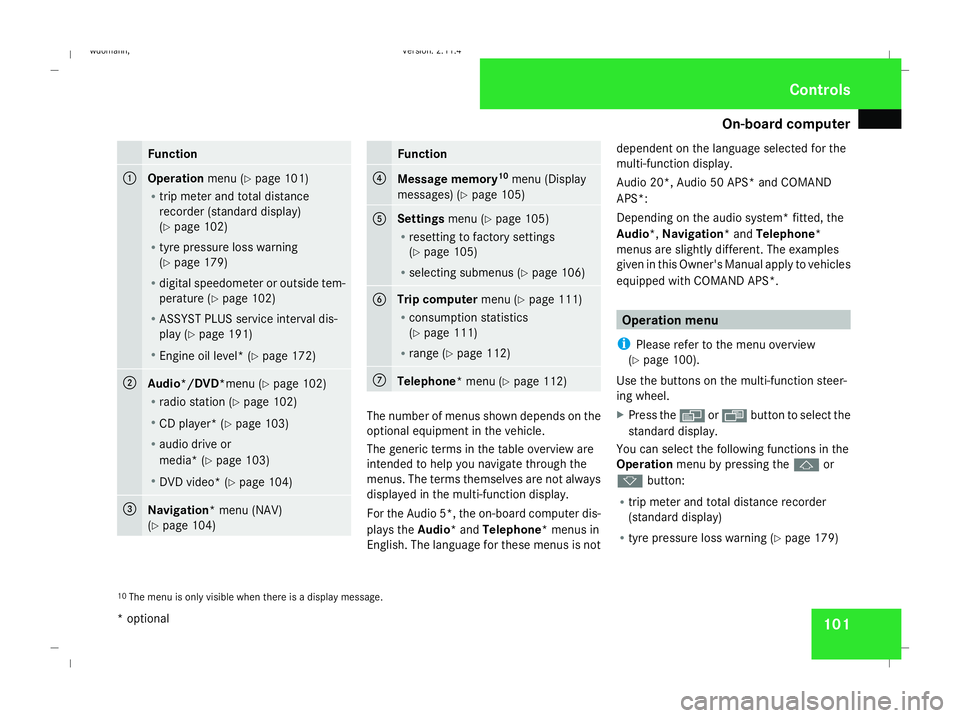
1
Operation
menu (Ypage 101)
R trip meter and total distance
recorder (standard display)
(Y page 102)
R tyre pressure loss warning
(Y page 179)
R digital speedometer or outside tem-
perature (Y page 102)
R ASSYST PLUS service interval dis-
play (Y page 191)
R Engine oil level* (Y page 172) 2
Audio*/DVD*
menu (Ypage 102)
R radio station (Y page 102)
R CD player* (Y page 103)
R audio drive or
media* ( Ypage 103)
R DVD video* (Y page 104) 3
Navigation* menu (NAV)
(Y
page 104) Function
4
Message memory
10
menu (Display
messages) ( Ypage 105) 5
Settings
menu (Ypage 105)
R resetting to factory settings
(Y page 105)
R selecting submenus (Y page 106) 6
Trip computer
menu (Ypage 111)
R consumption statistics
(Y page 111)
R range (Y page 112) 7
Telephone
* menu (Ypage 112) The number of menus shown depends on the
optional equipment in the vehicle.
The generic terms in the table overview are
intended to help you navigate through the
menus. The terms themselves are not always
displayed in the multi-function display.
For the Audio 5*, the on-board computer dis-
plays the Audio* and Telephone* menus in
English. The language for these menus is not dependent on the language selected for the
multi-function display.
Audio 20*, Audio 50 APS* and COMAND
APS*:
Depending on the audio system* fitted, the
Audio*,
Navigation* and Telephone*
menus are slightly different. The examples
given in this Owner's Manual apply to vehicles
equipped with COMAND APS*. Operation menu
i Please refer to the menu overview
(Y page 100).
Use the buttons on the multi-function steer-
ing wheel.
X Press the èor· button to select the
standard display.
You can select the following functions in the
Operation menu by pressing the jor
k button:
R trip meter and total distance recorder
(standard display)
R tyre pressure loss warning (Y page 179)
10 The menu is only visible when there is a display message. Controls
* optional
245_AKB; 2; 7, en-GB
wdomann
,V ersion: 2.11.4
2008-10-17T11:22:31+02:00 - Seite 101 ZDateiname: 6515_1640_02_buchblock.pdf; preflight
Page 105 of 305
On-board computer
102
R
digital speedometer or outside tempera-
ture
R ASSYST PLUS service interval display
(Y page 191)
R engine oil level* (Y page 172)
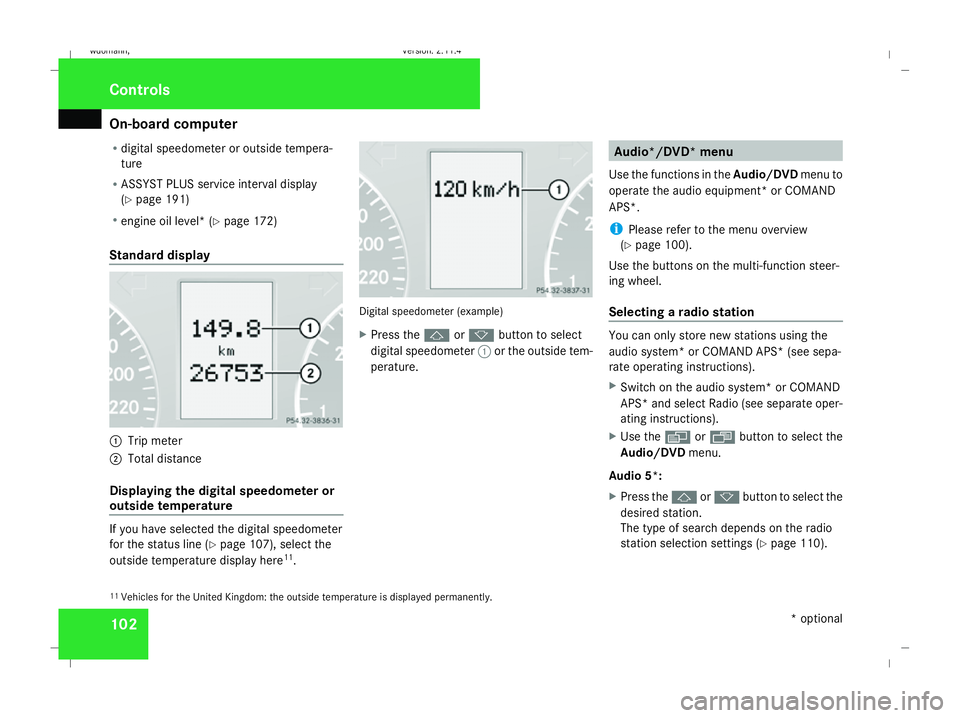
Standard display 1
Trip meter
2 Total distance
Displaying the digital speedometer or
outside temperature If you have selected the digital speedometer
for the status line (Y
page 107), select the
outside temperature display here 11
. Digital speedometer (example)
X
Press the jork button to select
digital speedometer 1or the outside tem-
perature. Audio*/DVD* menu
Use the functions in the Audio/DVDmenu to
operate the audio equipment *or COMAND
APS*.
i Please refer to the menu overview
(Y page 100).
Use the buttons on the multi-function steer-
ing wheel.
Selecting a radio station You can only store new stations using the
audio system* or COMAND APS* (see sepa-
rate operating instructions).
X Switch on the audio system* or COMAND
APS* and select Radio (see separate oper-
ating instructions).
X Use the èor· button to select the
Audio/DVD menu.
Audio 5*:
X Press the jork button to select the
desired station.
The type of search depends on the radio
station selection settings (Y page 110).
11 Vehicles for the United Kingdom: the outside temperature is displayed permanently. Controls
* optional
245_AKB; 2; 7, en-GB
wdomann,
Version: 2.11.4 2008-10-17T11:22:31+02:00 - Seite 102Dateiname: 6515_1640_02_buchblock.pdf; preflight
Page 175 of 305
Engine compartment
172
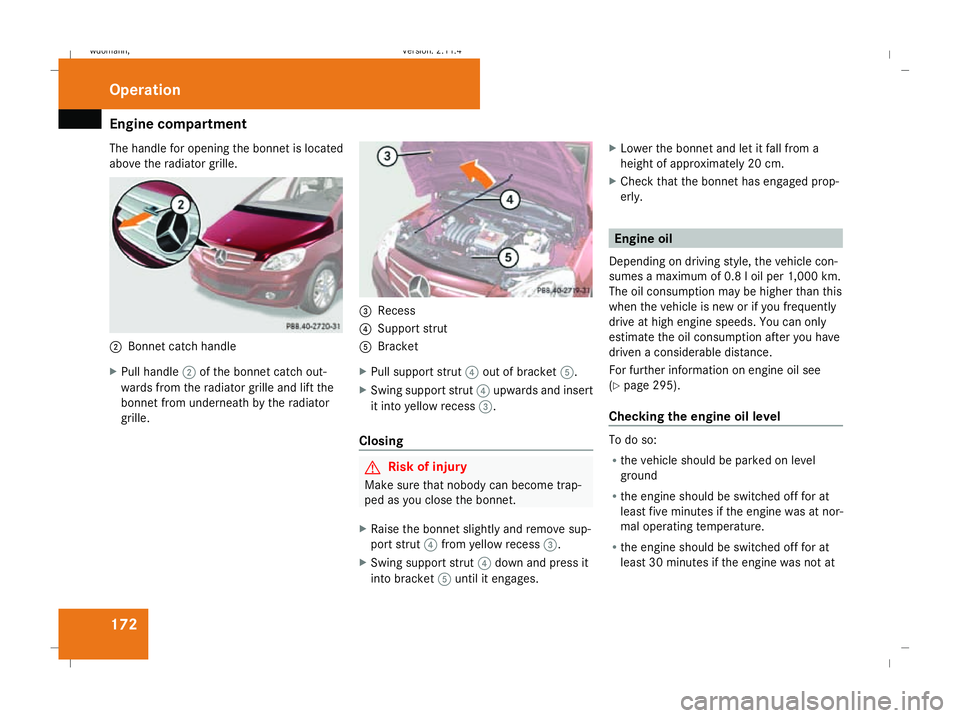
The handle for opening the bonnet is located
above the radiator grille. 2
Bonnet catch handle
X Pull handle 2of the bonnet catch out-
wards from the radiator grille and lift the
bonnet from underneath by the radiator
grille. 3
Recess
4 Support strut
5 Bracket
X Pull support strut 4out of bracket 5.
X Swing support strut 4upwards and insert
it into yellow recess 3.
Closing G
Risk of injury
Make sure that nobody can become trap-
ped as you close the bonnet.
X Raise the bonnet slightly and remove sup-
port strut 4from yellow recess 3.
X Swing support strut 4down and press it
into bracket 5until it engages. X
Lower the bonnet and let it fall from a
height of approximately 20 cm.
X Check that the bonnet has engaged prop-
erly. Engine oil
Depending on driving style, the vehicle con-
sumes a maximum of 0.8 l oil per 1,000 km.
The oil consumption may be higher than this
when the vehicle is new or if you frequently
drive at high engine speeds. You can only
estimate the oil consumption after you have
driven a considerable distance.
For further information on engine oil see
(Y page 295).
Checking the engine oil level To do so:
R
the vehicle should be parked on level
ground
R the engine should be switched off for at
least five minutes if the engine was at nor-
mal operating temperature.
R the engine should be switched off for at
least 30 minutes if the engine was not at Operation
245_AKB; 2; 7, en-GB
wdomann,
Version: 2.11.4
2008-10-17T11:22:31+02:00 - Seite 172 Dateiname: 6515_1640_02_buchblock.pdf; preflight
Page 176 of 305
Engine compartment
173
operating temperature (i.e. if you only star-
ted the engine briefly)
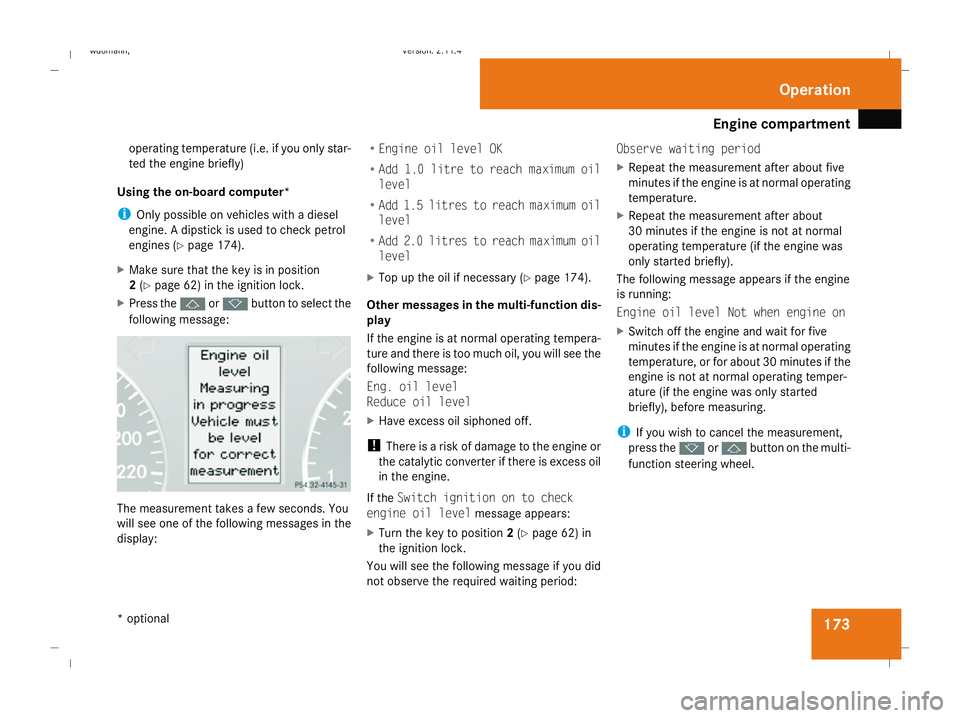
Using the on-board computer*
i Only possible on vehicles with a diesel
engine. A dipstick is used to check petrol
engines (Y page 174).
X Make sure that the key is in position
2(Y page 62) in the ignition lock.
X Press the jork button to select the
following message: The measurement takes a few seconds. You
will see one of the following messages in the
display: R
Engine oil level OK
R Add 1.0 litre to reach maximum oil
level
R Add 1.5 litres to reach maximum oil
level
R Add 2.0 litres to reach maximum oil
level
X Top up the oil if necessary ( Ypage 174).
Other messages in the multi-function dis-
play
If the engine is at normal operating tempera-
ture and there is too much oil, you will see the
following message:
Eng. oil level
Reduce oil level
X Have excess oil siphoned off.
! There is a risk of damage to the engine or
the catalytic converter if there is excess oil
in the engine.
If the Switch ignition on to check
engine oil level message appears:
X Turn the key to position 2(Y page 62) in
the ignition lock.
You will see the following message if you did
not observe the required waiting period: Observe waiting period
X
Repeat the measurement after about five
minutes if the engine is at normal operating
temperature.
X Repeat the measurement after about
30 minutes if the engine is not at normal
operating temperature (if the engine was
only started briefly).
The following message appears if the engine
is running:
Engine oil level Not when engine on
X Switch off the engine and wait for five
minutes if the engine is at normal operating
temperature, or for about 30 minutes if the
engine is not at normal operating temper-
ature (if the engine was only started
briefly), before measuring.
i If you wish to cancel the measurement,
press the korj button on the multi-
function steering wheel. Operation
* optional
245_AKB; 2; 7, en-GB
wdomann,
Version: 2.11.4 2008-10-17T11:22:31+02:00 - Seite 173 ZDateiname: 6515_1640_02_buchblock.pdf; preflight
Page 177 of 305
Engine compartment
174
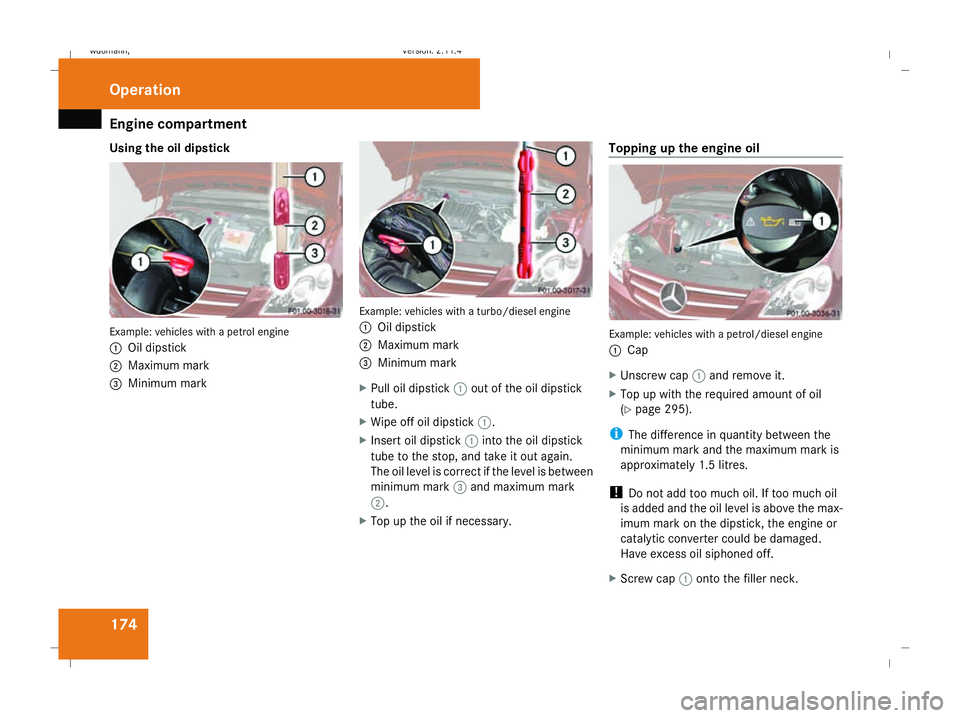
Using the oil dipstick
Example: vehicles with a petrol engine
1
Oil dipstick
2 Maximum mark
3 Minimum mark Example: vehicles with a turbo/diesel engine
1
Oil dipstick
2 Maximum mark
3 Minimum mark
X Pull oil dipstick 1out of the oil dipstick
tube.
X Wipe off oil dipstick 1.
X Insert oil dipstick 1into the oil dipstick
tube to the stop, and take it out again.
The oil level is correct if the level is between
minimum mark 3and maximum mark
2.
X Top up the oil if necessary. Topping up the engine oil Example: vehicles with a petrol/diesel engine
1
Cap
X Unscrew cap 1and remove it.
X Top up with the required amount of oil
(Y page 295).
i The difference in quantity between the
minimum mark and the maximum mark is
approximately 1.5 litres.
! Do not add too much oil. If too much oil
is added and the oil level is above the max-
imum mark on the dipstick, the engine or
catalytic converter could be damaged.
Have excess oil siphoned off.
X Screw cap 1onto the filler neck. Operation
245_AKB; 2; 7, en-GB
wdomann, Version: 2.11.4
2008-10-17T11:22:31+02:00 - Seite 174 Dateiname: 6515_1640_02_buchblock.pdf; preflight
Page 178 of 305
Engine compartment
175H
Environmental note
When topping up the oil, take care not to
spill any. Oil must not be allowed to escape
into the soil or waterways. You would oth-
erwise be damaging the environment.
For further information on engine oil
(Y page 295). Coolant
G
Risk of injury
The cooling system is pressurised. There-
fore, only unscrew the cap once the engine
has cooled down. The coolant temperature
gauge must display less than 70 °C. You
could otherwise be scalded by escaping hot
coolant.
Coolant consists of water and antifreeze/cor-
rosion inhibitor. Only check the coolant level
when the vehicle is on a level surface and the
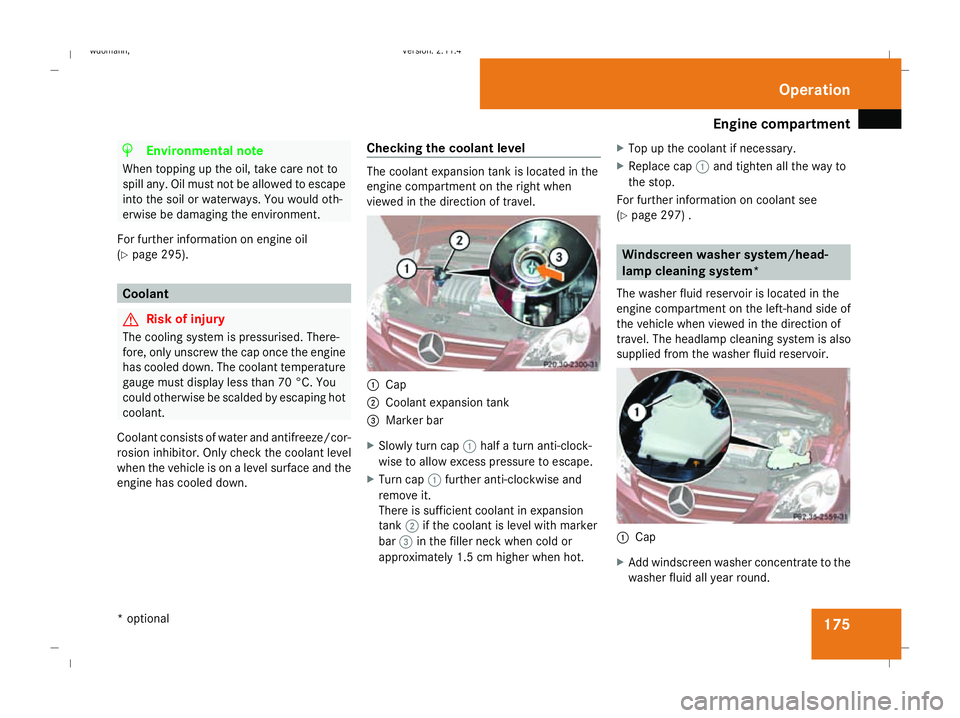
engine has cooled down. Checking the coolant level The coolant expansion tank is located in the
engine compartment on the right when
viewed in the direction of travel.
1
Cap
2 Coolant expansion tank
3 Marker bar
X Slowly turn cap 1half a turn anti-clock-
wise to allow excess pressure to escape.
X Turn cap 1further anti-clockwise and
remove it.
There is sufficient coolant in expansion
tank 2if the coolant is level with marker
bar 3in the filler neck when cold or
approximately 1.5 cm higher when hot. X
Top up the coolant if necessary.
X Replace cap 1and tighten all the way to
the stop.
For further information on coolant see
(Y page 297) . Windscreen washer system/head-
lamp cleaning system*
The washer fluid reservoir is located in the
engine compartment on the left-hand side of
the vehicle when viewed in the direction of
travel. The headlamp cleaning system is also
supplied from the washer fluid reservoir. 1
Cap
X Add windscreen washer concentrate to the
washer fluid all year round. Operation
* optional
245_AKB; 2; 7, en-GB
wdomann
,V ersion: 2.11.4
2008-10-17T11:22:31+02:00 - Seite 175 ZDateiname: 6515_1640_02_buchblock.pdf; preflight
Page 222 of 305
Display
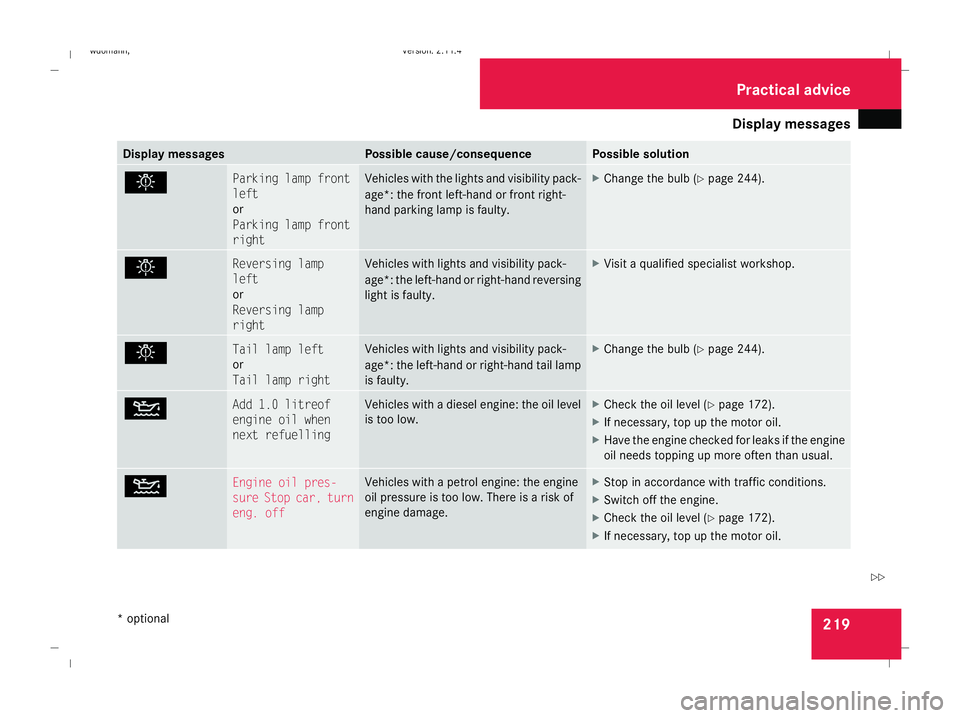
messages 219Display messages Possible cause/consequence Possible solution
. Parking lamp front
left
or
Parking lamp front
right Vehicles with the lights and visibility pack-
age*: the front left-hand or front right-
hand parking lamp is faulty. X
Change the bulb (Y page 244). . Reversing lamp
left
or
Reversing lamp
right Vehicles with lights and visibility pack-
age*: the left-hand or right-hand reversing
light is faulty. X
Visit a qualified specialist workshop. . Tail lamp left
or
Tail lamp right Vehicles with lights and visibility pack-
age*: the left-hand or right-hand tail lamp
is faulty. X
Change the bulb (Y page 244). N Add 1.0 litreof
engine oil when
next refuelling Vehicles with a diesel engine: the oil level
is too low. X
Check the oil level (Y page 172).
X If necessary, top up the motor oil.
X Have the engine checked for leaks if the engine
oil needs topping up more often than usual. N Engine oil pres-
sure Stop car, turn
eng. off Vehicles with a petrol engine: the engine
oil pressure is too low. There is a risk of
engine damage. X
Stop in accordance with traffic conditions.
X Switch off the engine.
X Check the oil level (Y page 172).
X If necessary, top up the motor oil. Practical advi
ce
* optional
245_AKB; 2; 7, en-GB
wdomann,
Version: 2.11.4 2008-10-17T11:22:31+02:00 - Seite 219 ZDateiname: 6515_1640_02_buchblock.pdf; preflight
Page 223 of 305
Display
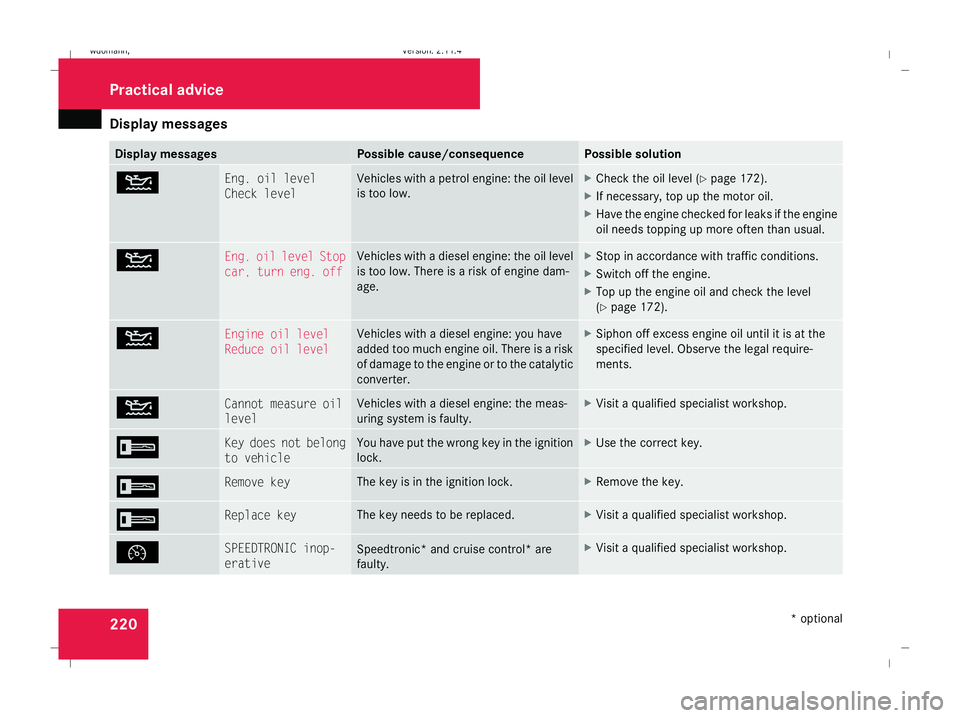
messages 220 Display messages Possible cause/consequence Possible solution
N Eng. oil level
Check level Vehicles with a petrol engine: the oil level
is too low. X
Check the oil level (Y page 172).
X If necessary, top up the motor oil.
X Have the engine checked for leaks if the engine
oil needs topping up more often than usual. N Eng. oil level Stop
car, turn eng. off Vehicles with a diesel engine: the oil level
is too low. There is a risk of engine dam-
age. X
Stop in accordance with traffic conditions.
X Switch off the engine.
X Top up the engine oil and check the level
(Y page 172). N Engine oil level
Reduce oil level Vehicles with a diesel engine: you have
added too much engine oil. There is a risk
of damage to the engine or to the catalytic
converter. X
Siphon off excess engine oil until it is at the
specified level. Observe the legal require-
ments. N Cannot measure oil
level Vehicles with a diesel engine: the meas-
uring system is faulty. X
Visit a qualified specialist workshop. I Key does not belong
to vehicle You have put the wrong key in the ignition
lock. X
Use the correct key. I Remove key The key is in the ignition lock. X
Remove the key. I Replace key The key needs to be replaced. X
Visit a qualified specialist workshop. Ñ SPEEDTRONIC inop-
erative
Speedtronic* and cruise control* are
faulty. X
Visit a qualified specialist workshop. Practical advi
ce
* optional
245_AKB; 2; 7, en-GB
wdomann,
Version: 2.11.4 2008-10-17T11:22:31+02:00 - Seite 220Dateiname: 6515_1640_02_buchblock.pdf; preflight