trailer MERCEDES-BENZ B-CLASS HATCHBACK 2011 User Guide
[x] Cancel search | Manufacturer: MERCEDES-BENZ, Model Year: 2011, Model line: B-CLASS HATCHBACK, Model: MERCEDES-BENZ B-CLASS HATCHBACK 2011Pages: 329, PDF Size: 7.91 MB
Page 128 of 329
Useful information
............................126
Running-in notes ............................... 126
Driving ............................................... 126
Manual transmission ........................133
Automatic transmission ...................134
Refuelling ........................................... 141
Parking ............................................... 144
Driving tips ........................................ 146
Driving systems ................................ 149
Towing atrailer ................................. 181 125Driving and parking
Page 131 of 329
Pulling away
Manual transmission !
Change gear in good time and avoid spin-
ning the wheels. Otherwise, you could dam-
age the vehicle.
X Depress the brake pedal and keep it
depressed.
X Depress the clutch pedal fully.
X Shift to either first gear or reverse gear R.
X Release the electric parking brake
(Y page 145).
X Release the brake pedal.
X Slowly release the clutch pedal and gently
depress the accelerator pedal.
i Follow the shift recommendations in the
multifunction display for an economical
driving style (Y page 134).
i The vehicle locks centrally once you have
pulled away.T he locking knobs in the doors
drop down.
You can open the doors from the inside at
any time.
You can also deactivate the automatic lock-
ing feature (Y page 203).
Automatic transmission i
It is only possible to shift the transmission
from position Pto the desired position if
you depress the brake pedal. Only then can
the parking lock be deactivated. If the
brake pedal is not depressed, the DIRECT
SELECT lever can still be operated, but the
parking lock remains engaged.
i At transmission fluid temperatures below
Ò20 †, you can only shift out of park posi-
tion Pinto another transmission position
when the engine is running.
X Depress the brake pedal and keep it
depressed.
X Shift the transmission to position Dor R. X
Release the brake pedal.
X Carefully depress the accelerator pedal.
The electric parking brake (Y page 145) is
automatically released.
The red !indicator lamp in the instru-
ment cluster goes out.
i The vehicle locks centrally once you have
pulled away.T he locking knobs in the doors
drop down.
You can open the doors from the inside at
any time.
You can also deactivate the automatic lock-
ing feature (Y page 203).
i Upshifts take place at higher engine
speeds after a cold start. This helps the
catalytic converter to reach its operating
temperature more quickly.
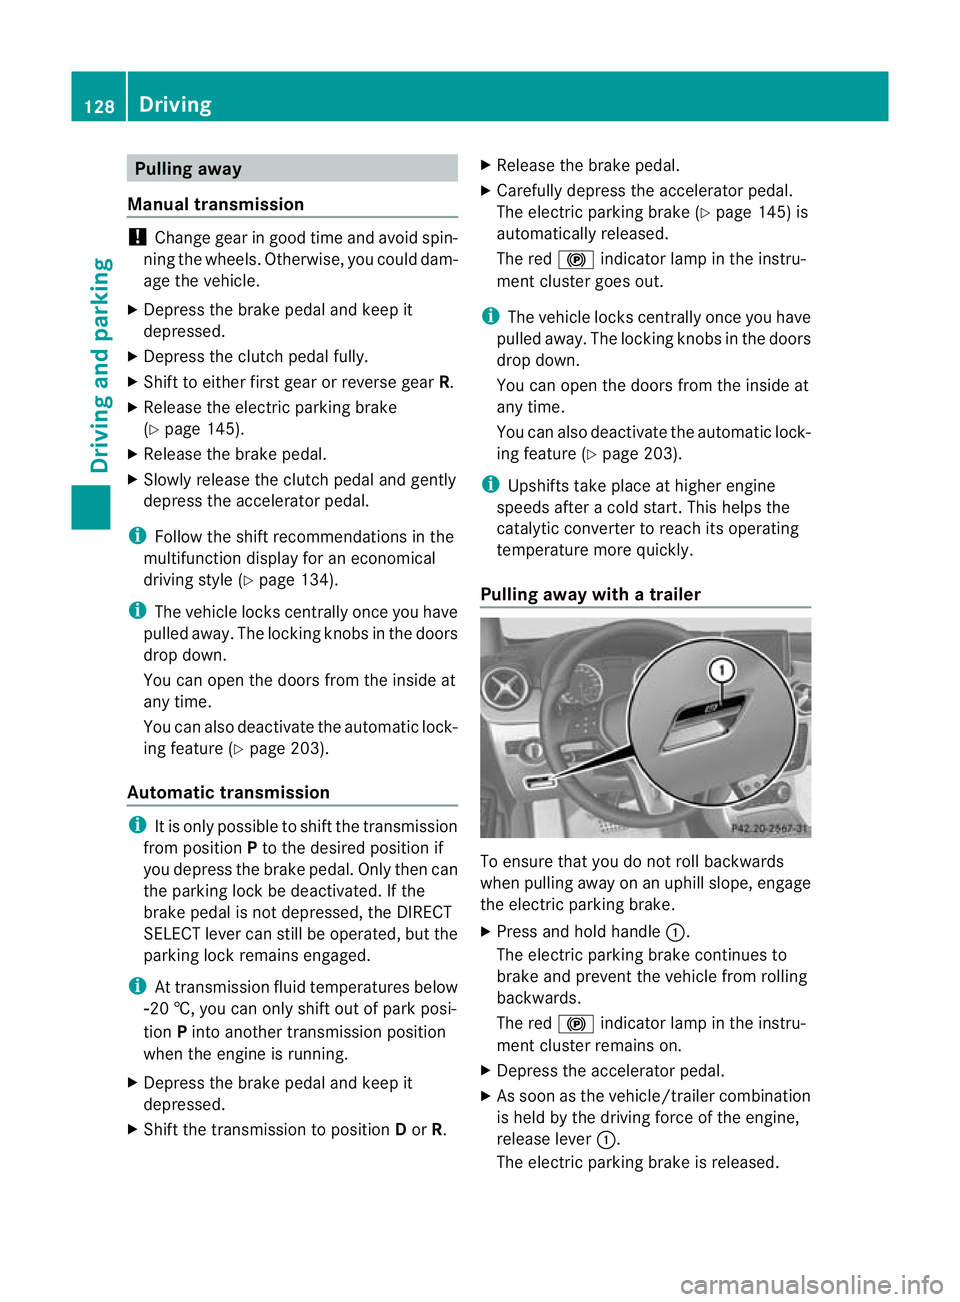
Pulling away with a trailer To ensure that you do not roll backwards
when pulling away on an uphill slope, engage
the electric parking brake.
X Press and hold handle :.
The electric parking brake continues to
brake and prevent the vehicle from rolling
backwards.
The red !indicator lamp in the instru-
ment cluster remains on.
X Depress the accelerator pedal.
X As soon as the vehicle/trailer combination
is held by the driving force of the engine,
release lever :.
The electric parking brake is released. 128
DrivingDriving and parking
Page 137 of 329
!
On long and steep downhill gradients,
especially if the vehicle is ladenort owing
a trailer, you must shift into gear 1, 2or3
in good time. This uses the engine's braking
effect .This relieves the load on the brake
system and prevents the brakes from over-
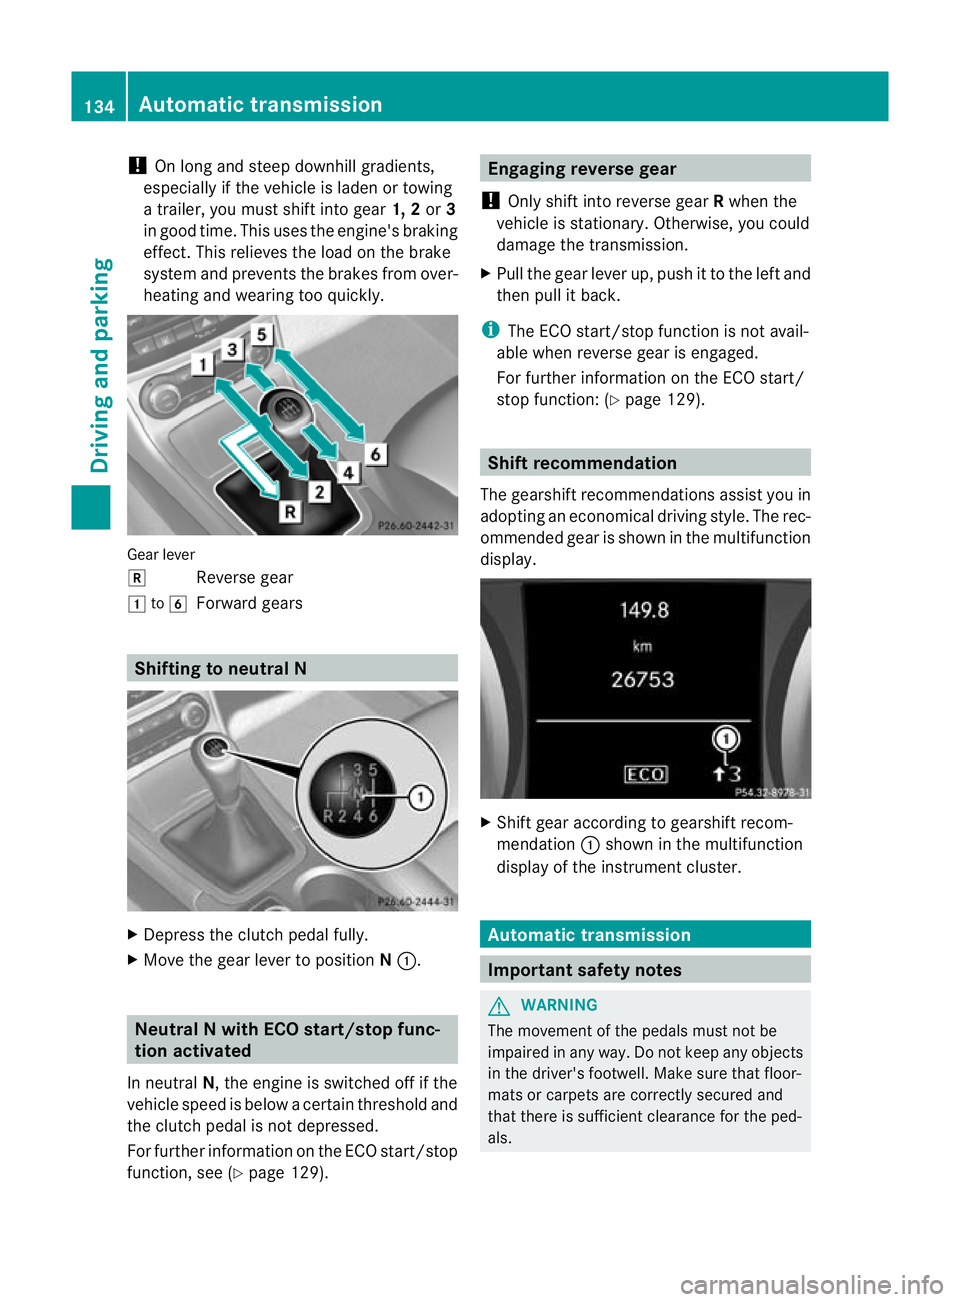
heating and wearing too quickly. Gear lever
k
Reverse gear
1 to6
Forward gears Shifting to neutral N
X
Depress the clutch pedal fully.
X Move the gear lever to position N:. Neutral N with ECO start/stop func-
tion activated
In neutral N, the engine is switched off if the
vehicle speed is below a certain threshold and
the clutch pedal is not depressed.
For further information on the ECO start/stop
function, see (Y page 129). Engaging reverse gear
! Only shift into reverse gear Rwhen the
vehicle is stationary. Otherwise, you could
damage the transmission.
X Pull the gear lever up, push it to the left and
then pull it back.
i The ECO start/stop function is not avail-
able when reverse gear is engaged.
For further information on the ECO start/
stop function: (Y page 129). Shift recommendation
The gearshift recommendations assist you in
adopting an economical driving style. The rec-
ommended gear is shown in the multifunction
display. X
Shift gear according to gearshift recom-
mendation :shown in the multifunction
display of the instrumentc luster. Automatic transmission
Important safety notes
G
WARNING
The movemen tofthe pedals must not be
impaired in any way.D o not keep any objects
in the driver's footwell. Make sure that floor-
mats or carpets are correctly secured and
that there is sufficient clearance for the ped-
als. 134
Automatic transmissionDriving and parking
Page 140 of 329
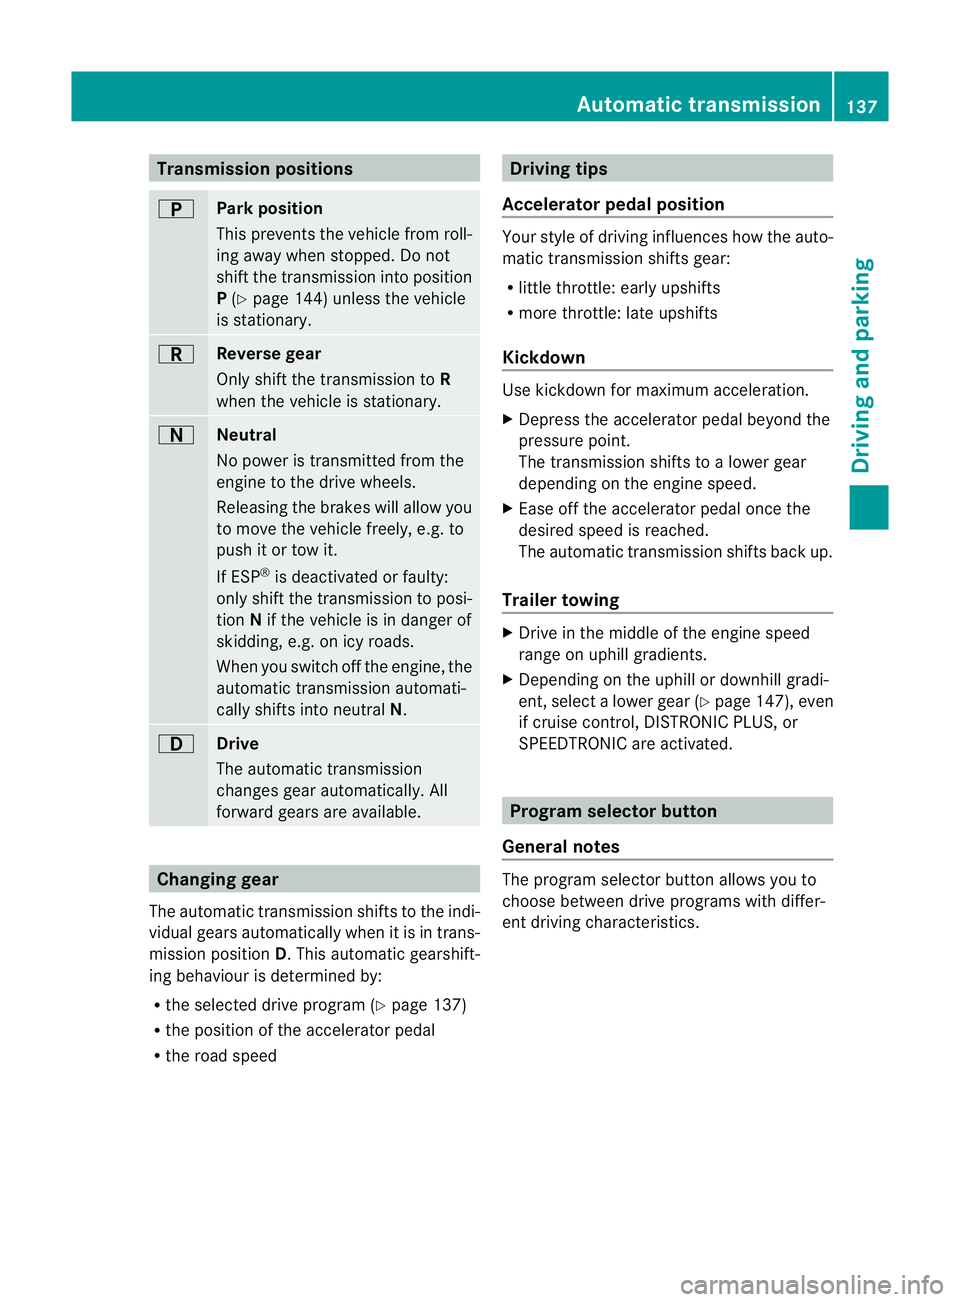
Transmission positions
B
Park position
This prevents the vehicle fro
mroll-
ing away when stopped. Do not
shift the transmission into position
P (Y page 144) unless the vehicle
is stationary. C
Reverse gear
Only shift the transmission to
R
when the vehicle is stationary. A
Neutral
No power is transmitted from the
engine to the drive wheels.
Releasing the brakes will allow you
to move the vehicle freely, e.g. to
push it or tow it.
If ESP
®
is deactivated or faulty:
only shift the transmission to posi-
tion Nif the vehicle is in danger of
skidding, e.g. on icy roads.
When you switch off the engine, the
automatic transmission automati-
cally shifts into neutral N.7
Drive
The automatic transmission
changes gear automatically. All
forward gears are available.
Changing gear
The automatic transmission shifts to the indi-
vidual gears automatically when it is in trans-
mission position D.This automatic gearshift-
ing behaviouri s determined by:
R the selected drive program (Y page 137)
R the position of the accelerator pedal
R the road speed Driving tips
Accelerator pedal position Your style of driving influences how the auto-
matic transmission shifts gear:
R
little throttle: early upshifts
R more throttle: late upshifts
Kickdown Use kickdown for maximum acceleration.
X
Depress the accelerator pedal beyond the
pressure point.
The transmission shifts to a lower gear
depending on the engine speed.
X Ease off the accelerator pedal once the
desired speed is reached.
The automatic transmission shifts back up.
Trailer towing X
Drive in the middle of the engine speed
range on uphill gradients.
X Depending on the uphill or downhill gradi-
ent, select a lower gear (Y page 147), even
if cruise control, DISTRONIC PLUS, or
SPEEDTRONIC are activated. Program selector button
General notes The program selector button allows you to
choose between drive programs with differ-
ent driving characteristics. Automatic transmission
137Driving and parking Z
Page 150 of 329
cause the drive wheels to los
etheir grip and
the vehicle could skid. G
WARNING
Make sure that other road users are not
endangered by your braking.
Downhill gradients You must select a lower gear in good time on
long and steep downhill gradients, especially
if the vehicle is laden or towing a trailer. To
do so in vehicles with an automatic transmis-
sion, you will need to select the manual drive
program Min advance (Y page 139).
i This also applies if you have activated
cruise control, SPEEDTRONIC or DIS-
TRONIC PLUS.
This will use the braking effect of the engine,
so less braking will be required to prevent the
vehicle from gaining speed. This relieves the
load on the brake system and prevents the
brakes from overheating and wearing too
quickly.
i Vehicles with automatic transmis-
sion: if the accelerator pedal is depressed
briefly on downhill gradients while the man-
ual drive program Mis temporarily activa-
ted, the automatic transmission may
switch back to the last active automatic
drive program Eor S.T he automatic trans-
mission may shift to a higher gear. This can
reduce the engine's braking effect.
Heavy and light loads G
WARNING
Never depress the brake pedal continuously
while the vehicle is in motion, e.g. never cause
the brakes to rub by applying constant slight
pedal pressure. This causes the brake system
to overheat, increases the braking distance
and can lead to the brakes failing completely.
If the brakes have been subjected to a heavy
load, do not stop the vehicle immediately, but drive on for a short while. This allows the air-
flow to cool the brakes more quickly.
If the brakes have been used only moderately,
you should occasionally test their effective-
ness. To do this, brake more firmly from a
higher speed. This improves the grip of the
brakes.
Wet road surfaces
If driving in heavy rain for a prolonged period
of time without braking, there may be a
delayed reaction from the brakes when brak-
ing for the first time. This may also occur after
the vehicle has been washed.
You have to depress the brake pedal more
firmly. Maintain a greater distance from the
vehicle in front.
After driving on a wet road or having the vehi-
cle washed, brake firmly while paying atten-
tion to the traffic conditions. This will warm
up the brake discs, thereby drying them more
quickly and protecting them against corro-
sion.
Limited braking performance on salt-
treated roads
G
WARNING
The layerofs alt on thebrake discs and the
brake pads/linings may caus eadelay in the
braking effect, resulting in a significantly lon-
ger braking distance, which could lead to an
accident.
To avoid this danger, you should:
R occasionally brake carefully, without put-
ting other road users at risk, when you are
driving on salted roads. This helps to
remove any salt that may have started to
build up on the brake discs and the brake
pads/linings.
R maintain a greater distanc eto the vehicle
ahead and drive with particular care.
R carefully apply the brakes at the end of a
trip and immediately after commencing a
new trip, so that salt residues are removed
from the brake discs. Driving tips
147Driving and parking Z
Page 152 of 329
Have your vehicle winterproofed at a qualified
specialist workshop at the onset of winter.
Observe the notes in the "Winter operation"
sectio n(Ypage 294).
Driving with summer tyres Observe the notes in the "Winter operation"
section (Y page 294).
Slippery road surfaces G
WARNING
Do not shift down for additional engine brak-
ing on a slippery road surface. This could
cause the drive wheels to lose their grip and
the vehicle could skid.
If the vehicle threatens to skid or cannot be
stopped when moving at low speed:
X Vehicles with manual transmission:
shift to neutral.
X Vehicles with automatic transmission:
shift the transmission to position N.
X Try to bring the vehicle under control by
using corrective steering.
You should drive particularly carefully on slip-
pery road surfaces .Avoid sudden accelera-
tion, steering and braking manoeuvres.
i For more information on driving with
snow chains, see (Y page 295). Driving systems
Cruise control
General notes Cruise control maintains a constant road
speed for you.Itb
rakes automatically in order
to avoid exceeding the set speed. You must
select a lower gearing ood time on long and
steep downhill gradients, especially if the
vehicle is laden or towing a trailer. For vehi-
cles with automatic transmission, you need
to have selected manual drive program
M(Y page 147). By doing so, you will make use of the braking effect of the engine. This
relieves the load on the brake system and
prevents the brakes from overheating and
wearing too quickly.
Use cruise control only if road and traffic con-
ditions make it appropriate to maintain a
steady speed for a prolonged period. You can
store any road speed above 30 km/h.
Important safety notes
G
WARNING
Do not change down for additional engine
braking on a slippery road surface. This could
cause the drive wheels to lose their grip and
the vehicle could skid. G
WARNING
Cruise control cannot take account of road
and traffic conditions.
Always pay attention to traffic conditions
even when cruise control is activated.
Cruise control is only an aid designed to assist
driving. You are responsible for the vehicle's
speed and for braking in good time. G
WARNING
Do not use cruise control
R in traffic conditions that do not allow you to
drive at a constant speed (e.g. heavy traffic
or winding roads). You may otherwise
cause an accident.
R on slippery roads. The drive wheels may
lose their grip when braking or accelerating
and the vehicle may skid.
R when there is low visibility, e.g. due to fog,
heavy rain or snow.
Cruise control lever You can operate cruise control and variable
SPEEDTRONIC with the cruise control lever. Driving systems
149Driving and parking Z
Page 154 of 329
Storing the current speed or calling up the
last stored speed
G
WARNING
Only call up a stored speed if you know what
that speed is and if it is suitable for the current
traffic and driving situation. You can other-
wise endanger yourself or others by uninten-
tionally triggering sudden acceleration or
braking.
X Briefly pull the cruise control lever towards
you =.
X Remove your foot from the accelerator
pedal.
The first time cruise control is activated, it
stores the current speed or regulates the
speed of the vehicle to the previously
stored speed.
Setting aspeed X
Press the cruise control lever up :for a
highe rspeed or down ?for a lower speed.
X Keep the cruise control lever pressed until
the desired speed is reached.
X Release the cruise control lever.
The new speed is stored.
X To adjust the set speed in 1 km/h incre-
ments: briefly press the cruise control
lever up :or down ?to the pressure
point.
The last stored speed increases or decrea-
ses in 1 km/h increments.
X To adjust the set speed in 10 km/h
increments: briefly press the cruise con-
trol lever up :or down ?beyond the
pressure point.
The last stored speed increases or decrea-
ses in 10 km/h increments.
i Cruise control is not deactivated if you
depress the accelerator pedal. For exam-
ple, if you accelerate briefly to overtake,
cruise control adjusts the vehicle's speed
to the last speed stored after you have fin-
ished overtaking. Deactivating cruise control There are several ways to deactivate cruise
control:
X
Briefly press the cruise control lever for-
wards B.
or
X Brake
or
X Briefly press the cruise control lever in the
direction of arrow A.
Variable SPEEDTRONIC is selected. LIM
indicator lamp ;in the cruise contro llever
lights up.
Cruise control is automatically deactivated if:
R you engage the electric parking brake.
R you are driving at less than 30 km/h.
R ESP ®
intervenes or if you deactivate ESP ®
.
R while driving a vehicle with manual trans-
mission, you shift into neutral or depress
the clutch pedal for longer than six sec-
onds.
R on vehicles with manual transmission, you
shift to a gear that is too high, and as a
result the engine speed is too low.
R on vehicles with automatic transmission,
you shift into position Nwhile driving.
If cruise control is deactivated, you will hear
a warning tone. You will see the Cruise control off message in the multifunction
display for approximately five seconds.
i The last speed stored is cleared when you
switch off the engine. SPEEDTRONIC
General notes SPEEDTRONIC brakes automatically so that
you do not exceed the set speed. You must
select a low gear in good time on long and
steep downhill gradients, especially if the
vehicle is laden or towing a trailer. For vehi-
cles with automatic transmission, you need Driving systems
151Driving and parking Z
Page 158 of 329
G
WARNING
The vehicle can be braked when DISTRONIC
PLUS is activated. For this reason, deactivate
DISTRONIC PLUS if the vehicle is to be set in
motion by other means (e.g. in a car wash or
by towing).
General notes DISTRONIC PLUS regulates the speed and
automatically helps you maintai nthe dis-
tance to the vehicle detected in front. DIS-
TRONIC PLUS brakes automatically so that
the set speed is not exceeded.
You must select a lower gear in good time on
long and steep downhill gradients, especially
if the vehicle is laden or towing a trailer. For
this, you need to have selected manual drive
program M(Ypage 147). By doing so, you will
make use of the braking effect of the engine.
This relieves the load on the brake system and
prevents the brakes from overheating and
wearing too quickly.
If DISTRONIC PLUS detects a slower-moving
vehicle in front, your vehicle is braked in order
to maintain the preset distance to the vehicle
in front.
If there is no vehicle in front, DISTRONIC
PLUS operates in the same way as cruise
control in the speed range between
30 km/h and 200 km/h. If avehicle is driving
in front of you, DISTRONIC operates in the
speed range between 0km/h and
200 km/h.
Do not use DISTRONIC PLUS on roads with
steep gradients.
Cruise control lever With the cruise control lever, you can operate
DISTRONIC PLUS and variable SPEED-
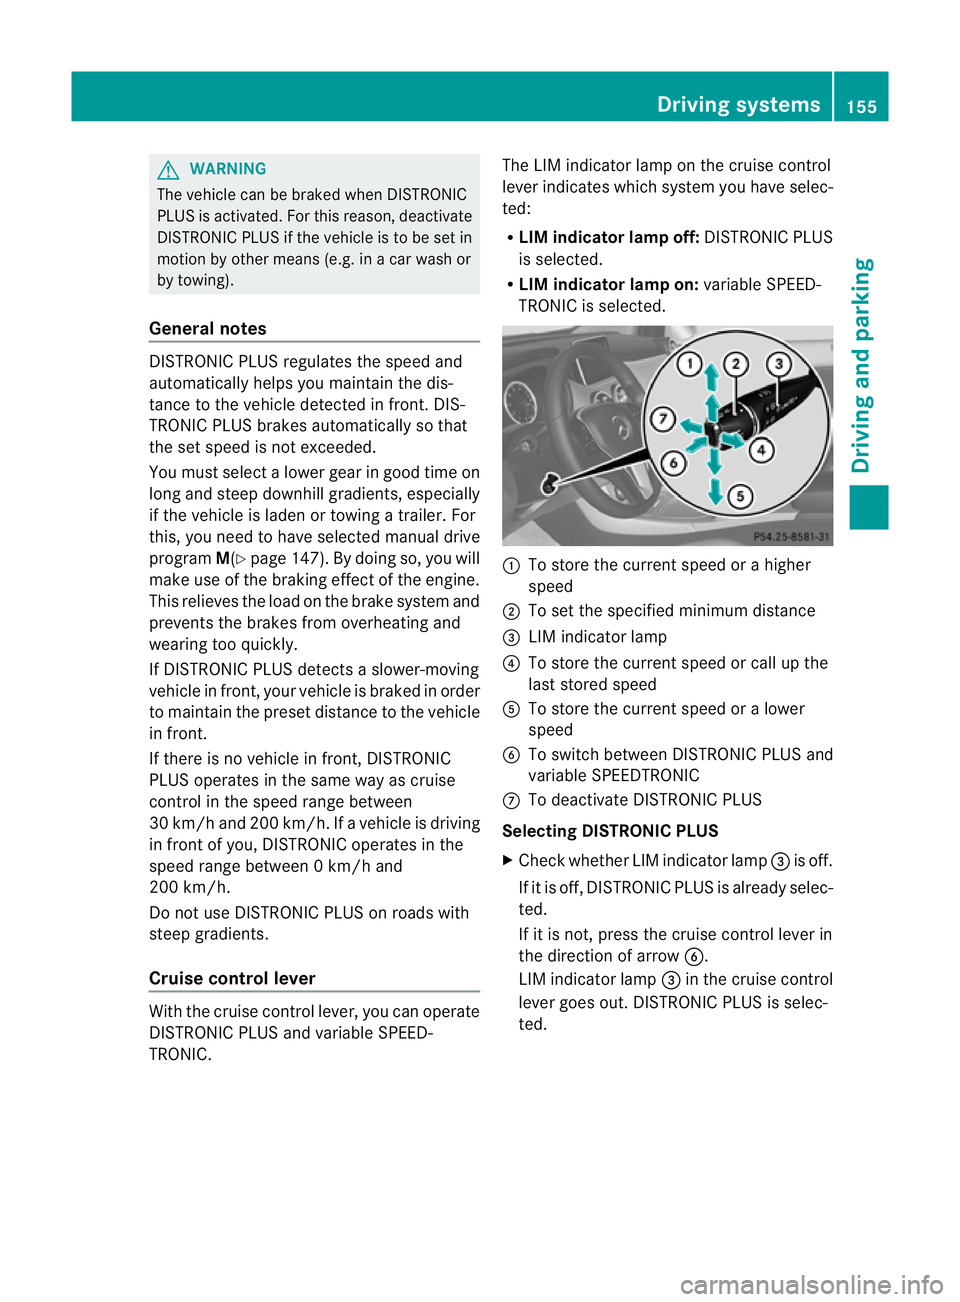
TRONIC. The LIM indicator lamp on the cruise control
lever indicates which system you have selec-
ted:
R
LIM indicator lamp off: DISTRONIC PLUS
is selected.
R LIM indicator lamp on: variable SPEED-
TRONIC is selected. :
To store the current spee dorahigher
speed
; To set the specified minimum distance
= LIM indicator lamp
? To store the current speed or call up the
last stored speed
A To store the current speed or a lower
speed
B To switch between DISTRONIC PLUS and
variable SPEEDTRONIC
C To deactivate DISTRONIC PLUS
Selecting DISTRONIC PLUS
X Check whether LIM indicator lamp =is off.
If it is off, DISTRONIC PLUS is already selec-
ted.
If it is not, press the cruise control lever in
the direction of arrow B.
LIM indicator lamp =in the cruise control
lever goes out. DISTRONIC PLUS is selec-
ted. Driving systems
155Driving and parking Z
Page 166 of 329

i
If depressing the brake pedalt he first
time does not activate the HOLD function,
wait briefly and then try again.
Deactivating the HOLD function The HOLD function is deactivated automati-
cally if:
R you accelerate and the transmission is in
position Dor R.
R you shift the transmission to position P.
R you depress the brake pedal again with a
certain amount of pressure until ëdis-
appears from the multifunction display.
R you secure the vehicle using the electric
parking brake.
R you activate DISTRONIC PLUS.
i After a time, the electric parking brake
secures the vehicle and relieves the service
brake.
The electric parking brake secures the vehicle
automatically if the HOLD function is activa-
ted and:
R the driver's door is open and the driver's
seat belt is unfastened.
R the engine is switched off, unless it is auto-
matically switched off by the ECO start/
stop function.
R a system fault occurs.
R the power supply is not sufficient.
If a fault occurs, then the transmission may
be shifted into position Pautomatically. PARKTRONIC
Important safety notes G
WARNING
PARKTRONIC is only an aid and may not
detect all obstacles. It is not a substitute for
attentive driving.
You are always responsible for safety and
must continue to pay attention to your imme-
diate surroundings when parking and manoeuvring. You could otherwise endanger
yourself and others.
G
WARNING
Make sure that no persons or animals are in
the manoeuvring range. Otherwise, they
could be injured.
! When parking, pay particular attention to
objects above or below the sensors, such
as flower pots or trailer drawbars. PARK-
TRONIC does not detect such objects when
they are in the immediate vicinity of the
vehicle. You could damage the vehicle or
the objects.
The sensors may not detect snow and
objects which absorb ultrasonic sources.
Ultrasonic sources, such as an automatic
car wash, a lorry's compressed-air brakes
or a pneumatic drill, could cause PARK-
TRONIC to malfunction.
PARKTRONIC may not function correctly on
uneven terrain.
PARKTRONIC is an electronic parking aid with
ultrasonic sensors. It indicates visually and
audibly the distance between your vehicle
and an object.
PARKTRONIC is activated automatically if
you:
R switch on the ignition
R shift to position D,Ror Non vehicles with
automatic transmission
R release the electric parking brake
PARKTRONIC is deactivated at speeds above
18 km/h. It is reactivated at lower speeds.
PARKTRONIC monitors the area around your
vehicle using six sensors in the front bumper
and four sensors in the rear bumper. Driving systems
163Driving and parking Z
Page 168 of 329
The gear lever position or the transmission
position of the automatic transmission and
the direction in which the vehicle is rolling
determine which warning display is active
when the engine is running.
Manual transmission: Gear lever posi-
tion Warning display
Forwards gear
or
Neutral
Front area activated
Reverse gear, or
the vehicle is rolling
backwards Rear and front areas
activated
Automatic transmission:
Transmission
position Warning display
D
Front area activated
R,
Nor the vehicle
is rolling back-
wards Rear and front areas
activated
P
No areas activated
One or more segments light up as the vehicle
approaches an obstacle, depending on the
vehicle's distance from the obstacle.
From the:
R sixth segment onwards, you will hear an
intermittent warning tonef or approx-
imately two seconds.
R seventh segment onwards, you will hear a
warning tone for approximately two sec-
onds. This indicates that you have now
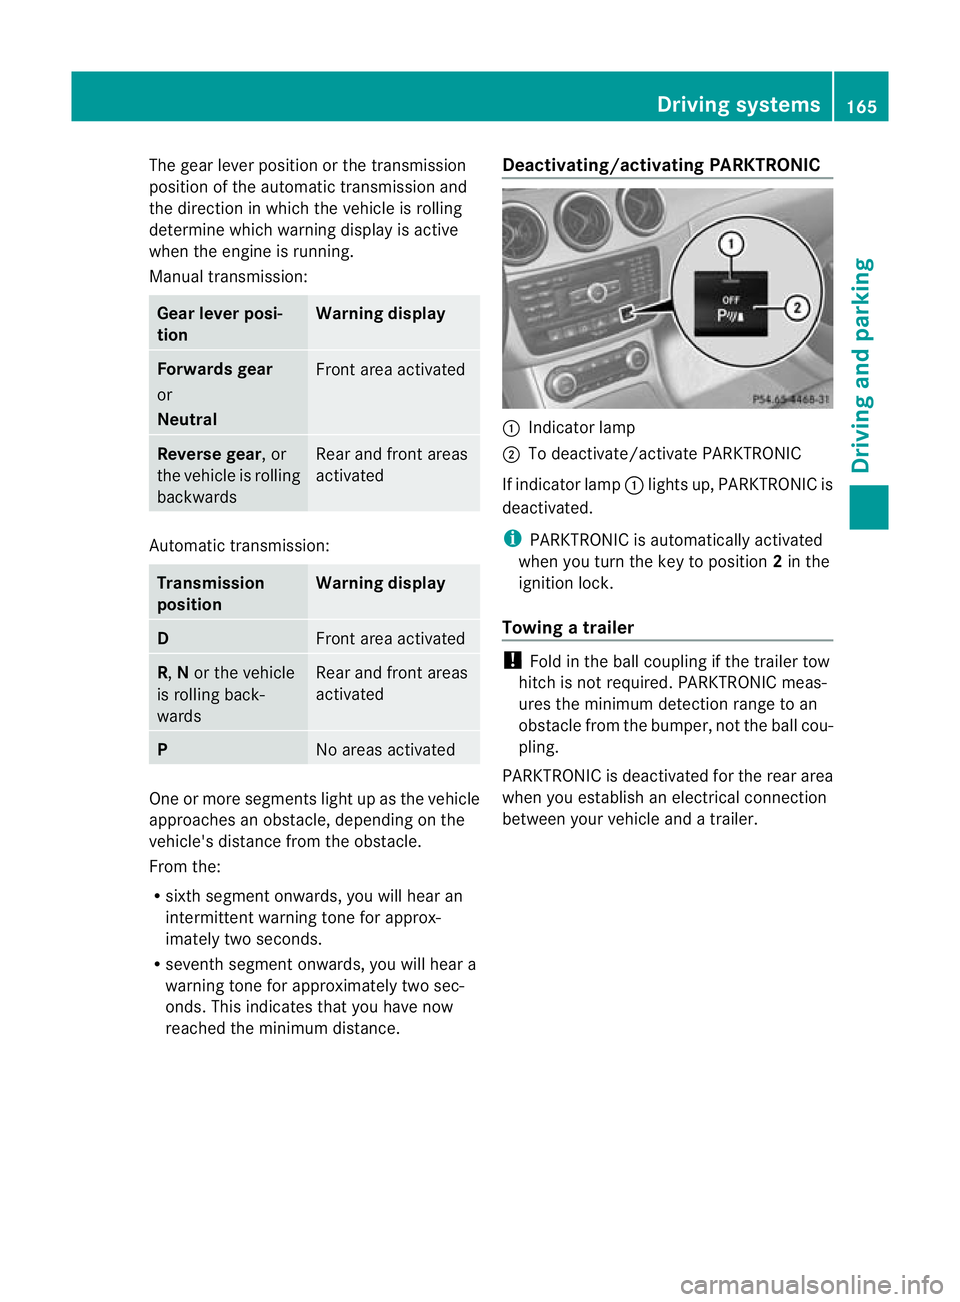
reached the minimum distance. Deactivating/activating PARKTRONIC :
Indicator lamp
; To deactivate/activate PARKTRONIC
If indicator lamp :lights up, PARKTRONIC is
deactivated.
i PARKTRONIC is automatically activated
when you turn the key to position 2in the
ignition lock.
Towing atrailer !
Fold in the ball coupling if the trailer tow
hitch is not required .PARKTRONIC meas-
ures the minimum detection range to an
obstacle fro mthe bumper, not the ball cou-
pling.
PARKTRONIC is deactivated for the rear area
when you establish an electrical connection
between your vehicle and a trailer. Driving systems
165Driving and parking Z