length MERCEDES-BENZ B-CLASS HATCHBACK 2014 Owners Manual
[x] Cancel search | Manufacturer: MERCEDES-BENZ, Model Year: 2014, Model line: B-CLASS HATCHBACK, Model: MERCEDES-BENZ B-CLASS HATCHBACK 2014Pages: 405, PDF Size: 12.24 MB
Page 135 of 405
X
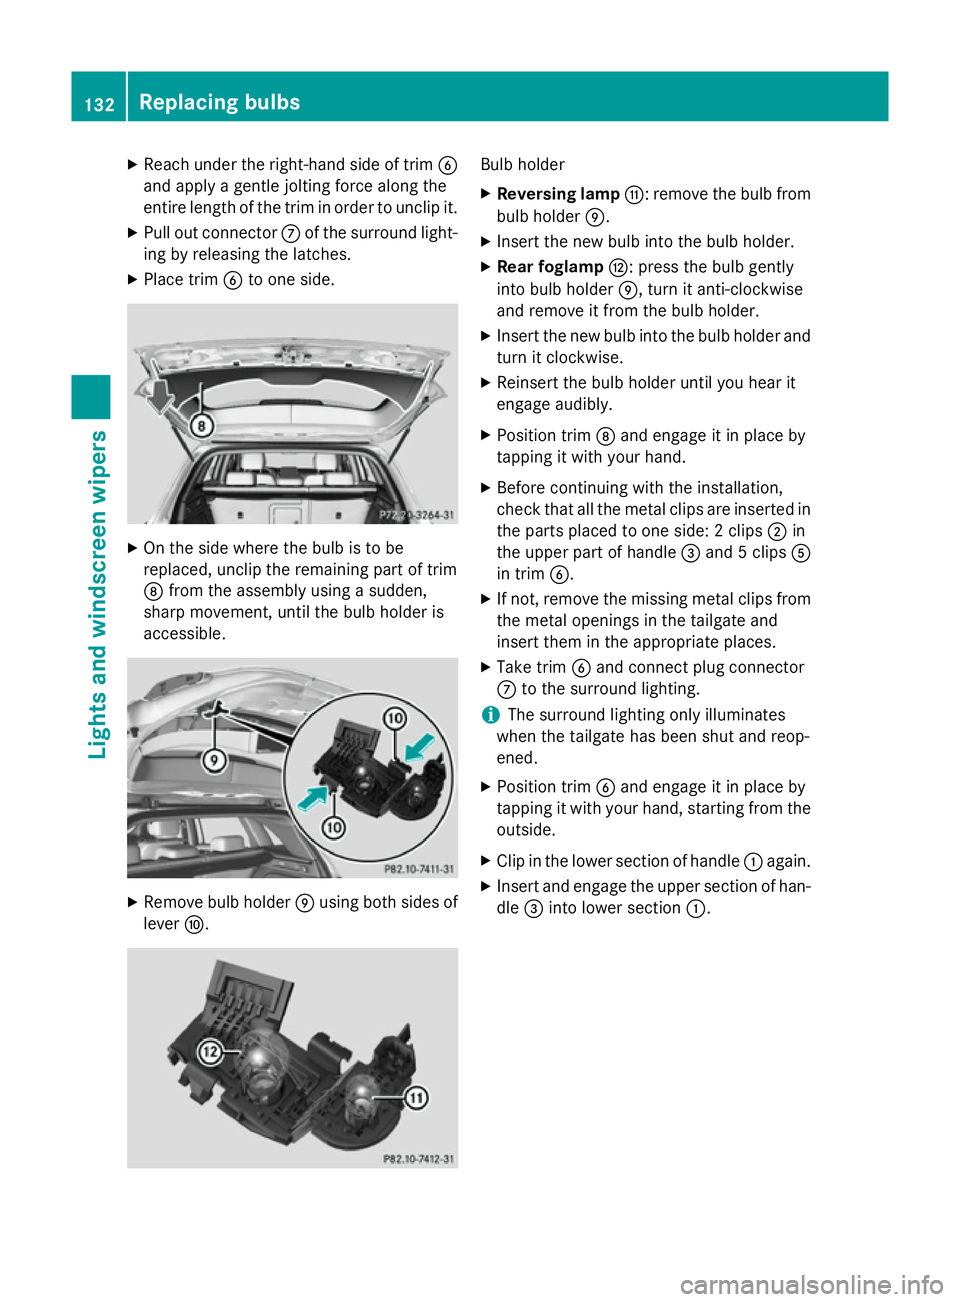
Reach under the right-hand side of trim B
and apply a gentle jolting force along the
entire length of the trim in order to unclip it.
X Pull out connector Cof the surround light-
ing by releasing the latches.
X Place trim Bto one side. X
On the side where the bulb is to be
replaced, unclip the remaining part of trim
D from the assembly using a sudden,
sharp movement, until the bulb holder is
accessible. X
Remove bulb holder Eusing both sides of
lever F. Bulb holder
X Reversing lamp G: remove the bulb from
bulb holder E.
X Insert the new bulb into the bulb holder.
X Rear foglamp H: press the bulb gently
into bulb holder E, turn it anti-clockwise
and remove it from the bulb holder.
X Insert the new bulb into the bulb holder and
turn it clockwise.
X Reinsert the bulb holder until you hear it
engage audibly.
X Position trim Dand engage it in place by
tapping it with your hand.
X Before continuing with the installation,
check that all the metal clips are inserted in
the parts placed to one side: 2 clips ;in
the upper part of handle =and 5 clips A
in trim B.
X If not, remove the missing metal clips from
the metal openings in the tailgate and
insert them in the appropriate places.
X Take trim Band connect plug connector
C to the surround lighting.
i The surround lighting only illuminates
when the tailgate has been shut and reop-
ened.
X Position trim Band engage it in place by
tapping it with your hand, starting from the
outside.
X Clip in the lower section of handle :again.
X Insert and engage the upper section of han-
dle =into lower section :.132
Replacing bulbsLights and windscreen wipers
Page 186 of 405
engine is switched off. Noises that occur are
normal.
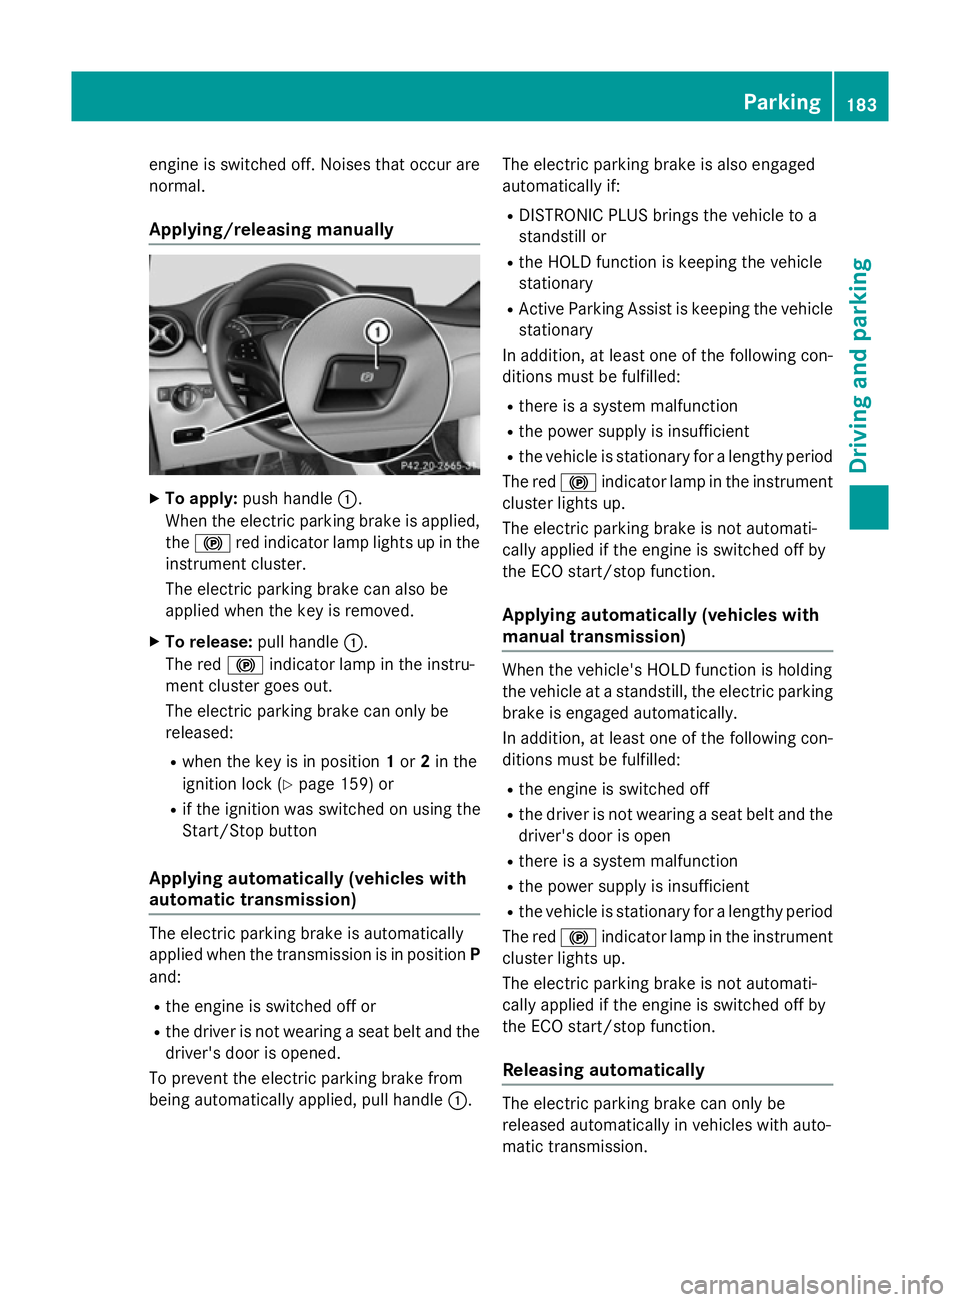
Applying/releasing manually X
To apply: push handle :.
When the electric parking brake is applied,
the ! red indicator lamp lights up in the
instrument cluster.
The electric parking brake can also be
applied when the key is removed.
X To release: pull handle:.
The red !indicator lamp in the instru-
ment cluster goes out.
The electric parking brake can only be
released:
R when the key is in position 1or 2in the
ignition lock (Y page 159) or
R if the ignition was switched on using the
Start/Stop button
Applying automatically (vehicles with
automatic transmission) The electric parking brake is automatically
applied when the transmission is in position
P
and:
R the engine is switched off or
R the driver is not wearing a seat belt and the
driver's door is opened.
To prevent the electric parking brake from
being automatically applied, pull handle :.The electric parking brake is also engaged
automatically if:
R DISTRONIC PLUS brings the vehicle to a
standstill or
R the HOLD function is keeping the vehicle
stationary
R Active Parking Assist is keeping the vehicle
stationary
In addition, at least one of the following con-
ditions must be fulfilled:
R there is a system malfunction
R the power supply is insufficient
R the vehicle is stationary for a lengthy period
The red !indicator lamp in the instrument
cluster lights up.
The electric parking brake is not automati-
cally applied if the engine is switched off by
the ECO start/stop function.
Applying automatically (vehicles with
manual transmission) When the vehicle's HOLD function is holding
the vehicle at a standstill, the electric parking
brake is engaged automatically.
In addition, at least one of the following con-
ditions must be fulfilled:
R the engine is switched off
R the driver is not wearing a seat belt and the
driver's door is open
R there is a system malfunction
R the power supply is insufficient
R the vehicle is stationary for a lengthy period
The red !indicator lamp in the instrument
cluster lights up.
The electric parking brake is not automati-
cally applied if the engine is switched off by
the ECO start/stop function.
Releasing automatically The electric parking brake can only be
released automatically in vehicles with auto-
matic transmission. Parking
183Driving and parking Z
Page 210 of 405
Active Parking Assist may also display spaces
not suitable for parking, e.g.:
R parking or stopping prohibitions.
R in front of driveways or entrances and exits.
R unsuitable surfaces.
Parking tips:
R on narrow roads, drive as closely as possi-
ble past the parking space.
R parking spaces that are littered or over-
grown might be identified or measured
incorrectly.
R parking spaces that are partially occupied
by trailer drawbars might not be identified
as such or be measured incorrectly.
R snowfall or heavy rain may lead to a parking
space being measured inaccurately.
R pay attention to the PARKTRONIC
(Y page 204 )warning messages during the
parking procedure.
R you can intervene in the steering procedure
to correct it at any time. Active Parking
Assist will then be cancelled.
R when transporting a load which protrudes
from your vehicle, you should not use
Active Parking Assist.
R never use Active Parking Assist when snow
chains are fitted.
R make sure that the tyre pressures are
always correct. This has a direct influence
on the parking characteristics of the vehi-
cle.
Use Active Parking Assist for parking spaces
that are:
R parallel or at right angles to the direction of
travel
R on straight roads, not bends.
R on the same level as the road, e.g. not on
the pavement.
For vehicles with the trailer tow hitch folded
out, the minimum length for parking spaces is slightly longer.
If you have attached a trailer to your vehicle,
you may not use Active Parking Assist. Once
the electrical connection is established between your vehicle and the trailer, Active
Parking Assist is no longer available.
PARKTRONIC is deactivated for the rear area.
Detecting parking spaces Objects located above the height range of
Active Parking Assist will not be detected
when the parking space is measured. These
are not taken into account when the parking
procedure is calculated, e.g. overhanging
loads, tail sections or loading ramps of goods
vehicles. G
WARNING
If there are objects above the detection range:
R Active Park Assist may steer too early
R the vehicle may not stop in front of these
objects.
This could cause a collision. There is a risk of
an accident.
If objects are located above the detection
range, stop and switch off Active Parking
Assist.
For further information on the detection
range (Y page 203).
Active Parking Assist does not assist you
parking in spaces at right angles to the direc-
tion of travel if:
R two parking spaces are located directly
next to one another
R the parking space is directly next to a low
obstacle such as a low kerb
R you forward park
Active Parking Assist does not assist you
parking in spaces that are parallel or at right
angles to the direction of travel if:
R the parking space is on a kerb
R the system reads the parking space as
being blocked, for example by foliage or
grass paving blocks
R the area is too small for the vehicle to
manoeuvre into
R the parking space is bordered by an obsta-
cle, e.g. a tree, a post or a trailer Driving systems
207Driving and parking Z
Page 211 of 405
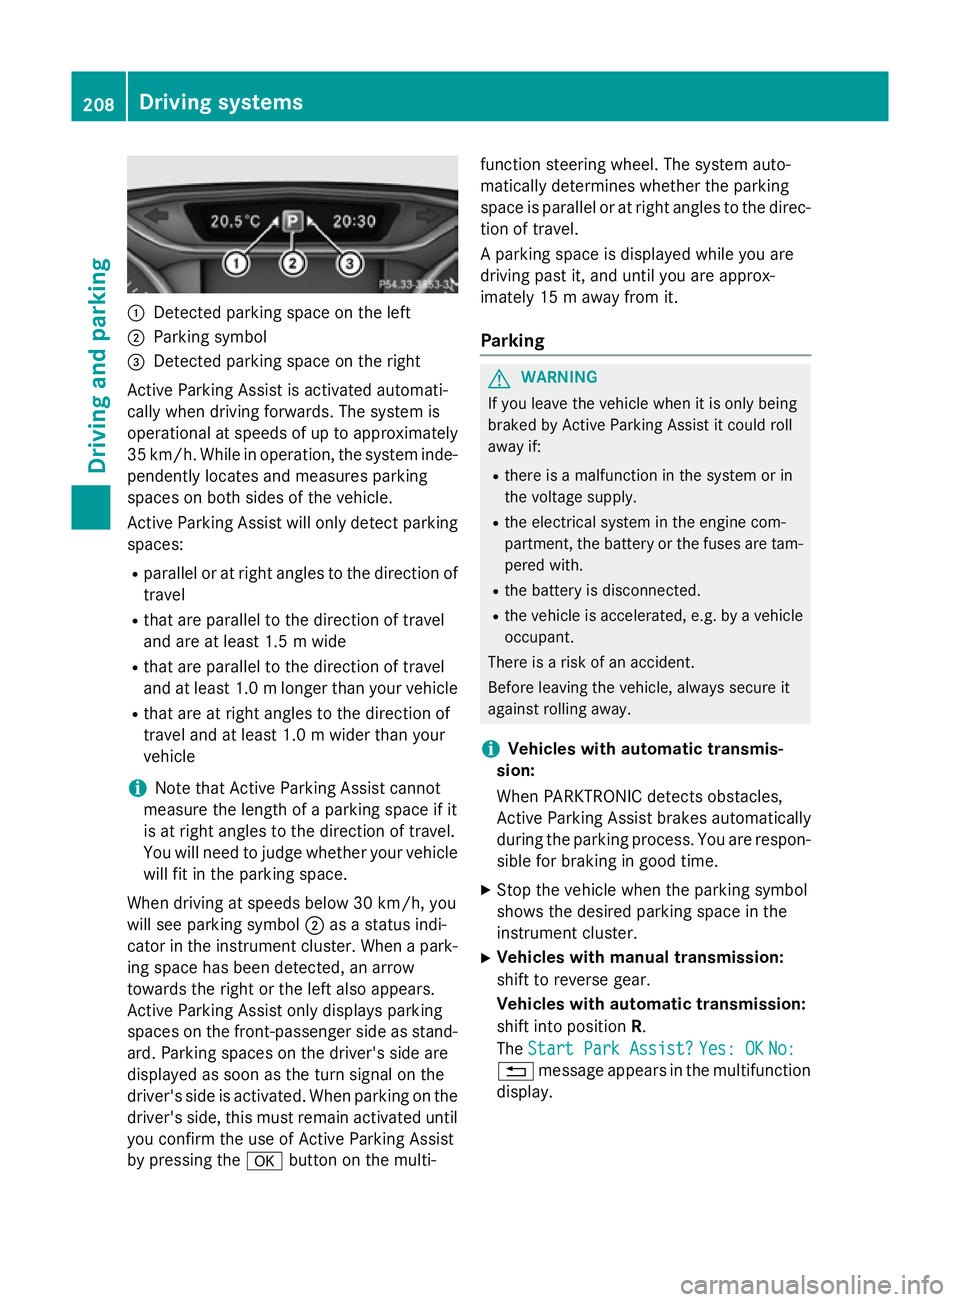
:
Detected parking space on the left
; Parking symbol
= Detected parking space on the right
Active Parking Assist is activated automati-
cally when driving forwards. The system is
operational at speeds of up to approximately
35 km/h. While in operation, the system inde- pendently locates and measures parking
spaces on both sides of the vehicle.
Active Parking Assist will only detect parkingspaces:
R parallel or at right angles to the direction of
travel
R that are parallel to the direction of travel
and are at least 1.5 m wide
R that are parallel to the direction of travel
and at least 1.0 mlonger than your vehicle
R that are at right angles to the direction of
travel and at least 1.0 m wider than your
vehicle
i Note that Active Parking Assist cannot
measure the length of a parking space if it
is at right angles to the direction of travel.
You will need to judge whether your vehicle
will fit in the parking space.
When driving at speeds below 30 km/h, you
will see parking symbol ;as a status indi-
cator in the instrument cluster. When a park-
ing space has been detected, an arrow
towards the right or the left also appears.
Active Parking Assist only displays parking
spaces on the front-passenger side as stand- ard. Parking spaces on the driver's side are
displayed as soon as the turn signal on the
driver's side is activated. When parking on the driver's side, this must remain activated untilyou confirm the use of Active Parking Assist
by pressing the abutton on the multi- function steering wheel. The system auto-
matically determines whether the parking
space is parallel or at right angles to the direc-
tion of travel.
A parking space is displayed while you are
driving past it, and until you are approx-
imately 15 m away from it.
Parking G
WARNING
If you leave the vehicle when it is only being
braked by Active Parking Assist it could roll
away if:
R there is a malfunction in the system or in
the voltage supply.
R the electrical system in the engine com-
partment, the battery or the fuses are tam-
pered with.
R the battery is disconnected.
R the vehicle is accelerated, e.g. by a vehicle
occupant.
There is a risk of an accident.
Before leaving the vehicle, always secure it
against rolling away.
i Vehicles with automatic transmis-
sion:
When PARKTRONIC detects obstacles,
Active Parking Assist brakes automatically
during the parking process. You are respon-
sible for braking in good time.
X Stop the vehicle when the parking symbol
shows the desired parking space in the
instrument cluster.
X Vehicles with manual transmission:
shift to reverse gear.
Vehicles with automatic transmission:
shift into position R.
The Start Park Assist? Start Park Assist? Yes: OK
Yes: OKNo:
No:
% message appears in the multifunction
display. 208
Driving systemsDriving and parking
Page 219 of 405
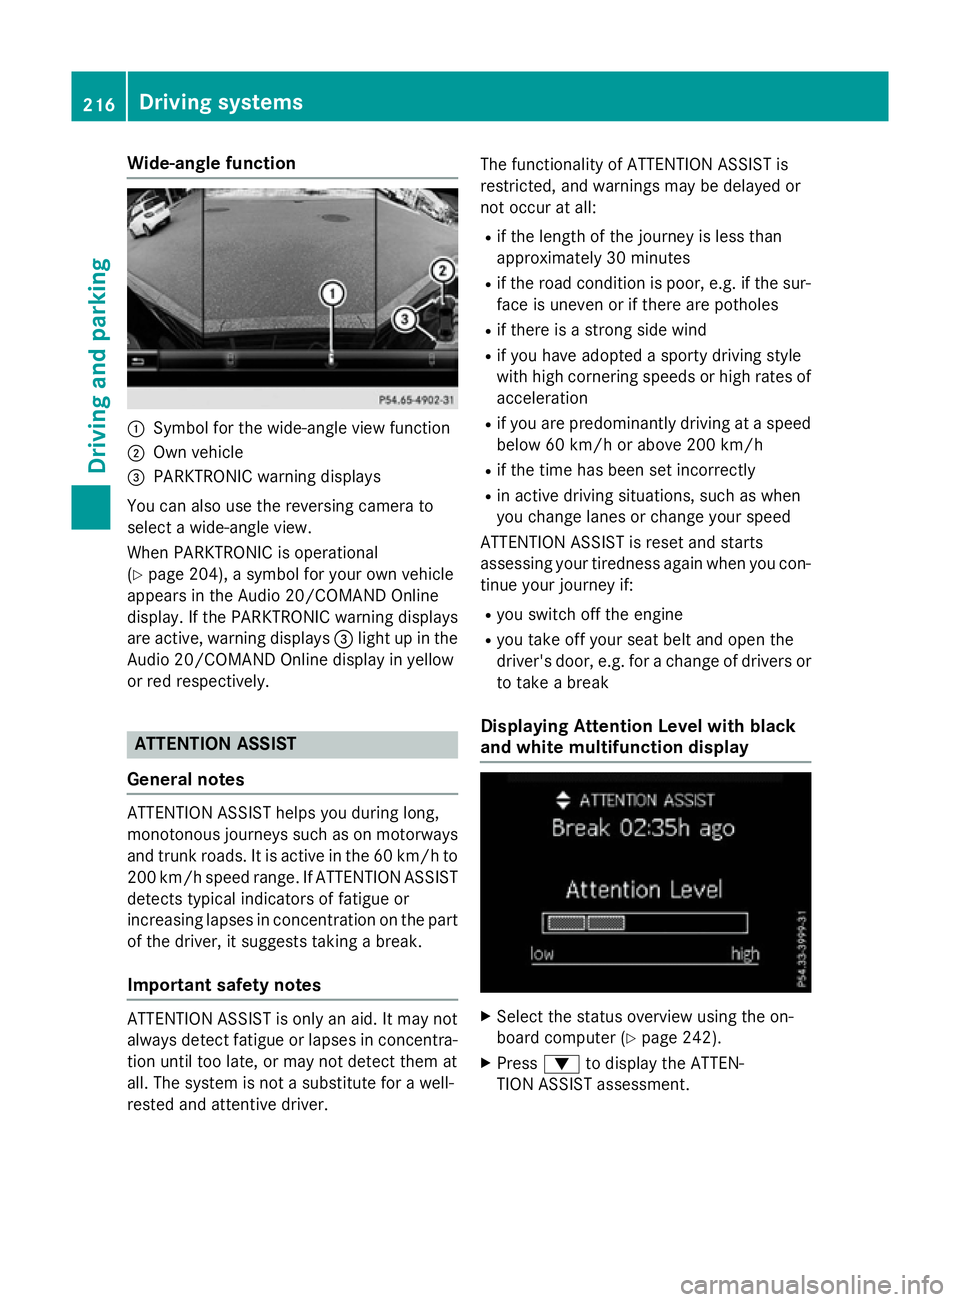
Wide-angle function
:
Symbol for the wide-angle view function
; Own vehicle
= PARKTRONIC warning displays
You can also use the reversing camera to
select a wide-angle view.
When PARKTRONIC is operational
(Y page 204), a symbol for your own vehicle
appears in the Audio 20/COMAND Online
display. If the PARKTRONIC warning displays
are active, warning displays =light up in the
Audio 20/COMAND Online display in yellow
or red respectively. ATTENTION ASSIST
General notes ATTENTION ASSIST helps you during long,
monotonous journeys such as on motorways
and trunk roads. It is active in the 60 km/h to
200 km/h speed range. If ATTENTION ASSIST
detects typical indicators of fatigue or
increasing lapses in concentration on the part of the driver, it suggests taking a break.
Important safety notes ATTENTION ASSIST is only an aid. It may not
always detect fatigue or lapses in concentra-
tion until too late, or may not detect them at
all. The system is not a substitute for a well-
rested and attentive driver. The functionality of ATTENTION ASSIST is
restricted, and warnings may be delayed or
not occur at all:
R if the length of the journey is less than
approximately 30 minutes
R if the road condition is poor, e.g. if the sur-
face is uneven or if there are potholes
R if there is a strong side wind
R if you have adopted a sporty driving style
with high cornering speeds or high rates of
acceleration
R if you are predominantly driving at a speed
below 60 km/h or above 200 km/h
R if the time has been set incorrectly
R in active driving situations, such as when
you change lanes or change your speed
ATTENTION ASSIST is reset and starts
assessing your tiredness again when you con- tinue your journey if:
R you switch off the engine
R you take off your seat belt and open the
driver's door, e.g. for a change of drivers or
to take a break
Displaying Attention Level with black
and white multifunction display X
Select the status overview using the on-
board computer (Y page 242).
X Press :to display the ATTEN-
TION ASSIST assessment. 216
Driving systemsDriving and parking
Page 220 of 405
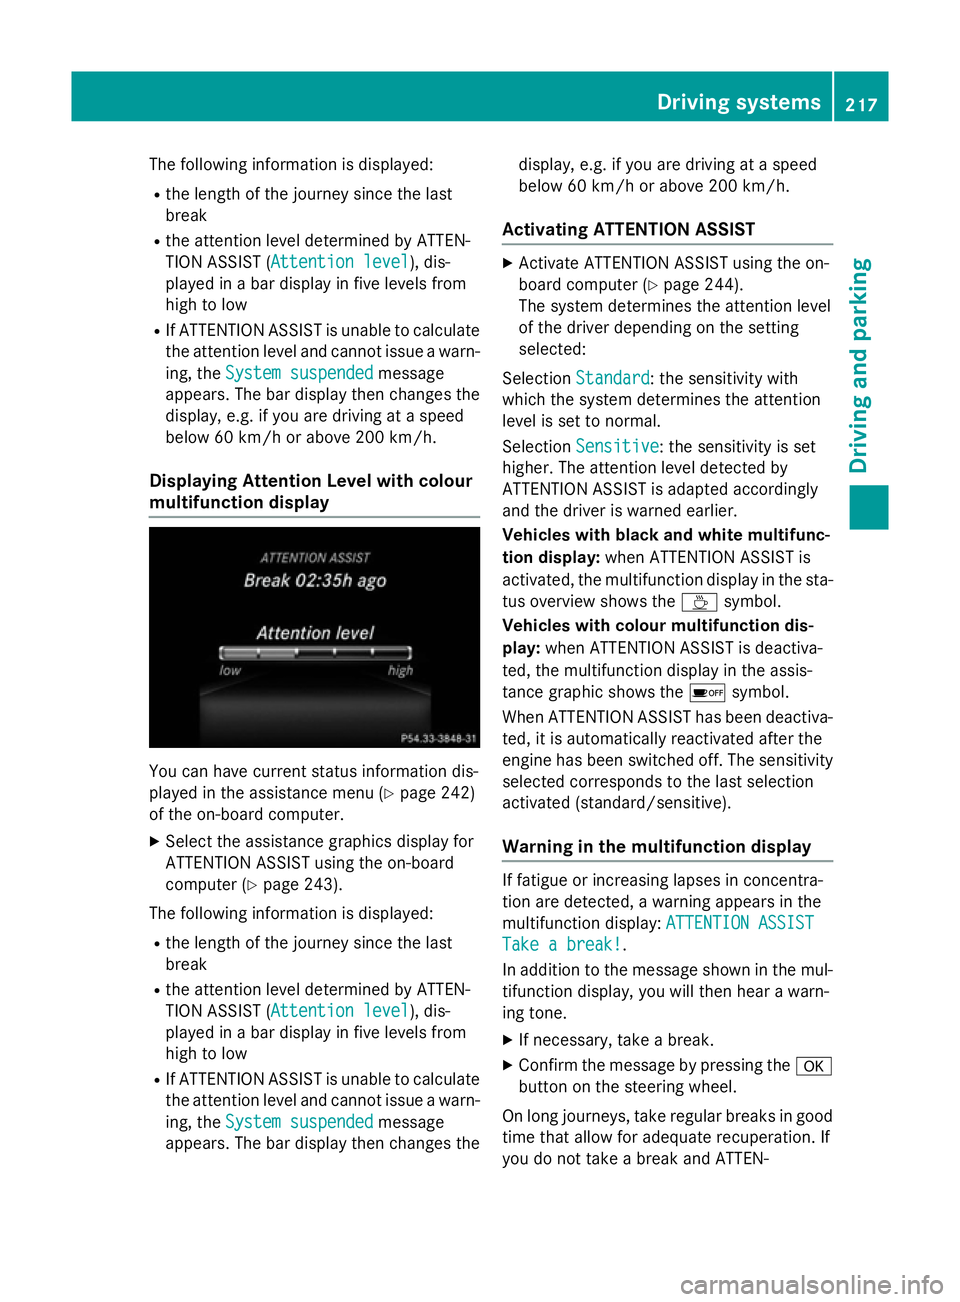
The following information is displayed:
R the length of the journey since the last
break
R the attention level determined by ATTEN-
TION ASSIST ( Attention level Attention level), dis-
played in a bar display in five levels from
high to low
R If ATTENTION ASSIST is unable to calculate
the attention level and cannot issue a warn-
ing, the System suspended
System suspended message
appears. The bar display then changes the
display, e.g. if you are driving at a speed
below 60 km/h or above 200 km/h.
Displaying Attention Level with colour
multifunction display You can have current status information dis-
played in the assistance menu (Y
page 242)
of the on-board computer.
X Select the assistance graphics display for
ATTENTION ASSIST using the on-board
computer (Y page 243).
The following information is displayed: R the length of the journey since the last
break
R the attention level determined by ATTEN-
TION ASSIST ( Attention level
Attention level), dis-
played in a bar display in five levels from
high to low
R If ATTENTION ASSIST is unable to calculate
the attention level and cannot issue a warn-
ing, the System suspended
System suspended message
appears. The bar display then changes the display, e.g. if you are driving at a speed
below 60 km/h or above 200 km/h.
Activating ATTENTION ASSIST X
Activate ATTENTION ASSIST using the on-
board computer (Y page 244).
The system determines the attention level
of the driver depending on the setting
selected:
Selection Standard Standard: the sensitivity with
which the system determines the attention
level is set to normal.
Selection Sensitive
Sensitive : the sensitivity is set
higher. The attention level detected by
ATTENTION ASSIST is adapted accordingly
and the driver is warned earlier.
Vehicles with black and white multifunc-
tion display: when ATTENTION ASSIST is
activated, the multifunction display in the sta- tus overview shows the Àsymbol.
Vehicles with colour multifunction dis-
play: when ATTENTION ASSIST is deactiva-
ted, the multifunction display in the assis-
tance graphic shows the ésymbol.
When ATTENTION ASSIST has been deactiva-
ted, it is automatically reactivated after the
engine has been switched off. The sensitivity selected corresponds to the last selection
activated (standard/sensitive).
Warning in the multifunction display If fatigue or increasing lapses in concentra-
tion are detected, a warning appears in the
multifunction display:
ATTENTION ASSIST ATTENTION ASSIST
Take a break!
Take a break! .
In addition to the message shown in the mul-
tifunction display, you will then hear a warn-
ing tone.
X If necessary, take a break.
X Confirm the message by pressing the a
button on the steering wheel.
On long journeys, take regular breaks in good time that allow for adequate recuperation. If
you do not take a break and ATTEN- Driving syste
ms
217Driving an d parking Z
Page 307 of 405
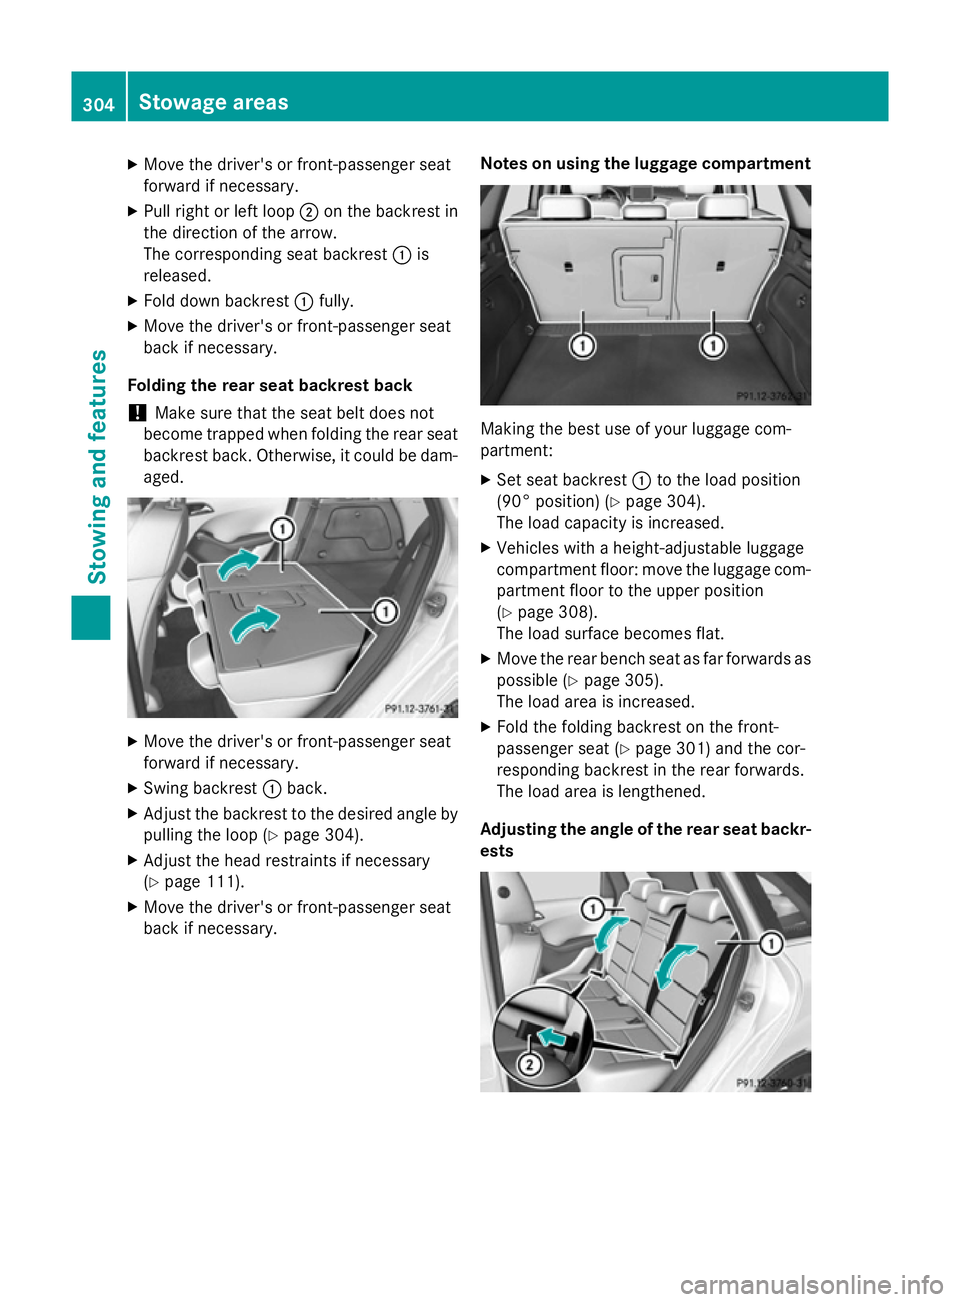
X
Move the driver's or front-passenger seat
forward if necessary.
X Pull right or left loop ;on the backrest in
the direction of the arrow.
The corresponding seat backrest :is
released.
X Fold down backrest :fully.
X Move the driver's or front-passenger seat
back if necessary.
Folding the rear seat backrest back ! Make sure that the seat belt does not
become trapped when folding the rear seat
backrest back. Otherwise, it could be dam- aged. X
Move the driver's or front-passenger seat
forward if necessary.
X Swing backrest :back.
X Adjust the backrest to the desired angle by
pulling the loop (Y page 304).
X Adjust the head restraints if necessary
(Y page 111).
X Move the driver's or front-passenger seat
back if necessary. Notes on using the luggage compartment Making the best use of your luggage com-
partment:
X Set seat backrest :to the load position
(90° position) (Y page 304).
The load capacity is increased.
X Vehicles with a height-adjustable luggage
compartment floor: move the luggage com-
partment floor to the upper position
(Y page 308).
The load surface becomes flat.
X Move the rear bench seat as far forwards as
possible (Y page 305).
The load area is increased.
X Fold the folding backrest on the front-
passenger seat (Y page 301) and the cor-
responding backrest in the rear forwards.
The load area is lengthened.
Adjusting the angle of the rear seat backr-
ests 304
Stowage areasStowing and features
Page 343 of 405
manner. Take discharged
batteries to a qualified spe-
cialist workshop or to a col-
lection point for used batter-
ies.
! Have the battery checked regularly at a
qualified specialist workshop.
Observe the service intervals in the Service
Booklet or contact a qualified specialist
workshop for more information.
! You should have all work involving the
battery carried out at a qualified specialist
workshop. In the exceptional case that it is
necessary for you to disconnect the battery yourself, make sure that:
R you switch off the engine and remove the
key. On vehicles with KEYLESS-GO,
ensure that the ignition is switched off.
Check that all the indicator lamps in the
instrument cluster are off. Otherwise,
electronic components, such as the
alternator, may be damaged.
R you first remove the negative terminal
clamp and then the positive terminal
clamp. Never swap the terminal clamps.
Otherwise, the vehicle's electronic sys-
tem may be damaged.
R in vehicles with automatic transmission,
the transmission is locked in position P
after disconnecting the battery. The vehi-
cle is secured against rolling away. You
can then no longer move the vehicle.
The battery and the cover of the positive
terminal clamp must be fitted securely dur- ing operation.
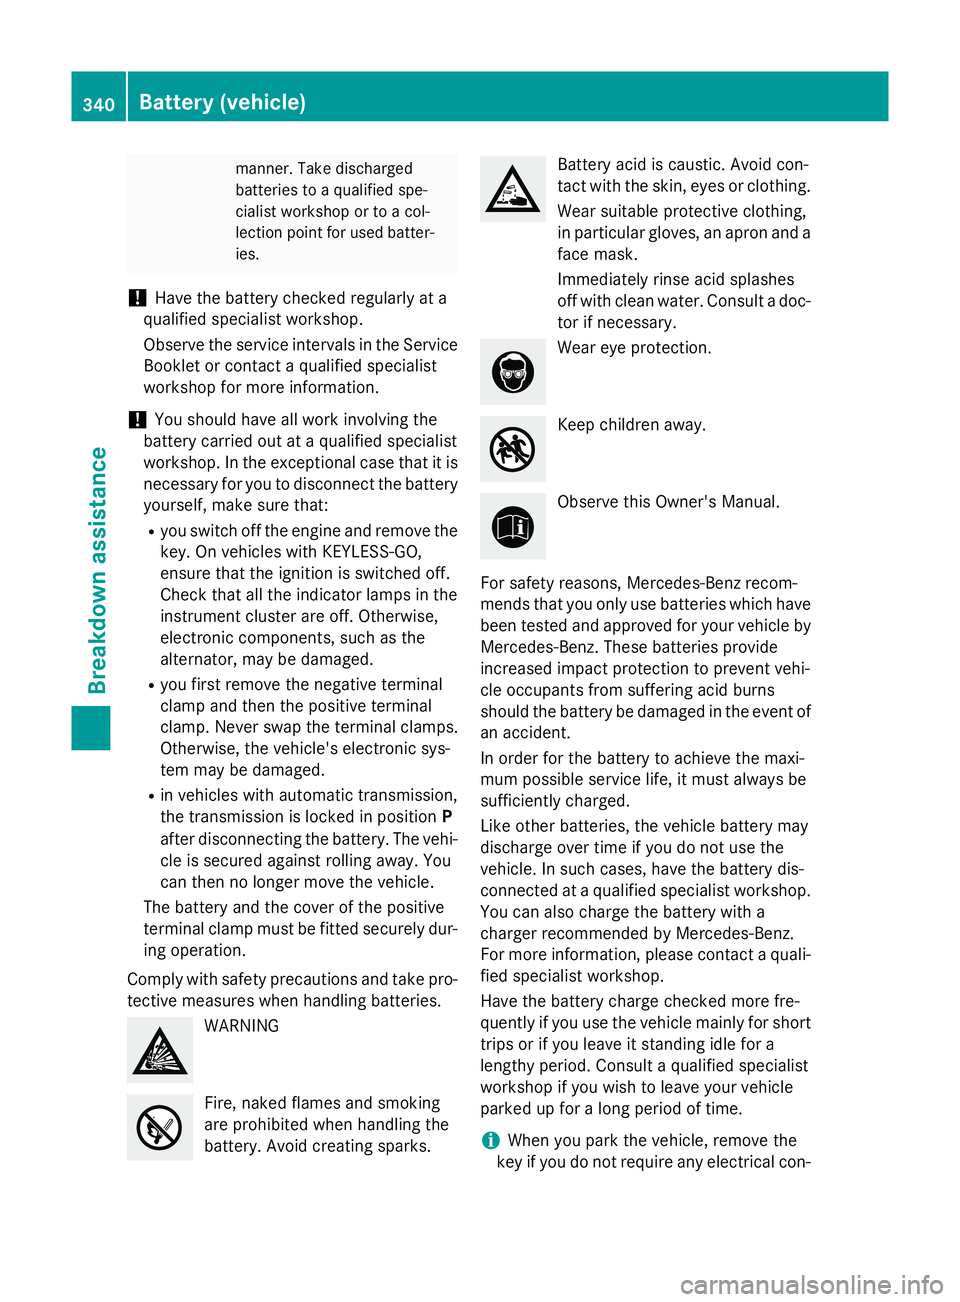
Comply with safety precautions and take pro-
tective measures when handling batteries. WARNING
Fire, naked flames and smoking
are prohibited when handling the
battery. Avoid creating sparks. Battery acid is caustic. Avoid con-
tact with the skin, eyes or clothing.
Wear suitable protective clothing,
in particular gloves, an apron and a
face mask.
Immediately rinse acid splashes
off with clean water. Consult a doc-
tor if necessary. Wear eye protection.
Keep children away.
Observe this Owner's Manual.
For safety reasons, Mercedes-Benz recom-
mends that you only use batteries which have been tested and approved for your vehicle by
Mercedes-Benz. These batteries provide
increased impact protection to prevent vehi-
cle occupants from suffering acid burns
should the battery be damaged in the event of
an accident.
In order for the battery to achieve the maxi-
mum possible service life, it must always be
sufficiently charged.
Like other batteries, the vehicle battery may
discharge over time if you do not use the
vehicle. In such cases, have the battery dis-
connected at a qualified specialist workshop. You can also charge the battery with a
charger recommended by Mercedes-Benz.
For more information, please contact a quali-
fied specialist workshop.
Have the battery charge checked more fre-
quently if you use the vehicle mainly for short
trips or if you leave it standing idle for a
lengthy period. Consult a qualified specialist
workshop if you wish to leave your vehicle
parked up for a long period of time.
i When you park the vehicle, remove the
key if you do not require any electrical con- 340
Battery (vehicle)Breakdown assistance
Page 345 of 405
Jump-starting
For the jump-starting procedure, use only the jump-starting connection point, consisting of a positive terminal and an earth point, in the engine compartment. G
WARNING
Battery acid is caustic. There is a risk of injury.
Avoid contact with the skin, eyes or clothing. Do not breathe in any battery gases. Do not lean over the battery. Keep the batteries out of the reach of children. Immediately rinse off battery acid
thoroughly with plenty of clean water and seek medical attention at once. G
WARNING
During charging and jump-starting, explosive gases can escape from the battery. There is a risk of an explosion.
Particularly avoid fire, naked flames, creating sparks and smoking. Ensure there is sufficient
ventilation while charging and jump-starting. Do not lean over a battery. G
WARNING
During the charging process, a battery produces hydrogen gas. If a short circuit occurs or sparks
are created, the hydrogen gas can ignite. There is a risk of an explosion.
R Make sure that the positive terminal of a connected battery does not come into contact with
vehicle parts.
R Never place metal objects or tools on a battery.
R It is important that you observe the described order of the battery terminals when connecting
and disconnecting a battery.
R When jump-starting, make sure that the battery poles with identical polarity are connected.
R It is particularly important to observe the described order when connecting and disconnecting
the jump leads.
R Never connect or disconnect the battery terminals while the engine is running. G
WARNING
A discharged battery can freeze at temperatures below freezing point. When jump-starting the
vehicle or charging the battery, gases can escape from the battery. There is a risk of an explosion.
Allow the frozen battery to thaw out before charging it or jump-starting.
! Vehicles with a petrol engine:
avoid repeated and lengthy starting attempts. Otherwise,
the non-combusted fuel may damage the catalytic converter.
If the indicator/warning lamps do not light up at low temperatures, it is very likely that the
discharged battery has frozen. In this case you may neither jump-start the vehicle nor charge
the battery. Let the battery thaw first. The service life of a battery that has been thawed may
be reduced. The starting characteristics may be impaired, especially at low temperatures.
Have the thawed battery checked at a qualified specialist workshop. 342
Jump-startingBreakdown assistance
Page 397 of 405
Dimensions and weights
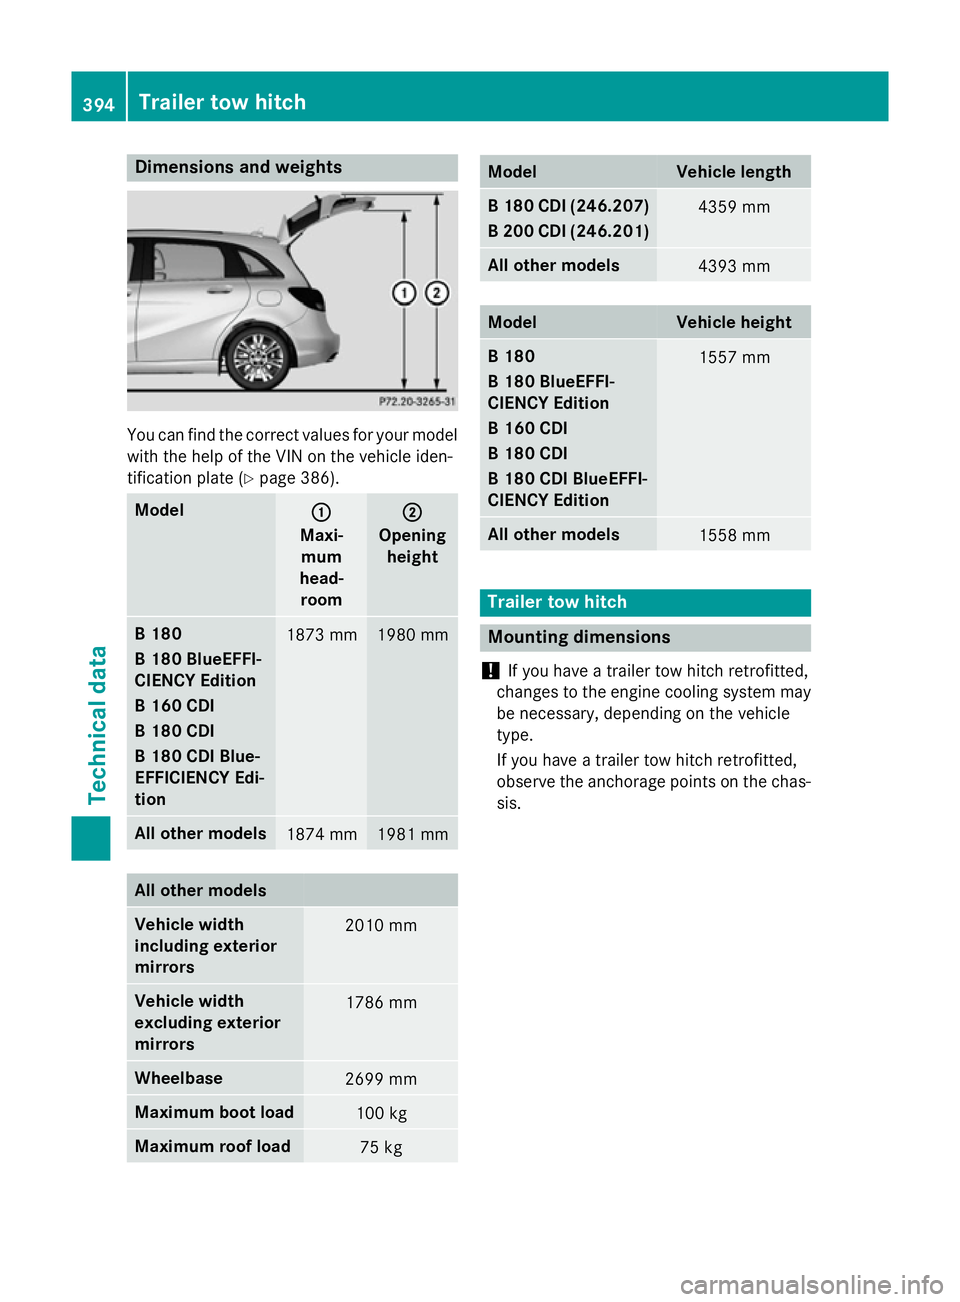
You can find the correct values for your model
with the help of the VIN on the vehicle iden-
tification plate (Y page 386). Model
: :
Maxi- mum
head- room ;
;
Opening height B 180
B 180 BlueEFFI-
CIENCY Edition
B 160 CDI
B 180 CDI
B 180 CDI Blue-
EFFICIENCY Edi-
tion
1873 mm 1980 mm
All other models
1874 mm 1981 mm
All other models
Vehicle width
including exterior
mirrors
2010 mm
Vehicle width
excluding exterior
mirrors
1786 mm
Wheelbase
2699 mm
Maximum boot load
100 kg
Maximum roof load
75 kg Model Vehicle length
B 180 CDI (246.207)
B 200 CDI (246.201) 4359 mm
All other models
4393 mm
Model Vehicle height
B 180
B 180 BlueEFFI-
CIENCY Edition
B 160 CDI
B 180 CDI
B 180 CDI BlueEFFI-
CIENCY Edition
1557 mm
All other models
1558 mm
Trailer tow hitch
Mounting dimensions
! If you have a trailer tow hitch retrofitted,
changes to the engine cooling system may
be necessary, depending on the vehicle
type.
If you have a trailer tow hitch retrofitted,
observe the anchorage points on the chas- sis. 394
Trailer tow hitchTe
chnical da ta