key MERCEDES-BENZ C-Class 2000 W202 Owner's Manual
[x] Cancel search | Manufacturer: MERCEDES-BENZ, Model Year: 2000, Model line: C-Class, Model: MERCEDES-BENZ C-Class 2000 W202Pages: 130, PDF Size: 2.43 MB
Page 3 of 130
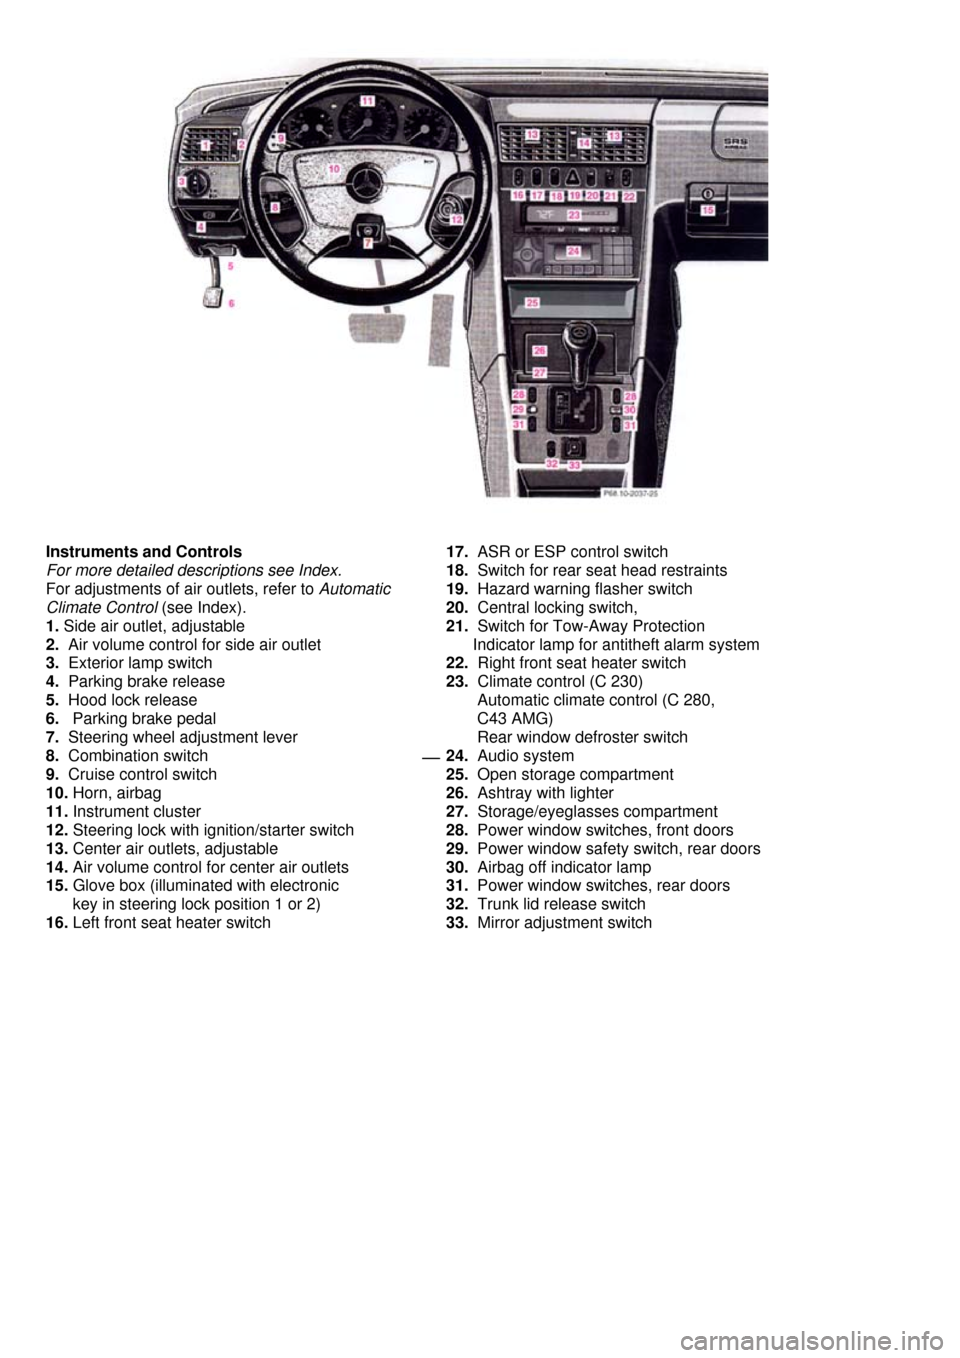
Instruments and Controls
For more detailed descriptions see Index.
For adjustments of air outlets, refer to Automatic
Climate Control (see Index).
1. Side air outlet, adjustable
2. Air volume control for side air outlet
3. Exterior lamp switch
4. Parking brake release
5. Hood lock release
6. Parking brake pedal
7. Steering wheel adjustment lever
8. Combination switch
9. Cruise control switch
10. Horn, airbag
11. Instrument cluster
12. Steering lock with ignition/starter switch
13. Center air outlets, adjustable
14. Air volume control for center air outlets
15. Glove box (illuminated with electronic
key in steering lock position 1 or 2)
16. Left front seat heater switch
17. ASR or ESP control switch
18. Switch for rear seat head restraints
19. Hazard warning flasher switch
20. Central locking switch,
21. Switch for Tow-Away Protection
Indicator lamp for antitheft alarm system
22. Right front seat heater switch
23. Climate control (C 230)
Automatic climate control (C 280,
C43 AMG)
Rear window defroster switch
24. Audio system
25. Open storage compartment
26. Ashtray with lighter
27. Storage/eyeglasses compartment
28. Power window switches, front doors
29. Power window safety switch, rear doors
30. Airbag off indicator lamp
31. Power window switches, rear doors
32. Trunk lid release switch
33. Mirror adjustment switch
Page 7 of 130

Starting and Turning Off the Engine
Before Starting
Ensure that parking brake is engaged and that selector lever is in position "P" or "N". Turn electronic
key in steering lock to position 2. The charge indicator lamp should come on.
Starting
Do not depress accelerator. Brie fly turn electronic key in steering lock clockwise to the stop and
release. The starter will engage until the engine is running. If engine will not run, and the starting
procedure stops, turn electronic key completely to the left and repeat starting the engine. After
several unsuccessful attempts, have the system checked at the nearest authorized Mercedes-Benz
dealer.
Important!
Due to the installed starter nonrepeat feature, t he electronic key must be turned completely to the
left before attempting to start the engine again. The battery charge indicator lamp should go out as
soon as the engine has started. In areas where te mperatures frequently drop below -4°F (-20°C) we
recommend that an engine block heater be installed. Your authorized Mercedes-Benz dealer will
advise you on this subject.
Turning Off
Turn the electronic key in the steering lock to position 0 to stop the engine.
The electronic key can only be removed with your foot off the brake pedal and the selector lever in
position "P".
Page 10 of 130

Tire Speed Rating
Model C 43 AMG only: This vehicle is factory equipped with "Z"-rated tires. All other models: These vehicles are factory
equipped with "H"-rated tires, which have a European spee d rating of 130 mph (210 km/h). An electronic speed limiter
prevents your vehicle from exceeding the speed rating. Despit e the tire rating, local speed limits should be obeyed. Use
prudent driving speeds appropriate to prevailing conditions.
Warning !
Even when permitted by law, never operate a vehicle at speeds greater than the maximum speed rating of the
tires. Exceeding the maximum speed for which tires are rated can lead to sudden tire failure causing loss of
vehicle control and resulting in personal injury and possible death.
Parking
Warning !
To reduce the risk of personal injury as a result of vehicle movement, before turning off the engine
and leaving the vehicle always:
1. Keep right foot on brake pedal.
2. Firmly depress parking brake pedal.
3. Move the selector lever to position "P".
4. Slowly release brake pedal.
5. Turn front wheels towards the road curb.
6. Turn the key to steering lock position 0 and remove.
7. Take the electronic key and lock vehicle when leaving.
Important !
It is advisable to set the parking brake whenever parking or leaving the vehicle. In addition, move selector lever
to position "P". When parking on hills, always set the parking brake.
Winter Driving Instructions
The most important rule for slippery or icy roads is to driv e sensibly and to avoid abrupt acceleration, braking and steering
maneuvers. Do not use the cruise control system under such conditions.
When the vehicle is in danger of skidding, move selector le ver to position "N". Try to keep the vehicle under control by
corrective steering action. Road salts and chem icals can adversely affect braking efficiency.
Increased pedal force may become necessary to produce t he normal brake effect. We therefore recommend depressing
the brake pedal periodically when travelling at length on salt-strewn roads. This can bring road salt impaired
braking efficiency back to normal. A prerequisite is, however, that this is done without endangering other drivers on the
road. If the vehicle is parked after being driven on salt treated roads, the braking efficiency should be tested as soon as
possible after driving is resumed while observi ng the safety rules in the previous paragraph.
Warning !
If the vehicle becomes stuck in snow, make sure that snow is kept clear of the exhaust pipe and from
around the vehicle with engine running. Otherwise, deadly carbon monoxide (CO) gases may enter
vehicle interior resulting in unconsciousness and death. To assure sufficient fresh air ventilation, open
a window slightly on the side of the car that is out of the wind.
Deep Water
Caution !
Do riot drive through flooded areas or water of unknown dept h. If you must drive through deep water, drive slowly to
prevent water from entering the engine compartment or being ingested by the air intake, possibly causing damage to
electrical components or wiring, to engine or transmission t hat is not covered by the Mercedes-Benz Limited Warranty.
Passenger Compartment
Warning !
Always fasten items being carried as securely as possible. In an accident, during hard braking or sudden
maneuvers, loose items will be thrown around inside the vehicle, and cause injury to vehicle occupants unless
the items are securely fastened in the vehicle. The trunk is the preferred place to carry objects.
Page 13 of 130
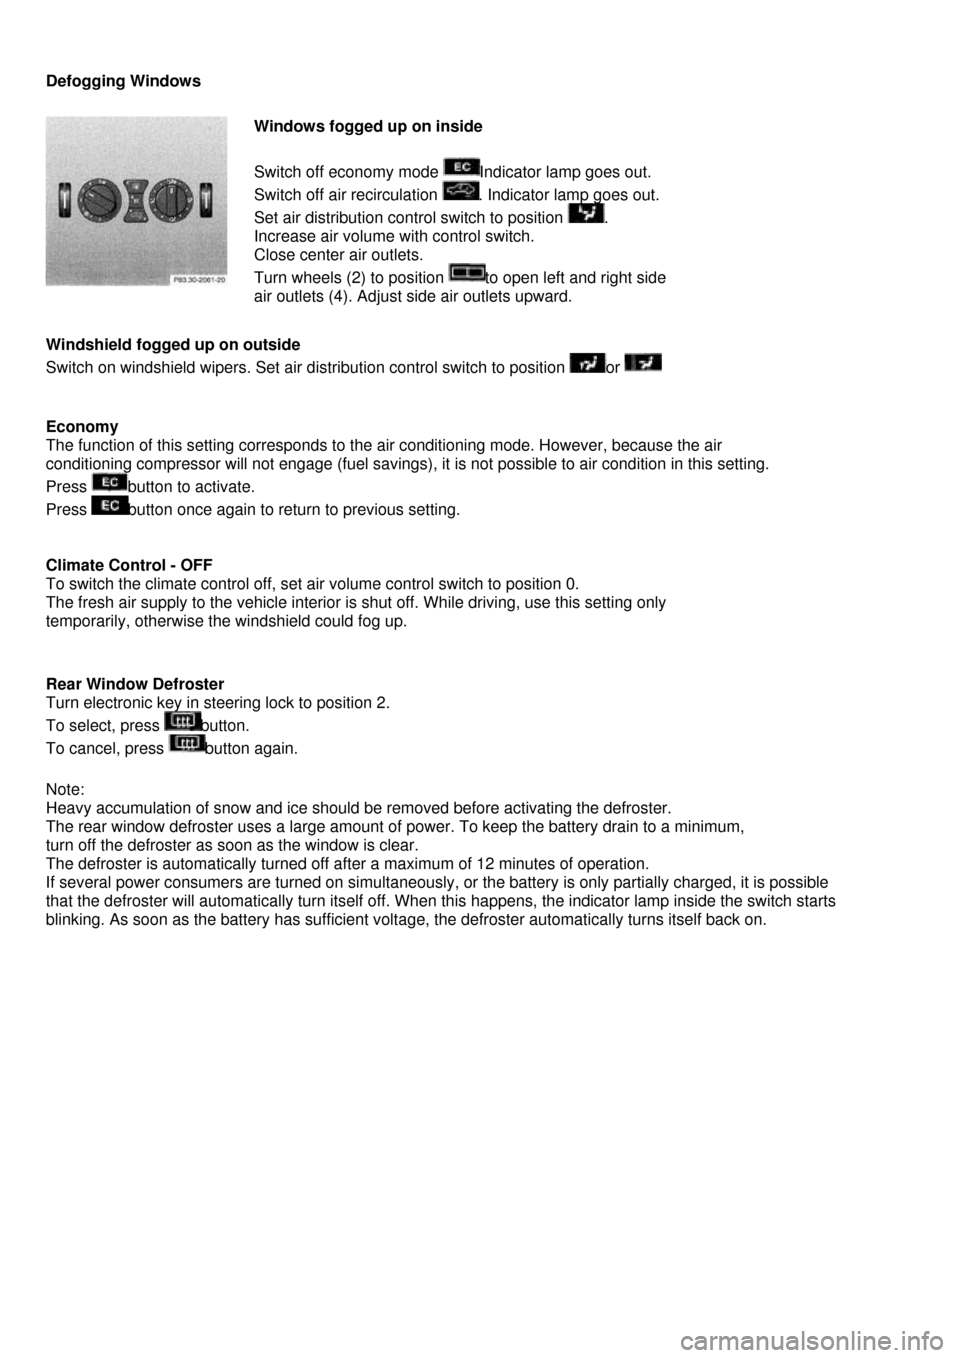
Defogging Windows
Windows fogged up on inside
Switch off economy mode Indicator lamp goes out.
Switch off air recirculation . Indicator lamp goes out.
Set air distribution control switch to position .
Increase air volume with control switch.
Close center air outlets.
Turn wheels (2) to position to open left and right side
air outlets (4). Adjust side air outlets upward.
Windshield fogged up on outside
Switch on windshield wipers. Set air distribution control switch to position or
Economy
The function of this setting corresponds to the air conditioning mode. However, because the air
conditioning compressor will not engage (fuel savings), it is not possible to air condition in this setting.
Press button to activate.
Press button once again to return to previous setting.
Climate Control - OFF
To switch the climate control off, set air volume control switch to position 0.
The fresh air supply to the vehicle interior is shut off. While driving, use this setting only
temporarily, otherwise the windshield could fog up.
Rear Window Defroster
Turn electronic key in steering lock to position 2.
To select, press button.
To cancel, press button again.
Note:
Heavy accumulation of snow and ice should be removed before activating the defroster.
The rear window defroster uses a large amount of power. To keep the battery drain to a minimum,
turn off the defroster as soon as the window is clear.
The defroster is automatically turned off after a maximum of 12 minutes of operation.
If several power consumers are turned on simultaneously, or the battery is only partially charged, it is possible
that the defroster will automatically turn itself off. When this happens, the indicator lamp inside the switch starts
blinking. As soon as the battery has sufficient voltage, the defroster automatically turns itself back on.
Page 14 of 130

Air Recirculation
This mode can be selected to temporarily reduce the entry of annoying odours or dust from vehicle's interior.
Outside air is not supplied to the car's interior.
To select, press button.
To cancel, press button again.
The system will automatically switch from recirculated air to fresh air
• after approx. 5 minutes at outside temperatures below approx. 40°F (5°C),
• after approx. 30 minutes, at outside temperatures above approx. 40°F (5°C),
• after approx. 5 minutes, if button is pressed.
At hight ouside temperatures, the system automatically engages the recirculated air mode for approx.
30 minutes, thereby increasing the cooling capacity performance. Press button again to extend the recirculated
air mode.
Residual Engine Heat Utilization
With the engine switched off, it is possible to continue heating the interior for a short while.
Air volume is controlled automatically
To select:
Turn electronic key in steering lock to position 1 or 0 or remove . Close air outlet in rear passenger compartment.
Press button. Indicator lamp in the button lights up.
This function selection will not activate if the battery charge level is insufficient.
To cancel:
Press button. Indicator lamp in the button goes out
The system will automatically shut off
• if you turn key in steering lock to position 2,
• after approx. 30 minutes,
• if the battery voltage drops.
Dust Filter
Nearly all dust particles and pollen are filtered out before outside air enters the passenger compartment through the
air distribution system.
Note:
Keep the air intake grille in front of windshield free of snow and debris.
Important !
This vehicle is equipped with an air conditioner system that uses R-134a (HFC: hydrofluorocarbon)
as a refrigerant. Repairs should always be performed by a qualified technician, and refrigerant
should be collected in a recovery system for recycling.
Page 17 of 130
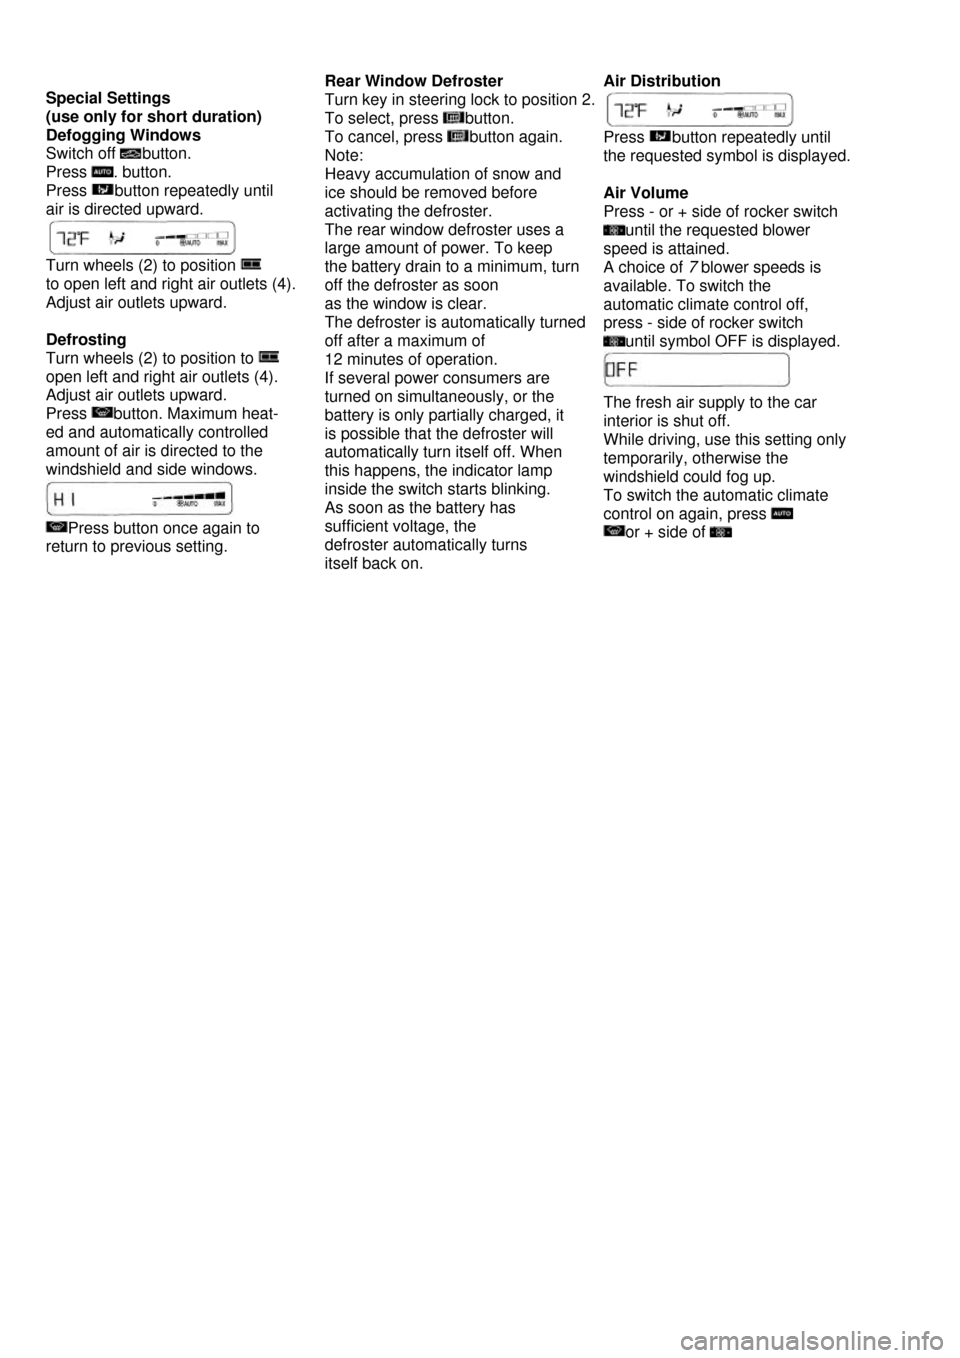
Special Settings
(use only for short duration)
Defogging Windows
Switch off button.
Press . button.
Press button repeatedly until
air is directed upward.
Turn wheels (2) to position
to open left and right air outlets (4).
Adjust air outlets upward.
Defrosting
Turn wheels (2) to position to
open left and right air outlets (4).
Adjust air outlets upward.
Press button. Maximum heat-
ed and automatically controlled
amount of air is directed to the
windshield and side windows.
Press button once again to
return to previous setting.
Rear Window Defroster
Turn key in steering lock to position 2.
To select, press button.
To cancel, press button again.
Note:
Heavy accumulation of snow and
ice should be removed before
activating the defroster.
The rear window defroster uses a
large amount of power. To keep
the battery drain to a minimum, turn
off the defroster as soon
as the window is clear.
The defroster is automatically turned
off after a maximum of
12 minutes of operation.
If several power consumers are
turned on simultaneously, or the
battery is only partially charged, it
is possible that the defroster will
automatically turn itself off. When
this happens, the indicator lamp
inside the switch starts blinking.
As soon as the battery has
sufficient voltage, the
defroster automatically turns
itself back on.
Air Distribution
Press button repeatedly until
the requested symbol is displayed.
Air Volume
Press - or + side of rocker switch
until the requested blower
speed is attained.
A choice of 7 blower speeds is
available. To switch the
automatic climate control off,
press - side of rocker switch
until symbol OFF is displayed.
The fresh air supply to the car
interior is shut off.
While driving, use this setting only
temporarily, otherwise the
windshield could fog up.
To switch the automatic climate
control on again, press
or + side of
Page 18 of 130

Air Recirculation
This mode can be selected to prevent annoying odours or dust from entering the car's interior.
Outside air is not supplied to the car's interior.
To select, press button.
To cancel, press button again.
The system will automatically switch from recirculated air to fresh air
• after approx. 5 minutes at outside temperatures below approx. 40°F (5°C),
• after approx. 30 minutes, at outside temperatures above approx. 40°F (5°C),
• after approx. 5 minutes, if button is pressed.
Notes:
If the windows should fog up from the inside, switch from recirculated air back to fresh air.
At high outside temperatures, the system automatically engages the recirculated air mode thereby
increasing the cooling capacity performance, switching to partially fresh air within 20 minutes.
Dust Filter
Nearly all dust particles and pollen are filtered out before outside air enters the
passenger compartment through the air distribution system.
Notes:
Do not obstruct the air flow by placing objects on the air flowthrough exhaust slots below the rear
window.
Also keep the air intake grille in front of windshield free of snow and debris.
Residual Engine Heat Utilization
With the engine switched off, it is possible to continue heating the interior for a short while.
Air volume and distribution are controlled automatically
To select:
Turn electronic key in steering lock to position 1 or 0 or remove electronic key.
Press button.
This function selection will not activate if the battery charge level is insufficient.
To cancel:
Press button.
The system will automatically shut off
• if you turn electronic key in steering lock to position 2,
• after approx. 30 minutes,
• if the battery voltage drops.
Page 19 of 130
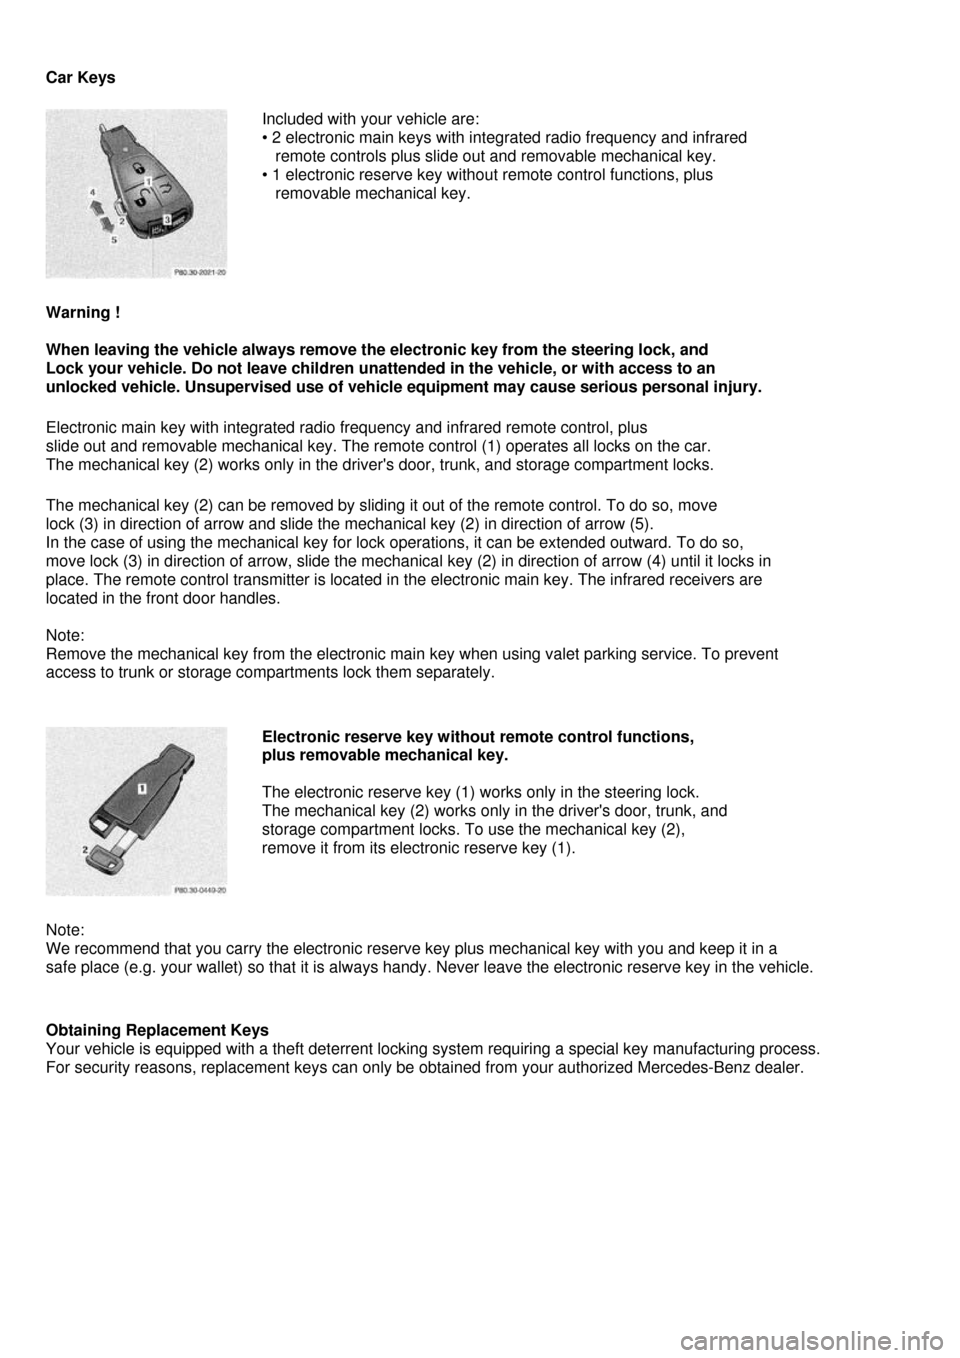
Car Keys
Included with your vehicle are:
• 2 electronic main keys with integrated radio frequency and infrared
remote controls plus slide out and removable mechanical key.
• 1 electronic reserve key without remote control functions, plus
removable mechanical key.
Warning !
When leaving the vehicle always remove the electronic key from the steering lock, and
Lock your vehicle. Do not leave children unattended in the vehicle, or with access to an
unlocked vehicle. Unsupervised use of vehicle equipment may cause serious personal injury.
Electronic main key with integrated radio frequency and infrared remote control, plus
slide out and removable mechanical key. The remote control (1) operates all locks on the car.
The mechanical key (2) works only in the driver's door, trunk, and storage compartment locks.
The mechanical key (2) can be removed by sliding it out of the remote control. To do so, move
lock (3) in direction of arrow and slide the mechanical key (2) in direction of arrow (5).
In the case of using the mechanical key for lock operations, it can be extended outward. To do so,
move lock (3) in direction of arrow, slide the mechanical key (2) in direction of arrow (4) until it locks in
place. The remote control transmitter is located in the electronic main key. The infrared receivers are
located in the front door handles.
Note:
Remove the mechanical key from the electronic main key when using valet parking service. To prevent
access to trunk or storage compartments lock them separately.
Electronic reserve key without remote control functions,
plus removable mechanical key.
The electronic reserve key (1) works only in the steering lock.
The mechanical key (2) works only in the driver's door, trunk, and
storage compartment locks. To use the mechanical key (2),
remove it from its electronic reserve key (1).
Note:
We recommend that you carry the electronic reserve key plus mechanical key with you and keep it in a
safe place (e.g. your wallet) so that it is always handy. Never leave the electronic reserve key in the vehicle.
Obtaining Replacement Keys
Your vehicle is equipped with a theft deterrent locking system requiring a special key manufacturing process.
For security reasons, replacement keys can only be obtained from your authorized Mercedes-Benz dealer.
Page 20 of 130

Start Lock-Out
Important !
Removing the electronic key from the steering lock ac tivates the start lock-out. The engine cannot be started.
Inserting the electronic key in the steer ing lock deactivates the start lock-out. The engine cannot be started. Inserting
the electronic key in the steering lock deactivates the start lock-out.
Note:
In case the engine cannot be started, the system is not operational. Contact an authorized Mercedes-Benz dealer or
call 1-800-FOR-MERCedes.
Page 21 of 130
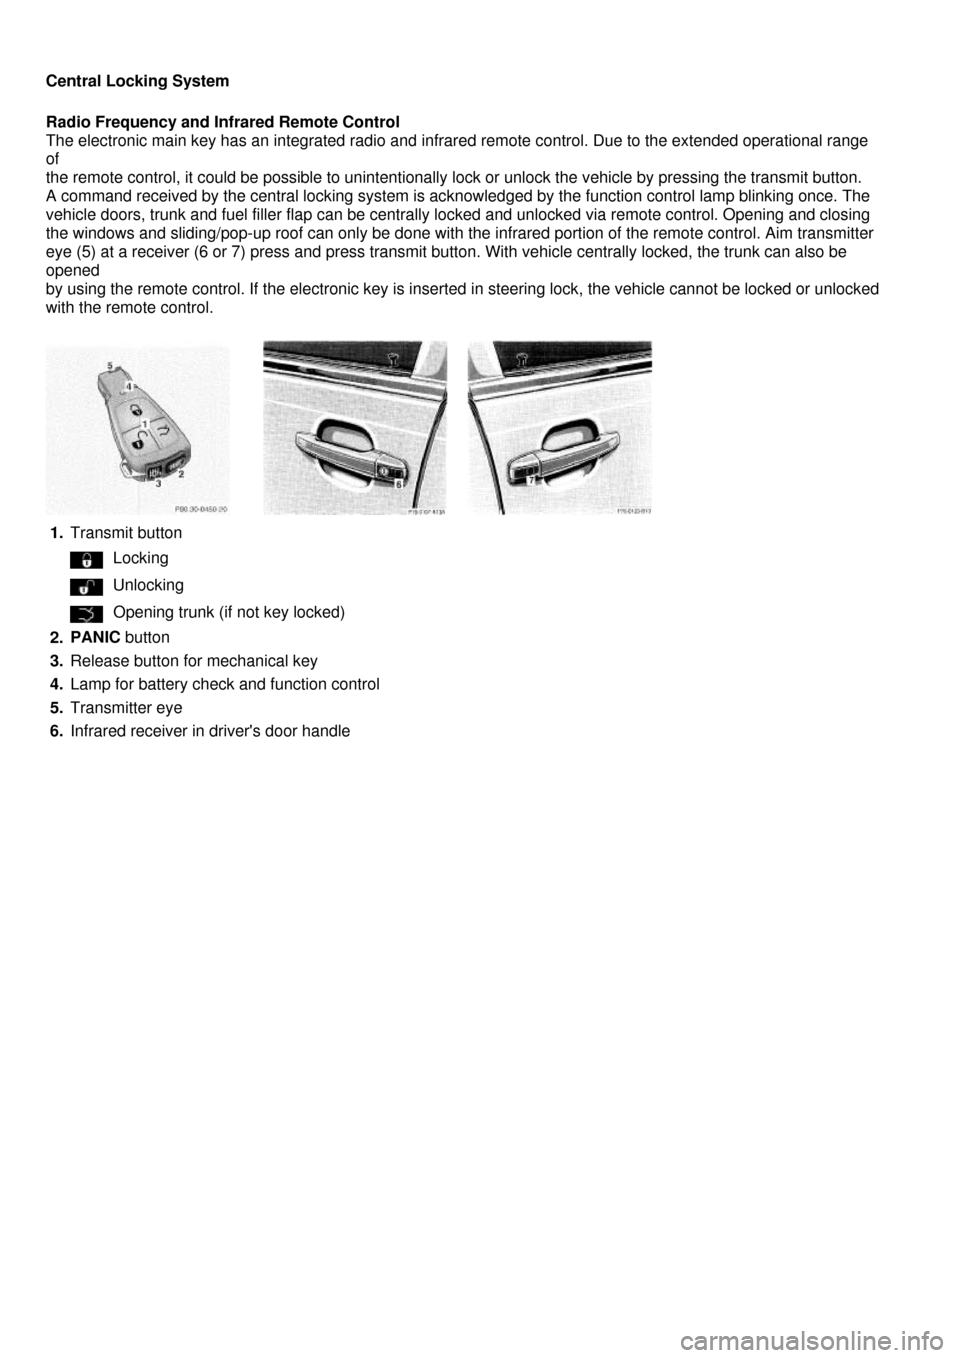
Central Locking System
Radio Frequency and Infrared Remote Control
The electronic main key has an integrated radio and infrared remote control. Due to the extended operational range
of
the remote control, it could be possible to unintentionally lock or unlock the vehicle by pressing the transmit button.
A command received by the central locking system is acknowledged by the function control lamp blinking once. The
vehicle doors, trunk and fuel filler flap can be centrally locked and unlocked via remote control. Opening and closing
the windows and sliding/pop-up roof can only be done with the infrared portion of the remote control. Aim transmitter
eye (5) at a receiver (6 or 7) press and press transmit button. With vehicle centrally locked, the trunk can also be
opened
by using the remote control. If the electronic key is inserted in steering lock, the vehicle cannot be locked or unlocked
with the remote control.
1. Transmit button
Locking
Unlocking
Opening trunk (if not key locked)
2. PANIC button
3. Release button for mechanical key
4. Lamp for battery check and function control
5. Transmitter eye
6. Infrared receiver in driver's door handle