battery MERCEDES-BENZ C-Class 2011 W204 User Guide
[x] Cancel search | Manufacturer: MERCEDES-BENZ, Model Year: 2011, Model line: C-Class, Model: MERCEDES-BENZ C-Class 2011 W204Pages: 320, PDF Size: 13.17 MB
Page 102 of 320
XAnti-glare mode: flick anti-glare
switch : forwards or back.
Exterior mirrors
Adjusting the exterior mirrors
GWarning
Exercise care when using the passenger-side
exterior rear view mirror. The mirror surface
is convex (outwardly curved surface for a
wider field of view). Objects in mirror are
closer than they appear. Check your interior
rear view mirror and glance over your
shoulder before changing lanes.
The exterior mirrors are automatically heated
if the rear window defroster is switched on
and the outside temperature is low.
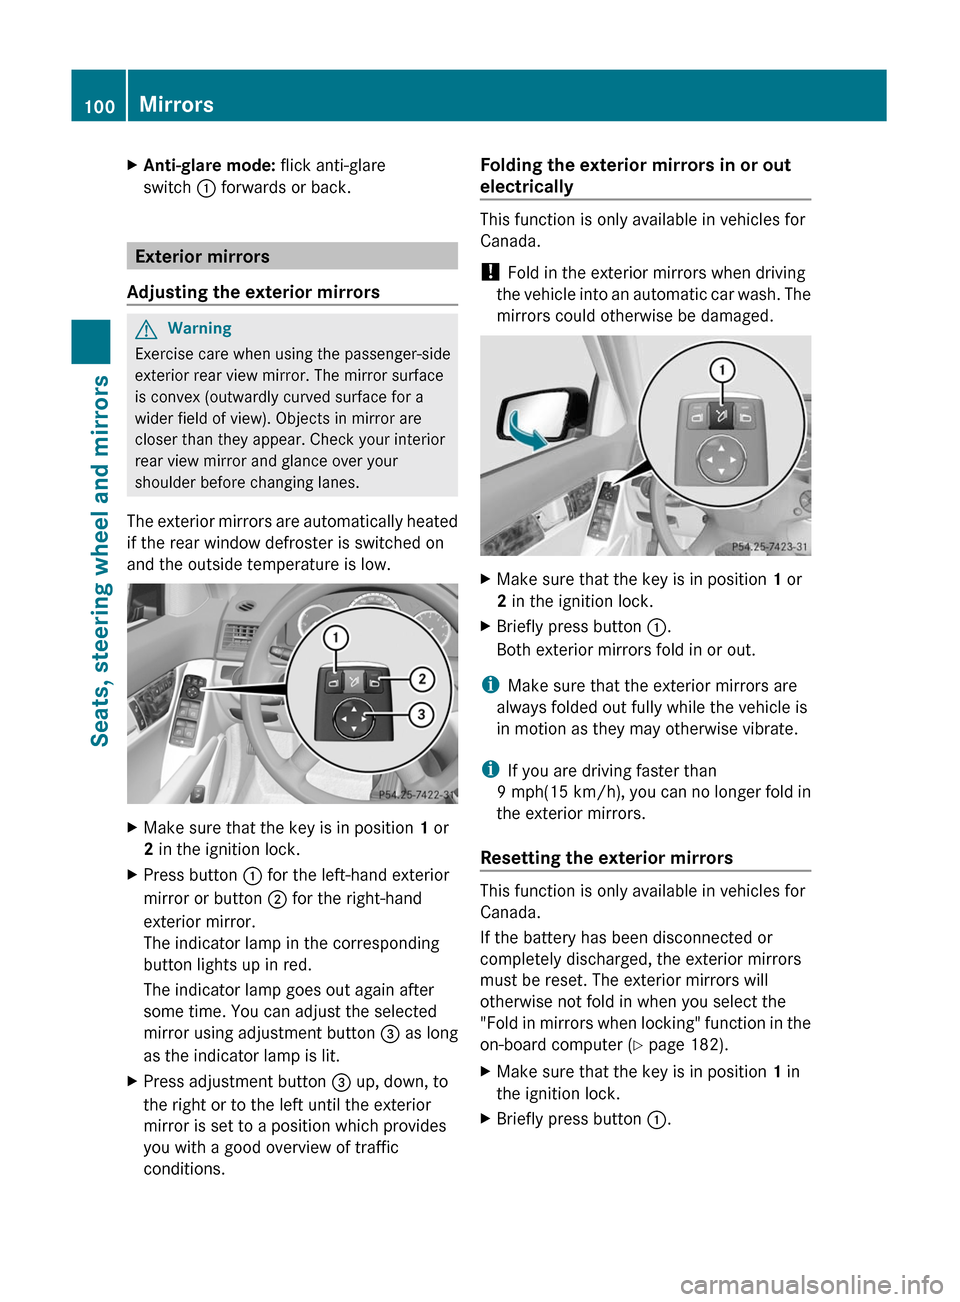
XMake sure that the key is in position 1 or
2 in the ignition lock.
XPress button : for the left-hand exterior
mirror or button ; for the right-hand
exterior mirror.
The indicator lamp in the corresponding
button lights up in red.
The indicator lamp goes out again after
some time. You can adjust the selected
mirror using adjustment button = as long
as the indicator lamp is lit.
XPress adjustment button = up, down, to
the right or to the left until the exterior
mirror is set to a position which provides
you with a good overview of traffic
conditions.
Folding the exterior mirrors in or out
electrically
This function is only available in vehicles for
Canada.
! Fold in the exterior mirrors when driving
the vehicle into an automatic car wash. The
mirrors could otherwise be damaged.
XMake sure that the key is in position 1 or
2 in the ignition lock.
XBriefly press button :.
Both exterior mirrors fold in or out.
iMake sure that the exterior mirrors are
always folded out fully while the vehicle is
in motion as they may otherwise vibrate.
iIf you are driving faster than
9 mph(15 km/h), you can no longer fold in
the exterior mirrors.
Resetting the exterior mirrors
This function is only available in vehicles for
Canada.
If the battery has been disconnected or
completely discharged, the exterior mirrors
must be reset. The exterior mirrors will
otherwise not fold in when you select the
"Fold in mirrors when locking" function in the
on-board computer (Y page 182).
XMake sure that the key is in position 1 in
the ignition lock.
XBriefly press button :.100MirrorsSeats, steering wheel and mirrors
BA 204 USA, CA Edition A 2011; 1; 5, en-UShereepeVersion: 3.0.3.62010-05-20T09:17:30+02:00 - Seite 100
Page 108 of 320
Vehicle equipment
i This manual describes all the standard
and optional equipment of your vehicle
which was available at the time of
purchase. Country-specific differences are
possible. Bear in mind that your vehicle
may not feature all functions described
here. This also refers to safety-related
systems and functions.
Exterior lighting
Important safety notes
For reasons of safety, Mercedes-Benz
recommends that you drive with the lights
switched on even during the daytime. In some
countries, operation of the headlamps varies
due to legal requirements and self-imposed
obligations. In these countries, the daytime
running lamps are automatically switched on
when the engine is started.
Notes on driving abroad
Converting to symmetrical low beam
when driving abroad: switch the headlamps
to symmetrical low beam in countries in
which traffic drives on the opposite side of the
road to the country where the vehicle is
registered. This prevents oncoming traffic
from being dazzled. Symmetrical lights do not
illuminate as large an area of the edge of the
road.
Have the headlamps converted at a qualified
specialist workshop, e.g. an authorized
Mercedes-Benz Center, as close to the border
as possible before driving in these countries.
Converting to asymmetrical low beam
after returning: have the headlamps
converted back to asymmetrical low beam at
a qualified specialist workshop, e.g. an
authorized Mercedes-Benz Center, as soon as
possible after crossing the border when
returning.
Light switch
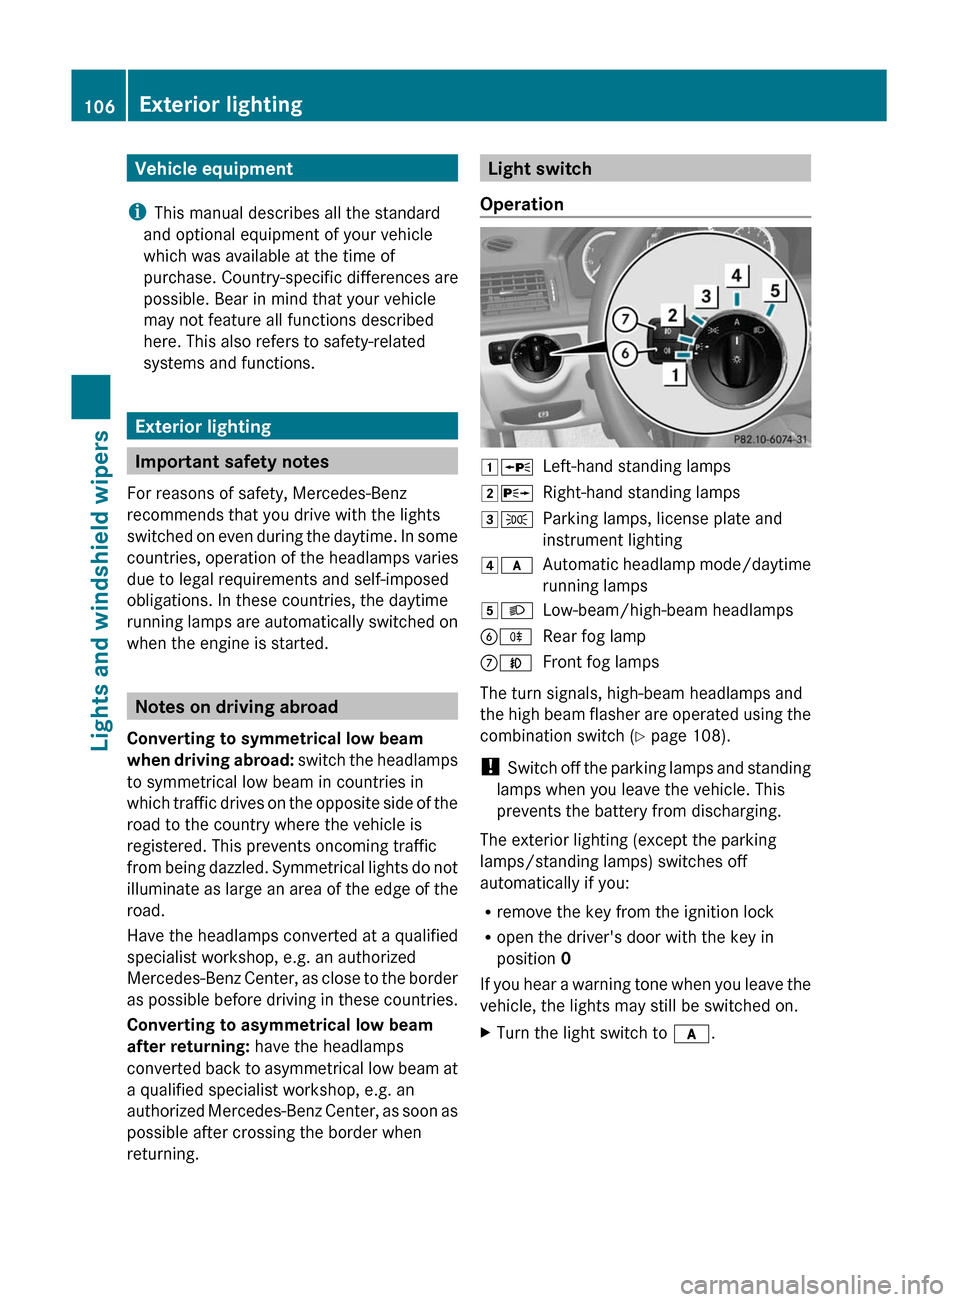
Operation1 WLeft-hand standing lamps2XRight-hand standing lamps3TParking lamps, license plate and
instrument lighting4 cAutomatic headlamp mode/daytime
running lamps5 LLow-beam/high-beam headlampsBRRear fog lampCNFront fog lamps
The turn signals, high-beam headlamps and
the high beam flasher are operated using the
combination switch ( Y page 108).
! Switch off the parking lamps and standing
lamps when you leave the vehicle. This
prevents the battery from discharging.
The exterior lighting (except the parking
lamps/standing lamps) switches off
automatically if you:
R remove the key from the ignition lock
R open the driver's door with the key in
position 0
If you hear a warning tone when you leave the
vehicle, the lights may still be switched on.
XTurn the light switch to c.106Exterior lightingLights and windshield wipers
BA 204 USA, CA Edition A 2011; 1; 5, en-UShereepeVersion: 3.0.3.62010-05-20T09:17:30+02:00 - Seite 106
Page 113 of 320
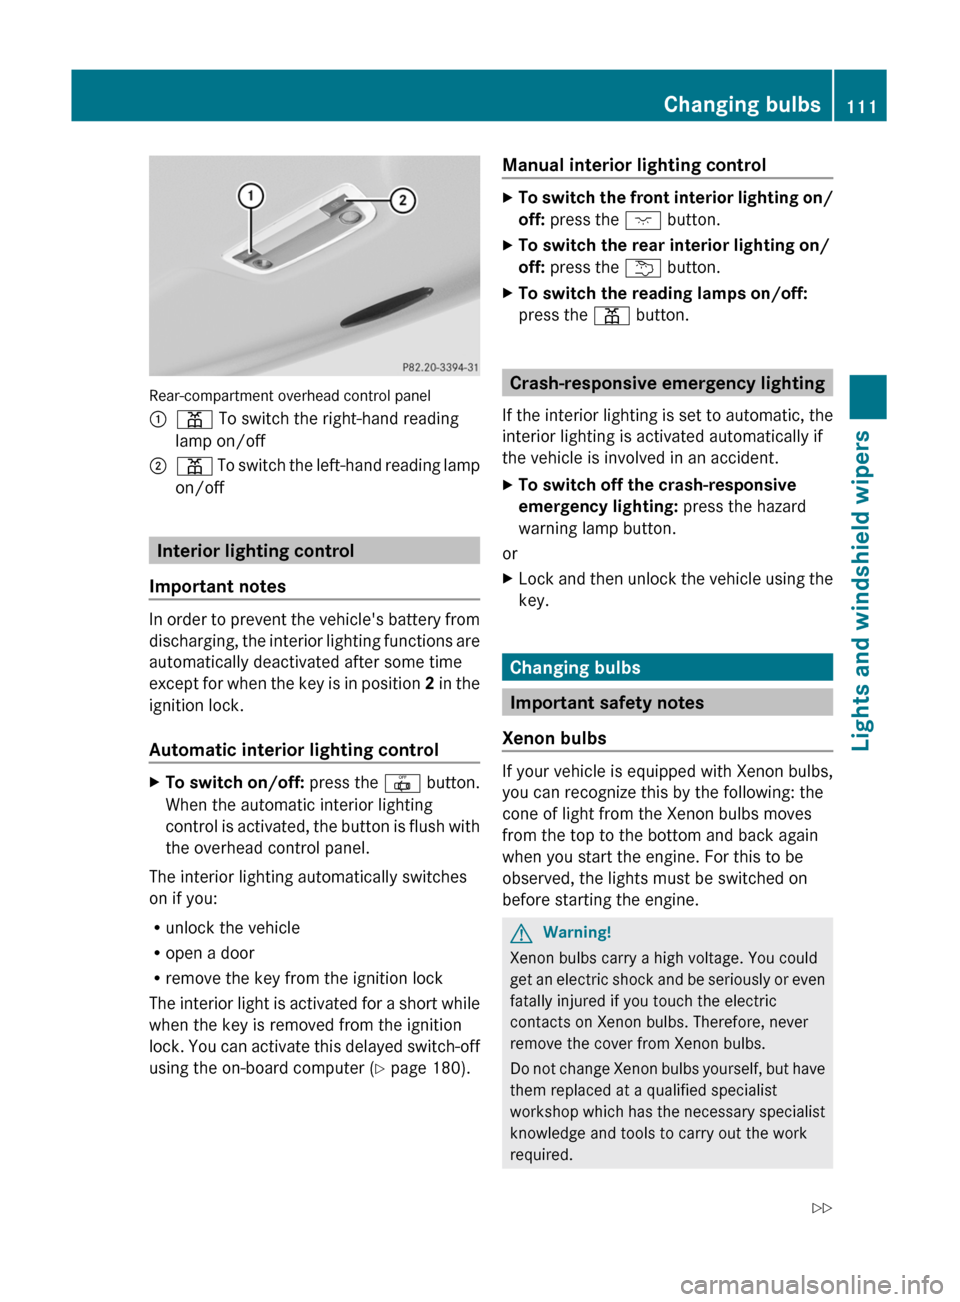
Rear-compartment overhead control panel
:p To switch the right-hand reading
lamp on/off
;p To switch the left-hand reading lamp
on/off
Interior lighting control
Important notes
In order to prevent the vehicle's battery from
discharging, the interior lighting functions are
automatically deactivated after some time
except for when the key is in position 2 in the
ignition lock.
Automatic interior lighting control
XTo switch on/off: press the | button.
When the automatic interior lighting
control is activated, the button is flush with
the overhead control panel.
The interior lighting automatically switches
on if you:
Runlock the vehicle
Ropen a door
Rremove the key from the ignition lock
The interior light is activated for a short while
when the key is removed from the ignition
lock. You can activate this delayed switch-off
using the on-board computer (Y page 180).
Manual interior lighting controlXTo switch the front interior lighting on/
off: press the c button.
XTo switch the rear interior lighting on/
off: press the u button.
XTo switch the reading lamps on/off:
press the p button.
Crash-responsive emergency lighting
If the interior lighting is set to automatic, the
interior lighting is activated automatically if
the vehicle is involved in an accident.
XTo switch off the crash-responsive
emergency lighting: press the hazard
warning lamp button.
or
XLock and then unlock the vehicle using the
key.
Changing bulbs
Important safety notes
Xenon bulbs
If your vehicle is equipped with Xenon bulbs,
you can recognize this by the following: the
cone of light from the Xenon bulbs moves
from the top to the bottom and back again
when you start the engine. For this to be
observed, the lights must be switched on
before starting the engine.
GWarning!
Xenon bulbs carry a high voltage. You could
get an electric shock and be seriously or even
fatally injured if you touch the electric
contacts on Xenon bulbs. Therefore, never
remove the cover from Xenon bulbs.
Do not change Xenon bulbs yourself, but have
them replaced at a qualified specialist
workshop which has the necessary specialist
knowledge and tools to carry out the work
required.
Changing bulbs111Lights and windshield wipersBA 204 USA, CA Edition A 2011; 1; 5, en-UShereepeVersion: 3.0.3.62010-05-20T09:17:30+02:00 - Seite 111Z
Page 124 of 320
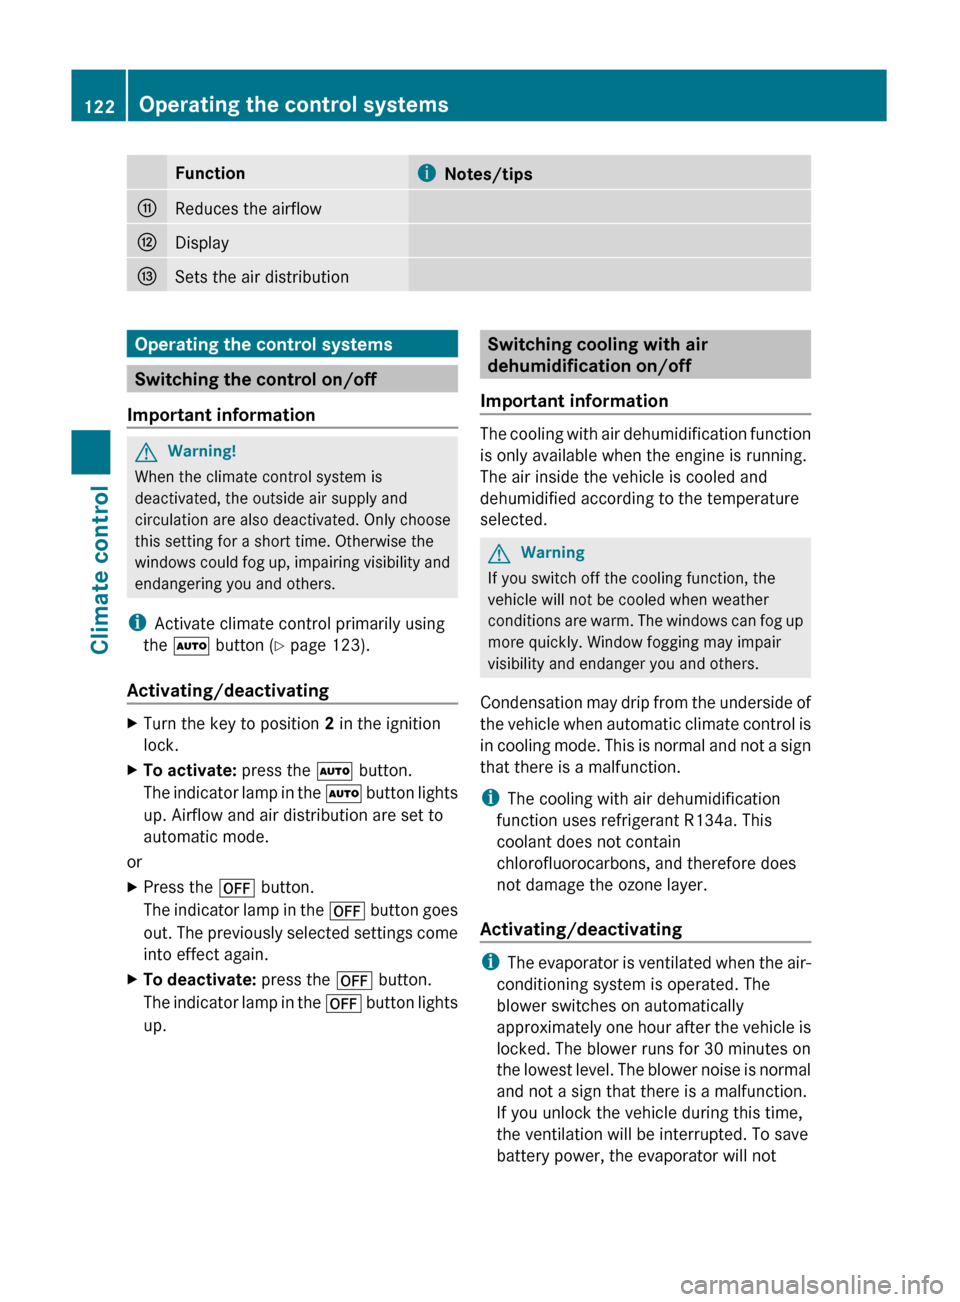
FunctioniNotes/tipsGReduces the airflowHDisplayISets the air distributionOperating the control systems
Switching the control on/off
Important information
GWarning!
When the climate control system is
deactivated, the outside air supply and
circulation are also deactivated. Only choose
this setting for a short time. Otherwise the
windows could fog up, impairing visibility and
endangering you and others.
i Activate climate control primarily using
the à button ( Y page 123).
Activating/deactivating
XTurn the key to position 2 in the ignition
lock.XTo activate: press the à button.
The indicator lamp in the à button lights
up. Airflow and air distribution are set to
automatic mode.
or
XPress the ^ button.
The indicator lamp in the ^ button goes
out. The previously selected settings come
into effect again.XTo deactivate: press the ^ button.
The indicator lamp in the ^ button lights
up.Switching cooling with air
dehumidification on/off
Important information
The cooling with air dehumidification function
is only available when the engine is running.
The air inside the vehicle is cooled and
dehumidified according to the temperature
selected.
GWarning
If you switch off the cooling function, the
vehicle will not be cooled when weather
conditions are warm. The windows can fog up
more quickly. Window fogging may impair
visibility and endanger you and others.
Condensation may drip from the underside of
the vehicle when automatic climate control is
in cooling mode. This is normal and not a sign
that there is a malfunction.
i The cooling with air dehumidification
function uses refrigerant R134a. This
coolant does not contain
chlorofluorocarbons, and therefore does
not damage the ozone layer.
Activating/deactivating
i The evaporator is ventilated when the air-
conditioning system is operated. The
blower switches on automatically
approximately one hour after the vehicle is
locked. The blower runs for 30 minutes on
the lowest level. The blower noise is normal
and not a sign that there is a malfunction.
If you unlock the vehicle during this time,
the ventilation will be interrupted. To save
battery power, the evaporator will not
122Operating the control systemsClimate control
BA 204 USA, CA Edition A 2011; 1; 5, en-UShereepeVersion: 3.0.3.62010-05-20T09:17:30+02:00 - Seite 122
Page 125 of 320
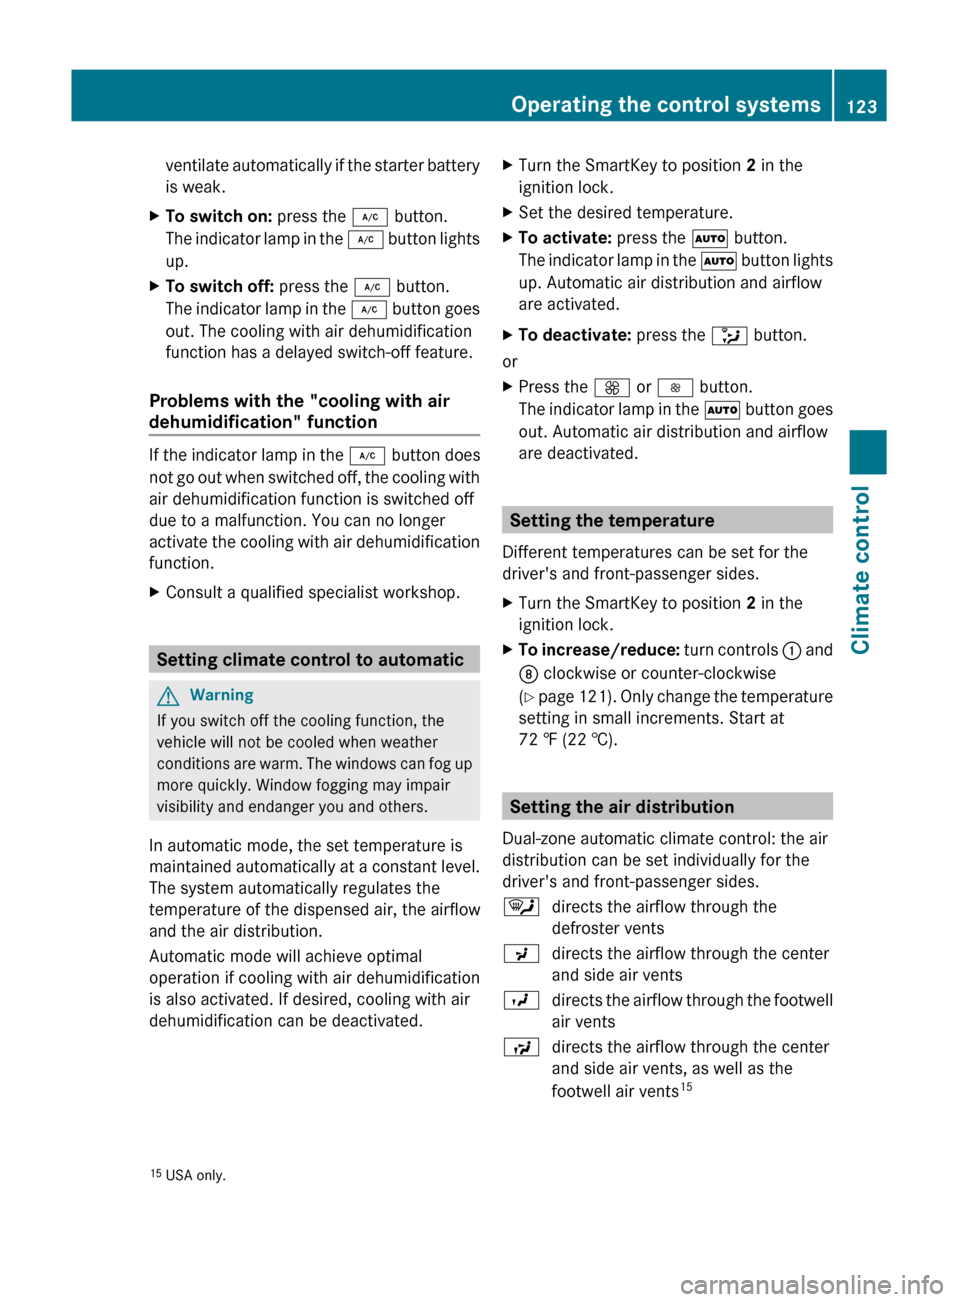
ventilate automatically if the starter battery
is weak.XTo switch on: press the ¿ button.
The indicator lamp in the ¿ button lights
up.XTo switch off: press the ¿ button.
The indicator lamp in the ¿ button goes
out. The cooling with air dehumidification
function has a delayed switch-off feature.
Problems with the "cooling with air
dehumidification" function
If the indicator lamp in the ¿ button does
not go out when switched off, the cooling with
air dehumidification function is switched off
due to a malfunction. You can no longer
activate the cooling with air dehumidification
function.
XConsult a qualified specialist workshop.
Setting climate control to automatic
GWarning
If you switch off the cooling function, the
vehicle will not be cooled when weather
conditions are warm. The windows can fog up
more quickly. Window fogging may impair
visibility and endanger you and others.
In automatic mode, the set temperature is
maintained automatically at a constant level.
The system automatically regulates the
temperature of the dispensed air, the airflow
and the air distribution.
Automatic mode will achieve optimal
operation if cooling with air dehumidification
is also activated. If desired, cooling with air
dehumidification can be deactivated.
XTurn the SmartKey to position 2 in the
ignition lock.XSet the desired temperature.XTo activate: press the à button.
The indicator lamp in the à button lights
up. Automatic air distribution and airflow
are activated.XTo deactivate: press the _ button.
or
XPress the K or I button.
The indicator lamp in the à button goes
out. Automatic air distribution and airflow
are deactivated.
Setting the temperature
Different temperatures can be set for the
driver's and front-passenger sides.
XTurn the SmartKey to position 2 in the
ignition lock.XTo increase/reduce: turn controls : and
D clockwise or counter-clockwise
( Y page 121). Only change the temperature
setting in small increments. Start at
72 ‡ (22 †).
Setting the air distribution
Dual-zone automatic climate control: the air
distribution can be set individually for the
driver's and front-passenger sides.
¯directs the airflow through the
defroster ventsPdirects the airflow through the center
and side air ventsOdirects the airflow through the footwell
air ventsSdirects the airflow through the center
and side air vents, as well as the
footwell air vents 1515
USA only.Operating the control systems123Climate controlBA 204 USA, CA Edition A 2011; 1; 5, en-UShereepeVersion: 3.0.3.62010-05-20T09:17:30+02:00 - Seite 123Z
Page 127 of 320
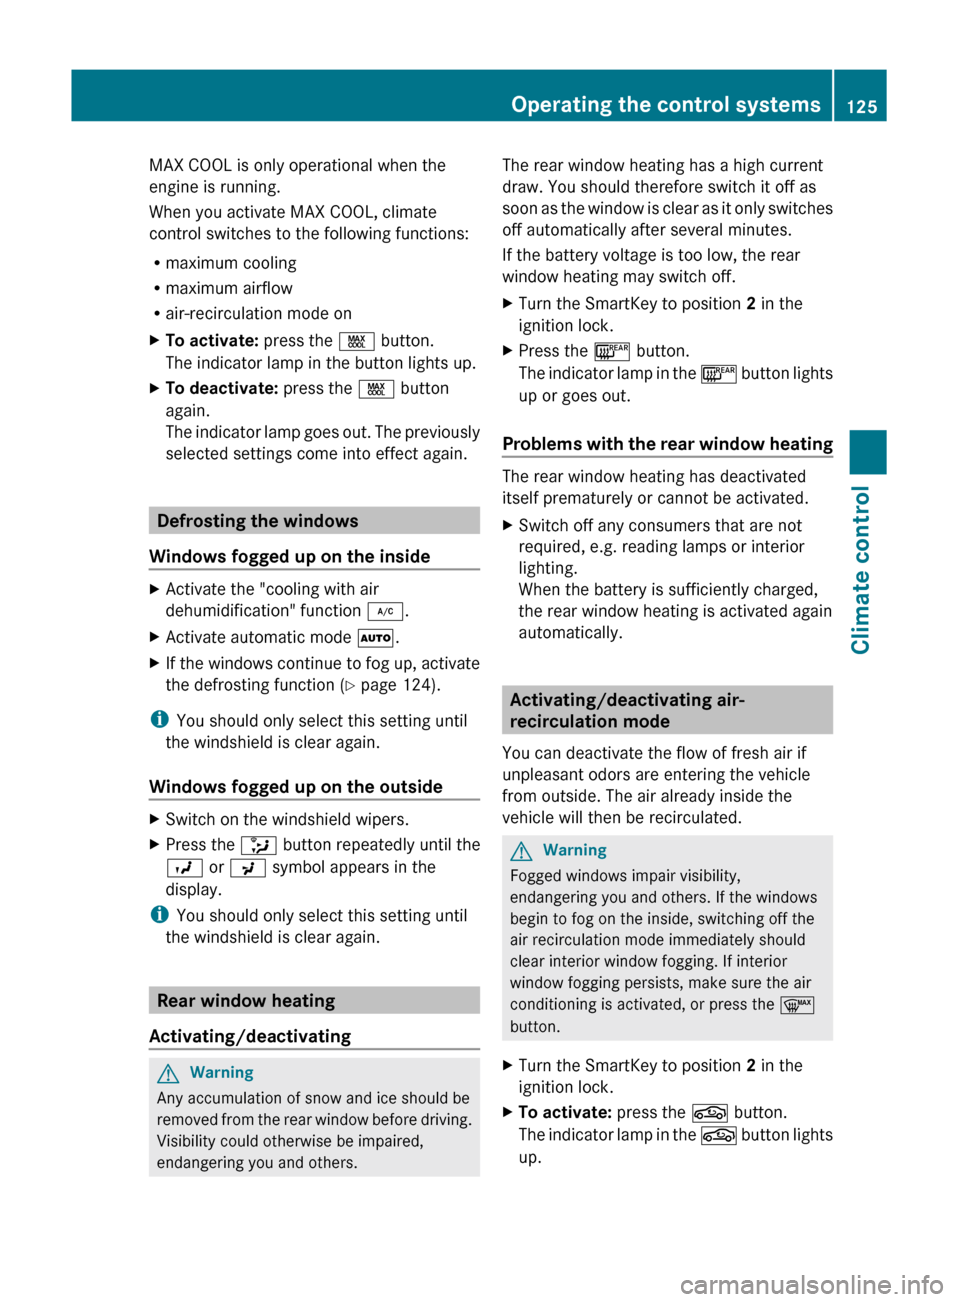
MAX COOL is only operational when the
engine is running.
When you activate MAX COOL, climate
control switches to the following functions:
R maximum cooling
R maximum airflow
R air-recirculation mode onXTo activate: press the Ù button.
The indicator lamp in the button lights up.XTo deactivate: press the Ù button
again.
The indicator lamp goes out. The previously
selected settings come into effect again.
Defrosting the windows
Windows fogged up on the inside
XActivate the "cooling with air
dehumidification" function ¿.XActivate automatic mode Ã.XIf the windows continue to fog up, activate
the defrosting function ( Y page 124).
i
You should only select this setting until
the windshield is clear again.
Windows fogged up on the outside
XSwitch on the windshield wipers.XPress the _ button repeatedly until the
O or P symbol appears in the
display.
i You should only select this setting until
the windshield is clear again.
Rear window heating
Activating/deactivating
GWarning
Any accumulation of snow and ice should be
removed from the rear window before driving.
Visibility could otherwise be impaired,
endangering you and others.
The rear window heating has a high current
draw. You should therefore switch it off as
soon as the window is clear as it only switches
off automatically after several minutes.
If the battery voltage is too low, the rear
window heating may switch off.XTurn the SmartKey to position 2 in the
ignition lock.XPress the ¤ button.
The indicator lamp in the ¤ button lights
up or goes out.
Problems with the rear window heating
The rear window heating has deactivated
itself prematurely or cannot be activated.
XSwitch off any consumers that are not
required, e.g. reading lamps or interior
lighting.
When the battery is sufficiently charged,
the rear window heating is activated again
automatically.
Activating/deactivating air-
recirculation mode
You can deactivate the flow of fresh air if
unpleasant odors are entering the vehicle
from outside. The air already inside the
vehicle will then be recirculated.
GWarning
Fogged windows impair visibility,
endangering you and others. If the windows
begin to fog on the inside, switching off the
air recirculation mode immediately should
clear interior window fogging. If interior
window fogging persists, make sure the air
conditioning is activated, or press the ¬
button.
XTurn the SmartKey to position 2 in the
ignition lock.XTo activate: press the g button.
The indicator lamp in the g button lights
up.Operating the control systems125Climate controlBA 204 USA, CA Edition A 2011; 1; 5, en-UShereepeVersion: 3.0.3.62010-05-20T09:17:30+02:00 - Seite 125Z
Page 133 of 320
GWarning
On slippery road surfaces, never downshift in
order to obtain braking action. This could
result in drive wheel slip and reduced vehicle
control. Your vehicle's ABS will not prevent
this type of loss of control.
GWarning
Manual transmission: Wait until the vehicle is
stationary before removing the SmartKey
from the starter switch. The vehicle cannot be
steered when the SmartKey is removed from
the starter switch.
GWarning
It is dangerous to shift the automatic
transmission out of parking position P or
neutral position N if the engine speed is
higher than idle speed. If your foot is not firmly
on the brake pedal, the vehicle could
accelerate quickly forward or in reverse. You
could lose control of the vehicle and hit
someone or something. Only shift into gear
when the engine is idling normally and when
your right foot is firmly on the brake pedal.
! Warm up the engine quickly. Do not use
the engine's full performance until it has
reached operating temperature.
Only shift the automatic transmission to
the desired drive position when the vehicle
is stationary.
Where possible, avoid spinning the drive
wheels when pulling away on slippery
roads. You could otherwise damage the
drive train.
! AMG vehicles: at low engine oil
temperatures (below 68 ‡ (+20 †), the
maximum engine speed is restricted in
order to protect the engine. To protect the
engine and maintain smooth engine
operation, avoid driving at full throttle when
the engine is cold.
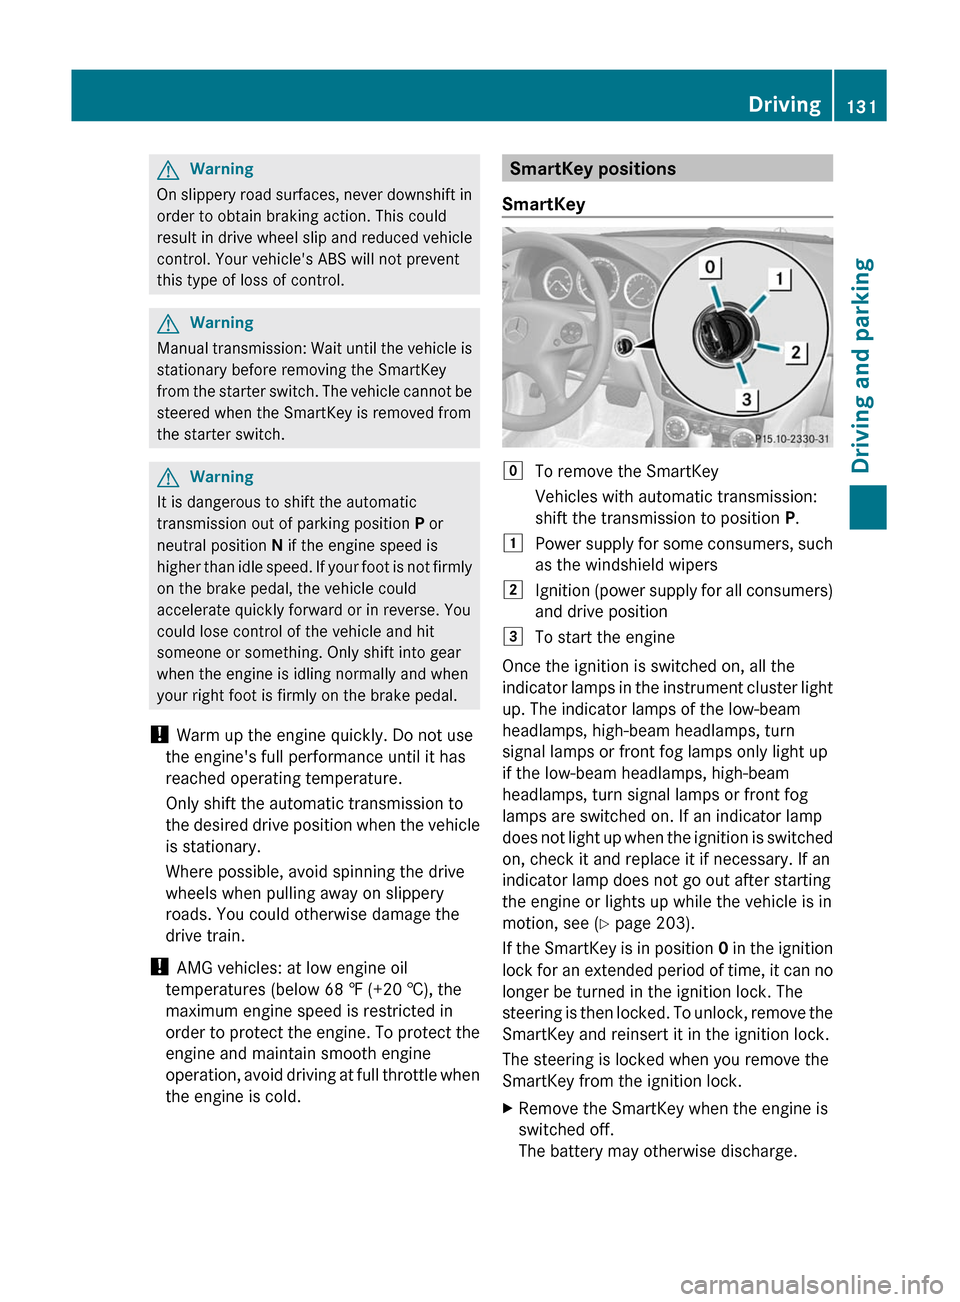
SmartKey positions
SmartKeygTo remove the SmartKey
Vehicles with automatic transmission:
shift the transmission to position P.1Power supply for some consumers, such
as the windshield wipers2Ignition (power supply for all consumers)
and drive position3To start the engine
Once the ignition is switched on, all the
indicator lamps in the instrument cluster light
up. The indicator lamps of the low-beam
headlamps, high-beam headlamps, turn
signal lamps or front fog lamps only light up
if the low-beam headlamps, high-beam
headlamps, turn signal lamps or front fog
lamps are switched on. If an indicator lamp
does not light up when the ignition is switched
on, check it and replace it if necessary. If an
indicator lamp does not go out after starting
the engine or lights up while the vehicle is in
motion, see ( Y page 203).
If the SmartKey is in position 0 in the ignition
lock for an extended period of time, it can no
longer be turned in the ignition lock. The
steering is then locked. To unlock, remove the
SmartKey and reinsert it in the ignition lock.
The steering is locked when you remove the
SmartKey from the ignition lock.
XRemove the SmartKey when the engine is
switched off.
The battery may otherwise discharge.Driving131Driving and parkingBA 204 USA, CA Edition A 2011; 1; 5, en-UShereepeVersion: 3.0.3.62010-05-20T09:17:30+02:00 - Seite 131Z
Page 134 of 320
If you cannot turn the SmartKey in the ignition
lock, the vehicle battery may not be charged
sufficiently.XCheck the vehicle battery and charge if
necessary ( Y page 261).
or
XJump-start the vehicle ( Y page 262).
i
The SmartKey can be turned in the
ignition lock even if it is not the correct
SmartKey for the vehicle. The ignition is not
switched on. The engine cannot be started.
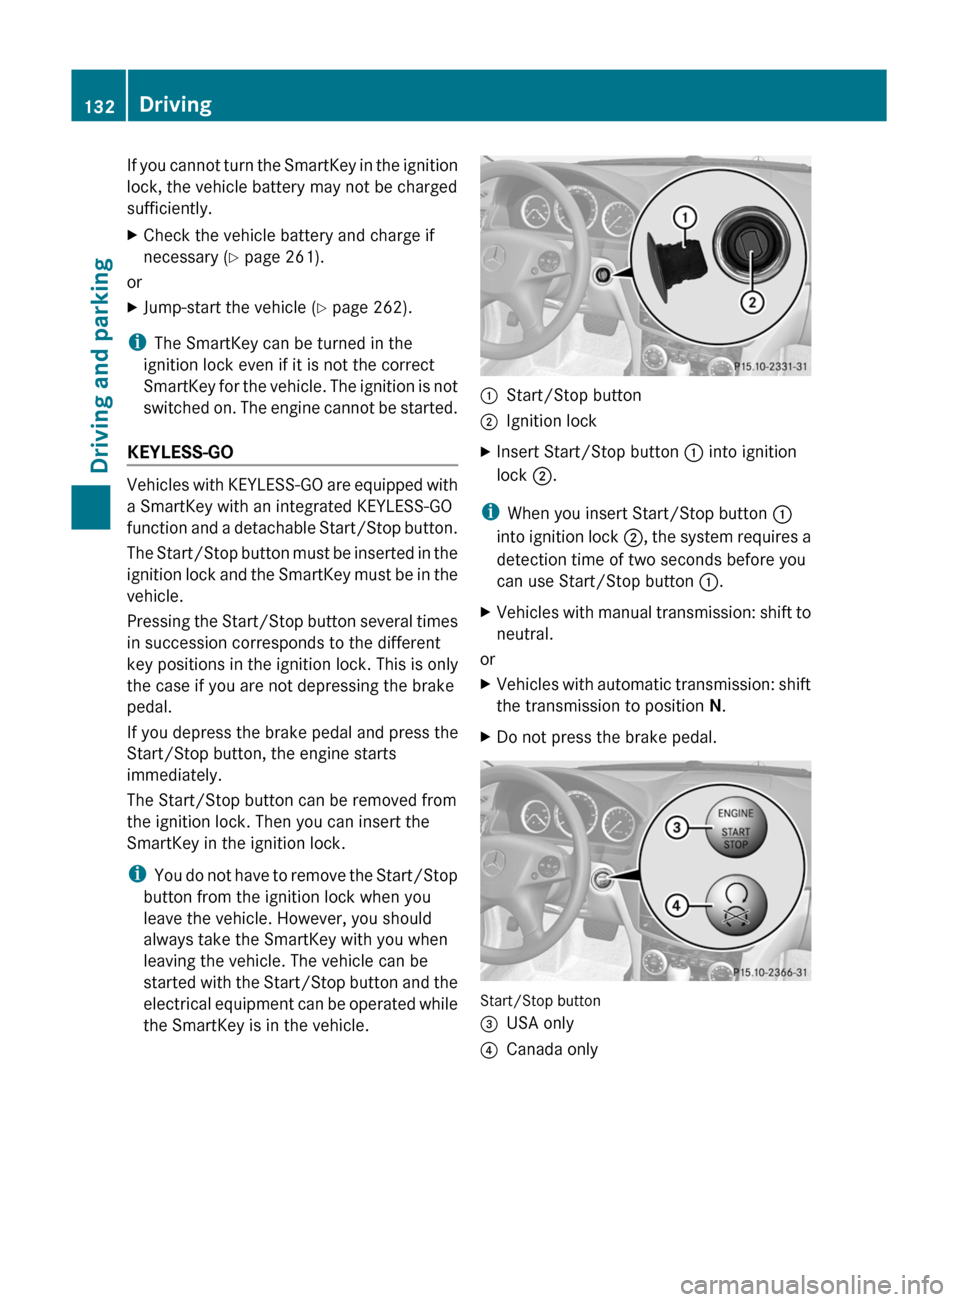
KEYLESS-GO
Vehicles with KEYLESS-GO are equipped with
a SmartKey with an integrated KEYLESS-GO
function and a detachable Start/Stop button.
The Start/Stop button must be inserted in the
ignition lock and the SmartKey must be in the
vehicle.
Pressing the Start/Stop button several times
in succession corresponds to the different
key positions in the ignition lock. This is only
the case if you are not depressing the brake
pedal.
If you depress the brake pedal and press the
Start/Stop button, the engine starts
immediately.
The Start/Stop button can be removed from
the ignition lock. Then you can insert the
SmartKey in the ignition lock.
i You do not have to remove the Start/Stop
button from the ignition lock when you
leave the vehicle. However, you should
always take the SmartKey with you when
leaving the vehicle. The vehicle can be
started with the Start/Stop button and the
electrical equipment can be operated while
the SmartKey is in the vehicle.
:Start/Stop button;Ignition lockXInsert Start/Stop button : into ignition
lock ;.
i
When you insert Start/Stop button :
into ignition lock ;, the system requires a
detection time of two seconds before you
can use Start/Stop button :.
XVehicles with manual transmission: shift to
neutral.
or
XVehicles with automatic transmission: shift
the transmission to position N.XDo not press the brake pedal.
Start/Stop button
=USA only?Canada only132DrivingDriving and parking
BA 204 USA, CA Edition A 2011; 1; 5, en-UShereepeVersion: 3.0.3.62010-05-20T09:17:30+02:00 - Seite 132
Page 138 of 320
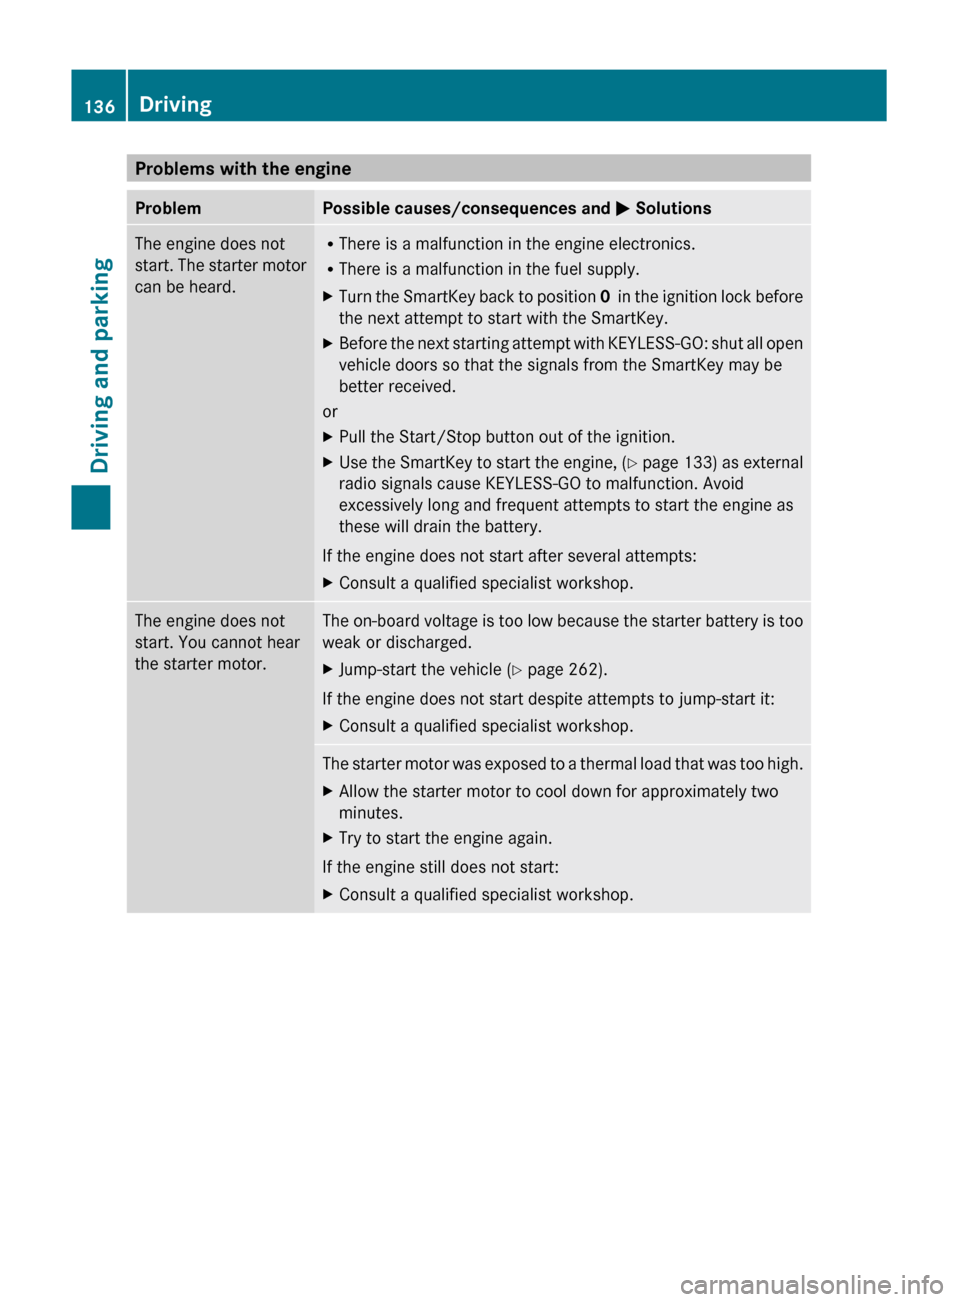
Problems with the engineProblemPossible causes/consequences and M SolutionsThe engine does not
start. The starter motor
can be heard.R There is a malfunction in the engine electronics.
R There is a malfunction in the fuel supply.XTurn the SmartKey back to position 0 in the ignition lock before
the next attempt to start with the SmartKey.XBefore the next starting attempt with KEYLESS-GO: shut all open
vehicle doors so that the signals from the SmartKey may be
better received.
or
XPull the Start/Stop button out of the ignition.XUse the SmartKey to start the engine, (Y page 133) as external
radio signals cause KEYLESS-GO to malfunction. Avoid
excessively long and frequent attempts to start the engine as
these will drain the battery.
If the engine does not start after several attempts:
XConsult a qualified specialist workshop.The engine does not
start. You cannot hear
the starter motor.The on-board voltage is too low because the starter battery is too
weak or discharged.XJump-start the vehicle ( Y page 262).
If the engine does not start despite attempts to jump-start it:
XConsult a qualified specialist workshop.The starter motor was exposed to a thermal load that was too high.XAllow the starter motor to cool down for approximately two
minutes.XTry to start the engine again.
If the engine still does not start:
XConsult a qualified specialist workshop.136DrivingDriving and parking
BA 204 USA, CA Edition A 2011; 1; 5, en-UShereepeVersion: 3.0.3.62010-05-20T09:17:30+02:00 - Seite 136
Page 152 of 320
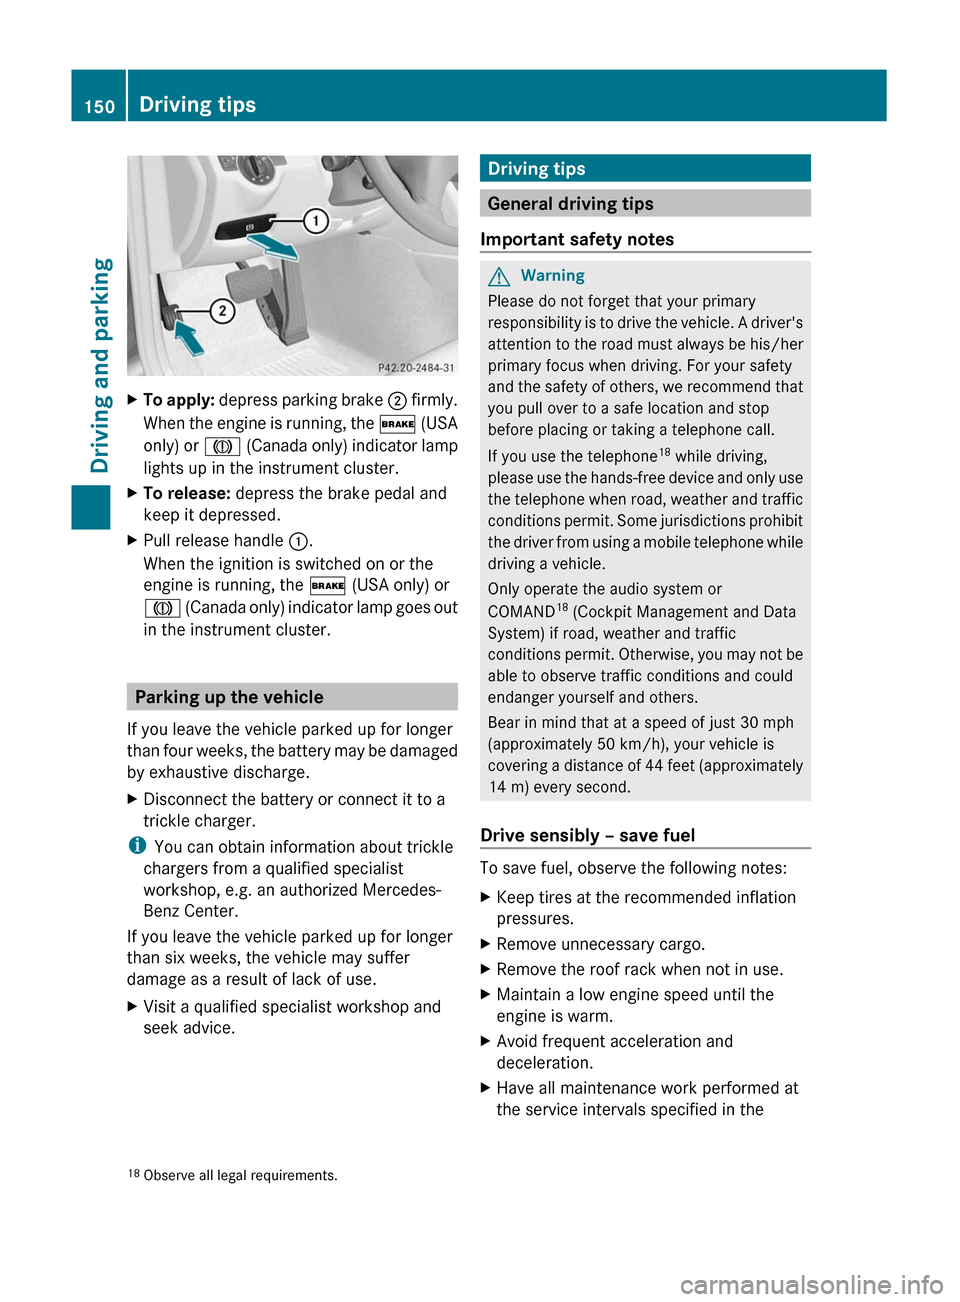
XTo apply: depress parking brake ; firmly.
When the engine is running, the $ (USA
only) or J (Canada only) indicator lamp
lights up in the instrument cluster.
XTo release: depress the brake pedal and
keep it depressed.
XPull release handle :.
When the ignition is switched on or the
engine is running, the $ (USA only) or
J (Canada only) indicator lamp goes out
in the instrument cluster.
Parking up the vehicle
If you leave the vehicle parked up for longer
than four weeks, the battery may be damaged
by exhaustive discharge.
XDisconnect the battery or connect it to a
trickle charger.
iYou can obtain information about trickle
chargers from a qualified specialist
workshop, e.g. an authorized Mercedes-
Benz Center.
If you leave the vehicle parked up for longer
than six weeks, the vehicle may suffer
damage as a result of lack of use.
XVisit a qualified specialist workshop and
seek advice.Driving tips
General driving tips
Important safety notes
GWarning
Please do not forget that your primary
responsibility is to drive the vehicle. A driver's
attention to the road must always be his/her
primary focus when driving. For your safety
and the safety of others, we recommend that
you pull over to a safe location and stop
before placing or taking a telephone call.
If you use the telephone18 while driving,
please use the hands-free device and only use
the telephone when road, weather and traffic
conditions permit. Some jurisdictions prohibit
the driver from using a mobile telephone while
driving a vehicle.
Only operate the audio system or
COMAND18 (Cockpit Management and Data
System) if road, weather and traffic
conditions permit. Otherwise, you may not be
able to observe traffic conditions and could
endanger yourself and others.
Bear in mind that at a speed of just 30 mph
(approximately 50 km/h), your vehicle is
covering a distance of 44 feet (approximately
14 m) every second.
Drive sensibly – save fuel
To save fuel, observe the following notes:
XKeep tires at the recommended inflation
pressures.
XRemove unnecessary cargo.XRemove the roof rack when not in use.XMaintain a low engine speed until the
engine is warm.
XAvoid frequent acceleration and
deceleration.
XHave all maintenance work performed at
the service intervals specified in the18Observe all legal requirements.150Driving tipsDriving and parking
BA 204 USA, CA Edition A 2011; 1; 5, en-UShereepeVersion: 3.0.3.62010-05-20T09:17:30+02:00 - Seite 150