seat memory MERCEDES-BENZ C-Class 2011 W204 User Guide
[x] Cancel search | Manufacturer: MERCEDES-BENZ, Model Year: 2011, Model line: C-Class, Model: MERCEDES-BENZ C-Class 2011 W204Pages: 320, PDF Size: 13.17 MB
Page 96 of 320
Do not drive the vehicle without the seat head
restraints. Head restraints are intended to
help reduce injuries during an accident.
! To avoid damage to the seats and the seat
heating, observe the following information:
Rdo not spill any liquids on the seats. If
liquid is spilled on the seats, dry them as
soon as possible.
Rif the seat covers are damp or wet, do not
switch on the seat heating. The seat
heating should also not to be used to dry
the seats.
Rclean the seat covers as recommended;
see the " Interior care" section.
Rdo not transport heavy loads on the
seats. Do not place sharp objects on the
seat cushions, e.g. knives, nails or tools.
The seats should only be occupied by
passengers, if possible.
Rwhen the seat heating is in operation, do
not cover the seats with insulating
materials, e.g. covers, bags, seat covers,
child seats or booster seats.
! When you move the seats, make sure that
there are no objects in the footwell or
behind the seats. Otherwise, you could
damage the seats and the objects.
iThe head restraints in the front seats are
installed with the NECK-PRO system
(Y page 49). For this reason, it is not
possible to remove the head restraints
from the front seats.
Vehicles without the through-loading
feature: the head restraints cannot be
removed from the rear compartment seats.
Please contact an authorized Mercedes-
Benz Center for more information.
iRelated topics:
RThrough-loading feature in the rear
bench seat (Y page 218)
Adjusting the seat manually and
electrically
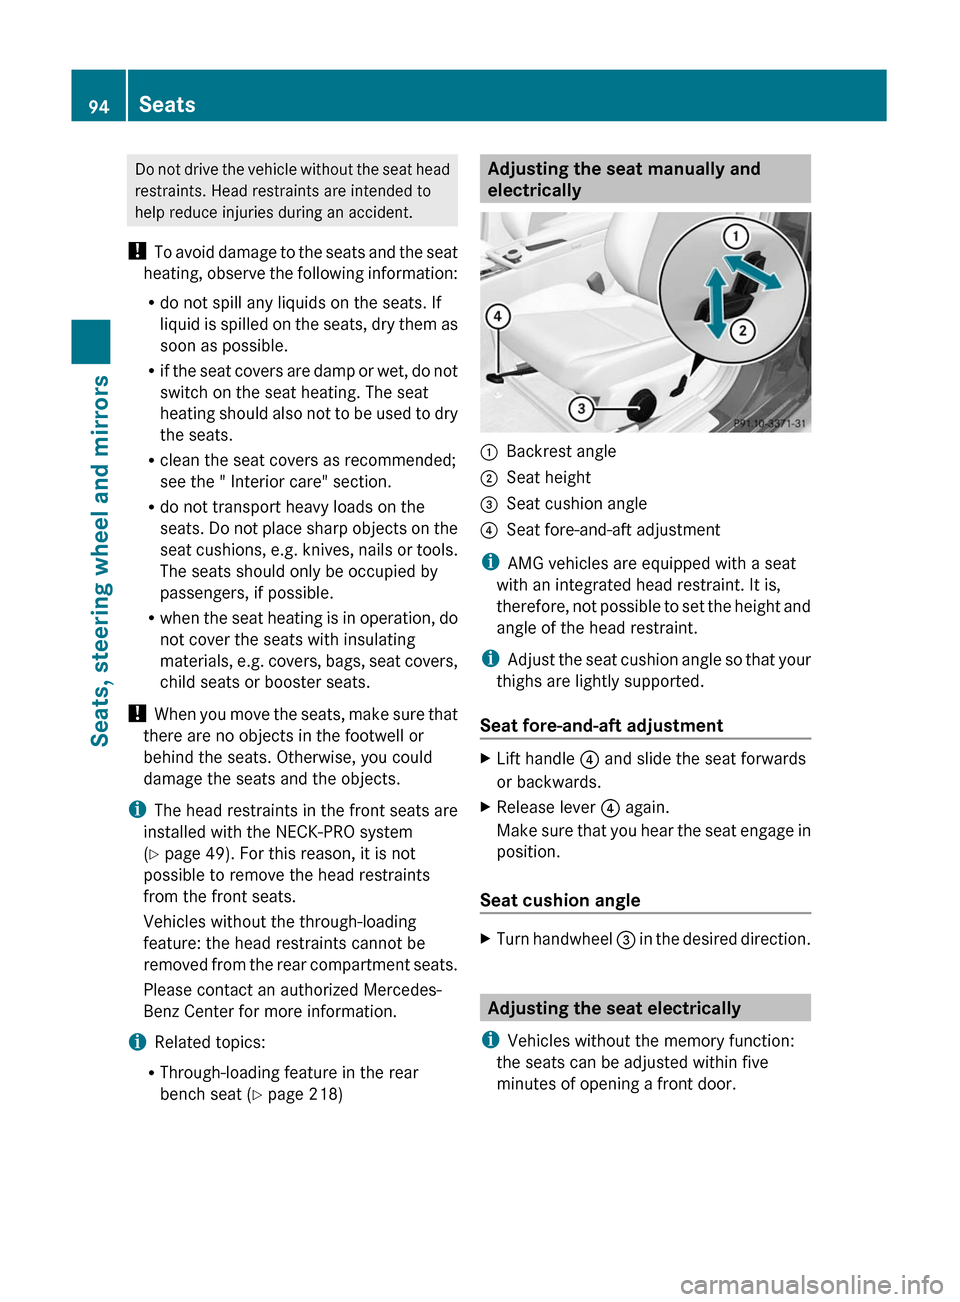
:Backrest angle;Seat height=Seat cushion angle?Seat fore-and-aft adjustment
iAMG vehicles are equipped with a seat
with an integrated head restraint. It is,
therefore, not possible to set the height and
angle of the head restraint.
iAdjust the seat cushion angle so that your
thighs are lightly supported.
Seat fore-and-aft adjustment
XLift handle ? and slide the seat forwards
or backwards.
XRelease lever ? again.
Make sure that you hear the seat engage in
position.
Seat cushion angle
XTurn handwheel = in the desired direction.
Adjusting the seat electrically
iVehicles without the memory function:
the seats can be adjusted within five
minutes of opening a front door.
94SeatsSeats, steering wheel and mirrors
BA 204 USA, CA Edition A 2011; 1; 5, en-UShereepeVersion: 3.0.3.62010-05-20T09:17:30+02:00 - Seite 94
Page 97 of 320
The time span starts over if, within these
five minutes, you:
Ropen or close a front door
Rinsert the key into or remove the key
from the ignition lock
Rswitch the ignition on or off.
If the key is in position 2 in the ignition, you
can adjust the seats at any time.
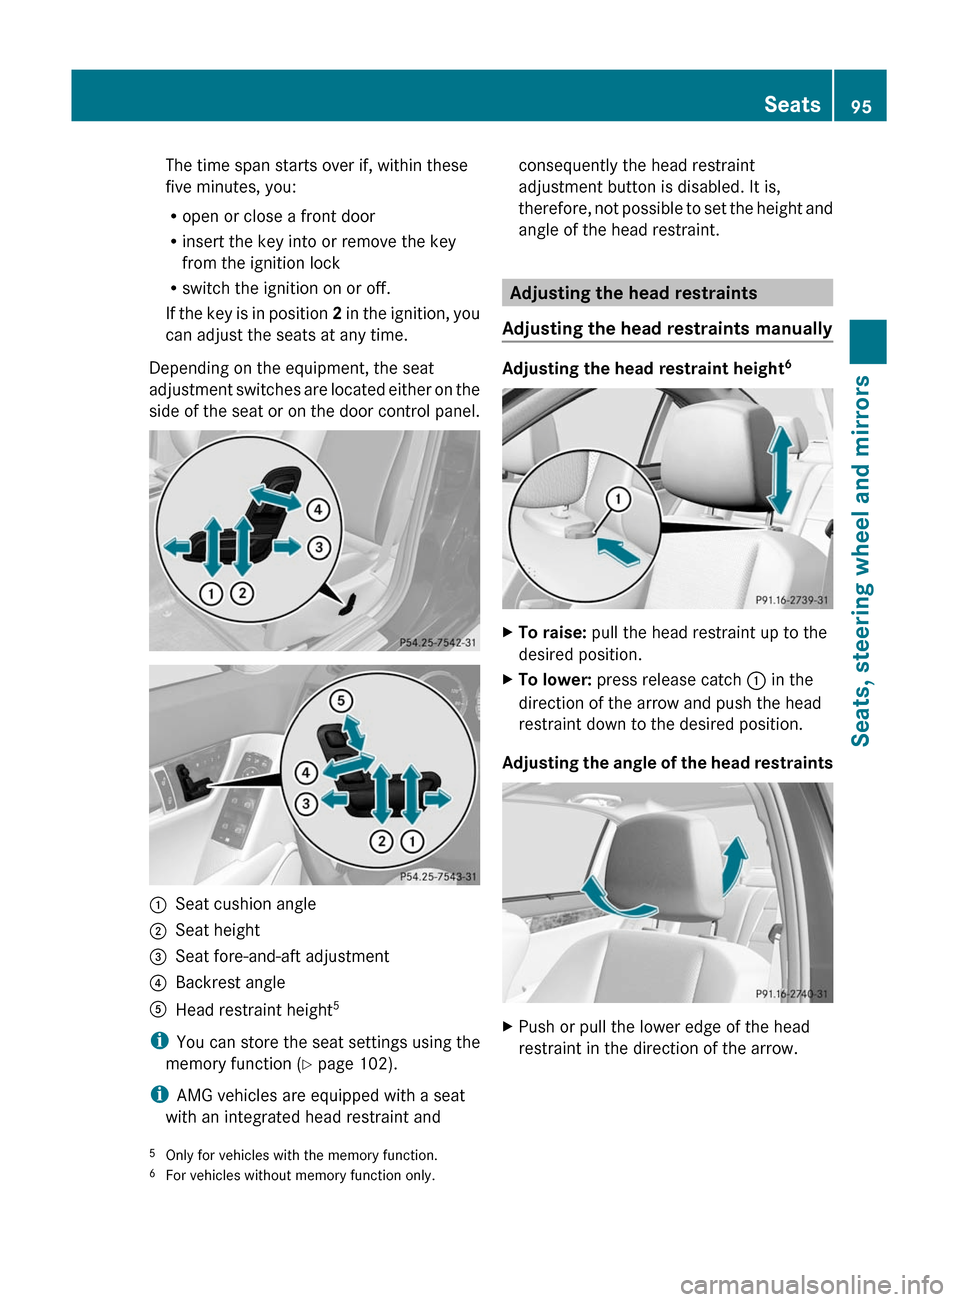
Depending on the equipment, the seat
adjustment switches are located either on the
side of the seat or on the door control panel.
:Seat cushion angle;Seat height=Seat fore-and-aft adjustment?Backrest angleAHead restraint height5
iYou can store the seat settings using the
memory function (Y page 102).
iAMG vehicles are equipped with a seat
with an integrated head restraint and
consequently the head restraint
adjustment button is disabled. It is,
therefore, not possible to set the height and
angle of the head restraint.
Adjusting the head restraints
Adjusting the head restraints manually
Adjusting the head restraint height6
XTo raise: pull the head restraint up to the
desired position.
XTo lower: press release catch : in the
direction of the arrow and push the head
restraint down to the desired position.
Adjusting the angle of the head restraints
XPush or pull the lower edge of the head
restraint in the direction of the arrow.5Only for vehicles with the memory function.6For vehicles without memory function only.
Seats95Seats, steering wheel and mirrorsBA 204 USA, CA Edition A 2011; 1; 5, en-UShereepeVersion: 3.0.3.62010-05-20T09:17:30+02:00 - Seite 95Z
Page 98 of 320

Adjusting the head restraints
electrically 7XTo adjust the head restraint height:
slide
the switch for head restraint adjustment
( Y page 94) up or down in the direction of
the arrow.
Rear seat head restraints
GWarning!
For your protection, drive only with properly
positioned head restraints.
Adjust the head restraint in such a way that it
is as close to the head as possible and the
center of the head restraint supports the back
of the head at eye level. This will reduce the
potential for injury to the head and neck in the
event of an accident or similar situation.
With a rear seat occupied, make sure to move
the respective head restraint up from the
lowest non-use position and have the
occupant adjust the head restraint properly.
Do not drive the vehicle without the seat head
restraints installed when the rear seats are
occupied. Head restraints are intended to
help reduce injuries during an accident.
Adjusting the rear seat head restraint
height
If the head restraint is fully lowered, it is
necessary to press release catch :.
XTo raise: pull the head restraint up to the
desired position.XTo lower: press release catch : and push
the head restraint down until it is in the
desired position.
Removing and installing the rear head
restraints 8
GWarning!
Occupants should only travel sitting on seats
which have the head restraints installed. In
the event of an accident, this reduces the risk
of injury for passengers seated in the rear
compartment.
XRelease the rear seat backrest and fold it
slightly forwards ( Y page 218).XTo remove: pull the head restraint up to
the stop.XPress release catch : and pull the head
restraint out of the guides.XTo re-install: insert the head restraint so
that the notches on the bar are on the left
when viewed in the direction of travel.XPush the head restraint down until you hear
it engage in position.XFold back the rear seat backrest until it
engages.7 Only for vehicles with memory function.
8 Only for vehicles with the through-loading feature.96SeatsSeats, steering wheel and mirrors
BA 204 USA, CA Edition A 2011; 1; 5, en-UShereepeVersion: 3.0.3.62010-05-20T09:17:30+02:00 - Seite 96
Page 101 of 320
iRelated topics:
R EASY-ENTRY/EXIT feature
( Y page 99)
R storing settings ( Y page 102)
EASY-ENTRY/EXIT
GWarning!
You must make sure no one can become
trapped or injured by the moving steering
wheel when the easy-entry/exit feature is
activated.
To stop steering wheel movement, move
steering wheel adjustment stalk or press the
memory position switch.
Do not leave children unattended in the
vehicle, or with access to an unlocked vehicle.
Children could open the driver's door and
unintentionally activate the easy-entry/exit
feature, which could result in an accident
and/or serious personal injury.
The EASY-ENTRY/EXIT feature makes getting
in and out of your vehicle easier.
The steering wheel swings upwards when
you:
R remove the key from the ignition lock.
R open the driver's door and KEYLESS-GO is
in position 1
R open the driver's door and the key is in
position 0 or 1 in the ignition lock.
i The steering wheel only moves upwards if
it has not already reached the upper end
stop.
The steering wheel is moved to the last
selected position when:
R the driver's door is closed, and
R you insert the key into the ignition lock.
or
R in vehicles with KEYLESS-GO, you press the
Start/Stop button once.
When you close the driver's door with the
ignition switched on, the steering wheel is
also automatically moved to the previously
set position.
The last position of the steering wheel is
stored when you switch off the ignition or
when you store the setting with the memory
function ( Y page 102).
You can activate and deactivate the EASY-
ENTRY/EXIT feature in the on-board
computer ( Y page 181).GWarning
Let the system complete the adjustment
procedure before setting the vehicle in
motion. All steering wheel adjustment must
be completed before setting the vehicle in
motion. Driving off with the steering wheel
still adjusting could cause the driver to lose
control of the vehicle.
i If the crash-responsive EASY-EXIT feature
is triggered in an accident, the steering
column will move upwards when the
driver's door is opened. This occurs
irrespective of the position of the key in the
ignition lock. This makes it easier to exit the
vehicle and rescue the occupants.
The crash-responsive EASY-EXIT feature is
only operational after an accident if the
EASY-EXIT/ENTRY feature is activated in
the on-board computer.
Mirrors
Rear-view mirror
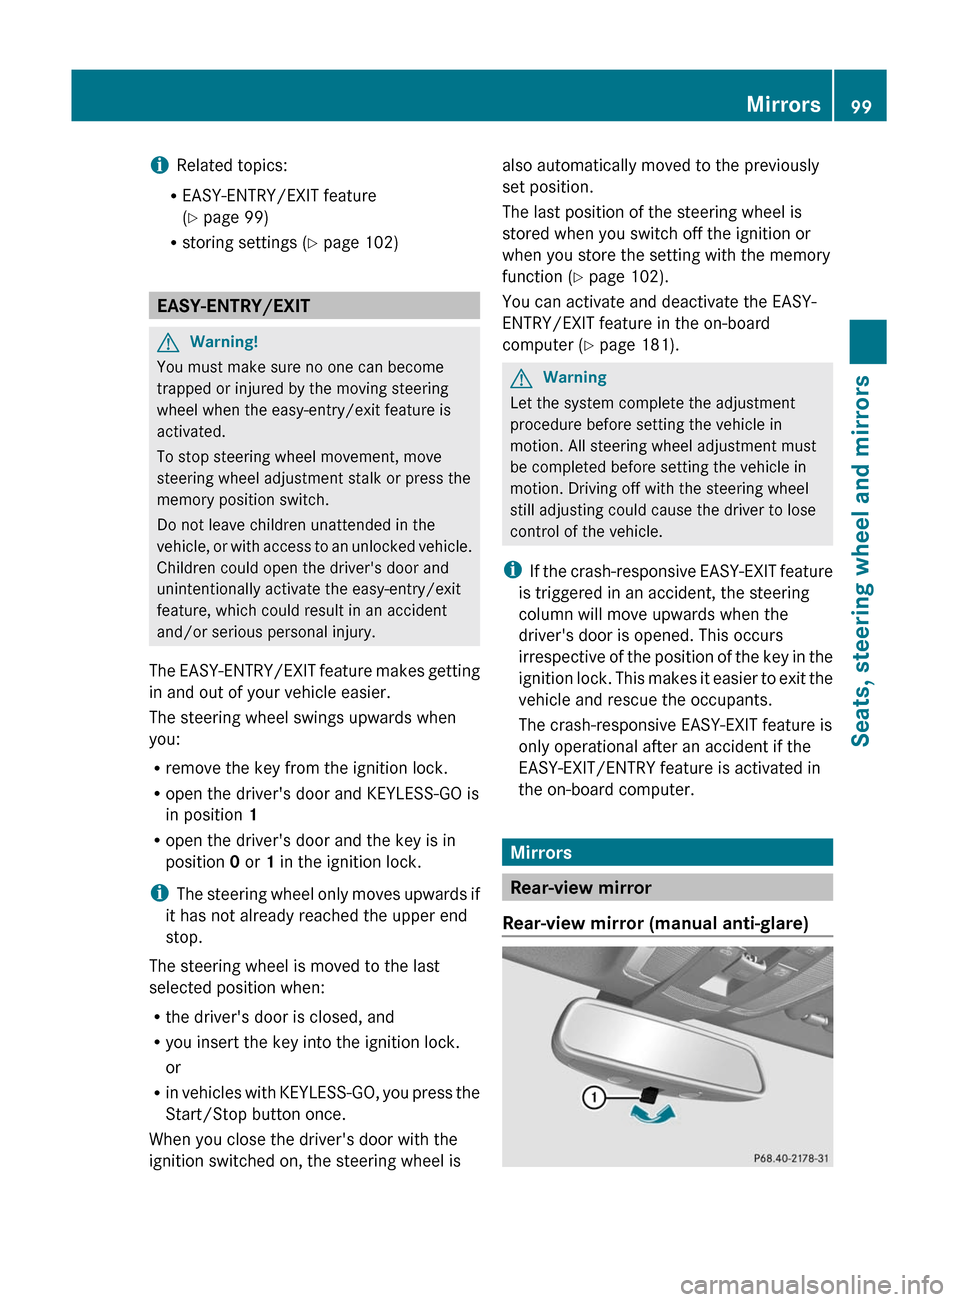
Rear-view mirror (manual anti-glare)
Mirrors99Seats, steering wheel and mirrorsBA 204 USA, CA Edition A 2011; 1; 5, en-UShereepeVersion: 3.0.3.62010-05-20T09:17:30+02:00 - Seite 99Z
Page 104 of 320
XEngage reverse gear.
The exterior mirror on the front-passenger
side moves to the preset parking position.
XUse adjustment button = to adjust the
exterior mirror to a position which allows
you to see the rear wheel and the curb.
The parking position is stored.
iIf you shift the transmission to another
position, the exterior mirror on the front-
passenger side returns to the driving
position.
iYou can also store the parking position
using memory button M ?.
XWith the key in position 2 in the
ignition lock and with the exterior
mirror on the front-passenger side
activated, use adjustment button = to
set the exterior mirror such that the
rear wheel and curb are visible.
XPress memory button M ? and one of
the arrows on adjustment button =
within three seconds.
The parking position is stored if the
exterior mirror does not move.
If the mirror moves out of position, repeat
the steps.
Calling up a stored parking position
setting
XWith the key in position 2 in the ignition
lock and the exterior mirror on the front-
passenger side activated, engage reverse
gear.
The exterior mirror on the front-passenger
side moves to the stored parking position.
The exterior mirror on the front-passenger
side moves back to its original position:
Ras soon as you exceed a speed of 6 mph
(10 km/h)
Rabout ten seconds after you have
disengaged reverse gear
Rif you press button : for the exterior
mirror on the driver's side
Memory functions
Storing settings
With the memory function, you can store up
to three different settings, e.g. for three
different people.
The following settings are stored as a single
memory preset:
Rposition of the seat, backrest and head
restraint
Rdriver's side: steering wheel position
Rdriver's side: position of the exterior
mirrors on the driver's and front-passenger
sides
GWarning!
The memory function can still be used when
the key has been removed. For this reason,
children should never be left unsupervised in
the vehicle. They could otherwise become
trapped when adjusting the seat or the
steering wheel.
GWarning!
Only use the memory function on the driver's
side when the vehicle is stationary. You could
otherwise be distracted from the traffic
conditions by the steering wheel and seat
moving of their own accord, and as a result
cause an accident.
102Memory functionsSeats, steering wheel and mirrors
BA 204 USA, CA Edition A 2011; 1; 5, en-UShereepeVersion: 3.0.3.62010-05-20T09:17:30+02:00 - Seite 102
Page 105 of 320
XAdjust the seat (Y page 94).XOn the driver's side, adjust the steering
wheel ( Y page 98) and the exterior mirrors
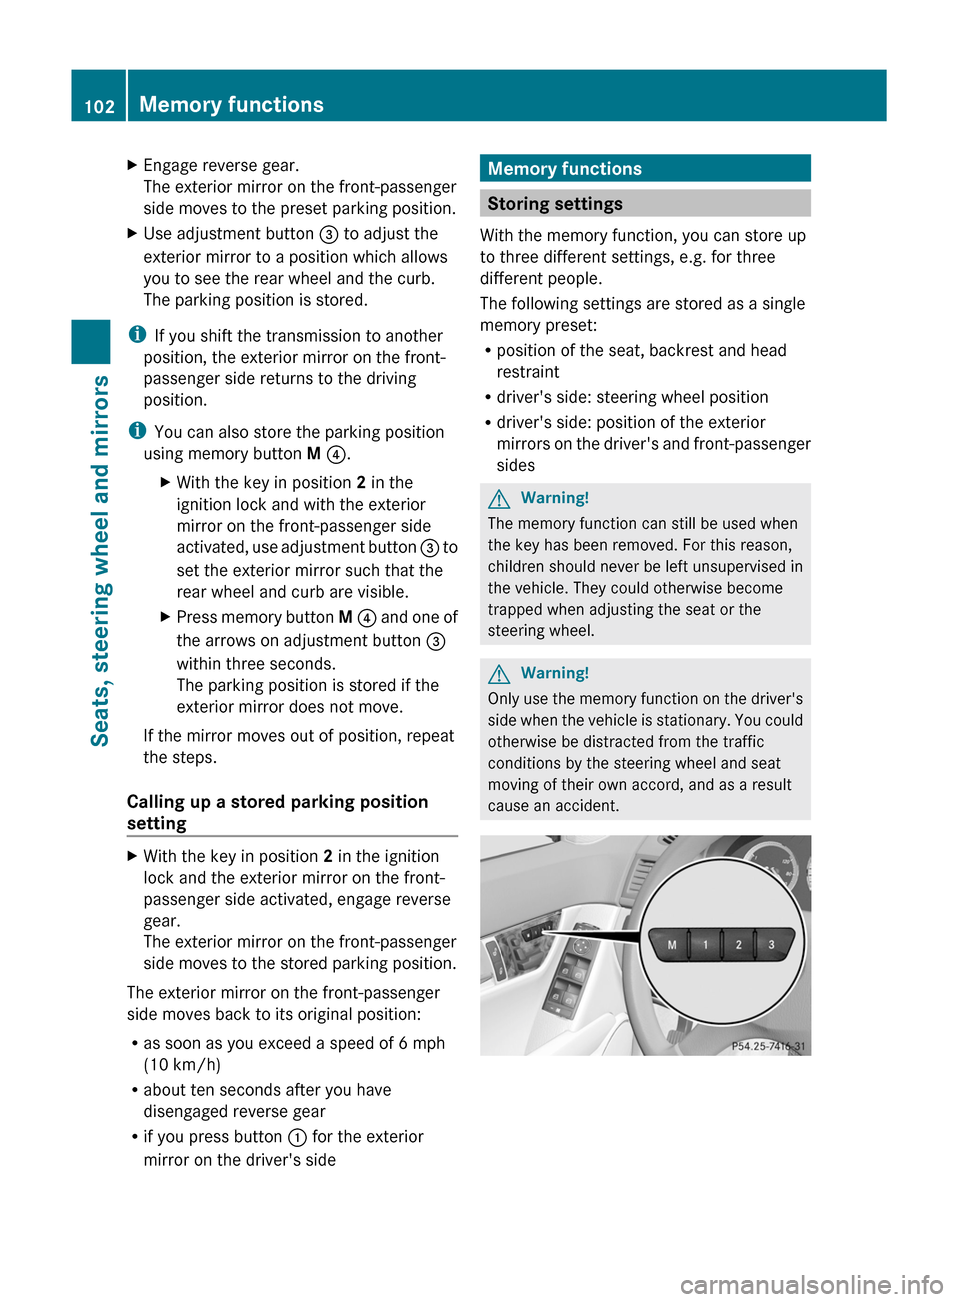
( Y page 100).XPress memory button M and one of the
storage position buttons 1, 2 or 3 within
three seconds.
The settings are stored in the selected
preset position. A tone sounds when the
settings have been completed.
Calling up a stored setting
! If you want to move the seat from the fully
reclined position to a stored seat position,
first raise the backrest. The seat could
otherwise be damaged.
XPress and hold the relevant storage
position button 1, 2 or 3, until the seat,
steering wheel and exterior mirrors are in
the stored position.
i The setting procedure is interrupted as
soon as you release the storage position
button.
Memory functions103Seats, steering wheel and mirrorsBA 204 USA, CA Edition A 2011; 1; 5, en-UShereepeVersion: 3.0.3.62010-05-20T09:17:30+02:00 - Seite 103Z
Page 224 of 320
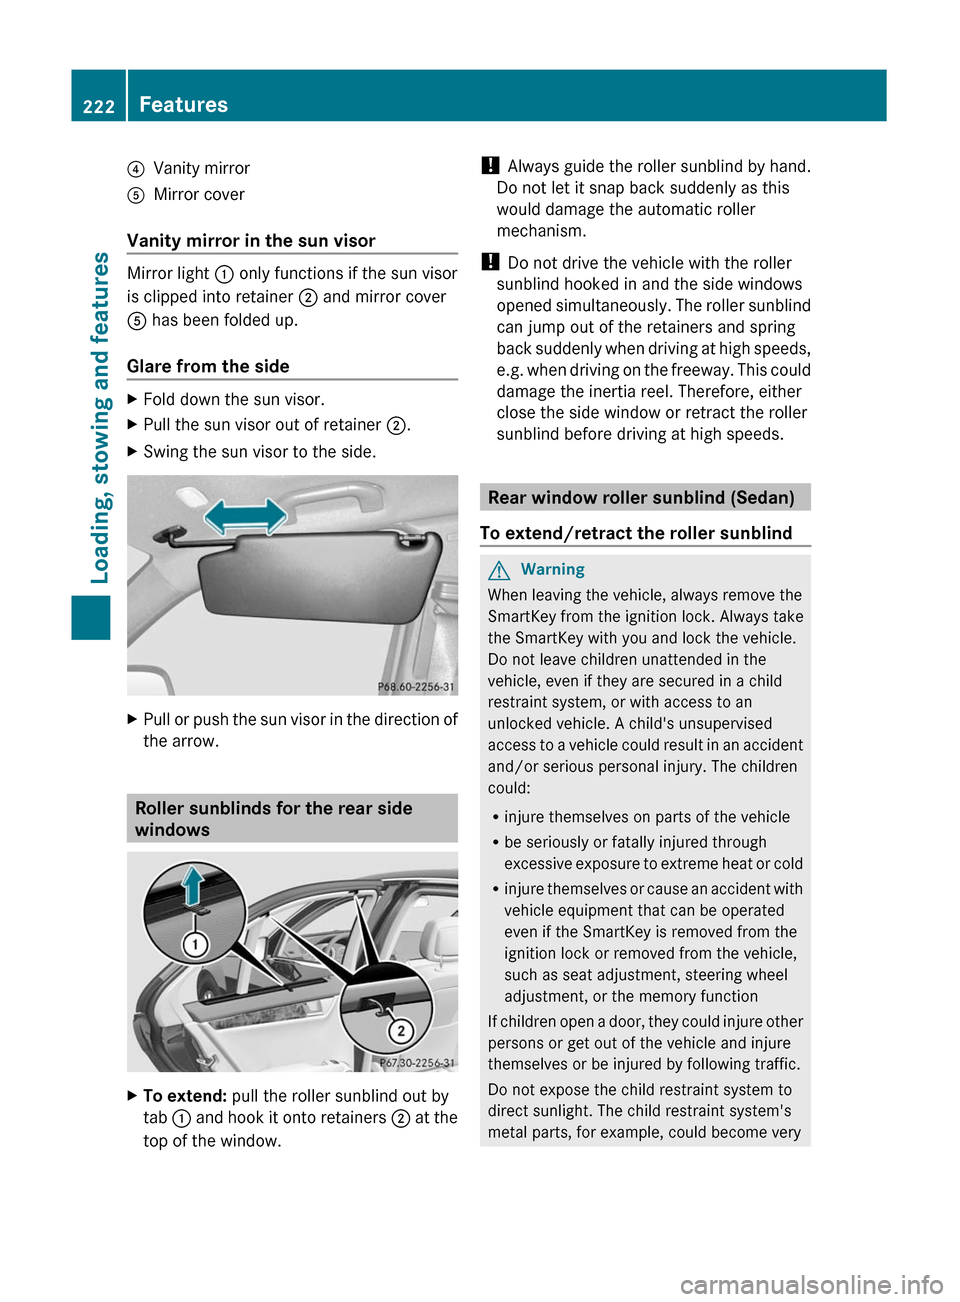
?Vanity mirrorAMirror cover
Vanity mirror in the sun visor
Mirror light : only functions if the sun visor
is clipped into retainer ; and mirror cover
A has been folded up.
Glare from the side
XFold down the sun visor.XPull the sun visor out of retainer ;.XSwing the sun visor to the side.XPull or push the sun visor in the direction of
the arrow.
Roller sunblinds for the rear side
windows
XTo extend: pull the roller sunblind out by
tab : and hook it onto retainers ; at the
top of the window.
! Always guide the roller sunblind by hand.
Do not let it snap back suddenly as this
would damage the automatic roller
mechanism.
! Do not drive the vehicle with the roller
sunblind hooked in and the side windows
opened simultaneously. The roller sunblind
can jump out of the retainers and spring
back suddenly when driving at high speeds,
e.g. when driving on the freeway. This could
damage the inertia reel. Therefore, either
close the side window or retract the roller
sunblind before driving at high speeds.
Rear window roller sunblind (Sedan)
To extend/retract the roller sunblind
GWarning
When leaving the vehicle, always remove the
SmartKey from the ignition lock. Always take
the SmartKey with you and lock the vehicle.
Do not leave children unattended in the
vehicle, even if they are secured in a child
restraint system, or with access to an
unlocked vehicle. A child's unsupervised
access to a vehicle could result in an accident
and/or serious personal injury. The children
could:
Rinjure themselves on parts of the vehicle
Rbe seriously or fatally injured through
excessive exposure to extreme heat or cold
Rinjure themselves or cause an accident with
vehicle equipment that can be operated
even if the SmartKey is removed from the
ignition lock or removed from the vehicle,
such as seat adjustment, steering wheel
adjustment, or the memory function
If children open a door, they could injure other
persons or get out of the vehicle and injure
themselves or be injured by following traffic.
Do not expose the child restraint system to
direct sunlight. The child restraint system's
metal parts, for example, could become very
222FeaturesLoading, stowing and features
BA 204 USA, CA Edition A 2011; 1; 5, en-UShereepeVersion: 3.0.3.62010-05-20T09:17:30+02:00 - Seite 222
Page 226 of 320
Cigarette lighterGWarning
When leaving the vehicle, always remove the
SmartKey from the ignition lock. Always take
the SmartKey with you and lock the vehicle.
Do not leave children unattended in the
vehicle, even if they are secured in a child
restraint system, or with access to an
unlocked vehicle. A child's unsupervised
access to a vehicle could result in an accident
and/or serious personal injury. The children
could:
Rinjure themselves on parts of the vehicle
Rbe seriously or fatally injured through
excessive exposure to extreme heat or cold
Rinjure themselves or cause an accident with
vehicle equipment that can be operated
even if the SmartKey is removed from the
ignition lock or removed from the vehicle,
such as seat adjustment, steering wheel
adjustment, or the memory function
If children open a door, they could injure other
persons or get out of the vehicle and injure
themselves or be injured by following traffic.
Do not expose the child restraint system to
direct sunlight. The child restraint system's
metal parts, for example, could become very
hot, and the child could be burned on these
parts.
GWarning
Never touch the heating element or sides of
the lighter; they are extremely hot. Hold the
knob only.
Make sure any children traveling with you do
not injure themselves or start a fire with the
hot cigarette lighter.
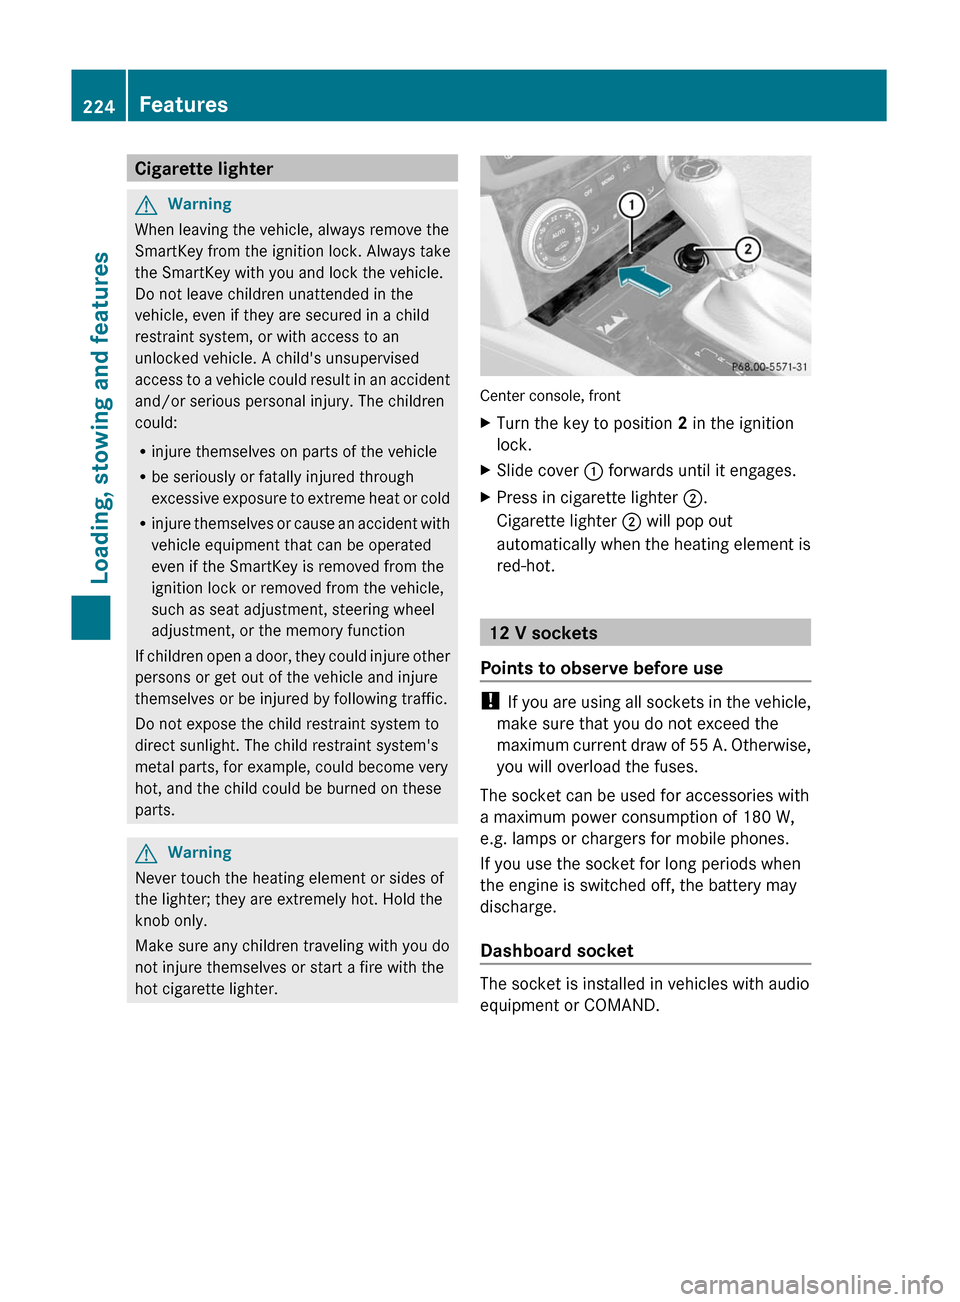
Center console, front
XTurn the key to position 2 in the ignition
lock.
XSlide cover : forwards until it engages.XPress in cigarette lighter ;.
Cigarette lighter ; will pop out
automatically when the heating element is
red-hot.
12 V sockets
Points to observe before use
! If you are using all sockets in the vehicle,
make sure that you do not exceed the
maximum current draw of 55 A. Otherwise,
you will overload the fuses.
The socket can be used for accessories with
a maximum power consumption of 180 W,
e.g. lamps or chargers for mobile phones.
If you use the socket for long periods when
the engine is switched off, the battery may
discharge.
Dashboard socket
The socket is installed in vehicles with audio
equipment or COMAND.
224FeaturesLoading, stowing and features
BA 204 USA, CA Edition A 2011; 1; 5, en-UShereepeVersion: 3.0.3.62010-05-20T09:17:30+02:00 - Seite 224