display MERCEDES-BENZ C-Class 2011 W204 Owner's Guide
[x] Cancel search | Manufacturer: MERCEDES-BENZ, Model Year: 2011, Model line: C-Class, Model: MERCEDES-BENZ C-Class 2011 W204Pages: 320, PDF Size: 13.17 MB
Page 47 of 320
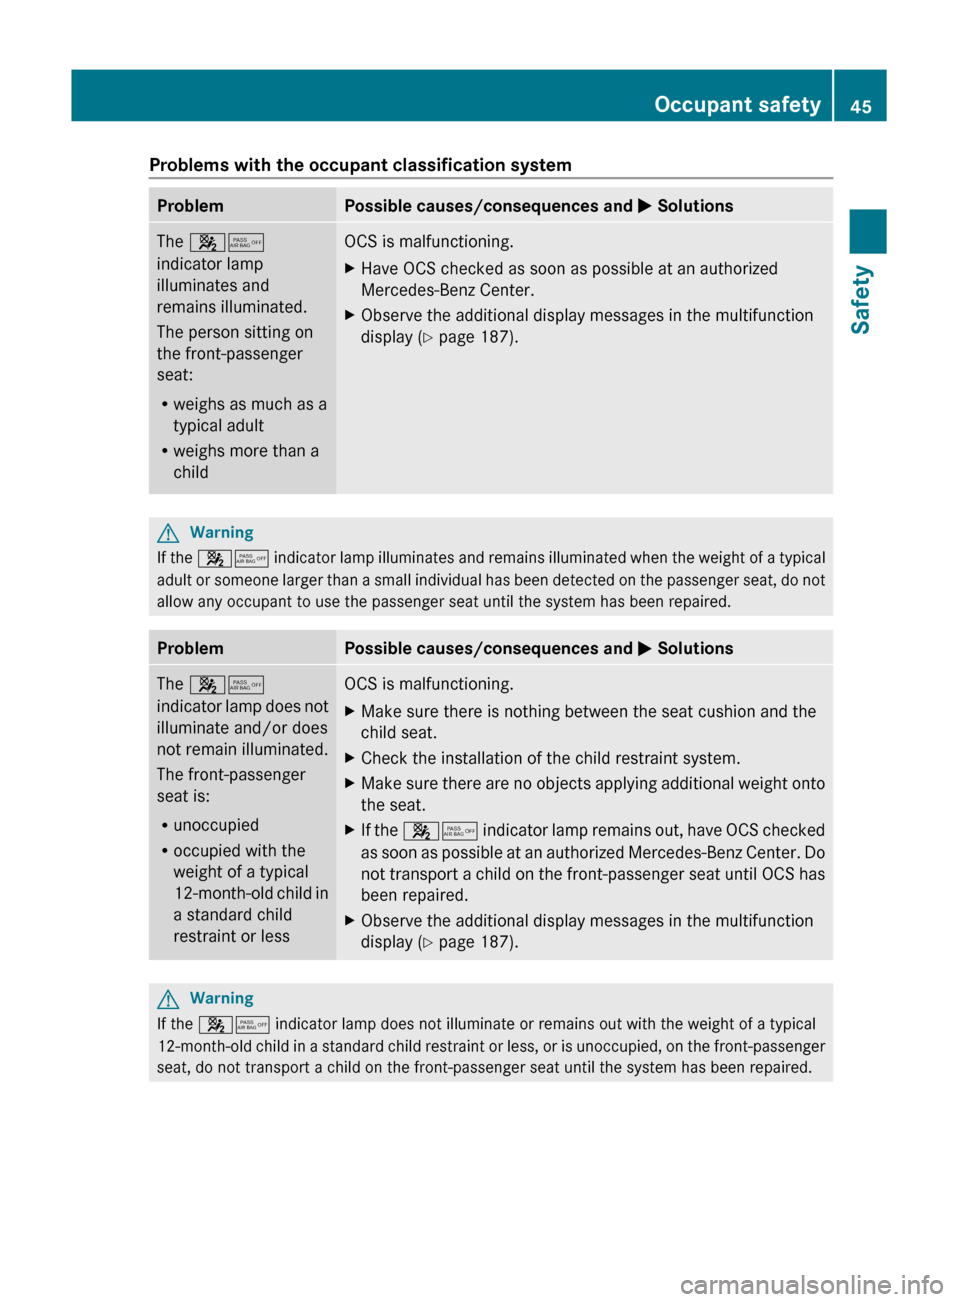
Problems with the occupant classification systemProblemPossible causes/consequences and M SolutionsThe 45
indicator lamp
illuminates and
remains illuminated.
The person sitting on
the front-passenger
seat:
R weighs as much as a
typical adult
R weighs more than a
childOCS is malfunctioning.XHave OCS checked as soon as possible at an authorized
Mercedes-Benz Center.XObserve the additional display messages in the multifunction
display ( Y page 187).GWarning
If the 45 indicator lamp illuminates and remains illuminated when the weight of a typical
adult or someone larger than a small individual has been detected on the passenger seat, do not
allow any occupant to use the passenger seat until the system has been repaired.
ProblemPossible causes/consequences and M SolutionsThe 45
indicator lamp does not
illuminate and/or does
not remain illuminated.
The front-passenger
seat is:
R unoccupied
R occupied with the
weight of a typical
12-month-old child in
a standard child
restraint or lessOCS is malfunctioning.XMake sure there is nothing between the seat cushion and the
child seat.XCheck the installation of the child restraint system.XMake sure there are no objects applying additional weight onto
the seat.XIf the 45 indicator lamp remains out, have OCS checked
as soon as possible at an authorized Mercedes-Benz Center. Do
not transport a child on the front-passenger seat until OCS has
been repaired.XObserve the additional display messages in the multifunction
display ( Y page 187).GWarning
If the 45 indicator lamp does not illuminate or remains out with the weight of a typical
12-month-old child in a standard child restraint or less, or is unoccupied, on the front-passenger
seat, do not transport a child on the front-passenger seat until the system has been repaired.
Occupant safety45SafetyBA 204 USA, CA Edition A 2011; 1; 5, en-UShereepeVersion: 3.0.3.62010-05-20T09:17:30+02:00 - Seite 45Z
Page 64 of 320
section must never be exploited in a reckless
or dangerous manner which could jeopardize
the user's safety or the safety of others.
Always adjust your driving style to the
prevailing road and weather conditions and
keep a safe distance to other road users and
objects on the street.
If a driving system malfunctions, other driving
safety systems may also switch off. Observe
indicator and warning lamps that may come
on as well as messages in the multifunction
display that may appear.
i In wintry driving conditions, always use
winter tires (M+S tires) and if necessary,
snow chains. Only in this way will the
driving safety systems described in this
section work as effectively as possible.
ABS (Anti-lock Braking System)
Important safety notes
GWarning
Observe "Important safety notes"
( Y page 61).
GWarning
Do not pump the brake pedal. Use firm, steady
brake pedal pressure instead. Pumping the
brake pedal defeats the purpose of the ABS
and significantly reduces braking
effectiveness.
ABS regulates brake pressure in such a way
that the wheels do not lock when you brake.
This allows you to continue steering the
vehicle when braking.
ABS works from a speed of about
5 mph (8 km/h) upwards, regardless of road-
surface conditions. ABS works on slippery
surfaces, even when you only brake gently.
The ! warning lamp in the instrument
cluster lights up when the ignition is switched
on. It goes out when the engine is running.
Braking
If ABS intervenes when braking, you will feel
a pulsing in the brake pedal.
XIf ABS intervenes: continue to depress the
brake pedal with force until the braking
situation is over.XTo make a full brake application:
depress the brake pedal with full force.GWarning
If the ABS malfunctions, other driving systems
such as the BAS or the ESP ®
are also switched
off. Observe indicator and warning lamps that
may come on as well as messages in the
multifunction display that may appear.
If the ABS malfunctions, the wheels may lock
during hard braking, reducing the steering
capability and extending the braking distance.
The pulsating brake pedal can be an
indication of hazardous road conditions and
functions as a reminder to take extra care
while driving.
BAS (Brake Assist)
GWarning
Observe "Important safety notes"
( Y page 61).
BAS operates in emergency braking
situations. If you depress the brake pedal
quickly, BAS automatically boosts the braking
force, thus shortening the stopping distance.
XKeep the brake pedal firmly depressed until
the emergency braking situation is over.
ABS prevents the wheels from locking.
The brakes will function as usual once you
release the brake pedal. BAS is deactivated.
GWarning
If the BAS malfunctions, the brake system still
functions, but without the additional brake
boost available that the BAS would normally
provide in an emergency braking maneuver.
Therefore, the braking distance may increase.
62Driving safety systemsSafety
BA 204 USA, CA Edition A 2011; 1; 5, en-UShereepeVersion: 3.0.3.62010-05-20T09:17:30+02:00 - Seite 62
Page 67 of 320
It may be best to activate SPORT handling
mode in the following situations:
R when using snow chains
R in deep snow
R on sand or gravelGWarning
Switch off the SPORT handling mode and
switch on the ESP ®
immediately if the
aforementioned circumstances do not apply
anymore. Otherwise the SPORT handling
mode will only stabilize the vehicle to a limited
extent when it is starting to skid or a wheel is
spinning.
When SPORT handling mode is activated:
R ESP ®
only improves driving stability to a
limited degree.
R the engine's torque is restricted to a limited
degree and the drive wheels can spin. The
spinning of the wheels results in a cutting
action, which provides better grip.
R traction control is still activated.
R ESP ®
still provides support when you brake
firmly.
If SPORT handling mode is activated and one
or more wheels start to spin, the ä
warning lamp in the instrument cluster
flashes. ESP ®
only stabilizes the vehicle to a
limited degree.
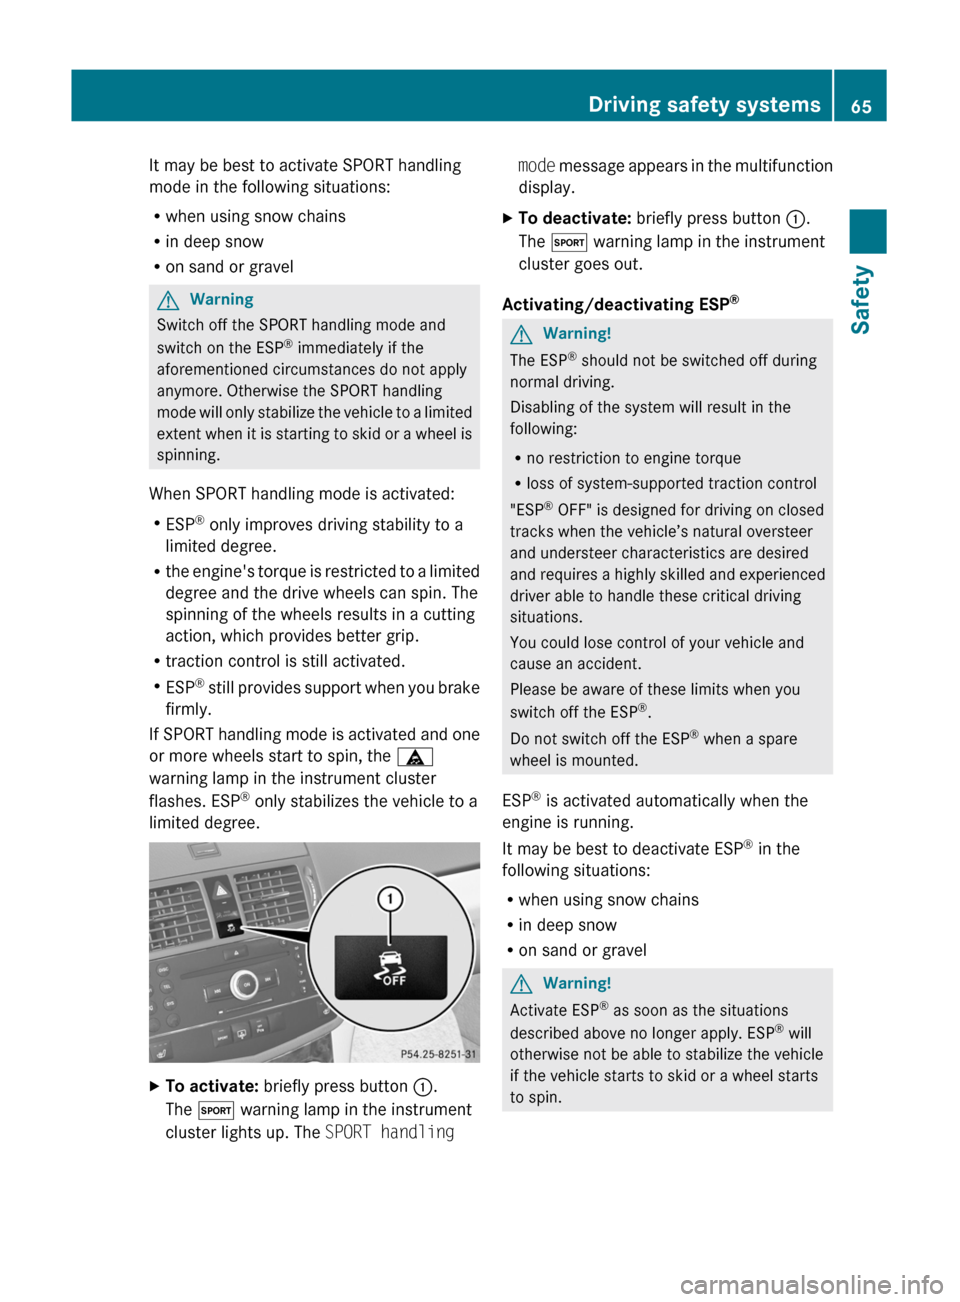
XTo activate: briefly press button :.
The M warning lamp in the instrument
cluster lights up. The SPORT handling mode message appears in the multifunction
display.XTo deactivate: briefly press button :.
The M warning lamp in the instrument
cluster goes out.
Activating/deactivating ESP ®
GWarning!
The ESP
®
should not be switched off during
normal driving.
Disabling of the system will result in the
following:
R no restriction to engine torque
R loss of system-supported traction control
"ESP ®
OFF" is designed for driving on closed
tracks when the vehicle’s natural oversteer
and understeer characteristics are desired
and requires a highly skilled and experienced
driver able to handle these critical driving
situations.
You could lose control of your vehicle and
cause an accident.
Please be aware of these limits when you
switch off the ESP ®
.
Do not switch off the ESP ®
when a spare
wheel is mounted.
ESP ®
is activated automatically when the
engine is running.
It may be best to deactivate ESP ®
in the
following situations:
R when using snow chains
R in deep snow
R on sand or gravel
GWarning!
Activate ESP ®
as soon as the situations
described above no longer apply. ESP ®
will
otherwise not be able to stabilize the vehicle
if the vehicle starts to skid or a wheel starts
to spin.
Driving safety systems65SafetyBA 204 USA, CA Edition A 2011; 1; 5, en-UShereepeVersion: 3.0.3.62010-05-20T09:17:30+02:00 - Seite 65Z
Page 68 of 320
If you deactivate ESP®
:
R ESP ®
no longer improves driving stability.
R the engine's torque is no longer limited and
the drive wheels are able to spin. The
spinning of the wheels results in a cutting
action, which provides better grip.
R traction control is still activated.
R ESP ®
still provides support when you brake
firmly.
If ESP ®
is deactivated and one or more wheels
start to spin, the ä warning lamp in the
instrument cluster does not flash. In such
situations, ESP ®
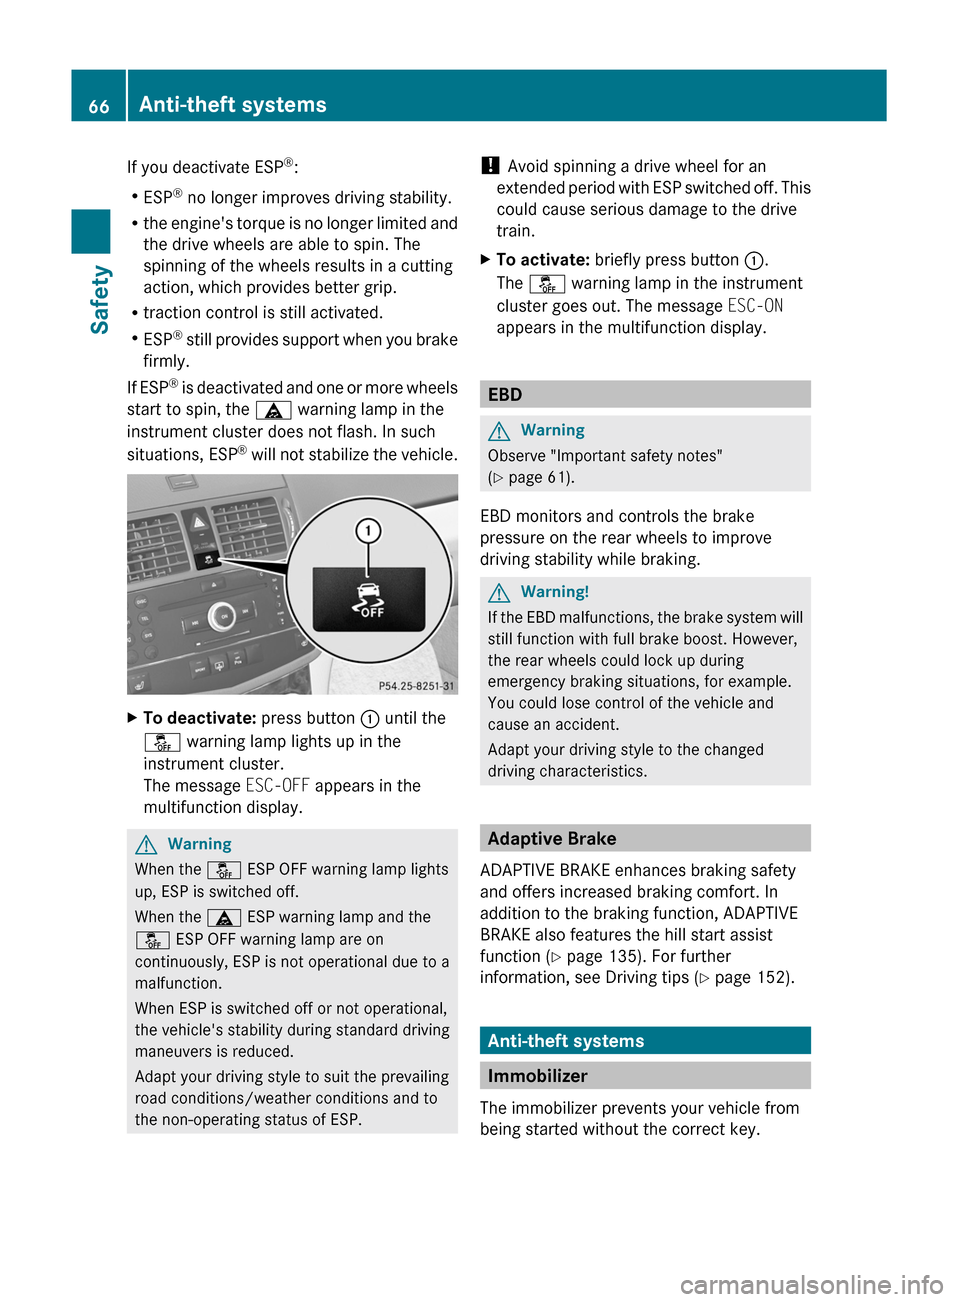
will not stabilize the vehicle.XTo deactivate: press button : until the
å warning lamp lights up in the
instrument cluster.
The message ESC-OFF appears in the
multifunction display.GWarning
When the å ESP OFF warning lamp lights
up, ESP is switched off.
When the ä ESP warning lamp and the
å ESP OFF warning lamp are on
continuously, ESP is not operational due to a
malfunction.
When ESP is switched off or not operational,
the vehicle's stability during standard driving
maneuvers is reduced.
Adapt your driving style to suit the prevailing
road conditions/weather conditions and to
the non-operating status of ESP.
! Avoid spinning a drive wheel for an
extended period with ESP switched off. This
could cause serious damage to the drive
train.XTo activate: briefly press button :.
The å warning lamp in the instrument
cluster goes out. The message ESC-ON
appears in the multifunction display.
EBD
GWarning
Observe "Important safety notes"
( Y page 61).
EBD monitors and controls the brake
pressure on the rear wheels to improve
driving stability while braking.
GWarning!
If the EBD malfunctions, the brake system will
still function with full brake boost. However,
the rear wheels could lock up during
emergency braking situations, for example.
You could lose control of the vehicle and
cause an accident.
Adapt your driving style to the changed
driving characteristics.
Adaptive Brake
ADAPTIVE BRAKE enhances braking safety
and offers increased braking comfort. In
addition to the braking function, ADAPTIVE
BRAKE also features the hill start assist
function ( Y page 135). For further
information, see Driving tips ( Y page 152).
Anti-theft systems
Immobilizer
The immobilizer prevents your vehicle from
being started without the correct key.
66Anti-theft systemsSafety
BA 204 USA, CA Edition A 2011; 1; 5, en-UShereepeVersion: 3.0.3.62010-05-20T09:17:30+02:00 - Seite 66
Page 74 of 320
This may impair the functioning of KEYLESS-
GO.
RTo open or close the vehicle, the KEYLESS-
GO key should be no more than 3 ft (1 m)
from the door or trunk.
RWhen the vehicle is parked for more than
72 hours, the KEYLESS-GO function is
deactivated. Pull one of the outer door
handles and turn on the ignition to
reactivate the KEYLESS-GO function.
RIf the KEYLESS-GO key is not near the
vehicle, it is possible that the system may
not recognize it. In this case, the vehicle
cannot be locked or started with KEYLESS-
GO.
RIf the KEYLESS-GO key has been removed
from the vehicle (e.g. if a passenger leaves
the vehicle with the KEYLESS-GO key):
-while someone is holding the Start/Stop
button or attempting to lock the vehicle
with the outer door handle, the message
Key not detected appears in the
multifunction display
-while the engine is running, the red
message Key not detected appears in
the multifunction display as you pull
away. Find the KEYLESS-GO key or
change its current position immediately
(e.g. place it on the front-passenger seat
or carry it in your shirt pocket.)
RIf you have started the engine using the
Start/Stop button, you can turn if off again
by:
-pressing the Start/Stop button again
-inserting the KEYLESS-GO key in the
ignition lock when the vehicle is
stationary and the automatic
transmission is in parking position P.
RYou may accidentally unlock the vehicle if
the KEYLESS-GO key is within 3 ft (1 m) of
the vehicle and:
-an outer door handle comes into contact
with water
or
-you are cleaning an outer door handle.
RNote that the engine can be started by any
vehicle occupant if a KEYLESS-GO key is in
the vehicle.
Option 1: there is a KEYLESS-GO key in the
vehicle and a KEYLESS-GO key outside the
vehicle. If you leave the KEYLESS-GO key
behind when you get out and lock the
vehicle, a message does not appear in the
multifunction display.
Option 2: there is a KEYLESS-GO key in the
vehicle but no KEYLESS-GO key outside the
vehicle. When you get out and try to lock
the vehicle, the message Key still in
vehicle appears in the multifunction
display. The vehicle is not locked in this
case.
When starting the engine and while driving,
KEYLESS-GO also checks whether a valid key
is in the vehicle by periodically establishing
radio contact.
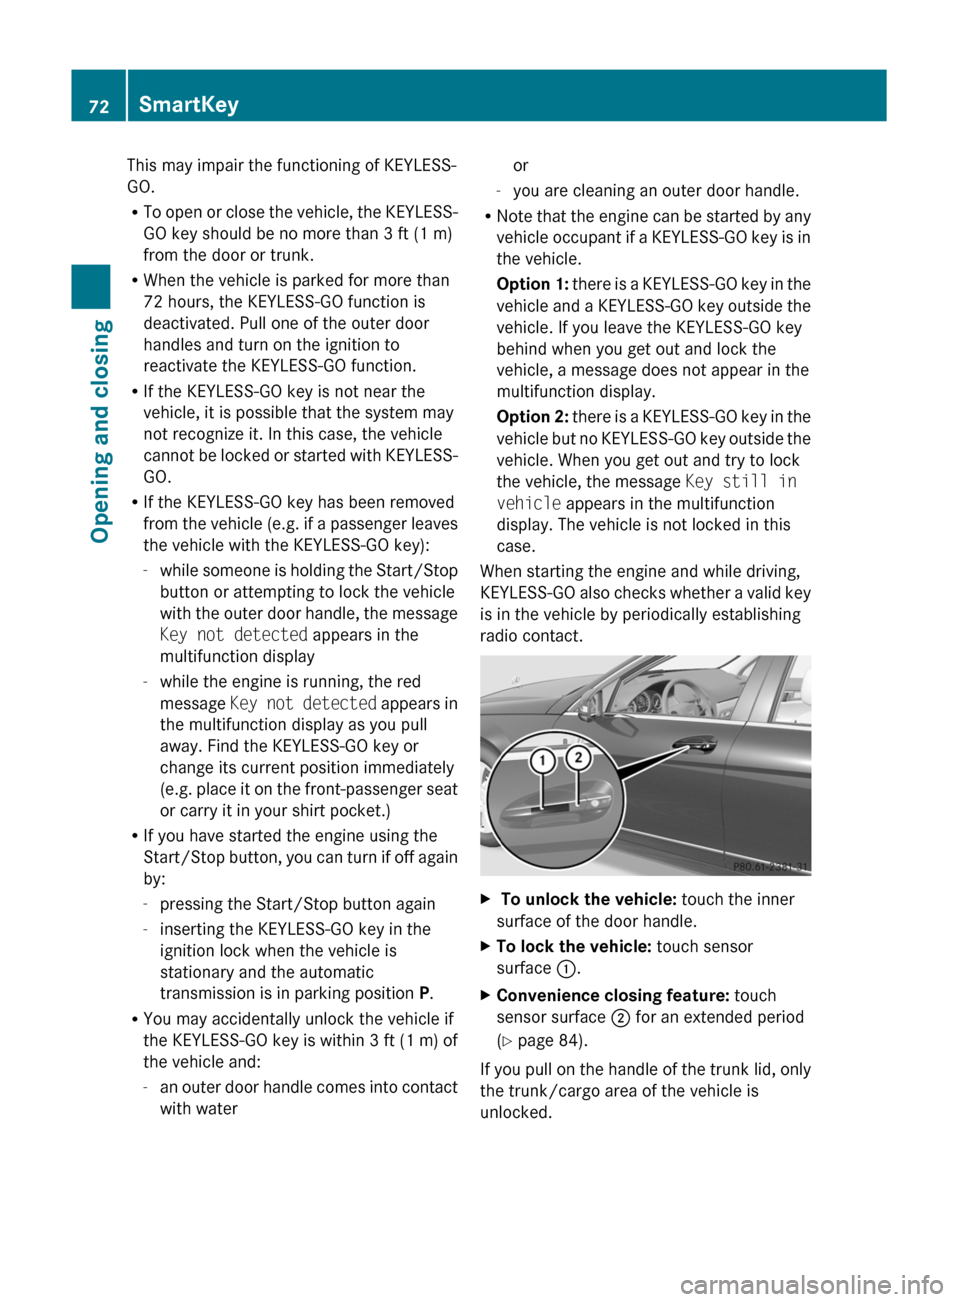
X To unlock the vehicle: touch the inner
surface of the door handle.
XTo lock the vehicle: touch sensor
surface :.
XConvenience closing feature: touch
sensor surface ; for an extended period
(Y page 84).
If you pull on the handle of the trunk lid, only
the trunk/cargo area of the vehicle is
unlocked.
72SmartKeyOpening and closing
BA 204 USA, CA Edition A 2011; 1; 5, en-UShereepeVersion: 3.0.3.62010-05-20T09:17:30+02:00 - Seite 72
Page 94 of 320
Vehicle equipment
i This manual describes all the standard
and optional equipment of your vehicle
which was available at the time of
purchase. Country-specific differences are
possible. Bear in mind that your vehicle
may not feature all functions described
here. This also refers to safety-related
systems and functions.
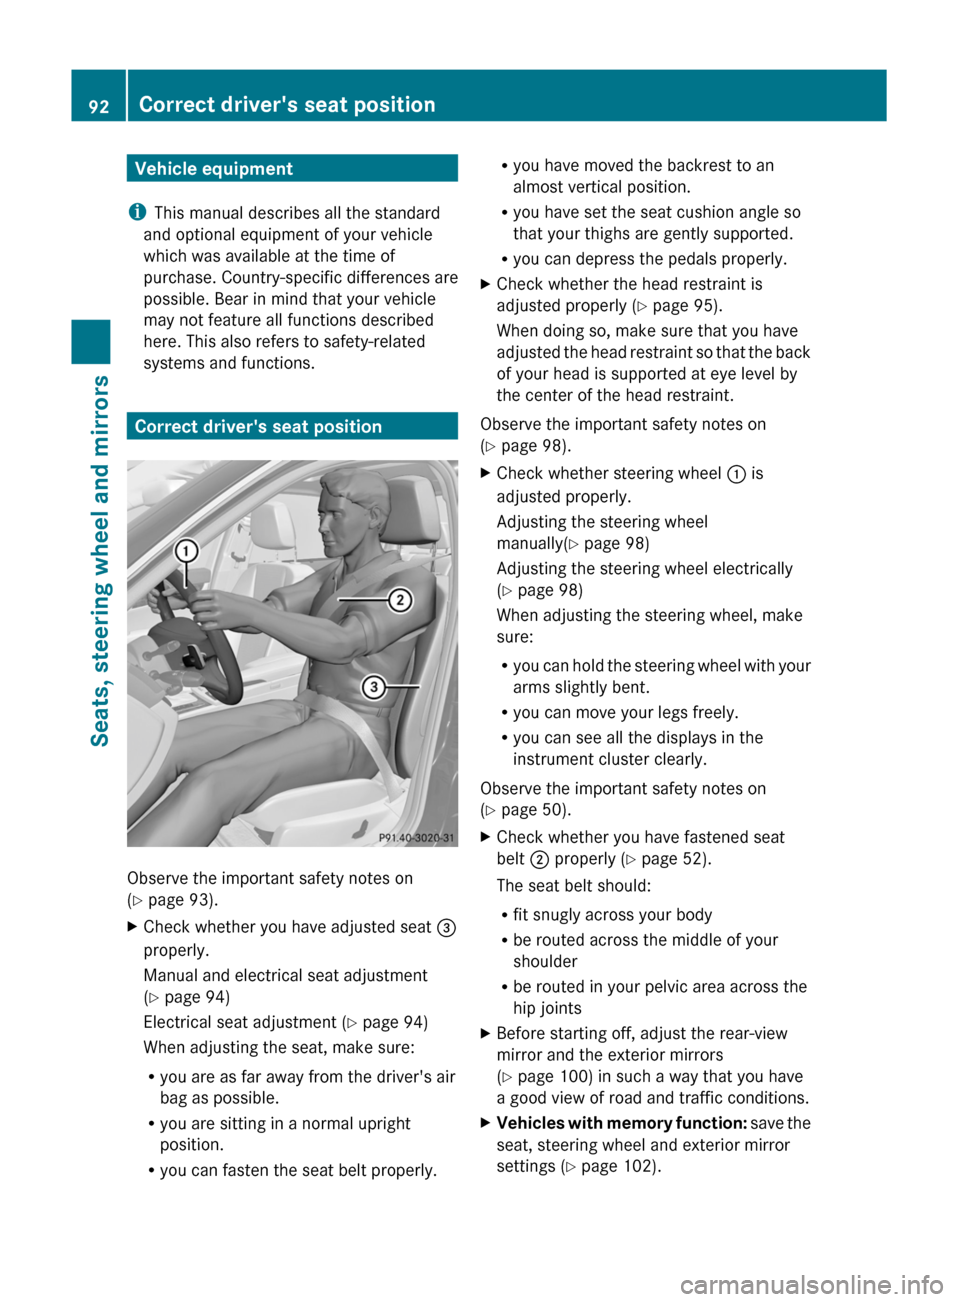
Correct driver's seat position
Observe the important safety notes on
( Y page 93).
XCheck whether you have adjusted seat =
properly.
Manual and electrical seat adjustment
( Y page 94)
Electrical seat adjustment ( Y page 94)
When adjusting the seat, make sure:
R you are as far away from the driver's air
bag as possible.
R you are sitting in a normal upright
position.
R you can fasten the seat belt properly.Ryou have moved the backrest to an
almost vertical position.
R you have set the seat cushion angle so
that your thighs are gently supported.
R you can depress the pedals properly.XCheck whether the head restraint is
adjusted properly ( Y page 95).
When doing so, make sure that you have
adjusted the head restraint so that the back
of your head is supported at eye level by
the center of the head restraint.
Observe the important safety notes on
( Y page 98).
XCheck whether steering wheel : is
adjusted properly.
Adjusting the steering wheel
manually( Y page 98)
Adjusting the steering wheel electrically
( Y page 98)
When adjusting the steering wheel, make
sure:
R you can hold the steering wheel with your
arms slightly bent.
R you can move your legs freely.
R you can see all the displays in the
instrument cluster clearly.
Observe the important safety notes on
( Y page 50).
XCheck whether you have fastened seat
belt ; properly ( Y page 52).
The seat belt should:
R fit snugly across your body
R be routed across the middle of your
shoulder
R be routed in your pelvic area across the
hip jointsXBefore starting off, adjust the rear-view
mirror and the exterior mirrors
( Y page 100) in such a way that you have
a good view of road and traffic conditions.XVehicles with memory function: save the
seat, steering wheel and exterior mirror
settings ( Y page 102).92Correct driver's seat positionSeats, steering wheel and mirrors
BA 204 USA, CA Edition A 2011; 1; 5, en-UShereepeVersion: 3.0.3.62010-05-20T09:17:30+02:00 - Seite 92
Page 124 of 320
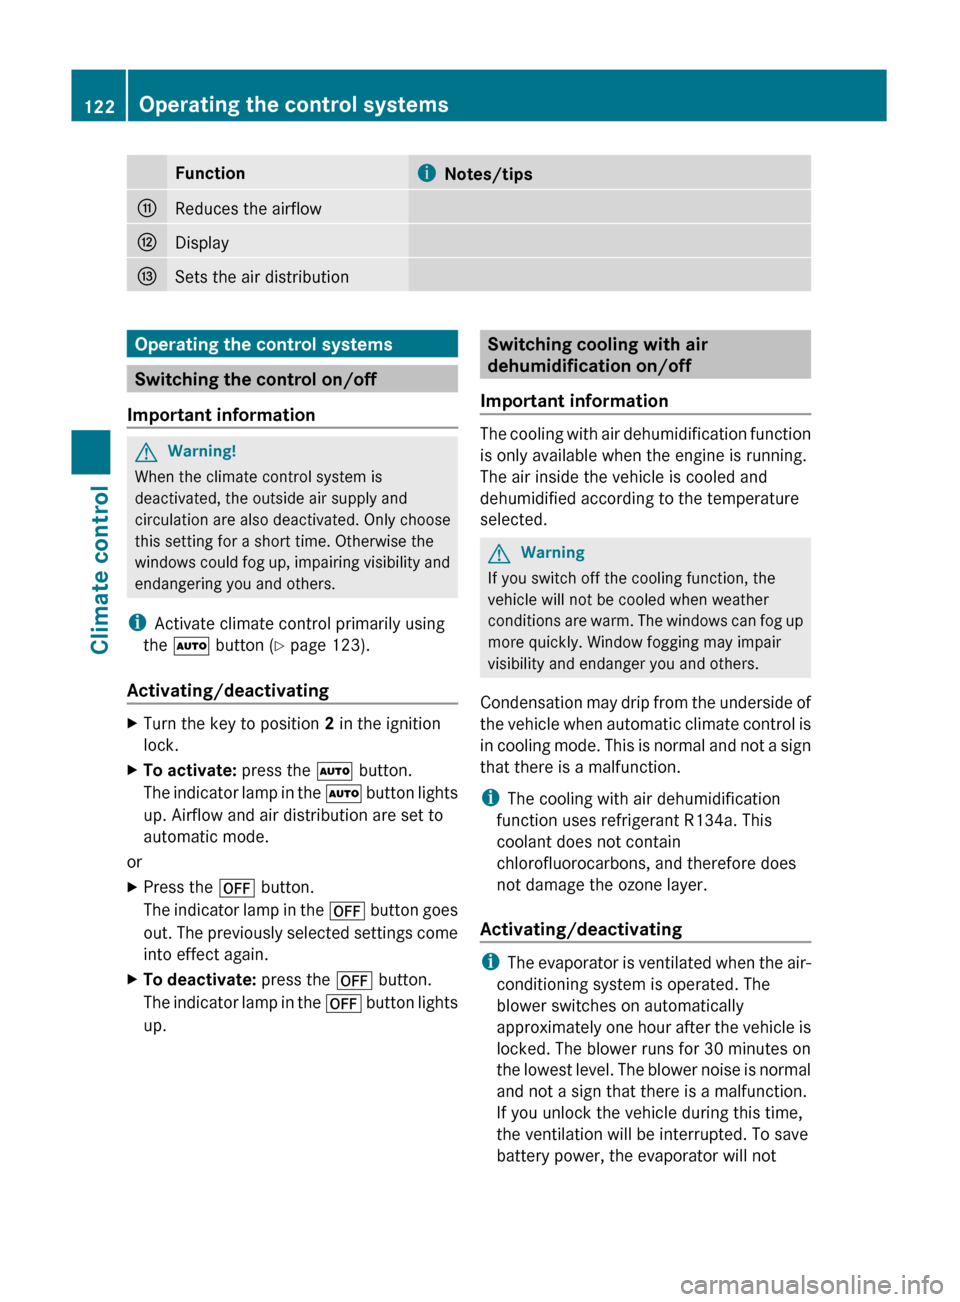
FunctioniNotes/tipsGReduces the airflowHDisplayISets the air distributionOperating the control systems
Switching the control on/off
Important information
GWarning!
When the climate control system is
deactivated, the outside air supply and
circulation are also deactivated. Only choose
this setting for a short time. Otherwise the
windows could fog up, impairing visibility and
endangering you and others.
i Activate climate control primarily using
the à button ( Y page 123).
Activating/deactivating
XTurn the key to position 2 in the ignition
lock.XTo activate: press the à button.
The indicator lamp in the à button lights
up. Airflow and air distribution are set to
automatic mode.
or
XPress the ^ button.
The indicator lamp in the ^ button goes
out. The previously selected settings come
into effect again.XTo deactivate: press the ^ button.
The indicator lamp in the ^ button lights
up.Switching cooling with air
dehumidification on/off
Important information
The cooling with air dehumidification function
is only available when the engine is running.
The air inside the vehicle is cooled and
dehumidified according to the temperature
selected.
GWarning
If you switch off the cooling function, the
vehicle will not be cooled when weather
conditions are warm. The windows can fog up
more quickly. Window fogging may impair
visibility and endanger you and others.
Condensation may drip from the underside of
the vehicle when automatic climate control is
in cooling mode. This is normal and not a sign
that there is a malfunction.
i The cooling with air dehumidification
function uses refrigerant R134a. This
coolant does not contain
chlorofluorocarbons, and therefore does
not damage the ozone layer.
Activating/deactivating
i The evaporator is ventilated when the air-
conditioning system is operated. The
blower switches on automatically
approximately one hour after the vehicle is
locked. The blower runs for 30 minutes on
the lowest level. The blower noise is normal
and not a sign that there is a malfunction.
If you unlock the vehicle during this time,
the ventilation will be interrupted. To save
battery power, the evaporator will not
122Operating the control systemsClimate control
BA 204 USA, CA Edition A 2011; 1; 5, en-UShereepeVersion: 3.0.3.62010-05-20T09:17:30+02:00 - Seite 122
Page 126 of 320
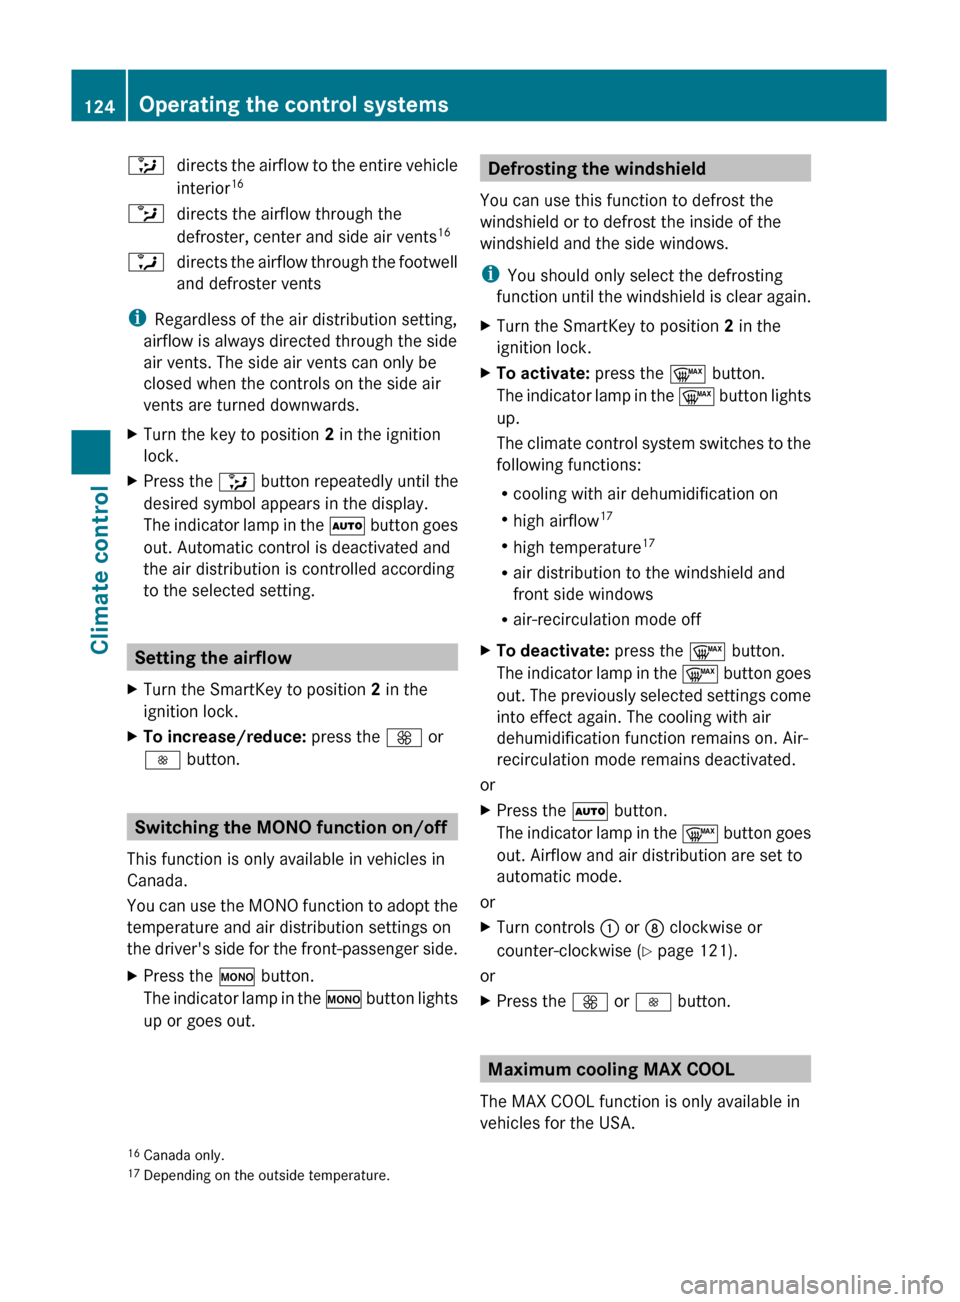
_directs the airflow to the entire vehicle
interior 16bdirects the airflow through the
defroster, center and side air vents 16adirects the airflow through the footwell
and defroster vents
i Regardless of the air distribution setting,
airflow is always directed through the side
air vents. The side air vents can only be
closed when the controls on the side air
vents are turned downwards.
XTurn the key to position 2 in the ignition
lock.XPress the _ button repeatedly until the
desired symbol appears in the display.
The indicator lamp in the à button goes
out. Automatic control is deactivated and
the air distribution is controlled according
to the selected setting.
Setting the airflow
XTurn the SmartKey to position 2 in the
ignition lock.XTo increase/reduce: press the K or
I button.
Switching the MONO function on/off
This function is only available in vehicles in
Canada.
You can use the MONO function to adopt the
temperature and air distribution settings on
the driver's side for the front-passenger side.
XPress the º button.
The indicator lamp in the º button lights
up or goes out.Defrosting the windshield
You can use this function to defrost the
windshield or to defrost the inside of the
windshield and the side windows.
i You should only select the defrosting
function until the windshield is clear again.XTurn the SmartKey to position 2 in the
ignition lock.XTo activate: press the ¬ button.
The indicator lamp in the ¬ button lights
up.
The climate control system switches to the
following functions:
R cooling with air dehumidification on
R high airflow 17
R high temperature 17
R air distribution to the windshield and
front side windows
R air-recirculation mode offXTo deactivate: press the ¬ button.
The indicator lamp in the ¬ button goes
out. The previously selected settings come
into effect again. The cooling with air
dehumidification function remains on. Air-
recirculation mode remains deactivated.
or
XPress the à button.
The indicator lamp in the ¬ button goes
out. Airflow and air distribution are set to
automatic mode.
or
XTurn controls : or D clockwise or
counter-clockwise ( Y page 121).
or
XPress the K or I button.
Maximum cooling MAX COOL
The MAX COOL function is only available in
vehicles for the USA.
16 Canada only.
17 Depending on the outside temperature.124Operating the control systemsClimate control
BA 204 USA, CA Edition A 2011; 1; 5, en-UShereepeVersion: 3.0.3.62010-05-20T09:17:30+02:00 - Seite 124
Page 127 of 320
MAX COOL is only operational when the
engine is running.
When you activate MAX COOL, climate
control switches to the following functions:
R maximum cooling
R maximum airflow
R air-recirculation mode onXTo activate: press the Ù button.
The indicator lamp in the button lights up.XTo deactivate: press the Ù button
again.
The indicator lamp goes out. The previously
selected settings come into effect again.
Defrosting the windows
Windows fogged up on the inside
XActivate the "cooling with air
dehumidification" function ¿.XActivate automatic mode Ã.XIf the windows continue to fog up, activate
the defrosting function ( Y page 124).
i
You should only select this setting until
the windshield is clear again.
Windows fogged up on the outside
XSwitch on the windshield wipers.XPress the _ button repeatedly until the
O or P symbol appears in the
display.
i You should only select this setting until
the windshield is clear again.
Rear window heating
Activating/deactivating
GWarning
Any accumulation of snow and ice should be
removed from the rear window before driving.
Visibility could otherwise be impaired,
endangering you and others.
The rear window heating has a high current
draw. You should therefore switch it off as
soon as the window is clear as it only switches
off automatically after several minutes.
If the battery voltage is too low, the rear
window heating may switch off.XTurn the SmartKey to position 2 in the
ignition lock.XPress the ¤ button.
The indicator lamp in the ¤ button lights
up or goes out.
Problems with the rear window heating
The rear window heating has deactivated
itself prematurely or cannot be activated.
XSwitch off any consumers that are not
required, e.g. reading lamps or interior
lighting.
When the battery is sufficiently charged,
the rear window heating is activated again
automatically.
Activating/deactivating air-
recirculation mode
You can deactivate the flow of fresh air if
unpleasant odors are entering the vehicle
from outside. The air already inside the
vehicle will then be recirculated.
GWarning
Fogged windows impair visibility,
endangering you and others. If the windows
begin to fog on the inside, switching off the
air recirculation mode immediately should
clear interior window fogging. If interior
window fogging persists, make sure the air
conditioning is activated, or press the ¬
button.
XTurn the SmartKey to position 2 in the
ignition lock.XTo activate: press the g button.
The indicator lamp in the g button lights
up.Operating the control systems125Climate controlBA 204 USA, CA Edition A 2011; 1; 5, en-UShereepeVersion: 3.0.3.62010-05-20T09:17:30+02:00 - Seite 125Z
Page 132 of 320
Vehicle equipment
i This manual describes all the standard
and optional equipment of your vehicle
which was available at the time of
purchase. Country-specific differences are
possible. Bear in mind that your vehicle
may not feature all functions described
here. This also refers to safety-related
systems and functions.
Notes on breaking-in a new vehicle
The first 1000 miles (1500 km)
The more you look after the engine when it is
new, the happier you will be with its
performance in the future.
R Drive at varying vehicle speeds and engine
speeds for the first 1000 miles (1500 km)
for this reason.
R Avoid overstraining the vehicle during this
period, e.g. driving at full throttle.
R Change gear in good time, at the latest
when the tachometer needle is 2
/ 3 of the
way to the red area in the tachometer
display.
Vehicles with automatic transmission:
R Ideally, drive program C should be selected
for driving the first 1000 miles (1500 km).
R Do not manually shift to a lower gear to
brake the vehicle.
R If possible, do not depress the accelerator
pedal past the point of resistance
(kickdown).
R Only select shift ranges 3, 2 or 1 when
driving slowly, e.g. in mountainous terrain.
After 1000 miles (1500 km) you may
gradually bring the vehicle up to full road and
engine speeds.
Additional breaking-in notes for AMG
vehicles:
R For the first 1000 miles (1500 km), do not
exceed a speed of 85 mph (140 km/h).
R Only allow the engine to briefly reach a
maximum engine speed of 4500 rpm.
R Shift gears in good time.
i Also observe these breaking-in notes
when the vehicle's engine or axle gear have
been replaced.
i Always observe the respective limit
speeds.
AMG vehicles with rear axle locking
differential
Your vehicle is equipped with a self-locking
differential on the rear axle. Change the oil
after a breaking-in period of
2000 miles(3000 km) to improve protection
of the rear axle differential. This oil change
extends the service life of the differential.
Have the oil change carried out at a qualified
specialist workshop. Mercedes-Benz
recommends that you use an authorized
Mercedes-Benz Center for this purpose.
Driving
Important safety notes
GWarning
Make sure absolutely no objects are
obstructing the pedals' range of movement.
Keep the driver's footwell clear of all
obstacles. If there are any floormats or
carpets in the footwell, make sure the pedals
still have sufficient clearance.
During sudden driving or braking maneuvers
the objects could get caught between the
pedals. You could then no longer brake or
accelerate. This could lead to accidents and
injury.
130DrivingDriving and parking
BA 204 USA, CA Edition A 2011; 1; 5, en-UShereepeVersion: 3.0.3.62010-05-20T09:17:30+02:00 - Seite 130