Parking break MERCEDES-BENZ C-Class 2011 W204 Owner's Manual
[x] Cancel search | Manufacturer: MERCEDES-BENZ, Model Year: 2011, Model line: C-Class, Model: MERCEDES-BENZ C-Class 2011 W204Pages: 320, PDF Size: 13.17 MB
Page 5 of 320
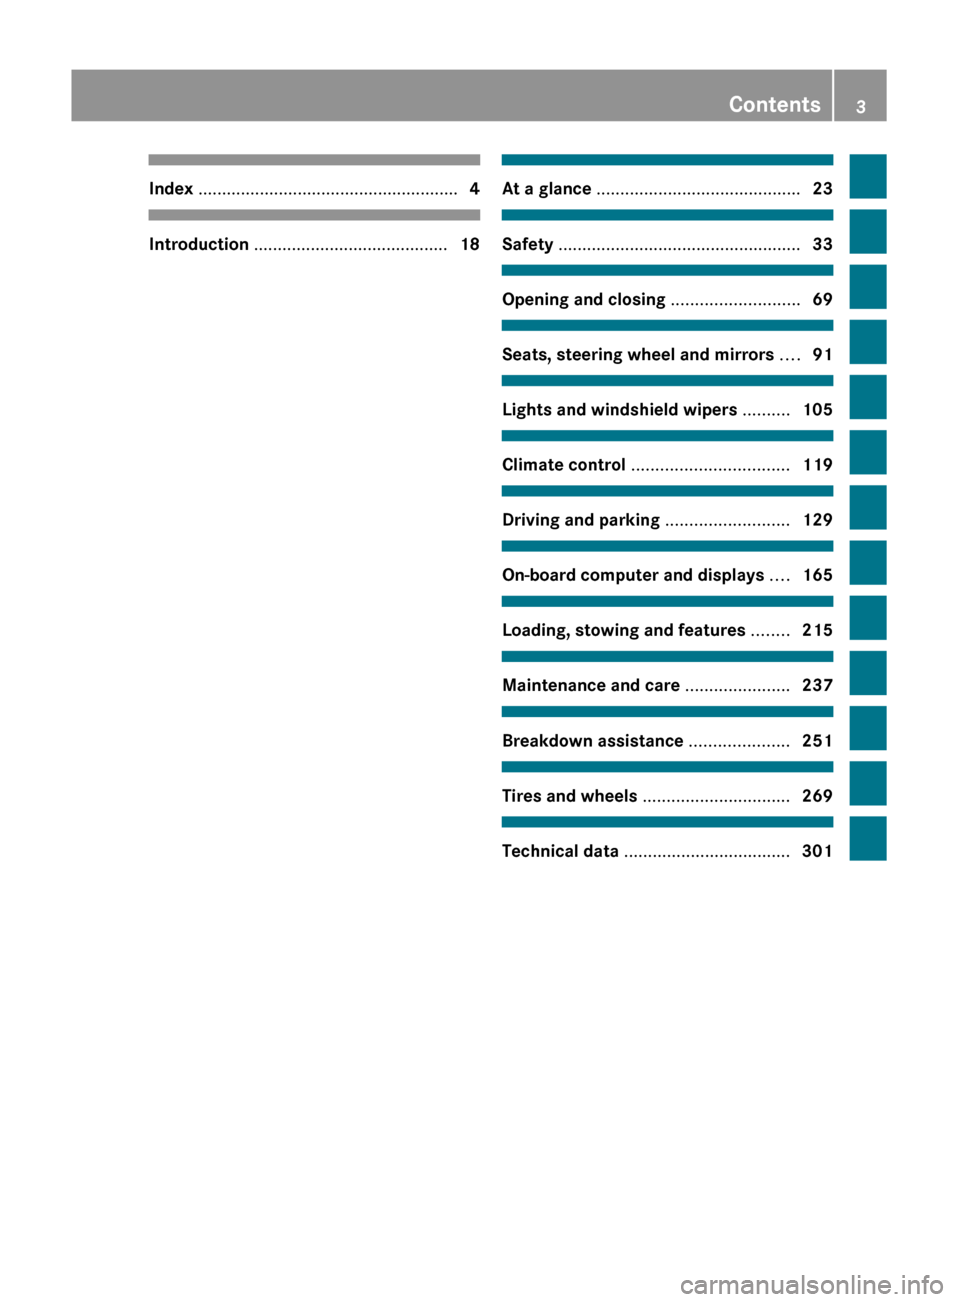
Index ....................................................... 4Introduction ......................................... 18At a glance ........................................... 23Safety ................................................... 33Opening and closing ...........................69Seats, steering wheel and mirrors ....91Lights and windshield wipers ..........105Climate control ................................. 119Driving and parking ..........................129On-board computer and displays ....165Loading, stowing and features ........215Maintenance and care ......................237Breakdown assistance .....................251Tires and wheels ............................... 269Technical data ................................... 301
Contents3BA 204 USA, CA Edition A 2011; 1; 5, en-UShereepeVersion: 3.0.3.62010-05-20T09:17:30+02:00 - Seite 3
Page 7 of 320
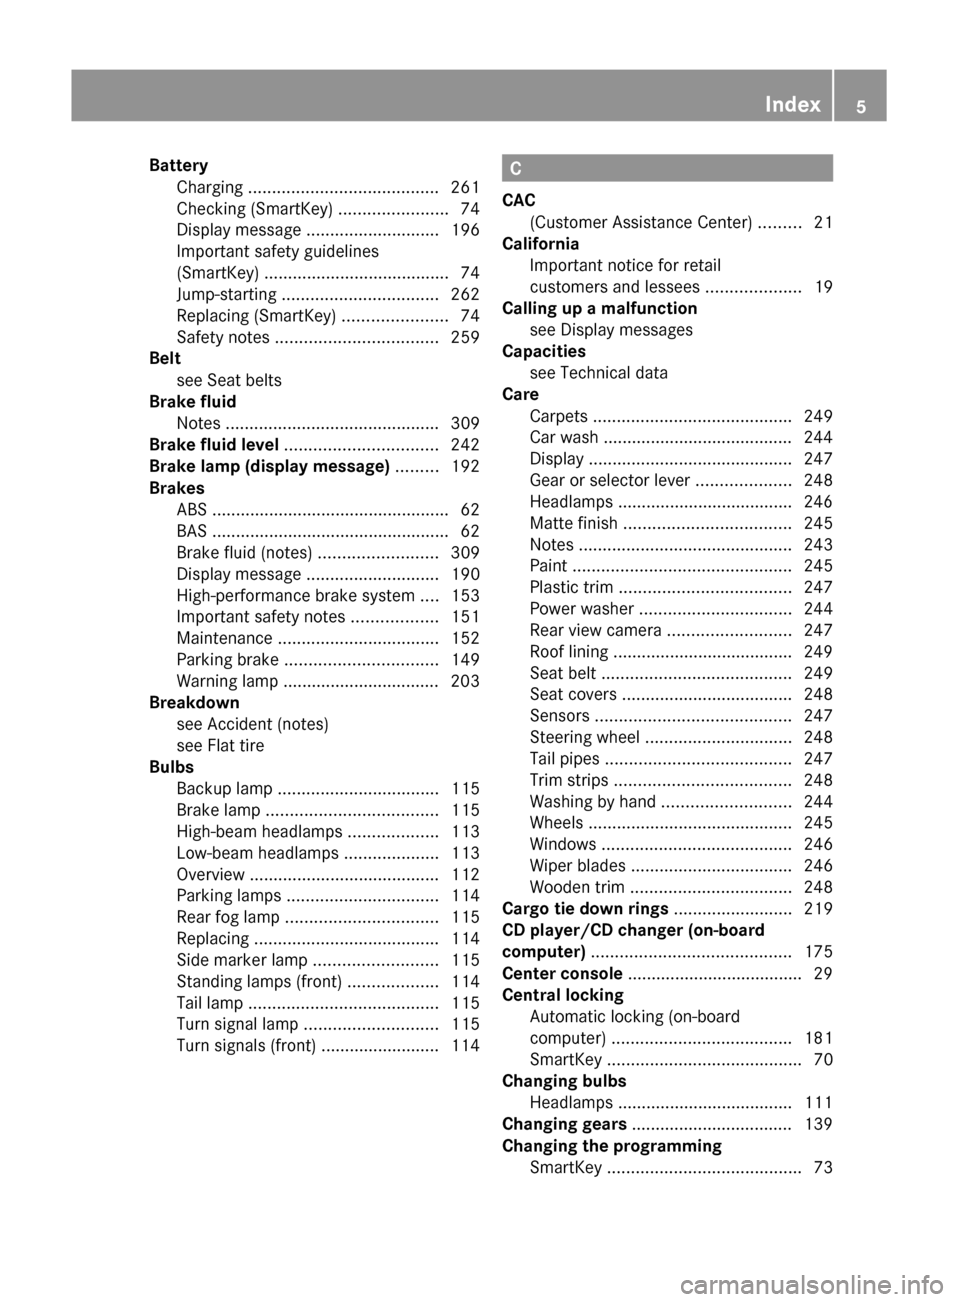
BatteryCharging ........................................ 261
Checking (SmartKey) .......................74
Display message ............................ 196
Important safety guidelines
(SmartKey) ....................................... 74
Jump-starting ................................. 262
Replacing (SmartKey) ......................74
Safety notes .................................. 259
Belt
see Seat belts
Brake fluid
Notes ............................................. 309
Brake fluid level ................................ 242
Brake lamp (display message) ......... 192
Brakes ABS .................................................. 62
BAS .................................................. 62
Brake fluid (notes) .........................309
Display message ............................ 190
High-performance brake system ....153
Important safety notes ..................151
Maintenance .................................. 152
Parking brake ................................ 149
Warning lamp ................................. 203
Breakdown
see Accident (notes)
see Flat tire
Bulbs
Backup lamp .................................. 115
Brake lamp .................................... 115
High-beam headlamps ...................113
Low-beam headlamps ....................113
Overview ........................................ 112
Parking lamps ................................ 114
Rear fog lamp ................................ 115
Replacing ....................................... 114
Side marker lamp .......................... 115
Standing lamps (front) ...................114
Tail lamp ........................................ 115
Turn signal lamp ............................ 115
Turn signals (front) ......................... 114C
CAC (Customer Assistance Center) .........21
California
Important notice for retail
customers and lessees ....................19
Calling up a malfunction
see Display messages
Capacities
see Technical data
Care
Carpets .......................................... 249
Car wash ........................................ 244
Display ........................................... 247
Gear or selector lever ....................248
Headlamps ..................................... 246
Matte finish ................................... 245
Notes ............................................. 243
Paint .............................................. 245
Plastic trim .................................... 247
Power washer ................................ 244
Rear view camera .......................... 247
Roof lining ...................................... 249
Seat belt ........................................ 249
Seat covers .................................... 248
Sensors ......................................... 247
Steering wheel ............................... 248
Tail pipes ....................................... 247
Trim strips ..................................... 248
Washing by hand ........................... 244
Wheels ........................................... 245
Windows ........................................ 246
Wiper blades .................................. 246
Wooden trim .................................. 248
Cargo tie down rings ......................... 219
CD player/CD changer (on-board
computer) .......................................... 175
Center console ..................................... 29
Central locking Automatic locking (on-board
computer) ...................................... 181
SmartKey ......................................... 70
Changing bulbs
Headlamps ..................................... 111
Changing gears .................................. 139
Changing the programming SmartKey ......................................... 73Index5BA 204 USA, CA Edition A 2011; 1; 5, en-UShereepeVersion: 3.0.3.62010-05-20T09:17:30+02:00 - Seite 5
Page 13 of 320
Multifunction steering wheelOperating the on-board computer . 167
Overview .......................................... 28
N
Navigation On-board computer .......................174
see separate operating instructions
NECK-PRO head restraints (except
AMG vehicles) Operation ......................................... 49
Resetting triggered ..........................50
Notes on breaking-in a new
vehicle ................................................ 130
O
Occupant Classification System
(OCS) Faults ............................................... 45
Operation ......................................... 41
System self-test ............................... 44
Occupant safety
Children in the vehicle .....................55
System overview .............................. 34
Octane number (fuel) ........................ 307
Odometer ........................................... 170
Off-road 4MATIC .......................................... 159
Oil
see Engine oil
On-board computer
AMG menu ..................................... 171
Assistance menu ........................... 178
Audio menu ................................... 175
Convenience submenu ..................181
Display messages ..........................183
Factory settings ............................. 182
Important safety notes ..................166
Instrument cluster submenu ..........178
Lighting submenu .......................... 180
Message memory .......................... 183
Navigation menu ............................ 174
Operating video DVD .....................176
Operation ....................................... 167
Overview of menus ........................169
Service menu ................................. 178
Settings menu ............................... 178
Standard display submenu ............170
Telephone menu ............................ 176
Time/Date submenu .....................179
Trip menu ...................................... 170
Vehicle submenu ........................... 181
Opening and closing the side trim
panels ................................................. 114
Operating system see On-board computer
Outside temperature
Display ........................................... 167
Overhead control panel
Overview .......................................... 30
Override feature
Rear side windows ...........................60
P
Paint code number ............................ 303
Paintwork (cleaning instructions) ... 245
Panic alarm .......................................... 61
Panorama roof with power tilt/
sliding panel Opening/closing .............................. 89
Resetting ......................................... 90
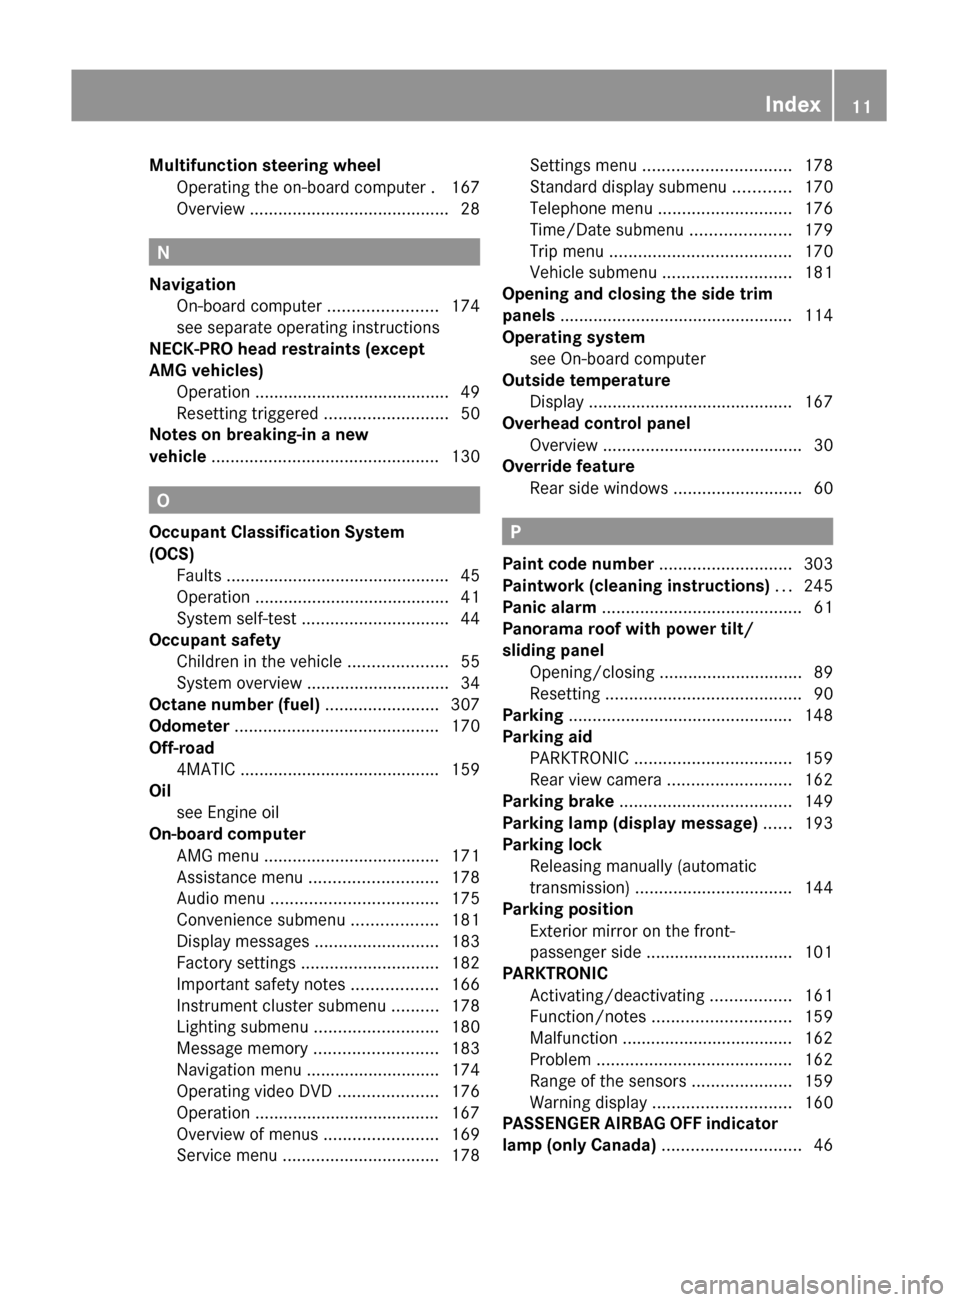
Parking ............................................... 148
Parking aid PARKTRONIC ................................. 159
Rear view camera .......................... 162
Parking brake .................................... 149
Parking lamp (display message) ...... 193
Parking lock Releasing manually (automatic
transmission) ................................. 144
Parking position
Exterior mirror on the front-
passenger side ............................... 101
PARKTRONIC
Activating/deactivating .................161
Function/notes ............................. 159
Malfunction .................................... 162
Problem ......................................... 162
Range of the sensors .....................159
Warning display ............................. 160
PASSENGER AIRBAG OFF indicator
lamp (only Canada) ............................. 46
Index11BA 204 USA, CA Edition A 2011; 1; 5, en-UShereepeVersion: 3.0.3.62010-05-20T09:17:30+02:00 - Seite 11
Page 114 of 320
Mercedes-Benz recommends that you use an
authorized Mercedes-Benz Center for this
purpose. In particular, work relevant to safety
or on safety-related systems must be carried
out at a qualified specialist workshop.
Bulbs and lamps are an important aspect of
vehicle safety. You must therefore make sure
that these function correctly at all times.
Have the headlamp setting checked regularly.
Other bulbs
GWarning!
Bulbs and lamps can be very hot. You should
therefore allow them to cool down before you
change them. Otherwise, you could be burned
if you touch them.
Keep bulbs out of the reach of children.
Otherwise, they could damage the bulbs, for
example, and injure themselves.
Never use a bulb which has been dropped.
Such a bulb may break or even explode and
injure you.
Halogen bulbs are pressurized and can
explode when you change them, particularly
if they are very hot. You should therefore wear
eye protection and gloves when you are
changing them.
There are bulbs other than the Xenon bulbs
that you cannot replace. Replace only the
bulbs listed (Y page 112). Have the bulbs that
you cannot replace yourself changed at a
qualified specialist workshop.
Mercedes-Benz recommends that you use an
authorized Mercedes-Benz Center for this
purpose. In particular, work relevant to safety
or on safety-related systems must be carried
out at a qualified specialist workshop.
If you require assistance changing bulbs,
consult a qualified specialist workshop.
Do not touch the glass tube of new bulbs with
your bare hands. Even minor contamination
can burn into the glass surface and reduce
the service life of the bulbs. Always use a lint-
free cloth or only touch the base of the bulb
when installing.
Only use bulbs of the correct type.
If the new bulb still does not light up, consult
a qualified specialist workshop.
Bulbs and lamps are an important aspect of
vehicle safety. You must therefore make sure
that these function correctly at all times.
Have the headlamp setting checked regularly.
Overview: changing bulbs/bulb types
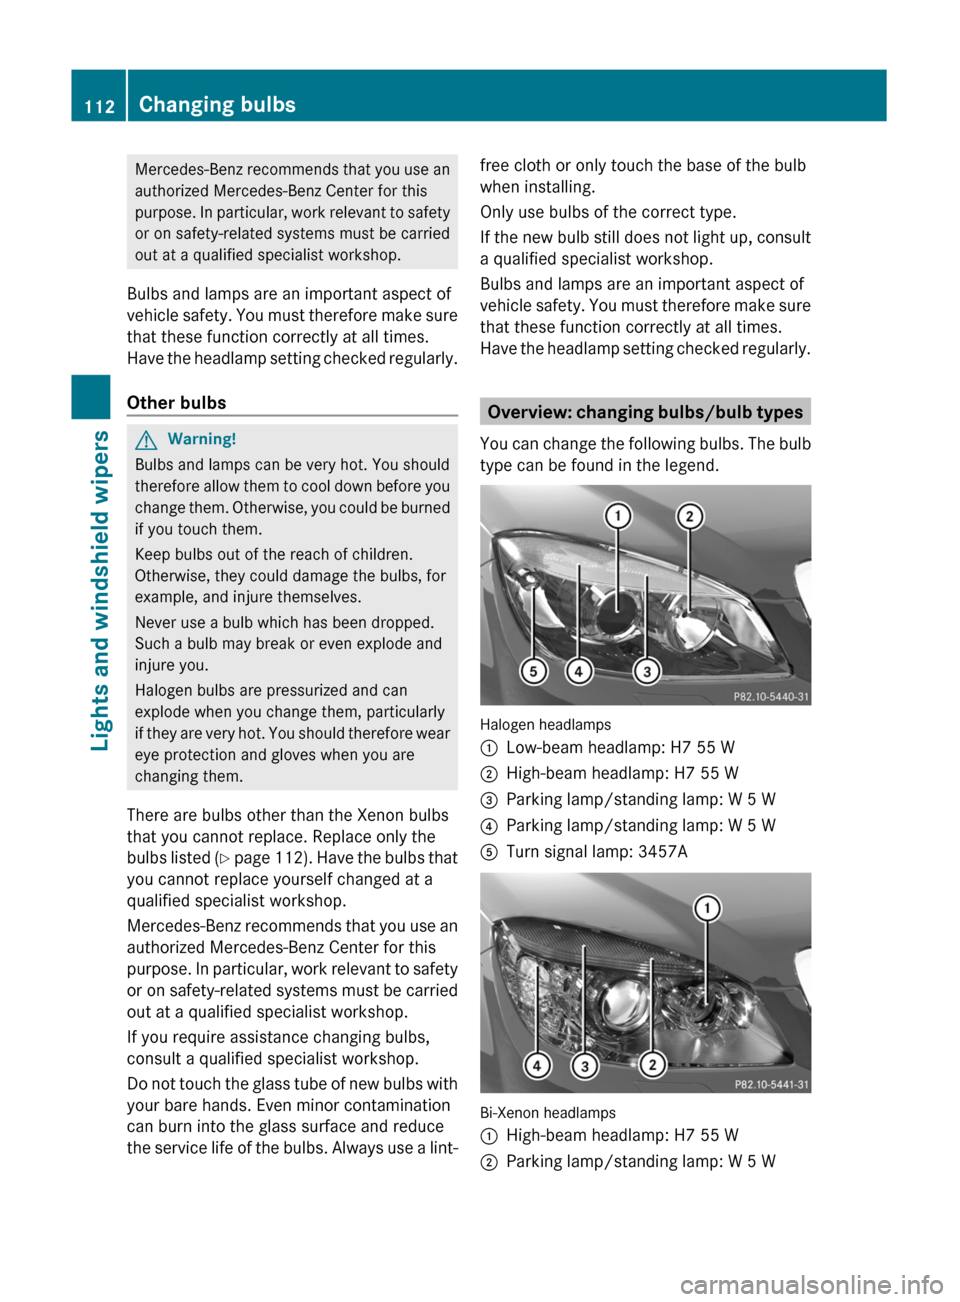
You can change the following bulbs. The bulb
type can be found in the legend.
Halogen headlamps
:Low-beam headlamp: H7 55 W;High-beam headlamp: H7 55 W=Parking lamp/standing lamp: W 5 W?Parking lamp/standing lamp: W 5 WATurn signal lamp: 3457A
Bi-Xenon headlamps
:High-beam headlamp: H7 55 W;Parking lamp/standing lamp: W 5 W112Changing bulbsLights and windshield wipers
BA 204 USA, CA Edition A 2011; 1; 5, en-UShereepeVersion: 3.0.3.62010-05-20T09:17:30+02:00 - Seite 112
Page 131 of 320
Vehicle equipment ............................130
Notes on breaking-in a new vehicle 130
Driving ............................................... 130
Manual transmission ........................137
Automatic transmission ...................138
Refueling ............................................ 145
Parking ............................................... 148
Driving tips ........................................ 150
Driving systems ................................ 156129Driving and parkingBA 204 USA, CA Edition A 2011; 1; 5, en-UShereepeVersion: 3.0.3.62010-05-20T09:17:30+02:00 - Seite 129
Page 132 of 320
Vehicle equipment
i This manual describes all the standard
and optional equipment of your vehicle
which was available at the time of
purchase. Country-specific differences are
possible. Bear in mind that your vehicle
may not feature all functions described
here. This also refers to safety-related
systems and functions.
Notes on breaking-in a new vehicle
The first 1000 miles (1500 km)
The more you look after the engine when it is
new, the happier you will be with its
performance in the future.
R Drive at varying vehicle speeds and engine
speeds for the first 1000 miles (1500 km)
for this reason.
R Avoid overstraining the vehicle during this
period, e.g. driving at full throttle.
R Change gear in good time, at the latest
when the tachometer needle is 2
/ 3 of the
way to the red area in the tachometer
display.
Vehicles with automatic transmission:
R Ideally, drive program C should be selected
for driving the first 1000 miles (1500 km).
R Do not manually shift to a lower gear to
brake the vehicle.
R If possible, do not depress the accelerator
pedal past the point of resistance
(kickdown).
R Only select shift ranges 3, 2 or 1 when
driving slowly, e.g. in mountainous terrain.
After 1000 miles (1500 km) you may
gradually bring the vehicle up to full road and
engine speeds.
Additional breaking-in notes for AMG
vehicles:
R For the first 1000 miles (1500 km), do not
exceed a speed of 85 mph (140 km/h).
R Only allow the engine to briefly reach a
maximum engine speed of 4500 rpm.
R Shift gears in good time.
i Also observe these breaking-in notes
when the vehicle's engine or axle gear have
been replaced.
i Always observe the respective limit
speeds.
AMG vehicles with rear axle locking
differential
Your vehicle is equipped with a self-locking
differential on the rear axle. Change the oil
after a breaking-in period of
2000 miles(3000 km) to improve protection
of the rear axle differential. This oil change
extends the service life of the differential.
Have the oil change carried out at a qualified
specialist workshop. Mercedes-Benz
recommends that you use an authorized
Mercedes-Benz Center for this purpose.
Driving
Important safety notes
GWarning
Make sure absolutely no objects are
obstructing the pedals' range of movement.
Keep the driver's footwell clear of all
obstacles. If there are any floormats or
carpets in the footwell, make sure the pedals
still have sufficient clearance.
During sudden driving or braking maneuvers
the objects could get caught between the
pedals. You could then no longer brake or
accelerate. This could lead to accidents and
injury.
130DrivingDriving and parking
BA 204 USA, CA Edition A 2011; 1; 5, en-UShereepeVersion: 3.0.3.62010-05-20T09:17:30+02:00 - Seite 130
Page 155 of 320
GWarning
If other than recommended brake pads are
installed, or other than recommended brake
fluid is used, the braking properties of the
vehicle can be degraded to an extent that safe
braking is substantially impaired. This could
result in an accident.
! Vehicles with 4MATIC: a function or
performance test may only be carried out
on a two-axle dynamometer. If you are
planning to have the vehicle tested on such
a dynamometer, contact an authorized
Mercedes-Benz Center to obtain further
information first. Otherwise, the drive train
or the brake system may suffer damage.
! Vehicles with 4MATIC: as the ESP®
system operates automatically, the engine
and the ignition must be switched off
(SmartKey in position 0 or 1 in the ignition
lock or Start/Stop button in position 0 or
1 ) while the parking brake is being tested
on a brake dynamometer.
Braking maneuvers triggered automatically
by ESP ®
may seriously damage the brake
system.
! Vehicles with 4MATIC: as the ESP®
system operates automatically, the engine
and the ignition system must be switched
off (SmartKey in position 0 or 1 in the
ignition lock or Start/Stop button in
position 0 or 1) when:
R testing the parking brake on a brake
dynamometer.
R you intend to have the vehicle towed with
the front axle raised.
Braking maneuvers triggered automatically
by ESP ®
may seriously damage the brake
system.
If your brake system is only subjected to
moderate loads, you should regularly test
your brake system's function by forcefully
depressing the brake pedal when driving at
high speed. This will give the brake pads
better grip.
GWarning
Make sure that you do not endanger other
road users when you apply the brakes.
You can find a description of Brake Assist
(BAS) on ( Y page 62).
High-performance brake system for
AMG vehicles
The high-performance brake system is only
installed on the C 63 AMG.
GWarning
New vehicle brake pads and discs, and
replacement brake pads and discs may take
several hundred miles of driving until they
provide optimum braking efficiency. Until that
time, you may need to use increased brake
pedal pressure while braking. Please be aware
of this and adjust your driving and braking
accordingly during this break-in period.
Excessive high-demand braking will cause
correspondingly high brake wear. Please be
attentive to the brake warning lamp in the
instrument cluster and brake condition
messages in the multifunction display.
Especially for high performance driving, it is
important to maintain and have the brake
system checked regularly.
The high-performance brake system is
designed for heavy loads. This may lead to
noise when braking. This will depend on:
R speed
R braking force
R environmental conditions, such as
temperature and humidity
The wear of individual components of the
brake system, such as the brake pads/linings
or brake discs, depends on the individual
driving style and operating conditions.
Driving tips153Driving and parkingBA 204 USA, CA Edition A 2011; 1; 5, en-UShereepeVersion: 3.0.3.62010-05-20T09:17:30+02:00 - Seite 153Z
Page 212 of 320
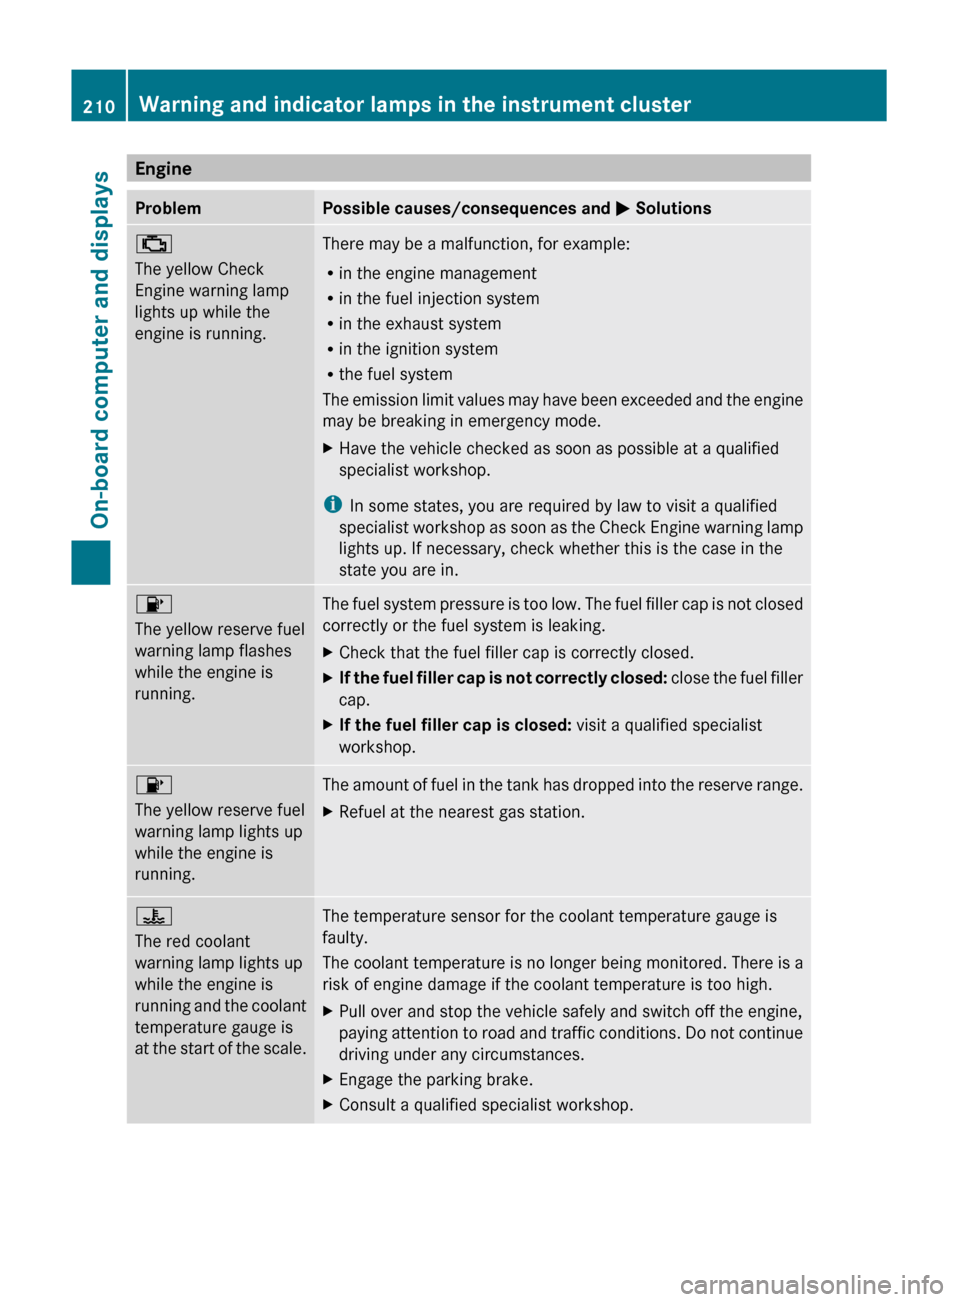
EngineProblemPossible causes/consequences and M Solutions;
The yellow Check
Engine warning lamp
lights up while the
engine is running.There may be a malfunction, for example:
R in the engine management
R in the fuel injection system
R in the exhaust system
R in the ignition system
R the fuel system
The emission limit values may have been exceeded and the engine
may be breaking in emergency mode.XHave the vehicle checked as soon as possible at a qualified
specialist workshop.
i In some states, you are required by law to visit a qualified
specialist workshop as soon as the Check Engine warning lamp
lights up. If necessary, check whether this is the case in the
state you are in.
8
The yellow reserve fuel
warning lamp flashes
while the engine is
running.The fuel system pressure is too low. The fuel filler cap is not closed
correctly or the fuel system is leaking.XCheck that the fuel filler cap is correctly closed.XIf the fuel filler cap is not correctly closed: close the fuel filler
cap.XIf the fuel filler cap is closed: visit a qualified specialist
workshop.8
The yellow reserve fuel
warning lamp lights up
while the engine is
running. The amount of fuel in the tank has dropped into the reserve range.XRefuel at the nearest gas station.?
The red coolant
warning lamp lights up
while the engine is
running and the coolant
temperature gauge is
at the start of the scale.The temperature sensor for the coolant temperature gauge is
faulty.
The coolant temperature is no longer being monitored. There is a
risk of engine damage if the coolant temperature is too high.XPull over and stop the vehicle safely and switch off the engine,
paying attention to road and traffic conditions. Do not continue
driving under any circumstances.XEngage the parking brake.XConsult a qualified specialist workshop.210Warning and indicator lamps in the instrument clusterOn-board computer and displays
BA 204 USA, CA Edition A 2011; 1; 5, en-UShereepeVersion: 3.0.3.62010-05-20T09:17:30+02:00 - Seite 210
Page 256 of 320
a qualified specialist workshop, e.g. an
authorized Mercedes-Benz Center.
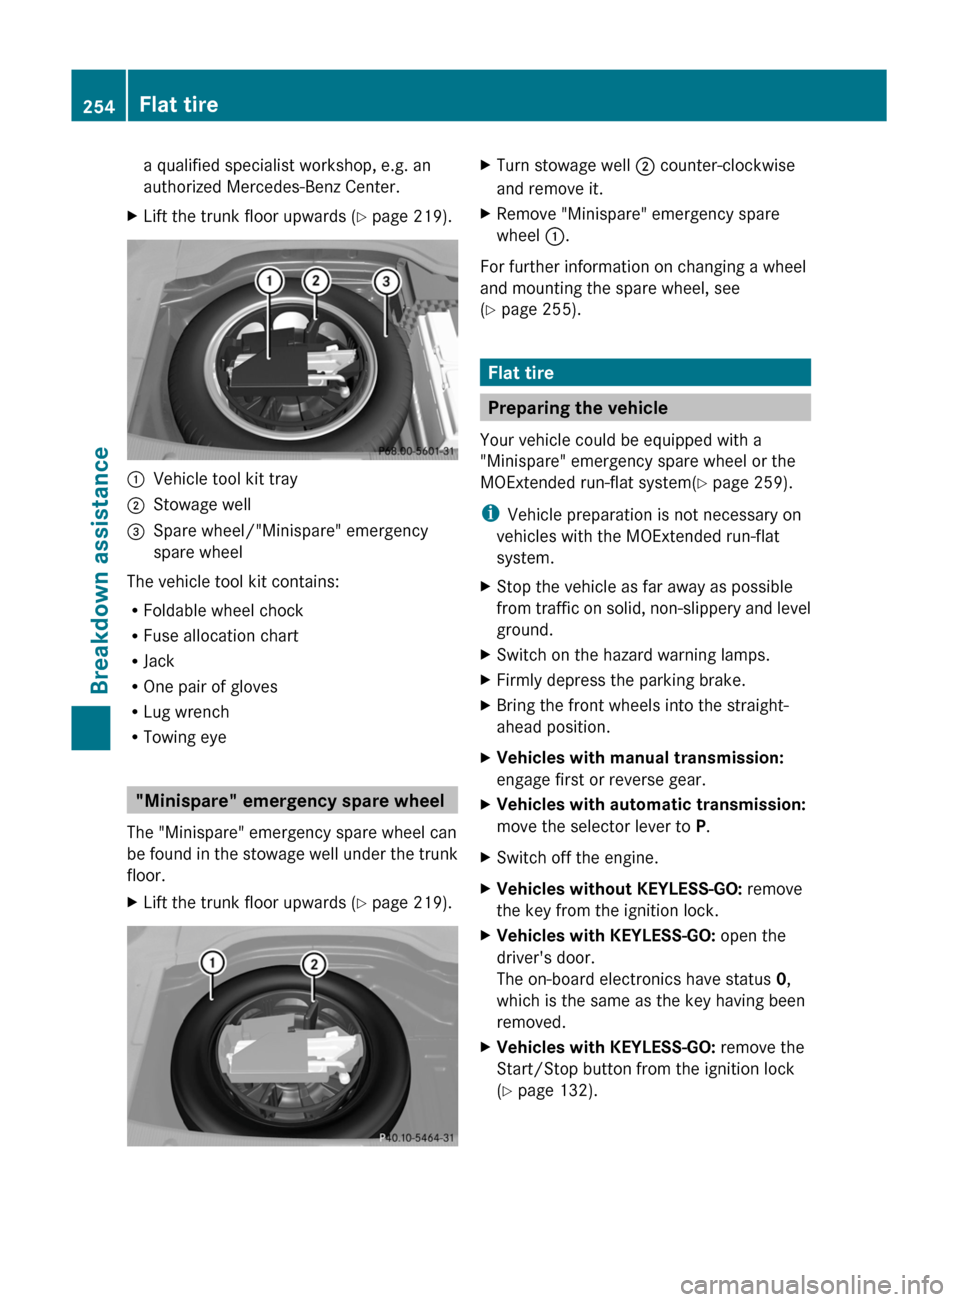
XLift the trunk floor upwards (Y page 219).:Vehicle tool kit tray;Stowage well=Spare wheel/"Minispare" emergency
spare wheel
The vehicle tool kit contains:
RFoldable wheel chock
RFuse allocation chart
RJack
ROne pair of gloves
RLug wrench
RTowing eye
"Minispare" emergency spare wheel
The "Minispare" emergency spare wheel can
be found in the stowage well under the trunk
floor.
XLift the trunk floor upwards (Y page 219).XTurn stowage well ; counter-clockwise
and remove it.
XRemove "Minispare" emergency spare
wheel :.
For further information on changing a wheel
and mounting the spare wheel, see
(Y page 255).
Flat tire
Preparing the vehicle
Your vehicle could be equipped with a
"Minispare" emergency spare wheel or the
MOExtended run-flat system(Y page 259).
iVehicle preparation is not necessary on
vehicles with the MOExtended run-flat
system.
XStop the vehicle as far away as possible
from traffic on solid, non-slippery and level
ground.
XSwitch on the hazard warning lamps.XFirmly depress the parking brake.XBring the front wheels into the straight-
ahead position.
XVehicles with manual transmission:
engage first or reverse gear.
XVehicles with automatic transmission:
move the selector lever to P.
XSwitch off the engine.XVehicles without KEYLESS-GO: remove
the key from the ignition lock.
XVehicles with KEYLESS-GO: open the
driver's door.
The on-board electronics have status 0,
which is the same as the key having been
removed.
XVehicles with KEYLESS-GO: remove the
Start/Stop button from the ignition lock
(Y page 132).
254Flat tireBreakdown assistance
BA 204 USA, CA Edition A 2011; 1; 5, en-UShereepeVersion: 3.0.3.62010-05-20T09:17:30+02:00 - Seite 254
Page 258 of 320
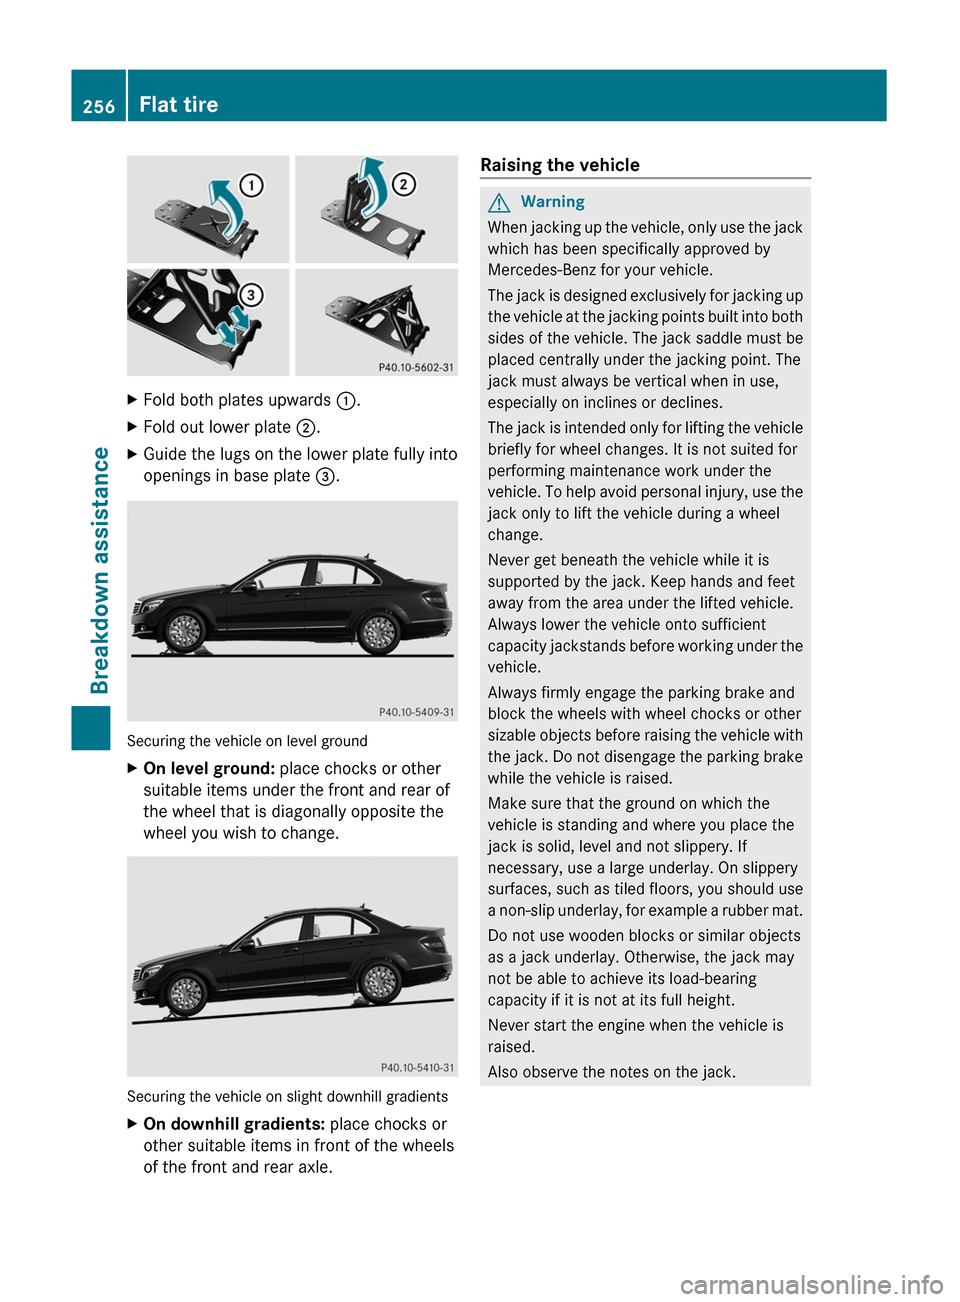
XFold both plates upwards :.XFold out lower plate ;.XGuide the lugs on the lower plate fully into
openings in base plate =.
Securing the vehicle on level ground
XOn level ground: place chocks or other
suitable items under the front and rear of
the wheel that is diagonally opposite the
wheel you wish to change.
Securing the vehicle on slight downhill gradients
XOn downhill gradients: place chocks or
other suitable items in front of the wheels
of the front and rear axle.
Raising the vehicleGWarning
When jacking up the vehicle, only use the jack
which has been specifically approved by
Mercedes-Benz for your vehicle.
The jack is designed exclusively for jacking up
the vehicle at the jacking points built into both
sides of the vehicle. The jack saddle must be
placed centrally under the jacking point. The
jack must always be vertical when in use,
especially on inclines or declines.
The jack is intended only for lifting the vehicle
briefly for wheel changes. It is not suited for
performing maintenance work under the
vehicle. To help avoid personal injury, use the
jack only to lift the vehicle during a wheel
change.
Never get beneath the vehicle while it is
supported by the jack. Keep hands and feet
away from the area under the lifted vehicle.
Always lower the vehicle onto sufficient
capacity jackstands before working under the
vehicle.
Always firmly engage the parking brake and
block the wheels with wheel chocks or other
sizable objects before raising the vehicle with
the jack. Do not disengage the parking brake
while the vehicle is raised.
Make sure that the ground on which the
vehicle is standing and where you place the
jack is solid, level and not slippery. If
necessary, use a large underlay. On slippery
surfaces, such as tiled floors, you should use
a non-slip underlay, for example a rubber mat.
Do not use wooden blocks or similar objects
as a jack underlay. Otherwise, the jack may
not be able to achieve its load-bearing
capacity if it is not at its full height.
Never start the engine when the vehicle is
raised.
Also observe the notes on the jack.
256Flat tireBreakdown assistance
BA 204 USA, CA Edition A 2011; 1; 5, en-UShereepeVersion: 3.0.3.62010-05-20T09:17:30+02:00 - Seite 256