lock MERCEDES-BENZ C-Class 2014 W204 Comand Manual
[x] Cancel search | Manufacturer: MERCEDES-BENZ, Model Year: 2014, Model line: C-Class, Model: MERCEDES-BENZ C-Class 2014 W204Pages: 270, PDF Size: 5.76 MB
Page 102 of 270
Symbols used in real-time traffic reports
Unimpeded traffic flow
Green line with arrows
The arrows can be seen on a map scale of 200 m (0.25 mi) and smaller.
Heavy/slow-moving traffic
Together with a yellow line
The symbol marks average speeds of 25 – 45 mph (40 – 72 km/h).
Caution, traffic incident
Traffic jam
Together with a red line and arrows
The symbol marks average speeds of 5 - 20 mph (8 - 32 km/h).
The arrows can be seen on a map scale of 200 m (0.25 mi) and smaller.
Warning message
Together with a red/white striped line and arrows
The arrows can be seen on a map scale of 200 m (0.25 mi) and smaller.
Blocked route section
Possibly in combination with X X X X
Displaying real-time traffic reports
Starting a search for traffic reports X
To switch to navigation mode: press the
00BE button.
X To show the menu: press0098the COMAND
controller.
X Select Traffic
Traffic by turning 00790052007Athe
COMAND controller and press 0098to con-
firm.
A menu appears.
If No Traffic Messages No Traffic Messages appears, this
means either:
R no traffic reports have been received yet,
or
R no traffic reports are available.
X To end the search: selectCancel Cancel and
press 0098to confirm.
X To close the report window: selectOK
OK
and press 0098to confirm. Traffic symbol information
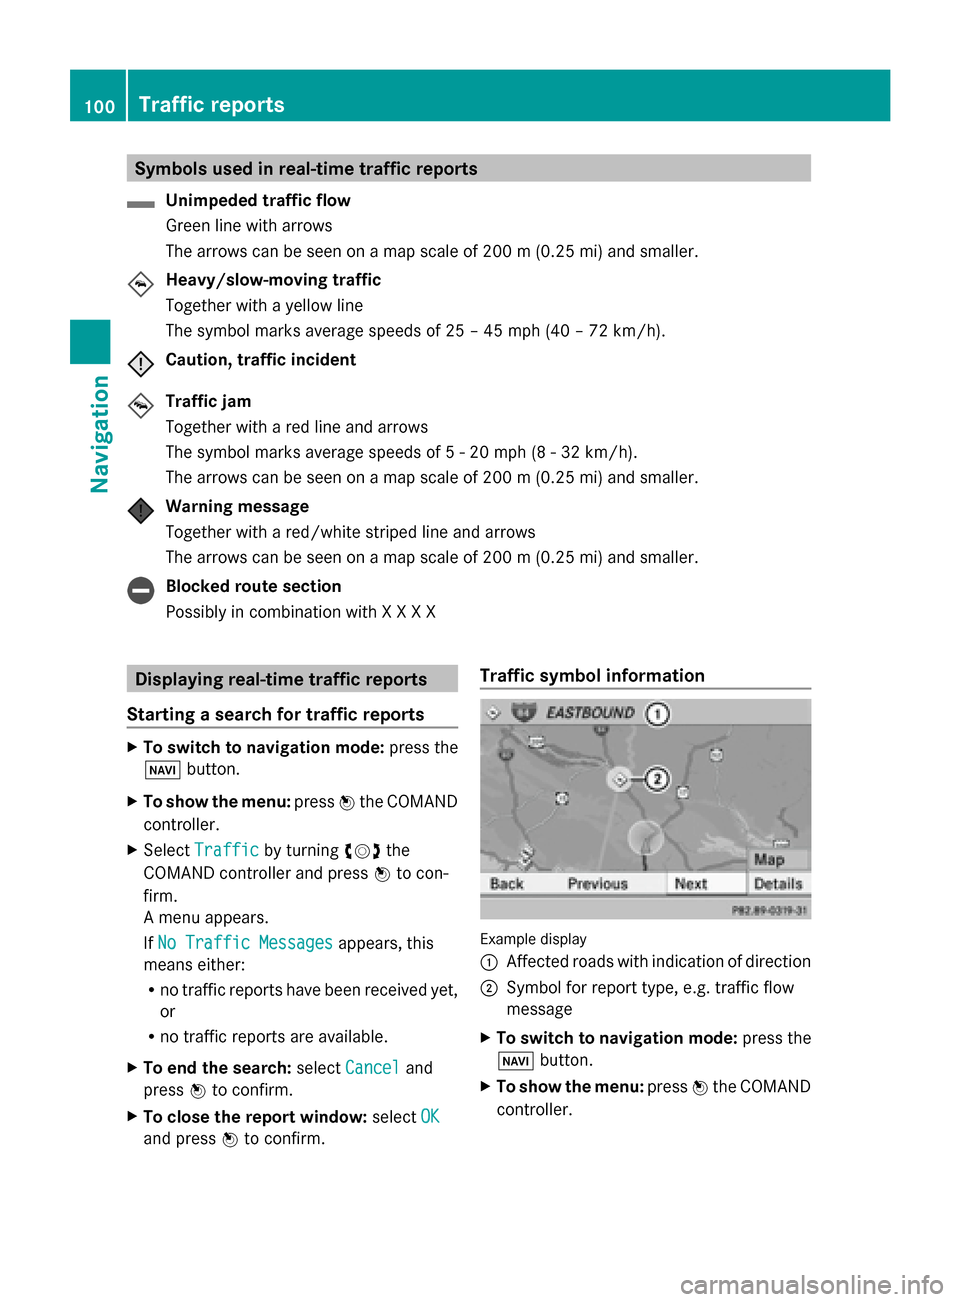
Example display
0043
Affected roads with indication of direction
0044 Symbol for report type, e.g. traffic flow
message
X To switch to navigation mode: press the
00BE button.
X To show the menu: press0098the COMAND
controller. 100
Traffic reportsNavigation
Page 116 of 270
X
To show the menu: press0098the COMAND
controller.
X Select Navi
Navi in the main function bar by
sliding 00970052and turning 00790052007Athe COMAND
controller and press 0098to confirm.
X Select Map
Map Settings
Settings and press0098to con-
firm.
The map settings menu appears.
X Select Next Intersecting Street Next Intersecting Street and
press 0098to confirm.
Depending on the previous status, switch
the option on 0073or off 0053. Traffic information on the map
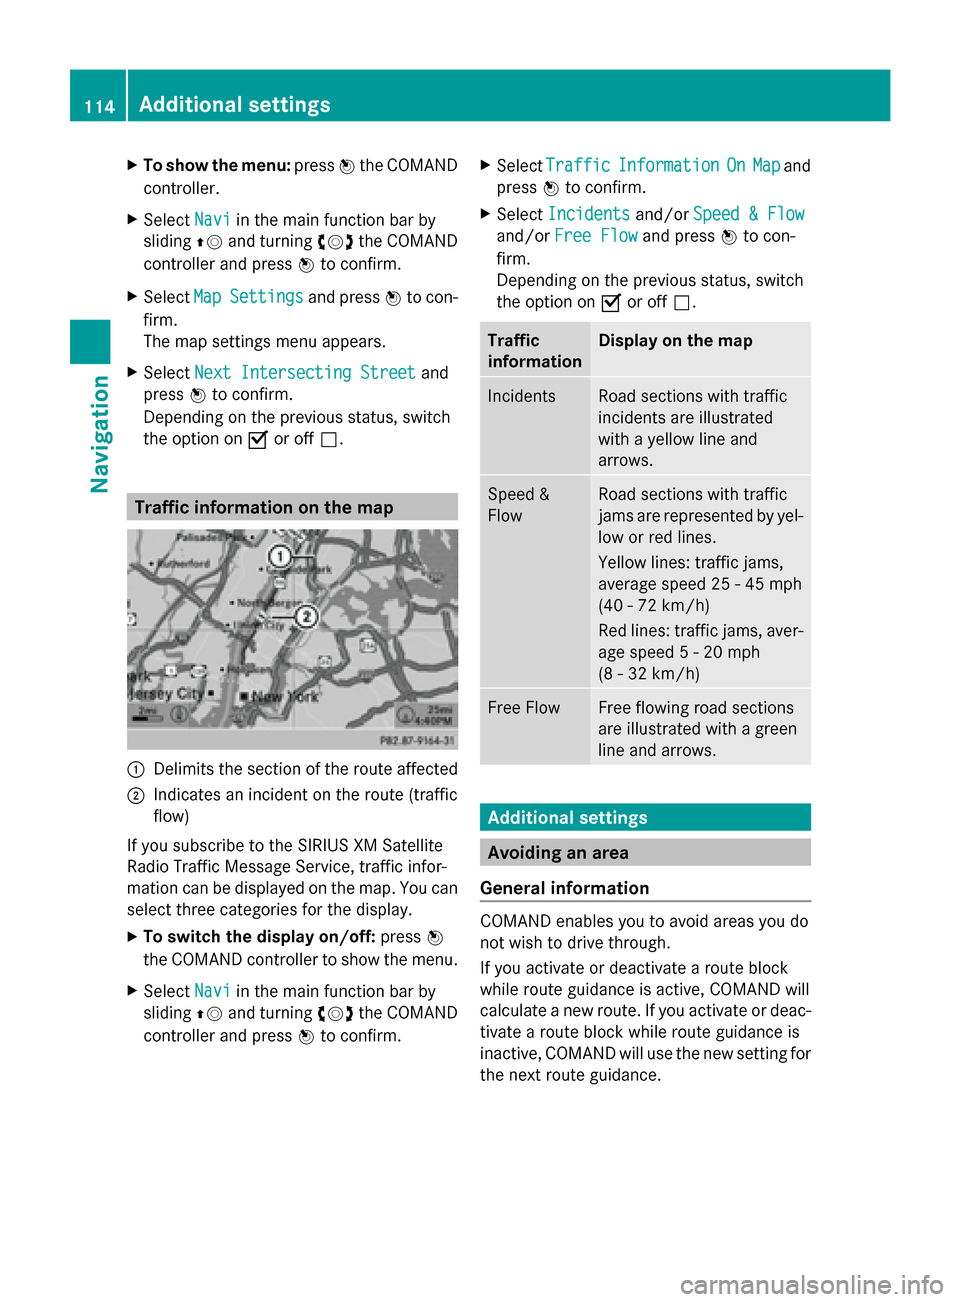
0043
Delimits the section of the route affected
0044 Indicates an incident on the route (traffic
flow)
If you subscribe to the SIRIUS XM Satellite
Radio Traffic Message Service, traffic infor-
mation can be displayed on the map. You can
select three categories for the display.
X To switch the display on/off: press0098
the COMAND controller to show the menu.
X Select Navi
Navi in the main function bar by
sliding 00970052and turning 00790052007Athe COMAND
controller and press 0098to confirm. X
Select Traffic
Traffic Information Information On
OnMap
Map and
press 0098to confirm.
X Select Incidents
Incidents and/orSpeed & Flow
Speed & Flow
and/or Free Flow
Free Flow and press0098to con-
firm.
Depending on the previous status, switch
the option on 0073or off 0053. Traffic
information Display on the map
Incidents Road sections with traffic
incidents are illustrated
with a yellow line and
arrows.
Speed &
Flow Road sections with traffic
jams are represented by yel-
low or red lines.
Yellow lines: traffic jams,
average speed 25 - 45 mph
(40 - 72 km/h)
Red lines: traffic jams, aver-
age speed 5 - 20 mph
(8 - 32 km/h)
Free Flow Free flowing road sections
are illustrated with a green
line and arrows.
Additional settings
Avoiding an area
General information COMAND enables you to avoid areas you do
not wish to drive through.
If you activate or deactivate a route block
while route guidance is active, COMAND will
calculate a new route. If you activate or deac-
tivate a route block while route guidance is
inactive, COMAND will use the new setting for
the next route guidance. 114
Additional settingsNavigation
Page 117 of 270
The calculated route may include an area to
be avoided if:
R your destination is located in such an area.
R the route uses roads that lead through an
area to be avoided.
i Highways within blocked areas are always
taken into consideration in the route cal-
culation.
Defining an area for the first time X
To switch to navigation mode: press the
00BE button.
X To show the menu: press0098the COMAND
controller.
X Select Navi
Navi in the main function bar by
sliding 00970052and turning 00790052007Athe COMAND
controller and press 0098to confirm.
X Select Avoid Area Avoid Area and press0098to con-
firm.
If you have not previously blocked an area,
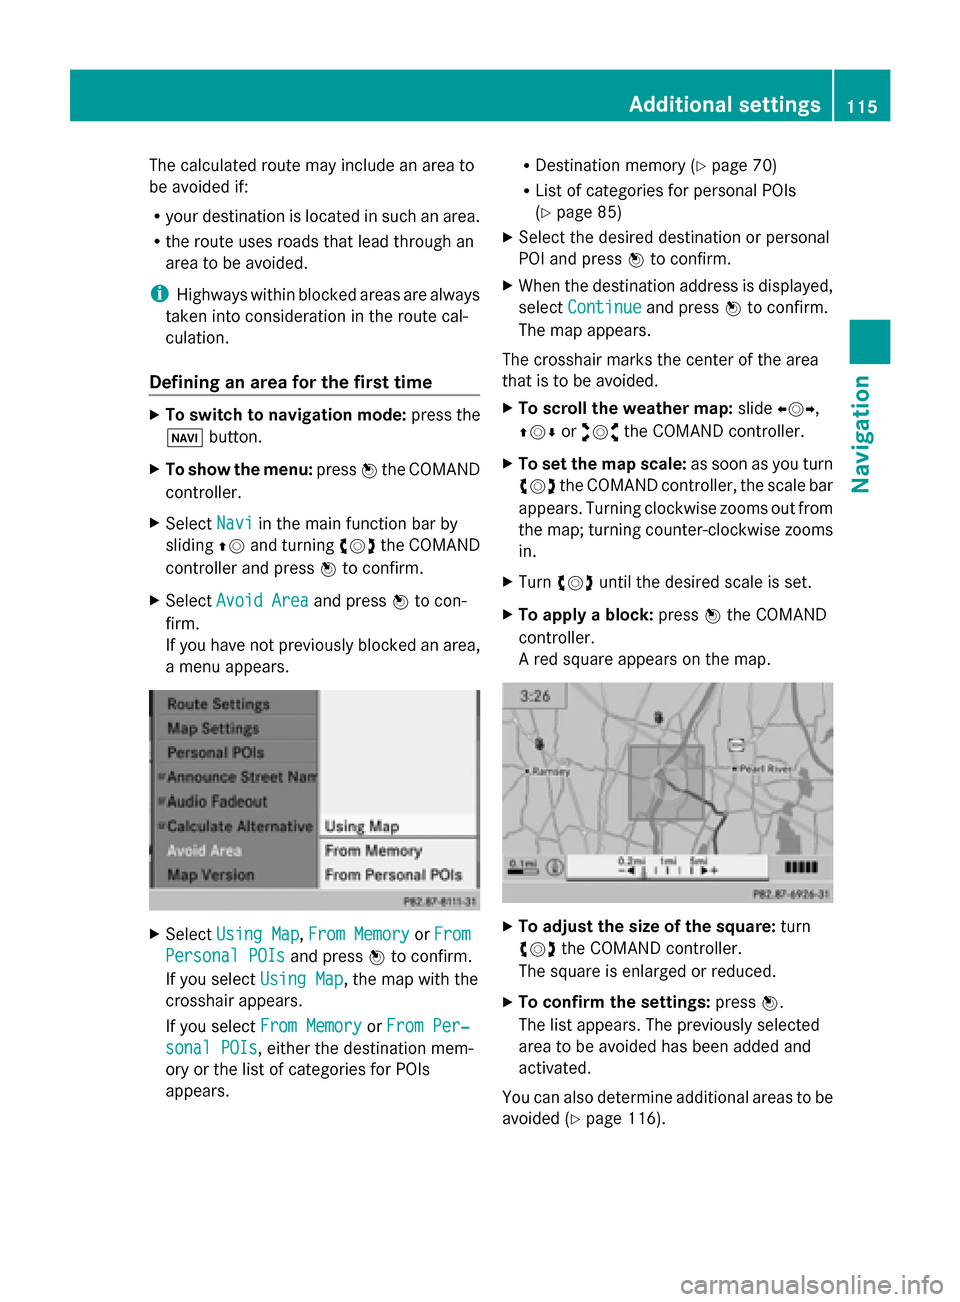
a menu appears. X
Select Using Map
Using Map ,From Memory From Memory orFrom
From
Personal POIs
Personal POIs and press0098to confirm.
If you select Using Map
Using Map, the map with the
crosshair appears.
If you select From Memory
From Memory orFrom Per‐ From Per‐
sonal POIs
sonal POIs, either the destination mem-
ory or the list of categories for POIs
appears. R
Destination memory (Y page 70)
R List of categories for personal POIs
(Y page 85)
X Select the desired destination or personal
POI and press 0098to confirm.
X When the destination address is displayed,
select Continue Continue and press0098to confirm.
The map appears.
The crosshair marks the center of the area
that is to be avoided.
X To scroll the weather map: slide009500520096,
009700520064 or009100520078 the COMAND controller.
X To set the map scale: as soon as you turn
00790052007A the COMAND controller, the scale bar
appears. Turning clockwise zooms out from
the map; turning counter-clockwise zooms
in.
X Turn 00790052007A until the desired scale is set.
X To apply a block: press0098the COMAND
controller.
A red square appears on the map. X
To adjust the size of the square: turn
00790052007A the COMAND controller.
The square is enlarged or reduced.
X To confirm the settings: press0098.
The list appears. The previously selected
area to be avoided has been added and
activated.
You can also determine additional areas to be
avoided (Y page 116). Additional settings
115Navigation Z
Page 177 of 270
Deleting favorites in the Favorites menu
X Select Delete
Delete by turning 00790052007Aor sliding
009700520064 the COMAND controller and press
0098 to confirm.
or
X Press the 0084button to the right of the
COMAND controller.
The favorite is deleted. Settings
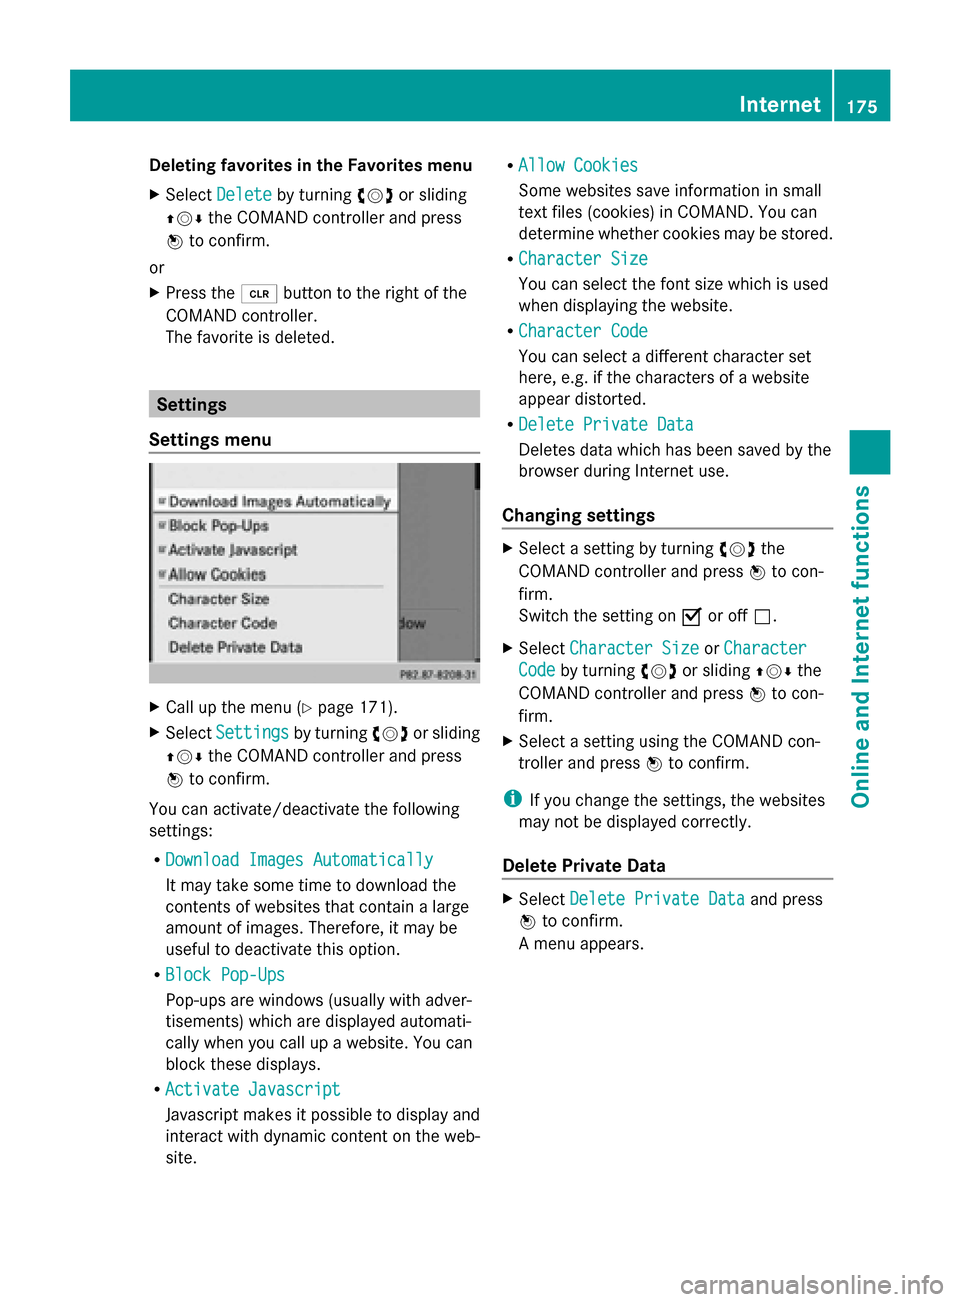
Settings menu X
Call up the menu ( Ypage 171).
X Select Settings Settings by turning00790052007Aor sliding
009700520064 the COMAND controller and press
0098 to confirm.
You can activate/deactivate the following
settings:
R Download Images Automatically
Download Images Automatically
It may take some time to download the
contents of websites that contain a large
amount of images. Therefore, it may be
useful to deactivate this option.
R Block Pop-Ups
Block Pop-Ups
Pop-ups are windows (usually with adver-
tisements) which are displayed automati-
cally when you call up a website. You can
block these displays.
R Activate Javascript Activate Javascript
Javascript makes it possible to display and
interact with dynamic content on the web-
site. R
Allow Cookies
Allow Cookies
Some websites save information in small
text files (cookies) in COMAND. You can
determine whether cookies may be stored.
R Character Size
Character Size
You can select the font size which is used
when displaying the website.
R Character Code Character Code
You can select a different character set
here, e.g. if the characters of a website
appear distorted.
R Delete Private Data Delete Private Data
Deletes data which has been saved by the
browser during Internet use.
Changing settings X
Select a setting by turning 00790052007Athe
COMAND controller and press 0098to con-
firm.
Switch the setting on 0073or off 0053.
X Select Character Size Character Size orCharacter
Character
Code
Code by turning 00790052007Aor sliding 009700520064the
COMAND controller and press 0098to con-
firm.
X Select a setting using the COMAND con-
troller and press 0098to confirm.
i If you change the settings, the websites
may not be displayed correctly.
Delete Private Data X
Select Delete Private Data Delete Private Data and press
0098 to confirm.
A menu appears. Internet
175Online and Internet functions
Page 185 of 270
i
SIRIUS XM Radio offers more than 130
radio stations in digital quality, for example
100% commercial-free music, sports, news
and entertainment.
SIRIUS XM Radio employs a fleet of high-
performance satellites to broadcast around
the clock in the contiguous USA and Can-
ada.
The satellite radio program is available for
a monthly fee. Details are available from
the SIRIUS XM Service Center and at
http://www.sirius.com (USA) or
http://www.siriuscanada.com (Can-
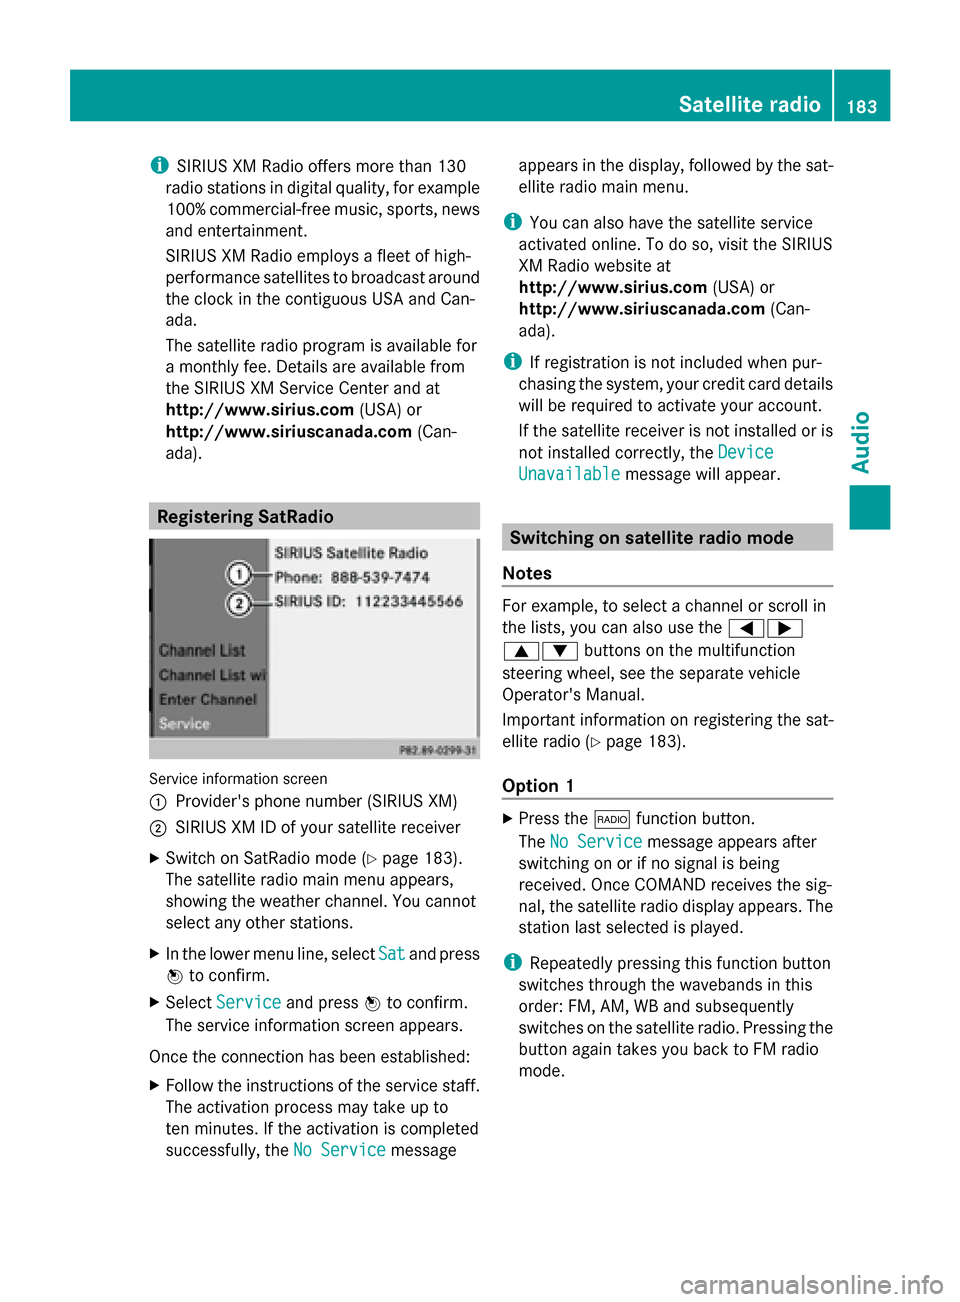
ada). Registering SatRadio
Service information screen
0043
Provider's phone number (SIRIUS XM)
0044 SIRIUS XM ID of your satellite receiver
X Switch on SatRadio mode (Y page 183).
The satellite radio main menu appears,
showing the weather channel. You cannot
select any other stations.
X In the lower menu line, select Sat
Sat and press
0098 to confirm.
X Select Service Service and press 0098to confirm.
The service information screen appears.
Once the connection has been established:
X Follow the instructions of the service staff.
The activation process may take up to
ten minutes. If the activation is completed
successfully, the No Service No Servicemessage appears in the display, followed by the sat-
ellite radio main menu.
i You can also have the satellite service
activated online. To do so, visit the SIRIUS
XM Radio website at
http://www.sirius.com (USA) or
http://www.siriuscanada.com (Can-
ada).
i If registration is not included when pur-
chasing the system, your credit card details
will be required to activate your account.
If the satellite receiver is not installed or is
not installed correctly, the Device Device
Unavailable
Unavailable message will appear. Switching on satellite radio mode
Notes For example, to select a channel or scroll in
the lists, you can also use the
00590065
00630064 buttons on the multifunction
steering wheel, see the separate vehicle
Operator's Manual.
Important information on registering the sat-
ellite radio (Y page 183).
Option 1 X
Press the 002Afunction button.
The No Service No Service message appears after
switching on or if no signal is being
received. Once COMAND receives the sig-
nal, the satellite radio display appears. The
station last selected is played.
i Repeatedly pressing this function button
switches through the wavebands in this
order: FM, AM, WB and subsequently
switches on the satellite radio. Pressing the
button again takes you back to FM radio
mode. Satellite radio
183Audio
Page 227 of 270

Bear in mind that at a speed of just 30 mph
(approximately 50 km/h), your vehicle is cov-
ering a distance of 44 feet (approximately
14 m) every second. Notes on discs
! Do not affix stickers or labels to the discs.
They could peel off and damage COMAND.
Stickers can cause the disc to bend, which
can result in read errors and disc recogni-
tion problems.
! COMAND is designed to play discs that
comply with the EN 60908 standard. There-
fore, you can only use discs with a maxi-
mum thickness of 1.3 mm.
If you insert thicker discs, e.g. those that
contain data on both sides (DVD on one
side and audio data on the other), they can-
not be ejected and can damage the device.
Only use round discs with a diameter of
12 cm. Do not use discs with a diameter of
8 cm, even with an adapter.
Playback problems may occur when playing
copied discs. There are a large variety of
discs, DVD authoring software, writing soft-
ware and writers available. This variety means
that there is no guarantee that the system will
be able to play discs that you have copied
yourself. DVD playback conditions
If video DVDs do not conform to the NTSC or
PAL TV standards, they may create picture,
sound or other problems during playback.
COMAND is capable of playing back video
DVDs produced according to the following
standards:
R Region code 1 or region code 0 (no region
code)
R PAL or NTSC standard
You will generally find the relevant details
either on the DVD itself or on the DVD case. i
If you insert a video DVD with a different
region code, you will see a message to this
effect.
i COMAND is set to region code 1 at the
factory. This setting can be changed at an
authorized Mercedes-Benz Center. This will
allow you to play video DVDs with a differ-
ent region code, provided that they are pro-
duced in accordance with the PAL or NTSC
standard. The region code can be changed
up to five times. Function restrictions
Depending on the DVD, it is possible that cer-
tain functions or actions will be temporarily
blocked or may not function at all. As soon as
you try to activate these functions or actions,
you will see the 0047symbol in the display. Inserting and removing DVDs
X Proceed as described in the "Inserting and
ejecting CDs and DVDs" section
(Y page 188). Switching to video DVD mode
Switching on automatically X
Single DVD drive: insert a video DVD.
COMAND loads the medium inserted and
starts to play it.
X DVD changer: insert a video DVD.
X Press 003A.
or
X Press the 003Dback button.
COMAND loads the medium inserted and
starts to play it. Video DVD mode
225Video Z
Page 234 of 270
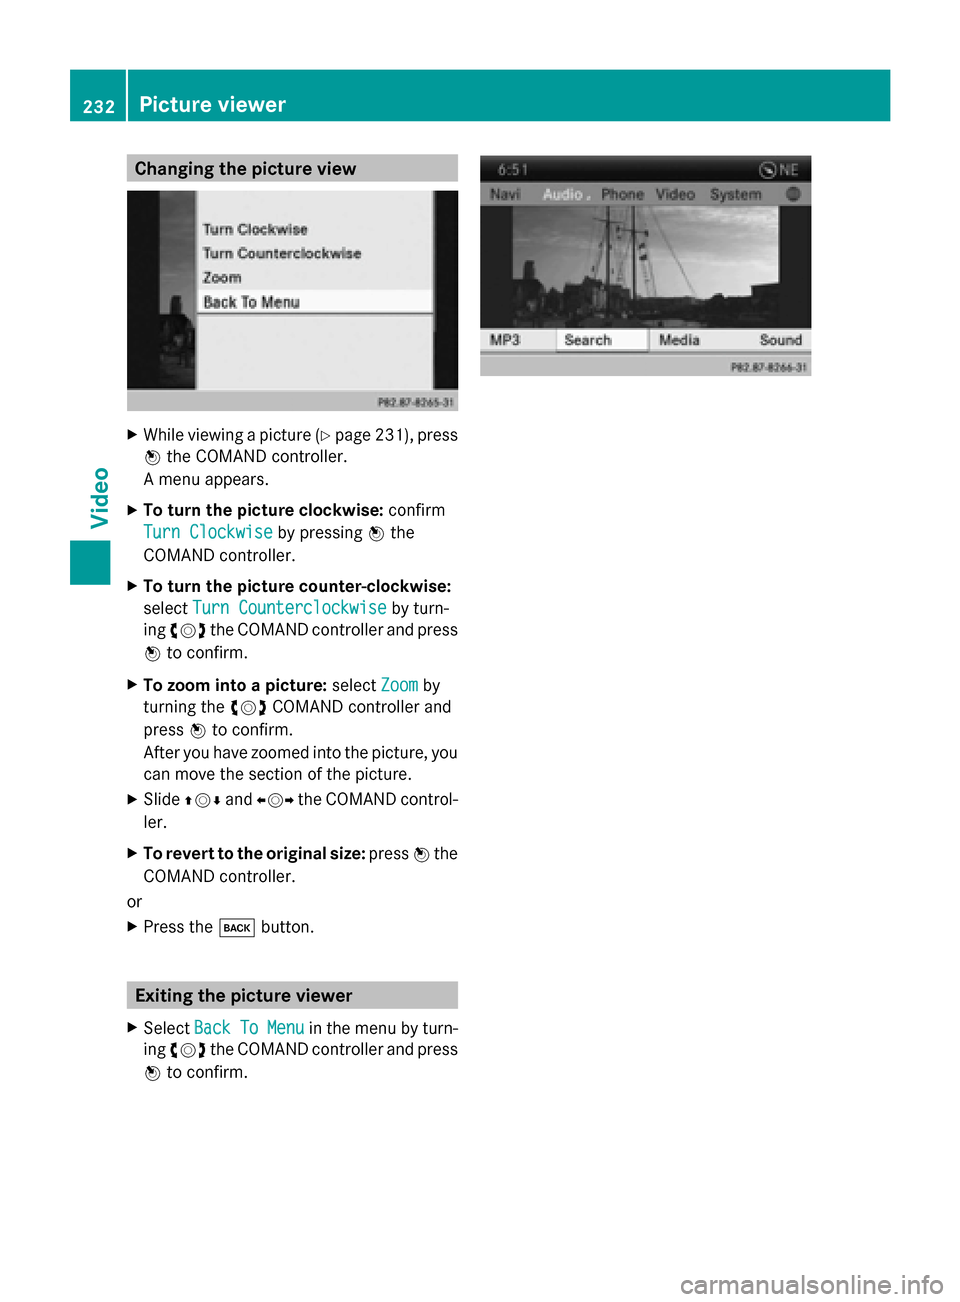
Changing the picture view
X
While viewing a picture (Y page 231), press
0098 the COMAND controller.
A menu appears.
X To turn the picture clockwise: confirm
Turn Clockwise
Turn Clockwise by pressing0098the
COMAND controller.
X To turn the picture counter-clockwise:
select Turn Counterclockwise Turn Counterclockwise by turn-
ing 00790052007A the COMAND controller and press
0098 to confirm.
X To zoom into a picture: selectZoom
Zoom by
turning the 00790052007ACOMAND controller and
press 0098to confirm.
After you have zoomed into the picture, you
can move the section of the picture.
X Slide 009700520064 and009500520096 the COMAND control-
ler.
X To revert to the original size: press0098the
COMAND controller.
or
X Press the 003Dbutton. Exiting the picture viewer
X Select Back BackTo
ToMenu
Menu in the menu by turn-
ing 00790052007A the COMAND controller and press
0098 to confirm. 232
Picture viewerVideo
Page 236 of 270
Your COMAND equipment
These operating instructions describe all the
standard and optional equipment for your
COMAND system, as available at the time of
going to print. Country-specific differences
are possible. Please note that your
COMAND system may not be equipped with
all the features described. Overview
Important safety notes
G
WARNING
The CD/DVD drive is a class 1 laser product.
If you open the CD/DVD drive housing, you
could be exposed to invisible laser radiation.
This laser radiation could damage your retina.
There is a risk of injury.
Never open the housing. Always have main-
tenance and repair work carried out at a quali-
fied specialist workshop. G
WARNING
If objects such as headphones/headsets or
external audio/video sources are not secured
in the passenger compartment, they can be
flung around and hit vehicle occupants. There
is a risk of injury, for example in the event of
sudden braking or a sudden change in direc-
tion.
Always stow these items or similar objects
carefully so that they cannot be flung around,
for example in a lockable vehicle stowage
compartment. Components
The Rear Seat Entertainment System
includes:
R two screens for the rear behind the front-
seat head restraints
R two remote controls
R a CD/DVD drive R
AUX jacks on both screens (AUX display)
and on the CD/DVD drive (AUX drive)
R two sets of cordless headphones 234
OverviewRea
r Seat Entertainment System
Page 237 of 270
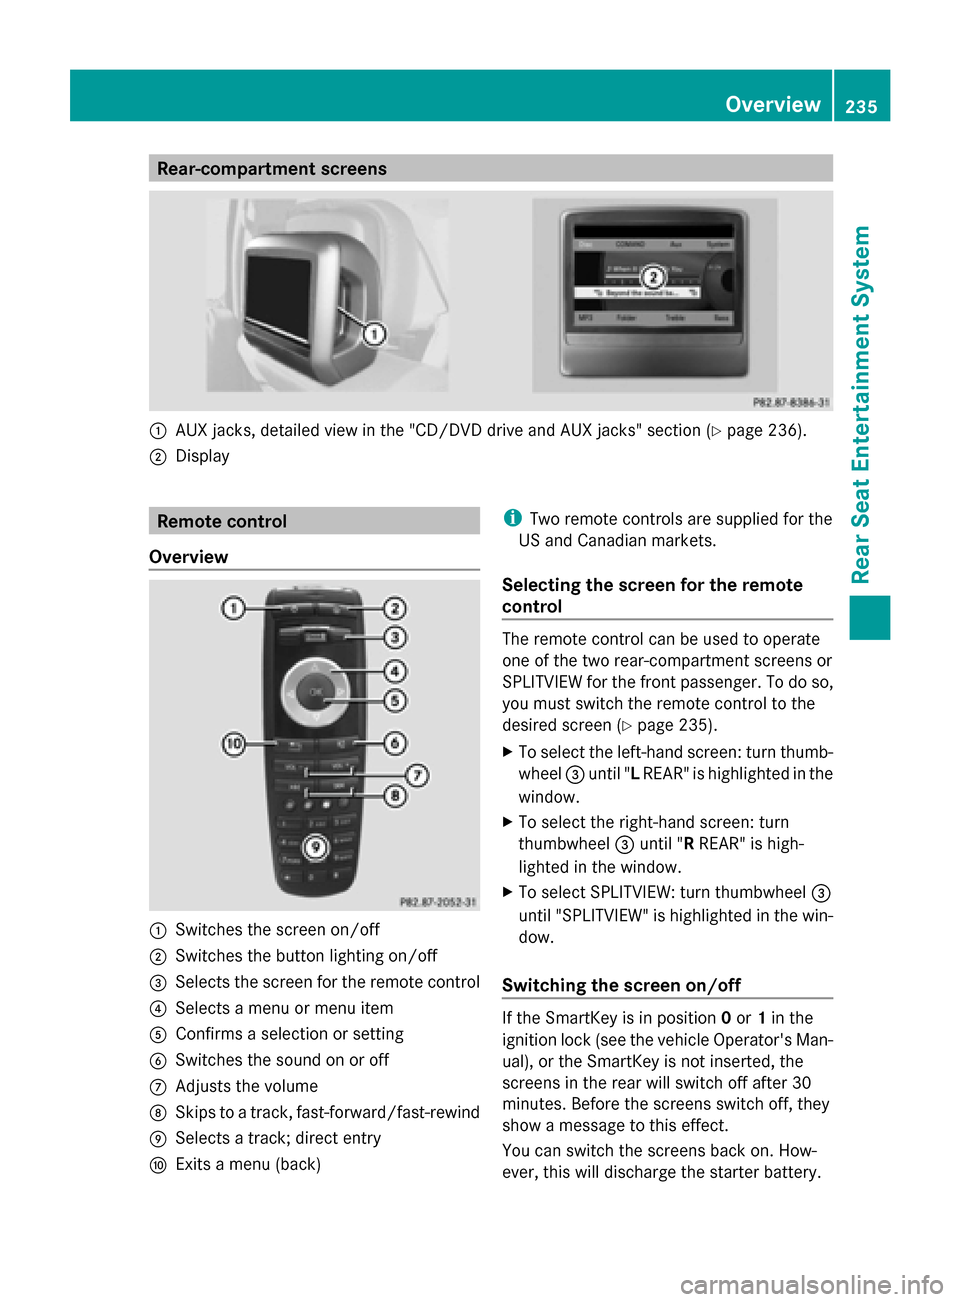
Rear-compartment screens
0043
AUX jacks, detailed view in the "CD/DVD drive and AUX jacks" section (Y page 236).
0044 Display Remote control
Overview 0043
Switches the screen on/off
0044 Switches the button lighting on/off
0087 Selects the screen for the remote control
0085 Selects a menu or menu item
0083 Confirms a selection or setting
0084 Switches the sound on or off
006B Adjusts the volume
006C Skips to a track, fast-forward/fast-rewind
006D Selects a track; direct entry
006E Exits a menu (back) i
Two remote controls are supplied for the
US and Canadian markets.
Selecting the screen for the remote
control The remote control can be used to operate
one of the two rear-compartment screens or
SPLITVIEW for the front passenger. To do so,
you must switch the remote control to the
desired screen (Y
page 235).
X To select the left-hand screen: turn thumb-
wheel 0087until " LREAR" is highlighted in the
window.
X To select the right-hand screen: turn
thumbwheel 0087until "R REAR" is high-
lighted in the window.
X To select SPLITVIEW: turn thumbwheel 0087
until "SPLITVIEW" is highlighted in the win-
dow.
Switching the screen on/off If the SmartKey is in position
0or 1in the
ignition lock (see the vehicle Operator's Man-
ual), or the SmartKey is not inserted, the
screens in the rear will switch off after 30
minutes. Before the screens switch off, they
show a message to this effect.
You can switch the screens back on. How-
ever, this will discharge the starter battery. Overview
235Rear Seat Entertainment System Z
Page 248 of 270
X
Select Display Track Information
Display Track Information
using the 00630064 buttons and press the
008B button to confirm.
The function is switched on 0073or off 0053,
depending on the previous status. Video DVD mode
Important safety notes
G
WARNING
The CD/DVD drive is a class 1 laser product.
If you open the CD/DVD drive housing, you
could be exposed to invisible laser radiation.
This laser radiation could damage your retina.
There is a risk of injury.
Never open the housing. Always have main-
tenance and repair work carried out at a quali-
fied specialist workshop. General notes
DVD playback conditions Playback problems may occur when playing
copied discs. There is a large variety of discs,
DVD authoring software, writing software and
writers available. This variety means that
there is no guarantee that the Rear Seat
Entertainment System will be able to play
video DVDs that you have copied yourself.
Further information can be found under video
(Y page 225). Information regarding
COMAND also applies to the Rear Seat Enter-
tainment System.
Function restrictions Depending on the DVD, it is possible that cer-
tain functions or actions described in this
section will be temporarily blocked or may not
function at all. As soon as you try to activate
these functions or actions, you will see the
0047
symbol in the display. Switching to video DVD mode
X Insert a video DVD ( Ypage 242).
The Rear Seat Entertainment System loads
the disc.
If disc mode was the last mode selected, it
will now be active.
If it was not, switch on video DVD mode as
described in the following instruction.
X Select Disc Discin the menu using the
006300590065 buttons on the remote
control and confirm by pressing the 008Bbut-
ton.
If the video DVD fulfills the playback crite-
ria, the film either starts automatically or
the menu stored on the DVD appears. If the
DVD menu appears, you must start the film
manually.
X Select the corresponding menu item in the
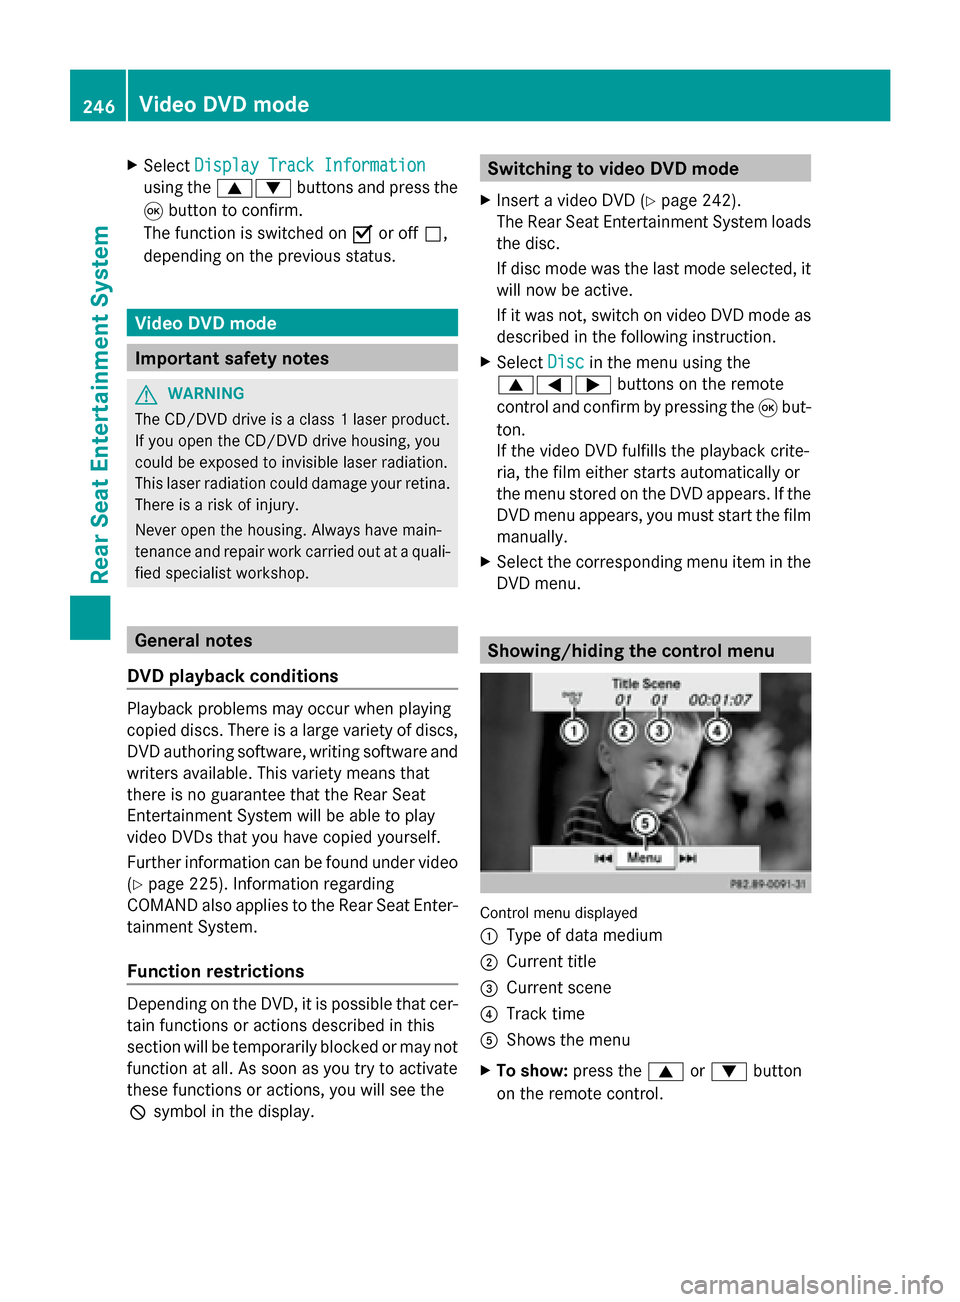
DVD menu. Showing/hiding the control menu
Control menu displayed
0043
Type of data medium
0044 Current title
0087 Current scene
0085 Track time
0083 Shows the menu
X To show: press the0063or0064 button
on the remote control. 246
Video DVD modeRear Seat Entertainment System