ECO mode MERCEDES-BENZ C-Class 2015 W205 Comand Manual
[x] Cancel search | Manufacturer: MERCEDES-BENZ, Model Year: 2015, Model line: C-Class, Model: MERCEDES-BENZ C-Class 2015 W205Pages: 214, PDF Size: 5.16 MB
Page 83 of 214
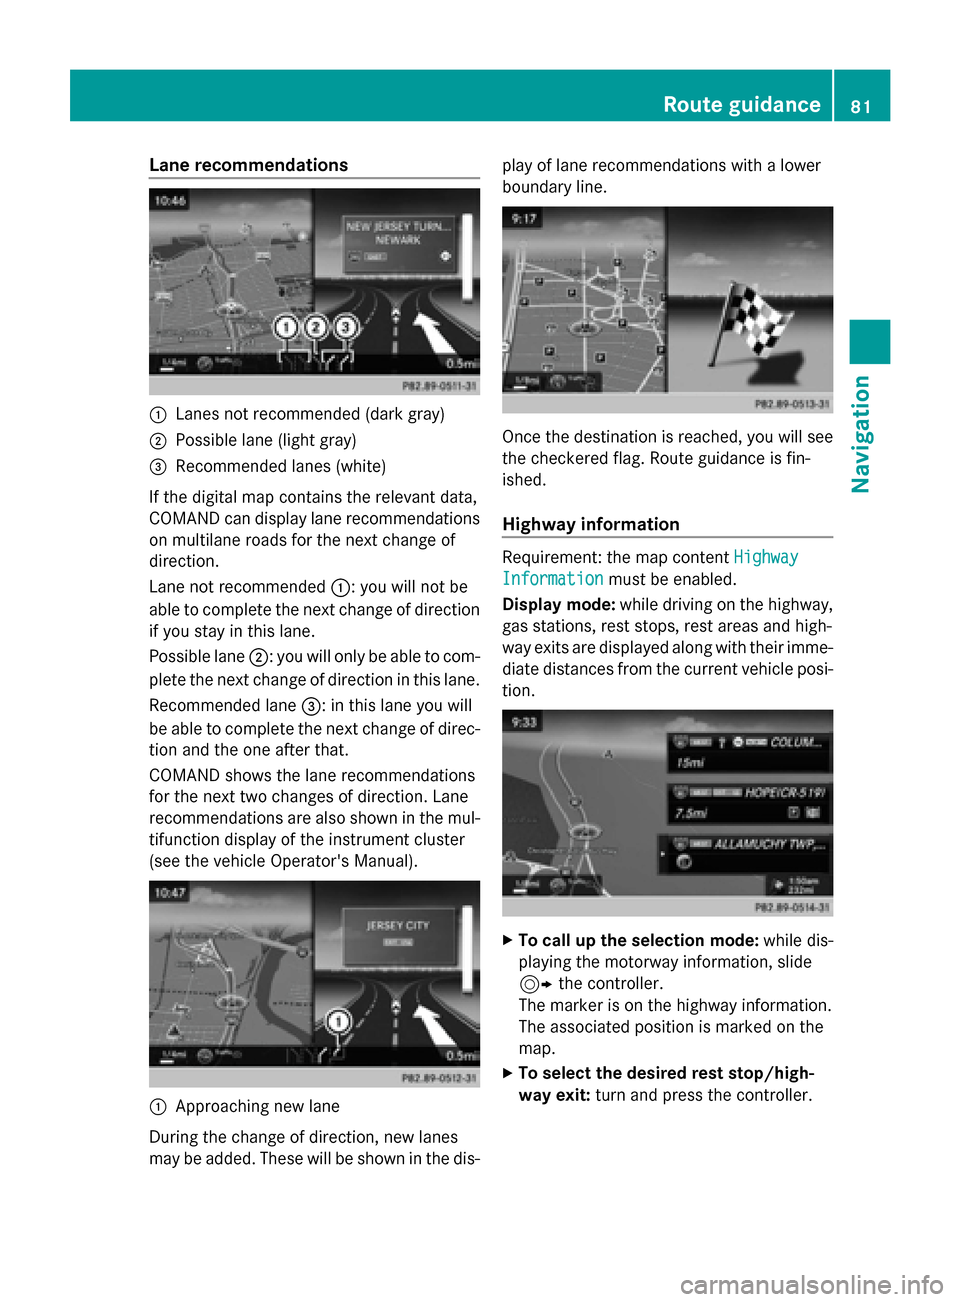
Lane recommendations
0043
Lanes not recommended (dark gray)
0044 Possible lane (light gray)
0087 Recommended lanes (white)
If the digital map contains the relevant data,
COMAND can display lane recommendations
on multilane roads for the next change of
direction.
Lane not recommended 0043: you will not be
able to complete the next change of direction
if you stay in this lane.
Possible lane 0044: you will only be able to com-
plete the next change of direction in this lane.
Recommended lane 0087: in this lane you will
be able to complete the next change of direc-
tion and the one after that.
COMAND shows the lane recommendations
for the next two changes of direction. Lane
recommendations are also shown in the mul-
tifunction display of the instrument cluster
(see the vehicle Operator's Manual). 0043
Approaching new lane
During the change of direction, new lanes
may be added. These will be shown in the dis- play of lane recommendations with a lower
boundary line. Once the destination is reached, you will see
the checkered flag. Route guidance is fin-
ished.
Highway information
Requirement: the map content
Highway Highway
Information
Information must be enabled.
Display mode: while driving on the highway,
gas stations, rest stops, rest areas and high-
way exits are displayed along with their imme-
diate distances from the current vehicle posi-
tion. X
To call up the selection mode: while dis-
playing the motorway information, slide
9 the controller.
The marker is on the highway information.
The associated position is marked on the
map.
X To select the desired rest stop/high-
way exit: turn and press the controller. Route guidance
81Navigation Z
Page 84 of 214
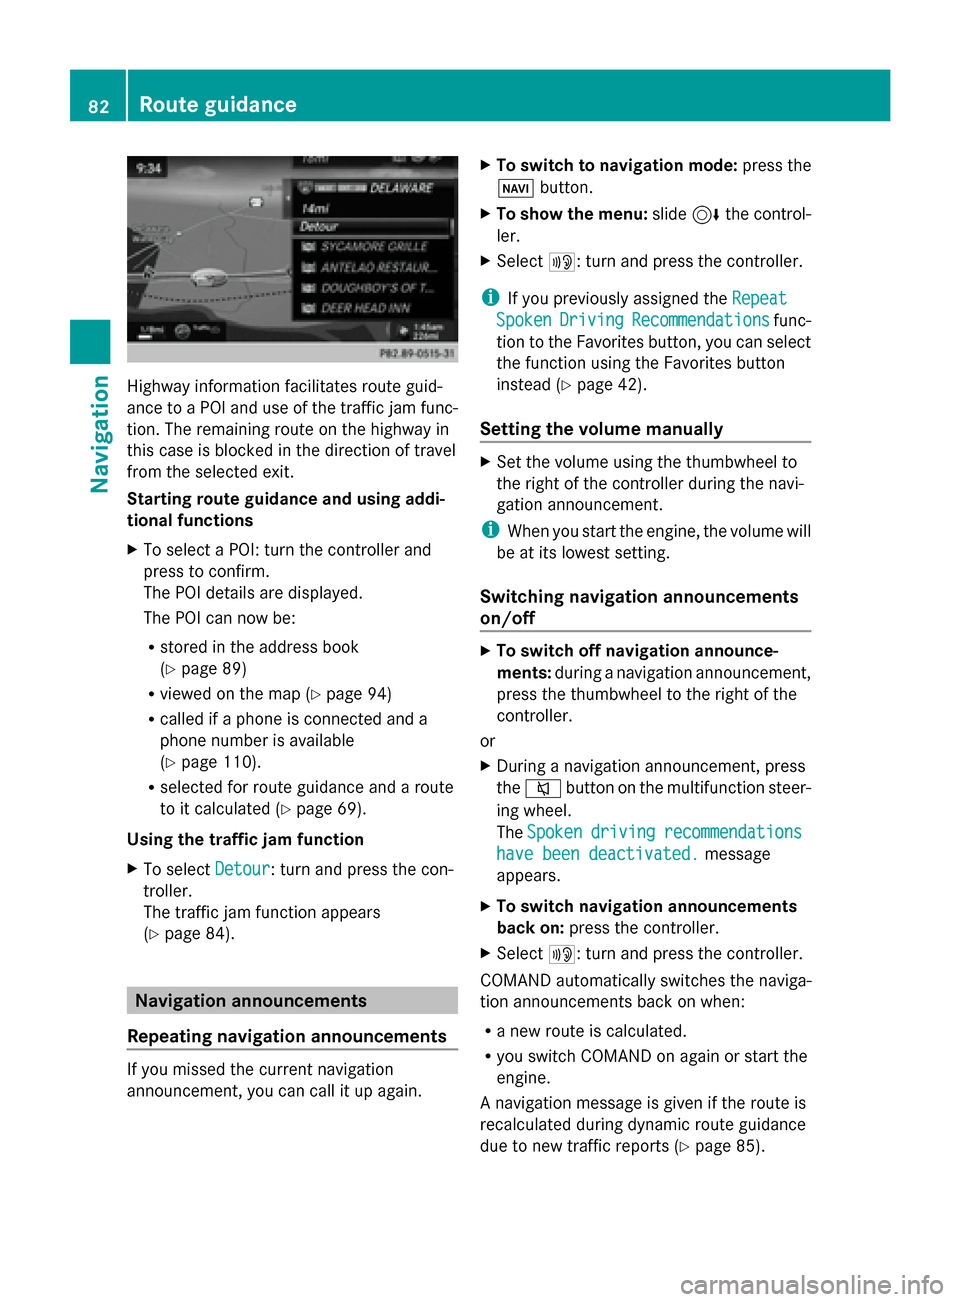
Highway information facilitates route guid-
ance to a POI and use of the traffic jam func-
tion. The remaining route on the highway in
this case is blocked in the direction of travel
from the selected exit.
Starting route guidance and using addi-
tional functions
X To select a POI: turn the controller and
press to confirm.
The POI details are displayed.
The POI can now be:
R stored in the address book
(Y page 89)
R viewed on the map (Y page 94)
R called if a phone is connected and a
phone number is available
(Y page 110).
R selected for route guidance and a route
to it calculated (Y page 69).
Using the traffic jam function
X To select Detour
Detour: turn and press the con-
troller.
The traffic jam function appears
(Y page 84). Navigation announcements
Repeating navigation announcements If you missed the current navigation
announcement, you can call it up again. X
To switch to navigation mode: press the
00BE button.
X To show the menu: slide6the control-
ler.
X Select 006A: turn and press the controller.
i If you previously assigned the Repeat Repeat
Spoken
Spoken Driving
Driving Recommendations
Recommendations func-
tion to the Favorites button, you can select
the function using the Favorites button
instead (Y page 42).
Setting the volume manually X
Set the volume using the thumbwheel to
the right of the controller during the navi-
gation announcement.
i When you start the engine, the volume will
be at its lowest setting.
Switching navigation announcements
on/off X
To switch off navigation announce-
ments: during a navigation announcement,
press the thumbwheel to the right of the
controller.
or
X During a navigation announcement, press
the 0063 button on the multifunction steer-
ing wheel.
The Spoken Spoken driving
driving recommendations
recommendations
have been deactivated.
have been deactivated. message
appears.
X To switch navigation announcements
back on: press the controller.
X Select 006A: turn and press the controller.
COMAND automatically switches the naviga-
tion announcements back on when:
R a new route is calculated.
R you switch COMAND on again or start the
engine.
A navigation message is given if the route is
recalculated during dynamic route guidance
due to new traffic reports (Y page 85).82
Route guidanceNavigation
Page 86 of 214
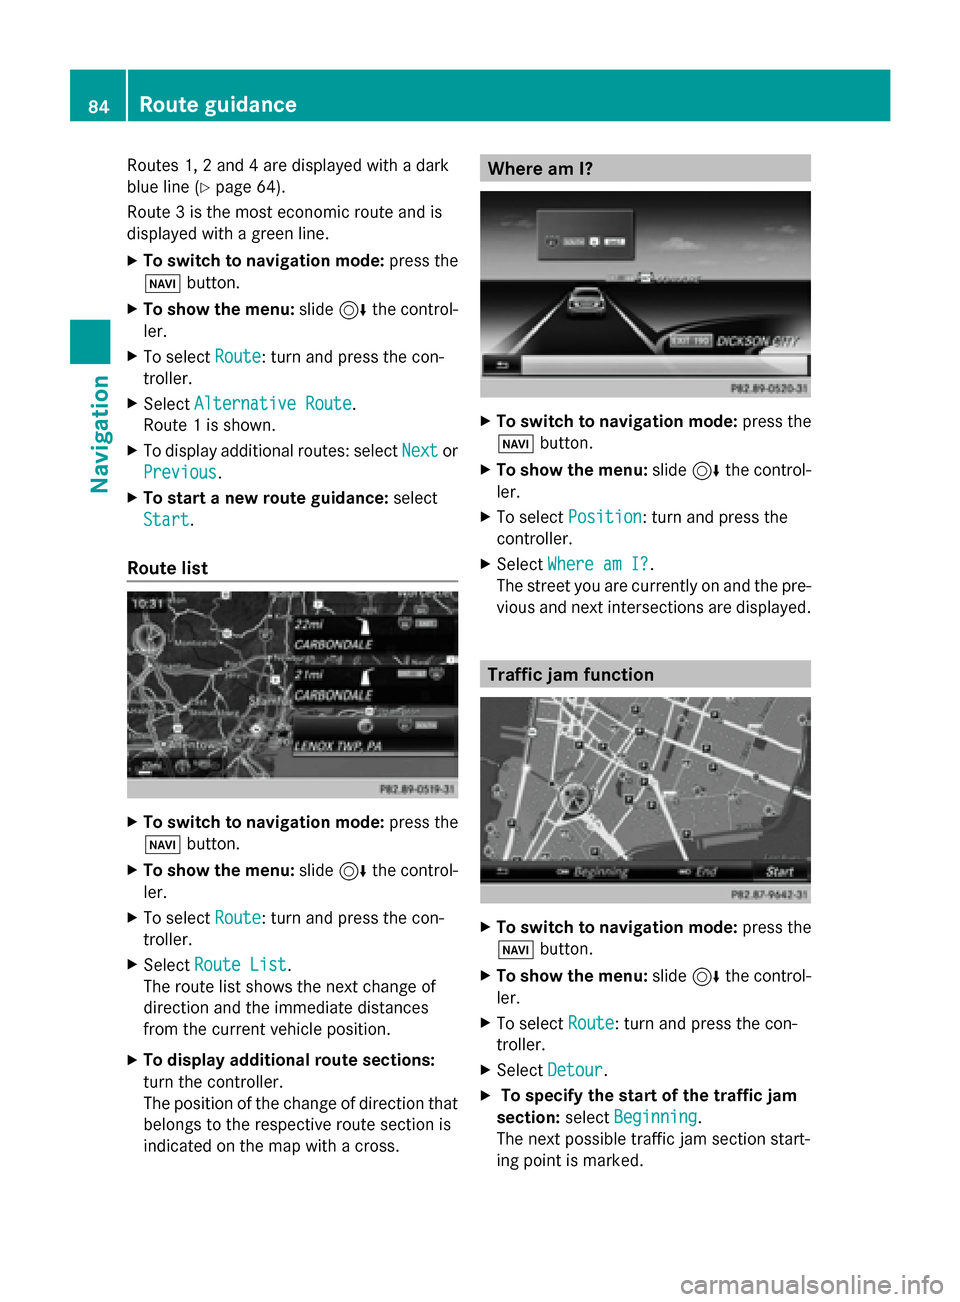
Routes 1, 2 and 4 are displayed with a dark
blue line (Y page 64).
Route 3 is the most economic route and is
displayed with a green line.
X To switch to navigation mode: press the
00BE button.
X To show the menu: slide6the control-
ler.
X To select Route
Route: turn and press the con-
troller.
X Select Alternative Route
Alternative Route.
Route 1 is shown.
X To display additional routes: select Next Nextor
Previous
Previous.
X To start a new route guidance: select
Start
Start.
Route list X
To switch to navigation mode: press the
00BE button.
X To show the menu: slide6the control-
ler.
X To select Route
Route: turn and press the con-
troller.
X Select Route List
Route List.
The route list shows the next change of
direction and the immediate distances
from the current vehicle position.
X To display additional route sections:
turn the controller.
The position of the change of direction that
belongs to the respective route section is
indicated on the map with a cross. Where am I?
X
To switch to navigation mode: press the
00BE button.
X To show the menu: slide6the control-
ler.
X To select Position
Position: turn and press the
controller.
X Select Where am I?
Where am I?.
The street you are currently on and the pre-
vious and next intersections are displayed. Traffic jam function
X
To switch to navigation mode: press the
00BE button.
X To show the menu: slide6the control-
ler.
X To select Route Route: turn and press the con-
troller.
X Select Detour
Detour .
X To specify the start of the traffic jam
section: selectBeginning
Beginning .
The next possible traffic jam section start-
ing point is marked. 84
Route guidanceNavigation
Page 98 of 214
Activating/deactivating the blocked area:
X To select an area: turn and press the con-
troller.
Switch blocking on 0073or off 0053.
Displaying/changing the area:
X To select an area: turn the controller.
X Slide 9the controller.
X To select Display/Change
Display/Change : press the con-
troller.
The map with the crosshair appears.
The area currently blocked is displayed as
a red square.
X To move to a different area to block: slide
1, 4,2the controller.
X To resize the blocked area: press the con-
troller.
X Turn the controller.
The size of the blocked area changes.
X To accept changes: press the controller.
A message appears stating that the area
has been set.
Deleting an area:
X To select an area: turn the controller.
X Slide 9the controller.
X Select Delete
Delete .
A prompt appears asking whether you wish
to delete the area.
X Select Yes
Yes orNo No.
After selecting Yes
Yes , the area is deleted.
Deleting all areas:
X Slide 9and press the controller while
the list is shown.
X Select Delete All
Delete All .
A prompt appears asking whether you wish
to delete all areas.
X Select Yes
Yes orNo No.
After selecting Yes
Yes , all areas are deleted.
i Alternatively, you can carry out this oper-
ation using the touchpad ( Ypage 21). SIRIUS XM service
Displaying SIRIUS XM service informa-
tion You can display the SIRIUS XM service infor-
mation.
X
To switch to navigation mode: press the
00BE button.
X To show the menu: slide6the control-
ler.
X To select Traffic Traffic: turn and press the con-
troller.
X Select SIRIUS Service
SIRIUS Service.
The provider's phone number (SIRIUS XM)
and the serial number of your service mod-
ule are displayed.
i Alternatively you can call up this function
using the touchpad ( Ypage 21).
Registering for the SIRIUS XM traffic
report service X
Call the provider telephone number shown
on the COMAND display.
i You can also have the satellite service
activated online. To do so, visit the SIRIUS
XM Radio website at
http://www.sirius.com (USA).
Once the connection has been established:
X Follow the service employee's instructions.
The activation process may take up to ten
minutes.
If registration is not included when purchas-
ing the system, your credit card details will be
required to activate your account. Updating the digital map
Introduction The digital maps generated by the map soft-
ware become outdated in the same way as
conventional road maps. Optimal route guid-
ance can only be provided by the navigation96
Map functionsNavigation
Page 104 of 214
Your COMAND equipment
These operating instructions describe all
standard and optional equipment available
for your COMAND system at the time of pur-
chase. Country-specific differences are pos-
sible. Please note that your COMAND system
may not be equipped with all the features
described. This also applies to safety-relevant
systems and functions. Therefore, the equip-
ment on your COMAND system may differ
from that in the descriptions and illustrations.
Should you have any questions concerning
equipment and operation, please consult an
authorized Mercedes-Benz Center. Important safety notes
G
WARNING
If you operate mobile communication equip-
ment while driving, you will be distracted from
traffic conditions. You could also lose control
of the vehicle. There is a risk of an accident.
Only operate this equipment when the vehicle
is stationary.
If you make a call on your mobile phone while
driving, always use hands-free mode. Only
use the mobile phone when road, weather
and traffic conditions permit. Some jurisdic-
tions prohibit the driver from using a mobile
phone while driving a vehicle.
Bear in mind that at a speed of 30 mph
(approximately 50 km/h), the vehicle covers
a distance of 44 feet (approximately 14 m)
per second.
Excessive levels of electromagnetic radiation
may cause damage to your health and the
health of others.
There is scientific discussion surrounding the
possible health risks posed by electromag-
netic fields. You can reduce this risk by using
an exterior antenna. Therefore, connect your mobile communica-
tions equipment to the vehicle's exterior
antenna wherever possible. General notes
Introduction
A Bluetooth ®
interface is available for teleph-
ony.
If your mobile phone supports the Blue-
tooth ®
profile PBAP (P honeBook Access
Profile), the contacts are automatically dis-
played in COMAND.
You can use the message function if your
mobile phone supports the MAP Bluetooth ®
profile ( Message AccessProfile).
With a suitable mobile phone, you can use the
hands-free system and receive vCards via the
Bluetooth ®
interface.
You can obtain more information about suit-
able mobile phones on the Internet at
http://www.mbusa-mobile.com. Or call
the Mercedes-Benz Customer Assistance
center at
1-800-FOR-MERCedes(1-800-367-6372) for
the USA or at 1-800-387-0100 for Canada. Call disconnection while the vehicle is
in motion
A call may be disconnected if:
R there is insufficient network coverage in
certain areas.
R you move from one transmitter/receiver
area (cell) into another and no channels are
free.
R you use a SIM card which is not compatible
with the network available. Operating options
You can operate the telephone by:
R using the controller: 102
General notesTelephone
Page 173 of 214

X
Select a sub-category, e.g. Rock
Rock.
If the Rock
Rocksub-category includes music
tracks, these will be shown.. Gracenote
®
Media Database
General notes This function is only available in audio CD
mode.
There is a version of
Gracenote® music recognition technology,
Emeryville, California, USA on the COMAND
hard disk. You will recognize this by the logo
in the bottom right-hand corner of certain
audio displays.
If the audio CD does not contain any CD text
information, COMAND can use the Grace-
note ®
Media Database to identify unknown
audio tracks when in audio CD mode.
Internet update of metadata With the option
Update metadata via Inter-
net, the audio CD meta data that is not avail-
able (e.g. cover, track, album, artist) can be
reloaded to the internal Gracenote database.
An Internet connection is required for this
(Y page 136). Selecting Internet update of meta data
X
In media mode, slide 00520064the controller.
The media menu bar is shown.
X To select Options Options: turn and press the con-
troller.
X Select Updating Metadata Via Inter‐
Updating Metadata Via Inter‐
net
net in the selection list.
A connection with the Gracenote data
server is established. The missing data is
loaded, saved and displayed in the main
display field.
If there is no data found or there is no Inter-
net connection, a corresponding error mes-
sage will appear.
Switching the Gracenote ®
data display
on/off X
Switch on CD mode (Y page 168).
X To select Gracenote Media Database Gracenote Media Database:
turn and press the controller.
X To switch the display off: select None
None.
In the basic display, Track 1
Track 1,Track 2
Track 2 etc.
are shown instead of the Gracenote ®
data,
for example.
X To switch on the display: press the control-
ler. Notes on audio/video mode
Permissible data carriers R
CD-R, CD-A and CD-RW
R DVD-R, DVD-V and DVD-RW Audio/video mode
171Media Z
Page 174 of 214
R
SD memory card
R USB storage device
Permissible file systems R
ISO 9660/Joliet standard for CDs
R UDF for video DVDs
R FAT16, FAT32, exFAT and NTFS for SD
memory card and USB storage media
Multisession CDs For multisession CDs, the content of the first
session determines how COMAND will proc-
ess the CD. COMAND plays only one session
and gives priority to the audio CD session.
File structure of a data carrier When you create a disc with compressed
music files, the tracks can be organized in
folders. A folder may also contain subfolders.
The disc may contain no more than eight
directory levels. Files beyond the eighth level
will not be recognized by the system.
i COMAND supports up to 50,000 files
from one data medium. For data media with
more than 64 GB, only files in the following
folders are supported: music, pictures, vid-
eos.
Track and file names When you create a disc with compressed
music files, you can assign names to the
tracks and folders.
If MP3 or WMA files are stored in the root
directory itself, the root directory will also be
treated as a folder. You should observe the following when
assigning track names:
R
track names must have at least one char-
acter.
R track names must have the ending of a
supported audio/video format, e.g. mp3,
aac or m4v.
R there must be a dot between the track
name and the extension.
Example of a correct track name:
"Track1.mp3".
Permissible formats COMAND supports the following audio for-
mats:
R
MP3
R WMA
R CD-A
R AAC formats: .aac, .mp4, .m4a and .m4b
Copy-protected iTunes music files with
the .m4p file ending are not supported.
COMAND supports the following video for-
mats:
R DVD-V
R MPEG
R wmv
R M4V
R AVI up to 720p.
Permissible bit and sampling rates COMAND supports MP3 files of the following
types:
R
fixed and variable bit rates from 32 kbit/s
to 320 kbit/s
R sampling rates of 8 kHz to 48 kHz
COMAND supports WMA files of the following
types:
R fixed bit rates from 5 kbit/s to 384 kbit/s
R sampling rates of 8 kHz to 48 kHz 172
Audio/video modeMedia
Page 176 of 214

Category list
X
In media mode, slide 00520064the controller.
The media menu bar is shown.
X To select Search
Search: turn and press the con-
troller.
The category list is shown.
Depending on the connected media sources
and files, the following categories are listed:
R Current Tracklist
Current Tracklist ;
R Folders: Folders:;
R Select By Cover
Select By Cover;
R Keyword Search
Keyword Search ;
R Playlists
Playlists ;
R Artists
Artists;
R Albums
Albums ;
R Track
Track;
R Genres
Genres ;
R Year
Year ;
R Composers
Composers ;
R Videos
Videos ;
R Photos
Photos .
i The categories are available as soon as
the entire media content has been read and
analyzed.
If the same device is reconnected with
unchanged media content, these catego-
ries are available more quickly.
When connecting Apple ®
devices, the cat-
egories “Folder”, “Year” and “Photos” are
not available. Searching by current track list
X
To select Current Tracklist Current Tracklist in the cat-
egory list: turn and press the controller.
The selection list appears.
X Select the required track. Searching by folder
Playable files can be searched for in the active
data medium's directories.
X To select Folders: Folders: in the category list:
turn and press the controller.
The folder list appears.
X Select the required folder.
The track list appears.
X Select the required track. Select By Cover
X
To select Select SelectBy
ByCover
Cover in the category
list: turn and press the controller.
A menu with cover views appears. 174
Media searchMedia
Page 182 of 214

Selecting a playback mode
X To switch MEDIA REGISTER on: press the
00FD button repeatedly until the MEDIA
REGISTER is switched on.
X Slide 00520064the controller.
The media menu bar appears.
X To select Options
Options: turn and press the con-
troller. X
Select Playback Mode
Playback Mode.
The options list appears. The 003Bdot indi-
cates the current setting.
X Select the desired option.
The option is switched on. For all options
except Normal Track Sequence
Normal Track Sequence, you will
see a corresponding icon in the main dis-
play.
i The Normal Track Sequence Normal Track Sequence option is
automatically selected when you change
the disc you are currently listening to or
when you select a different medium. If an
option is selected, it remains selected after
COMAND is switched on or off.
The following options are available:
R Normal Track Sequence Normal Track Sequence: the tracks are
played in the normal order (e.g. track 1, 2,
3 etc.).
R Random Medium Random Medium: all the tracks on the
medium are played in random order.
R Random Random Track
TrackList
List: the tracks in the cur-
rently active track list are played in random
order. Bluetooth
®
audio mode Connecting Bluetooth
®
audio devices
Prerequisites X
Activate the Bluetooth ®
function in
COMAND (Y page 42).
Bluetooth ®
audio mode requires a Blue-
tooth ®
-capable audio device.
Check your Bluetooth ®
audio device for the
following (see the Bluetooth ®
audio device's
operating instructions):
R Bluetooth ®
audio profile
The Bluetooth ®
audio device must support
the A2DP and AVRCP Bluetooth ®
audio
profiles.
R Bluetooth ®
visibility
Certain Bluetooth ®
audio devices do not
just require activation of the Bluetooth ®
function. In addition, your device must be
made "visible" to other devices.
R Bluetooth ®
device name
This device name is predetermined but can
usually be changed. To make a clear selec-
tion of the Bluetooth ®
device possible,
Mercedes-Benz recommends that you cus-
tomize the device name (see the Blue-
tooth ®
audio device's operating instruc-
tions).
i A2DP (Advanced AudioDistribution
Profile): Bluetooth ®
audio profile for audio
data transmission
AVRCP (Audio VideoRemote Control
Profile): Bluetooth ®
audio profile for audio
data playback.
i The Bluetooth ®
device must be visible for
authorization. After authorization,
COMAND even finds the Bluetooth ®
device
when it is not visible.
X The Bluetooth ®
function in COMAND must
be activated (Y page 42).180
Bluetooth ®
audio modeMedia
Page 183 of 214
General notes
Before using your Bluetooth
®
audio device
with COMAND for the first time, you will need
to authorize it.
When you authorize a new Bluetooth ®
audio
device, it is connected automatically. Con-
nection involves first searching for a Blue-
tooth ®
audio device and then authorizing it.
You can authorize up to fifteen Bluetooth ®
devices.
i If you authorize a mobile phone that sup-
ports Bluetooth ®
audio, the A2DP and
AVRCP Bluetooth ®
audio profiles are con-
nected automatically.
The mobile phone is then entered:
R in the Bluetooth ®
telephone list
(Y page 105)
R in the Bluetooth ®
device list
(Y page 181)
Mercedes-Benz recommends authorizing a
mobile phone in Bluetooth ®
telephony
(Y page 106).
i If the mobile phone that is connected only
supports two Bluetooth ®
profiles at the
same time, COMAND functions may
behave as follows:
R when connecting to the Internet, play-
back is stopped on the Bluetooth ®
audio
device.
R when starting playback on the Blue-
tooth ®
audio device, the Internet con-
nection is ended. Searching for and authorizing a Blue-
tooth ®
audio device
Switching to Bluetooth ®
audio mode
X Press the 00FDbutton.
X To select Bluetooth Audio
Bluetooth Audio in the menu:
turn and press the controller.
A menu appears. If you see the
No Bluetooth Audio No Bluetooth Audio
Device Connected
Device Connected message, you will
need to authorize the Bluetooth ®
audio
device first.
X To select Options
Optionsin the Bluetooth ®
audio
menu: slide 005200C5and press the controller.
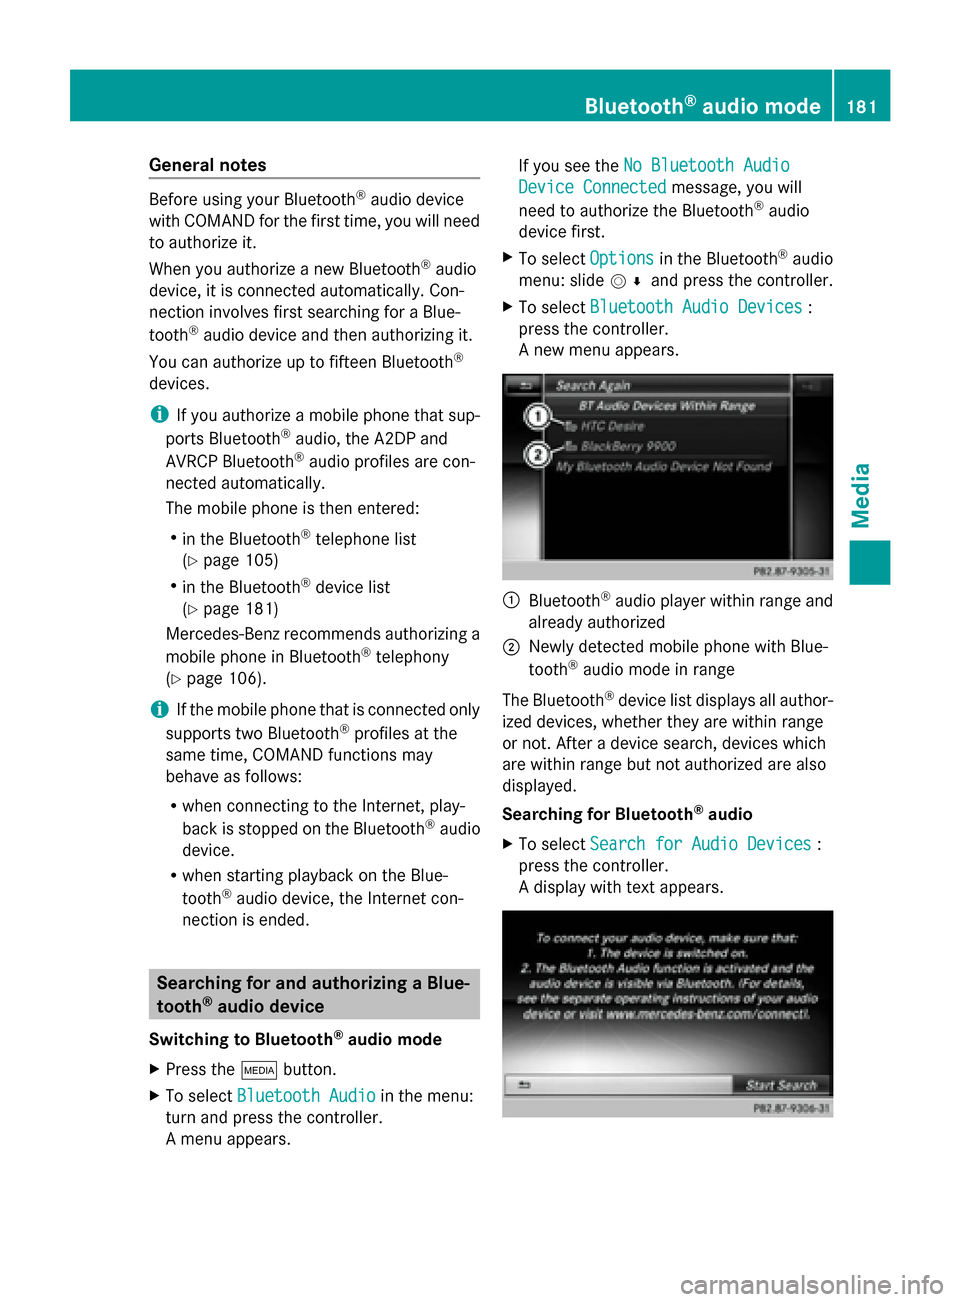
X To select Bluetooth Audio Devices
Bluetooth Audio Devices :
press the controller.
A new menu appears. 0043
Bluetooth ®
audio player within range and
already authorized
0044 Newly detected mobile phone with Blue-
tooth ®
audio mode in range
The Bluetooth ®
device list displays all author-
ized devices, whether they are within range
or not. After a device search, devices which
are within range but not authorized are also
displayed.
Searching for Bluetooth ®
audio
X To select Search for Audio Devices Search for Audio Devices :
press the controller.
A display with text appears. Bluetooth
®
audio mode 181Media Z