audio MERCEDES-BENZ C-Class 2015 W205 Comand Manual
[x] Cancel search | Manufacturer: MERCEDES-BENZ, Model Year: 2015, Model line: C-Class, Model: MERCEDES-BENZ C-Class 2015 W205Pages: 214, PDF Size: 5.16 MB
Page 168 of 214
Inserting and removing a disc from
the single CD/DVD drive
Before inserting a CD/DVD, ensure that the
cup holder is empty.
X To insert: press the00F8button on the
single drive.
If there is a disc already inserted, it will be
ejected.
X Insert a disc into the disc slot with the
printed side facing upwards.
The drive closes and the disc is played.
If the CD/DVD is operated in Media mode,
the corresponding basic menu will be
shown. If the CD/DVD is started using
another application (e.g. navigation), the
display will not change.
i The drive may not be able to play discs
with copy protection.
X To remove: press the00F8button.
The drive ejects the disc.
X Remove the ejected disc from the slot.
If you do not take the disc out of the slot, it
is drawn in again automatically after a short
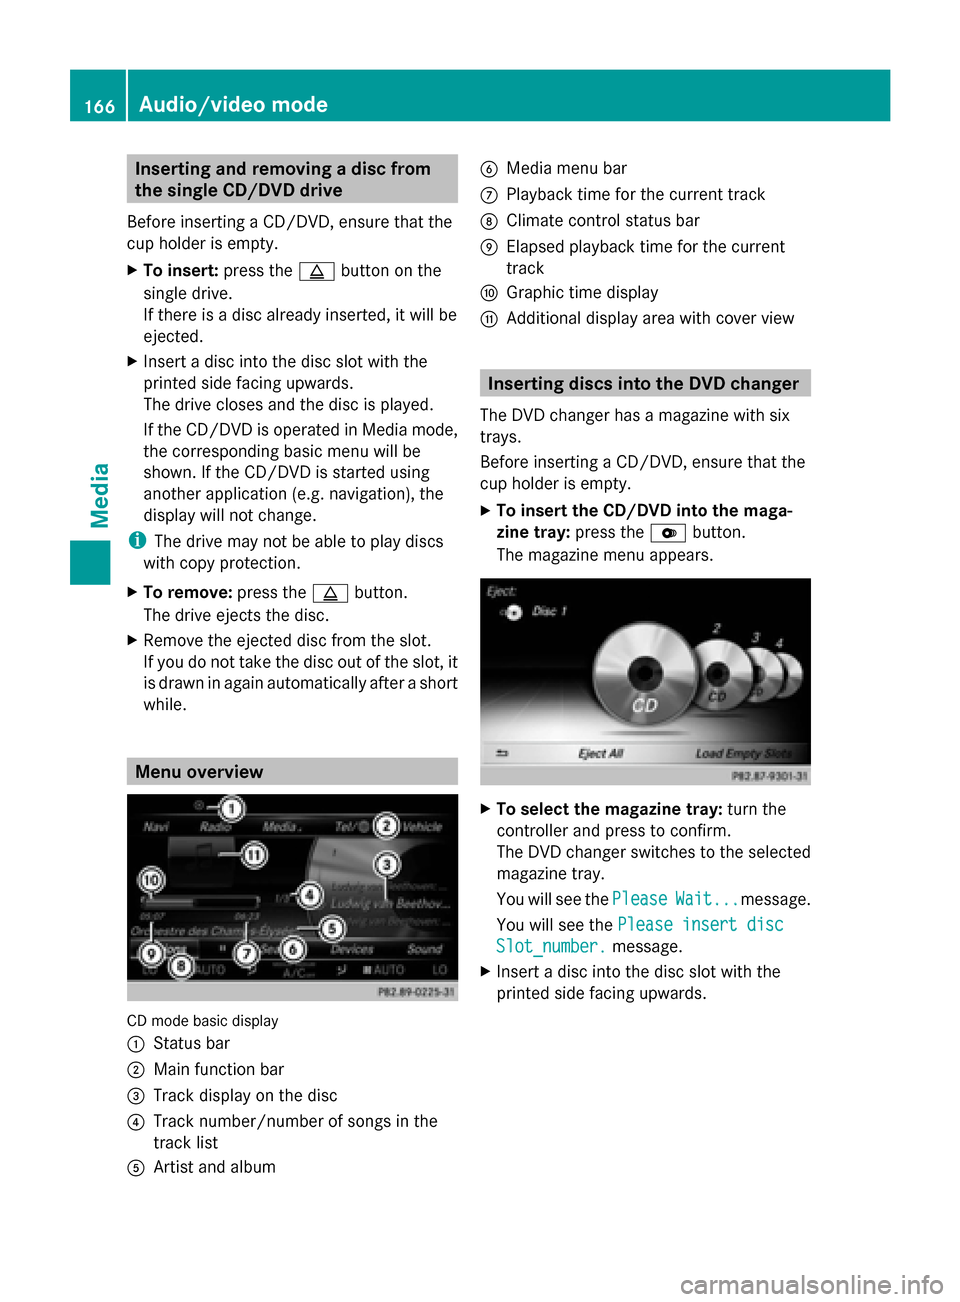
while. Menu overview
CD mode basic display
0043
Status bar
0044 Main function bar
0087 Track display on the disc
0085 Track number/number of songs in the
track list
0083 Artist and album 0084
Media menu bar
006B Playback time for the current track
006C Climate control status bar
006D Elapsed playback time for the current
track
006E Graphic time display
006F Additional display area with cover view Inserting discs into the DVD changer
The DVD changer has a magazine with six
trays.
Before inserting a CD/DVD, ensure that the
cup holder is empty.
X To insert the CD/DVD into the maga-
zine tray: press the0065button.
The magazine menu appears. X
To select the magazine tray: turn the
controller and press to confirm.
The DVD changer switches to the selected
magazine tray.
You will see the Please PleaseWait...
Wait...message.
You will see the Please insert disc
Please insert disc
Slot_number.
Slot_number. message.
X Insert a disc into the disc slot with the
printed side facing upwards. 166
Audio/video modeMedia
Page 169 of 214
X
To load all empty magazine trays: press
the 0065 button
The magazine menu appears.
X To select Load Empty Slots
Load Empty Slots: slide 00520064,
turn and press controller.
COMAND switches to the next empty mag-
azine tray.
You will see the Please PleaseWait...
Wait...message.
You will see the Please insert disc
Please insert disc
Slot_number.
Slot_number. message.
X Insert a disc into the disc slot with the
printed side facing upwards.
Once the disc is loaded, the DVD changer
switches to the next empty tray.
X Repeat these steps until all magazine trays
are filled.
The DVD changer plays the last inserted
disc.
X To cancel the loading process: press the
0065 button.
or
X To select 0038in the magazine menu: turn
and press the controller. Ejecting discs from the DVD changer
i If you remove one disc while playing
another disc, the DVD changer interrupts
playback. Playback continues once the disc
has been ejected.
X To eject a single CD/DVD: press the
0065 button.
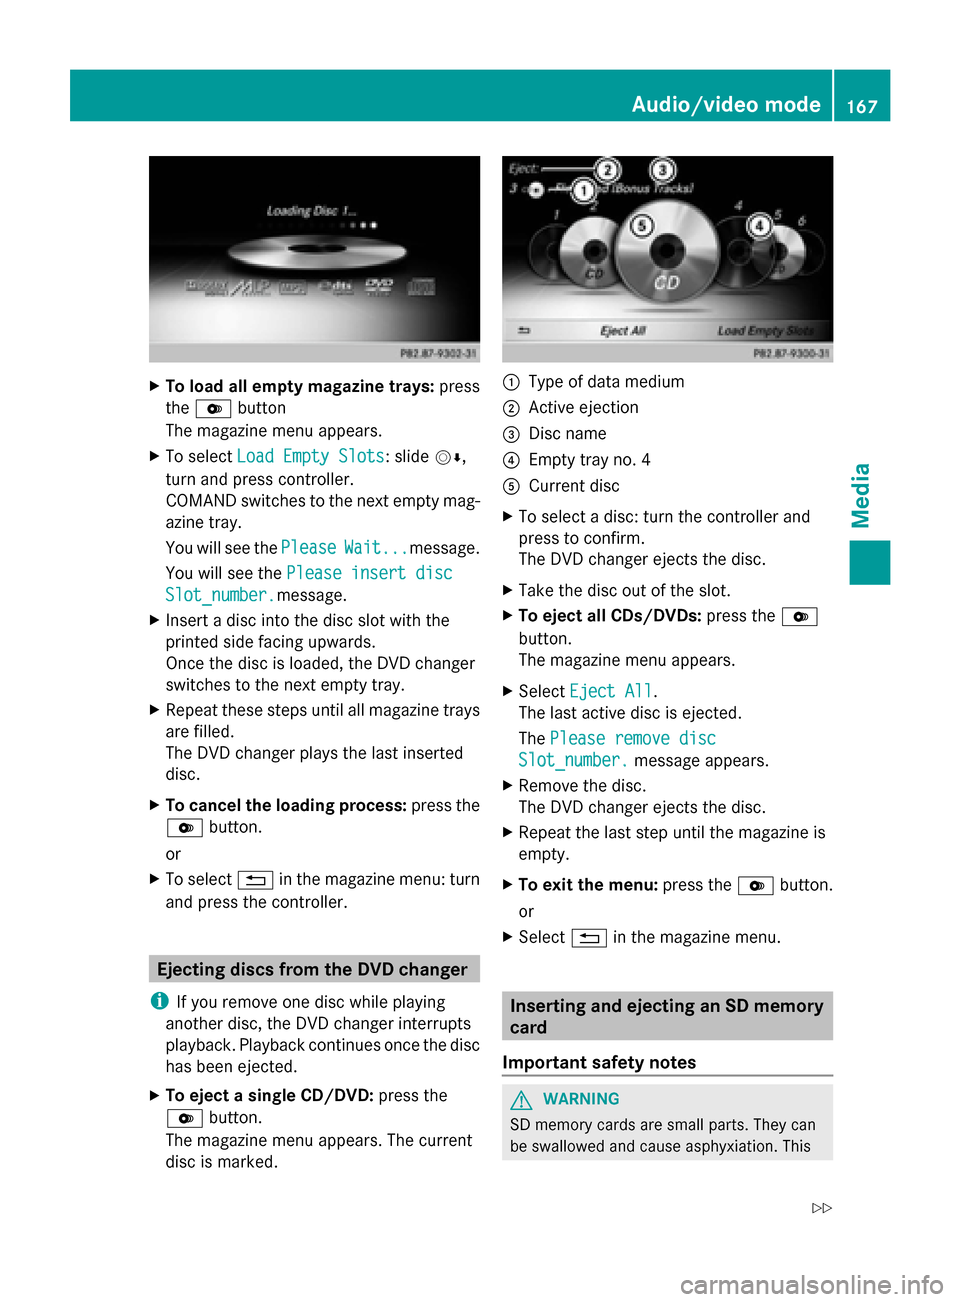
The magazine menu appears. The current
disc is marked. 0043
Type of data medium
0044 Active ejection
0087 Disc name
0085 Empty tray no. 4
0083 Current disc
X To select a disc: turn the controller and
press to confirm.
The DVD changer ejects the disc.
X Take the disc out of the slot.
X To eject all CDs/DVDs: press the0065
button.
The magazine menu appears.
X Select Eject All Eject All .
The last active disc is ejected.
The Please remove disc Please remove disc
Slot_number.
Slot_number. message appears.
X Remove the disc.
The DVD changer ejects the disc.
X Repeat the last step until the magazine is
empty.
X To exit the menu: press the0065button.
or
X Select 0038in the magazine menu. Inserting and ejecting an SD memory
card
Important safety notes G
WARNING
SD memory cards are small parts. They can
be swallowed and cause asphyxiation. This Audio/video mode
167Media
Z
Page 170 of 214
poses an increased risk of injury or even fatal
injury.
Keep SD memory cards out of the reach of
children. If an SD memory card is swallowed,
seek immediate medical attention.
! If you are no longer using the SD memory
card, you should remove it. High tempera-
tures can damage the card.
COMAND supports SD memory cards
(Secure Digital), SDHC memory cards
(Secure DigitalHighCapacity), and SDXC
memory cards (Secure Digital eXtended
Capacity.
Inserting an SD memory card X
Insert the SD memory card into the SD card
slot in the stowage space under the arm-
rest until the SD memory card engages into
place. The side with the contacts must face
downwards.
The music is played while the files are
loaded in the background. If there are no
supported audio/video files, you will see a
message to this effect.
Ejecting an SD memory card X
Press the memory card.
The memory card is ejected.
X Remove the memory card. Connecting USB devices
There are two USB ports in the stowage space
under the armrest.
X Connect the USB device to the USB port.
The data medium will only be played and
the files will only be loaded in the back-
ground if the corresponding media display
is visible. Otherwise, the system does not
automatically switch to USB. If there are no
supported audio/video files, you will see a
message to this effect. i
MP3 players must support Media Transfer
Protocol (MTP). Activating media mode
Switching on automatically After an external media source has been con-
nected, COMAND will only activate the cor-
responding media mode automatically and
show the basic display in the case of CDs and
SD cards. If the CD/DVD is started using
another application (e.g. navigation), the dis-
play will not change.
When using USB devices, depending on the
vehicle's equipment, the relevant Media
Interface 1, 2 or USB 1, 2 basic display must
already be activated.
X Insert the CDs/DVDs (Y page 166)
or
X Insert a SD memory card: (Y page 168)
or
X Connect a USB device: (Y page 168)
COMAND loads the medium inserted and
starts to play it automatically.
Further options for switching on R
Using the number keypad: (Y page 165)
R Using the main function bar: (Y page 165)
R Using the device list: (Y page 165)
R Using the 00FDbutton: (Y page 164) Options menu168
Audio/video modeMedia
Page 171 of 214

X
In Media mode, slide 00520064the controller.
The media menu bar is shown.
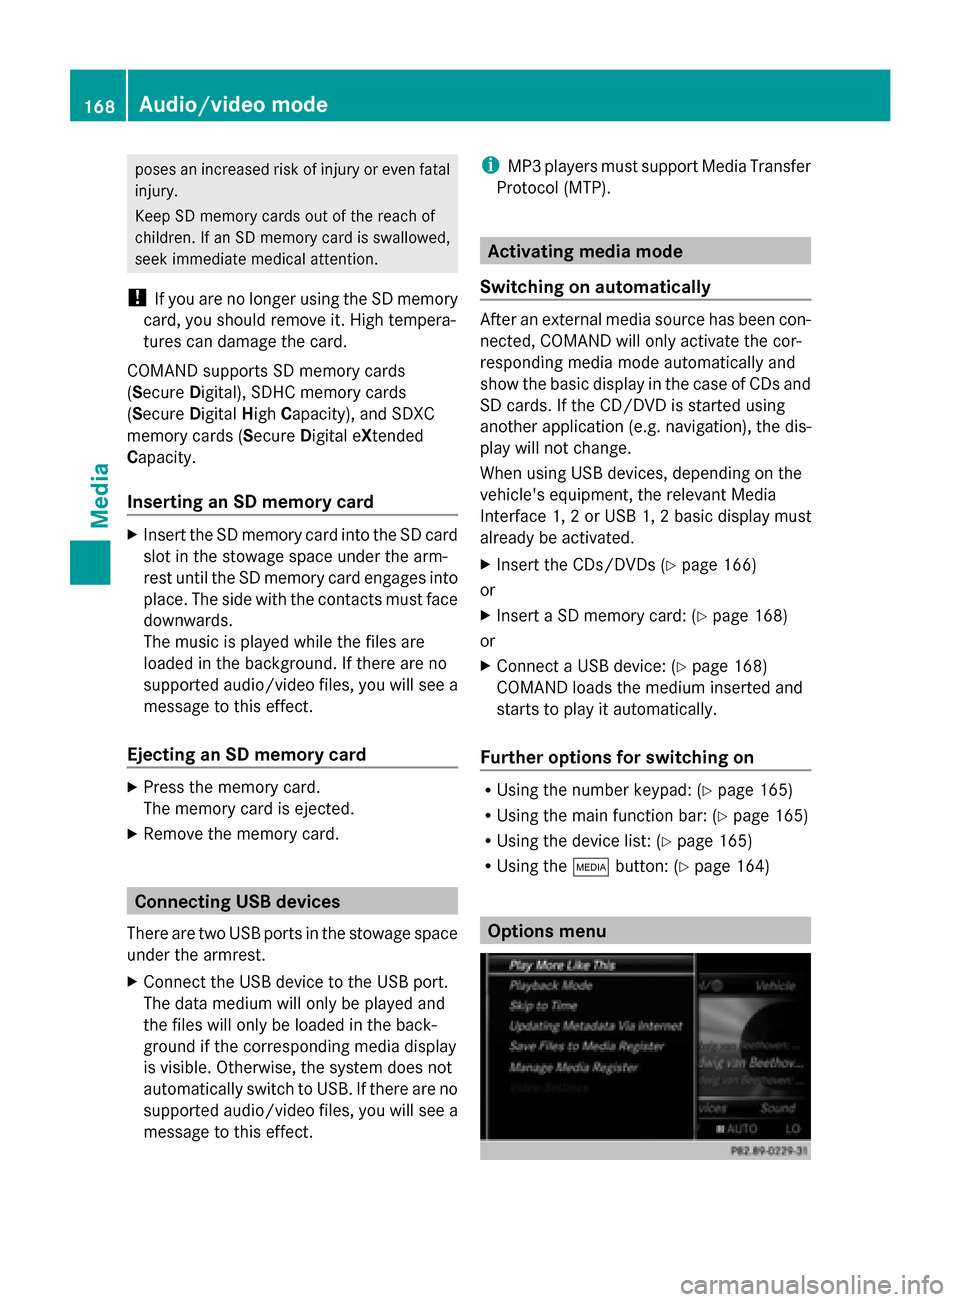
X To select Options
Options: turn and press the con-
troller.
Playing similar tracks
X To select Play PlayMore
More Like
LikeThis
This: turn and
press the controller.
COMAND automatically creates and plays
a track list with similar tracks. If there are
no comparable tracks on the data carrier,
you will see a message to this effect.
X Select the required track. Play mode
X
To select Playback Mode Playback Mode: turn and press
the controller.
X Select Normal Track Sequence
Normal Track Sequence.
The current track list is played in the order
it appears on the data medium.
X Select Random Track List
Random Track List.
The current track list is played in random
order.
X Select Random Medium
Random Medium.
All tracks on the data medium are played in
random order. Skip to time
X
To select Skip
Skip to toTime
Time : turn and press the
controller.
A pop-up menu appears.
X To set the time: turn the controller
or
X Set the desired time using the number key-
pad.
Select active partition
X To select Select Active Partition Select Active Partition:
turn and press the controller.
With the Select Active Partition Select Active Partition
option, you can select a partition in the USB
data medium.
Save files to Media Register
i With the Save Files to Media Reg‐ Save Files to Media Reg‐
ister
ister option, you can transfer supported
audio/video/image files to the COMAND
hard drive.
X To select the Save SaveFiles
Files to
toMedia
Media Reg‐
Reg‐
ister
ister option: turn and press the controller.
A menu appears (Y page 176). Manage Media Register
X
To select Manage ManageMedia
MediaRegister
Register : press
the controller.
The contents are shown. Using the control-
ler, files and folders can be renamed or
deleted.
A pop-up window appears when the file is
renamed. The characters are entered using
the controller (Y page 28).
X To select Delete All Media Files
Delete All Media Files : turn
and press the controller. Audio/video mode
169Media Z
Page 172 of 214
Files and folders can be completely deleted
from the Media Register. X
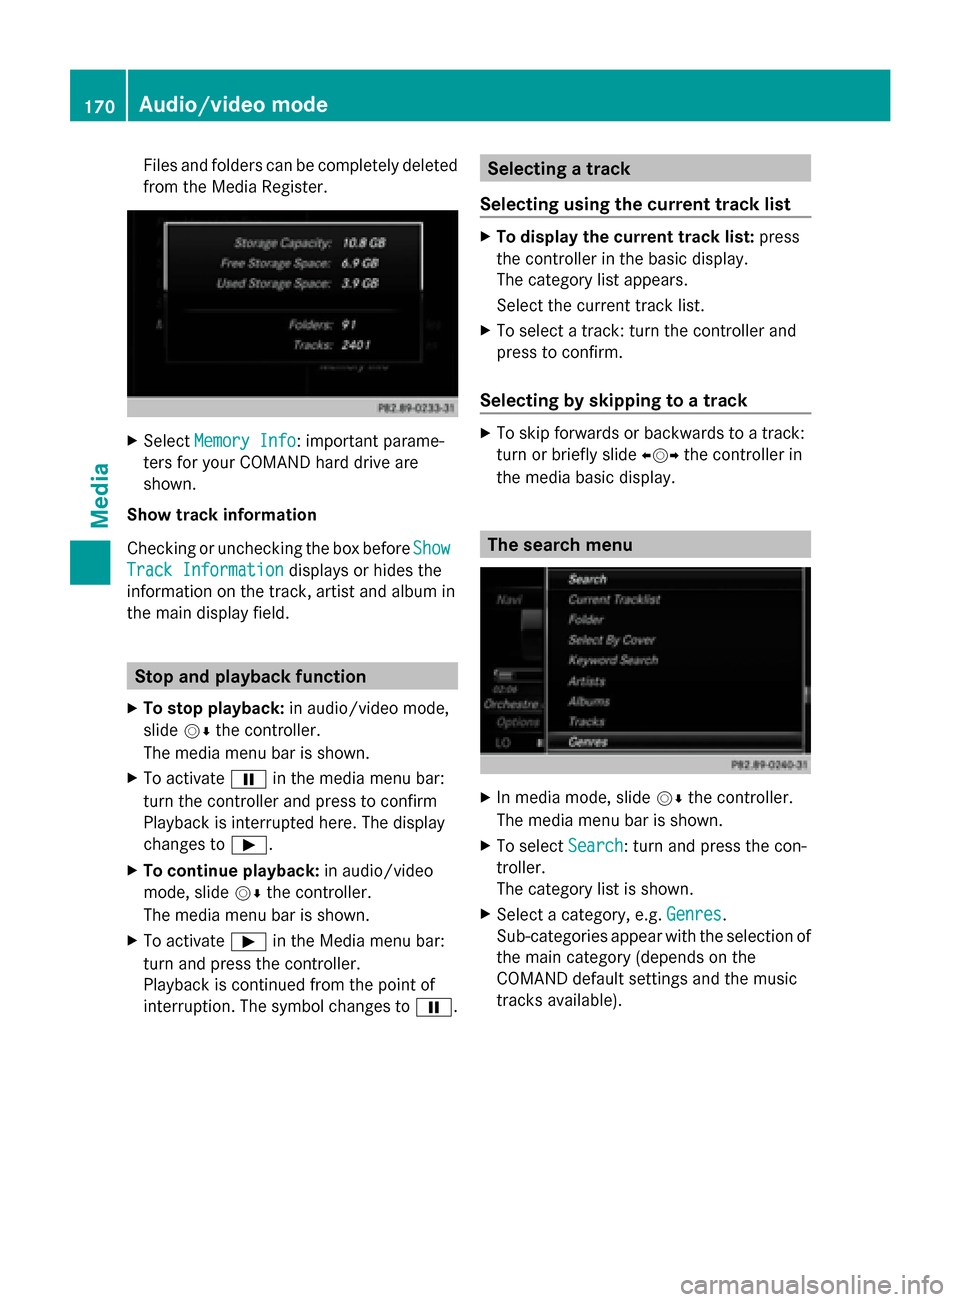
Select Memory Info
Memory Info : important parame-
ters for your COMAND hard drive are
shown.
Show track information
Checking or unchecking the box before Show
Show
Track Information
Track Information displays or hides the
information on the track, artist and album in
the main display field. Stop and playback function
X To stop playback: in audio/video mode,
slide 00520064the controller.
The media menu bar is shown.
X To activate 00CFin the media menu bar:
turn the controller and press to confirm
Playback is interrupted here. The display
changes to 00D0.
X To continue playback: in audio/video
mode, slide 00520064the controller.
The media menu bar is shown.
X To activate 00D0in the Media menu bar:
turn and press the controller.
Playback is continued from the point of
interruption. The symbol changes to 00CF. Selecting a track
Selecting using the current track list X
To display the current track list: press
the controller in the basic display.
The category list appears.
Select the current track list.
X To select a track: turn the controller and
press to confirm.
Selecting by skipping to a track X
To skip forwards or backwards to a track:
turn or briefly slide 009500520096the controller in
the media basic display. The search menu
X
In media mode, slide 00520064the controller.
The media menu bar is shown.
X To select Search Search: turn and press the con-
troller.
The category list is shown.
X Select a category, e.g. Genres Genres.
Sub-categories appear with the selection of
the main category (depends on the
COMAND default settings and the music
tracks available). 170
Audio/video modeMedia
Page 173 of 214

X
Select a sub-category, e.g. Rock
Rock.
If the Rock
Rocksub-category includes music
tracks, these will be shown.. Gracenote
®
Media Database
General notes This function is only available in audio CD
mode.
There is a version of
Gracenote® music recognition technology,
Emeryville, California, USA on the COMAND
hard disk. You will recognize this by the logo
in the bottom right-hand corner of certain
audio displays.
If the audio CD does not contain any CD text
information, COMAND can use the Grace-
note ®
Media Database to identify unknown
audio tracks when in audio CD mode.
Internet update of metadata With the option
Update metadata via Inter-
net, the audio CD meta data that is not avail-
able (e.g. cover, track, album, artist) can be
reloaded to the internal Gracenote database.
An Internet connection is required for this
(Y page 136). Selecting Internet update of meta data
X
In media mode, slide 00520064the controller.
The media menu bar is shown.
X To select Options Options: turn and press the con-
troller.
X Select Updating Metadata Via Inter‐
Updating Metadata Via Inter‐
net
net in the selection list.
A connection with the Gracenote data
server is established. The missing data is
loaded, saved and displayed in the main
display field.
If there is no data found or there is no Inter-
net connection, a corresponding error mes-
sage will appear.
Switching the Gracenote ®
data display
on/off X
Switch on CD mode (Y page 168).
X To select Gracenote Media Database Gracenote Media Database:
turn and press the controller.
X To switch the display off: select None
None.
In the basic display, Track 1
Track 1,Track 2
Track 2 etc.
are shown instead of the Gracenote ®
data,
for example.
X To switch on the display: press the control-
ler. Notes on audio/video mode
Permissible data carriers R
CD-R, CD-A and CD-RW
R DVD-R, DVD-V and DVD-RW Audio/video mode
171Media Z
Page 174 of 214
R
SD memory card
R USB storage device
Permissible file systems R
ISO 9660/Joliet standard for CDs
R UDF for video DVDs
R FAT16, FAT32, exFAT and NTFS for SD
memory card and USB storage media
Multisession CDs For multisession CDs, the content of the first
session determines how COMAND will proc-
ess the CD. COMAND plays only one session
and gives priority to the audio CD session.
File structure of a data carrier When you create a disc with compressed
music files, the tracks can be organized in
folders. A folder may also contain subfolders.
The disc may contain no more than eight
directory levels. Files beyond the eighth level
will not be recognized by the system.
i COMAND supports up to 50,000 files
from one data medium. For data media with
more than 64 GB, only files in the following
folders are supported: music, pictures, vid-
eos.
Track and file names When you create a disc with compressed
music files, you can assign names to the
tracks and folders.
If MP3 or WMA files are stored in the root
directory itself, the root directory will also be
treated as a folder. You should observe the following when
assigning track names:
R
track names must have at least one char-
acter.
R track names must have the ending of a
supported audio/video format, e.g. mp3,
aac or m4v.
R there must be a dot between the track
name and the extension.
Example of a correct track name:
"Track1.mp3".
Permissible formats COMAND supports the following audio for-
mats:
R
MP3
R WMA
R CD-A
R AAC formats: .aac, .mp4, .m4a and .m4b
Copy-protected iTunes music files with
the .m4p file ending are not supported.
COMAND supports the following video for-
mats:
R DVD-V
R MPEG
R wmv
R M4V
R AVI up to 720p.
Permissible bit and sampling rates COMAND supports MP3 files of the following
types:
R
fixed and variable bit rates from 32 kbit/s
to 320 kbit/s
R sampling rates of 8 kHz to 48 kHz
COMAND supports WMA files of the following
types:
R fixed bit rates from 5 kbit/s to 384 kbit/s
R sampling rates of 8 kHz to 48 kHz 172
Audio/video modeMedia
Page 175 of 214
COMAND does not support WMA files of the
following types:
R DRM (Digital Rights Management)
encrypted files
R variable bit rate
R WMA Pro
R 5.1 surround sound
i Only use tracks with a bit rate of at least
128 kbit/s and a sampling rate of at least
44.1 kH z.Lower rates can cause a notice-
able deterioration in quality. This is espe-
cially the case if you have activated a sur-
round sound function.
Selecting an active partition (USB mass
storage devices only) You can select this function for USB storage
devices when the storage device is parti-
tioned. Up to 9 partitions (primary or logical,
FAT, FAT32 and NTFS) are supported.
Select active partition
X To select Options
Options in the Media menu bar:
turn and press the controller.
X Select Select Active Partition
Select Active Partition.
Notes on copyright Audio/video files that you create or repro-
duce yourself for playback are generally sub-
ject to copyright protection.
In many countries, reproductions, even for
private use, are not permitted without the
prior consent of the copyright holder.
Make sure that you know about the applicable
copyright regulations and that you comply
with these.
Notes on CDs/DVDs !
COMAND is designed to play discs that
comply with the EN 60908 standard. There-
fore, you can only use discs with a maxi-
mum thickness of 1.3 mm.
If you insert thicker discs, e.g. those that
contain data on both sides (DVD on one side and audio data on the other), they can-
not be ejected and can damage the device.
Only use round discs with a diameter of
12 cm. Do not use discs with a diameter of
8 cm, even with an adapter.
Discs with copy protection are not compati-
ble with the audio CD standard and therefore
may not be able to be played by COMAND.
Playback problems may occur when playing
copied discs.
There may be playback problems if you play
CDs that you have copied yourself with a stor-
age capacity of more than 700 MB.
i COMAND is able to play back audio CDs
in multichannel audio format. Media search
Starting the media search
X In Media mode, slide 00520064the controller.
The media menu bar appears.
X To select Search Search: turn and press the con-
troller.
The category list appears. General information
COMAND plays back files from the following
data mediums:
R Disc (CD/DVD Audio)
R Memory card
R MEDIA REGISTER
R USB storage device
R Apple devices (folder, year and photos are
not available)
The categories are displayed according to the
data available. Media search
173Media Z
Page 178 of 214
X
Select a track.
The basic display appears and playback
starts. MEDIA REGISTER
General notes
i Keep your original music files, photos and
video files in a secure location. An error in
COMAND may result in the loss of music
files stored in the MEDIA REGISTER.
Mercedes-Benz is not liable for any loss of
data.
You can store music files, photos or video files
in the MEDIA REGISTER. The memory has a
capacity of 10 GB. Switching on the MEDIA REGISTER
X Press the 00FDbutton repeatedly until the
MEDIA REGISTER is switched on.
Pressing the button repeatedly changes
the operating mode in the following order:
R Disc
Disc;
R Memory Card Memory Card;
R Media Register
Media Register;
R USB 1
USB 1 (vehicles without Media Interface)
R Media Interface 1
Media Interface 1 (vehicles without
Media Interface)
R USB 2
USB 2 (vehicles without Media Interface)
R Media Interface 2
Media Interface 2 (vehicles with
Media Interface) R
Bluetooth Audio Bluetooth Audio;
R Aux Aux .
Playback begins at the point last listened to.
If there are no files, you will see a message to
this effect.
Further options for switching on:
R Using the number keypad: (Y page 165)
R Using the main function bar: (Y page 165)
R Using the device list: (Y page 165)
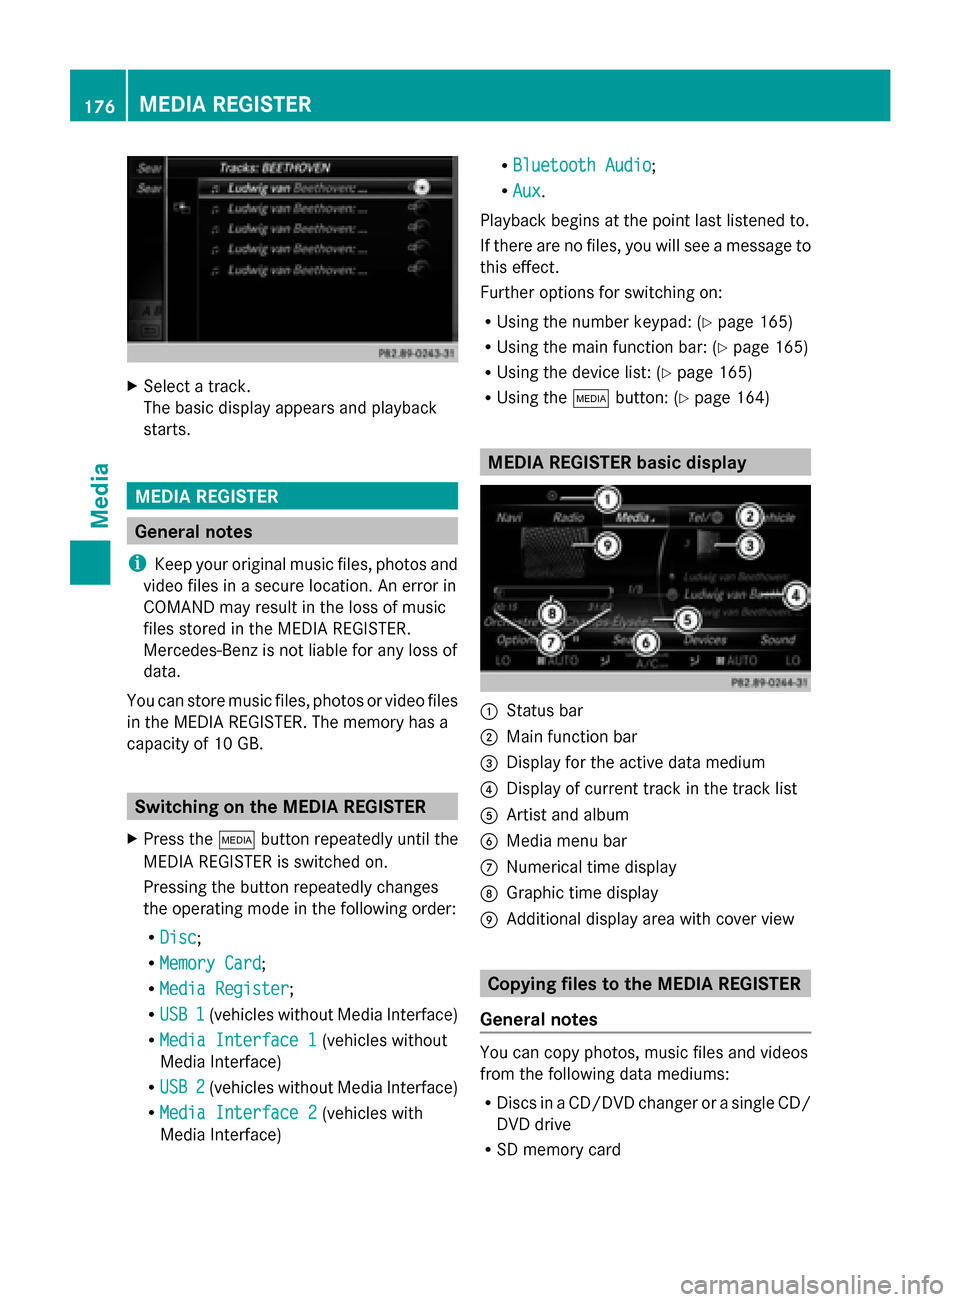
R Using the 00FDbutton: (Y page 164) MEDIA REGISTER basic display
0043
Status bar
0044 Main function bar
0087 Display for the active data medium
0085 Display of current track in the track list
0083 Artist and album
0084 Media menu bar
006B Numerical time display
006C Graphic time display
006D Additional display area with cover view Copying files to the MEDIA REGISTER
General notes You can copy photos, music files and videos
from the following data mediums:
R
Discs in a CD/DVD changer or a single CD/
DVD drive
R SD memory card 176
MEDIA REGISTERMedia
Page 182 of 214

Selecting a playback mode
X To switch MEDIA REGISTER on: press the
00FD button repeatedly until the MEDIA
REGISTER is switched on.
X Slide 00520064the controller.
The media menu bar appears.
X To select Options
Options: turn and press the con-
troller. X
Select Playback Mode
Playback Mode.
The options list appears. The 003Bdot indi-
cates the current setting.
X Select the desired option.
The option is switched on. For all options
except Normal Track Sequence
Normal Track Sequence, you will
see a corresponding icon in the main dis-
play.
i The Normal Track Sequence Normal Track Sequence option is
automatically selected when you change
the disc you are currently listening to or
when you select a different medium. If an
option is selected, it remains selected after
COMAND is switched on or off.
The following options are available:
R Normal Track Sequence Normal Track Sequence: the tracks are
played in the normal order (e.g. track 1, 2,
3 etc.).
R Random Medium Random Medium: all the tracks on the
medium are played in random order.
R Random Random Track
TrackList
List: the tracks in the cur-
rently active track list are played in random
order. Bluetooth
®
audio mode Connecting Bluetooth
®
audio devices
Prerequisites X
Activate the Bluetooth ®
function in
COMAND (Y page 42).
Bluetooth ®
audio mode requires a Blue-
tooth ®
-capable audio device.
Check your Bluetooth ®
audio device for the
following (see the Bluetooth ®
audio device's
operating instructions):
R Bluetooth ®
audio profile
The Bluetooth ®
audio device must support
the A2DP and AVRCP Bluetooth ®
audio
profiles.
R Bluetooth ®
visibility
Certain Bluetooth ®
audio devices do not
just require activation of the Bluetooth ®
function. In addition, your device must be
made "visible" to other devices.
R Bluetooth ®
device name
This device name is predetermined but can
usually be changed. To make a clear selec-
tion of the Bluetooth ®
device possible,
Mercedes-Benz recommends that you cus-
tomize the device name (see the Blue-
tooth ®
audio device's operating instruc-
tions).
i A2DP (Advanced AudioDistribution
Profile): Bluetooth ®
audio profile for audio
data transmission
AVRCP (Audio VideoRemote Control
Profile): Bluetooth ®
audio profile for audio
data playback.
i The Bluetooth ®
device must be visible for
authorization. After authorization,
COMAND even finds the Bluetooth ®
device
when it is not visible.
X The Bluetooth ®
function in COMAND must
be activated (Y page 42).180
Bluetooth ®
audio modeMedia