ESP MERCEDES-BENZ C-Class 2015 W205 Comand Manual
[x] Cancel search | Manufacturer: MERCEDES-BENZ, Model Year: 2015, Model line: C-Class, Model: MERCEDES-BENZ C-Class 2015 W205Pages: 214, PDF Size: 5.16 MB
Page 192 of 214
X
To select Options
Optionsin the menu bar: slide
005200C5 and press the controller.
A menu appears. You can set Mono/
Mono/
Stereo
Stereo andVolume
Volume.
Mono/stereo:
X To select Mono/Stereo
Mono/Stereo: turn and press the
controller.
A menu appears.
X Select Mono
Mono orStereo Stereo.
The 003Bdot indicates the current setting.
Volume:
X To select Volume
Volume: turn and press the con-
troller.
X Select Standard
Standard orBoost Boost.
Standard
Standard: the volume of the external audio
source is adjusted to a standard value.
Boost
Boost: the volume of the external audio
source is raised by approximately 10 dB.
The 003Bdot indicates the current setting.
A device which is connected as an external
audio source may seem quieter or louder in
the vehicle, or the usual maximum volume
cannot be achieved. On some devices, it is
possible to adjust the volume separately. In
this case, start at a medium volume and
increase it gradually. This enables you to
determine whether the system is able to play
the music at high volume without distorting
it. Video AUX mode
Connecting external video sources
G
WARNING
External video sources may have different vol-
umes, which can mean that system messages
such as traffic announcements and navigation
system announcements are much louder. If
necessary, please deactivate the system mes-
sages or adjust their volume manually.
Video AUX is another option for showing vid-
eos using COMAND. To connect an external video source to the
video AUX, you will require a video AUX cable.
i
If you only use an audio AUX cable, you
will only be able to hear the sound from the
video being played.
Videos cannot be shown on the driver's
side while the vehicle is in motion. Switching to AUX video mode
X Connect the external video source.
The socket for the video AUX jack is located
in the stowage compartment in the center
console.
The video AUX is not selected automati-
cally.
X Press the 00FDbutton.
The menu for the last accessed media
source appears.
X To select Media
Media from the main function bar:
turn and press the controller.
You will see the menu.
X Select Aux Aux.
The AUX video menu appears.
X To select Audio/Video Audio/Video in the menu bar:
slide 005200C5 and press the controller.
A Source Type Selection
Source Type Selection menu
appears.
X Select Video Video.
The 003Bdot indicates the current setting.
If the video source is connected and play-
back selected, the image from the external
video source will appear if Video Videois
selected.
Please see the corresponding device operat-
ing instructions for information on how to
operate the external video source.
Information about sound settings
(Y page 200) 190
Video AUX modeMedia
Page 202 of 214
Your COMAND equipment
These operating instructions describe all
standard and optional equipment available
for your COMAND system at the time of pur-
chase. Country-specific differences are pos-
sible. Please note that your COMAND system
may not be equipped with all the features
described. This also applies to safety-relevant
systems and functions. Therefore, the equip-
ment on your COMAND system may differ
from that in the descriptions and illustrations.
Should you have any questions concerning
equipment and operation, please consult an
authorized Mercedes-Benz Center. Sound settings
Calling up the sound menu
You can make various sound settings for the
different audio and video sources. It is possi-
ble to set more bass for radio mode than for
audio CD mode, for example. The respective
sound menu can be called up from the menu
of the desired mode.
The example describes where to call up the
sound menu in CD mode. X
Insert an audio CD (Y page 166).
The CD display appears.
X To display the menu bars: slide 00520064the
controller.
X To select Sound
Sound in the menu bar: turn and
press the controller.
The menu appears with the last setting
accessed, e.g. Balance/Fader Balance/Fader. Sound menu overview Function Options
Equalizer Sets: treble, mid-
range and base
Balance/fader Moves the sound
focus: right/left and
front/rear
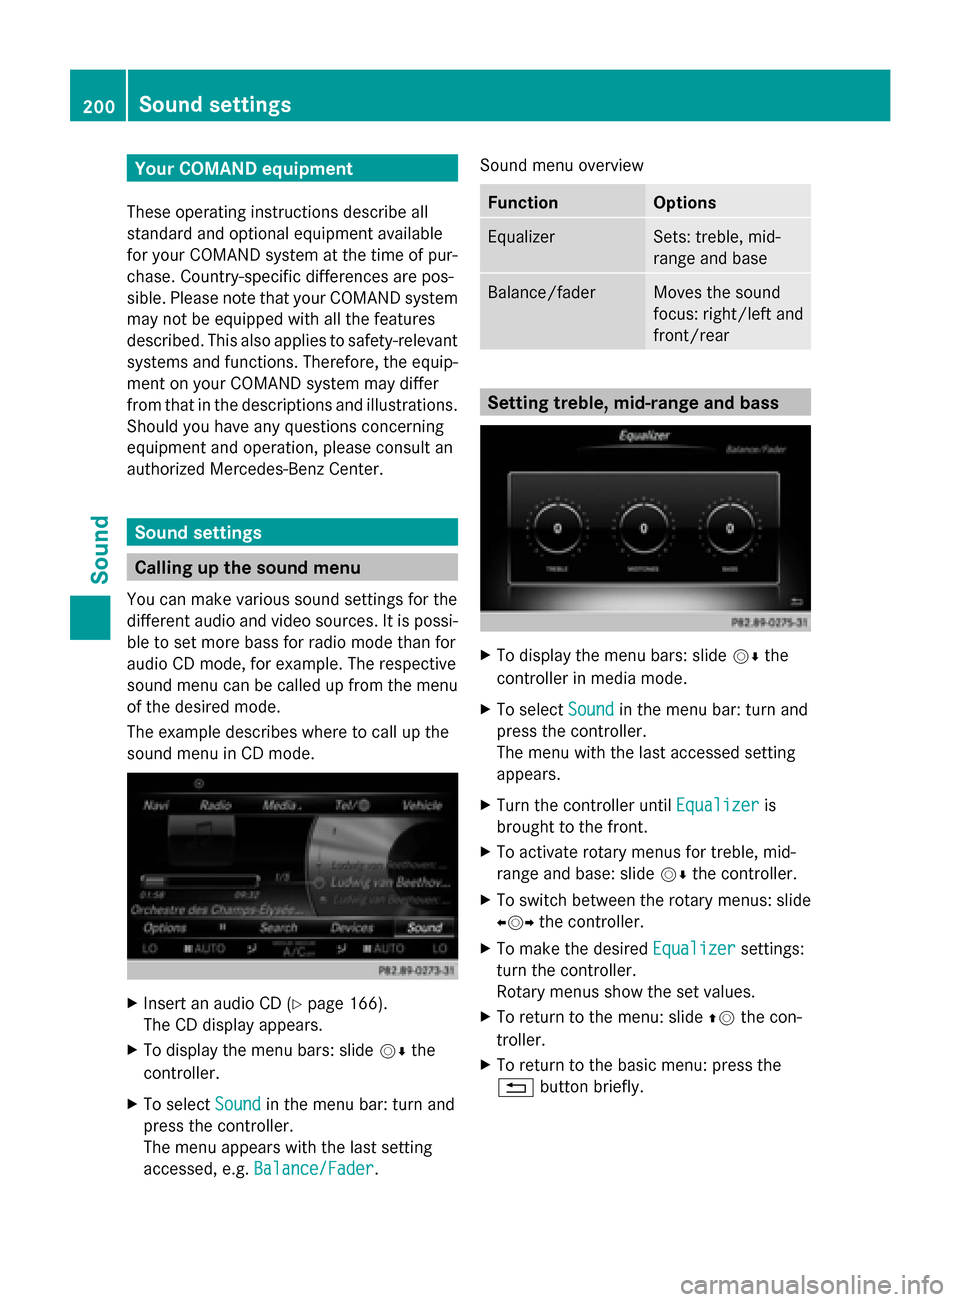
Setting treble, mid-range and bass
X
To display the menu bars: slide 00520064the
controller in media mode.
X To select Sound Soundin the menu bar: turn and
press the controller.
The menu with the last accessed setting
appears.
X Turn the controller until Equalizer Equalizeris
brought to the front.
X To activate rotary menus for treble, mid-
range and base: slide 00520064the controller.
X To switch between the rotary menus: slide
00950052 the controller.
X To make the desired Equalizer
Equalizer settings:
turn the controller.
Rotary menus show the set values.
X To return to the menu: slide 00970052the con-
troller.
X To return to the basic menu: press the
0038 button briefly. 200
Sound set
tingsSound
Page 203 of 214
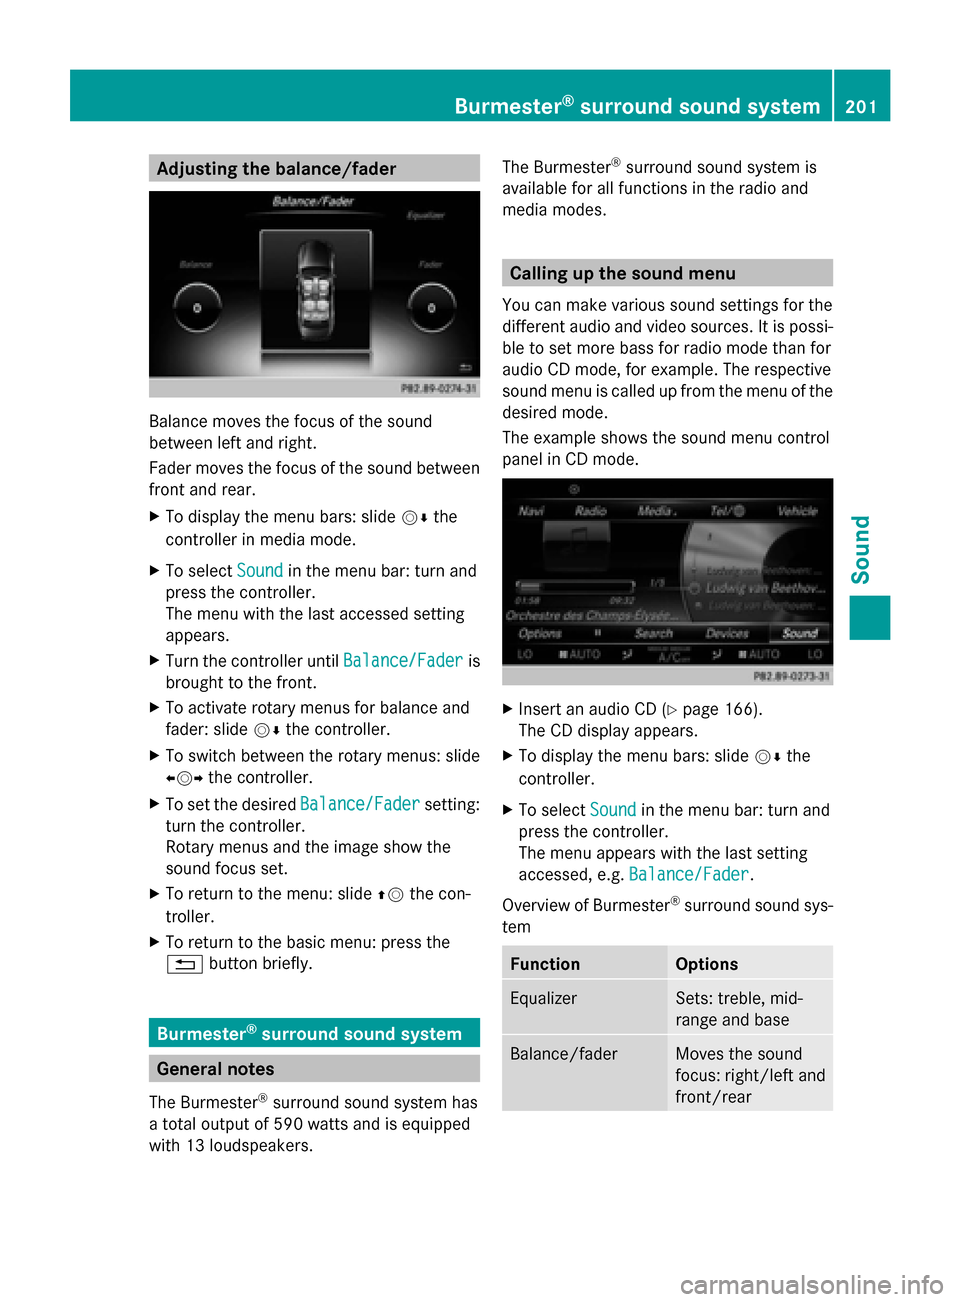
Adjusting the balance/fader
Balance moves the focus of the sound
between left and right.
Fader moves the focus of the sound between
front and rear.
X To display the menu bars: slide 00520064the
controller in media mode.
X To select Sound Soundin the menu bar: turn and
press the controller.
The menu with the last accessed setting
appears.
X Turn the controller until Balance/Fader
Balance/Fader is
brought to the front.
X To activate rotary menus for balance and
fader: slide 00520064the controller.
X To switch between the rotary menus: slide
009500520096 the controller.
X To set the desired Balance/Fader
Balance/Fader setting:
turn the controller.
Rotary menus and the image show the
sound focus set.
X To return to the menu: slide 00970052the con-
troller.
X To return to the basic menu: press the
0038 button briefly. Burmester
®
surround sound system General notes
The Burmester ®
surround sound system has
a total output of 590 watts and is equipped
with 13 loudspeakers. The Burmester
®
surround sound system is
available for all functions in the radio and
media modes. Calling up the sound menu
You can make various sound settings for the
different audio and video sources. It is possi-
ble to set more bass for radio mode than for
audio CD mode, for example. The respective
sound menu is called up from the menu of the
desired mode.
The example shows the sound menu control
panel in CD mode. X
Insert an audio CD (Y page 166).
The CD display appears.
X To display the menu bars: slide 00520064the
controller.
X To select Sound Soundin the menu bar: turn and
press the controller.
The menu appears with the last setting
accessed, e.g. Balance/Fader Balance/Fader.
Overview of Burmester ®
surround sound sys-
tem Function Options
Equalizer Sets: treble, mid-
range and base
Balance/fader Moves the sound
focus: right/left and
front/rearBurmester
®
surround sound system 201Sound
Page 210 of 214
Moving the weather map
X
Slide 4 or1 the controller.
The weather map moves in the correspond-
ing direction under the crosshair.
Changing the scale X
Turn the controller.
The scale bar appears.
X Turn until the desired scale is set.
Showing/hiding the menu in the
weather map X
To show: press the controller.
X To hide: slide5the controller.
Selecting a weather station in the map X
Move the weather map and crosshair to the
desired position (Y page 208).
X To show the menu: press the controller.
X To select Weather Table
Weather Table: press the con-
troller.
COMAND receives the weather data for the
selected position from the nearest weather
station and displays it automatically as a
daily forecast.
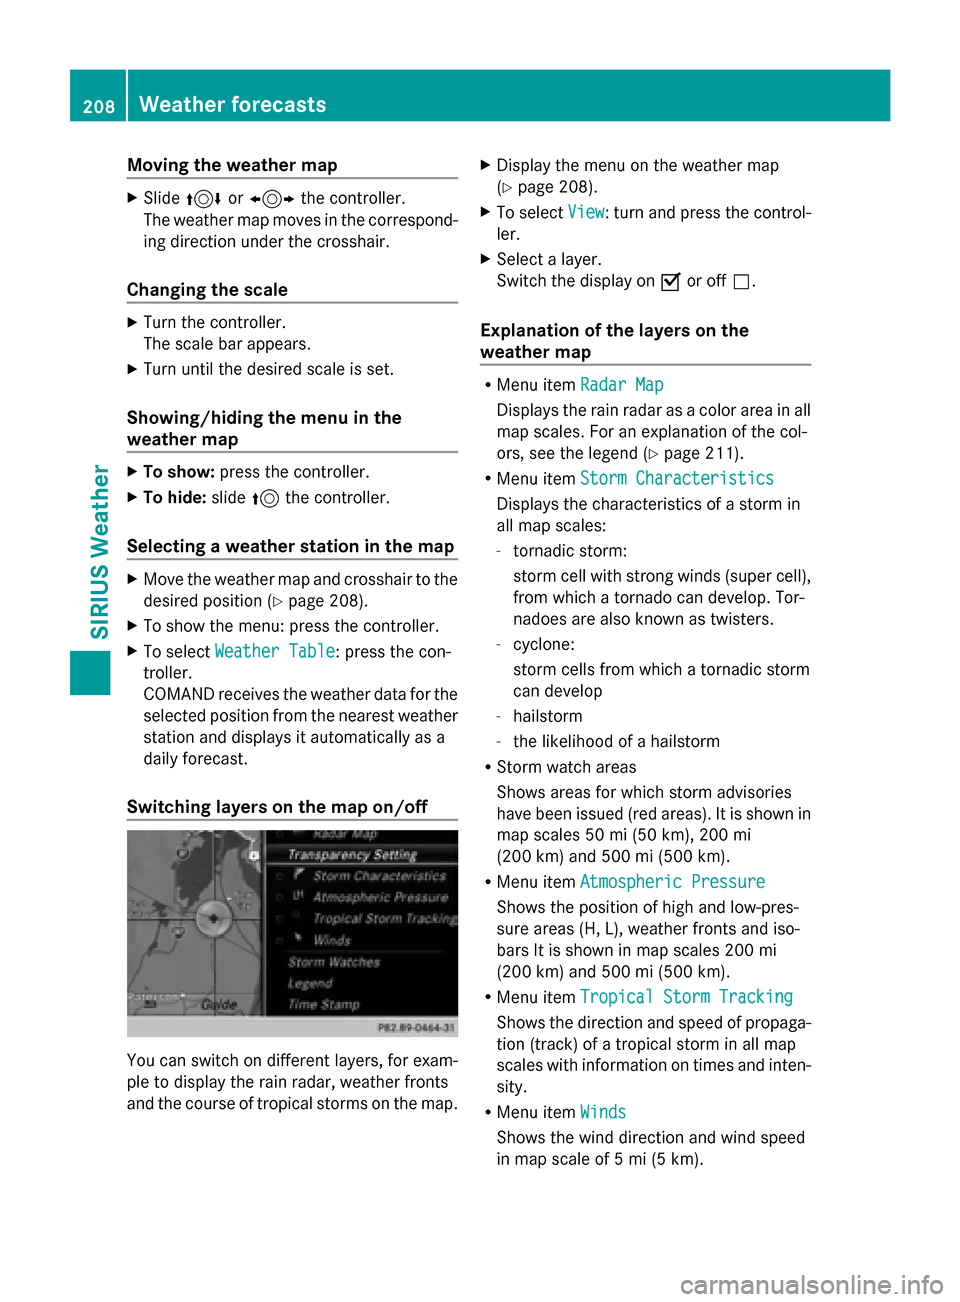
Switching layers on the map on/off You can switch on different layers, for exam-
ple to display the rain radar, weather fronts
and the course of tropical storms on the map. X
Display the menu on the weather map
(Y page 208).
X To select View View: turn and press the control-
ler.
X Select a layer.
Switch the display on 0073or off 0053.
Explanation of the layers on the
weather map R
Menu item Radar Map Radar Map
Displays the rain radar as a color area in all
map scales. For an explanation of the col-
ors, see the legend (Y page 211).
R Menu item Storm Characteristics Storm Characteristics
Displays the characteristics of a storm in
all map scales:
- tornadic storm:
storm cell with strong winds (super cell),
from which a tornado can develop. Tor-
nadoes are also known as twisters.
- cyclone:
storm cells from which a tornadic storm
can develop
- hailstorm
- the likelihood of a hailstorm
R Storm watch areas
Shows areas for which storm advisories
have been issued (red areas). It is shown in
map scales 50 mi (50 km), 200 mi
(200 km) and 500 mi (500 km).
R Menu item Atmospheric Pressure Atmospheric Pressure
Shows the position of high and low-pres-
sure areas (H, L), weather fronts and iso-
bars It is shown in map scales 200 mi
(200 km) and 500 mi (500 km).
R Menu item Tropical Storm Tracking Tropical Storm Tracking
Shows the direction and speed of propaga-
tion (track) of a tropical storm in all map
scales with information on times and inten-
sity.
R Menu item Winds Winds
Shows the wind direction and wind speed
in map scale of 5 mi (5 km). 208
Weather forecastsSIRIUS Weather
Page 213 of 214
Region of origin Category
Northwestern
Pacific Ocean
Menu item
Name_LP10 Name_LP10
(Tropical Cyclone)
(Tropical Cyclone) Northwestern
Pacific Ocean
Menu item
Name_1
Name_1
(Typhoon) (Typhoon) Northwestern
Pacific Ocean
Menu item
Name_1
Name_1
(Super-Typhoon) (Super-Typhoon) You can also see the time stamp for the
weather data on map scales of 50 miles and
smaller.
The weather map shows wind directions and
wind speeds.
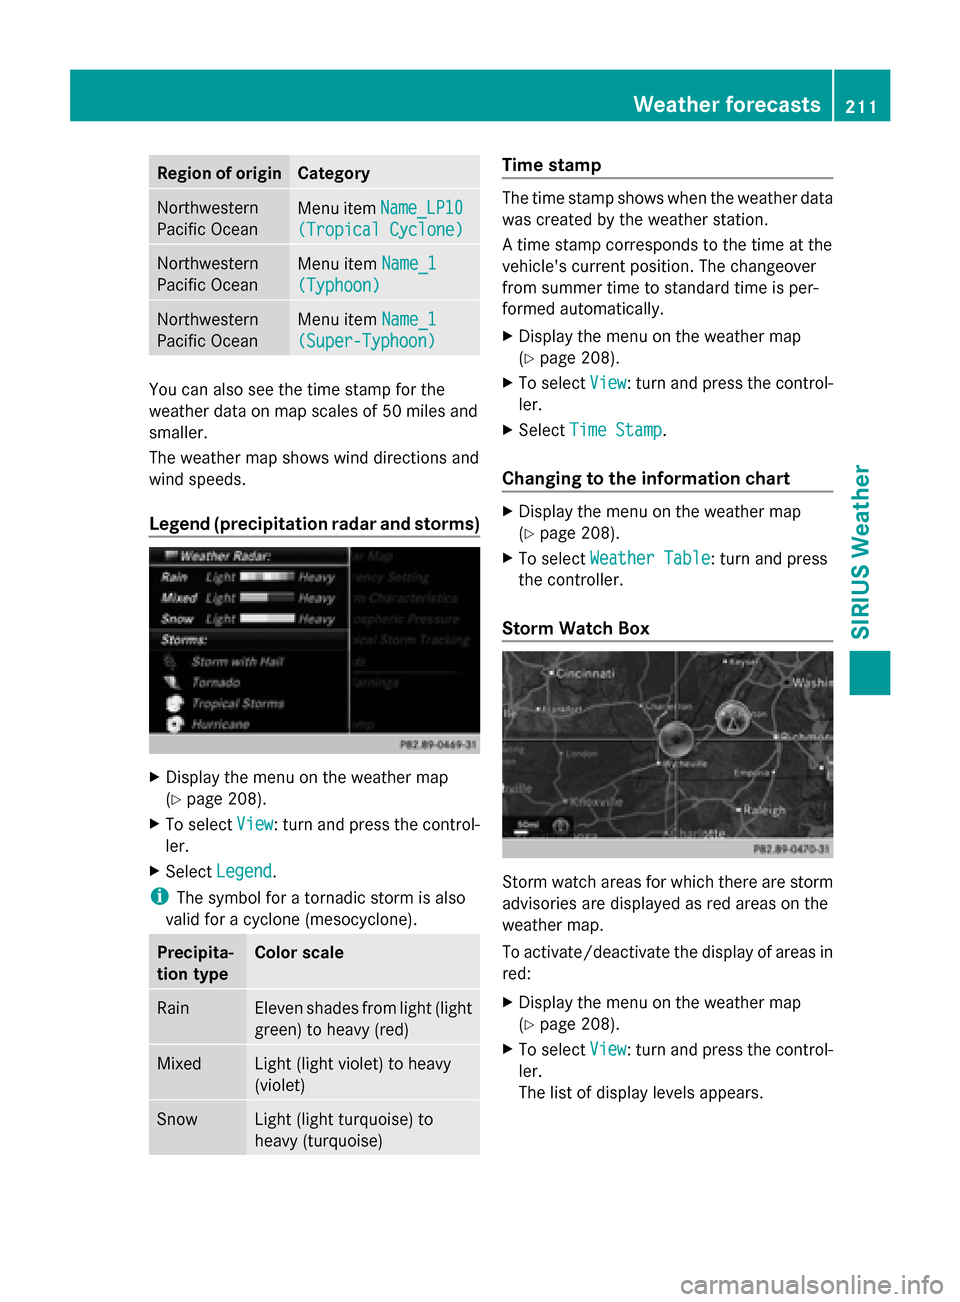
Legend (precipitation radar and storms) X
Display the menu on the weather map
(Y page 208).
X To select View
View : turn and press the control-
ler.
X Select Legend
Legend.
i The symbol for a tornadic storm is also
valid for a cyclone (mesocyclone). Precipita-
tion type Color scale
Rain Eleven shades from light (light
green) to heavy (red)
Mixed Light (light violet) to heavy
(violet)
Snow Light (light turquoise) to
heavy (turquoise) Time stamp
The time stamp shows when the weather data
was created by the weather station.
A time stamp corresponds to the time at the
vehicle's current position. The changeover
from summer time to standard time is per-
formed automatically.
X
Display the menu on the weather map
(Y page 208).
X To select View View: turn and press the control-
ler.
X Select Time Stamp
Time Stamp.
Changing to the information chart X
Display the menu on the weather map
(Y page 208).
X To select Weather Table Weather Table: turn and press
the controller.
Storm Watch Box Storm watch areas for which there are storm
advisories are displayed as red areas on the
weather map.
To activate/deactivate the display of areas in
red:
X
Display the menu on the weather map
(Y page 208).
X To select View View: turn and press the control-
ler.
The list of display levels appears. Weather forecasts
211SIRIUS Weather