display MERCEDES-BENZ C CLASS 2016 Owners Manual
[x] Cancel search | Manufacturer: MERCEDES-BENZ, Model Year: 2016, Model line: C CLASS, Model: MERCEDES-BENZ C CLASS 2016Pages: 398, PDF Size: 11.64 MB
Page 346 of 398
or more tires. The affected tire must not show
any clearly visible damage.
You can recognize MOExtended tires by the
MOExtended marking which appears on the
sidewall of the tire. You will find this marking
next to the tire size designation, the load-bear-
ing capacity and the speed index ( Y
page 374).
MOExtended tires may only be used in conjunc-
tion with an active tire pressure loss warning
system or with an active tire pressure monitor.
If a pressure loss warning message appears
in the multifunction display: R
observe the instructions in the display mes-
sages ( Y
page 280).R
check the tire for damage. R
if driving on, observe the following notes.
The driving distance possible in run-flat mode is
approximately 50 miles (80 km) when the vehi-
cle is partially laden. When the vehicle is fully
laden it is approximately 19 miles (30 km).
In addition to the vehicle load, the driving dis-
tance possible depends upon: R
vehicle speed R
road condition R
outside temperature
The driving distance possible in run-flat mode
may be reduced by extreme driving conditions
or maneuvers, or it can be increased through a
moderate style of driving.
The driving distance possible in run-flat mode is
counted from the moment the tire pressure loss
warning appears in the multifunction display.
You must not exceed a maximum speed of
50 mph (80 km/h).
When replacing one or all tires, please observe
the following specifications for your vehicle's
tires: R
size R
the type and R
the "MOExtended" mark
If a tire has gone flat and cannot be replaced
with a MOExtended tire, a standard tire may be
used as a temporary measure. Make sure that
you use the proper size and type (summer or
winter tire).
Vehicles equipped with MOExtended tires are
not equipped with a TIREFIT kit at the factory. It
is therefore recommended that you additionally
equip your vehicle with a TIREFIT kit if you mount
tires that do not feature run-flat properties, e.g. winter tires. A TIREFIT kit may be obtained from
a qualified specialist workshop.
Important safety notes
G WARNING
When driving in emergency mode, the driving
characteristics deteriorate, e.g. when corner-
ing, accelerating quickly and when braking.
There is a risk of an accident.
Do not exceed the stated maximum speed.
Avoid abrupt steering and driving maneuvers,
and driving over obstacles (curbs, potholes,
off-road). This applies in particular to a laden
vehicle.
Stop driving in emergency mode if: R
you hear banging noises. R
the vehicle starts to shake. R
you see smoke and smell rubber. R
ESP ®
is intervening constantly. R
there are tears in the sidewalls of the tire.
After driving in emergency mode, have the
wheel rims checked at a qualified specialist
workshop with regard to their further use. The
defective tire must be replaced in every case.
TIREFIT kit
Important safety notes TIREFIT is a tire sealant.
You can use TIREFIT to seal punctures of up to
0.16 in (4 mm), particularly those in the tire
tread. You can use TIREFIT at outside tempera-
tures down to �
Page 357 of 398
! When towing, pull away slowly and
smoothly. If the tractive power is too high, the
vehicles could be damaged.
! Shift the automatic transmission to N and
do not open the driver's or front passenger's
door during towing. The automatic transmis-
sion may otherwise shift to position P , which
could damage the transmission.
! Do not tow with sling-type equipment. This
could damage the vehicle.
! The vehicle can be towed a maximum of
30 miles (50km). The towing speed of 30 mph
(50 km/h) must not be exceeded.
If the vehicle has to be towed more than
30 miles (50km), the entire vehicle must be
raised and transported.
It is better to have the vehicle transported than
to have it towed away.
If the vehicle has suffered transmission damage,
have it transported on a transporter or trailer.
The automatic transmission must be in position
N when the vehicle is being towed. If the auto-
matic transmission cannot be shifted to position
N , have the vehicle transported on a transporter
or trailer.
The battery must be connected and charged.
Otherwise, you: R
cannot turn the SmartKey to position 2 in the
ignition lock R
cannot release the electric parking brake R
cannot shift the automatic transmission to
position N
Disarm the automatic locking feature before the
vehicle is towed ( Y
page 89). You could other-
wise be locked out when pushing or towing the
vehicle.
PLUG-IN HYBRID vehicles:
PLUG-IN HYBRID vehicles may not be towed
away but must instead be transported, if: R
the multifunction display is not working or R
the á Towing Not Permitted See
Operator's Manual message appears in the
multifunction display
If the vehicle is in a dangerous area, it can be
towed out of that area with both axles on the
ground. In this case, the towing distance must
not be greater than 165 ft (50 m) and must not
exceed a towing speed of 6 mph (10 km/ h) . For longer distances, have the vehicle loaded and
transported.
Installing/removing the towing eye
Installing the towing eye
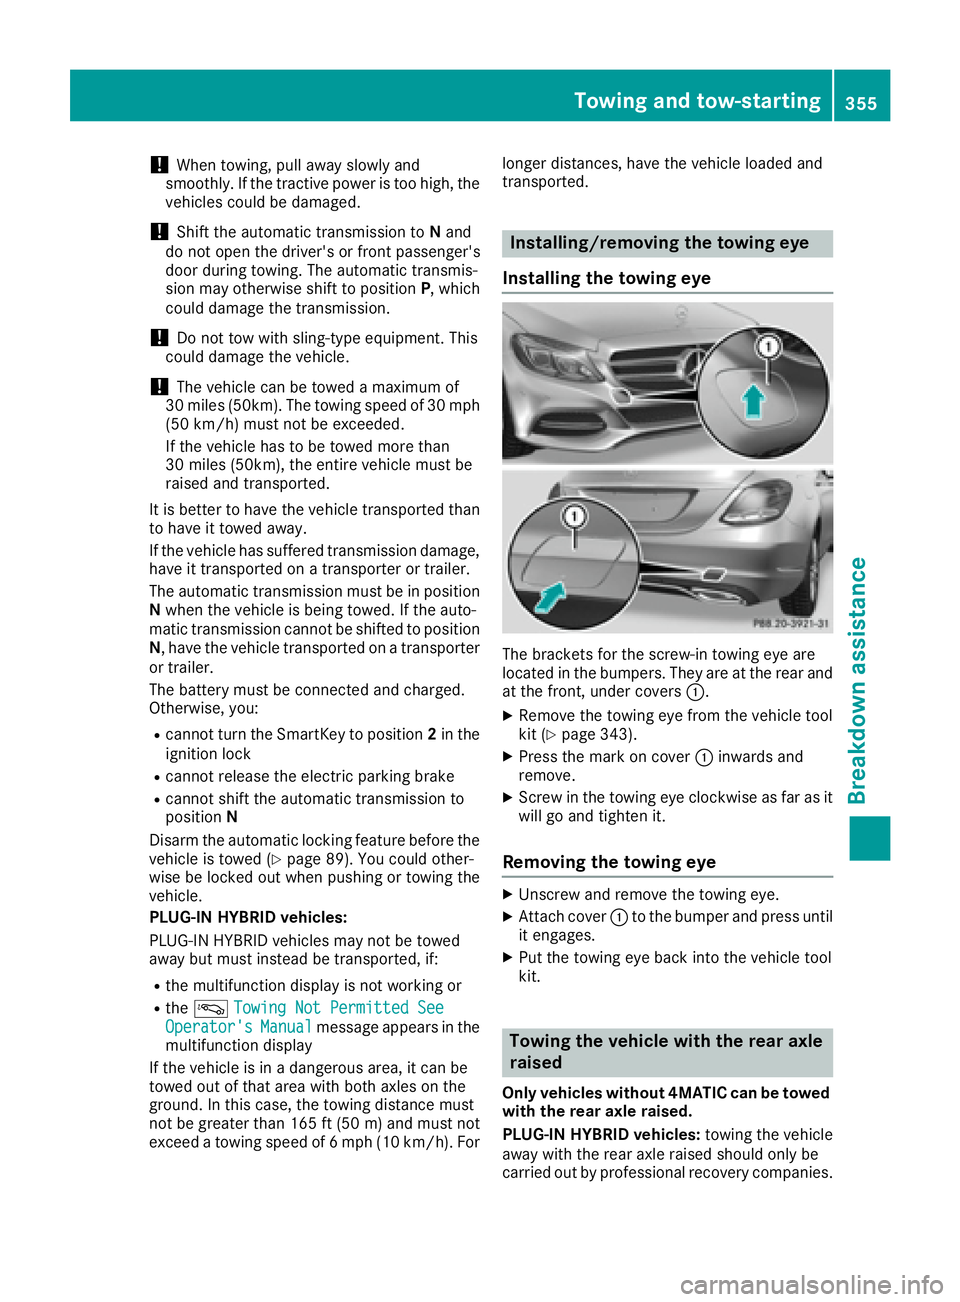
The brackets for the screw-in towing eye are
located in the bumpers. They are at the rear and
at the front, under covers �C .X
Remove the towing eye from the vehicle tool
kit ( Y
page 343). X
Press the mark on cover �C inwards and
remove. X
Screw in the towing eye clockwise as far as it
will go and tighten it.
Removing the towing eye X
Unscrew and remove the towing eye. X
Attach cover �C to the bumper and press until
it engages. X
Put the towing eye back into the vehicle tool
kit.
Towing the vehicle with the rear axle
raised
Only vehicles without 4MATIC can be towed
with the rear axle raised.
PLUG-IN HYBRID vehicles: towing the vehicle
away with the rear axle raised should only be
carried out by professional recovery companies.Towing and tow-starting 355
Breakdown assistance Z
Page 368 of 398
Overinflated tires may: R
increase the braking distance R
adversely affect handling R
wear excessively and/or unevenly R
have an adverse effect on ride comfort R
be more susceptible to damage
Maximum tire pressures
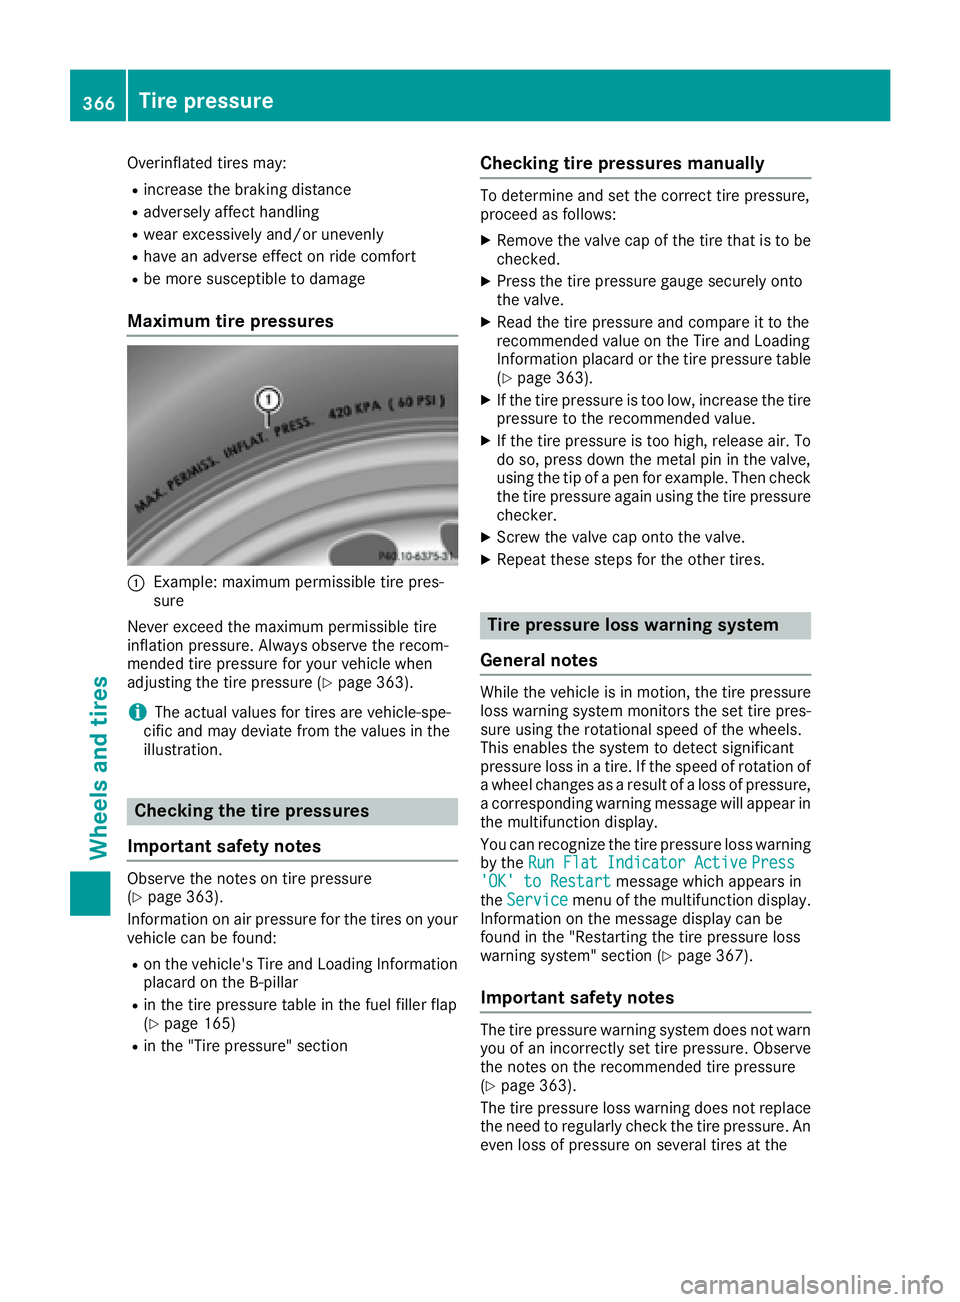
�C
Example: maximum permissible tire pres-
sure
Never exceed the maximum permissible tire
inflation pressure. Always observe the recom-
mended tire pressure for your vehicle when
adjusting the tire pressure ( Y
page 363).
i The actual values for tires are vehicle-spe-
cific and may deviate from the values in the
illustration.
Checking the tire pressures
Important safety notes Observe the notes on tire pressure
( Y
page 363).
Information on air pressure for the tires on your
vehicle can be found: R
on the vehicle's Tire and Loading Information
placard on the B-pillar R
in the tire pressure table in the fuel filler flap
( Y
page 165)R
in the "Tire pressure" section Checking tire pressures manually To determine and set the correct tire pressure,
proceed as follows: X
Remove the valve cap of the tire that is to be
checked. X
Press the tire pressure gauge securely onto
the valve. X
Read the tire pressure and compare it to the
recommended value on the Tire and Loading
Information placard or the tire pressure table
( Y
page 363). X
If the tire pressure is too low, increase the tire
pressure to the recommended value. X
If the tire pressure is too high, release air. To
do so, press down the metal pin in the valve,
using the tip of a pen for example. Then check
the tire pressure again using the tire pressure
checker. X
Screw the valve cap onto the valve. X
Repeat these steps for the other tires.
Tire pressure loss warning system
General notes While the vehicle is in motion, the tire pressure
loss warning system monitors the set tire pres-
sure using the rotational speed of the wheels.
This enables the system to detect significant
pressure loss in a tire. If the speed of rotation of
a wheel changes as a result of a loss of pressure,
a corresponding warning message will appear in
the multifunction display.
You can recognize the tire pressure loss warning
by the Run Flat Indicator Active Press
'OK' to Restart message which appears in
the Service menu of the multifunction display.
Information on the message display can be
found in the "Restarting the tire pressure loss
warning system" section ( Y
page 367).
Important safety notes
The tire pressure warning system does not warn
you of an incorrectly set tire pressure. Observe
the notes on the recommended tire pressure
( Y
page 363).
The tire pressure loss warning does not replace
the need to regularly check the tire pressure. An
even loss of pressure on several tires at the366
Tire pressure
Wheels and tires
Page 370 of 398
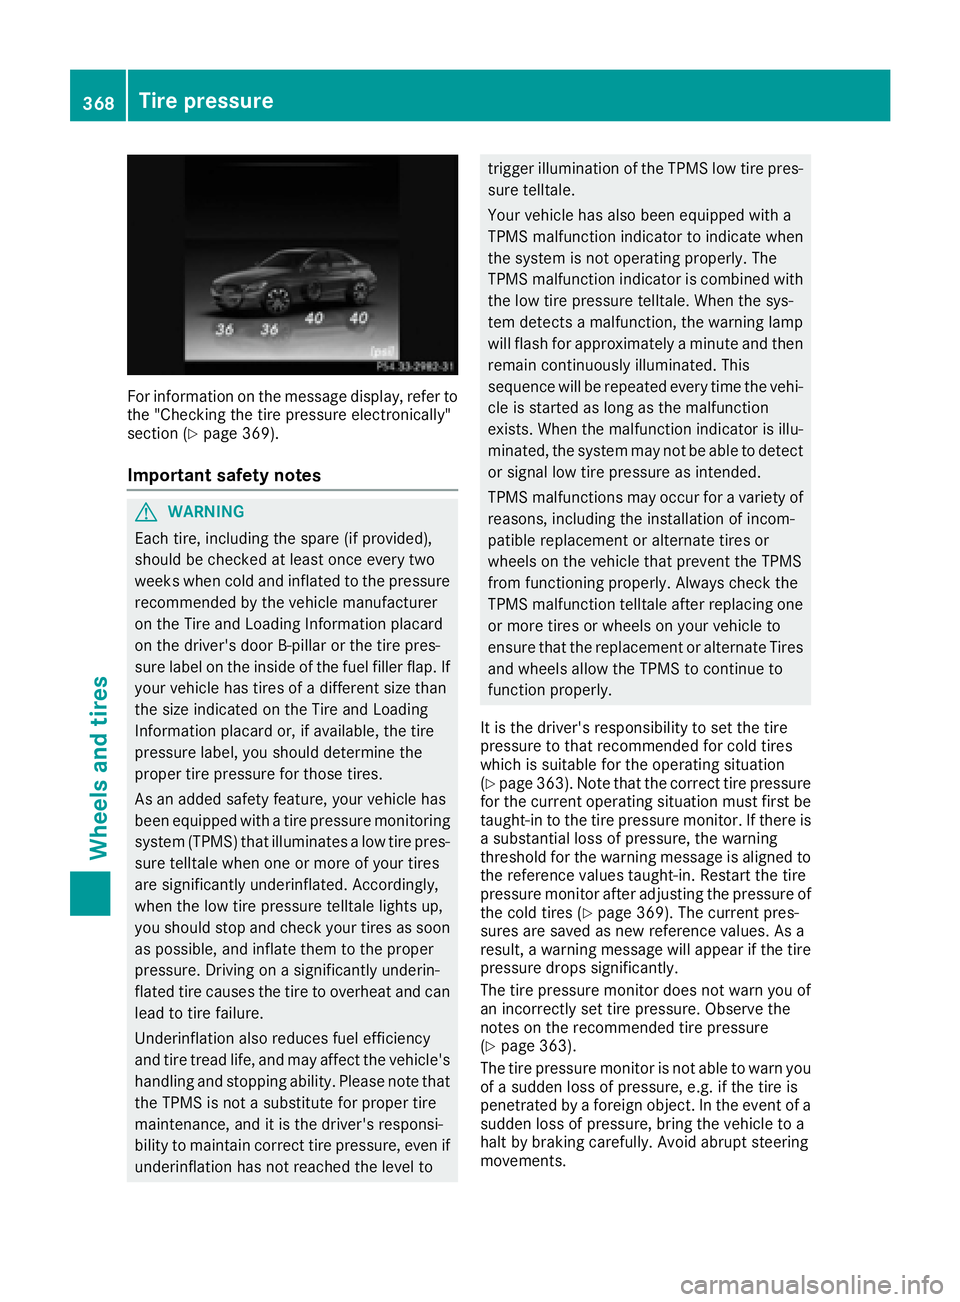
For information on the message display, refer to
the "Checking the tire pressure electronically"
section ( Y
page 369).
Important safety notes
G WARNING
Each tire, including the spare (if provided),
should be checked at least once every two
weeks when cold and inflated to the pressure
recommended by the vehicle manufacturer
on the Tire and Loading Information placard
on the driver's door B-pillar or the tire pres-
sure label on the inside of the fuel filler flap. If
your vehicle has tires of a different size than
the size indicated on the Tire and Loading
Information placard or, if available, the tire
pressure label, you should determine the
proper tire pressure for those tires.
As an added safety feature, your vehicle has
been equipped with a tire pressure monitoring
system (TPMS) that illuminates a low tire pres-
sure telltale when one or more of your tires
are significantly underinflated. Accordingly,
when the low tire pressure telltale lights up,
you should stop and check your tires as soon
as possible, and inflate them to the proper
pressure. Driving on a significantly underin-
flated tire causes the tire to overheat and can
lead to tire failure.
Underinflation also reduces fuel efficiency
and tire tread life, and may affect the vehicle's
handling and stopping ability. Please note that
the TPMS is not a substitute for proper tire
maintenance, and it is the driver's responsi-
bility to maintain correct tire pressure, even if
underinflation has not reached the level to trigger illumination of the TPMS low tire pres-
sure telltale.
Your vehicle has also been equipped with a
TPMS malfunction indicator to indicate when
the system is not operating properly. The
TPMS malfunction indicator is combined with
the low tire pressure telltale. When the sys-
tem detects a malfunction, the warning lamp
will flash for approximately a minute and then
remain continuously illuminated. This
sequence will be repeated every time the vehi-
cle is started as long as the malfunction
exists. When the malfunction indicator is illu-
minated, the system may not be able to detect
or signal low tire pressure as intended.
TPMS malfunctions may occur for a variety of
reasons, including the installation of incom-
patible replacement or alternate tires or
wheels on the vehicle that prevent the TPMS
from functioning properly. Always check the
TPMS malfunction telltale after replacing one
or more tires or wheels on your vehicle to
ensure that the replacement or alternate Tires
and wheels allow the TPMS to continue to
function properly.
It is the driver's responsibility to set the tire
pressure to that recommended for cold tires
which is suitable for the operating situation
( Y
page 363). Note that the correct tire pressure
for the current operating situation must first be
taught-in to the tire pressure monitor. If there is
a substantial loss of pressure, the warning
threshold for the warning messag e i s aligned to
the
reference values taught-in. Restart the tire
pressure monitor after adjusting the pressure of
the cold tires ( Y
page 369). The current pres-
sures are saved as new reference values. As a
result, a warning message will appear if the tire
pressure drops significantly.
The tire pressure monitor does not warn you of
an incorrectly set tire pressure. Observe the
notes on the recommended tire pressure
( Y
page 363).
The tire pressure monitor is not able to warn you
of a sudden loss of pressure, e.g. if the tire is
penetrated by a foreign object. In the event of a
sudden loss of pressure, bring the vehicle to a
halt by braking carefully. Avoid abrupt steering
movements.368
Tire pressure
Wheels and tires
Page 371 of 398
The tire pressure monitor has a yellow warning
lamp in the instrument cluster for indicating
pressure loss or a malfunction. Whether the
warning lamp flashes or lights up indicates
whether a tire pressure is too low or the tire
pressure monitor is malfunctioning: R
if the warning lamp is lit continuously, the tire
pressure on one or more tires is significantly
too low. The tire pressure monitor is not mal-
functioning. R
if the warning lamp flashes for around a
minute and then remains lit constantly, the
tire pressure monitor is malfunctioning.
In addition to the warning lamp, a message
appears in the multifunction display. Observe
the information on display messages
( Y
page 280).
It may take up to ten minutes for a malfunction
of the tire pressure monitor to be indicated. A
malfunction will be indicated by the tire pres-
sure warning lamp flashing for approximately
one minute and then remaining lit. When the
malfunction has been rectified, the tire pressure
warning lamp goes out after a few minutes of
driving.
The tire pressure values indicated by the on-
board computer may differ from those meas-
ured at a gas station with a pressure gauge. The
tire pressures shown by the on-board computer
refer to those measured at sea level. At high
altitudes, the tire pressure values indicated by a
pressure gauge are higher than those shown by
the on-board computer. In this case, do not
reduce the tire pressures.
The operation of the tire pressure monitor can
be affected by interference from radio transmit-
ting equipment (e.g. radio headphones, two-way
radios) that may be being operated in or near the
vehicle.
Checking the tire pressure electroni-
cally X
Make sure that the SmartKey is in position 2
in the ignition lock ( Y
page 146).X
Use �
Page 393 of 398
Flexible Fuel vehicles can be refueled with the
following fuel types: R
premium-grade unleaded gasoline R
E85 fuel R
a mixture of E85 fuel and premium-grade
unleaded gasoline
i Flexible Fuel vehicles can be recognized by
the Ethanol up to E85 sticker on the inside of
the fuel filler flap.
Fuel consumption The energy content of E85 fuel is less than that
of the same amount of premium-grade gasoline.
The amount of fuel consumed when operating
the vehicle with E85 fuel is therefore higher than
with premium-grade gasoline.
Maintenance Inform your authorized Mercedes-Benz Center
that you are operating or have operated the
vehicle with E85 fuel.
Low outside temperatures If the outside temperature is below 32 ‡( 0 †),
the starting procedure can take noticeably lon-
ger when operating with E85 fuel.
E85 fuel is not suitable for use at outside tem-
peratures under -4 ‡ (-20 †).
Engine oil
General notes
! Never use engine oil or an oil filter of a spec-
ification other than is necessary to fulfill the
prescribed service intervals. Do not change
the engine oil or oil filter in order to achieve
longer replacement intervals than those pre-
scribed. You could otherwise cause engine damage or damage to the exhaust gas after-
treatment.
Follow the instructions in the service interval
display regarding the oil change. Otherwise,
you may damage the engine and the exhaust
gas aftertreatment.
When handling engine oil, observe the important
safety notes on service products ( Y
page 388).
The engine oils are matched to the performance
of Mercedes-Benz engines and service intervals.
You should therefore only use engine oils and oil
filters that are approved for vehicles with main-
tenance systems.
For a list of approved engine oils and oil filters,
consult an authorized Mercedes-Benz Center.
Or visit the website
http://bevo.mercedes-benz.com.
The table shows which engine oils have been
approved for your vehicle.
Missing values were not available at time of
going to print.
Model MB-Freigabe or
MB-Approval
Mercedes-Benz
C 450 AMG 4MATIC
All other models
229.5
Use only SAE 0W-40 or SAE 5W-40 engine oils
for Mercedes ‑ AMG vehicles.
i MB approval is indicated on the oil contain-
ers.
Filling capacities The following values refer to an oil change
including the oil filter.
Model Capacity
Mercedes ‑ AMG
vehicles 9.4 qt (9.0 l)
C 300
C 350 e 7.4 qt (7.0 l)
Al l ot her models
6.9 qt (6.5 l)Service products and filling capacities 391
Technical data Z