trunk MERCEDES-BENZ C CLASS 2016 Owner's Manual
[x] Cancel search | Manufacturer: MERCEDES-BENZ, Model Year: 2016, Model line: C CLASS, Model: MERCEDES-BENZ C CLASS 2016Pages: 398, PDF Size: 11.64 MB
Page 213 of 398
make sure that there are no persons, animals or
objects in the area in which you are maneuver-
ing.
You are always responsible for safety, and must
always pay attention to your surroundings when
parking and maneuvering. This applies to the
areas behind, in front of and beside the vehicle.
You could otherwise endanger yourself and oth-
ers.
The 360° camera will not function or will func-
tion in a limited manner: R
if the doors are open R
if the exterior mirrors are folded in R
if the trunk lid is open R
in heavy rain, snow or fog R
at night or in very dark places R
if the cameras are exposed to very bright light R
if the area is lit by fluorescent bulbs or LED
lighting (the display may flicker) R
if the camera lenses fog up, e.g. when driving
into a heated garage in winter, causing a rapid
change in temperature R
if the camera lenses are dirty or covered R
if the vehicle components in which the cam-
eras are installed are damaged. In this event,
have the camera position and setting checked
at a qualified specialist workshop.
Do not use the 360° camera in this case. You
can otherwise injure others or cause damage to
objects or the vehicle.
The guide lines in the COMAND display show the
distances to your vehicle. The distances only
apply to road level.
The camera in the rear area is protected by
means of a flap. This flap opens when the 360°
camera is activated. Observe the notes on
cleaning ( Y
page 339). For technical reasons,
the flap may remain open briefly after the 360°
camera has been deactivated.
On vehicles with height-adjustable chassis,
depending on technical conditions, leaving the
standard height can result in: R
inaccuracies in the guide lines R
inaccuracies in the display of generated
images (top view) Activation conditions The 360° camera image can be displayed if: R
the multimedia system is switched on R
the 360° Camera function is switched on
i If you are driving faster than at a moderate
speed and you turn on the 360° camera, a
warning message appears.
The warning message disappears if: R
you are again driving at a moderate speed
The 360° camera is then activated. R
the message is confirmed with the 8
button.
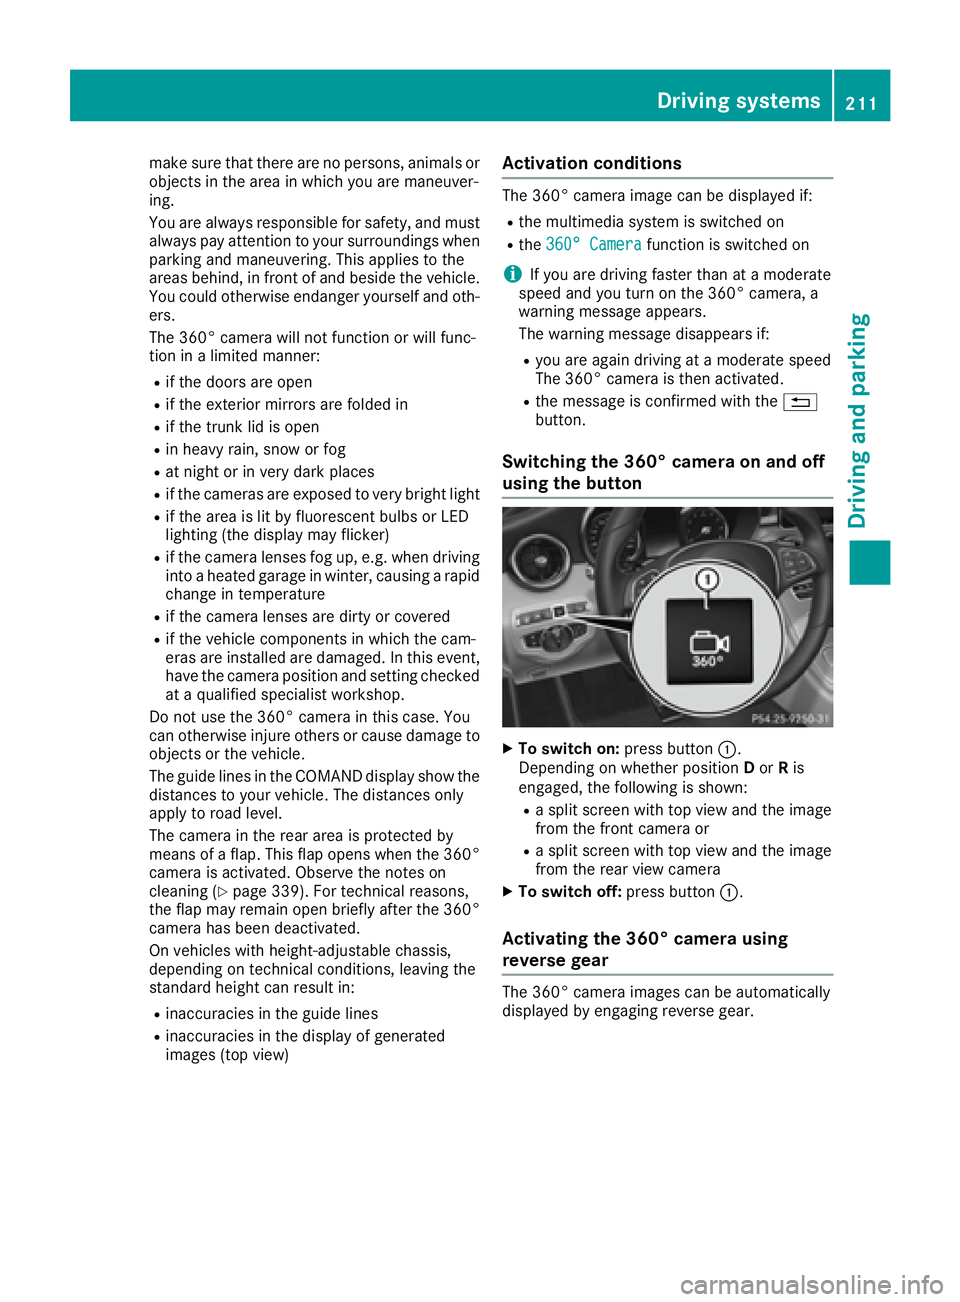
Switching the 360° camera on and off
using the button
X
To switch on: press button C .
Depending on whether position D or R is
engaged, the following is shown: R
a split screen with top view and the image
from the front camera or R
a split screen with top view and the image
from the rear view camera X
To switch off: press button C .
Activating the 360° camera using
reverse gear The 360° camera images can be automatically
displayed by engaging reverse gear.Driving systems 211
Driving and parking Z
Page 214 of 398
X
Make sure that the SmartKey is in position 2
in the ignition lock. X
Make sure that the Activation by R gear
function is selected in the multimedia system
(see the Digital Operator's Manual). X
To show the 360° camera image: engage
reverse gear.
The multimedia system shows the area
behind the vehicle in split-screen mode. You
see the top view of the vehicle and the image
from the rear view camera.
Selecting the split-screen view or full
screen mode Switching between split screen views: X
To switch to the line with the vehicle icons:
slide 5 the controller.X
To select a vehicle icon: turn the controller.
Switching to full screen mode: X
180° View Turn and press the controller.
i The full screen option is only available in the
following views: R
Top view with picture from the rear view
camera R
Top view with picture from the front camera
Multimedia display
Important safety notes The camera system may show a distorted view
of obstacles, show them incorrectly or not at all.
Obstacles are not shown by the system in the
following locations: R
under the front and rear bumpers R
very close to the front and rear bumpers R
in close range above the handle on the trunk
lid R
very close to the exterior mirrors R
in the transitional areas between the various
cameras in the virtual top view
! Objects not at ground level may appear to
be further away than they actually are, e.g.: R
the bumper of a parked vehicle R
the drawbar of a trailer R
the ball coupling of a trailer tow hitch R
the rear section of an HGV R
a slanted post
Use the guidelines only for orientation.
Approach objects no further than the bottom-
most guideline.
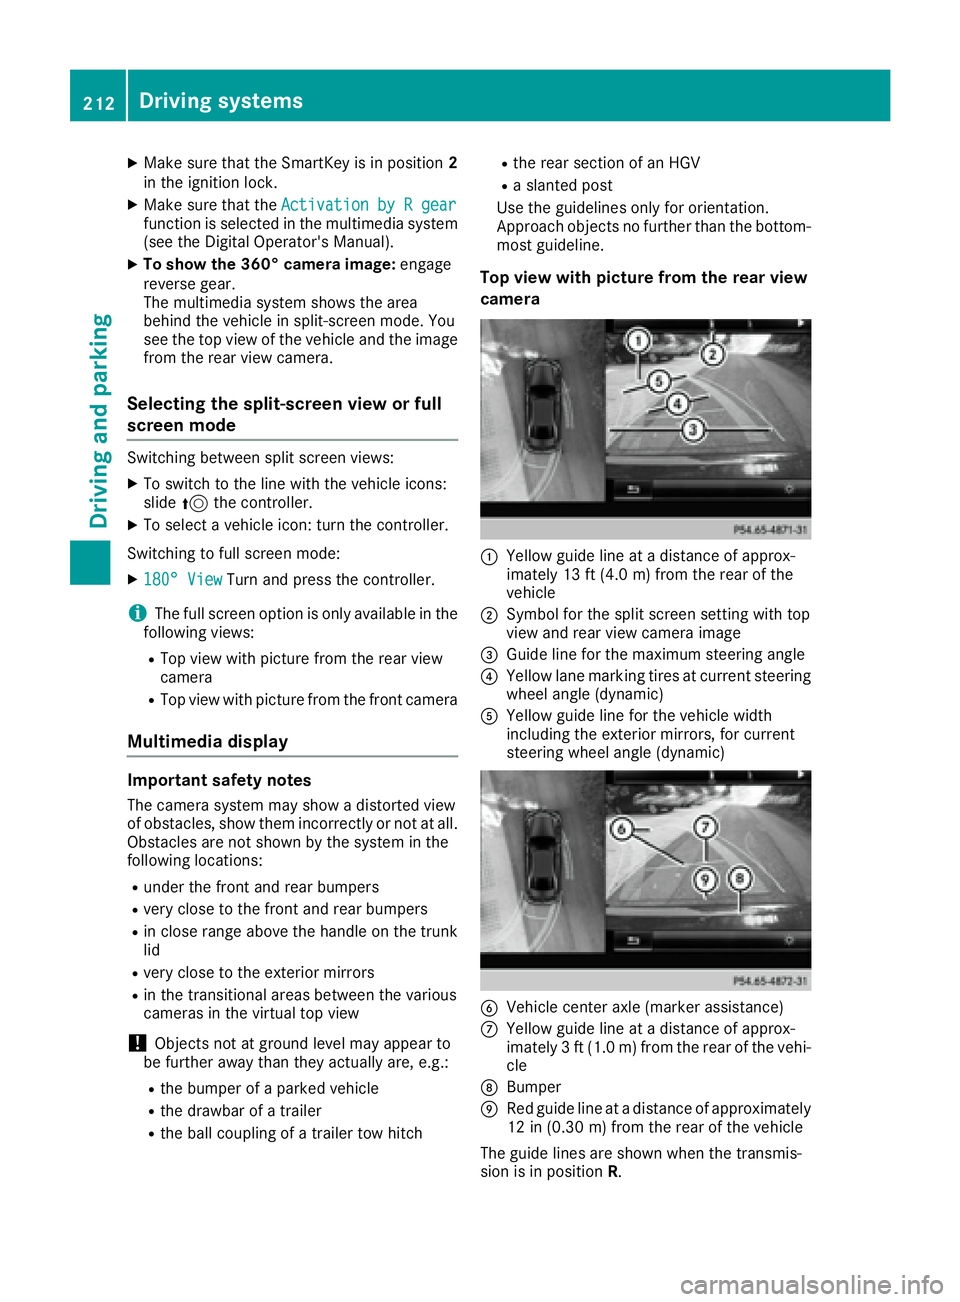
Top view with picture from the rear view
camera
C
Yellow guide line at a distance of approx-
imately 13 ft (4.0 m) from the rear of the
vehicle D
Symbol for the split screen setting with top
view and rear view camera image
Page 310 of 398
Stowage areas
Loading guidelines
G WARNING
Combustion engines emit poisonous exhaust
gases such as carbon monoxide. Exhaust
gases can enter the vehicle interior if the
trunk lid is open when the engine is running,
especially if the vehicle is in motion. There is a
risk of poisoning.
Always switch off the engine before opening
the trunk lid. Never drive with the trunk lid
open.
G WARNING
If objects, luggage or loads are not secured or
not secured sufficiently, they could slip, tip
over or be flung around and thereby hit vehicle
occupants. There is a risk of injury, particu-
larly in the event of sudden braking or a sud-
den change in direction.
Always store objects so that they cannot be
flung around. Secure objects, luggage or
loads against slipping or tipping before the
journey.
G WARNING
The exhaust tail pipe and tail pipe trim can
become very hot. If you come into contact
with these parts of the vehicle, you could burn
yourself. There is a risk of injury.
Always be particularly careful around the
exhaust tail pipe and the tail pipe trim. Allow
these components to cool down before touch-
ing them.
The handling characteristics of a laden vehicle
are dependent on the distribution of the load
within the vehicle. For this reason, you should
observe the following notes when transporting a
load: R
Never exceed the maximum permissible
gross vehicle mass or the gross axle weight
rating for the vehicle (including occupants).
The values are specified on the vehicle iden- tification plate on the B-pillar of the driver's
door. R
The trunk is the preferred place to carry
objects. R
Position heavy loads as far forwards as pos-
sible and as low down in the trunk as possible. R
The load must not protrude above the upper
edge of the seat backrests. R
Always place the load behind unoccupied
seats if possible. R
Secure the load with sufficiently strong and
wear-resistant tie-downs. Pad sharp edges for
protection.
Stowage spaces
Important safety notes
G WARNING
If objects in the passenger compartment are
stowed incorrectly, they can slide or be
thrown around and hit vehicle occupants. In
addition, cupholders, open stowage spaces
and mobile phone brackets cannot always
retain all objects they contain. There is a risk
of injury, particularly in the event of sudden
braking or a sudden change in direction. R
Always stow objects so that they cannot be
thrown around in such situations. R
Always make sure that objects do not pro-
trude from stowage spaces, parcel nets or
stowage nets. R
Close the lockable stowage spaces before
starting a journey. R
Always stow and secure heavy, hard, poin-
ted, sharp-edged, fragile or bulky objects in
the trunk.
Observe the loading guidelines ( Y
page 308).308
Stowage areas
Stowage and features
Page 312 of 398
Depending on the vehicle's equipment, the fol-
lowing may be in the stowage space: R
a multimedia connector unit with 2 USB ports
and a SD card slot, e.g. for use with an iPod ®
,
iPhone ®
or MP3 player, see the separate
Operator's Manual R
a small stowage space in the upper front sec-
tion
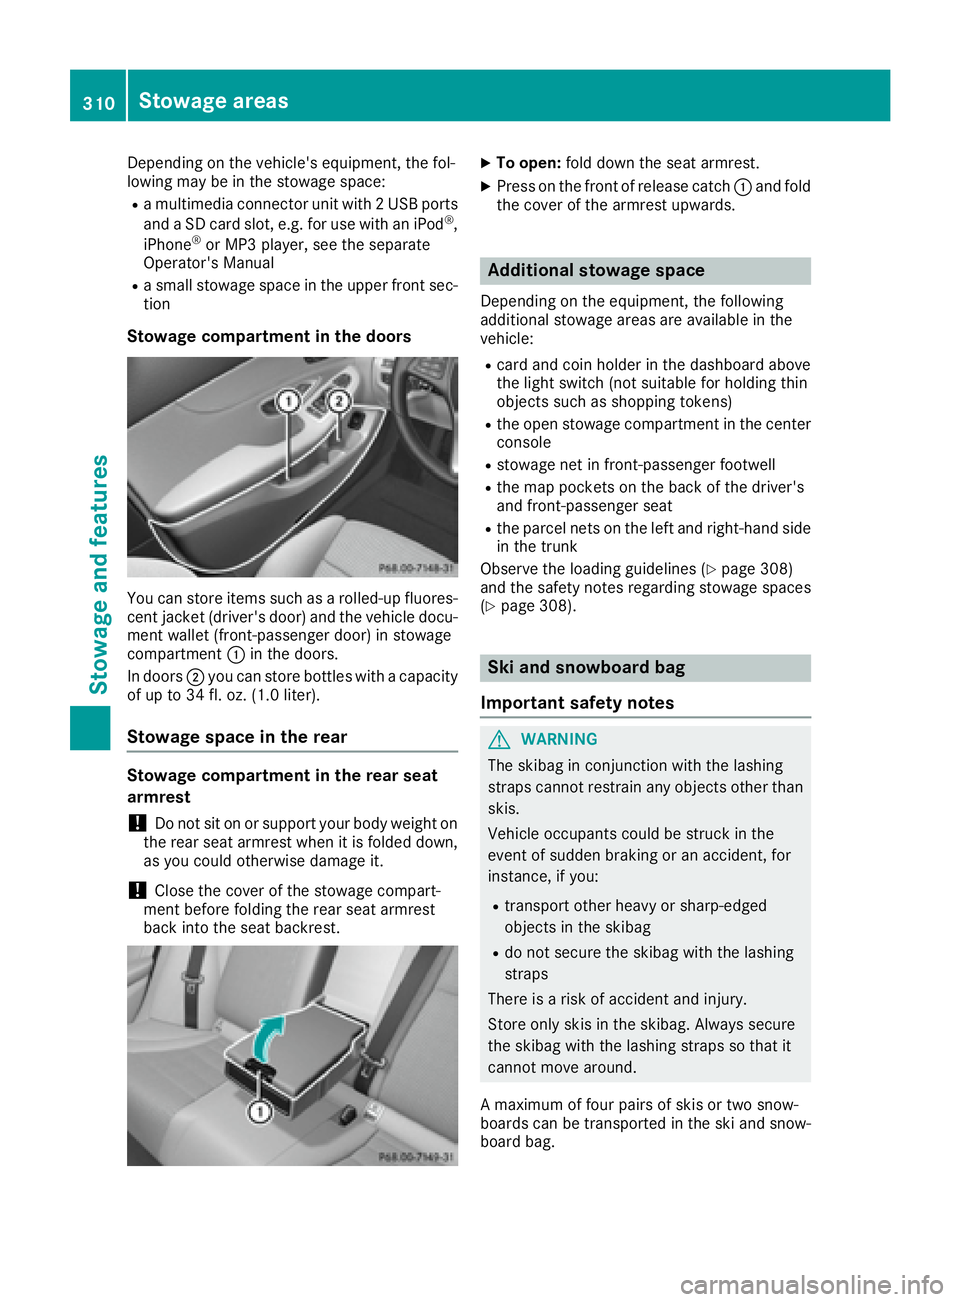
Stowage compartment in the doors
You can store items such as a rolled-up fluores-
cent jacket (driver's door) and the vehicle docu-
ment wallet (front-passenger door) in stowage
compartment C in the doors.
In doors D you can store bottles with a capacity
of up to 34 fl. oz. (1.0 liter).
Stowage space in the rear
Stowage compartment in the rear seat
armrest
! Do not sit on or support your body weight on
the rear seat armrest when it is folded down,
as you could otherwise damage it.
! Close the cover of the stowage compart-
ment before folding the rear seat armrest
back into the seat backrest. X
To open: fold down the seat armrest. X
Press on the front of release catch C and fold
the cover of the armrest upwards.
Additional stowage space Depending on the equipment, the following
additional stowage areas are available in the
vehicle: R
card and coin holder in the dashboard above
the light switch (not suitable for holding thin
objects such as shopping tokens) R
the open stowage compartment in the center
console R
stowage net in front-passenger footwell R
the map pockets on the back of the driver's
and front-passenger seat R
the parcel nets on the left and right-hand side
in the trunk
Observe the loading guidelines ( Y
page 308)
and the safety notes regarding stowage spaces
( Y
page 308).
Ski and snowboard bag
Important safety notes
G WARNING
The skibag in conjunction with the lashing
straps cannot restrain any objects other than
skis.
Vehicle occupants could be struck in the
event of sudden braking or an accident, for
instance, if you: R
transport other heavy or sharp-edged
objects in the skibag R
do not secure the skibag with the lashing
straps
There is a risk of accident and injury.
Store only skis in the skibag. Always secure
the skibag with the lashing straps so that it
cannot move around.
A maximum of four pairs of skis or two snow-
boards can be transported in the ski and snow-
board bag.310
Sto wag e areas
Stowag e an d features
Page 313 of 398

Securing the ski and snowboard bag in
the trunk X
Fold the middle rear seat backrest forwards
( Y
page 311). X
Slide the ski and snowboard bag between the
two outside rear seat backrests. Ensure that
the wheels of the ski and snowboard bag are
in the trunk. X
Open the ski/snowboard bag with zip C and
place the skis or snowboards inside it. X
Close the ski and snowboard bag. X
Pull tensioning strap D tight by the loose end
until the skis or snowboards are held firmly
inside the ski/snowboard bag.
X
Engage tensioning strap
Page 315 of 398

X
Adjust the head restraints if necessary
( Y
page 107). X
Move the driver's or front-passenger seat
back if necessary.
You should always engage the rear seat backr-
ests if you do not need the through-loading fea-
ture. This will prevent unauthorized access to
the trunk from the vehicle interior.
Locking the center rear seat backrest
In order to prevent the trunk from being
accessed by unauthorized persons, the center
seat backrest can be locked using a catch. The
center seat backrest can only be folded forward
together with the left seat backrest. X
To lock: fold the left and center seat backr-
ests forward. Make sure that the center and
left seat backrests are engaged and joined
together. X
Slide catch C upwards.
The release mechanism of the center seat
backrest is locked. X
To unlock: fold the left and center seat backr-
ests forward. X
Slide catch C downwards.
Securing cargo
Cargo tie-down rings
Observe the following notes on securing loads: R
Observe the loading guidelines ( Y
page 308).R
Secure the load using the cargo tie-down
rings. R
Distribute the load on the cargo tie-down
rings evenly. R
Do not use elastic straps or nets to secure a
load, as these are only intended as an anti-slip
protection for light loads. R
Do not route tie-downs across sharp edges or
corners. R
Pad sharp edges for protection.
Vehicles with the through-loading feature in the
rear bench seat: X
Fold up the cargo tie-down rings next to the
rear seat backrest and put them through the
slots in the carpet.
Bag hook
G WARNING
The bag hooks cannot restrain heavy objects
or items of luggage. Objects or items of lug-
gage could be flung around and thereby hit
vehicle occupants when braking or abruptly
changing directions. There is a risk of injury.
Only hang light objects on the bag hooks.
Never hang hard, sharp-edged or fragile
objects on the bag hooks.
! The bag hook can bear a maximum load of
6.6lbs (3kg) and should not be used to secure
a load.Stowage areas 313
Sto wag e an d features Z
Page 316 of 398
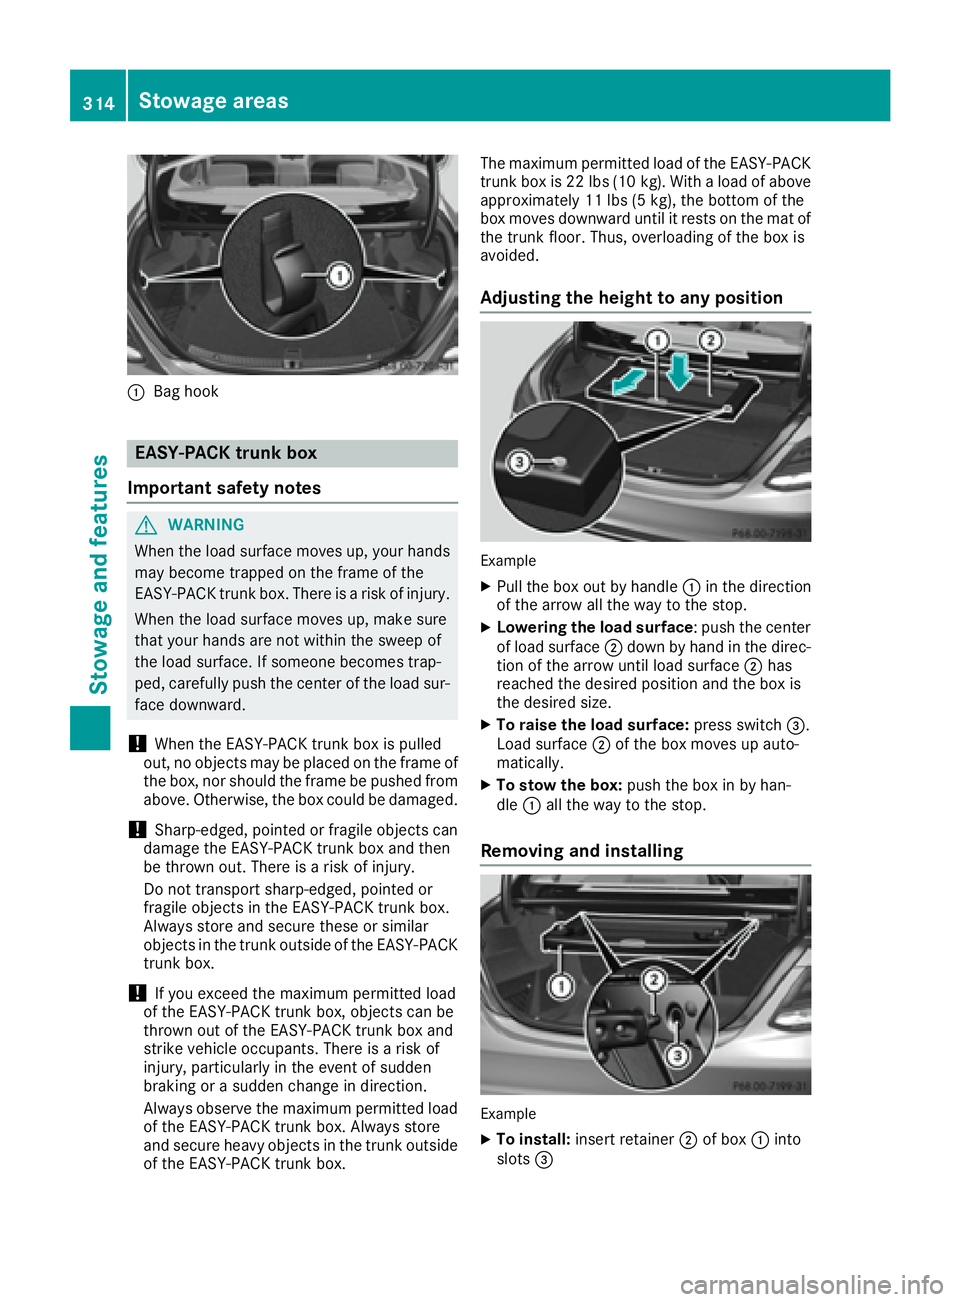
C
Bag hook
EASY-PACK trunk box
Important safety notes
G WARNING
When the load surface moves up, your hands
may become trapped on the frame of the
EASY-PACK trunk box. There is a risk of injury.
When the load surface moves up, make sure
that your hands are not within the sweep of
the load surface. If someone becomes trap-
ped, carefully push the center of the load sur-
face downward.
! When the EASY-PACK trunk box is pulled
out, no objects may be placed on the frame of
the box, nor should the frame be pushed from
above. Otherwise, the box could be damaged.
! Sharp-edged, pointed or fragile objects can
damage the EASY-PACK trunk box and then
be thrown out. There is a risk of injury.
Do not transport sharp-edged, pointed or
fragile objects in the EASY-PACK trunk box.
Always store and secure these or similar
objects in the trunk outside of the EASY-PACK
trunk box.
! If you exceed the maximum permitted load
of the EASY-PACK trunk box, objects can be
thrown out of the EASY-PACK trunk box and
strike vehicle occupants. There is a risk of
injury, particularly in the event of sudden
braking or a sudden change in direction.
Always observe the maximum permitted load
of the EASY-PACK trunk box. Always store
and secure heavy objects in the trunk outside
of the EASY-PACK trunk box. The maximum permitted load of the EASY-PACK
trunk box is 22 lb s( 10 kg). With a load of above
approximately 11 lbs (5 kg), the bottom of the
box moves downward until it rests on the mat of
the tru nk floor. Thus, overloading of the box is
a voided.
Adjusting the height to any position
Example X
Pull the box out by handle C in the direction
of the arrow all the way to the stop. X
Lowering the load surface : push the center
of load surface D down by hand in the direc-
tion of the arrow until load surface D has
reached the desired position and the box is
the desired size. X
To raise the load surface: press switch
Page 318 of 398
must therefore ensure that you observe the roof
carrier manufacturer's installation instructions.
Vehicles with a panorama roof with power
tilt/sliding panel: the panorama roof with
power tilt/sliding panel cannot be opened if a
roof carrier is installed. The panorama roof with
power tilt/sliding panel can still be raised to
allow ventilation of the vehicle interior.
If the panorama roof with power tilt/sliding
panel makes contact with a roof carrier
approved by Mercedes-Benz, the sunroof will
lower slightly but remain raised at the rear.
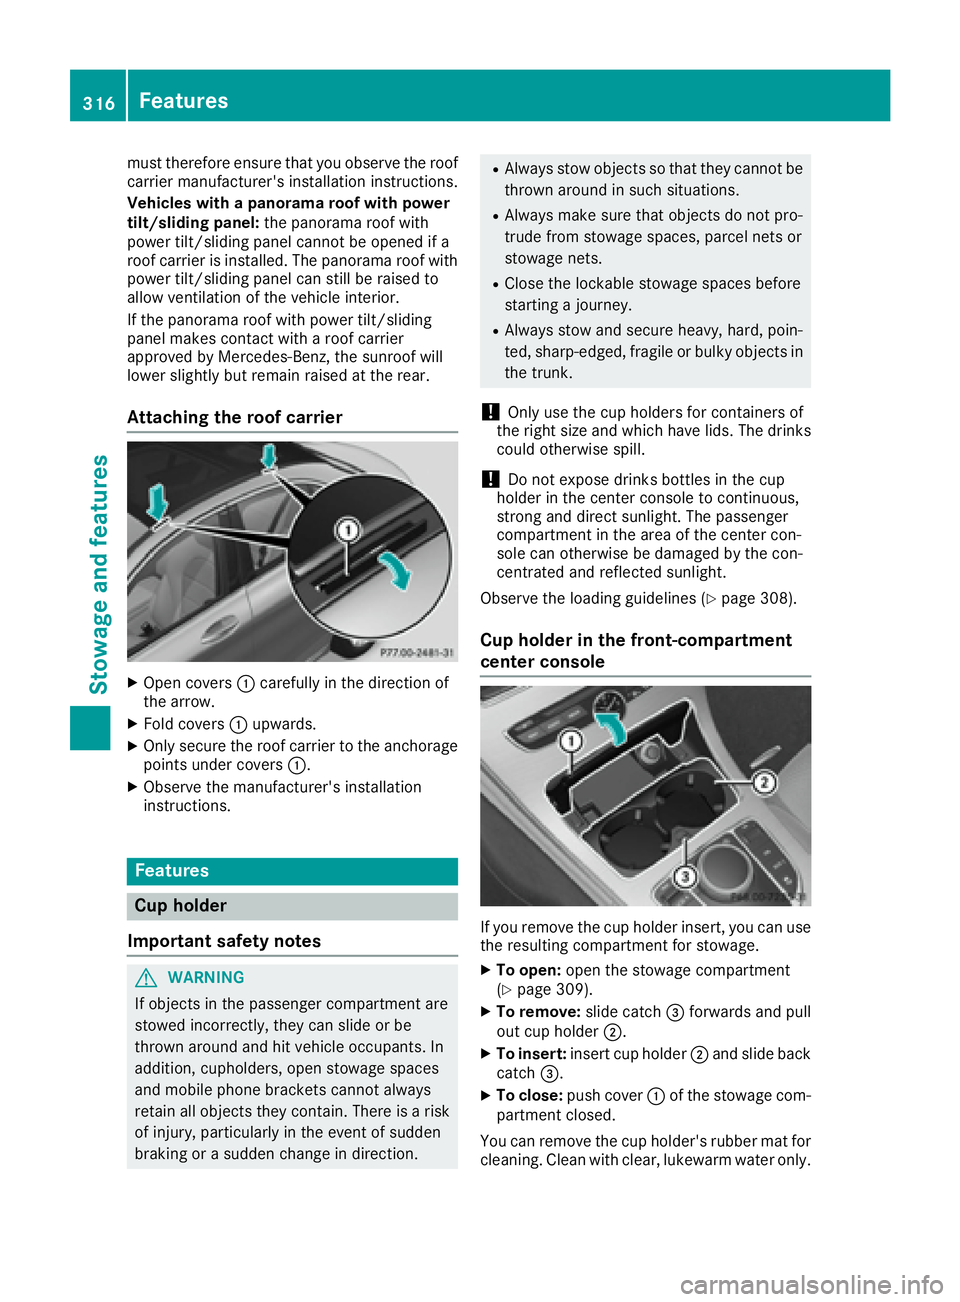
Attaching the roof carrier
X
Open covers C carefully in the direction of
the arrow. X
Fold covers C upwards.X
Only secure the roof carrier to the anchorage
points under covers C .X
Observe the manufacturer's installation
instructions.
Features
Cup holder
Important safety notes
G WARNING
If objects in the passenger compartment are
stowed incorrectly, they can slide or be
thrown around and hit vehicle occupants. In
addition, cupholders, open stowage spaces
and mobile phone brackets cannot always
retain all objects they contain. There is a risk
of injury, particularly in the event of sudden
braking or a sudden change in direction. R
Always stow objects so that they cannot be
thrown around in such situations. R
Always make sure that objects do not pro-
trude from stowage spaces, parcel nets or
stowage nets. R
Close the lockable stowage spaces before
starting a journey. R
Always stow and secure heavy, hard, poin-
ted, sharp-edged, fragile or bulky objects in
the trunk.
! Only use the cup holders for containers of
the right size and which have lids. The drinks
could otherwise spill.
! Do not expose drinks bottles in the cup
holder in the center console to continuous,
strong and direct sunlight. The passenger
compartment in the area of the center con-
sole can otherwise be damaged by the con-
centrated and reflected sunlight.
Observe the loading guidelines ( Y
page 308).
Cup holder in the front-compartment
center console
If you remove the cup holder insert, you can use
the resulting compartment for stowage. X
To open: open the stowage compartment
( Y
page 309). X
To remove: slide catch
Page 337 of 398
Drivin g abroadAn extensive Mercedes-Ben z Servic e networ k is
also available in other countries. You can obtain
further information from any authorized
Mercedes-Ben z Center.
Car e
General notes
H Environmental not e
Dispose of empty packagin g and cleanin g
cloths in an environmentally responsible man -
ner.
! Fo r cleanin g your vehicle, do no t use any of
th e following: R
dry, rough or har d clothsR
abrasiv e cleanin g agentsR
solvents R
cleanin g agents containin g solvents
Do no t scrub .
Do no t touch th e surfaces or protective films
wit h har d objects , e.g. a rin g or ic e scraper.
You could otherwise scratch or damage th e
surfaces and protective film.
! Do no t par k th e vehicle fo r an extended
period straight after cleanin g it , particularly
after havin g cleaned th e wheels wit h whee l
cleaner. Wheel cleaners could cause
increase d corrosion of th e brake discs and
brake pads/linings. Fo r this reason , you
should drive fo r a fe w minutes after cleaning.
Brakin g heat s th e brake discs and th e brake
pads/linings, thus drying them. The vehicle
can then be parked.
Regular car e of your vehicle is a condition fo r
retainin g th e qualit y in th e lon g term .
Use car e products and cleanin g agents recom -
mended and approved by Mercedes-Benz. Washing th e vehicle an d cleaning th e
paintwor k
Automatic car was h
G WARNING
Brakin g efficiency is reduce d after washin g
th e vehicle. There is a ris k of an accident.
Afte r th e vehicle has bee n washed, brake
carefully whil e payin g attention to th e traffic
condition s until full braking powe r is restored .
! If DISTRONIC PLU S or th e HOLD function is
activated, th e vehicle brake s automatically in
certain situations.
To preven t damage to th e vehicle, deactivat e
DISTRONIC PLU S and th e HOLD function in
th e followin g or other similar situations: R
when towin g th e vehicle R
in th e car wash
! Never clean your vehicle in a Touchless
Automatic Car Wash as these use special
cleanin g agents . These cleanin g agents can
damage th e paintwor k or plasti c parts .
! Mak e sur e that : R
th e sid e windows and th e slidin g sunroof
are full y closed. R
th e ventilation/heatin g is switched of f (the
OF F butto n has bee n pressed).R
th e windshield wipe r switch is at position 0 .R
th e 360° camera or rea r vie w camera is
switched off.
The vehicle may otherwise be damaged .
! If th e SmartKey is within th e rea r detection
range of KEYLESS-GO , th e followin g situa-
tions, fo r example, co uld l ead to th e u
ninten -
tional opening of th e trunk :R
usin g a car wash R
usin g a powe r washer
Mak e sur e that th e SmartKey is at leas t 10 ft
(3 m) away from th e vehicle.
! Mak e sur e that th e automatic transmissio n
is in neutral position N when washin g your
vehicle in a tow-through car wash . The vehicle
may otherwise be damaged .R
Operatin g wit h th e SmartKey:
Do no t remov e th e SmartKey from th e igni-
tion lock. Do no t ope n th e driver's doo rCare 335
Maintenance and care Z
Page 339 of 398
R
lights R
seals R
trim R
ventilation slots
Damaged seals or electrical components can
lead to leaks or failures.
! If the SmartKey is within the rear detection
range of KEYLESS-GO, the following situa-
tions, for example, could lead to the uninten-
tional opening of the trunk: R
using a car wash R
using a power washer
Make sure that the SmartKey is at least 10 ft
(3 m) away from the vehicle.
! Edition 1 special model: parts of your vehi-
cle are covered with a decorative foil. Main-
tain a distance of at least 70 cm between the
foil-wrapped parts of the vehicle and the noz-
zle of the high pressure cleaner.
Information about the correct distance is
available from the equipment manufacturer.
Move the power washer nozzle around when
cleaning your vehicle.
Cleaning the paintwork
! Do not affix: R
stickers R
films R
magnetic plates or similar items
to painted surfaces. You could otherwise
damage the paintwork.
Scratches, corrosive deposits, areas affected by
corrosion and damage caused by inadequate
care cannot always be completely repaired. In
such cases, visit a qualified specialist workshop. X
Remove dirt immediately, where possible,
while avoiding rubbing too hard. X
Soak insect remains with insect remover and
rinse off the treated areas afterwards. X
Soak bird droppings with water and rinse off
the treated areas afterwards. X
Remove coolant, brake fluid, tree resin, oils,
fuels and greases by rubbing gently with a
cloth soaked in petroleum ether or lighter
fluid. X
Use tar remover to remove tar stains. X
Use silicone remover to remove wax. If water no longer forms "beads" on the paint
surface, use the paint care products recommen-
ded and approved by Mercedes-Benz. This is the
case approximately every three to five months,
depending on the climate conditions and the
care product used.
If dirt has penetrated the paint surface or if the
paint has become dull, the paint cleaner recom-
mended and approved by Mercedes-Benz
should be used.
Do not use these care products in the sun or on
the hood while the hood is hot. X
Use a suitable touch-up stick, e.g. MB Touch-
Up Stick, to repair slight damage to the paint-
work quickly and provisionally.
Matte finish care
! Never polish the vehicle or the light alloy
wheels. Polishing causes the finish to shine.
! The following may cause the paint to
become shiny and thus reduce the matte
effect: R
strong rubbing of the paintwork with
unsuitable materials R
frequent use of automatic car washes R
washing the vehicle in direct sunlight
! Never use paint cleaner, buffing or polishing
products, or gloss preserver, e.g. wax. These
products are only suitable for high-gloss sur-
faces. Their use on vehicles with matte finish
leads to considerable surface damage (shiny,
mottled areas).
Always have paintwork repairs carried out at a
qualified specialist workshop.
! Do not use wash programs with a hot wax
treatment under any circumstances.
Observe these notes if your vehicle has a clear
matte finish. This will help you to avoid damage
to the paintwork due to incorrect treatment.
These notes also apply to light alloy wheels with
a clear matte finish.
The vehicle should preferably be washed by
hand using a soft sponge, car shampoo and
plenty of water.
Use only insect remover and car shampoo from
the range of approved Mercedes-Benz care
products. Care 337
Maintenance and care Z