ECO mode MERCEDES-BENZ C-Class 2017 W205 Comand Manual
[x] Cancel search | Manufacturer: MERCEDES-BENZ, Model Year: 2017, Model line: C-Class, Model: MERCEDES-BENZ C-Class 2017 W205Pages: 178, PDF Size: 5.62 MB
Page 131 of 178
Your multimediasyste mequipment
These operatin ginstruction sdescribe all th e
standar dan doptional equipment of your multi-
media system, as available at th etime of going
to press. Country-specifi cdifference sare pos -
sible. Bear in min dthat your vehicle may no t
feature all function sdescribed here. Thi salso
applies to safety-relevan tsystems an dfunc-
tions.
Read th einformation on qualifie dspecialis t
workshop sin th evehicle Operator's Manual.
Switchin gon th eradi o
XPress th e$ button.
The radio display appears .You will hear th e
last station playe don th elast waveban d
selected.
Switching HD Radi oon/of f
XIn radio mode: slid e6 thecontroller .
XSelectOption s.
XBy selecting Oorª in fron tof HD Radi o,
you determin ewhether HD radio is switched
on or off.
If HD Radio is switched off, th esyste mdoe sno t
switch to digita lradio an dit is no tpossible to
selec tan ysub-channels.
iHD Radio ™an dth eHD ,HD Radio ,an d“Arc ”
logos are proprietary trademark sof iBiquit y
Digital Corp.
Overview
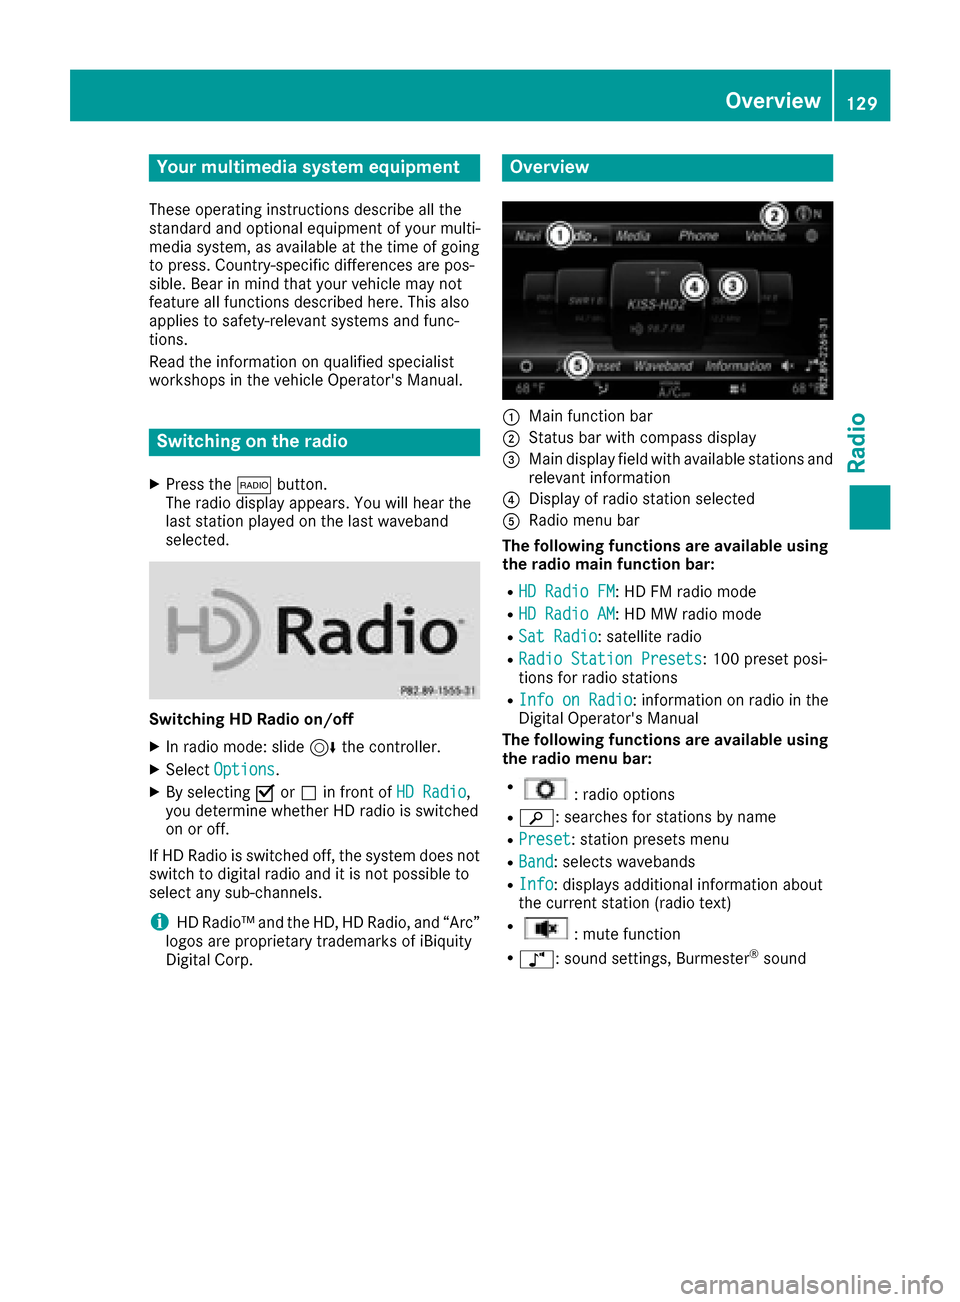
:Main function bar
;Status bar wit hcompass display
=Main display field wit havailable station san d
relevant information
?Display of radio station selecte d
ARadio menubar
Th efollowin gfunctions ar eavailable using
th eradi omain function bar:
RHD Radi oFM:HD FM radio mode
RHD Radi oAM:HD MW radio mode
RSa tRadi o:satellite radio
RRadi oStatio nPreset s:10 0preset posi-
tion sfo rradio station s
RInfo on Radi o:information on radio in th e
Digital Operator's Manual
Th efollowin gfunctions ar eavailable using
th eradi omenu bar:
R:radio option s
Rè:searches fo rstation sby name
RPreset:station preset smen u
RBand:selects wavebands
RInfo:displays additional information about
th ecurren tstation (radio text )
R:mut efunction
Rà :sound settings, Burmeste r®sound
Overview129
Radio
Page 138 of 178
Saving a channel using the edit function:
XIn satellite radio mode, slide6the control-
ler.
XTo select Preset: turn and press the control-
ler.
XTo select Edit Station Preset: turn and
press the controller.
The list of saved channels appears.
XTo select the preset: turn the controller and
press for about 2 seconds.
The newly saved channel overwrites the exist-
ing preset.
iThere are 100 presets available.
Presets menu view
You can use this function to change to the sta-
tion presets display.
Activating
XIn radio mode: slide 6the controller.
XTo select Preset: turn and press the control-
ler.
XTo select Station Preset View: On: turn
and press the controller.
The station preset display appears.
XTo switch between the stored stations: turn
the controller.
Deactivating
XIn radio mode: slide 6the controller.
XTo select Preset: turn and press the control-
ler.
XTo select StationPresetView:Off: turn
and press the controller.
A view of the last waveband you listened to
appears.
Music and sports alerts
General notes
This function makes it possible to store a pro-
gram alert for your favorite artists, tracks or
sporting events.
You can store up to 30 music and sports alerts
(favorites).
Music alerts can only be saved whilst a track is
being played. You can also specify sports alerts
via the menu option. The system then continu- ously searches through all the channels. If a
match is found with a saved message, you will
be informed. A window appears with the respec-
tive information.
Setting a music alert
XTo select: turn and press the control-
ler.
XTo select Alert for Artist, Track &SportsEvent: turn and press the controller.
A menu appears.
XSelect Add New Alert.
A window with a prompt appears.
XSelect ArtistorTrack.
The alert is set for the current artist or track.
The music alert window appears
XTo select Change ToorIgnore: turn and
press the controller.
If you select Change To
, the channel is
changed and the favorite artist or track is
played.
If you select Ignore
, the current channel will
continue playing.
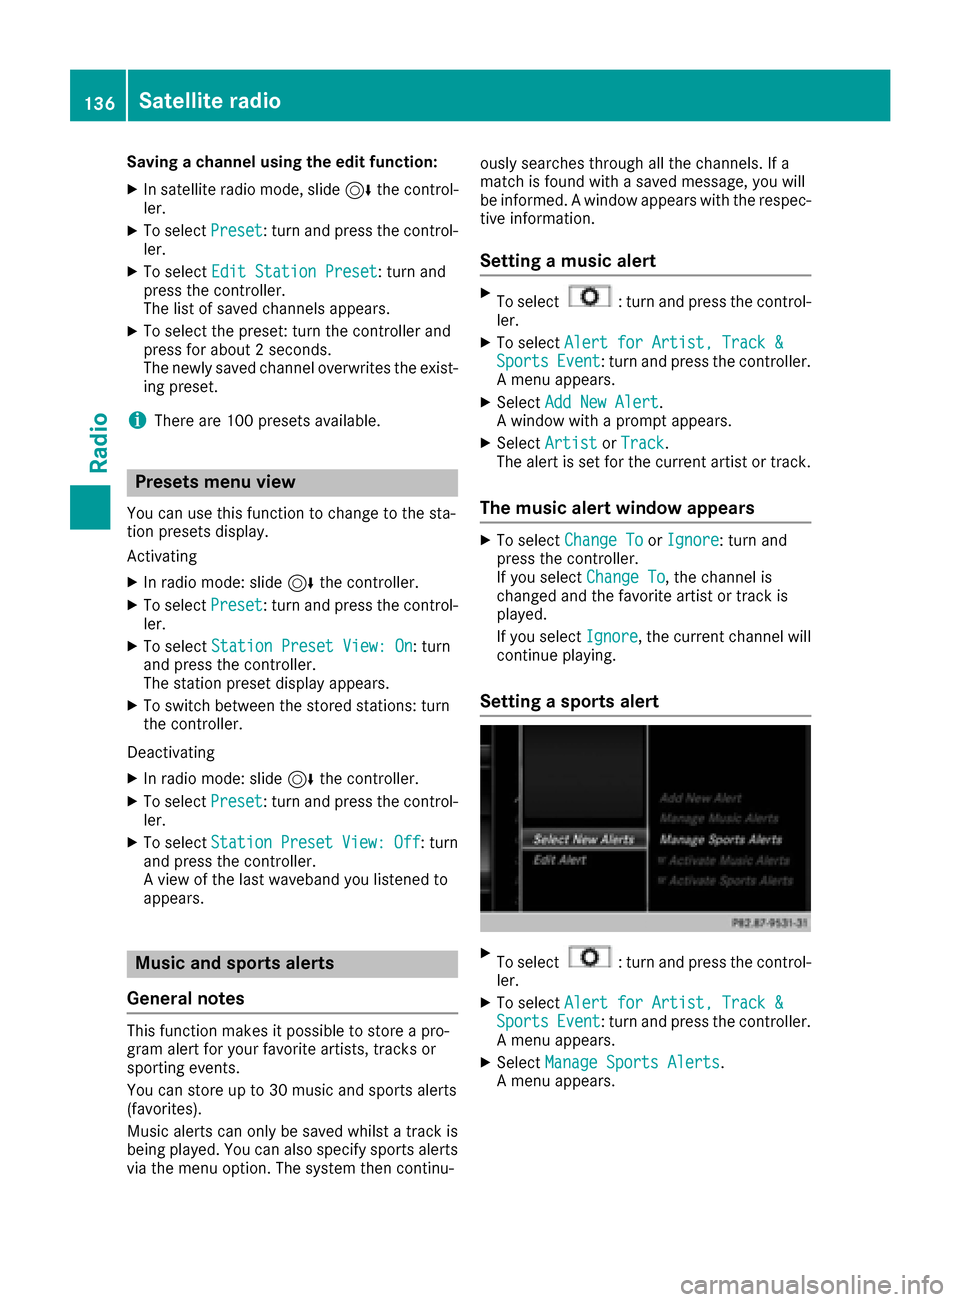
Setting a sports alert
XTo select: turn and press the control-
ler.
XTo select Alert for Artist, Track &SportsEvent: turn and press the controller.
A menu appears.
XSelect Manage Sports Alerts.
A menu appears.
136Satellite radio
Radio
Page 140 of 178
Your multimediasyste mequipment
These operatin ginstruction sdescribe all th e
standar dan doptional equipment of your multi-
media system, as available at th etime of going
to press. Country-specifi cdifference sare pos -
sible. Bear in min dthat your vehicle may no t
feature all function sdescribed here. Thi salso
applies to safety-relevan tsystems an dfunc-
tions.
Read th einformation on qualifie dspecialis t
workshop sin th evehicle Operator's Manual.
Activating medi amode
General notes
There are severa lways to activat emedia sour-
ce susin gth emultimedia system.
The relevant section sof th eOperator's Manual
describe th esimples tway to activat e amedia
source. Thi ssection describes all option sfo r
activatin gmedia sources. If you wish to play
external media sources, th edefault display
mus talready be turned on .
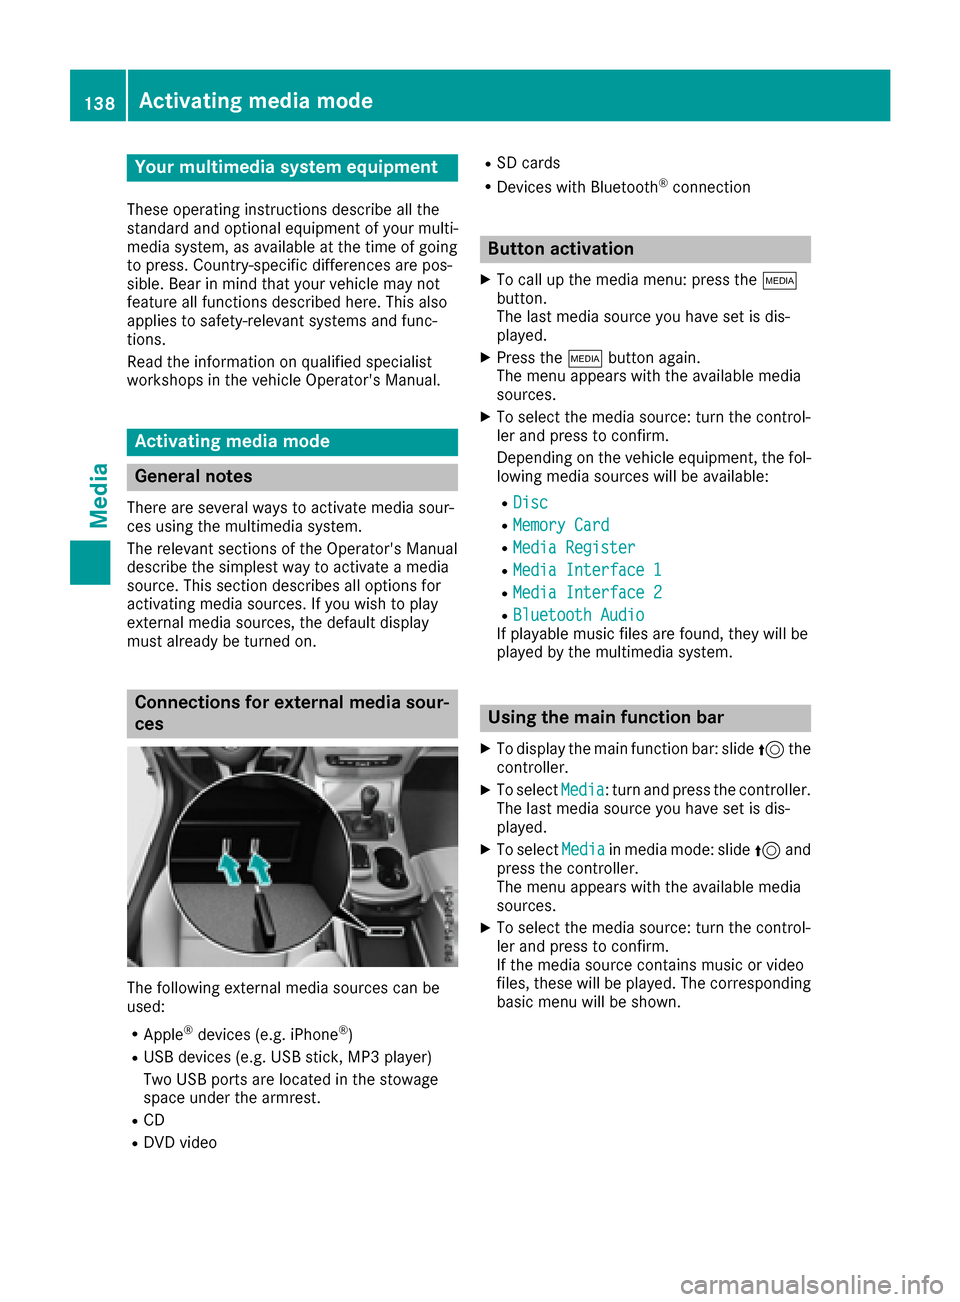
Connections for externa lmedi asour-
ces
The followin gexternal media sources can be
used :
RApple®devices (e.g. iPhon e®)
RUSBdevices (e.g. US Bstick, MP3 player)
Two US Bports are located in th estowag e
spac eunder th earmrest.
RCD
RDV Dvideo
RSD cards
RDevices wit hBluetoot h®connection
Button activation
XTo callup th emedia menu: press th eÕ
button.
The last media sourc eyou hav eset is dis -
played.
XPress th eÕ buttonagain .
The men uappears wit hth eavailable media
sources.
XTo selec tth emedia source: turn th econtrol-
ler an dpress to confirm .
Dependin gon th evehicle equipment ,th efol-
lowing media sources will be available :
RDisc
RMemory Card
RMediaRegister
RMedi aInterfac e 1
RMediaInterfac e 2
RBluetoothAudi oIf playable music files are found ,they will be
playe dby th emultimedia system.
Usin gth emain function ba r
XTo display themain function bar :slid e5 the
controller .
XTo selectMedi a:turn an dpress th econtroller .
The last media sourc eyou hav eset is dis -
played.
XTo selec tMedi ain media mode: slid e5 and
press th econtroller .
The men uappears wit hth eavailable media
sources.
XTo selec tth emedia source: turn th econtrol-
ler an dpress to confirm .
If th emedia sourc econtain smusic or video
files, these will be played. The correspondin g
basi cmen uwill be shown .
138Activating media mode
Media
Page 141 of 178
Using the device list
XIn media mode, slide6the controller.
The media menu bar is shown.
XTo select Devices: turn and press the con-
troller.
The available media sources will be shown.
The #dot indicates the current setting.
XSelect the media source.
If the media source contains music or video
files, these will be played. The corresponding
basic menu will be shown.
Switching on automatically
After inserting a CD/DVD, this media mode is
automatically switched on by the multimedia
system.
If playable music files are found, they will be
played by the multimedia system.
If a media function is already switched on in the
multimedia system, this will be interrupted and
the basic display of the CD/DVD mode will
appear. If another function, such as navigation,
is being operated, the basic display will not
change. Only the music from the last inserted
CD/DVD will be played.
Audio/video mode
Important safety notes
GWARNING
The CD/DVD drive is a class 1 laser product.
If you open the housing of the CD/DVD drive,
there is a risk of exposure to invisible laser
radiation. This laser radiation could damage
your retina. There is a risk of injury.
Never open the housing. Always have main-
tenance and repair work carried out at a quali- fied specialist workshop.
GWARNING
Handling discs while driving may distract you from traffic conditions. You could also lose
control of the vehicle. There is a risk of an
accident.
Handle discs only when the vehicle is station-
ary.
Bear in mind that at a speed of only 30 mph
(approximately 50 km/h) your vehicle covers a
distance of 44 feet (approximately 14 m) every
second.
Notes on audio/video mode
Permissible data carriers
RCD-R, CD-A and CD-RW
RDVD-R, DVD-V and DVD-RW
RSD card
RUSB storage device
Permissible file systems
RISO 9660/Joliet standard for CDs
RUDF for video DVDs
RFAT16, FAT32, exFAT and NTFS for SD card
and USB storage media
Multisession CDs
For multisession CDs, the content of the first
session determines how the multimedia system
processes the CD. The multimedia system plays
only one session and gives priority to the audio
CD session.
File structure of a data carrier
When you create a disc with compressed music
files, the tracks can be organized in folders. A
folder may also contain subfolders. The disc
may contain no more than eight directory levels.
Files beyond the eighth level will not be recog-
nized by the system.
iThe multimedia system supports up to
50,000 files from one data medium.
If more than 64 GB of the memory of a data
medium is full, only files in folders with the
following names are supported: Music, Pic-
tures, Video.
Track and file names
When you create a disc with compressed music
files, you can assign names to the tracks and
folders.
Audio/video mode139
Media
Z
Page 145 of 178
Selecting an active partition
XTo selectSelect Active Partition: turn
and press the controller.
With the Select
ActivePartitionoption,
you can select a partition in the USB data
medium.
Showing track information
XTo select Show Track Information: turn
and press the controller.
Ticking or removing the tick from the box in
front of Show Track Information
displays
or hides the information on the track, artist
and album in the main display field.
Saving files to Media Register
iWith the SaveFilestoMediaRegisteroption, you can transfer supported audio,
image or video files to the multimedia system
hard drive.
XTo select the Save Files to Media Reg‐isteroption: turn and press the controller.
A menu appears (Ypage 146).
Managing Media Register
XDelete or rename individual files in the Media
Register (Ypage 148).
XDelete all files in the Media Register
(Ypage 148).
XCall up information on the preset
(Ypage 149).
Stop and playback function
XTo pause playback: in audio/video mode,
slide 6the controller.
The media menu bar is shown.
XTo activate Ëin the media menu bar: turn
and press the controller.
Playback is interrupted here. The display
changes to Ì.
XTo continue playback: in audio/video mode,
slide 6the controller.
The media menu bar is shown.
XTo activate Ìin the media menu bar: turn
and press the controller.
Playback is continued from the point of inter- ruption. The symbol changes to Ë.
Selecting a track
Selecting using the current track list
XTo display the current track list: press the
controller in the basic display.
The category list appears.
XSelect the current track list.
XTo select a track: turn the controller and press
to confirm.
Selecting by skipping to a track
XTo skip forwards or backwards to a track: turn
or briefly slide 9or8 the controller in
the media basic display.
Search menu
XIn media mode, slide 6the controller.
The media menu bar is shown.
XTo select Search: turn and press the control-
ler.
The category list is shown.
XSelect a category, e.g. Genres.
Sub-categories appear with the selection of
the main category (depends on the multime-
dia system default settings and the music
tracks available).
XSelect a sub-category, for example Rock.
If the sub-category Rock
contains music
tracks, these will be displayed.
Gracenote®Media Database
General notes
This function is available in audio CD mode.
There is a version of
Gracenote®music recognition technology,
Emeryville, California, USA on the multimedia
system hard disk. You will recognize this by the
Audio/video mode143
Media
Z
Page 146 of 178
logo in the bottom right-hand corner of certain
audio displays.
If the audio CD does not contain any CD text
information, the multimedia system can use the
Gracenote
®Media Database to identify
unknown audio tracks when in CD audio mode.
Internet update of metadata
The Updating Metadata Via Internetoption allows any missing metadata for an audio
CD (e.g. cover, track, album, artist) to be uploa-
ded retrospectively to the internal Gracenote
®
database.
An Internet connection is required for this
(
Ypage 123).
Selecting Internet update of metadata
XIn media mode, slide 6the controller.
The media menu bar is shown.
XTo select: turn and press the control-
ler.
XSelect Updating Metadata Via Internetin the selection list.
A connection with the Gracenote®data server
is established. The missing data is loaded,
saved and displayed in the main display field.
If there is no data found or there is no Internet
connection, a corresponding error message
will appear.
Switching the Gracenote®data display
on/off
XSwitch on audio CD mode (Ypage 142).
XTo select Gracenote Media Database: turn
and press the controller.
XTo switch the display off: select None.
In the basic display, Track 1is shown instead
of the Gracenote®data, for example.
XTo switch on the display: press the controller.
Media search
General notes
The multimedia system plays back files from the following data media:
RDisc (CD/DVD Audio)
RMemory card
RMedia Register
RUSB storage device
RApple®devices (folder, year and photos are
not available)
The categories are displayed according to the
data available.
Starting the media search
XIn media mode, slide 6the controller.
The media menu bar is shown.
XTo select Search: turn and press the control-
ler.
The category list appears.
Category list
XIn media mode, slide 6the controller.
The media menu bar is shown.
XTo select Search: turn and press the control-
ler.
The category list is shown.
Depending on the connected media sources and
files, the following categories are listed:
RCurrent Tracklist
RFolder
RSelect By Cover
RKeyword Search
RPlaylists
RArtists
RAlbums
RTrack
RGenres
RYear
RComposers
RVideos
RPhotos
RPodcasts
RAudiobooks
iThe categories are available as soon as the
entire media content has been read and ana-
lyzed.
If the same device is reconnected with
unchanged media content, these categories
are available more quickly.
144Media search
Media
Page 152 of 178
The Bluetooth®audio device must support
the A2DP and AVRCP Bluetooth®audio pro-
files.
RBluetooth®visibility
Certain Bluetooth®audio devices do not just
require activation of the Bluetooth®function.
In addition, your device must be made "visi-
ble" to other devices.
RBluetooth®device name
This device name is predetermined but can
usually be changed. For a clear selection of
the Bluetooth
®device, Mercedes-Benz rec-
ommends that you customize the device
name.
iA2DP ( Advanced AudioDistribution Profile):
Bluetooth®audio profile for audio data trans-
mission
AVRCP (Audio VideoRemote ControlProfile):
Bluetooth
®audio profile for audio data play-
back
iThe Bluetooth®device must be visible for
authorization. After authorization, the multi-
media system even finds the Bluetooth
®
device when it is not visible.
General notes
Before using your Bluetooth®audio device with
the multimedia system for the first time, you will
need to authorize it.
When you authorize a new Bluetooth
®audio
device, it is connected automatically. Connec-
tion involves first searching for a Bluetooth
®
audio device and then authorizing it.
You can authorize up to 15 Bluetooth®devices.
iIf you authorize a mobile phone that sup-
ports Bluetooth®audio, the A2DP and AVRCP
Bluetooth®audio profiles are connected
automatically.
The mobile phone is then entered:
Rin the Bluetooth®telephone list
(Ypage 92)
Rin the Bluetooth®device list
(Ypage 150)
Mercedes-Benz recommends authorizing a
mobile phone in Bluetooth
®telephony
(Ypage 93).
Searching for and authorizing a Blue-
tooth®audio device
Switching to Bluetooth®audio mode
XTo call up the media menu: press the Õ
button.
The last media source you have set is dis-
played.
XTo display the main function bar: slide 5the
controller.
XTo select Media: turn and press the controller.
XTo select Bluetooth Audio: turn and press
the controller.
A menu appears.
If you see the No
BluetoothAudioDeviceConnectedmessage, you will need to author-
ize the Bluetooth®audio device first.
XSlide 6the controller.
The media menu bar is shown.
XTo select Connect Device: turn and press
the controller.
Searching for Bluetooth
®audio
XTo select Search for Audio Devices:
press the controller.
A message appears.
XSelect Start Search.
The multimedia system searches for Blue-
tooth
®audio devices within range and adds
them to the Bluetooth®device list.
The duration of the search depends on the
number of Bluetooth
®audio devices within
range and their characteristics.
:Bluetooth®audio player within range and
already authorized
;Newly detected mobile phone with Blue-
tooth®audio mode in range
The Bluetooth
®device list displays all author-
ized devices, whether they are within range or
150Bluetooth®audio mode
Media
Page 153 of 178
not. After a device search, devices which are
within range but not authorized are also dis-
played.
iWith some Bluetooth®audio devices, play-
back must initially be started on the device
itself, so that the multimedia system can play
the audio data. Bluetooth
®must also be given
as a media output location for the audio
device used.
Authorizing Bluetooth
®audio
XSelect a Bluetooth®audio device that has not
yet been authorized from the list: turn and
press the controller.
Authorization starts.
Depending on the Bluetooth
®audio device
used, you now have two options for continu-
ing with authorization.
Option 1: entering the passkey
XYou can find information on this in the
"Authorizing (connecting) a mobile phone"
section (
Ypage 93).
After successful authorization, the Blue-
tooth
®audio device is connected and starts
playing.
Option 2: Secure Simple Pairing
XYou can find information on this in the
"Authorizing (connecting) a mobile phone"
section (
Ypage 93).
After successful authorization, the Blue-
tooth
®audio device is connected and starts
playing.
iThe Bluetooth®audio device must support
Bluetooth®version 2.1 for connection via
Secure Simple Pairing. The multimedia sys-
tem cre
ates a six-digit code which is dis-
played simultaneously on both devices that
are to be connected.
For some Bluetooth
®audio devices, the pair-
ing must also be confirmed within 10 sec-
onds.
XIf the number code displayed on the multime-
dia system and on the Bluetooth®audio
device is the same, select Yes: press the con-
troller.
If you select Yes
, authorization continues and
the Bluetooth®audio device is connected.
Playback starts.
If you select No
, authorization will be can-
celed.
External authorization
If the multimedia system does not find your
Bluetooth®audio device, this may be due to
particular security settings on your Bluetooth®
audio device. In this case, check whether your
Bluetooth®audio device can locate the multi-
media system.
The Bluetooth
®device name of the multimedia
system is MB Bluetooth.
XSwitch on Bluetooth®audio mode
(Ypage 153).
XSlide 6the controller.
The media menu bar is shown.
XTo select Connect Device: turn and press
the controller.
XTo select ConnectviaAudioDevice: turn
and press the controller.
Authorizing
XStart the authorization on your Bluetooth®
audio device (see the manufacturer's operat-
ing instructions).
After successful authorization, the Blue-
tooth
®audio device is connected and starts
playing.
With some Bluetooth
®audio devices, playback
must initially be started on the device itself, so
that the multimedia system can play the audio
data.
Device-specific information on authorizing and
connecting Bluetooth
®-capable mobile phones
can be found on the Internet at
http://www.mercedes-benz.com/connect .
Reconnecting a Bluetooth®audio
device
The Bluetooth®audio profiles are connected
automatically under the following circumstan-
ces:
Rone of the last two mobile phones to have
been connected has also been used as a Blue-
tooth
®audio player (if this function is sup-
ported by the mobile phone).
Rthe mobile phone is automatically connected.
The Bluetooth®audio player is then connec-
ted.
Bluetooth®audio mode151
Media
Z
Page 154 of 178
iFor an automatic connection with the mul-
timedia system, the telephone must be within
range.
For most Bluetooth
®audio devices, the "auto-
matic connection" must be activated by tick-
ing a box. Depending on the device used, this
prompt often takes place when authorizing
(see the manufacturer's operating instruc-
tions).
If the No Bluetooth Audio Device Connec‐
tedmessage appears, you have two options to
reconnect the Bluetooth®audio device.
Option 1:
XTo confirm the ConnectLastUsedPlayermessage in the basic display: press the con-
troller.
If the multimedia system can locate the Blue-
tooth
®audio device, it will be connected and
start playing.
Option 2:
XSlide 6the controller.
The media menu bar is shown.
XTo select Connect Device: turn and press
the controller.
XTo select a Bluetooth®audio device: turn and
press the controller.
If the Bluetooth
®audio device has been
authorized, playback starts.
Bluetooth®audio device and simulta-
neous search for mobile phones
i
When searching for a mobile phone or a new
Bluetooth®audio device, the connection to an
already activated Bluetooth®audio device is
stopped.
In the Bluetooth
®audio basic display, you will
see the No Bluetooth Audio Device Con‐
nectedmessage, and the displayed ConnectLast Used Playermessage cannot be selec-
ted.
Displaying details
XTo select a Bluetooth®audio device from the
Bluetooth®device list: turn the controller
(Ypage 150).
XTo select G: slide 9the controller.
XTo select Details: turn and press the con-
troller.
The following information concerning the
selected mobile phone is shown:
RBluetooth®name
RBluetooth®address
RAvailability status (shown after an update)
RAuthorization status
XTo close the detailed display: press the
% button.
De-authorizing (deregistering) a Blue-
tooth®audio device
XTo select a Bluetooth®audio device from the
Bluetooth®device list: turn the controller
(Ypage 150).
XTo select G: slide 9the controller.
XTo select Deauthorize: press the controller.
A prompt appears asking whether you really
wish to deauthorize this device.
XTo select YesorNo: turn and press the con-
troller.
If you select Yes
, the device will be deleted
from the Bluetooth®device list.
If you select No
the process is canceled.
iBefore re-authorizing the Bluetooth®audio
device, you should also delete the device
name MB Bluetooth
from your Bluetooth®
audio device's Bluetooth®list (see the man-
ufacturer's operating instructions for the
Bluetooth
®audio device).
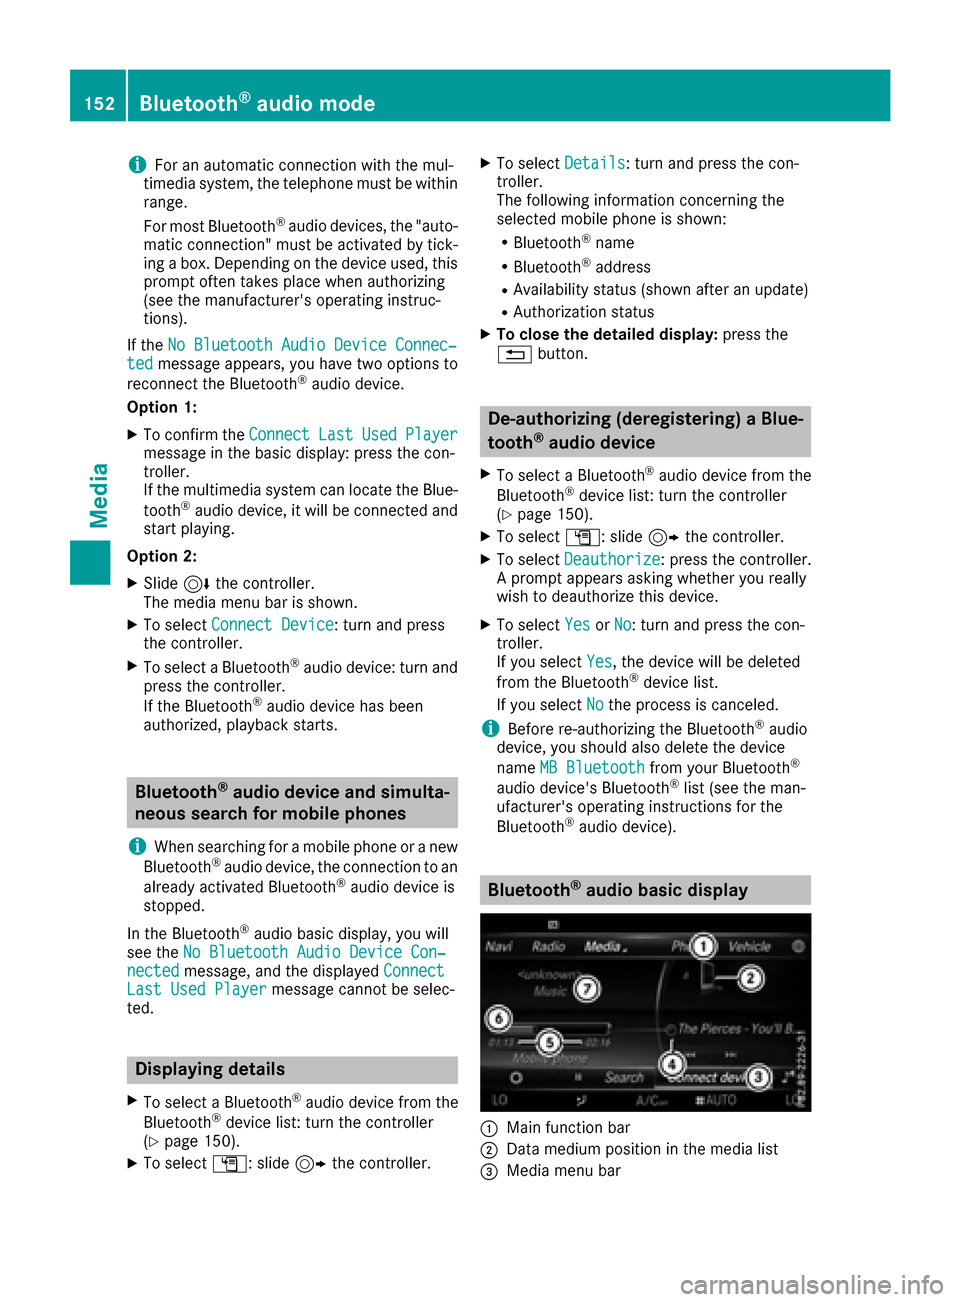
Bluetooth®audio basic display
:Main function bar
;Data medium position in the media list
=Media menu bar
152Bluetooth®audio mode
Media
Page 155 of 178
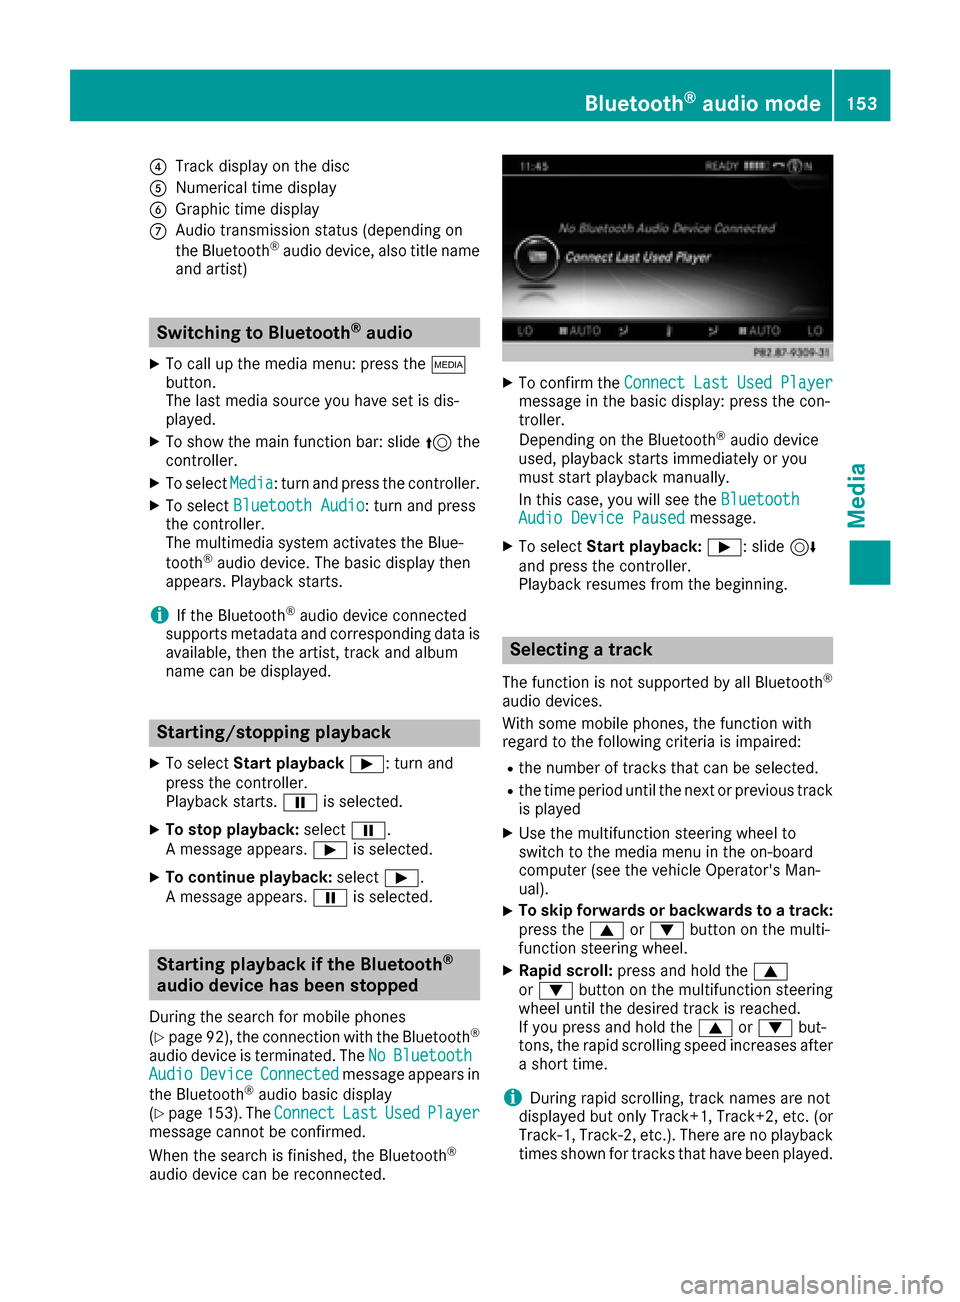
?Track display on the disc
ANumerical time display
BGraphic time display
CAudio transmission status (depending on
the Bluetooth®audio device, also title name
and artist)
Switching to Bluetooth®audio
XTo call up the media menu: press the Õ
button.
The last media source you have set is dis-
played.
XTo show the main function bar: slide 5the
controller.
XTo select Media: turn and press the controller.
XTo select Bluetooth Audio: turn and press
the controller.
The multimedia system activates the Blue-
tooth
®audio device. The basic display then
appears. Playback starts.
iIf the Bluetooth®audio device connected
supports metadata and corresponding data is
available, then the artist, track and album
name can be displayed.
Starting/stopping playback
XTo select Start playback Ì: turn and
press the controller.
Playback starts. Ëis selected.
XTo stop playback: selectË.
A message appears. Ìis selected.
XTo continue playback: selectÌ.
A message appears. Ëis selected.
Starting playback if the Bluetooth®
audio device has been stopped
During the search for mobile phones
(
Ypage 92), the connection with the Bluetooth®
audio device is terminated. The NoBluetoothAudioDeviceConnectedmessage appears in
the Bluetooth®audio basic display
(Ypage 153). The ConnectLastUsedPlayermessage cannot be confirmed.
When the search is finished, the Bluetooth®
audio device can be reconnected.
XTo confirm theConnectLastUsedPlayermessage in the basic display: press the con-
troller.
Depending on the Bluetooth
®audio device
used, playback starts immediately or you
must start playback manually.
In this case, you will see the Bluetooth
Audio Device Pausedmessage.
XTo selectStart playback: Ì: slide6
and press the controller.
Playback resumes from the beginning.
Selecting a track
The function is not supported by all Bluetooth®
audio devices.
With some mobile phones, the function with
regard to the following criteria is impaired:
Rthe number of tracks that can be selected.
Rthe time period until the next or previous track
is played
XUse the multifunction steering wheel to
switch to the media menu in the on-board
computer (see the vehicle Operator's Man-
ual).
XTo skip forwards or backwards to a track:
press the 9or: button on the multi-
function steering wheel.
XRapid scroll: press and hold the 9
or : button on the multifunction steering
wheel until the desired track is reached.
If you press and hold the 9or: but-
tons, the rapid scrolling speed increases after
a short time.
iDuring rapid scrolling, track names are not
displayed but only Track+1, Track+2, etc. (or
Track-1, Track-2, etc.). There are no playback
times shown for tracks that have been played.
Bluetooth®audio mode153
Media
Z