Setting time MERCEDES-BENZ C-Class 2017 W205 Comand Manual
[x] Cancel search | Manufacturer: MERCEDES-BENZ, Model Year: 2017, Model line: C-Class, Model: MERCEDES-BENZ C-Class 2017 W205Pages: 178, PDF Size: 5.62 MB
Page 134 of 178
XTo select the required preset entry: turn the
controller.
XSlide9the controller.
An additional menu appears.
XTo select the Move Highlighted Station/Channeloption: turn and press the control-
ler.
The list of stored stations appears again.
XTo move the highlighted station to the new
position: turn the controller and press to con-
firm.
Deleting highlighted stations
XIn radio mode: slide 6the controller.
The radio menu bar appears.
XTo select Preset: turn and press the control-
ler.
XSelect Edit Station Preset.
XTo select the required preset entry: turn the
controller.
XSlide9the controller.
XTo select the Delete Highlighted Sta‐tion/Channeloption in the additional menu:
turn and press the controller.
XTo select Yes: turn and press the controller.
The highlighted station is deleted.
or
XTo select No: turn and press the controller.
The process is canceled.
iFrequencies have already been stored in the
multimedia system. There are 100 preset
positions available.
Activating/deactivating the station
presets display
You can use this function to change to the sta-
tion presets display.
Activating
XIn radio mode: slide 6the controller.
XTo select Preset: turn and press the control-
ler.
XTo select Station Preset View: On: turn
and press the controller.
The station preset display appears.
XTo switch between the stored stations: turn
the controller. Deactivating
XIn radio mode: slide
6the controller.
XTo select Preset: turn and press the control-
ler.
XTo select StationPresetView:Off: turn
and press the controller.
A view of the last waveband you listened to
appears.
Tagging music tracks
If an Apple®device is connected, the music
tracks and artist displayed in the radio text can be stored. You have the option of purchasing
this track using iTunes Store
®. Not all radio sta-
tions support this function.
XIn radio mode: slide 6the controller.
The radio menu bar appears.
XTo select: turn and press the control-
ler.
XSelect Tag This Track.
A message appears about storing the track
information.
Displaying station information
XIn radio mode: slide 6the controller.
The radio menu bar appears.
XTo select: turn and press the control-
ler.
XYou can determine whether or not the artist,
track or station name are shown in the main
display area with Oorª before Show
Sta‐tion Information.
Calling up sound settings
XIn radio mode: slide 6the controller.
The radio menu bar appears.
XTo select à: turn and press the controller.
The sound menu appears (Ypage 163).
132Calling up sound settings
Radio
Page 137 of 178
XTo call up the category list:selectCate‐
goryin the menu bar by turning and pressing
the controller.
The category list appears.
XTo select a category: turn the controller and
press to confirm.
The category selected is shown in the display.
You hear the channel last selected for this
category.
The #dot indicates the current setting.
At the beginning of the category list, the All
Channelscategory appears. This category
enables you to browse all available channels.
Selecting a channel
Channel search
XWhen the display/section window is selec-
ted, slide 8or9 the controller.
The multimedia system searches in both
directions (ascending and descending) and
stops at the next channel found in the selec-
ted category.
Entering channel numbers directly
XTo select: turn and press the control-
ler.
XTo select Direct Entry: turn and press the
controller.
An input menu appears.
XTo select a channel number: turn and press
the controller.
XThe multimedia system sets the selected
channel.
iYou can only select currently permitted dig-
its.
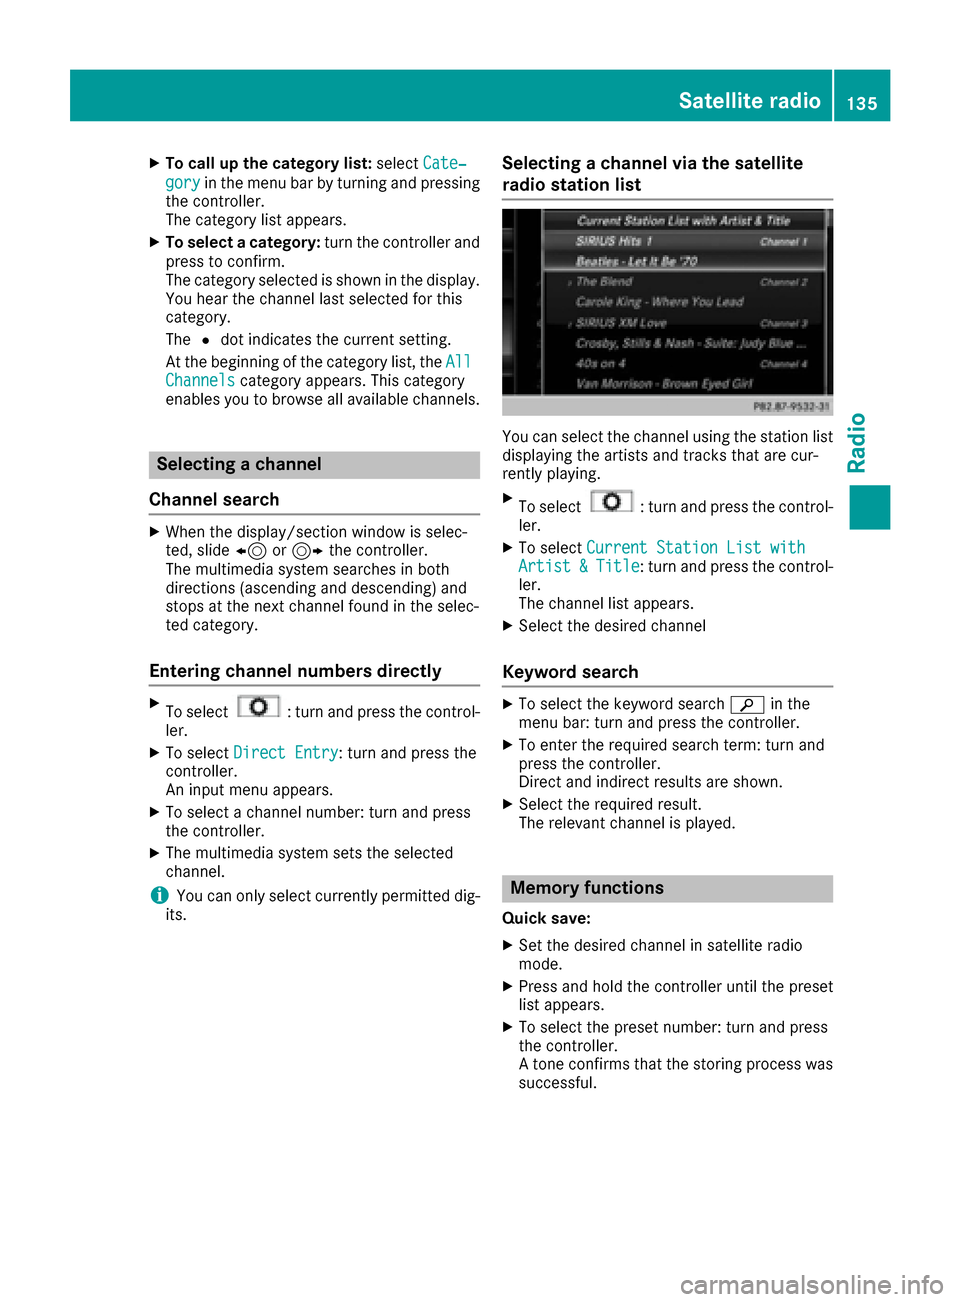
Selecting a channel via the satellite
radio station list
You can select the channel using the station list
displaying the artists and tracks that are cur-
rently playing.
XTo select: turn and press the control-
ler.
XTo select Current Station List withArtist&Title: turn and press the control-
ler.
The channel list appears.
XSelect the desired channel
Keyword search
XTo select the keyword search èin the
menu bar: turn and press the controller.
XTo enter the required search term: turn and
press the controller.
Direct and indirect results are shown.
XSelect the required result.
The relevant channel is played.
Memory functions
Quick save:
XSet the desired channel in satellite radio
mode.
XPress and hold the controller until the preset
list appears.
XTo select the preset number: turn and press
the controller.
A tone confirms that the storing process was
successful.
Satellite radio135
Radio
Page 139 of 178
XSelectSelect New Alerts.
A menu appears.
XSelect the desired team from a league, e.g.
college, NBA, NHL, NFL or MLB.
The alert function for the sports team is
added.
Editing music and sports alerts
XTo select Alert for Artist, Track &SportsEvent: turn and press the controller.
A menu appears.
XSelect Manage Music AlertsorManageSports Alerts.
A list of set alerts appears.
Tagging music tracks
If the channel supports this function, you are
able to transfer the music track currently playing
to an Apple
®device. You can then purchase it in
the iTunes®store.
XTo select: turn and press the control-
ler.
XTo select Tag This Track: turn and press
the controller.
A message about saving this music track on
the Apple
®device appears.
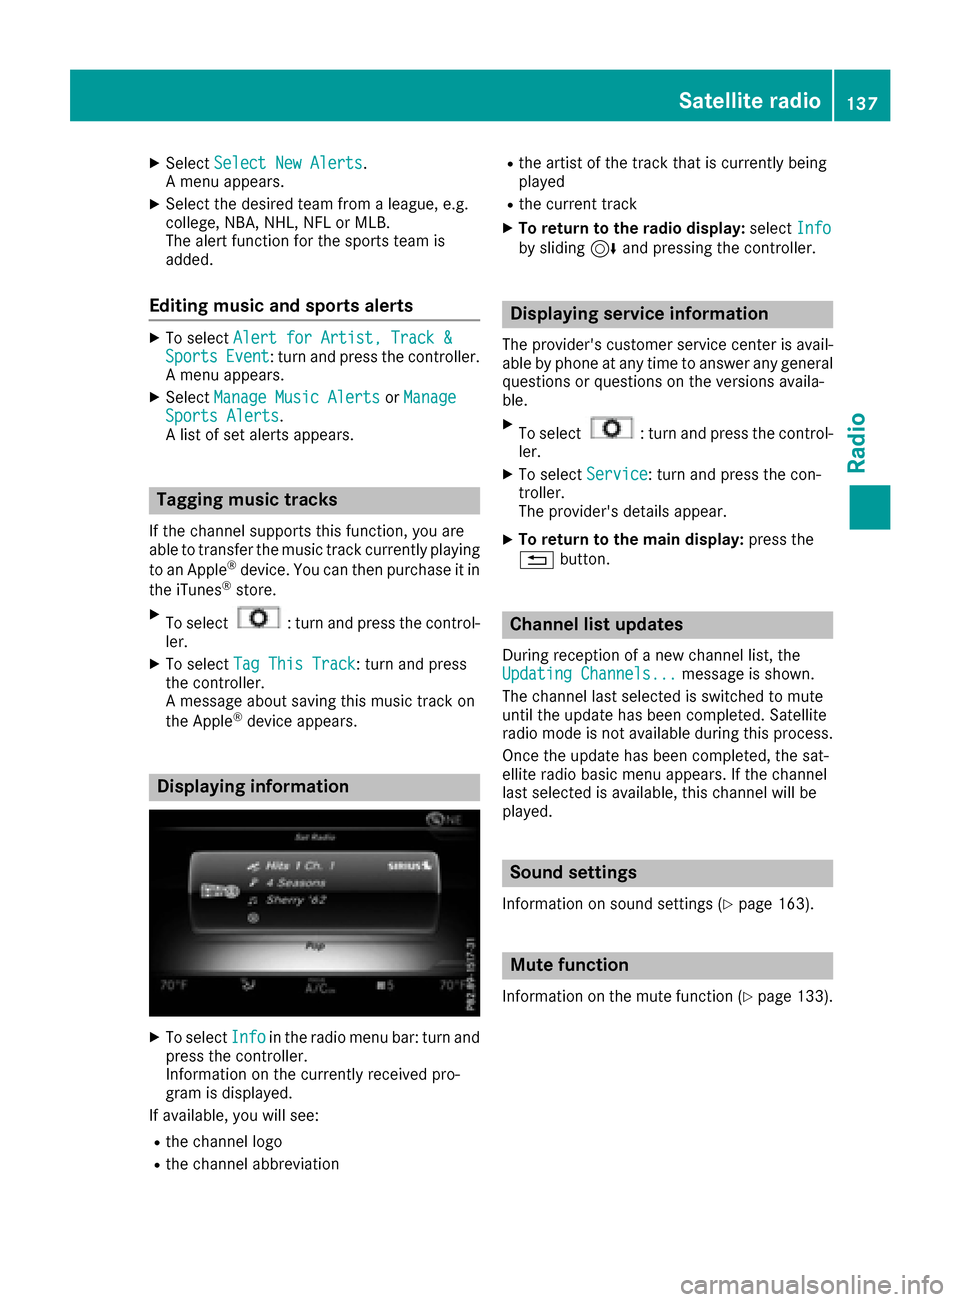
Displaying information
XTo select Infoin the radio menu bar: turn and
press the controller.
Information on the currently received pro-
gram is displayed.
If available, you will see:
Rthe channel logo
Rthe channel abbreviation
Rthe artist of the track that is currently being
played
Rthe current track
XTo return to the radio display: selectInfoby sliding 6and pressing the controller.
Displaying service information
The provider's customer service center is avail-
able by phone at any time to answer any general
questions or questions on the versions availa-
ble.
XTo select: turn and press the control-
ler.
XTo select Service: turn and press the con-
troller.
The provider's details appear.
XTo return to the main display: press the
% button.
Channel list updates
During reception of a new channel list, the
Updating Channels...message is shown.
The channel last selected is switched to mute
until the update has been completed. Satellite
radio mode is not available during this process. Once the update has been completed, the sat-
ellite radio basic menu appears. If the channel
last selected is available, this channel will be
played.
Sound settings
Information on sound settings (Ypage 163).
Mute function
Information on the mute function (Ypage 133).
Satellite radio137
Radio
Page 141 of 178
Using the device list
XIn media mode, slide6the controller.
The media menu bar is shown.
XTo select Devices: turn and press the con-
troller.
The available media sources will be shown.
The #dot indicates the current setting.
XSelect the media source.
If the media source contains music or video
files, these will be played. The corresponding
basic menu will be shown.
Switching on automatically
After inserting a CD/DVD, this media mode is
automatically switched on by the multimedia
system.
If playable music files are found, they will be
played by the multimedia system.
If a media function is already switched on in the
multimedia system, this will be interrupted and
the basic display of the CD/DVD mode will
appear. If another function, such as navigation,
is being operated, the basic display will not
change. Only the music from the last inserted
CD/DVD will be played.
Audio/video mode
Important safety notes
GWARNING
The CD/DVD drive is a class 1 laser product.
If you open the housing of the CD/DVD drive,
there is a risk of exposure to invisible laser
radiation. This laser radiation could damage
your retina. There is a risk of injury.
Never open the housing. Always have main-
tenance and repair work carried out at a quali- fied specialist workshop.
GWARNING
Handling discs while driving may distract you from traffic conditions. You could also lose
control of the vehicle. There is a risk of an
accident.
Handle discs only when the vehicle is station-
ary.
Bear in mind that at a speed of only 30 mph
(approximately 50 km/h) your vehicle covers a
distance of 44 feet (approximately 14 m) every
second.
Notes on audio/video mode
Permissible data carriers
RCD-R, CD-A and CD-RW
RDVD-R, DVD-V and DVD-RW
RSD card
RUSB storage device
Permissible file systems
RISO 9660/Joliet standard for CDs
RUDF for video DVDs
RFAT16, FAT32, exFAT and NTFS for SD card
and USB storage media
Multisession CDs
For multisession CDs, the content of the first
session determines how the multimedia system
processes the CD. The multimedia system plays
only one session and gives priority to the audio
CD session.
File structure of a data carrier
When you create a disc with compressed music
files, the tracks can be organized in folders. A
folder may also contain subfolders. The disc
may contain no more than eight directory levels.
Files beyond the eighth level will not be recog-
nized by the system.
iThe multimedia system supports up to
50,000 files from one data medium.
If more than 64 GB of the memory of a data
medium is full, only files in folders with the
following names are supported: Music, Pic-
tures, Video.
Track and file names
When you create a disc with compressed music
files, you can assign names to the tracks and
folders.
Audio/video mode139
Media
Z
Page 145 of 178
Selecting an active partition
XTo selectSelect Active Partition: turn
and press the controller.
With the Select
ActivePartitionoption,
you can select a partition in the USB data
medium.
Showing track information
XTo select Show Track Information: turn
and press the controller.
Ticking or removing the tick from the box in
front of Show Track Information
displays
or hides the information on the track, artist
and album in the main display field.
Saving files to Media Register
iWith the SaveFilestoMediaRegisteroption, you can transfer supported audio,
image or video files to the multimedia system
hard drive.
XTo select the Save Files to Media Reg‐isteroption: turn and press the controller.
A menu appears (Ypage 146).
Managing Media Register
XDelete or rename individual files in the Media
Register (Ypage 148).
XDelete all files in the Media Register
(Ypage 148).
XCall up information on the preset
(Ypage 149).
Stop and playback function
XTo pause playback: in audio/video mode,
slide 6the controller.
The media menu bar is shown.
XTo activate Ëin the media menu bar: turn
and press the controller.
Playback is interrupted here. The display
changes to Ì.
XTo continue playback: in audio/video mode,
slide 6the controller.
The media menu bar is shown.
XTo activate Ìin the media menu bar: turn
and press the controller.
Playback is continued from the point of inter- ruption. The symbol changes to Ë.
Selecting a track
Selecting using the current track list
XTo display the current track list: press the
controller in the basic display.
The category list appears.
XSelect the current track list.
XTo select a track: turn the controller and press
to confirm.
Selecting by skipping to a track
XTo skip forwards or backwards to a track: turn
or briefly slide 9or8 the controller in
the media basic display.
Search menu
XIn media mode, slide 6the controller.
The media menu bar is shown.
XTo select Search: turn and press the control-
ler.
The category list is shown.
XSelect a category, e.g. Genres.
Sub-categories appear with the selection of
the main category (depends on the multime-
dia system default settings and the music
tracks available).
XSelect a sub-category, for example Rock.
If the sub-category Rock
contains music
tracks, these will be displayed.
Gracenote®Media Database
General notes
This function is available in audio CD mode.
There is a version of
Gracenote®music recognition technology,
Emeryville, California, USA on the multimedia
system hard disk. You will recognize this by the
Audio/video mode143
Media
Z
Page 151 of 178
XTo selectYes: turn and press the controller.
The Please Wait...message appears. The
Data Deletedmessage then appears.
All files are deleted.
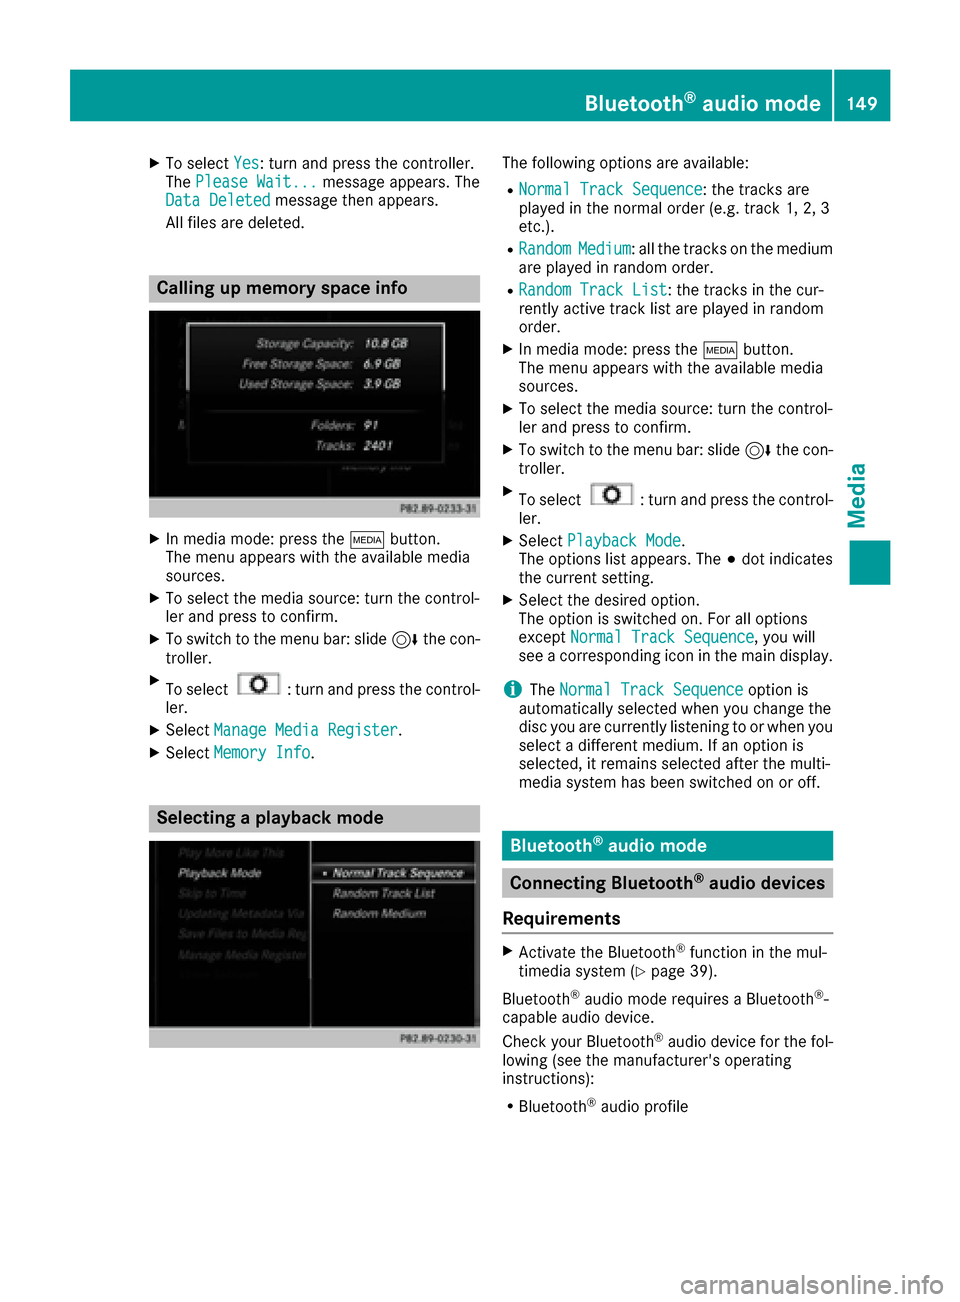
Calling up memory space info
XIn media mode: press the Õbutton.
The menu appears with the available media
sources.
XTo select the media source: turn the control-
ler and press to confirm.
XTo switch to the menu bar: slide 6the con-
troller.
XTo select: turn and press the control-
ler.
XSelect Manage Media Register.
XSelectMemory Info.
Selecting a playback mode
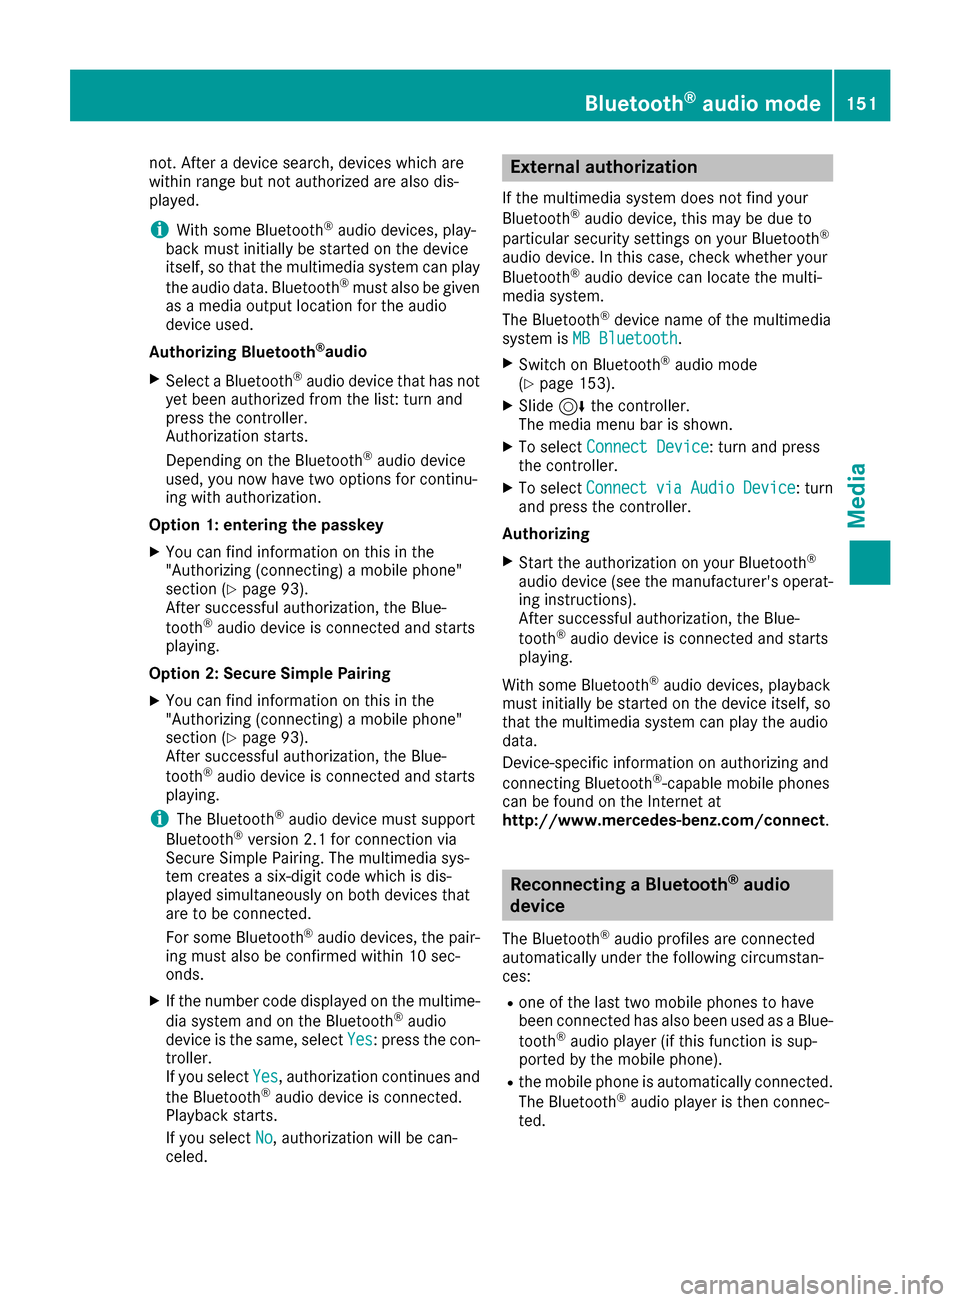
The following options are available:
RNormal Track Sequence: the tracks are
played in the normal order (e.g. track 1, 2, 3
etc.).
RRandomMedium: all the tracks on the medium
are played in random order.
RRandom Track List: the tracks in the cur-
rently active track list are played in random
order.
XIn media mode: press the Õbutton.
The menu appears with the available media
sources.
XTo select the media source: turn the control-
ler and press to confirm.
XTo switch to the menu bar: slide 6the con-
troller.
XTo select: turn and press the control-
ler.
XSelect Playback Mode.
The options list appears. The #dot indicates
the current setting.
XSelect the desired option.
The option is switched on. For all options
except Normal Track Sequence
, you will
see a corresponding icon in the main display.
iThe Normal Track Sequenceoption is
automatically selected when you change the
disc you are currently listening to or when you
select a different medium. If an option is
selected, it remains selected after the multi-
media system has been switched on or off.
Bluetooth®audio mode
Connecting Bluetooth®audio devices
Requirements
XActivate the Bluetooth®function in the mul-
timedia system (Ypage 39).
Bluetooth
®audio mode requires a Bluetooth®-
capable audio device.
Check your Bluetooth
®audio device for the fol-
lowing (see the manufacturer's operating
instructions):
RBluetooth®audio profile
Bluetooth®audio mode149
Media
Z
Page 153 of 178
not. After a device search, devices which are
within range but not authorized are also dis-
played.
iWith some Bluetooth®audio devices, play-
back must initially be started on the device
itself, so that the multimedia system can play
the audio data. Bluetooth
®must also be given
as a media output location for the audio
device used.
Authorizing Bluetooth
®audio
XSelect a Bluetooth®audio device that has not
yet been authorized from the list: turn and
press the controller.
Authorization starts.
Depending on the Bluetooth
®audio device
used, you now have two options for continu-
ing with authorization.
Option 1: entering the passkey
XYou can find information on this in the
"Authorizing (connecting) a mobile phone"
section (
Ypage 93).
After successful authorization, the Blue-
tooth
®audio device is connected and starts
playing.
Option 2: Secure Simple Pairing
XYou can find information on this in the
"Authorizing (connecting) a mobile phone"
section (
Ypage 93).
After successful authorization, the Blue-
tooth
®audio device is connected and starts
playing.
iThe Bluetooth®audio device must support
Bluetooth®version 2.1 for connection via
Secure Simple Pairing. The multimedia sys-
tem cre
ates a six-digit code which is dis-
played simultaneously on both devices that
are to be connected.
For some Bluetooth
®audio devices, the pair-
ing must also be confirmed within 10 sec-
onds.
XIf the number code displayed on the multime-
dia system and on the Bluetooth®audio
device is the same, select Yes: press the con-
troller.
If you select Yes
, authorization continues and
the Bluetooth®audio device is connected.
Playback starts.
If you select No
, authorization will be can-
celed.
External authorization
If the multimedia system does not find your
Bluetooth®audio device, this may be due to
particular security settings on your Bluetooth®
audio device. In this case, check whether your
Bluetooth®audio device can locate the multi-
media system.
The Bluetooth
®device name of the multimedia
system is MB Bluetooth.
XSwitch on Bluetooth®audio mode
(Ypage 153).
XSlide 6the controller.
The media menu bar is shown.
XTo select Connect Device: turn and press
the controller.
XTo select ConnectviaAudioDevice: turn
and press the controller.
Authorizing
XStart the authorization on your Bluetooth®
audio device (see the manufacturer's operat-
ing instructions).
After successful authorization, the Blue-
tooth
®audio device is connected and starts
playing.
With some Bluetooth
®audio devices, playback
must initially be started on the device itself, so
that the multimedia system can play the audio
data.
Device-specific information on authorizing and
connecting Bluetooth
®-capable mobile phones
can be found on the Internet at
http://www.mercedes-benz.com/connect .
Reconnecting a Bluetooth®audio
device
The Bluetooth®audio profiles are connected
automatically under the following circumstan-
ces:
Rone of the last two mobile phones to have
been connected has also been used as a Blue-
tooth
®audio player (if this function is sup-
ported by the mobile phone).
Rthe mobile phone is automatically connected.
The Bluetooth®audio player is then connec-
ted.
Bluetooth®audio mode151
Media
Z
Page 156 of 178
This is available as an optional function start-
ing with AVRCP Version 1.3.
Selecting playback options
If the Bluetooth®audio device supports the cor-
responding function, the following options are
available:
RNormal Track Sequence: the tracks are
played in the normal order (e.g. track 1, 2, 3
etc.).
Audio data playback is determined by the
order in which the tracks are written to the
data medium. Alphabetical order is the most
common. Once all the tracks in a folder have
been played, the tracks in the next folder are
played.
RRandomTrackList: the current track list is
played in random order (e.g. 3, 8, 5 etc.).
RRandom Medium: all tracks on the data
medium are played in random order (e.g.
track 3, 8, 5 etc.).
Playback options are optional functions and
are not, or only partially, supported by Blue-
tooth
®audio devices.
Selecting playback options
XSlide 6the controller.
XTo select: turn and press the control-
ler.
XSelect Playback Mode.
A # dot indicates the current setting.
XSelect the desired option.
If you select Random Track List, a corre-
sponding message appears in the display or
selection window.
Search function
Selecting Search using media menu bar
XSlide 6the controller.
The media menu bar is shown.
XTo select Search: turn and press the control-
ler.
The category list appears.
XTo select the desired category: turn and press
the controller.
Increasing the volume in the multime-
dia system
XSlide 6the controller.
XTo select: turn and press the control-
ler.
XTo select Volume: turn and press the control-
ler.
A menu appears. The #dot indicates the cur-
rent setting.
XSelect StandardorBoost.
iIf play back on the Bluetooth®audio player
is too quiet, the Boostfunction may be used.
It is recommended however, that you
increase the volume on the Bluetooth
®audio
player directly.
Operation with the Media Interface
General notes
Media Interface is a universal interface for the
connection of mobile audio and video devices.
Media Interface in the multimedia system has
two USB connections.
The USB connection sockets are located in the
stowage compartment under the armrest
(
Ypage 138).
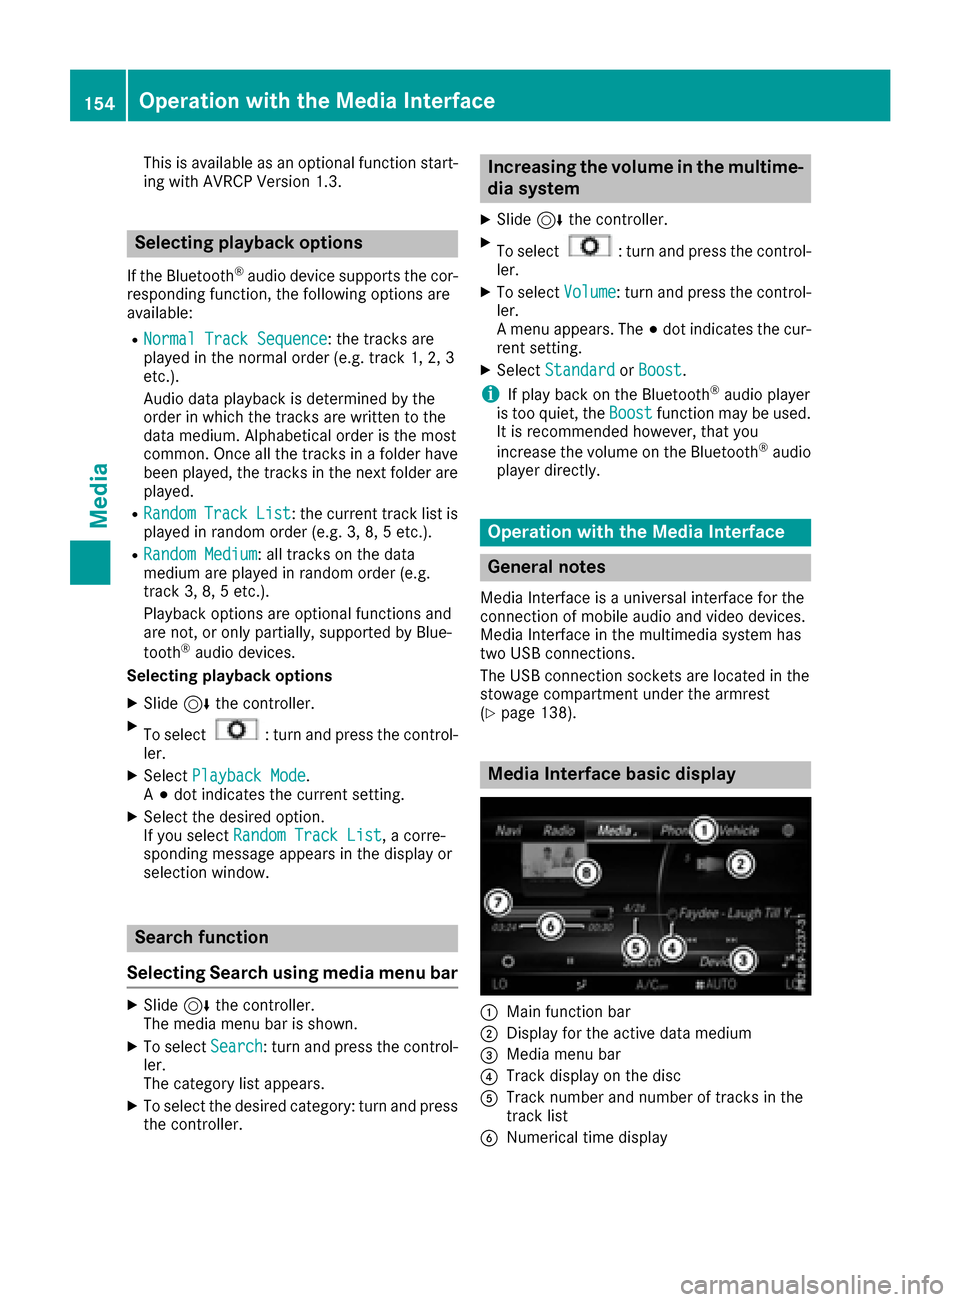
Media Interface basic display
:Main function bar
;Display for the active data medium
=Media menu bar
?Track display on the disc
ATrack number and number of tracks in the
track list
BNumerical time display
154Operation with the Media Interface
Media
Page 158 of 178
RPodcasts
RAudiobooks
iThe functions are available as soon as the
entire media content has been read and ana-
lyzed.
If the same device is reconnected with
unchanged media content, these functions
are available more quickly.
The audio books and podcasts categories are
only available for Apple
®devices.
When connecting Apple®devices, the cate-
gories “Folder”, “Year” and “Photos” are not
available.
XTo select a category, e.g. Current Track‐list: turn and press the controller.
The selection list appears.
XSelect the required track.
Keyword search
XTo select Keyword Searchin the category
list: turn and press the controller.
XEnter and confirm the characters of the
desired search using the controller
(
Ypage 145).
Search results are sorted according to the
available categories, displayed and can then
be selected.
Playback options
XIn media mode, slide 6the controller.
The media menu bar is shown.
XTo select: turn and press the control-
ler.
XTo select the desired playback option: turn
and press the controller.
Additional information on playback options
(
Ypage 142).
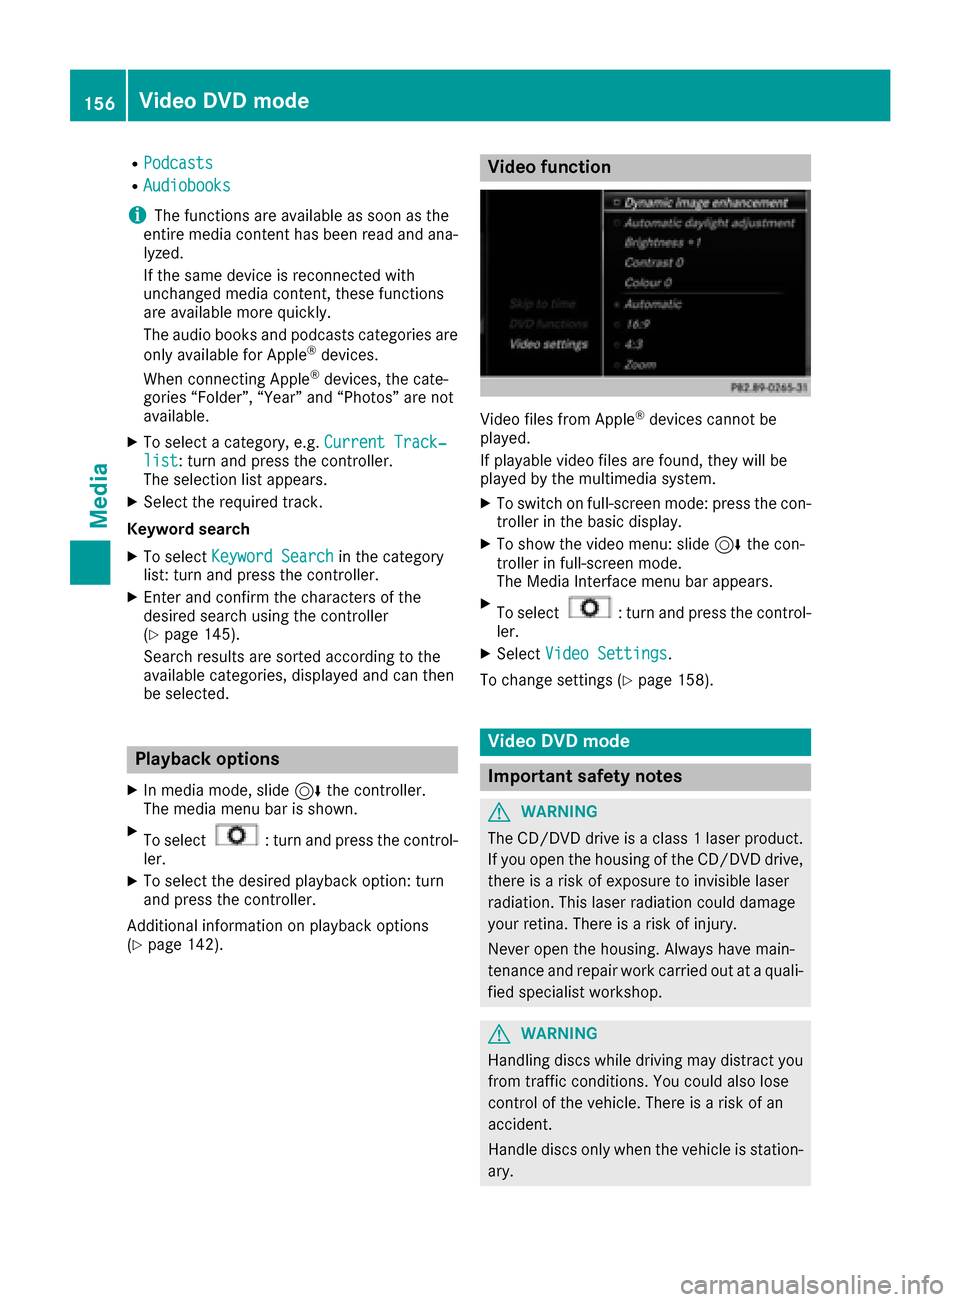
Video function
Video files from Apple®devices cannot be
played.
If playable video files are found, they will be
played by the multimedia system.
XTo switch on full-screen mode: press the con-
troller in the basic display.
XTo show the video menu: slide 6the con-
troller in full-screen mode.
The Media Interface menu bar appears.
XTo select: turn and press the control-
ler.
XSelect Video Settings.
To change settings (
Ypage 158).
Video DVD mode
Important safety notes
GWARNING
The CD/DVD drive is a class 1 laser product.
If you open the housing of the CD/DVD drive,
there is a risk of exposure to invisible laser
radiation. This laser radiation could damage
your retina. There is a risk of injury.
Never open the housing. Always have main-
tenance and repair work carried out at a quali- fied specialist workshop.
GWARNING
Handling discs while driving may distract you from traffic conditions. You could also lose
control of the vehicle. There is a risk of an
accident.
Handle discs only when the vehicle is station-
ary.
156Video DVD mode
Media
Page 159 of 178
Bear in mind that at a speed of only 30 mph
(approximately 50 km/h) your vehicle covers a
distance of 44 feet (approximately 14m) every
se cond.
General notes
Notes on discs
!Do not affix stickers or labels to the discs.
They could peel off and damage the drive.
The drive is designed to receive EN 60908 standard discs. Therefore, you can
only use discs with a maximum thickness of
1.3 mm.
If you insert thicker discs, e.g. those that con-
tain data on both sides (DVD on one side and
audio data on the other), they cannot be ejec-
ted and can damage the drive.
Do not use discs with an 8 cm diameter, even
when using an adapter. Only use round discs
with a 12 cm diameter.
The variety of data media, burners and burn
software means there is no guarantee that the
system will be able to play discs that you have
copied yourself.
DVD playback conditions
The multimedia system can play back video
DVDs produced according to the following
standards:
RRegion code 1 or region code 0 (no region
code)
RPAL or NTSC standard
You will generally find the relevant details either
on the DVD itself or on the DVD case.
With DVDs that do not meet the standard
requirements, you may encounter playback
problems.
iObserve the following notes:
RIt is also possible to play video DVDs with a
different region code, provided that they
are produced in accordance with the PAL or
NTSC standard. If you insert a video DVD
with a different region code, a message to
this effect appears.
RThe multimedia system is set to region
code 1 at the factory. This setting can be
changed at an authorized Mercedes-Benz Center. The region code can be changed up
to five times.
RIf a DVD cannot be played back according
to national color transfer methods (PAL or
NTSC standards), problems with the image,
sound or playback may occur.
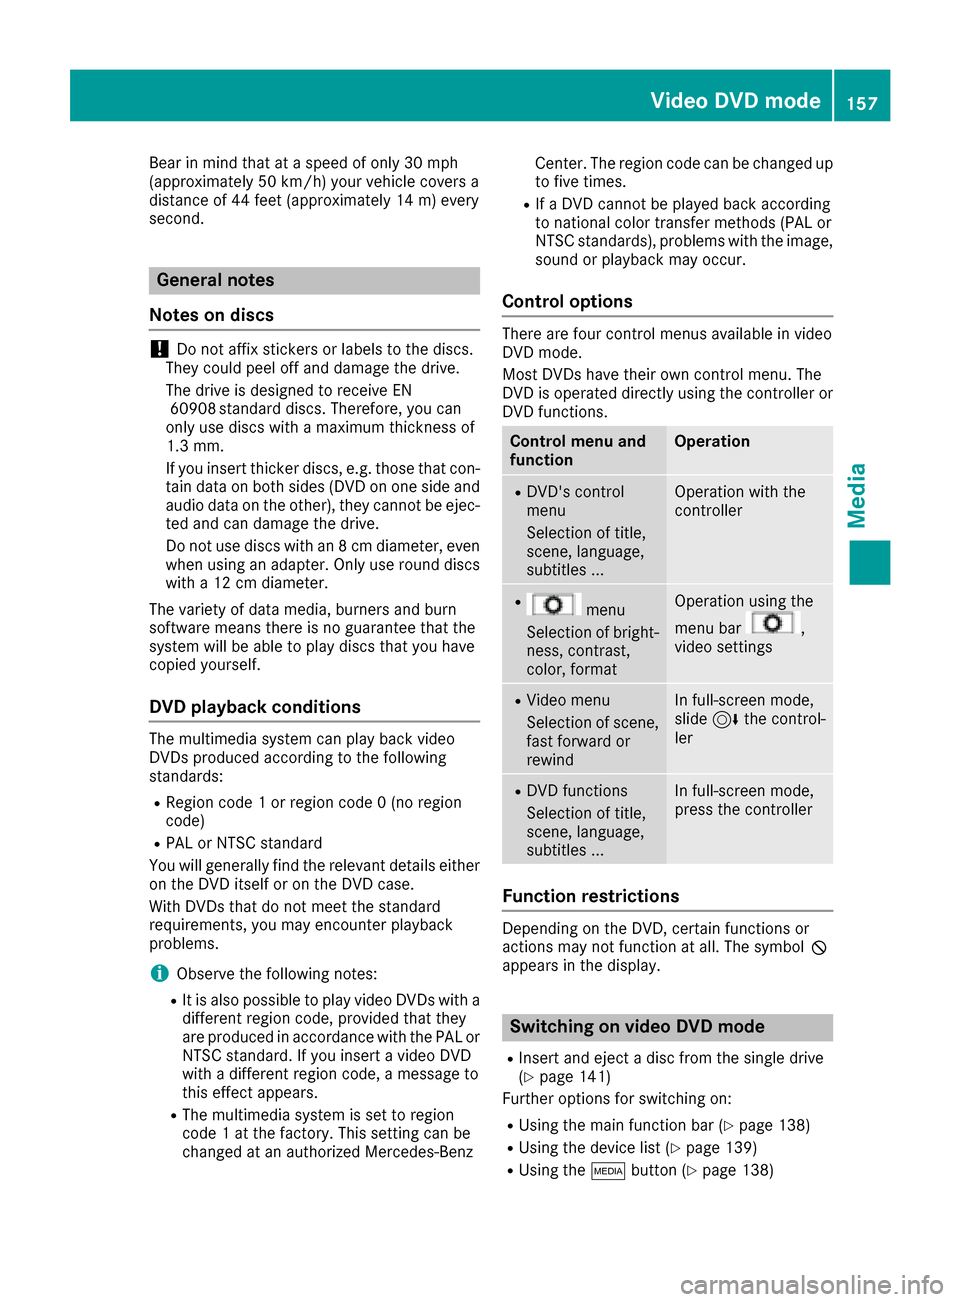
Control options
There are four control menus available in video
DVD mode.
Most DVDs have their own control menu. The
DVD is operated directly using the controller or
DVD functions.
Control menu and
functionOperation
RDVD's control
menu
Selection of title,
scene, language,
subtitles ...Operation with the
controller
Rmenu
Selection of bright-
ness, contrast,
color, formatOperation using the
menu bar
,
video settings
RVideo menu
Selection of scene,
fast forward or
rewindIn full-screen mode,
slide 6the control-
ler
RDVD functions
Selection of title,
scene, language,
subtitles ...In full-screen mode,
press the controller
Function restrictions
Depending on the DVD, certain functions or
actions may not function at all. The symbol K
appears in the display.
Switching on video DVD mode
RInsert and eject a disc from the single drive
(Ypage 141)
Further options for switching on:
RUsing the main function bar (Ypage 138)
RUsing the device list (Ypage 139)
RUsing the Õbutton (Ypage 138)
Video DVD mode157
Media
Z