key MERCEDES-BENZ C-CLASS CABRIOLET 2018 COMAND Manual
[x] Cancel search | Manufacturer: MERCEDES-BENZ, Model Year: 2018, Model line: C-CLASS CABRIOLET, Model: MERCEDES-BENZ C-CLASS CABRIOLET 2018Pages: 174, PDF Size: 4.1 MB
Page 42 of 174
XSelectChange SSID.
A dialog for entering the SSID appears.
XEnter the new SSID.
XSelect ¬.
XPress the controller.
From now on, when establishing a connec-
tion, the vehicle will be shown with the new
SSID both on the device to be connected and
in the Connect
UsingSecurityKeymenu.
iDevice connections established using the
previous SSID will no longer work after the
SSID is changed. You have to reconnect these
devices (
Ypage 38).
Bluetooth®settings
General information about Blue-
tooth®
Bluetooth®-capable devices, e. g. mobile
phones, need to comply with a certain profile in
order to be connected to the multimedia sys-
tem. Every Bluetooth
®device has its own spe-
cific Bluetooth®name.
Bluetooth®technology is a standard for short-
range wireless data transmissions up to approx-
imately 10 m.
Yo u can use Bluetooth
®to connect your mobile
phone to the multimedia system, for example:
Ruse the hands-free system
Restablish an Internet connection
Rlisten to music using Bluetooth®Audio
Rexchange vCards
Bluetooth®is a registered trademark of Blue-
tooth Special Interest Group (SIG) Inc.
Activating/deactivating Bluetooth®
X
Press the Øbutton.
or
XPress Vehiclein the main function bar.
The vehicle menu is displayed.
XTo switch to the menu bar: slide 6the con-
troller.
XTo select System Settings: turn and press
the controller.
A menu appears.
XTo activate Oor deactivate ªActivateBluetooth: turn and press the controller.
Automatic volume adjustment
General information
With the AutomaticVolumeAdjustmentfunc-
tion, the volumes of different audio sources are
adjusted for each other, to compensate for rel-
ative differences in volume.
For example: changing from a relatively quiet to
a relatively loud radio station. The volume for
both stations sounds the same. Manual read-
justment of the volume is not required.
The Automatic Volume Adjustment
function
is deactivated ªwhen the vehicle leaves the
factory. Using this function, the dynamic range
of the music is slightly reduced. To make the
most of the audiophile sound quality, it is rec-
ommended to leave it off.
Switching the automatic volume
adjustment on/off
XPress the Øbutton.
or
XPress Vehiclein the main function bar.
The vehicle menu is displayed.
XTo switch to the menu bar: slide 6the con-
troller.
XTo select System Settings: turn and press
the controller.
A menu appears.
XTo select Automatic Volume Adjustment:
turn and press the controller.
Switch the Automatic Volume Adjustment
function on Oor off ª.
Setting the system language
General information
This function allows you to determine the lan-
guage for the menu displays and the navigation
40Setting the system language
System settings
Page 48 of 174
XCallupVehicle Settings(Ypage 44).
XTo select Automatic Locking: turn and
press the controller.
The function switches on or off, dependin g on
the previous setting.
You can find further information on the locking
feature inthe veh icleOperator's Manual.
Setting the switch-off delay time
Interior lighting switch-off delay time
The interior lighting isactivated for the duration
of the switch-off delay time when the SmartKey
is removed from the ignition lock.
XCall upVehicle Settings(Ypage 44).
XTo select Interior Lighting DelayedSwitch-off: turn and press the controller.
The setting element isactive.
XTo change the delayed switch-off time: turn
and press the controller.
You can find further information on the interior
lighting inthe veh icleOperator's Manual.
Exterior lighting switch-off delay time
Ifyou switch on the Exterior LightingDelayed Switch-offfunction, the exterior
lighting is switched on for a short time after the
engine is switched off. The light switch must be
set to Ã; see the veh icleOperator's Manual.
The exterior lighting remains litfor 60 seconds
after the engine is switched off. Ifyou close all
the doors and the tailgate, the exterior lighting
swit ches off after the set time.
XCall upVehicle Settings(Ypage 44).
XTo select Exterior Lighting DelayedSwitch-off: turn and press the controller.
The setting element isactive.
XTo change the delayed switch-off time: turn
and press the controller.
Activating/deactivating the trunk lid
opening height restriction
Activating the Trunk Opening-heightRestrictionfunctionallowsyou to avoid
bumping the trunk lidon a low garage cei ling, for
example. Setting via the multimedia systemis
availab lefor the Sedan and Coupe.
XCall up Vehicle Settings(Ypage 44).
XTo select Trunk Opening-heightRestriction: turn and press the controller.
The function switches on or off, depending on
the previous setting.
360° camera
General notes
The 360° camera covers the immediate sur-
roundings of the vehicle and assists you, for
instance when parking or at exits with reduced
vis ibilit y.
The 360° camera isonly an aid. It is not a
replacement for your attention to your immedi-
ate surroundings. You are always responsible
for safe maneuvering and parking. Make sure
that no persons or animals are inthe maneu-
vering range.
For more information on the 360° camera see
the vehicle Operator's Manual.
Displaying the 360° camera image
The 360° camera image can be displayed if:
Ryour vehicle isequipped with a 360° camera
Rthe 360°Camerafunction is switched on (see
the vehicle Operator's Manual)
XPress the Øbutton.
or
XPress Vehiclein the main function bar.
The vehicle menu isdisplayed.
XTo select 360° Camera: turn and press the
controller.
The 360° camera image appears in split-
screen mode.
You willsee the previous view on the display if,
when the function is switched on:
Ryou turn the SmartKey to position 1in the
ignition lock
Ryou select transmission position j
Rwhen you are driving at moderate speeds
Switching the display off manually
XTo select &: slide 6and press the con-
troller.
46360° camera
Vehicle functions
Page 51 of 174
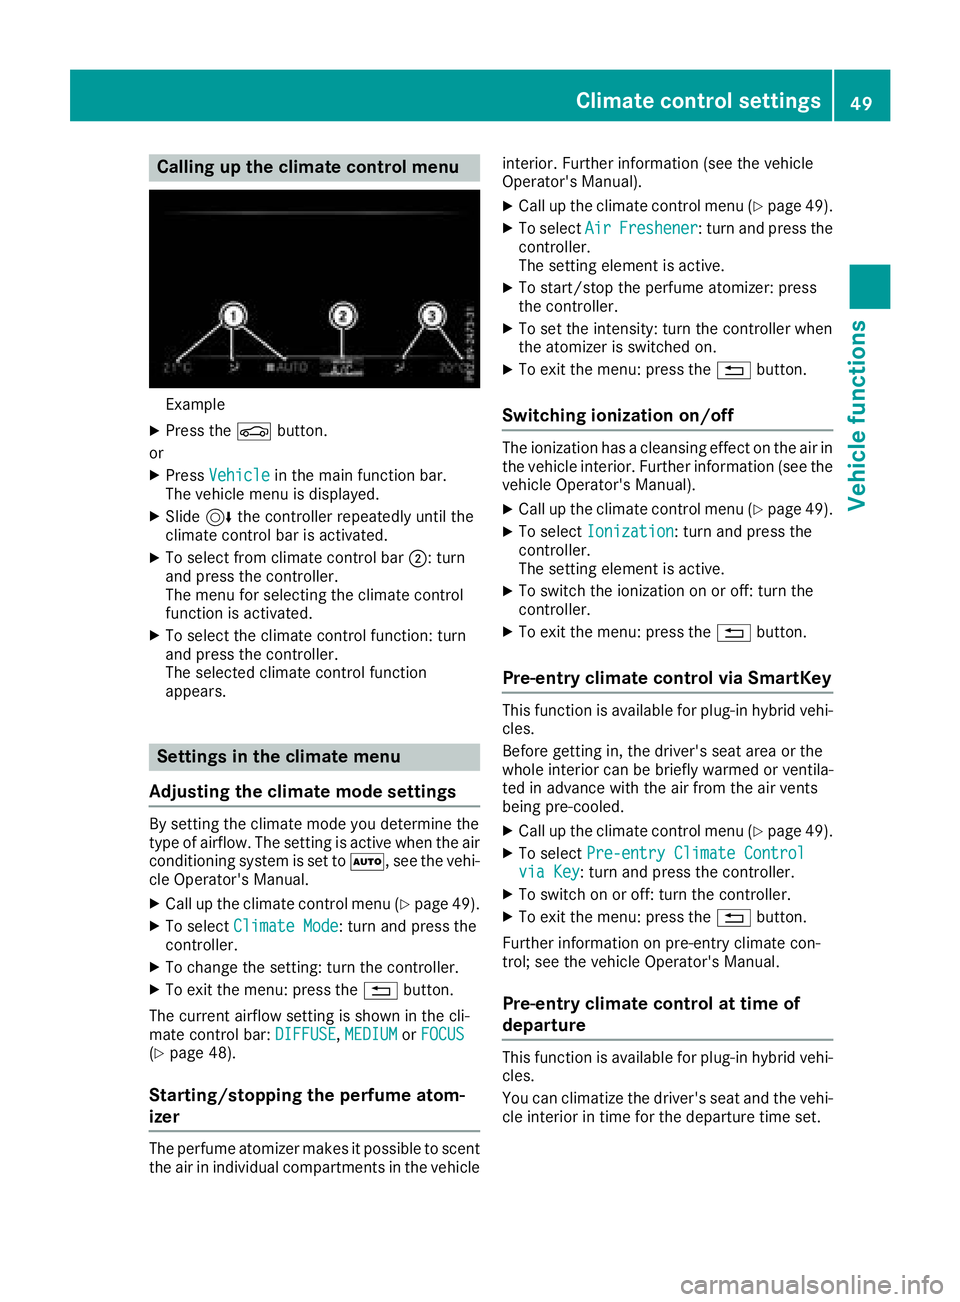
Calling up the climate control menu
Example
XPress theØbutton.
or
XPress Vehiclein the main function bar.
The vehicle menu is displayed.
XSlide 6the controller repeatedly until the
climate control bar is activated.
XTo select from climate control bar ;: turn
and press the controller.
The menu for selecting the climate control
function is activated.
XTo select the climate control function: turn
and press the controller.
The selected climate control function
appears.
Settings in the climate menu
Adjusting the climate mode settings
By setting the climate mode you determine the
type of airflow. The setting is active when the air
conditioning system is set to Ã, see the vehi-
cle Operator's Manual.
XCall up the climate control menu (Ypage 49).
XTo select Climate Mode: turn and press the
controller.
XTo change the setting: turn the controller.
XTo exit the menu: press the %button.
The current airflow setting is shown in the cli-
mate control bar: DIFFUSE
,MEDIUMor FOCUS(Ypage 48).
Starting/stopping the perfume atom-
izer
The perfume atomizer makes it possible to scent
the air in individual compartments in the vehicle interior. Further information (see the vehicle
Operator's Manual).
XCall up the climate control menu (Ypage 49).
XTo select
AirFreshener: turn and press the
controller.
The setting element is active.
XTo start/stop the perfume atomizer: press
the controller.
XTo set the intensity: turn the controller when
the atomizer is switched on.
XTo exit the menu: press the %button.
Switching ionization on/off
The ionization has a cleansing effect on the air in
the vehicle interior. Further information (see the
vehicle Operator's Manual).
XCall up the climate control menu (Ypage 49).
XTo select Ionization: turn and press the
controller.
The setting element is active.
XTo switch the ionization on or off: turn the
controller.
XTo exit the menu: press the %button.
Pre-entry climate control via SmartKey
This function is available for plug-in hybrid vehi-
cles.
Before getting in, the driver's seat area or the
whole interior can be briefly warmed or ventila-
ted in advance with the air from the air vents
being pre-cooled.
XCall up the climate control menu (Ypage 49).
XTo select Pre-entry Climate Controlvia Key: turn and press the controller.
XTo switch on or off: turn the controller.
XTo exit the menu: press the %button.
Further information on pre-entry climate con-
trol; see the vehicle Operator's Manual.
Pre-entry climate control at time of
departure
This function is available for plug-in hybrid vehi-
cles.
You can climatize the driver's seat and the vehi-
cle interior in time for the departure time set.
Climate control settings49
Vehicle functions
Z
Page 59 of 174
XSelectRoute Settings.
XSelectAvoid Options.
XSelectUse Carpool Lanes.
Carpool lanes will either be used Oor avoi-
ded ªwhen calculating the route.
Destination entry
Important safety notes
GWARNING
If you operate information systems and com-
munication equipment integrated in the vehi-
cle when driving, you may be distracted from
the traffic situation. You could also lose con-
trol of the vehicle. There is a risk of an acci-
dent.
Only operate this equipment when the traffic
situation permits. If you are not sure that this
is possible, park the vehicle paying attention
to traffic conditions and operate the equip-
ment when the vehicle is stationary.
You must observe the legal requirements for the
country in which you are currently driving when
operating the multimedia system.
Destination entry may be blocked while driving,
depending on the country specifications.
General notes
The various character entry options are descri-
bed for the controller. Alternatively you can use
the touchpad to enter characters and select
menus (
Ypage 23).
Using an address
Calling up the address entry menu
XTo switch to navigation mode: press the
Ø button.
XTo show the menu: slide6the controller.
XTo select Destination: turn and press the
controller.
XSelect Address Entry.
Address entry options
Examples of how you can enter an address:
RCity or ZIP code, street, house number
RCity or ZIP code, street
RCity or ZIP code, center
RCity or ZIP code, street, intersection
RStreet, city or ZIP code, house number
RStreet, city or ZIP code, intersection
The address can be entered faster by entering
the street before the city if the address has an
unusual street name.
While entering an address, you can also switch
to other destination entry options:
RKeyword search (Ypage 59)
RMap (Ypage 64)
RPOI (Ypage 61)
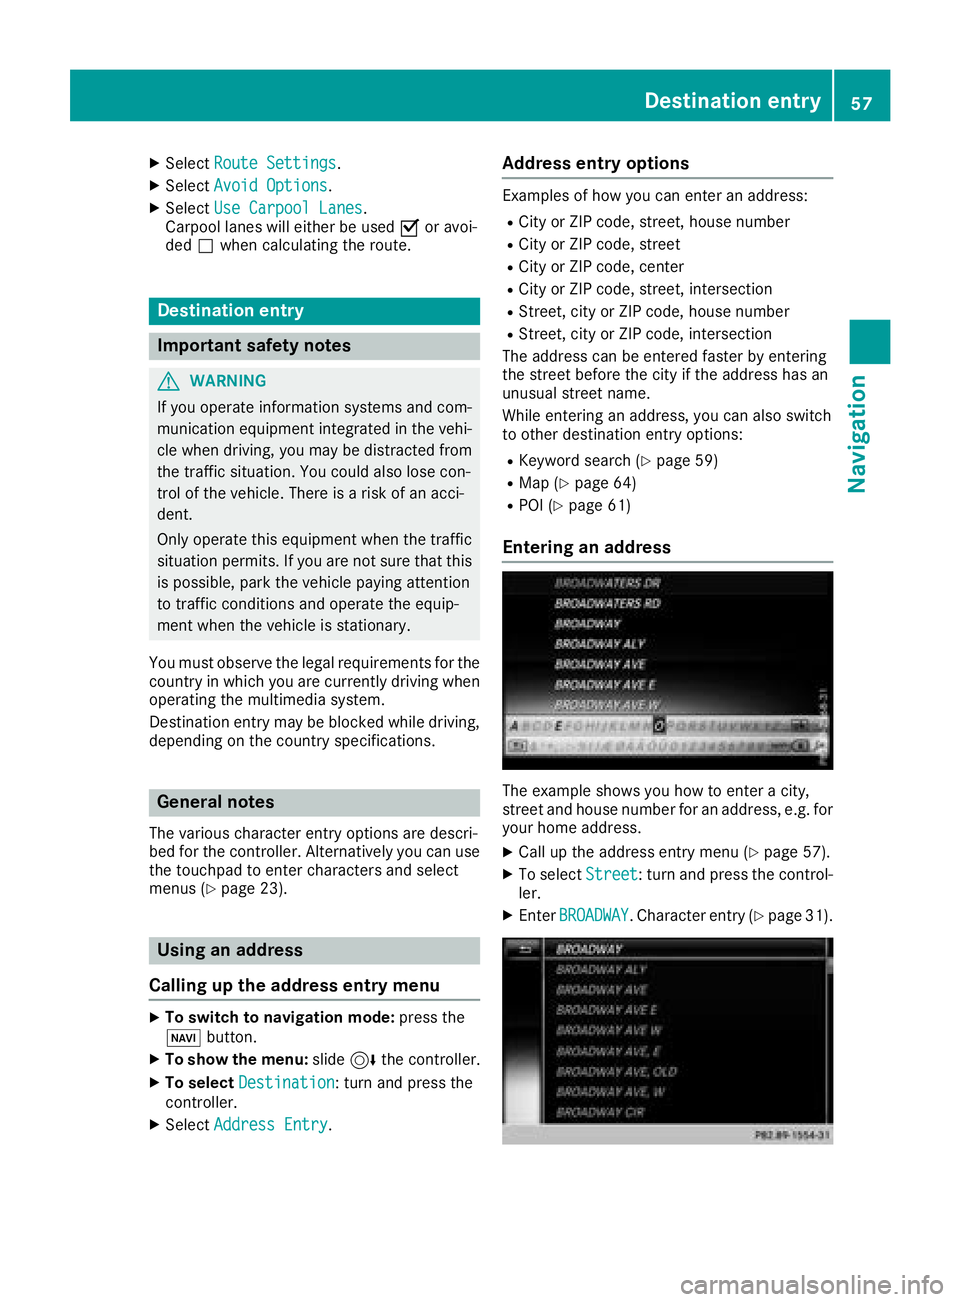
Entering an address
The example shows you how to enter a city,
street and house number for an address, e.g. for
your home address.
XCall up the address entry menu (Ypage 57).
XTo select Street: turn and press the control-
ler.
XEnter BROADWAY. Character entry (Ypage 31).
Destination entry57
Navigation
Z
Page 61 of 174
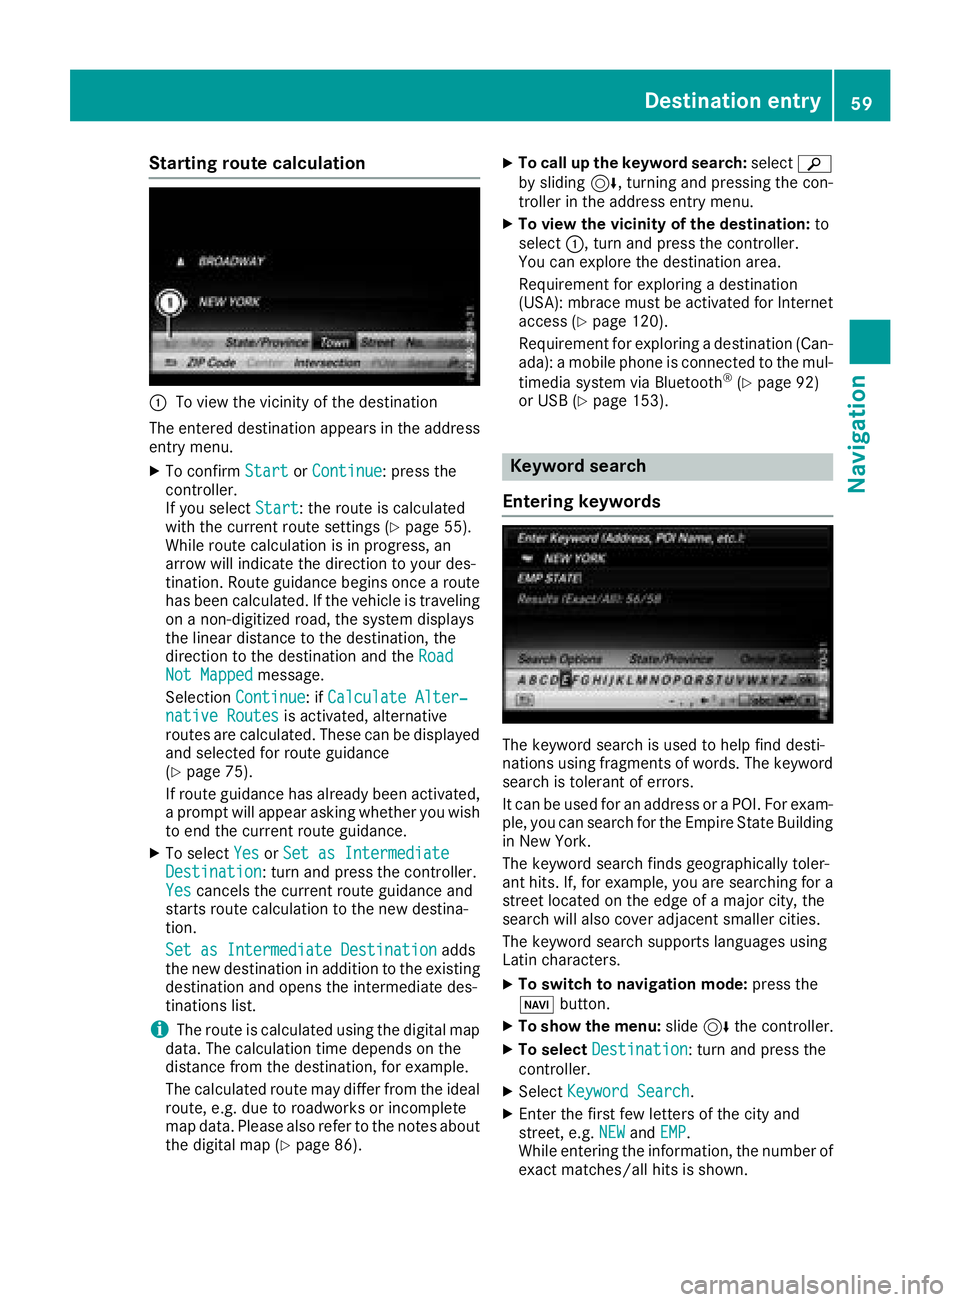
Starting route calculation
:To view the vicinity of the destination
The entered destination appears in the address
entry menu.
XTo confirm StartorContinue: press the
controller.
If you select Start
: the route is calculated
with the current route settings (Ypage 55).
While route calculation is in progress, an
arrow will indicate the direction to your des-
tination. Route guidance begins once a route has been calculated. If the vehicle is traveling
on a non-digitized road, the system displays
the linear distance to the destination, the
direction to the destination and the Road
Not Mappedmessage.
Selection Continue
: ifCalculate Alter‐native Routesis activated, alternative
routes are calculated. These can be displayed and selected for route guidance
(
Ypage 75).
If route guidance has already been activated,
a prompt will appear asking whether you wish
to end the current route guidance.
XTo select YesorSet as IntermediateDestination: turn and press the controller.
Yescancels the current route guidance and
starts route calculation to the new destina-
tion.
Set as Intermediate Destination
adds
the new destination in addition to the existing
destination and opens the intermediate des-
tinations list.
iThe route is calculated using the digital map
data. The calculation time depends on the
distance from the destination, for example.
The calculated route may differ from the ideal
route, e.g. due to roadworks or incomplete
map data. Please also refer to the notes about the digital map (
Ypage 86).
XTo call up the keyword search: selectè
by sliding 6, turning and pressing the con-
troller in the address entry menu.
XTo view the vicinity of the destination: to
select :, turn and press the controller.
You can explore the destination area.
Requirement for exploring a destination
(USA): mbrace must be activated for Internet
access (
Ypage 120).
Requirement for exploring a destination (Can- ada): a mobile phone is connected to the mul-
timedia system via Bluetooth
®(Ypage 92)
or USB (Ypage 153).
Keyword search
Entering keywords
The keyword search is used to help find desti-
nations using fragments of words. The keyword
search is tolerant of errors.
It can be used for an address or a POI. For exam-
ple, you can search for the Empire State Building
in New York.
The keyword search finds geographically toler-
ant hits. If, for example, you are searching for a
street located on the edge of a major city, the
search will also cover adjacent smaller cities.
The keyword search supports languages using
Latin characters.
XTo switch to navigation mode: press the
Ø button.
XTo show the menu: slide6the controller.
XTo select Destination: turn and press the
controller.
XSelect Keyword Search.
XEnter the first few letters of the city and
street, e.g. NEWandEMP.
While entering the information, the number of
exact matches/all hits is shown.
Destination entry59
Navigation
Z
Page 62 of 174
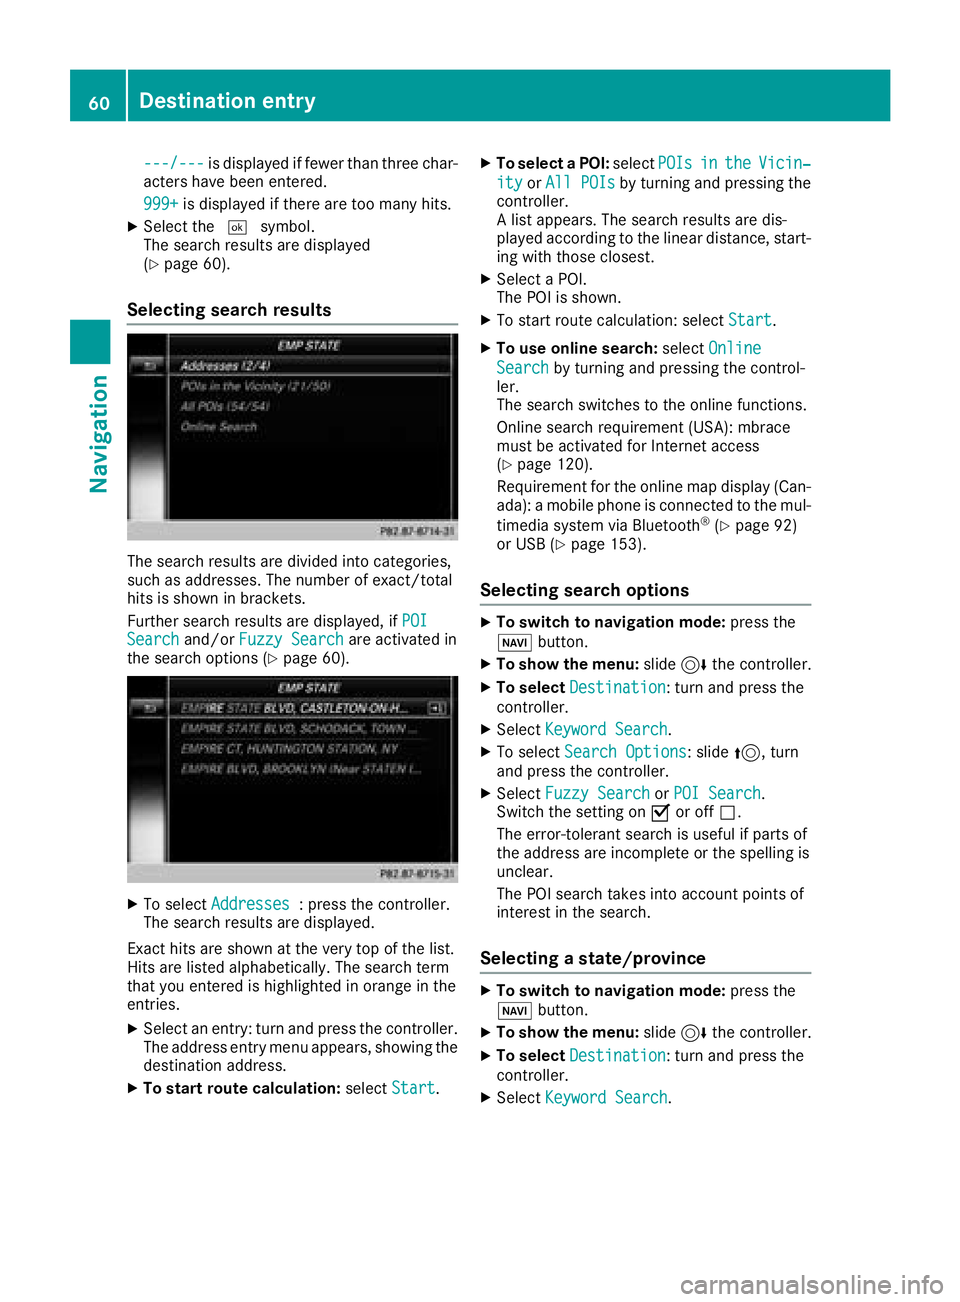
---/---is displayed if fewer than three char-
acters have been entered.
999+
is displayed if there are too many hits.
XSelect the ¬symbol.
The search results are displayed
(
Ypage 60).
Selecting search results
The search results are divided into categories,
such as addresses. The number of exact/total
hits is shown in brackets.
Further search results are displayed, if POI
Searchand/orFuzzy Searchare activated in
the search options (Ypage 60).
XTo select Addresses: press the controller.
The search results are displayed.
Exact hits are shown at the very top of the list.
Hits are listed alphabetically. The search term
that you entered is highlighted in orange in the
entries.
XSelect an entry: turn and press the controller.
The address entry menu appears, showing the
destination address.
XTo start route calculation: selectStart.
XTo select a POI: selectPOIsintheVicin‐
ityorAll POIsby turning and pressing the
controller.
A list appears. The search results are dis-
played according to the linear distance, start-
ing with those closest.
XSelect a POI.
The POI is shown.
XTo start route calculation: select Start.
XTo use online search:selectOnline
Searchby turning and pressing the control-
ler.
The search switches to the online functions.
Online search requirement (USA): mbrace
must be activated for Internet access
(
Ypage 120).
Requirement for the online map display (Can-
ada): a mobile phone is connected to the mul-
timedia system via Bluetooth
®(Ypage 92)
or USB (Ypage 153).
Selecting search options
XTo switch to navigation mode: press the
Ø button.
XTo show the menu: slide6the controller.
XTo select Destination: turn and press the
controller.
XSelect Keyword Search.
XTo select Search Options: slide5, turn
and press the controller.
XSelect Fuzzy SearchorPOI Search.
Switch the setting on Oor off ª.
The error-tolerant search is useful if parts of
the address are incomplete or the spelling is
unclear.
The POI search takes into account points of
interest in the search.
Selecting a state/province
XTo switch to navigation mode: press the
Ø button.
XTo show the menu: slide6the controller.
XTo select Destination: turn and press the
controller.
XSelect Keyword Search.
60Destination entry
Navigation
Page 63 of 174
XTo selectState/Province: slide5, turn
and press the controller.
States/provinces are sorted alphabetically.
XTo select a state/province: turn and press the
controller.
Using online search
Requirement (USA): mbrace must be activated
for Internet access (Ypage 120).
Requirement (Canada): a mobile phone is con-
nected to the multimedia system via Bluetooth
®
(Ypage 92) or USB (Ypage 153).
XTo switch to navigation mode: press the
Ø button.
XTo show the menu: slide6the controller.
XTo select Destination: turn and press the
controller.
XSelect Keyword Search.
XTo select OnlineSearch: slide5, turn and
press the controller.
The search switches to the online functions.
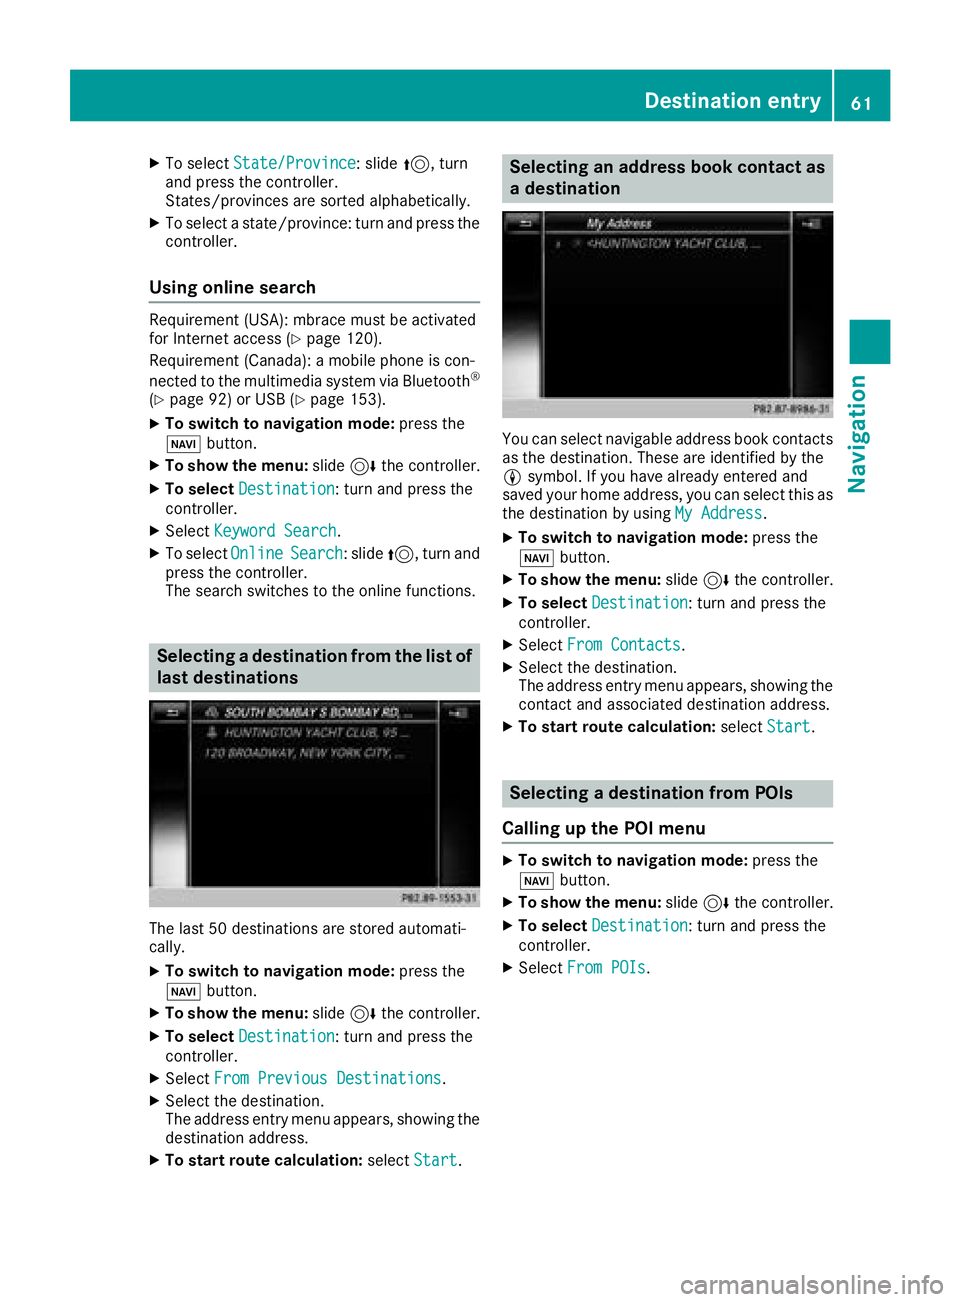
Selecting a destination from the list of
last destinations
The last 50 destinations are stored automati-
cally.
XTo switch to navigation mode: press the
Ø button.
XTo show the menu: slide6the controller.
XTo select Destination: turn and press the
controller.
XSelect From Previous Destinations.
XSelect the destination.
The address entry menu appears, showing the
destination address.
XTo start route calculation: selectStart.
Selecting an address book contact as
a destination
You can select navigable address book contacts
as the destination. These are identified by the
Lsymbol. If you have already entered and
saved your home address, you can select this as
the destination by using My Address
.
XTo switch to navigation mode: press the
Ø button.
XTo show the menu: slide6the controller.
XTo select Destination: turn and press the
controller.
XSelect From Contacts.
XSelect the destination.
The address entry menu appears, showing the
contact and associated destination address.
XTo start route calculation: selectStart.
Selecting a destination from POIs
Calling up the POI menu
XTo switch to navigation mode: press the
Ø button.
XTo show the menu: slide6the controller.
XTo select Destination: turn and press the
controller.
XSelect From POIs.
Destination entry61
Navigation
Z
Page 67 of 174
SelectionStep
AddressEntryXEnter a destination by
address (Ypage 57).
KeywordSearchXSelect a destination
using a keyword search
(
Ypage 59).
From Previ‐ous Destina‐tions
XSelect a destination
from the list of last des-
tinations (
Ypage 61).
From Con‐tactsXSelect a contact from
the address book as the
destination (
Ypage 61).
From POIsXSelect a point of interest(Ypage 63).
Using MapXEnter a destination using
the map (Ypage 64).
From MemoryCardXSelect a personal POI
(Ypage 69).
FromMercedes-Benz Apps
XEnter a destination from
Mercedes-Benz Apps
(
Ypage 66).
Using Geo-CoordinatesXEnter a destination using
the geo-coordinates
(
Ypage 67).
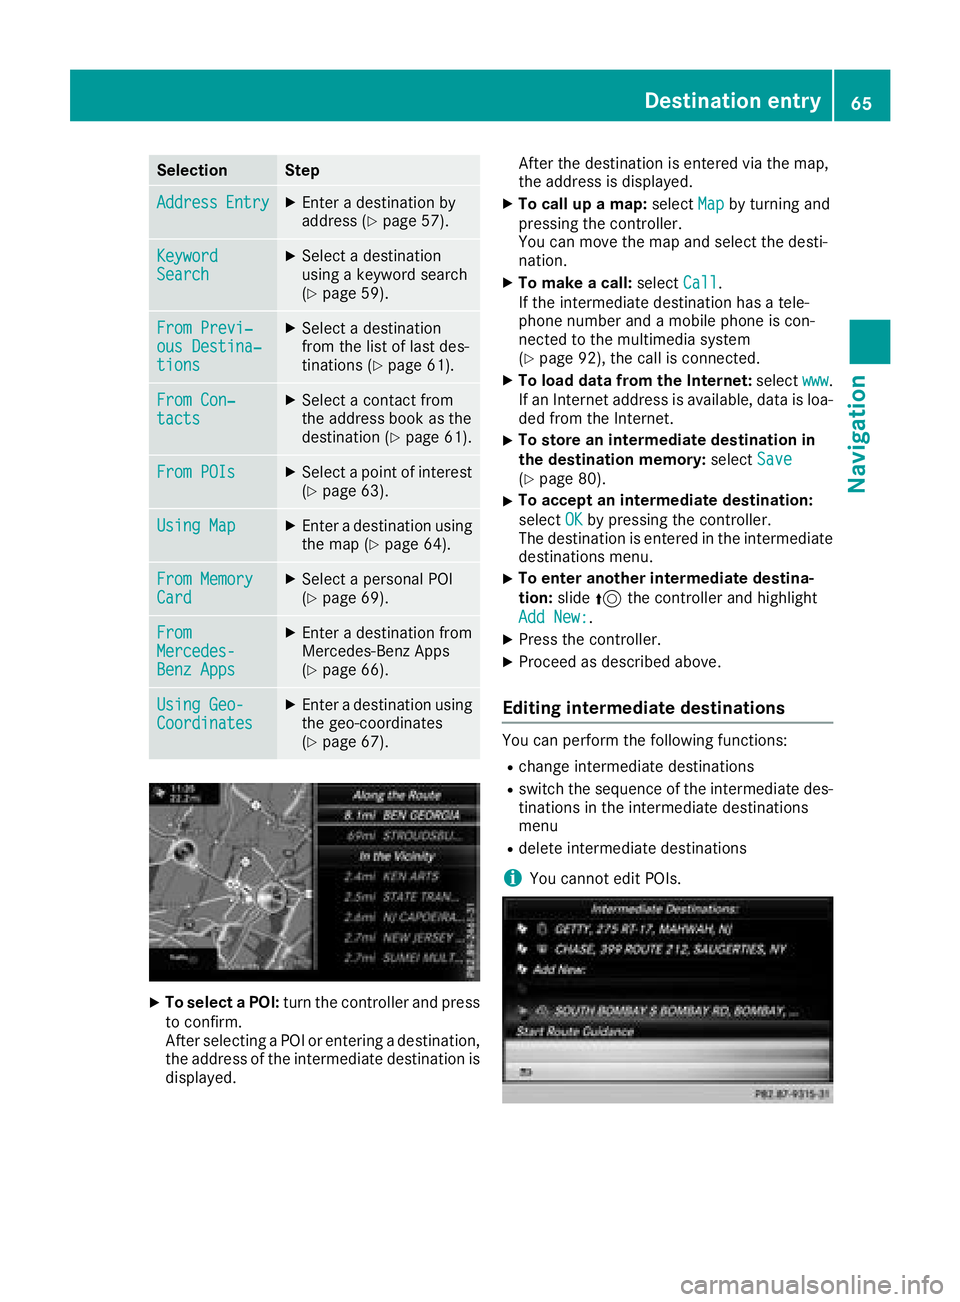
XTo select a POI: turn the controller and press
to confirm.
After selecting a POI or entering a destination,
the address of the intermediate destination is
displayed. After the destination is entered via the map,
the address is displayed.
XTo call up a map:
selectMapby turning and
pressing the controller.
You can move the map and select the desti-
nation.
XTo make a call: selectCall.
If the intermediate destination has a tele-
phone number and a mobile phone is con-
nected to the multimedia system
(
Ypage 92), the call is connected.
XTo load data from the Internet: selectwww.
If an Internet address is available, data is loa- ded from the Internet.
XTo store an intermediate destination in
the destination memory: selectSave
(Ypage 80).
XTo accept an intermediate destination:
selectOK
by pressing the controller.
The destination is entered in the intermediate
destinations menu.
XTo enter another intermediate destina-
tion: slide5the controller and highlight
Add New:
.
XPress the controller.
XProceed as described above.
Editing intermediate destinations
You can perform the following functions:
Rchange intermediate destinations
Rswitch the sequence of the intermediate des-
tinations in the intermediate destinations
menu
Rdelete intermediate destinations
iYou cannot edit POIs.
Destination entry65
Navigation
Z
Page 95 of 174
On the mobile phone
XSwitch on the mobile phone and enter the PIN
when prompted to do so (see the manufac-
turer's operating instructions).
XActivate Bluetooth®and, if necessary, Blue-
tooth®visibility for other devices (see the
manufacturer's operating instructions).
This visibility is for restricted periods of time
on some mobile phones (see the manufactur-
er's operating instructions).
XSet the Bluetooth®device name for the
mobile phone if necessary.
The Bluetooth
®device names for all of one man-
ufacturer's products might be identical. To
make it possible to clearly identify your mobile
phone, change the device name (see the man-
ufacturer's operating instructions). The name
can be freely selected.
If the mobile phone supports the PBAP (Phone
Book Access Profile) and MAP (M essage
Access Profile) Bluetooth
®profiles, the follow-
ing information will be transmitted after you
connect:
RPhone book
RCall lists
RMessages
Further information on allowing or suppressing
the automatic download of the phone book
(
Ypage 108).
The battery of the mobile phone should always
be kept sufficiently charged in order to prevent
malfunctions.
iNot all mobile phones available on the mar-
ket are equally suitable. You can obtain fur-
ther information about suitable mobile
phones and about the connection between
the mobile phone and the multimedia system
on the Internet at http://www.mercedes-
benz.com/connect .
You can also obtain more information by call-
ing.
In the USA, you can get in touch with the
Mercedes-Benz Customer Assistance Center
on 1-800-FOR-MERCedes (1-800-367-6372).
In Canada, you can get in touch with the Cus-
tomer Relations Center on 1-800-387-0100.
iSome displays (e.g. the signal strength) are
shown depending on the supported version of
the Hands-Free Profile.
Procedure and general information
Searching for and authorizing (connecting)
a mobile phone
Before using your mobile phone with the multi-
media system for the first time, you will need to search for the phone (
Ypage 94) and then
authorize it (Ypage 94). Depending on the
mobile phone, authorization either takes place
by means of Secure Simple Pairing or by enter-
ing a passkey. The multimedia system automat-
ically makes the procedure that is relevant for
your mobile phone available. You can recognize
Secure Simple Pairing by the fact that a code is
displayed on the mobile phone and on the mul-
timedia system. You can recognize the passkey
system by the fact that you have to enter a code
on the mobile phone and on the multimedia sys-
tem. The mobile phone is always connected
automatically after authorization.
If the multimedia system does not detect your
mobile phone, this may be due to particular
security settings on your mobile phone. You can
also start the search procedure and authoriza-
tion on the mobile phone (
Ypage 95).
Device-specific information on authorizing and
connecting Bluetooth
®-capable mobile phones
can be found on the Internet at http://
www.mercedes-benz.com/connect .
You can authorize up to 15 mobile phones. After authorization, the connection of the last two tel-
ephones used always functions automatically.
Only one mobile phone can be connected to the
multimedia system at any one time.
De-authorizing (disconnecting) a mobile
phone
The connection is terminated automatically if
you leave the receiver range of the multimedia
system or deactivate Bluetooth
®on your mobile
phone.
If you no longer want the Bluetooth
®connection
to be established automatically, the mobile
phone must be de-authorized (disconnected)
(
Ypage 96).
Connecting/disconnecting a mobile phone93
Telephone
Z
Page 96 of 174
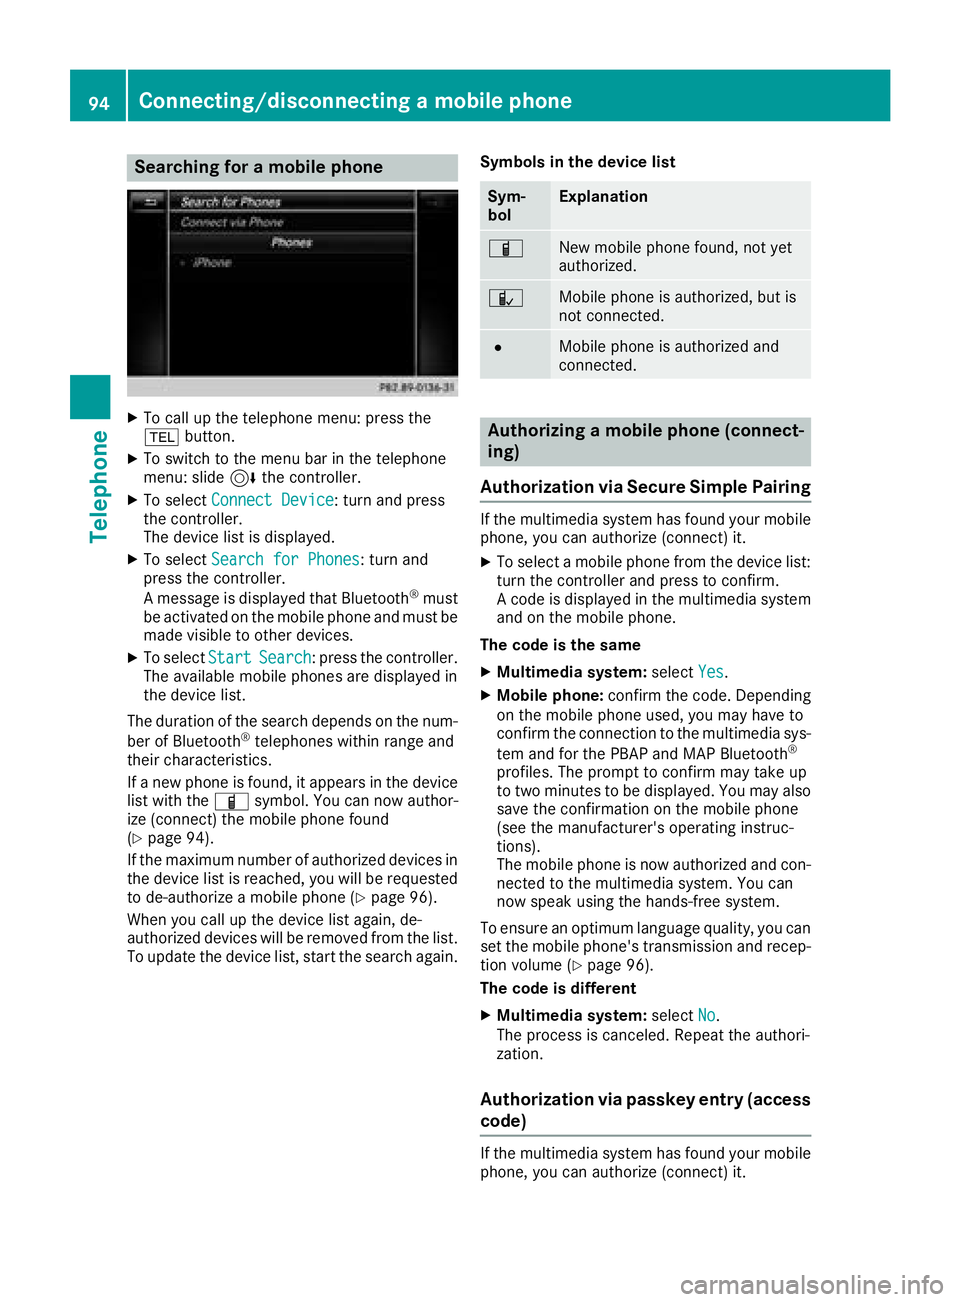
Searching for a mobile phone
XTo call up the telephone menu: press the
%button.
XTo switch to the menu bar in the telephone
menu: slide 6the controller.
XTo select Connect Device: turn and press
the controller.
The device list is displayed.
XTo select Search for Phones: turn and
press the controller.
A message is displayed that Bluetooth
®must
be activated on the mobile phone and must be
made visible to other devices.
XTo select StartSearch: press the controller.
The available mobile phones are displayed in
the device list.
The duration of the search depends on the num-
ber of Bluetooth
®telephones within range and
their characteristics.
If a new phone is found, it appears in the device list with the Ïsymbol. You can now author-
ize (connect) the mobile phone found
(
Ypage 94).
If the maximum number of authorized devices in
the device list is reached, you will be requested
to de-authorize a mobile phone (
Ypage 96).
When you call up the device list again, de-
authorized devices will be removed from the list.
To update the device list, start the search again. Symbols in the device list
Sym-
bolExplanation
ÏNew mobile phone found, not yet
authorized.
ÑMobile phone is authorized, but is
not connected.
#Mobile phone is authorized and
connected.
Authorizing a mobile phone (connect-
ing)
Authorization via Secure Simple Pairing
If the multimedia system has found your mobile
phone, you can authorize (connect) it.
XTo select a mobile phone from the device list: turn the controller and press to confirm.
A code is displayed in the multimedia system
and on the mobile phone.
The code is the same
XMultimedia system: selectYes.
XMobile phone: confirm the code. Depending
on the mobile phone used, you may have to
confirm the connection to the multimedia sys-
tem and for the PBAP and MAP Bluetooth
®
profiles. The prompt to confirm may take up
to two minutes to be displayed. You may also
save the confirmation on the mobile phone
(see the manufacturer's operating instruc-
tions).
The mobile phone is now authorized and con-
nected to the multimedia system. You can
now speak using the hands-free system.
To ensure an optimum language quality, you can
set the mobile phone's transmission and recep-
tion volume (
Ypage 96).
The code is different
XMultimedia system: selectNo.
The process is canceled. Repeat the authori-
zation.
Authorization via passkey entry (access
code)
If the multimedia system has found your mobile
phone, you can authorize (connect) it.
94Connecting/disconnecting a mobile phone
Telephone