reset MERCEDES-BENZ C-CLASS CABRIOLET 2018 COMAND Manual
[x] Cancel search | Manufacturer: MERCEDES-BENZ, Model Year: 2018, Model line: C-CLASS CABRIOLET, Model: MERCEDES-BENZ C-CLASS CABRIOLET 2018Pages: 174, PDF Size: 4.1 MB
Page 114 of 174
Overwriting an entry
XTo selectYes: turn and press the controller.
A list of the existing five numbers is displayed.
XTo select the number to be overwritten from
the list: turn the controller and press to con-
firm.
The entry is overwritten with the new tele-
phone number.
Canceling the overwriting of an entry
XTo select No: turn and press the controller.
The process is canceled.
Deleting call lists
Call lists which are generated and managed by
the multimedia system can be deleted in the
multimedia system.
You cannot delete call lists from the multimedia
system which are displayed on a mobile phone
that supports the PBAP Bluetooth
®.
XTo call up the telephone menu: press the
% button.
XTo switch to the menu bar: slide 6the con-
troller.
XTo select Call Lists: turn and press the
controller.
XSelect Delete Call Lists.
A prompt appears asking whether you wish to
delete all call lists.
XTo select Yes: turn and press the controller.
The call lists are deleted.
iIf you delete call lists from the mobile phone
(see the manufacturer's operating instruc-
tions), the multimedia system updates the
call list display the next time it connects.
Speed dial lists
Setting up
XTo call up the telephone menu: press the
% button.
XTo call up the menu bar: slide 6the con-
troller.
XTo select Call Lists: turn and press the
controller.
XSelect Speed Dial Preset List.
The speed dial list is displayed.
XTo highlight a memory position for the speed
dial: turn the controller.
If you highlight an entry that already exists in the speed dial list, this is overwritten with the
new entry.
XTo select G: slide 9the controller.
XSelect Assign Speed Dial Preset.
The phone book is displayed.
XSearch for a contact (Ypage 101).
XTo select a contact: turn and press the con-
troller.
The phone number has been saved as a speed
dial.
Deleting
Deleting a speed dial preset
XTo call up the telephone menu: press the
% button.
XTo call up the menu bar: slide 6the con-
troller.
XTo select Call Lists: turn and press the
controller.
XSelect Speed Dial Preset List.
The speed dial list is displayed.
XTo highlight the memory position you want to
delete: turn the controller.
XTo select G: slide 9the controller.
XTo select DeleteSpeedDialPreset: turn
and press the controller.
XTo select Yes: turn and press the controller.
The speed dial preset has been deleted.
Deleting all speed dial presets
XTo call up the telephone menu: press the
% button.
XTo call up the menu bar: slide 6the con-
troller.
XTo select Call Lists: turn and press the
controller.
XSelect Speed Dial Preset List.
The speed dial list is displayed.
XTo select G: slide 9the controller.
XTo select Delete All Speed Dial Pre‐sets: turn and press the controller.
XTo selectYes: turn and press the controller.
All speed dials are deleted.
112Speed dial lists
Telephone
Page 125 of 174
Managing existing access data
Calling up the device list
XCall up Internet functions (Ypage 124).
XTo switch to the menu bar: slide 6the con-
troller.
XTo select Settings: turn and press the con-
troller.
XTo select Configure Internet Settings:
turn and press the controller.
The device list is displayed.
Editing the access data
The mobile phone must be connected with the
system for the access data to be changed.
When the Internet connection is active, you can-
not edit or delete the access data of the cur-
rently set mobile phone network provider.
XCall up the device list (Ypage 123).
XTo highlight the desired mobile phone in the
device list: turn the controller.
XTo select G: slide 9the controller.
XTo select Change Configuration: turn and
press the controller.
XSelect Predefined SettingsorManualSettings.
The provider settings are displayed.
In order to edit the access data of the mobile
phone network provider you have two options:
ROption 1: select the predefined access data of
the mobile phone network provider
(
Ypage 121).
ROption 2: manually set the access data of the
mobile phone network provider (Ypage 122).
Canceling Internet access permission
for a mobile phone
XCall up the device list (Ypage 123).
XTo highlight the desired mobile phone in the
device list: turn the controller.
XTo select G: slide 9the controller.
XTo select Delete Configuration: turn and
press the controller.
A prompt appears asking whether you wish to
delete the Internet configuration.
XTo select Yes: turn and press the controller.
The Internet access permission for the mobile
phone is now canceled. The mobile phone can now no longer be used by the system for
Internet functions.
Setting automatic disconnection of
the Internet connection
If a preset time has elapsed during which the
Internet functions have not been used, the Inter-
net automatically disconnects.
XCall up the device list (Ypage 123).
XTo highlight the desired mobile phone in the
device list: turn the controller.
XTo select
G: slide 9the controller.
XTo select Disconnect AutomaticallyWhen Inactive: turn and press the control-
ler.
XTo select 5 Minutes,10 Minutesor 20Minutes: turn and press the controller.
Managing all Internet devices
If multiple mobile phones have been enabled for
Internet usage, these can be given priorities.
The system then selects the mobile phone with
the highest priority to establish an Internet con-
nection.
XCall up the device list (Ypage 123).
XTo highlight the mobile phone: turn the con-
troller.
XTo select G: slide 9the controller.
XTo select Manage All Internet Devices:
turn and press the controller.
A menu appears.
XTo highlight a mobile telephone: turn the con-
troller.
XTo select G: slide 9the controller.
XTo select Change Device Priority: turn
and press the controller.
XTo move the desired mobile phone up or
down: turn and press the controller.
The mobile phone's priority is changed.
The priority of the mobile phones is deter-
mined by the hierarchy. The mobile phone at
the top of the list has the highest priority.
Setting up an Internet connection (Canada)123
Online and Internet functions
Z
Page 130 of 174
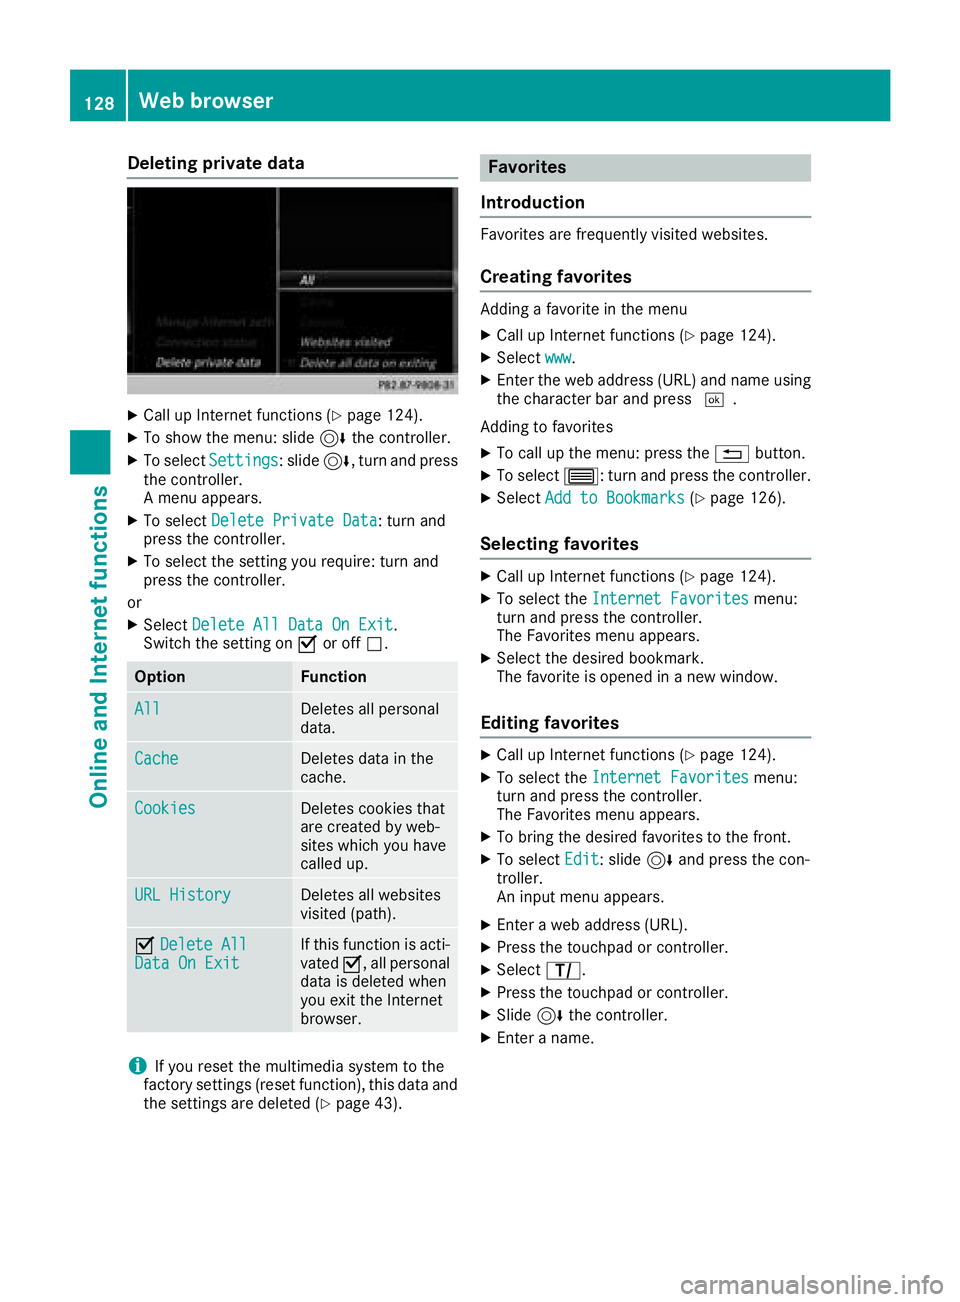
Deleting private data
XCall up Internet functions (Ypage 124).
XTo showthemenu: slid e6 thecontroller .
XTo selectSettings:slid e6 ,turn and press
th econtroller .
A men uappears .
XTo selec tDelete Privat eDat a:turn and
press th econtroller .
XTo selectth esetting you require :turn and
press th econtroller .
or
XSelec tDelete All Dat aOn Exi t.
Switc hth esetting on Oor of fª .
OptionFunction
AllDeletes all personal
data.
CacheDeletes dat ain th e
cache.
Cookie sDeletes cookies that
are created by web-
sites whic hyou hav e
called up.
URL Histor yDeletes all websites
visited (path).
ODelete AllDat aOn Exi tIf this function is acti-
vatedO,all personal
dat ais delete dwhen
you exit th eInternet
browser.
iIf you reset th emultimedia syste mto th e
factory setting s(reset function), this dat aand
th esetting sare delete d (
Ypage 43).
Favorites
Introduction
Favorites are frequently visited websites.
Creating favorites
Addin g afavorit ein th emen u
XCall up Internet function s (Ypage 124).
XSelectwww.
XEnte rth eweb address (URL )and nam eusin g
th echaracte rbar and press ¬.
Addin gto favorites
XTo cal lup th emenu: press th e% button.
XTo selec t3 :turn and press th econtroller .
XSelectAdd to Bookmarks(Ypage 126).
Selecting favorites
XCall up Internet function s (Ypage 124).
XTo selectth eInternet Favoritesmenu:
turn and press th econtroller .
The Favorites men uappears .
XSelectth edesire dbookmark .
The favorit eis opene din ane wwindow.
Editing favorites
XCall up Internet function s (Ypage 124).
XTo selectth eInternet Favoritesmenu:
turn and press th econtroller .
The Favorites men uappears .
XTo bring th edesire dfavorites to th efront.
XTo selec tEdi t:slid e6 and press th econ-
troller.
An input men uappears .
XEnter aweb address (URL).
XPress th etouchpad or controller .
XSelectp.
XPress th etouchpad or controller .
XSlide6thecontroller .
XEnter aname.
128Web browser
Online and Internet functions
Page 132 of 174
Your multimediasyste mequipment
These operatin ginstruction sdescribe all th e
standar dan doptional equipment of your multi-
media system, as available at th etime of going
to press. Country-specifi cdifference sare pos -
sible. Bear in min dthat your vehicle may no t
feature all function sdescribed here. Thi salso
applies to safety-relevan tsystems an dfunc-
tions.
Read th einformation on qualifie dspecialis t
workshop sin th evehicle Operator's Manual.
Switchin gon th eradi o
XPress th e$ button.
The radio men uappears .You will hear th elast
station set on th ewaveban dselecte dlast .
Switching HD Radi oon/of f
XIn radio mode: slid e6 thecontroller .
XTo selectOption s:turn an dpress th econ-
troller.
XSwitch HD RadioonO or of fª .
If HD
Radiois switched off, th esyste mdoe sno t
switch to digita lradio an dit is no tpossible to
selec tan ysub-channels.
iHD Radio ™an dth eHD ,HD Radio ,an d“Arc ”
logos are proprietary trademark sof iBiquit y
Digital Corp.
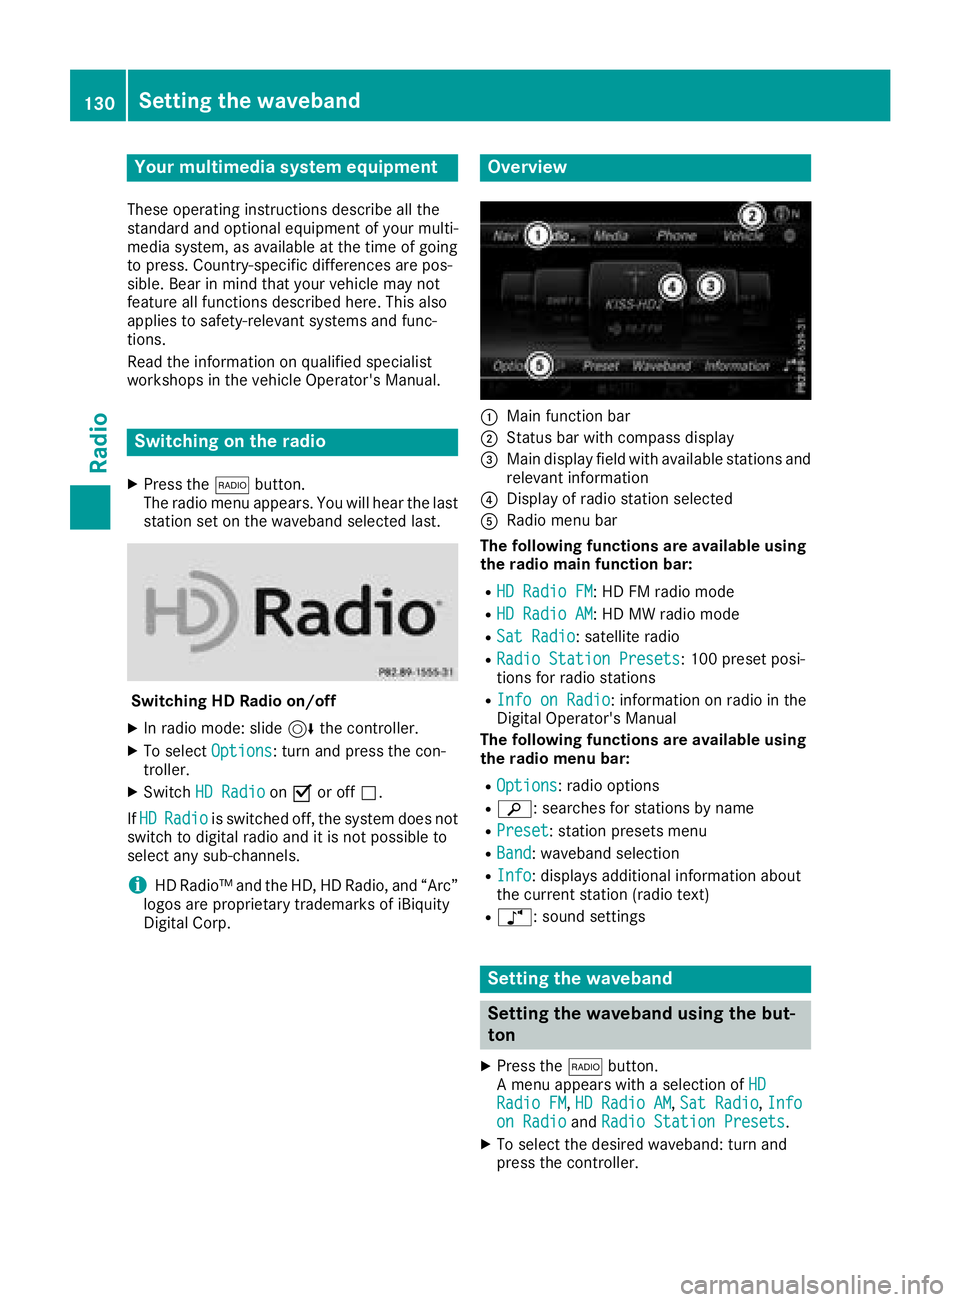
Overview
:Main function bar
;Status bar wit hcompass display
=Main display field wit havailable station san d
relevant information
?Display of radio station selecte d
ARadio menubar
Th efollowin gfunctions ar eavailable using
th eradi omain function bar:
RHD Radi oFM:HD FM radio mode
RHD Radi oAM:HD MW radio mode
RSa tRadi o:satellite radio
RRadio Statio nPreset s:10 0preset posi-
tion sfo rradio station s
RInfo on Radi o:information on radio in th e
Digital Operator's Manual
Th efollowin gfunctions ar eavailable using
th eradi omenu bar:
ROption s:radio option s
Rè:searches fo rstation sby name
RPreset:station preset smen u
RBand:waveban dselection
RInfo:displays additional information about
th ecurren tstation (radio text )
Rà:sound setting s
Setting thewaveband
Setting th ewaveband using th ebut-
to n
XPress th e$ button.
A men uappears wit h aselection of HD
Radio FM,HD Radi oAM,Sa tRadi o,Infoon Radi oandRadi oStatio nPreset s.
XTo selec tth edesire dwaveband: turn an d
press th econtroller .
130Setting the waveband
Radio
Page 133 of 174
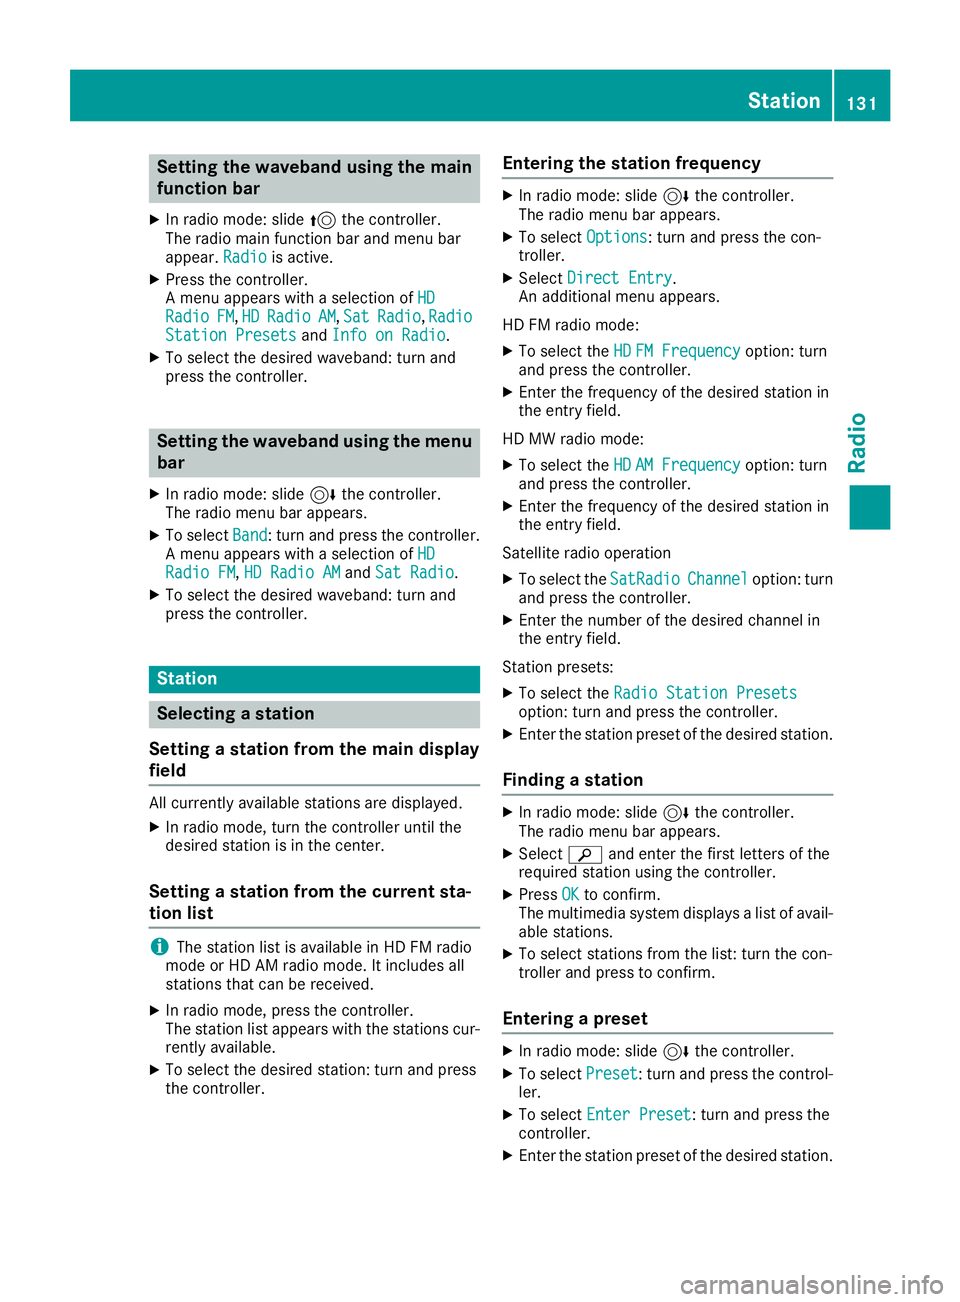
Setting the waveband using the main
function bar
XIn radio mode: slide5the controller.
The radio main function bar and menu bar
appear. Radio
is active.
XPress the controller.
A menu appears with a selection of HD
RadioFM,HDRadioAM,SatRadio,RadioStation Presetsand Info on Radio.
XTo select the desired waveband: turn and
press the controller.
Setting the waveband using the menu
bar
XIn radio mode: slide 6the controller.
The radio menu bar appears.
XTo select Band: turn and press the controller.
A menu appears with a selection of HD
Radio FM,HD Radio AMand Sat Radio.
XTo select the desired waveband: turn and
press the controller.
Station
Selecting a station
Setting a station from the main display
field
All currently available stations are displayed.
XIn radio mode, turn the controller until the
desired station is in the center.
Setting a station from the current sta-
tion list
iThe station list is available in HD FM radio
mode or HD AM radio mode. It includes all
stations that can be received.
XIn radio mode, press the controller.
The station list appears with the stations cur-
rently available.
XTo select the desired station: turn and press
the controller.
Entering the station frequency
XIn radio mode: slide 6the controller.
The radio menu bar appears.
XTo select Options: turn and press the con-
troller.
XSelect Direct Entry.
An additional menu appears.
HD FM radio mode:
XTo select the HDFM Frequencyoption: turn
and press the controller.
XEnter the frequency of the desired station in
the entry field.
HD MW radio mode:
XTo select the HDAM Frequencyoption: turn
and press the controller.
XEnter the frequency of the desired station in
the entry field.
Satellite radio operation
XTo select the SatRadioChanneloption: turn
and press the controller.
XEnter the number of the desired channel in
the entry field.
Station presets:
XTo select the Radio Station Presetsoption: turn and press the controller.
XEnter the station preset of the desired station.
Finding a station
XIn radio mode: slide 6the controller.
The radio menu bar appears.
XSelect èand enter the first letters of the
required station using the controller.
XPress OKto confirm.
The multimedia system displays a list of avail-
able stations.
XTo select stations from the list: turn the con-
troller and press to confirm.
Entering a preset
XIn radio mode: slide 6the controller.
XTo select Preset: turn and press the control-
ler.
XTo select Enter Preset: turn and press the
controller.
XEnter the station preset of the desired station.
Station131
Radio
Page 134 of 174
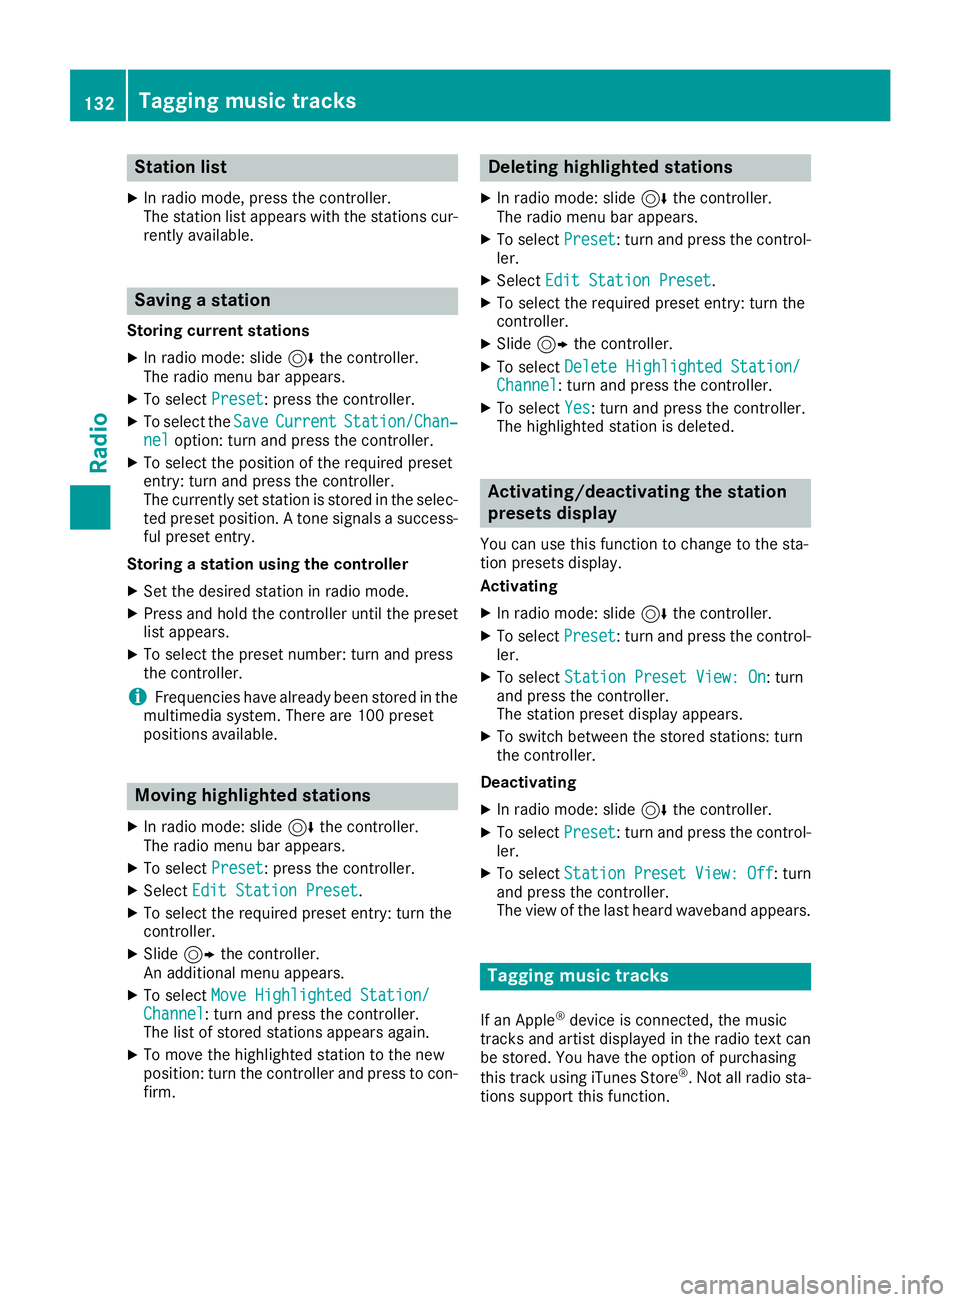
Station list
XIn radio mode, press the controller.
The station list appears with the stations cur-
rently available.
Saving a station
Storing current stations
XIn radio mode: slide6the controller.
The radio menu bar appears.
XTo select Preset: press the controller.
XTo select the SaveCurrentStation/Chan‐neloption: turn and press the controller.
XTo select the position of the required preset
entry: turn and press the controller.
The currently set station is stored in the selec-
ted preset position. A tone signals a success-
ful preset entry.
Storing a station using the controller
XSet the desired station in radio mode.
XPress and hold the controller until the preset
list appears.
XTo select the preset number: turn and press
the controller.
iFrequencies have already been stored in the
multimedia system. There are 100 preset
positions available.
Moving highlighted stations
XIn radio mode: slide 6the controller.
The radio menu bar appears.
XTo select Preset: press the controller.
XSelectEdit Station Preset.
XTo select the required preset entry: turn the
controller.
XSlide9the controller.
An additional menu appears.
XTo select Move Highlighted Station/Channel: turn and press the controller.
The list of stored stations appears again.
XTo move the highlighted station to the new
position: turn the controller and press to con-
firm.
Deleting highlighted stations
XIn radio mode: slide 6the controller.
The radio menu bar appears.
XTo select Preset: turn and press the control-
ler.
XSelect Edit Station Preset.
XTo select the required preset entry: turn the
controller.
XSlide9the controller.
XTo select Delete Highlighted Station/Channel: turn and press the controller.
XTo selectYes: turn and press the controller.
The highlighted station is deleted.
Activating/deactivating the station
presets display
You can use this function to change to the sta-
tion presets display.
Activating
XIn radio mode: slide 6the controller.
XTo select Preset: turn and press the control-
ler.
XTo select Station Preset View: On: turn
and press the controller.
The station preset display appears.
XTo switch between the stored stations: turn
the controller.
Deactivating
XIn radio mode: slide 6the controller.
XTo select Preset: turn and press the control-
ler.
XTo select StationPresetView:Off: turn
and press the controller.
The view of the last heard waveband appears.
Tagging music tracks
If an Apple®device is connected, the music
tracks and artist displayed in the radio text can be stored. You have the option of purchasing
this track using iTunes Store
®. Not all radio sta-
tions support this function.
132Tagging music tracks
Radio
Page 136 of 174
subsidiaries. All other marks, channel names
and logos are the property of their respective
owners. All rights reserved.
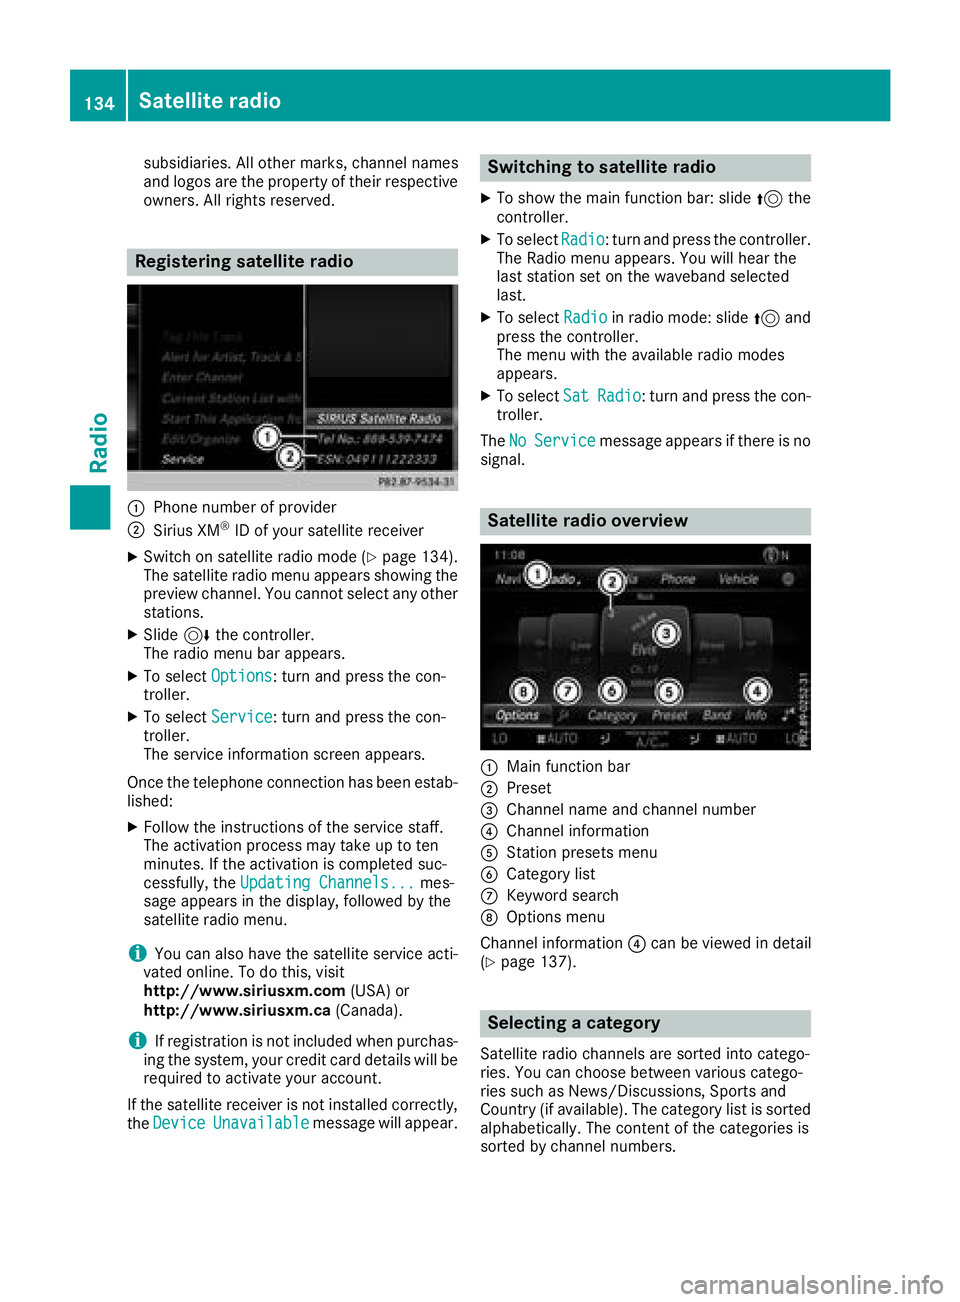
Registering satellite radio
:Phone number of provider
;Sirius XM®ID of your satellite receiver
XSwitch on satellite radio mode (Ypage 134).
The satellite radio menu appears showing the
preview channel. You cannot select any other
stations.
XSlide 6the controller.
The radio menu bar appears.
XTo select Options: turn and press the con-
troller.
XTo select Service: turn and press the con-
troller.
The service information screen appears.
Once the telephone connection has been estab-
lished:
XFollow the instructions of the service staff.
The activation process may take up to ten
minutes. If the activation is completed suc-
cessfully, the Updating Channels...
mes-
sage appears in the display, followed by the
satellite radio menu.
iYou can also have the satellite service acti-
vated online. To do this, visit
http://www.siriusxm.com (USA) or
http://www.siriusxm.ca (Canada).
iIf registration is not included when purchas-
ing the system, your credit card details will be
required to activate your account.
If the satellite receiver is not installed correctly,
the Device
Unavailablemessage will appear.
Switching to satellite radio
XTo show the main function bar: slide 5the
controller.
XTo select Radio: turn and press the controller.
The Radio menu appears. You will hear the
last station set on the waveband selected
last.
XTo select Radioin radio mode: slide 5and
press the controller.
The menu with the available radio modes
appears.
XTo select SatRadio: turn and press the con-
troller.
The No
Servicemessage appears if there is no
signal.
Satellite radio overview
:Main function bar
;Preset
=Channel name and channel number
?Channel information
AStation presets menu
BCategory list
CKeyword search
DOptions menu
Channel information ?can be viewed in detail
(
Ypage 137).
Selecting a category
Satellite radio channels are sorted into catego-
ries. You can choose between various catego-
ries such as News/Discussions, Sports and
Country (if available). The category list is sorted alphabetically. The content of the categories is
sorted by channel numbers.
134Satellite radio
Radio
Page 137 of 174
XTo call up the category list:selectCate‐
goryin the menu bar by turning and pressing
the controller.
The category list appears.
XTo select a category: turn and press the
controller.
The category selected is shown in the display.
You hear the channel last selected for this
category.
The #dot indicates the current setting.
At the beginning of the category list, the All
Channelscategory appears. This category
enables you to browse all available channels.
Selecting a channel
Channel search
XWhen the display/section window is selec-
ted, slide 8or9 the controller.
The multimedia system searches in both
directions (ascending and descending) and
stops at the next channel found in the selec-
ted category.
Entering channel numbers directly
XTo select Options: turn and press the con-
troller.
XTo select Direct Entry: turn and press the
controller.
An input menu appears.
XTo select a channel number: turn and press
the controller.
XThe multimedia system sets the selected
channel.
iYou can only select currently permitted dig-
its.
Selecting a channel via the satellite
radio station list
You can select the channel using the station list
displaying the artists and tracks that are cur-
rently playing.
XTo select Options: turn and press the con-
troller.
XTo select Current Station List withArtist&Title: turn and press the control-
ler.
The channel list appears.
XSelect the desired channel
Keyword search
XTo select the keyword search èin the
menu bar: turn and press the controller.
XTo enter the required search term: turn and
press the controller.
Direct and indirect results are shown.
XSelect the required result.
The relevant channel is played.
Memory functions
Quick save:
XSet the desired channel in satellite radio
mode.
XPress and hold the controller until the preset
list appears.
XTo select the preset number: turn and press
the controller.
A tone confirms that the storing process was
successful.
Saving a channel using the edit function:
XIn satellite radio mode, slide 6the control-
ler.
XTo select Preset: turn and press the control-
ler.
XTo select Edit Station Preset: turn and
press the controller.
The list of saved channels appears.
XTo select the preset: turn the controller and
press for about two seconds.
The newly saved channel overwrites the exist-
ing preset.
iThere are 100 presets available.
Activating/deactivating the station
presets display
You can use this function to change to the sta-
tion presets display.
Satellite radio135
Radio
Page 138 of 174
Activating
XIn radio mode: slide6the controller.
XTo select Preset: turn and press the control-
ler.
XTo select Station Preset View: On: turn
and press the controller.
The station preset display appears.
XTo switch between the stored stations: turn
the controller.
Deactivating
XIn radio mode: slide 6the controller.
XTo select Preset: turn and press the control-
ler.
XTo select StationPresetView:Off: turn
and press the controller.
The view of the last heard waveband appears.
Music and sports alerts
General notes
This function makes it possible to store a pro-
gram alert for your favorite artists, tracks or
sporting events.
You can store up to 30 music and sports alerts
(favorites).
Music alerts can only be saved whilst a track is
being played. You can also specify sports alerts
via the menu option. The system then continu-
ously searches through all the channels. If a
match is found with a saved message, you will
be informed. A window appears with the respec-
tive information.
Setting a music alert
XTo select Options: turn and press the con-
troller.
XTo select Alert for Artist, Track &SportsEvent: turn and press the controller.
A menu appears.
XSelect Add New Alert.
A window with a prompt appears.
XSelect ArtistorTrack.
The alert is set for the current artist or track.
The music alert window appears
XTo select Change ToorIgnore: turn and
press the controller.
If you select Change To
, the channel is
changed and the favorite artist or track is
played.
If you select Ignore
, the current channel will
continue playing.
Setting a sports alert
XTo select Options: turn and press the con-
troller.
XTo select Alert for Artist, Track &SportsEvent: turn and press the controller.
A menu appears.
XSelect Manage Sports Alerts.
A menu appears.
XSelect Select New Alerts.
A menu appears.
XSelect the desired team from a league, e.g.
college, NBA, NHL, NFL or MLB.
The alert function for the sports team is
added.
Editing music and sports alerts
XTo select Alert for Artist, Track &SportsEvent: turn and press the controller.
A menu appears.
XSelect Manage Music AlertsorManageSports Alerts.
A list of set alerts appears.
Tagging music tracks
If the channel supports this function, you are
able to transfer the music track currently playing
to an Apple
®device. You can then purchase it in
the iTunes®store.
XTo select Options: turn and press the con-
troller.
XTo select Tag This Track: turn and press
the controller.
A message about saving this music track on
the Apple
®device appears.
136Satellite radio
Radio
Page 145 of 174
XDelete all files in the Media Register
(Ypage 147).
XCall up information on the preset
(Ypage 147).
Pausing/continuing playback
XTo pause playback:in audio or video mode,
slide 6the controller.
The media menu bar is shown.
XTo select Ëin the media menu bar: turn
and press the controller.
Playback is interrupted. The display changes
to Ì.
XTo continue playback: in audio or video
mode, slide 6the controller.
The media menu bar is shown.
XTo select Ìin the media menu bar: turn
and press the controller.
Playback is continued from the point of inter- ruption. The symbol changes to Ë.
Selecting a track
Selecting a track using the current
track list
XTo display the current track list: press the
controller in the media mode menu.
The category list appears.
XSelect Current Tracklist.
XTo select a track: turn the controller and press
to confirm.
Selecting a track by skipping to a track
XTo skip forwards or backwards to a track: in
the media mode menu, turn or briefly slide
9or8 the controller.
Entering a track number directly
XIn media mode, slide 6the controller.
XTo select Options: turn and press the con-
troller.
XTo select TrackNumber:: turn and press the
controller.
A menu appears.
XEnter the desired track number.
Searching for a track
XIn the media mode menu, slide 6the con-
troller.
The media menu bar is shown.
XTo select Search: turn and press the control-
ler.
The category list is shown.
XSelect a category, e.g. Genres.
Sub-categories appear with the selection of
the main category (depends on the multime-
dia system default settings and the music
tracks available).
XSelect a sub-category, for example Rock.
If the selected sub-category contains music
tracks, these will be displayed.
Gracenote®Media Database
General notes
This function is available in CD mode.
There is a version of Gracenote®music recog-
nition technology, Emeryville, California, USA on
the multimedia system hard disk. In media
mode, you will recognize this by the logo in the
bottom right-hand corner of the display.
If the audio CD does not contain any CD text
information, the multimedia system can use the
Gracenote
®Media Database to identify
unknown audio tracks when in CD mode.
Carrying out an Internet update of met-
adata
The Updating Metadata Via Internetoption allows any missing metadata for an audio
CD (e.g. cover, track, album, artist) to be uploa-
ded retrospectively to the internal Gracenote
®
database.
An Internet connection is required for this
(
Ypage 124).
Audio/video mode143
Media
Z