weight MERCEDES-BENZ C-CLASS CABRIOLET 2018 Owner's Manual
[x] Cancel search | Manufacturer: MERCEDES-BENZ, Model Year: 2018, Model line: C-CLASS CABRIOLET, Model: MERCEDES-BENZ C-CLASS CABRIOLET 2018Pages: 350, PDF Size: 5.73 MB
Page 23 of 350
Suspension tuningSETUP (on-board computer,
Mercedes-AMG vehicles) ............... 209
Switching air-recirculation mode
on/off .................................................1 20
Switching on media mode
Via the device list .......................... 261
T
Tachometer ........................................ 193
Tail lamps
Display message ............................ 224
Tank
see Fuel tank
Tank content
Fuel gauge ....................................... 36
Technical data
Capacities ...................................... 340
Information .................................... 338
Vehicle data ................................... 345
Telephone
Accepting a call (multifunction
steering wheel) .............................. 202
Authorizing a mobile phone (con-
necting) ......................................... 260
Connecting a mobile phone (gen-
eral information) ............................ 260
Display message ............................ 239
Introduction ................................... 202
Menu (on-board computer) ............ 202
Number from the phone book ........ 202
Redialing ........................................ 203
Rejecting/ending a call ................. 202
see also Digital Operator's Man-
ual .................................................. 253
Switching between mobile
phones ........................................... 261
see Mobile phone
Temperature
Coolant (display in the instrument
cluster) .......................................... 193
Engine oil (on-board computer,
Mercedes-AMG vehicles) ............... 208
Outside temperature ...................... 193
Setting (climate control) ................ 118
Transmission oil (on-board com-
puter, Mercedes-AMG vehicles) ..... 208 Through-loading feature
................... 265
Timing (RACETIMER) ......................... 210
Tire pressure
Calling up (on-board computer) ..... 319
Checking manually ........................ 318
Display message ............................ 234
Maximum ....................................... 318
Not reached (TIREFIT) .................... 299
Notes ............................................. 316
Reached (TIREFIT) .......................... 300
Recommended ............................... 315
Using the TIREFIT kit ...................... 298
Tire pressure loss warning system
General notes ................................ 318
Important safety notes .................. 318
Restarting ...................................... 319
Tire pressure monitor
Checking the tire pressure elec-
tronically ........................................ 321
Function/notes ............................. 319
Genera l note
s ................................ 319
Important safety notes .................. 319
Radio type approval for the tire
pressure monitor ........................... 322
Restarting ...................................... 321
Warning lamp ................................. 251
Warning message .......................... 321
Tire pressure sensors
Display message ............................ 235
Tire-change tool kit ........................... 296
TIREFIT kit
Important safety notes .................. 298
Storage location ............................ 296
Tire pressure not reached .............. 299
Tire pressure reached .................... 300
Using ............................................. 298
Tires
Aspect ratio (definition) ................. 331
Average weight of the vehicle
occupants (definition) .................... 329
Bar (definition) ............................... 329
Changing a wheel .......................... 331
Characteristics .............................. 329
Checking ........................................ 313
Curb weight (definition) ................. 330
Definition of terms ......................... 329
Direction of rotation ...................... 332
Display message ............................ 234
Index21
Page 24 of 350
Distribution of the vehicle occu-
pants (definition) ............................ 331
DOT (Department of Transporta-
tion) (definition) ............................. 329
DOT, Tire Identification Number
(TIN) ............................................... 329
GAWR (Gross Axle Weight Rating)
(definition) .....................................330
GVW (Gross Vehicle Weight) (def-
inition) ...........................................3 30
GVWR (Gross Vehicle Weight Rat-
ing) (definition) .............................. 330
Important safety notes .................. 312
Increased vehicle weight due to
optional equipment (definition) ...... 330
Information on driving .................... 312
Kilopascal (kPa) (definition) ........... 330
Labeling (overview) ........................ 326
Load bearing index (definition) ...... 331
Load index ..................................... 328
Load index (definition) ................... 330
Maximum load on a tire (defini-
tion) ............................................... 330
Maximum loaded vehicle weight
(definition) ..................................... 330
Maximum permissible tire pres-
sure (definition) ............................. 330
Maximum tire load ......................... 328
Maximum tire load (definition) ....... 330
MOExtended tires .......................... 314
Optional equipment weight (defi-
nition) ............................................ 331
PSI (pounds per square inch) (def-
inition) ........................................... 331
Replacing ....................................... 331
Service life ..................................... 313
Sidewall (definition) ....................... 331
Snow chains .................................. 315
Speed rating (definition) ................ 330
Storing ........................................... 332
Structure and characteristics
(definition) ..................................... 329
Summer tires in winter .................. 314
Temperature .................................. 326
TIN (Tire Identification Number)
(definition) ..................................... 331
Ti re b
ead (definition) ...................... 331
Tire pressure (definition) ................ 331 Tire pressures (recommended) ...... 330
Tire size (data) ............................... 336
Tire size designation, load-bearing
capacity, speed rating .................... 326
Tire tread ....................................... 313
Tire tread (definition) ..................... 331
Total load limit (definition) ............. 331
Traction ......................................... 325
Traction (definition) ....................... 331
Tread wear ..................................... 325
Uniform Tire Quality Grading
Standards ...................................... 325
Uniform Tire Quality Grading
Standards (definition) .................... 330
Wear indicator (definition) ............. 331
Wheel and tire combination ........... 336
Wheel rim (definition) .................... 330
see Flat tire
Top Tether ............................................ 62
Touchpad
Changing the station/music
track .............................................. 256
Character suggestions ................... 255
Deleting characters ....................... 255
Entering a space ............................ 255
Entering characters ....................... 255
Gesture control .............................. 255
Handwriting recognition ................ 255
Operating the touchpad ................. 255
Overview ........................................ 255
Quick access for Audio .................. 256
Switching ....................................... 255
Switching input line ....................... 255
Tow-starting
Emergency engine starting ............ 309
Important safety notes .................. 306
Towing a trailer
ESP
®(Electronic Stability Pro-
gram) ............................................... 70
Towing away
Important safety guidelines ........... 306
Installing the towing eye ................ 307
Notes for 4MATIC vehicles ............ 309
Removing the towing eye ............... 307
Transporting the vehicle ................ 308
With both axles on the ground ....... 308
With the rear axle raised ................ 307
Towing eye ......................................... 296
22Index
Page 29 of 350

Protecting the environment
General notes
HEnvironmental note
Daimler's declared policy is one of compre-
hensive environmental protection.
The objectives are for the natural resources
that form the basis of our existence on this
planet to be used sparingly and in a manner
that takes the requirements of both nature
and humanity into account.
You too can help to protect the environment
by operating your vehicle in an environmen-
tally responsible manner.
Fuel consumption and the rate of engine,
transmission, brake and tire wear are affected by these factors:
Roperating conditions of your vehicle
Ryour personal driving style
You can influence both factors. You should
bear the following in mind:
Operating conditions:
Ravoid short trips as these increase fuel con-
sumption.
Ralways make sure that the tire pressures
are correct.
Rdo not carry any unnecessary weight.
Rremove roof racks once you no longer need
them.
Ra regularly serviced vehicle will contribute
to environmental protection. You should
therefore adhere to the service intervals.
Ralways have service work carried out at a
qualified specialist workshop.
Personal driving style:
Rdo not depress the accelerator pedal when
starting the engine.
Rdo not warm up the engine when the vehicle
is stationary.
Rdrive carefully and maintain a safe distance
from the vehicle in front.
Ravoid frequent, sudden acceleration and
braking.
Rchange gear in good time and use each gear
only up to Ôof its maximum engine speed.
Rswitch off the engine in stationary traffic.
Rkeep an eye on the vehicle's fuel consump-
tion.
Environmental concerns and recom-
mendations
Wherever the Operator's Manual requires you to
dispose of materials, first try to regenerate or re-
use them. Observe the relevant environmental
rules and regulations when disposing of materi-
als. In this way you will help to protect the envi-
ronment.
Genuine Mercedes-Benz parts
HEnvironmental note
Daimler AG also supplies reconditioned major
assemblies and parts which are of the same
quality as new parts. They are covered by the
same Limited Warranty entitlements as new
parts.
!Air bags and Emergency Tensioning Devi-
ces, as well as control units and sensors for
these restraint systems, may be installed in
the following areas of your vehicle:
Rdoors
Rdoor pillars
Rdoor sills
Rseats
Rcockpit
Rinstrument cluster
Rcenter console
Do not install accessories such as audio sys-
tems in these areas. Do not carry out repairs or welding. You could impair the operating
efficiency of the restraint systems.
Have aftermarket accessories installed at a
qualified specialist workshop.
You could jeopardize the operating safety of
your vehicle if you use parts, tires and wheels as
well as accessories relevant to safety which
have not been approved by Mercedes-Benz. This
could lead to malfunctions in safety-relevant
Genuine Mercedes-Benz parts27
Introduction
Z
Page 48 of 350

If a child younger than twelve years old and
under 5 ft (1.50m)in height is traveling in the
vehicle:
Ralways secure the child in a child restraint
system suitable for this Mercedes-Benz vehi-
cle. The child restraint system must be appro-
priate to the age, weight and size of the child
Ralways observe the instructions and safety
notes on "Children in the vehicle"
(
Ypage 59) in addition to the child restraint
system manufacturer's installation and oper-
ating instructions
Ralways observe the instructions and safety
notes on the "Occupant classification system
(OCS)" (
Ypage 51)
GWARNING
The seat belts may not perform their intended protective function if:
Rthey are damaged, modified, extremely
dirty, bleached or dyed
Rthe seat belt buckle is damaged or
extremely dirty
Rthe Emergency Tensioning Devices, belt
anchorages or inertia reels have been modi-
fied.
Seat belts may be damaged in an accident,
although the damage may not be visible, e.g.
due to splinters of glass. Modified or damaged
seat belts may tear or fail, e.g. in an accident.
Modified Emergency Tensioning Devices
could accidentally trigger or fail to deploy
when necessary. This poses an increased risk
of injury or even fatal injury.
Never modify the seat belts, Emergency Ten-
sioning Devices, belt anchorages and inertia
reels. Make sure that the seat belts are
undamaged, not worn out and clean. Follow-
ing an accident, have the seat belts checked
immediately at a qualified specialist work-
shop.
Only use seat belts that have been approved for
your vehicle by Mercedes-Benz.
AMG Performance seat: this seat is designed
for the standard three-point seat belt. If you
install another multi-point seat belt, e.g. sport or
racing seat belts, the restraint system cannot
provide the best level of protection.
GWARNING
If you feed seat belts through the opening in
the seat backrest, the seat backrest may be
damaged or may even break in the event of an accident. This poses an increased risk of
injury or even fatal injury.
Only use the standard three-point seat belt.
Never modify the seat belt system.
Proper use of the seat belts
Observe the safety notes on the seat belt
(Ypage 45).
All vehicle occupants must be wearing the seat
belt correctly before beginning the journey. Also
make sure that all vehicle occupants are always
wearing the seat belt correctly while the vehicle
is in motion.
When fastening the seat belt, always make sure
that:
Rthe seat belt buckle tongue is inserted only
into the belt buckle belonging to that seat
Rthe seat belt is pulled tight across your body
Avoid wearing bulky clothing, e.g. a winter
coat.
Rthe seat belt is not twisted
Only then can the forces which occur be dis-
tributed over the area of the belt.
Rthe shoulder section of the belt is routed
across the center of your shoulder
The shoulder section of the seat belt should
not touch your neck or be routed under your
arm or behind your back.
Rthe lap belt is taut and passes across your lap as low down as possible
The lap belt must always be routed across
your hip joints and not across your abdomen.
This applies particularly to pregnant women.
If necessary, push the lap belt down to your
hip joint and pull it tight using the shoulder
section of the belt.
Rthe seat belt is not routed across sharp, poin-
ted or fragile objects
If you have such items located on or in your
clothing, e.g. pens, keys or eyeglasses, store
these in a suitable place.
Ronly one person is using a seat belt
Infants and children must never travel sitting
on the lap of a vehicle occupant. In the event
46Occupant safety
Safety
Page 52 of 350

designed to do. There is an increased risk of
injury.
Never modify the doors or parts of the doors.Always have work on the doors or door pan-
eling carried out at a qualified specialist work-
shop.
Front air bags
!Do not place heavy objects on the front-
passenger seat. This could cause the system
to identify the seat as being occupied. In the
event of an accident, the restraint systems on
the front-passenger side may be triggered
and have to be replaced.
Driver's air bag :deploys in front of the steer-
ing wheel. Front-passenger front air bag ;
deploys in front of and above the glove box.
When deployed, the front air bags offer addi-
tional head and thorax protection for the occu-
pants in the front seats.
The PASSENGER AIR BAG OFF indicator lamp
informs you about the status of the front-
passenger front air bag (
Ypage 44).
The front-passenger front air bag will only
deploy if:
Rthe system, based on the OCS weight sensor
readings, detects that the front-passenger
seat is occupied (
Ypage 51). The
PASSENGER AIR BAG OFF indicator lamp is
not lit (
Ypage 52)
Rthe restraint system control unit predicts a
high accident severity
Knee bags
Driver's knee bag :deploys underneath the
steering column and front-passenger knee
bag ;underneath the glove box. The driver's
and front-passenger knee bags are triggered
together with the front air bags.
The driver's and front-passenger knee bags
offer additional thigh, knee and lower leg pro-
tection for the occupants in the front seats.
Side impact air bags
GWARNING
Unsuitable seat covers can obstruct or pre-
vent deployment of the air bags integrated
into the seats. Consequently, the air bags
cannot protect vehicle occupants as they are designed to do. In addition, the operation of
the occupant classification system (OCS)
could be adversely affected. This poses an
increased risk of injury or even fatal injury.
You should only use seat covers that have
been approved for the respective seat by
Mercedes-Benz.
50Occupant safety
Safety
Page 53 of 350
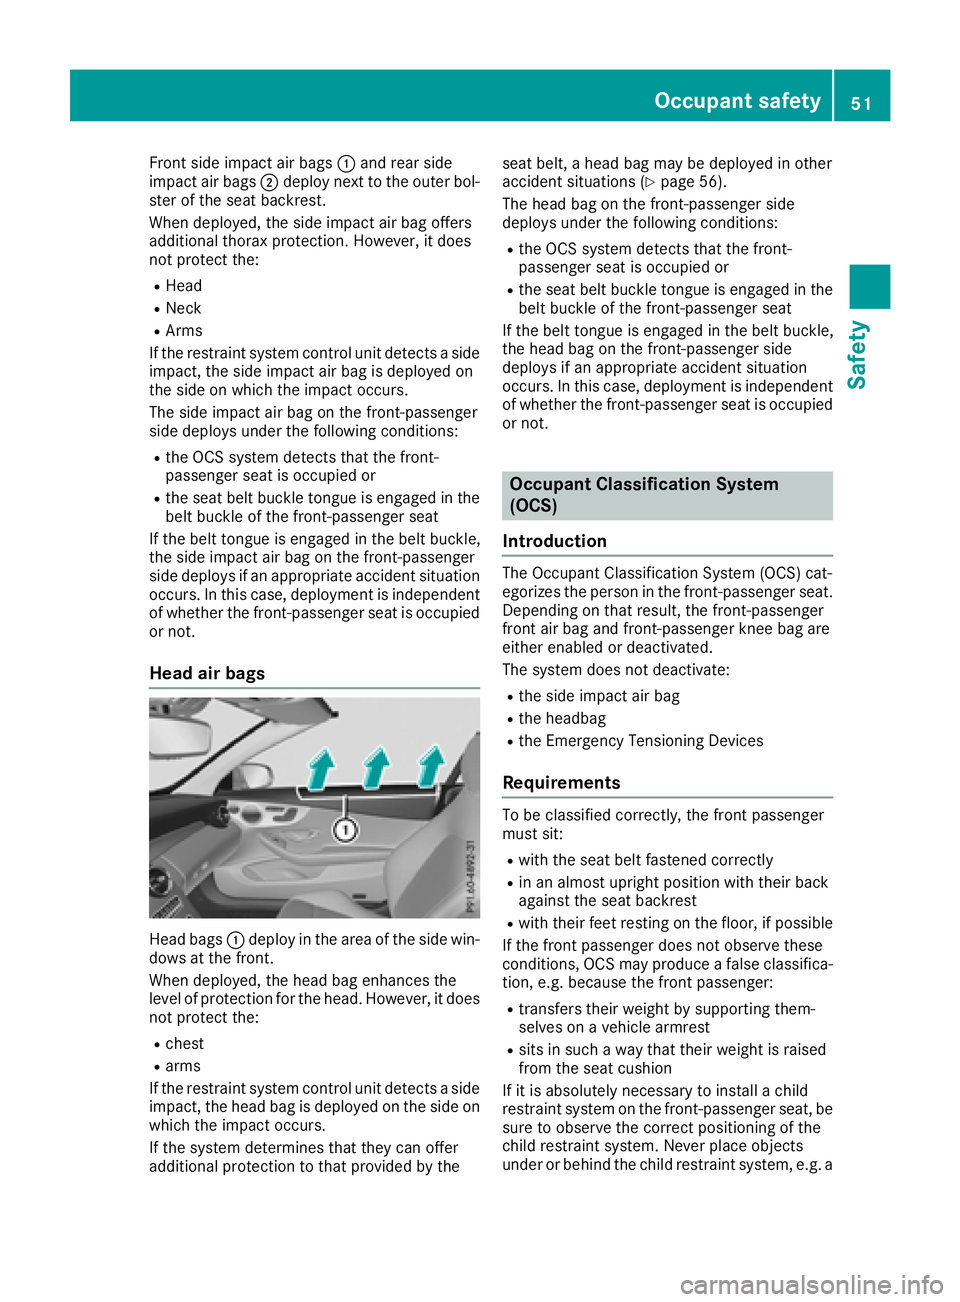
Front side impact air bags:and rear side
impact air bags ;deploy next to the outer bol-
ster of the seat backrest.
When deployed, the side impact air bag offers
additional thorax protection. However, it does
not protect the:
RHead
RNeck
RArms
If the restraint system control unit detects a side
impact, the side impact air bag is deployed on
the side on which the impact occurs.
The side impact air bag on the front-passenger
side deploys under the following conditions:
Rthe OCS system detects that the front-
passenger seat is occupied or
Rthe seat belt buckle tongue is engaged in the belt buckle of the front-passenger seat
If the belt tongue is engaged in the belt buckle,
the side impact air bag on the front-passenger
side deploys if an appropriate accident situation
occurs. In this case, deployment is independent
of whether the front-passenger seat is occupied
or not.
Head air bags
Head bags :deploy in the area of the side win-
dows at the front.
When deployed, the head bag enhances the
level of protection for the head. However, it does
not protect the:
Rchest
Rarms
If the restraint system control unit detects a side impact, the head bag is deployed on the side on
which the impact occurs.
If the system determines that they can offer
additional protection to that provided by the seat belt, a head bag may be deployed in other
accident situations (
Ypage 56).
The head bag on the front-passenger side
deploys under the following conditions:
Rthe OCS system detects that the front-
passenger seat is occupied or
Rthe seat belt buckle tongue is engaged in the belt buckle of the front-passenger seat
If the belt tongue is engaged in the belt buckle,
the head bag on the front-passenger side
deploys if an appropriate accident situation
occurs. In this case, deployment is independent
of whether the front-passenger seat is occupied
or not.
Occupant Classification System
(OCS)
Introduction
The Occupant Classification System (OCS) cat-
egorizes the person in the front-passenger seat.
Depending on that result, the front-passenger
front air bag and front-passenger knee bag are
either enabled or deactivated.
The system does not deactivate:
Rthe side impact air bag
Rthe headbag
Rthe Emergency Tensioning Devices
Requirements
To be classified correctly, the front passenger
must sit:
Rwith the seat belt fastened correctly
Rin an almost upright position with their back
against the seat backrest
Rwith their feet resting on the floor, if possible
If the front passenger does not observe these
conditions, OCS may produce a false classifica-
tion, e.g. because the front passenger:
Rtransfers their weight by supporting them-
selves on a vehicle armrest
Rsits in such a way that their weight is raised
from the seat cushion
If it is absolutely necessary to install a child
restraint system on the front-passenger seat, be
sure to observe the correct positioning of the
child restraint system. Never place objects
under or behind the child restraint system, e.g. a
Occupant safety51
Safety
Z
Page 57 of 350
front air bag. The PASSENGER AIR BAG OFF
indicator lamp may be lit continuously or be off.For more information about the OCS, see "Prob-
lems with the Occupant Classification System"
(
Ypage 55).
Problems with the Occupant Classification System (OCS)
Be sure to observe the notes on "System self-test" (Ypage 54).
ProblemPossible causes/consequences and
MSolutions
The PASSENGER AIR
BAG OFF indicator lamp
lights up and remains lit,
even though the front-
passenger seat is occu-
pied by an adult or a per-
son of a stature corre-
sponding to that of an
adult.The classification of the person on the front-passenger seat is incor-
rect.
XMake sure the conditions for a correct classification of the person
on the front-passenger seat are met (Ypage 51).
XIf the PASSENGER AIR BAG OFF indicator lamp remains lit, the front-
passenger seat may not be used.
XHave OCS checked as soon as possible at an authorized Mercedes- Benz Center.
The PASSENGER AIR
BAG OFF indicator lamp
does not light up and/or
does not stay on.
The front-passenger seat
is:
Runoccupied
Roccupied with the
weight of a child up to
twelve months old in a
child restraint system
OCS is malfunctioning.
XMake sure there is nothing between the seat cushion and the child
seat.
XMake sure that the entire base of the child restraint system rests on
the seat cushion of the front-passenger seat. The backrest of the
forward-facing child restraint system must lie as flat as possible
against the backrest of the front-passenger seat. If necessary,
adjust the position of the front-passenger seat.
XMake sure that the seat cushion length is fully retracted.
XWhen installing the child restraint system, make sure that the seat
belt is tight. Do not pull the seat belt tight using the front-passenger seat adjustment. This could result in the seat belt and the child
restraint system being pulled too tightly.
XCheck for correct installation of the child restraint system.
Make sure that the head restraint does not apply a load to the child
restraint system. If necessary, adjust the head restraint accord-
ingly.
XMake sure that no objects are applying additional weight onto the
seat.
XIf the PASSENGER AIR BAG OFF indicator lamp remains off and/or
the PASSENGER AIR BAG ON indicator lamp lights up, do not install a child restraint system on the front-passenger seat. It is recom-
mended that you install the child restraint system on a suitable rear
seat.
XHave OCS checked as soon as possible at an authorized Mercedes-Benz Center.
Roll bar
GDANGER
If the roll bar has developed a malfunction, it
may not function, e.g. in the event of an acci-
dent. The roll bars may then not protect the
vehicle occupants as intended. This poses an
increased risk of injury or even fatal injury.
Occupant safety55
Safety
Z
Page 63 of 350
GWARNING
If the child restraint system is installed incor-
rectly on a suitable seat, it cannot protect as
intended. The child cannot then be restrained
in the event of an accident, heavy braking or
sudden changes of direction. There is an
increased risk of injury, possibly even fatal.
Make sure that you observe the child restraint
system manufacturer's installation instruc-
tions and the notes on use. Please ensure,
that the base of the child restraint system is
always resting completely on the seat cush-
ion. Never place objects, e.g. cushions, under or behind the child restraint system. Only use
child restraint systems with the original cover
designed for them. Only replace damaged
covers with genuine covers.
GWARNING
If the child restraint system is installed incor-
rectly or is not secured, it can come loose in
the event of an accident, heavy braking or a
sudden change in direction. The child
restraint system could be thrown about, strik-
ing vehicle occupants. There is an increased
risk of injury, possibly even fatal.
Always install child restraint systems prop-
erly, even if they are not being used. Make
sure that you observe the child restraint sys-
tem manufacturer's installation instructions.
You will find further information on stowing
objects, luggage or loads under "Loading guide-
lines" (
Ypage 263).
GWARNING
Child restraint systems or their securing sys-
tems which have been damaged or subjected
to a load in an accident can no longer protect
as intended. The child cannot then be
restrained in the event of an accident, heavy
braking or sudden changes of direction. There is an increased risk of injury, possibly even
fatal.
Replace child restraint systems which have
been damaged or subjected to a load in an
accident as soon as possible. Have the secur-
ing systems on the child restraint system
checked at a qualified specialist workshop,
before you install a child restraint system
again.
The securing systems of child restraint systems
are:
Rthe seat belt system
Rthe LATCH-type (ISOFIX) securing rings
Rthe Top Tether anchorages
If it is absolutely necessary to carry a child on
the front-passenger seat, be sure to observe the
information on the "Occupant Classification
System (OCS)" (
Ypage 51). There you will also
find information on deactivating the front-
passenger front air bag.
All child restraint systems must meet the fol-
lowing standards:
RU.S. Federal Motor Vehicle Safety Standards
213 and 225
RCanadian Motor Vehicle Safety Standards
213 and 210.2
Confirmation that the child restraint system cor-
responds to the standards can be found on an
instruction label on the child restraint system.
This confirmation can also be found in the instal-
lation instructions that are included with the
child restraint system.
Observe the warning labels in the vehicle inte-
rior and on the child restraint system.
LATCH-type (ISOFIX) child seat secur-
ing system
GWARNING
LATCH-type (ISOFIX) child restraint systems
do not offer sufficient protection for children
whose weight combined with the child
restraint system is greater than 65 lbs (29 kg) and who are secured using the safety belt
integrated in the child restraint system. In the
event of an accident, a child might not be
restrained correctly. This poses an increased
risk of injury or even fatal injury.
If the child and the child restraint system
together weigh more than 65 lbs (29 kg), only
use LATCH-type (ISOFIX) child restraint sys-
tems with which the child is also secured with
Children in the vehicle61
Safety
Z
Page 152 of 350

For safety reasons, Mercedes-Benz recom-
mends only installing the following brake disks
and brake pads/linings:
Rbrake disks that have been approved by
Mercedes-Benz
Rbrake pads/linings that have been approved
by Mercedes-Benz or that are of an equivalent
standard of quality
Other brake disks or brake pads/linings can
compromise the safety of your vehicle.
Always replace all brake disks and brake pads/
linings on an axle at the same time. Always
install new brake pads/linings when replacing
brake disks.
The vehicle is equipped with lightweight brake
disks to which the wheel assembly with rim and
threaded connection is matched.
The use of brake disks other than those
approved by Mercedes-Benz can change the
track width and is subject to approval, if appli-
cable.
Shock-type loads when handling the brake
discs, such as when changing wheels, can lead
to a reduction in comfort when driving with light-
weight brake discs. Avoid shock-type loads on
the lightweight brake disks, particularly on the
brake plate.
Mercedes-Benz recommends that you only use
brake fluid that has been specially approved for
your vehicle by Mercedes-Benz, or which corre-
sponds to an equivalent quality standard. Brake
fluid which has not been approved for
Mercedes-Benz vehicles or which is not of an
equivalent quality could affect your vehicle's
operating safety.
High-performance and ceramic brakes
(Mercedes-AMG vehicles)
The AMG brake systems are designed for heavy
loads. This may lead to noise when braking. This
will depend on:
RSpeed
RBraking force
REnvironmental conditions, such as tempera-
ture and humidity
The wear of individual components of the brake
system, such as the brake pads/linings or brake
discs, depends on the individual driving style
and operating conditions.
For this reason, it is impossible to state a mile-
age that will be valid under all circumstances. An aggressive driving style will lead to high wear.
You can obtain more information on this from a
qualified specialist workshop.
New and replaced brake pads and discs only
reach their optimum braking effect after several
hundred kilometers of driving. Compensate for
this by applying greater force to the brake pedal.
Keep this in mind, and adapt your driving and
braking accordingly during this break-in period.
Excessive heavy braking results in correspond-
ingly high brake wear. If the brake pads/linings
have reached their wear limit, the multifunction
display shows a corresponding message. Espe-
cially for high performance driving, it is impor-
tant to maintain and have the brake system
checked regularly.
Driving on wet roads
Hydroplaning
If water has accumulated to a certain depth on
the road surface, there is a danger of hydro-
planing occurring, even if:
Ryou drive at low speeds
Rthe tires have adequate tread depth
For this reason, in the event of heavy rain or in
conditions in which hydroplaning may occur,
you must drive in the following manner:
Rlower your speed
Ravoid ruts
Ravoid sudden steering movements
Rbrake carefully
Driving on flooded roads
!Bear in mind that vehicles traveling in front
or in the opposite direction create waves. This
may cause the maximum permissible water
depth to be exceeded.
Failure to observe these notes may result in
damage to the engine, electrical systems and
transmission.
If you have to drive on stretches of road on which
water has collected, please bear in mind that:
Rin the case of standing water, the water level may be no higher than the lower edge of the
vehicle body
Ryou should drive no faster than walking pace
150Driving tips
Driving and parking
Page 225 of 350
Display messagesPossible causes/consequences andMSolutions
FrontPassengerAir‐bag Enable dSeeOperator' sManual
The front-passenger air bag and front-passenger knee bag are enabled
during th ejourney although:
Rachild, asmall adult or an objec tweighing less than th esystem' s
weigh tthreshold is locate don th efront-passenger seat
or
Rth efront-passenger seat is unoccupied
The system may detec tobjects or force sapplyin gadditional weigh ton
th eseat .
GWARNIN G
The front-passenger air bag and th efront-passenger knee bag may be
triggered unintentionally.
There is an increased ris kof injury.
XPull ove rand stop th evehicl esafely as soo nas possible, payin g
attention to roa dand traffic conditions.
XSecur eth evehicl eagainst rollin gaway (Ypage 143).
XSwitchth eignition off .
XOpenth efront-passenger door .
XRemove thechild and th echild restrain tsystem from th efront-
passenger seat .
XMakesur ethat there are no objects on th eseat addin gto th e
weight.
The system might otherwise detec tth eadditional weigh tand inter-
pre tth eseat occupant's weigh tas greate rthan it actually is.
XKee pth eseat unoccupied ,close th efront-passenger door and
switch on th eignition .
XObserveth ePASSENGER AI RBA Gindicator lamp sin th ecenter
co nsole and th emultifunction display and chec kth efollowing:
Seat unoccupied and ignition switched on :
Raself-diagnosis is carrie dout .The PASSENGER AI RBA GOF Fand
PASSENGER AI RBA GON indicator lamp smus tligh tup simulta-
neousl yfor approximately six seconds
Rth ePASSENGER AI RBA GOF Findicator lamp mus tthen ligh tup
and remain lit after th eself-diagnosis .If th eindicator lamp is on ,
th eOCS has disabled th efront-passenger fron tair bag and front-
passenger knee bag (
Ypage 52)
Rthedisplay message sFront Passenger Airbag Enable dSee Operator'sManualor Front Passenger Airbag Dis ‐abled See Operator'sManualmus tno tappear in th emulti-
function display
XWait for aperiod of at least 60 seconds until th enecessar ysystem
checks hav ebeen completed.
XMak esur ethat th edisplay message sdo no tappear in th emulti-
function display.
If these condition sare fulfilled ,th efront-passenger seat can be occu-
pied again .Whether th ePASSENGER AI RBA GOF Findicator lamp
remain slit or goe sout depend son how OCS classifies th eoccupant .
If th econdition sare no tfulfilled ,th esystem is no toperating correctly.
Display messages22 3
On-board computer and displays
Z