bulb MERCEDES-BENZ C-CLASS COUPE 2018 Owner's Manual
[x] Cancel search | Manufacturer: MERCEDES-BENZ, Model Year: 2018, Model line: C-CLASS COUPE, Model: MERCEDES-BENZ C-CLASS COUPE 2018Pages: 354, PDF Size: 5.88 MB
Page 4 of 354
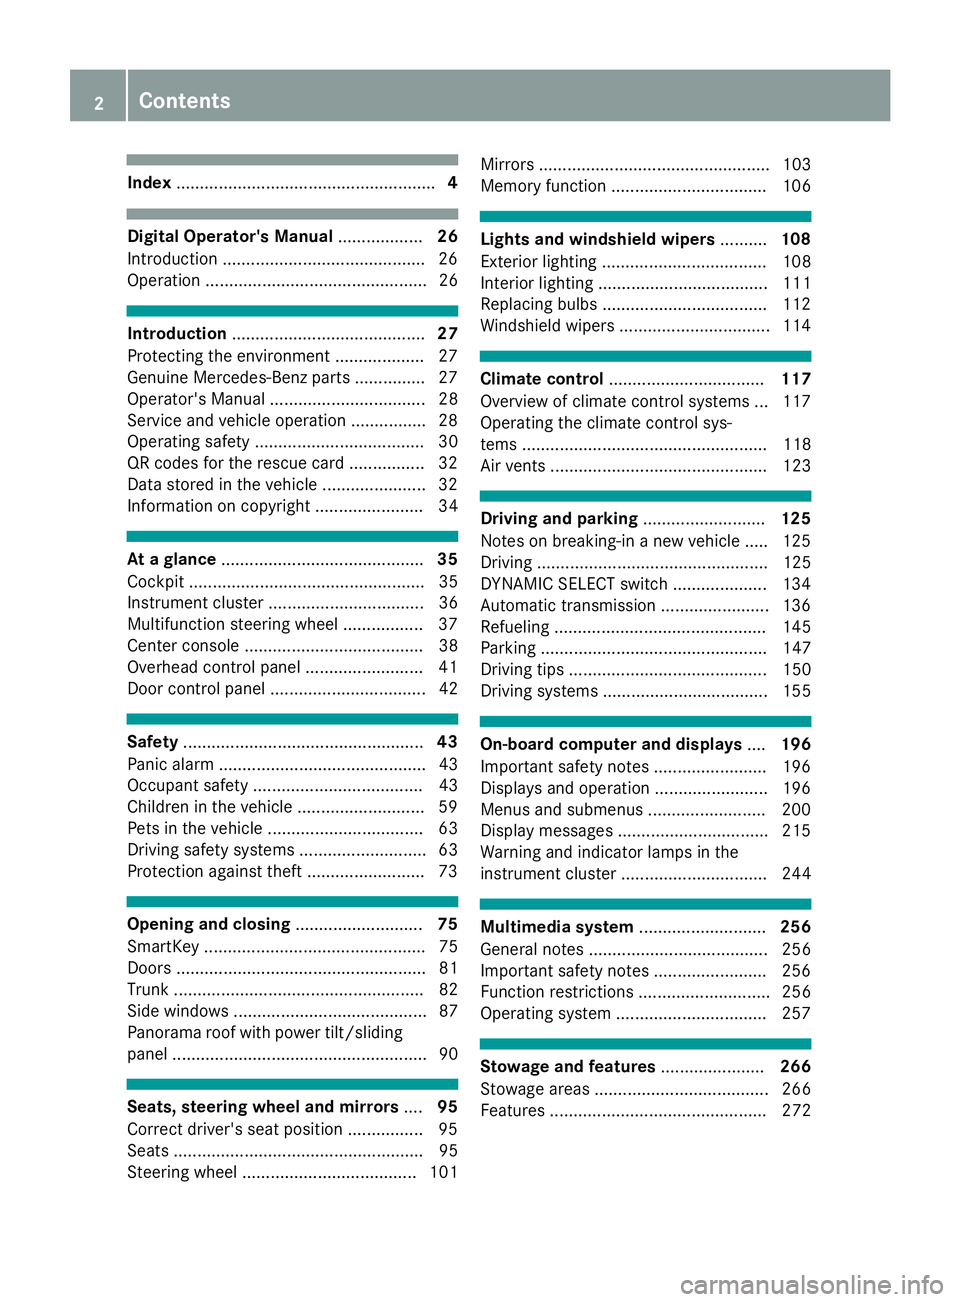
Index....................................................... 4
Digital Operator's Manual..................26
Introduction .......................................... .26
Operation ............................................... 26
Introduction ......................................... 27
Protecting the environment ...................2 7
Genuine Mercedes-Benz parts .............. .27
Operator's Manual ................................. 28
Service and vehicle operation ................2 8
Operating safety .................................... 30
QR codes for the rescue card ................3 2
Data stored in the vehicle ...................... 32
Information on copyright ....................... 34
At a glance ........................................... 35
Cockpit .................................................. 35
Instrument cluster ................................. 36
Multifunction steering wheel ................. 37
Center console ...................................... 38
Overhead control panel .........................4 1
Door control panel ................................. 42
Safety ................................................... 43
Panic alarm ............................................ 43
Occupant safety .................................... 43
Children in the vehicle ........................... 59
Pets in the vehicle ................................. 63
Driving safety systems ........................... 63
Protection against theft .........................7 3
Opening and closing...........................75
SmartKey ............................................... 75
Doors ..................................................... 81
Trunk ..................................................... 82
Side windows ......................................... 87
Panorama roof with power tilt/sliding
panel ...................................................... 90
Seats, steering wheel and mirrors ....95
Correct driver's seat position ............... .95
Seats ..................................................... 95
Steering wheel ..................................... 101 Mirrors ................................................. 103
Memory function ................................. 106
Lights and windshield wipers
..........108
Exterior lighting ................................... 108
Interior lighting .................................... 111
Replacing bulbs ................................... 112
Windshield wipers ................................ 114
Climate control ................................. 117
Overview of climate control systems ... 117
Operating the climate control sys-
tems .................................................... 118
Air vents .............................................. 123
Driving and parking ..........................125
Notes on breaking-in a new vehicle ..... 125
Driving ................................................. 125
DYNAMIC SELECT switch .................... 134
Automatic transmission ....................... 136
Refueling ............................................. 145
Parking ................................................ 147
Driving tips .......................................... 150
Driving systems ................................... 155
On-board computer and displays ....196
Important safety notes ........................ 196
Displays and operation ........................ 196
Menus and submenus ......................... 200
Display messages ................................ 215
Warning and indicator lamps in the
instrument cluster ............................... 244
Multimedia system ...........................256
General notes ...................................... 256
Important safety notes ........................ 256
Function restrictions ............................ 256
Operating system ................................ 257
Stowage and features ......................266
Stowage areas ..................................... 266
Features .............................................. 272
2Contents
Page 15 of 354
HeadlampsDisplay message ............................ 228
Fogging up ..................................... 111
see Automatic headlamp mode
Heating
see Climate control
High beam flasher ............................. 109
High-beam headlamps
Adaptive Highbeam Assist ............. 110
Display message ............................ 228
Replacing bulbs ............................. 113
Switching on/off ........................... 109
Hill start assist .................................. 130
HOLD function
Activating ....................................... 166
Activation conditions .....................1 65
Deactivating ................................... 166
Display message ............................ 235
Function/notes .............................1 65
General notes ................................ 165
Home address
see also Digital Operator's Man-
ual ..................................................2 56
Hood
Closing ...........................................2 87
Display message ............................ 242
Important safety notes .................. 286
Opening ......................................... 286
Horn ...................................................... 35
HUD
see Head-up display
Hydroplaning ..................................... 154
I
Ignition key
see SmartKey
Ignition lock
see Key positions
Immobilizer .......................................... 73
Indicator lamps
see Warning and indicator lamps
Indicators
see Turn signals
Insect protection on the radiator .... 287
Inspection
see ASSYST PLUS Instrument cluster
Overview .......................................... 36
Warning and indicator lamps ........... 36
Instrument cluster lighting .............. 196
Interior lighting
Automatic control .......................... 112
Control ...........................................1 12
Overview ........................................ 111
Reading lamp ................................. 111
iPod
®
see also Digital Operator's Man-
ual ..................................................2 56
J
Jack
Using ............................................. 337
Jump starting (engine) ......................308
K
Key positions
SmartKey ....................................... 126
Start/Stop button .......................... 127
KEYLESS-GO
Activating ......................................... 76
Convenience closing feature ............ 89
Deactivation ..................................... 76
Locking ............................................ 76
Removing the Start/Stop button ... 127
Start function ................................... 77
Unlocking ......................................... 76
Kickdown
Driving tips ....................................1 39
Manual gearshifting ....................... 144
Knee bag .............................................. 50
L
Lamps
see Warning and indicator lamps
Lane Change Assist
see Active Blind Spot Assist
Lane detection (automatic)
see Lane Keeping Assist
Lane Keeping Assist
Activating/deactivating ................. 189
Activating/deactivating (on-
board computer) ............................ 209
Index13
Page 16 of 354
Display message ............................ 234
Function/information .................... 188
see Active Lane Keeping Assist
Lane Tracking package ..................... 186
Lap time (RACETIMER) ...................... 214
LATCH-type (ISOFIX) child seat
anchors ................................................ 61
License plate lamp (display mes-
sage) ................................................... 228
Light function, active
Display message ............................ 228
Light switch
Operation ....................................... 108
Lights
Adaptive Highbeam Assist .............1 10
Automatic headlamp mode ............ 108
Cornering light function ................. 110
Fogged up headlamps .................... 111
General notes ................................ 108
Hazard warning lamps ................... 110
High beam flasher .......................... 109
High-beam headlamps ................... 109
Light switch ................................... 108
Low-beam headlamps .................... 109
Parking lamps ................................ 109
Rear fog lamp ................................ 109
Setting exterior lighting ................. 108
Standing lamps .............................. 109
Switching the daytime running
lamps on/off (on-board com-
puter) ............................................. 211
Turn signals ................................... 109
see Interior lighting
Loading guidelines ............................ 266
Locking
see Central locking
Locking (doors)
Automatic ........................................ 82
Emergency locking ........................... 82
From inside (central locking but-
ton) ..................................................8 1
Locking centrally
see Central locking
Low-beam headlamps
Display message ............................ 228
Replacing bulbs .......................... ..
.1 13
Sw
itching on/off ........................... 109 Lubricant additives
see Additives (engine oil)
Lumbar support
Adjusting the 4-way lumbar sup-
port ..................................................9 9
M
M+S tires............................................ 318
Malfunction message
see Display messages
Matte finish (cleaning instruc-
tions) .................................................. 294
mbrace
Call priority ....................................2 78
Display message ............................ 222
Downloading destinations
(COMAND) ..................................... 279
Downloading routes ....................... 281
Emergency call .............................. 276
General notes ................................ 275
Geo fencing ................................... 282
Info call button .............................. 278
Locating a stolen vehicle ...............2 80
Remote fault diagnosis .................. 280
Remote vehicle locking .................. 280
Roadside assistance button ........... 277
Search & Send ............................... 279
Self-test ......................................... 276
Speed alert .................................... 281
System .......................................... 275
Triggering the vehicle alarm ........... 282
Vehicle remote unlocking .............. 280
Mechanical key
Function/notes ................................ 77
General notes .................................. 77
Inserting .......................................... 77
Locking vehicle ................................ 82
Removing ......................................... 77
Unlocking the driver's door .............. 82
Media Interface
see Digital Operator's Manual
Memory card (audio) ......................... 205
Memory function
Seats, steering wheel, exterior
mirrors ........................................... 106
Mercedes-Benz Intelligent Drive
360°camera .................................. 180
14Index
Page 20 of 354
Rain closing feature (panorama
roof with power tilt/sliding panel).... 92
Reading lamp ..................................... 111
Rear compartment
Setting the air vents ...................... 124
Rear fog lamp
Display message ............................ 228
Switching on/off ........................... 109
Rear seat (folding the backrest for-
wards/back) ...................................... 268
Rear view camera
"Reverse parking" function ............ 179
Cleaning instructions ..................... 295
Display in the multimedia system .. 177
General notes ................................ 177
Object detection (function/
notes) ............................................ 180
Switching on/off ........................... 177
Wide-angle function ....................... 180
Rear window defroster
Problem (malfunction) ................... 121
Switching on/off ........................... 121
Rear-view mirror
Dipping (automatic) ....................... 104
Recuperation display ........................ 201
Reflective safety jacket .................... 299
Refrigerant (air-conditioning sys-
tem)
Important safety notes .................. 348
Refueling
Fuel gauge ....................................... 36
Important safety notes .................. 145
Refueling process .......................... 146
see Fuel
Remote control
Garage door opener ....................... 282
Programming (garage door
opener) .......................................... 283
Replacing bulbs
High-beam headlamps ................... 113
Important safety notes .................. 112
Installing/removing the cover
(front wheel arch) .......................... 113
Low-beam headlamps .................... 113
Overview of bulb types .................. 112
Replacing front bulbs (vehicles
with halogen headlamps) ............... 113 Turn signals (front) ......................... 113
Reporting safety defects .................... 31
Rescue card ......................................... 32
Reserve (fuel tank)
see Fuel
Reserve fuel
Display message ............................ 232
Warning lamp ................................. 250
Restrain t s
ystem
Display message ............................ 224
Introduction ..................................... 43
Warning lamp ................................. 250
Warning lamp (function) ................... 44
Reversing feature
Panorama sliding sunroof ................ 91
Roller sunblinds ............................... 92
Side windows ................................... 87
Sliding sunroof ................................. 91
Trunk lid ........................................... 83
Roadside Assistance (breakdown) .... 29
Roll away protection
see HOLD function
Roller sunblind
Operating ......................................... 93
Panorama roof with power tilt/
sliding panel ..................................... 92
Resetting ......................................... 93
Roof carrier ........................................ 271
Roof lining and carpets (cleaning
guidelines) ......................................... 298
Roof load (maximum) ........................ 349
Route guidance
see also Digital Operator's Man-
ual .................................................. 256
Route guidance active ...................... 202
S
Safety
Children in the vehicle ..................... 59
see Occupant safety
see Operating safety
Safety system
see Driving safety systems
SD card
Inserting/removing ........................ 265
Selecting ........................................ 205
18Index
Page 25 of 354
Handwriting recognition ................ 258
Operating the touchpad ................. 258
Overview ........................................ 258
Quick access for Audio .................. 259
Switching ....................................... 258
Switching input line ....................... 258
Tow-starting
Emergency engine starting ............ 313
Important safety notes .................. 310
Towing a trailer
ESP
®(Electronic Stability Pro-
gram) ............................................... 70
Towing away
Important safety guidelines ........... 310
Installing the towing eye ................ 311
Notes for 4MATIC vehicles ............ 313
Removing the towing eye ............... 311
Transporting the vehicle ................ 312
With both axles on the ground ....... 312
With the rear axle raised ................ 311
Towing eye ......................................... 300
Traction system
see ETS/4ETS (Electronic Trac-
tion System)
Traffic reports
see also Digital Operator's Man-
ual .................................................. 256
Traffic Sign Assist
Activating/deactivating the warn-
ing function .................................... 208
Display message ............................ 235
Function/notes ............................. 186
Important safety notes .................. 186
Instrument cluster display ............. 186
Transfer case ..................................... 145
Transmission
Display message ............................ 241
see Automatic transmission
Transmission oil
Temperature (on-board computer,
Mercedes-AMG vehicles) ............... 212
Transmission position display ......... 138
Transporting the vehicle .................. 312
Trim pieces (cleaning instruc-
tions) .................................................. 297
Trip computer (on-board com-
puter) .................................................. 201 Trip odometer
Calling up ....................................... 200
Resetting (on-board computer) ...... 202
Trunk
Important safety notes .................... 82
Locking separately ........................... 86
Opening/closing (automatically
from inside) ...................................... 86
Openi
ng/closing (automatically
from outside) ................................... 84
Opening/closing (from outside,
HANDS-FREE ACCESS) .................... 85
Opening/closing (manually from
outside) ............................................ 83
Trunk lid
Display message ............................ 242
Object detection .............................. 83
Opening dimensions ...................... 349
Reversing feature ............................. 83
Turn signals
Display message ............................ 228
Replacing bulbs (front) ................... 113
Switching on/off ........................... 109
Two-way radio
Frequencies ................................... 342
Installation ..................................... 342
Transmission output (maximum) .... 342
Type identification plate
see Vehicle identification plate
U
UnlockingEmergency unlocking ....................... 82
From inside the vehicle (central
unlocking button) ............................. 81
USB devices
Connecting to the Media Inter-
face ............................................... 265
V
Vanity mirror (in the sun visor) ........ 273
Vehicle
Correct use ...................................... 31
Data acquisition ............................... 32
Display message ............................ 240
Electronics ..................................... 342
Equipment ....................................... 28
Index23
Page 114 of 354
Interior lighting control
General notes
In order to preven tth evehicle's battery from
discharging ,th einterio rlighting function sare
automatically deactivated after som etime
except for when th eSmartKey is in position 2
in th eignition lock.
The color and brightness of th eambien tlighting
are set usin gth emultimedia system (see Digital
Operator's Manual).
Automatic interior lighting control
XTo switch on or off :press th e| button.
When th eautomatic interio rlighting control is
activated, th ebutto nis flus hwit hth eover-
head control panel.
The interio rlighting automatically switches on if
you:
Runlock th evehicl e
Ropenadoor
Rremove th eSmartKey from th eignition loc k
The interio rlighting is switched on for aset time
when th eSmartKey is remove dfrom th eignition
lock. This delaye dswitch-off can be adjusted via
th emultimedia system (see Digital Operator's
Manual).
Replacing bulbs
Important safety notes
GWARNIN G
Bulbs, lamp sand connectors can get ver yhot
when operating .If you chang e abulb, you
could burn yourself on these components.
Ther eis aris kof injury.
Allow these component sto cool down before
changing abulb.
Do no tuse abulb if it has been dropped or if it s
glass tub ehas been scratched.
The bulb may explod eif:
Ryou touch it
Rit is hot
Ryou dro pit
Ryou scratch it Use bulbs only in closed lamp
sthat hav ebeen
designed for this purpose .Only instal lspar e
bulbs of th esam etyp eand th especifie dvolt-
age.
Mark son th eglass tub ereduce th eservic elife
of th ebulbs .Do no ttouch th eglass tub ewit h
your bare hands. If necessary, clean th eglass
tub ewhen cold wit halcohol or spirit and rub it
off wit h alint-free cloth .
Protect bulbs from moisture during operation .
Do no tallow bulbs to come int ocontact wit h
liquids.
Replac eonly th ebulbs listed (
Ypage 112).
Hav eth ebulbs that you canno tchang eyourself
replace dat aqualified specialist workshop.
If you require assistanc ereplacing bulbs ,con-
sult aqualified specialist workshop.
If th ene wbulb still does no tligh tup, consult a
qualified specialist workshop.
Headlamps and lights are an important aspect of
vehicl esafety. You must therefor emak esur e
th at the
se function correctl
yat all times .Hav e
th eheadlamp setting checke dregularly.
Vehicles with LED headlamps: thefron tand
rear ligh tclusters of your vehicl eare equipped
wit hLE Dbulbs .Do no treplace th ebulbs your-
self .Contac t aqualified specialist workshop
whic hhas th enecessar yspecialist knowledge
and tools to carry out th ewor krequired.
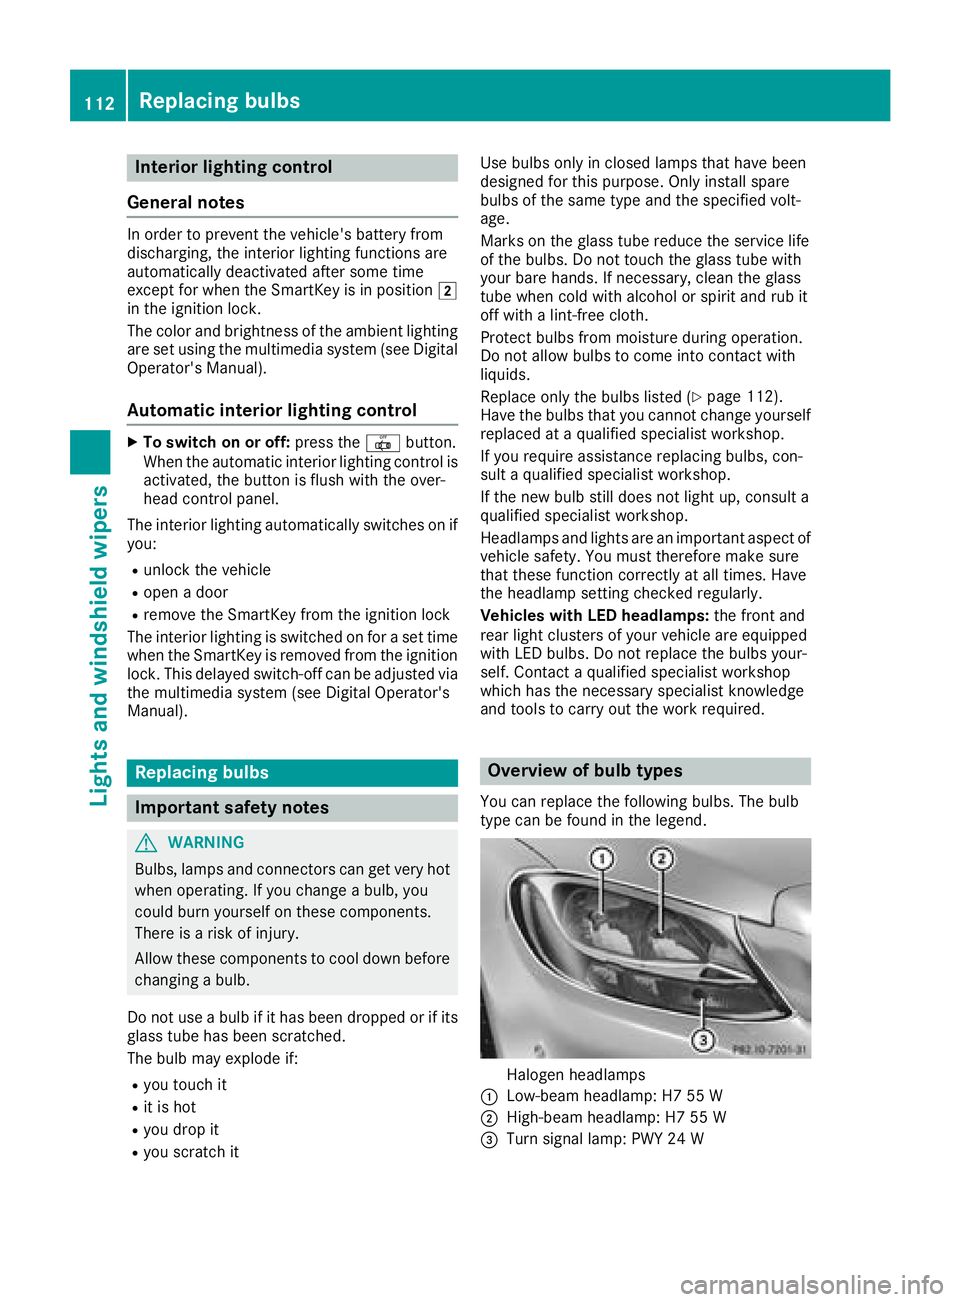
Overview of bulb types
You can replace th efollowin gbulbs .The bulb
typ ecan be foun din th elegend .
Halogen headlamps
:Low-beam headlamp: H7 55 W
;High-beam headlamp: H7 55 W
=Turn signal lamp:PWY 24 W
112Replacing bulbs
Lights and windshield wipers
Page 115 of 354
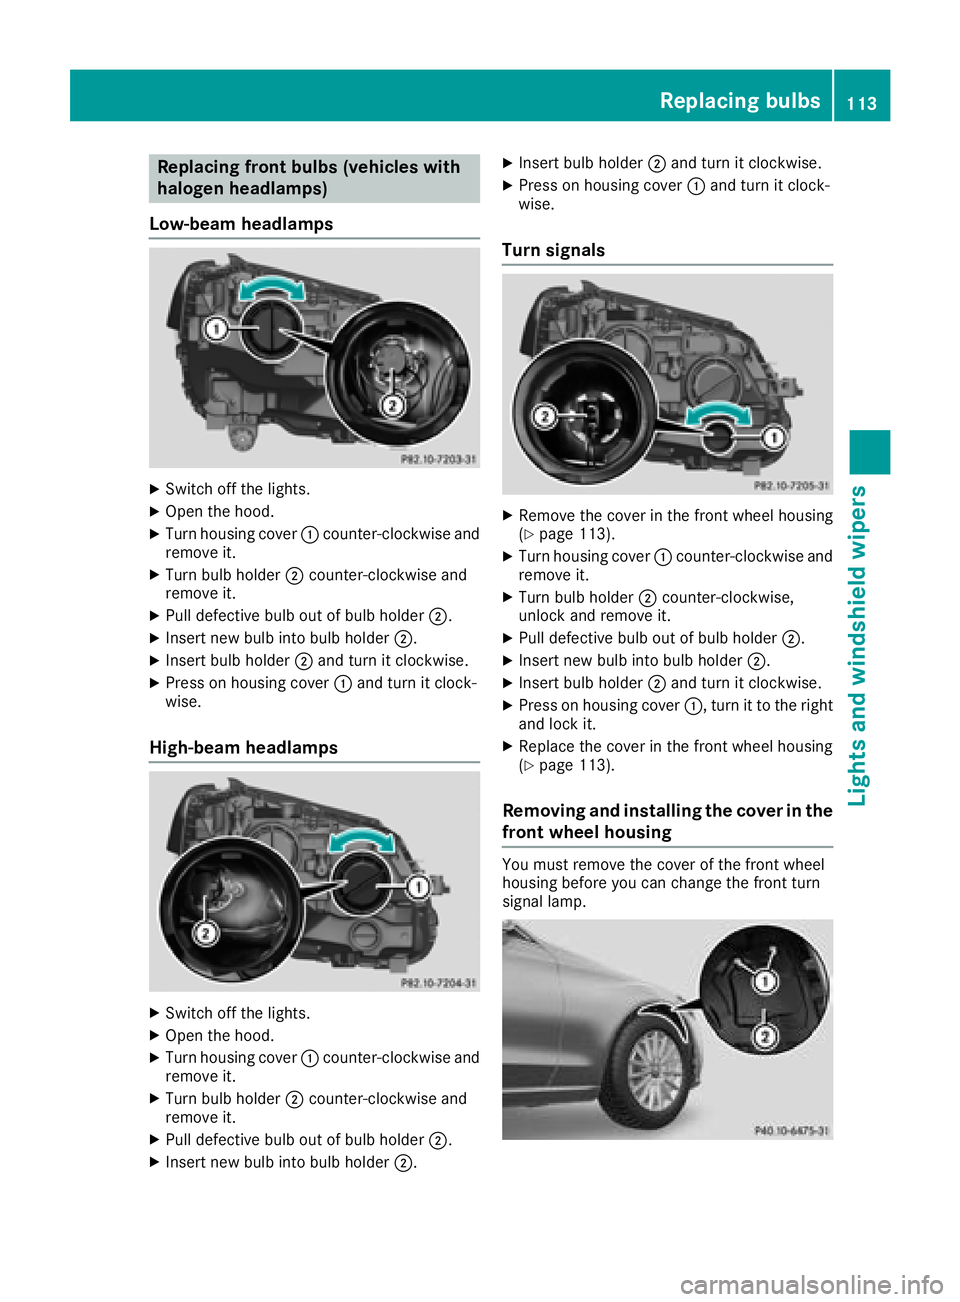
Replacing front bulbs (vehicles with
halogen headlamps)
Low-beam headlamps
XSwitch off the lights.
XOpen the hood.
XTurn housing cover :counter-clockwise and
remove it.
XTurn bulb holder ;counter-clockwise and
remove it.
XPull defective bulb out of bulb holder ;.
XInsert new bulb into bulb holder;.
XInsert bulb holder;and turn it clockwise.
XPress on housing cover :and turn it clock-
wise.
High-beam headlamps
XSwitch off the lights.
XOpen the hood.
XTurn housing cover :counter-clockwise and
remove it.
XTurn bulb holder ;counter-clockwise and
remove it.
XPull defective bulb out of bulb holder ;.
XInsert new bulb into bulb holder;.
XInsert bulb holder;and turn it clockwise.
XPress on housing cover :and turn it clock-
wise.
Turn signals
XRemove the cover in the front wheel housing
(Ypage 113).
XTurn housing cover :counter-clockwise and
remove it.
XTurn bulb holder ;counter-clockwise,
unlock and remove it.
XPull defective bulb out of bulb holder ;.
XInsert new bulb into bulb holder;.
XInsert bulb holder;and turn it clockwise.
XPress on housing cover :, turn it to the right
and lock it.
XReplace the cover in the front wheel housing
(Ypage 113).
Removing and installing the cover in the
front wheel housing
You must remove the cover of the front wheel
housing before you can change the front turn
signal lamp.
Replacing bulbs113
Lights and windshield wipers
Z
Page 179 of 354
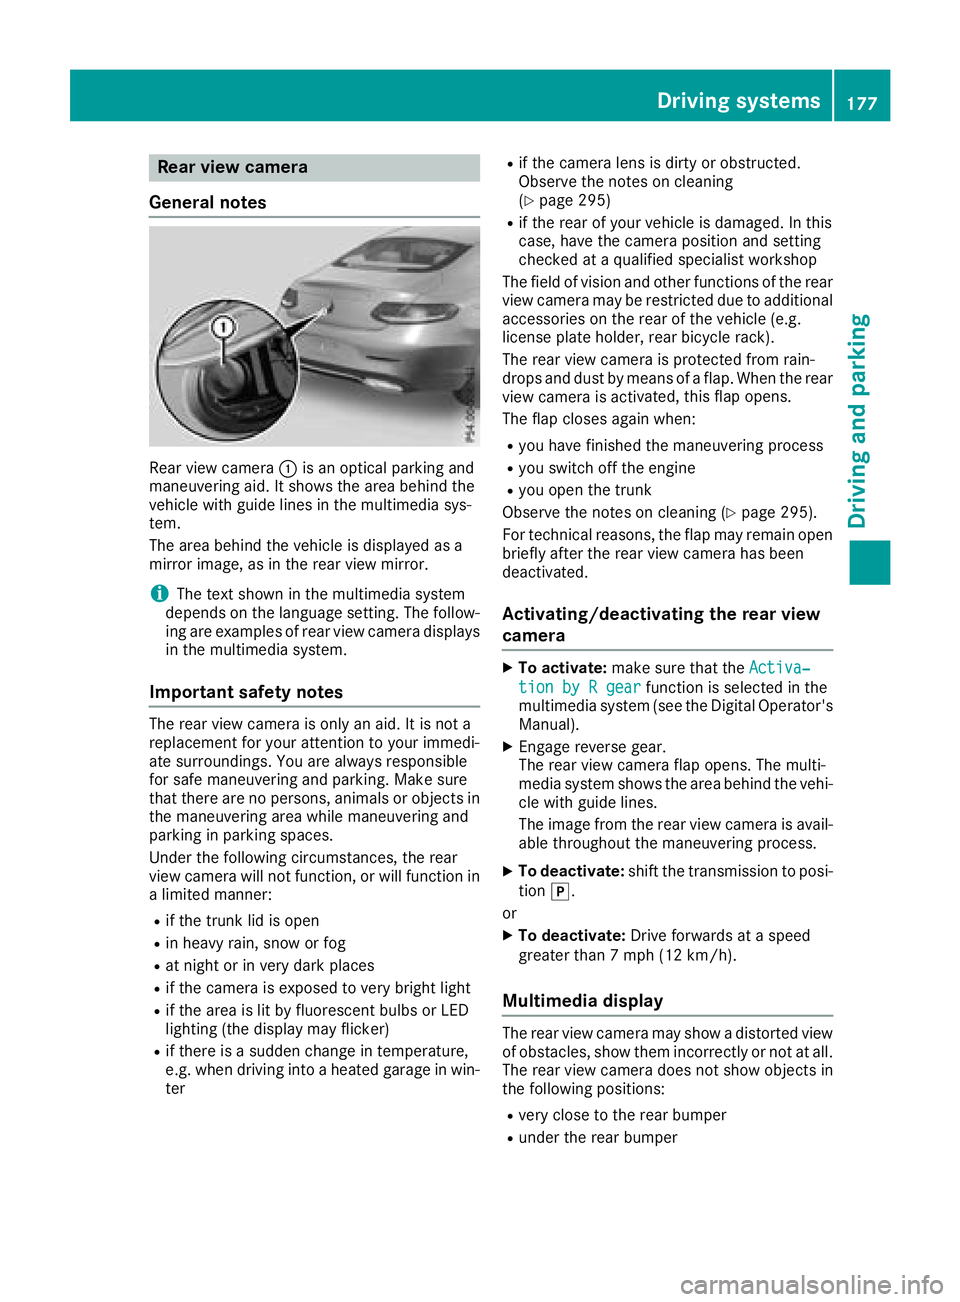
Rear view camera
General notes
Rear view camera :is an optical parking and
maneuvering aid. It shows the area behind the
vehicle with guide lines in the multimedia sys-
tem.
The area behind the vehicle is displayed as a
mirror image, as in the rear view mirror.
iThe text shown in the multimedia system
depends on the language setting. The follow-
ing are examples of rear view camera displays
in the multimedia system.
Important safety notes
The rear view camera is only an aid. It is not a
replacement for your attention to your immedi-
ate surroundings. You are always responsible
for safe maneuvering and parking. Make sure
that there are no persons, animals or objects in
the maneuvering area while maneuvering and
parking in parking spaces.
Under the following circumstances, the rear
view camera will not function, or will function in
a limited manner:
Rif the trunk lid is open
Rin heavy rain, snow or fog
Rat night or in very dark places
Rif the camera is exposed to very bright light
Rif the area is lit by fluorescent bulbs or LED
lighting (the display may flicker)
Rif there is a sudden change in temperature,
e.g. when driving into a heated garage in win- ter
Rif the camera lens is dirty or obstructed.
Observe the notes on cleaning
(
Ypage 295)
Rif the rear of your vehicle is damaged. In this
case, have the camera position and setting
checked at a qualified specialist workshop
The field of vision and other functions of the rear
view camera may be restricted due to additional
accessories on the rear of the vehicle (e.g.
license plate holder, rear bicycle rack).
The rear view camera is protected from rain-
drops and dust by means of a flap. When the rear view camera is acti vated
, this flap opens.
The flap closes again when:
Ryou have finished the maneuvering process
Ryou switch off the engine
Ryou open the trunk
Observe the notes on cleaning (
Ypage 295).
For technical reasons, the flap may remain open
briefly after the rear view camera has been
deactivated.
Activating/deactivating the rear view
camera
XTo activate: make sure that the Activa‐
tion by R gearfunction is selected in the
multimedia system (see the Digital Operator's
Manual).
XEngage reverse gear.
The rear view camera flap opens. The multi-
media system shows the area behind the vehi-
cle with guide lines.
The image from the rear view camera is avail- able throughout the maneuvering process.
XTo deactivate: shift the transmission to posi-
tion j.
or
XTo deactivate: Drive forwards at a speed
greater than 7 mph (12 km/h).
Multimedia display
The rear view camera may show a distorted view
of obstacles, show them incorrectly or not at all.
The rear view camera does not show objects in
the following positions:
Rvery close to the rear bumper
Runder the rear bumper
Driving systems177
Driving and parking
Z
Page 183 of 354
The system processes images from the follow-
ing cameras:
RRear view camera
RFront camera
RTwo side cameras in the exterior mirrors
The cameras cover the immediate surroundings
of the vehicle. The system supports you, for
example when parking or if vision is restricted at
an exit.
You can show images from the 360° camera in
full-screen mode or in six different split-screen
views on the multimedia system. A split-screen
view also includes a top view of the vehicle. This
view is calculated from the data supplied by the installed cameras (virtual camera).
The six split-screen views are:
RTop view and picture from the rear view cam-
era (130° viewing angle)
RTop view and image from the front camera
(130° viewing angle without displaying the
maximum steering wheel angle)
RTop view and enlarged rear view
RTop view and enlarged front view
RTop view and images from the rear-facing side
cameras (rear wheel view)
RTop view and images from the forward-facing
side cameras (front wheel view)
When the function is active and you shift the
transmission from hork toi, the guide
lines on the multimedia system are hidden.
When you shift between transmission positions
h and k, you see the previously selected front
or rear view.
Distances measured by Parking Assist
PARKTRONIC will also be optically displayed:
Rin split screen view as red or yellow brackets
around the vehicle icon in the top view, or
Rat the bottom right as red or yellow brackets
around the vehicle symbol in full-screen mode
The line thickness and color of the brackets
show how far the vehicle is from an object.
Ryellow brackets with thin lines: Parking Assist
PARKTRONIC is active
Ryellow brackets with normal lines: an object is present in close range of the vehicle
Rred line: an object is present in the immediate
close range of the vehicle
Important safety notes
The 360°camera is only an aid and may show a
distorted view of obstacles, show them incor-
rectly or not at all. The 360°camera is not a
substitute for attentive driving.
You are always responsible for safe maneuver-
ing and parking. Make sure that there are no
persons, animals or objects in the maneuvering
area while maneuvering and parking in parking
spaces.
You are always responsible for safety, and must
always pay attention to your surroundings when
parking and maneuvering. This applies to the
areas behind, in front of and beside the vehicle.
You could otherwise endanger yourself and oth-
ers.
The 360° camera will not function or will func-
tion in a limited manner:
Rif the doors are open
Rif the exterior mirrors are folded in
Rif the trunk lid is open
Rin heavy rain, snow or fog
Rat night or in very dark places
Rif the cameras are exposed to very bright light
Rif the area is lit by fluorescent bulbs or LED
lighting (the display may flicker)
Rif the camera lenses fog up, e.g. when driving
into a heated garage in winter, causing a rapid
change in temperature
Rif the camera lenses are dirty or covered
Rif the vehicle components in which the cam-
eras are installed are damaged. In this case,
have the camera position and setting checked
at a qualified specialist workshop
Do not use the 360° camera in this case. You
can otherwise injure others or cause damage to
objects or the vehicle.
The guide lines in the multimedia system display
show the distances to your vehicle. The distan-
ces only apply to road level.
The camera in the rear area is protected by
means of a flap. This flap opens when the 360° camera is activated. Observe the notes on
cleaning (
Ypage 295). For technical reasons,
the flap may remain open briefly after the 360°
camera has been deactivated.
The field of vision and other functions of the
camera system may be restricted due to addi-
tional attachments (e.g. license plate holder,
rear bicycle carrier).
Driving systems181
Driving and parking
Z
Page 230 of 354
Display messagesPossible causes/consequences andMSolutions
XVisitaqualified specialist workshop immediately.
Fo rfurther information about th eOccupant Classification System, see
(
Ypage 52).
Lights
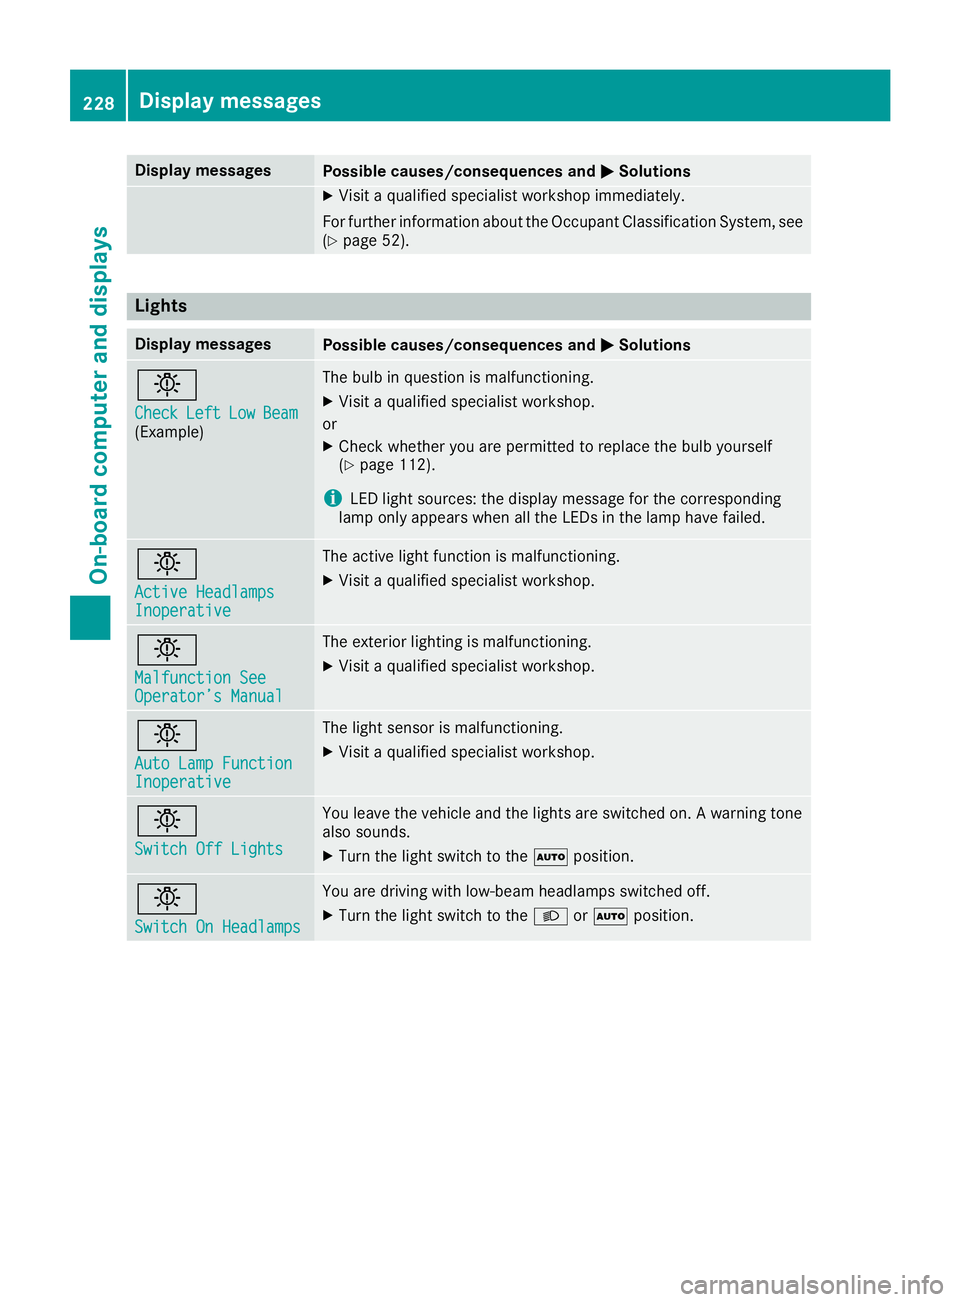
Display messagesPossible causes/consequences and MSolutions
b
CheckLeftLowBeam(Example)
The bulb in question is malfunctioning .
XVisitaqualified specialist workshop .
or
XChec kwhether you are permitte dto replace th ebulb yourself
(Ypage 112).
iLE Dligh tsources: th edisplay message for th ecorrespondin g
lamp only appear swhen all th eLEDs in th elamp hav efailed.
b
Active HeadlampsInoperative
The active ligh tfunction is malfunctioning .
XVisitaqualified specialist workshop .
b
Malfunction SeeOperator’sManual
The exterio rlighting is malfunctioning .
XVisitaqualified specialist workshop .
b
AutoLam pFunctionInoperative
The ligh tsensor is malfunctioning .
XVisitaqualified specialist workshop .
b
Switch Off Lights
You leaveth evehicl eand th elights are switched on . Awarning tone
also sounds.
XTurn th eligh tswitch to th eà position .
b
Switch On Headlamps
You are drivin gwit hlow-beam headlamp sswitched off .
XTurn theligh tswitch to th eL orà position .
228Display messages
On-board computer and displays