airbag MERCEDES-BENZ C-CLASS COUPE 2021 Owner's Manual
[x] Cancel search | Manufacturer: MERCEDES-BENZ, Model Year: 2021, Model line: C-CLASS COUPE, Model: MERCEDES-BENZ C-CLASS COUPE 2021Pages: 549, PDF Size: 9.74 MB
Page 70 of 549
Obser
vethe no tes under "Suitability of
seats for attaching belt-secu redch ild
re stra int sy stems" (/ page 65).
O When using a
weight category 0/0+
baby car seat and a weight category I
re ar wa rd-facing child restra int sy stem
on a rear seat: adjustthe front seat so that
th e seat does not touch thech ild restra int
sy stem.
O When using a
weight category I forw ard-
fa cing child restra int sy stem: remo vethe
head restra int from there spective seat, if
possible.
Af terth ech ild restra int sy stem has been
re mo ved, replace the head restra ints again
immediately and adjust them cor rectly.
O The ba
ckrest of thefo rw ard-facing child
re stra int sy stem must, as far as possible, be
re sting on the seat backrest of there ar
seat.
O If
th e head restra int of thech ild seat cannot
be fully extended when it is ins talled in the
ve hicle, this will result in restrictions on the maximum size setting
forch ild restra int sys‐
te ms in weight category II or III.
Contact with thero of when the head
re stra int is fully extended and lo cked in
place will not result in any restrictions on
use.
O The
child restra int sy stem must not be put
under stra in between thero of and the seat
cushion and/or be fitted facing the wrong
direction. Where possible, adjust the seat
cushion inclination accordingly.
O The
child restra int sy stem must not be put
under stra in by the head restra int. Adjust
th e head restra ints as appropriate.
O Make sure
that thech ild's feet do not touch
th e front seat. If necessar y,mo vethe front
seat slightly forw ards. #
Install thech ild restra int sy stem.
The entire base of thech ild restra int sy stem
must alw aysre st on the sitting sur face of the
re ar seat. #
Alw ays make sure that the shoulder belt
st ra p is cor rectly routed from the seat belt outlet of
theve hicle tothe shoulder belt
guide on thech ild restra int sy stem.
The shoulder belt stra p must be routed
fo rw ard from the seat belt outlet.
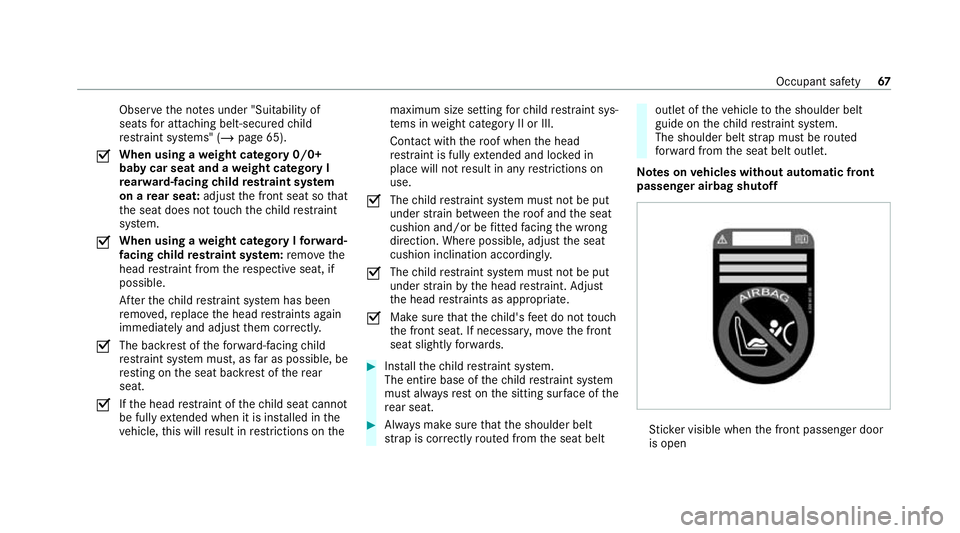
Note s onvehicles without automatic front
passen ger airbag shu toff St
icke r visible when the front passenger door
is open Occupant saf
ety67
Page 71 of 549
Ve
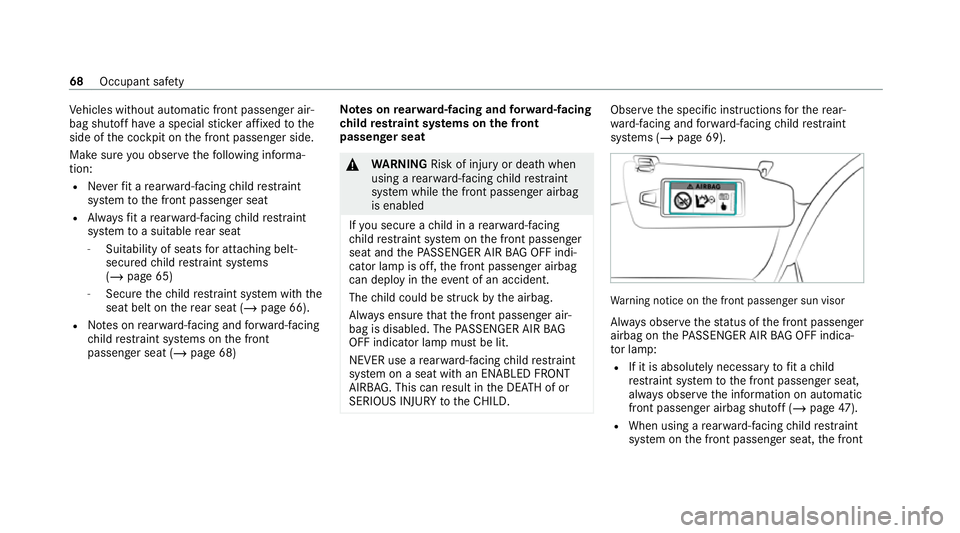
hicles without automatic front passenger air‐
bag shutoff ha vea special sticke r af fixe dto the
side of the cockpit on the front passenger side.
Make sure you obse rveth efo llowing informa‐
tion:
R Neverfit a rear wa rd-facing child restra int
sy stem tothe front passenger seat
R Alw aysfit a rear wa rd-facing child restra int
sy stem toa suitable rear seat
- Suitability of seats for attaching belt-
secured child restra int sy stems
(/ page 65)
- Secure thech ild restra int sy stem with the
seat belt on there ar seat (/ page 66).
R Notes on rear wa rd-facing and forw ard-facing
ch ild restra int sy stems on the front
passenger seat (/ page 68) Note
s onrear wa rd-facing and forw ard-facing
ch ild restra int sy stems on the front
passenger seat &
WARNING Risk of inju ryor death when
using a rear wa rd-facing child restra int
sy stem while the front passenger airbag
is enabled
If yo u secure a child in a rear wa rd-facing
ch ild restra int sy stem on the front passenger
seat and thePA SSENGER AIR BAG OFF indi‐
cator lamp is off, the front passenger airbag
can deploy in theev ent of an accident.
The child could be stru ck bythe airbag.
Alw ays ensure that the front passenger air‐
bag is disabled. The PASSENGER AIR BAG
OFF indicator lamp must be lit.
NEVER use a rear wa rd-facing child restra int
sy stem on a seat with an ENABLED FRONT
AIRB AG. This can result in the DEAT H of or
SERIOUS INJU RYtotheCH ILD. Obser
vethe specific instructions forth ere ar‐
wa rd-facing and forw ard-facing child restra int
sy stems (/ page 69). Wa
rning notice on the front passenger sun visor
Alw ays obser vethest atus of the front passenger
airbag on thePA SSENGER AIR BAG OFF indica‐
to r lamp:
R If it is absolutely necessary tofit a child
re stra int sy stem tothe front passenger seat,
alw ays obser vethe information on automatic
front passenger airbag shutoff (/ page47).
R When using a rear wa rd-f acing child restra int
sy stem on the front passenger seat, the front 68
Occupant saf ety
Page 72 of 549
passenger airbag must alw
ays be disabled.
This is only the case if thePA SSENGER AIR
BA G OFF indicator lamp is lit continuously
(/ page 49).
R Ifth ePA SSENGER AIR BAG OFF indicator
lamp is off, the front passenger airbag is ena‐
bled. The front passenger airbag may deploy
during an accident.
Securing thech ild restra int sy stem with the
seat belt on the front passenger seat
When fitting a belt-secu redch ild restra int sys‐
te m on the front passenger seat, alw ays obser ve
th efo llowing:
O Obser
vethe no tes on rear wa rd-facing and
fo rw ard-facing child restra int sy stems on
th e front passenger seat (/ page 68).
O Obser
vethech ild restra int sy stem manufac‐
turer's ins tallation and operating instruc‐
tions.
O Fo
r a child restra int sy stem in the "Univer‐
sal" or "Semi-Universal" categor y,make
sure that the sy stem has been appr ovedfor
th eve hicle seat. Obser
vethe no tes under "Suitability of
seats for attaching belt-secu redch ild
re stra int sy stems" (/ page 65).
O When using a
forw ard-facing child restra int
sy stem in weight category I: remo vethe
head restra int from there spective seat, if
possible.
Af terth ech ild restra int sy stem has been
re mo ved, replace the head restra ints again
immediately and adjust them cor rectl y.
O The backrest of
thefo rw ard-facing child
re stra int sy stem must, as far as possible, be
re sting on the seat backrest of the front
passenger seat.
O If
th e head restra int of thech ild seat cannot
be fully extended when it is ins talled in the
ve hicle, this will result in restrictions on the
maximum size setting forch ild restra int sys‐
te ms in weight category II or III.
Contact with thero of when the head
re stra int is fully extended and lo cked in
place will not result in any restrictions on
use. O
The
child restra int sy stem must not be put
under stra in between thero of and the seat
cushion and/or be fitted facing the wrong
direction.
O The
child restra int sy stem must not be put
under stra in by the head restra int. Adjust
th e head restra ints as appropriate.
O Ne
ver place objects (e.g. cushions) under or
behind thech ild restra int sy stem. #
Set the front passenger seat as far back as
possible and mo vethe seat into the highest
position if possible. #
Fully retract the seat cushion length adjust‐
ment. #
Adjust the seat cushion inclination so that
th e front edge of the seat cushion is in the
highest position and there ar edge of the
seat cushion is in the lo west position. #
Set the seat backrest tothe most vertical
position possible. Occupant saf
ety69
Page 97 of 549
Note
s onthe cor rect driver's seat position &
WARNING Risk of inju ryifve hicle set‐
tings are adjus ted while theve hicle is in
motion
Yo u could lose cont rol of theve hicle in par‐
ticular in thefo llowing situations:
R Ifyo u adjust the driver's seat, the head
re stra ints, thesteering wheel or the mir‐
ro r while theve hicle is in motion.
R Ifyo ufast enyour seat belt while theve hi‐
cle is in motion. #
Before starting the engine: adjust the
driver's seat, head restra ints, steering
wheel and mir ror in particular and fas‐
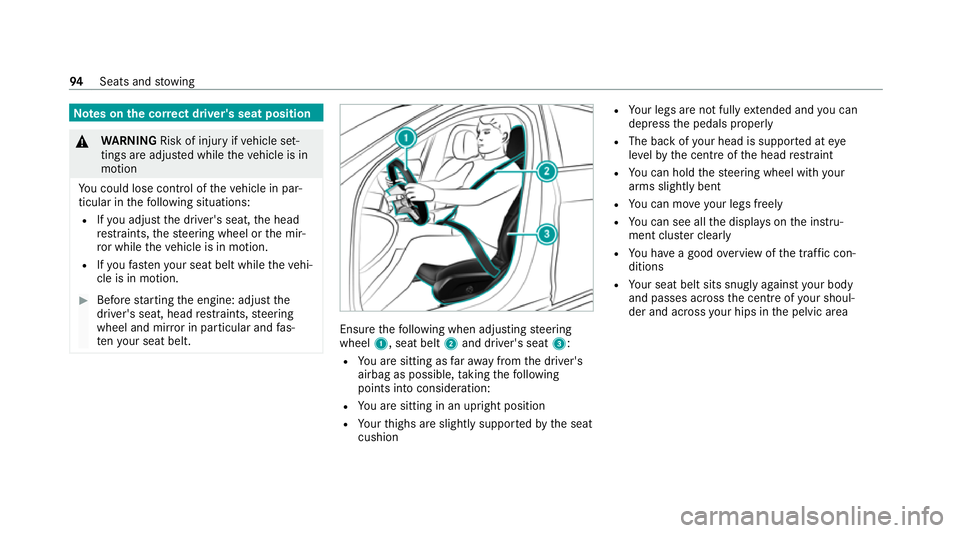
te nyo ur seat belt. Ensure
thefo llowing when adjusting steering
wheel 1, seat belt 2and driver's seat 3:
R You are sitting as faraw ay from the driver's
airbag as possible, taking thefo llowing
points into consideration:
R You are sitting in an upright position
R Your thighs are slight lysuppor tedby the seat
cushion R
Your legs are not fully extended and you can
depress the pedals properly
R The back of your head is suppo rted at eye
le ve lby the cent reofthe head restra int
R You can hold thesteering wheel with your
arms slightly bent
R You can mo veyour legs freely
R You can see all the displa yson the instru‐
ment clus ter clea rly
R You ha vea good overview of the tra ffic con‐
ditions
R Your seat belt sits snug lyagainst your body
and passes across the cent reofyour shoul‐
der and across your hips in the pelvic area 94
Seats and stowing
Page 98 of 549
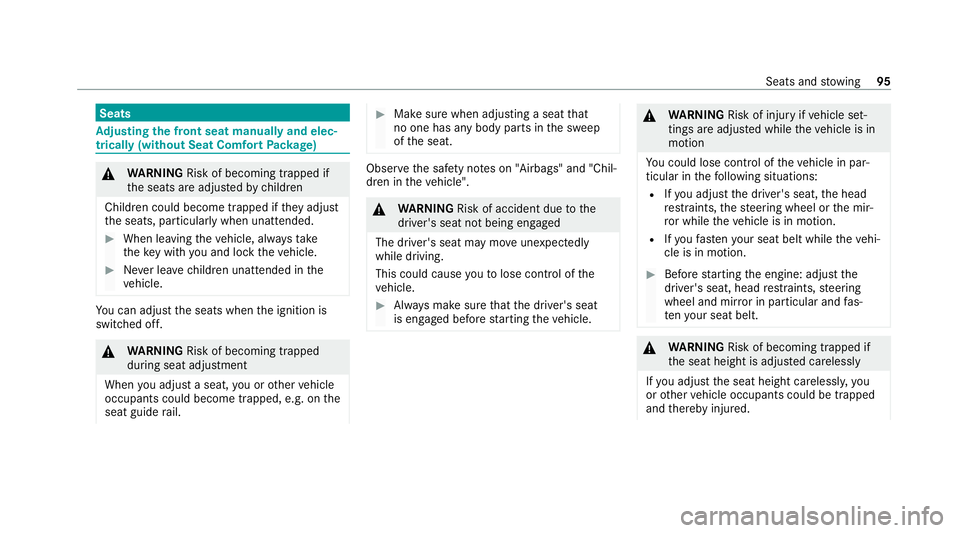
Seats
Ad
justing the front seat manually and elec‐
trically (without Seat Comfort Package) &
WARNING Risk of becoming trapped if
th e seats are adjus tedby children
Children could become trapped if they adjust
th e seats, particularly when unattended. #
When leaving theve hicle, alw aysta ke
th eke y with you and lock theve hicle. #
Never lea vechildren unat tended in the
ve hicle. Yo
u can adjust the seats when the ignition is
switched off. &
WARNING Risk of becoming trapped
du ring seat adjustment
When you adjust a seat, you or other vehicle
occupants could become trapped, e.g. on the
seat guide rail. #
Make sure when adjusting a seat that
no one has any body parts in the sweep
of the seat. Obser
vethe saf ety no tes on "Airbags" and "Chil‐
dren in theve hicle". &
WARNING Risk of accident due tothe
driver's seat not being engaged
The driver's seat may mo veunexpectedly
while driving.
This could cause youto lose control of the
ve hicle. #
Alw ays make sure that the driver's seat
is engaged before starting theve hicle. &
WARNING Risk of inju ryifve hicle set‐
tings are adjus ted while theve hicle is in
motion
Yo u could lose cont rol of theve hicle in par‐
ticular in thefo llowing situations:
R Ifyo u adjust the driver's seat, the head
re stra ints, thesteering wheel or the mir‐
ro r while theve hicle is in motion.
R Ifyo ufast enyour seat belt while theve hi‐
cle is in motion. #
Before starting the engine: adjust the
driver's seat, head restra ints, steering
wheel and mir ror in particular and fas‐
te nyo ur seat belt. &
WARNING Risk of becoming trapped if
th e seat height is adjus ted carelessly
If yo u adjust the seat height carelessly, you
or other vehicle occupants could be trapped
and thereby injured. Seats and
stowing 95
Page 99 of 549
Children in particular could acciden
tally
press the electrical seat adjustment buttons
and become trapped. #
While moving the seats, make sure that
hands or other body parts do not get
under the le ver assembly of the seat
adjustment sy stem. &
WARNING Risk of inju rydue tohead
re stra ints not being fitted or being adjus‐
te d incor rectly
If head restra ints ha venot been ins talled or
ha ve not been adjus ted cor rectly, there is an
increased risk of injury in the head and neck
area, e.g. in theev ent of an accident or when
braking. #
Alw ays drive with the head restra ints
fi tted. #
Before driving off, ma kesure forev ery
ve hicle occupant that the cent reofthe
head restra int supports the back of the
head at about eye le vel. Do not inter
change the head restra ints of the
front and rear seats. Otherwise, you will not be
able toadjust the height and angle of the head
re stra ints cor rectl y.
Ad just the head restra int fore -and-aft position so
th at it is as close as possible tothe back of your
head. &
WARNING Risk of inju ryor death due to
incor rect seat position
The seat belt will not of ferth e intended le vel
of pr otection if you ha venot mo vedth e seat
backrest toan almost vertical position.
In particular, you may slip under the seatbelt
and injure yourself. #
Adjust the seat proper lybefore begin‐
ning your journe y. #
Alw ays ensure that the seat backrest is
in an almost vertical position and that
th e shoulder section of your seat belt is
ro uted across the cent reofyour shoul‐
der. &
WARNING Risk of inju rydue toexc es‐
sive stra in on the grab handle
If yo u apply your full body weight tothe grab
handle or pull it abruptl y,the grab handle
may be damaged or become loose from its
anchorage. #
Use the grab handles only tostabilise
th e seating position or toassist in get‐
ting in and out of the seat. &
WARNING Risk of inju ryor death due to
objects under the co-driver seat
Objects trapped under the co-driver seat can
inter fere with the function of the automatic
co-driver airbag shutoff or damage the sys‐
te m. #
Do not store any objects under the co-
driver seat. #
When the co-driver seat is occupied,
make sure that no objects are trapped
under the co-driver seat. 96
Seats and stowing
Page 112 of 549
&
WARNING Risk of inju ryfrom unsecu red
items in theve hicle
If objects, luggage or loads are not secured
or not secured suf ficientl y,they could slip,
tip ove r or be throw n around and thereby hit
ve hicle occupants.
There is a risk of injur y,particularly in the
ev ent of sudden braking or a sudden change
in direction. #
Alw aysstow objects in such a wayth at
th ey cannot be thro wn around. #
Before the journe y,secure objects, lug‐
ga ge or loads against slipping or tipping
ove r. &
WARNING Risk of inju rydue toobjects
being stowed incor rectly
If objects in theve hicle interior are stowed
incor rectly, they can slide or be thrown
around and hit vehicle occupants. In addi‐
tion, cup holders, open stowage spaces and
mobile phone brac kets cann otalw aysre tain
all objects they contain. The
reis a risk of injur y,particularly in the
ev ent of sudden braking or a sudden change
in direction. #
Alw aysstow objects in such a wayth at
th ey cannot be thro wn around in such
situations. #
Alw ays make sure that objects do not
pr otru de from stowage spaces, luggage
nets or stowage nets. #
Close the loc kable stow age spaces
before starting a journe y. #
Alw aysstow and secure heavy, hard,
poin ted, sharp-edged, fragile or bulky
objects in the boot. Ve
hicles with automatic front passen ger air‐
bag shu toff:objects trapped under the front
passenger seat may inter fere with the function
of the automatic front passenger airbag shutoff
or damage the sy stem. Please obser vethe no tes
on the function of the automatic front passenger
airbag shutoff (/ page47). &
WARNING ‑ Risk of accident or inju ry
when using the cup holder while the
ve hicle is in motion
The cup holder cannot hold a container
secure while theve hicle is in motion.
If yo u use a cup holder while theve hicle is in
motion, the conta iner may be flung around
and liquids could be spilled. The vehicle
occupants may come into contact with the
liquid and if it is hot, they could be scalded.
Yo u could be distracted from traf fic condi‐
tions and you may lose cont rol of theve hicle. #
Only use the cup holder when theve hi‐
cle is stationar y. #
Only use the cup holder for containers
of theright size. #
Alw ays close the conta iner, particularly
if th e liquid is hot. Seats and
stowing 109
Page 127 of 549
The hazard
warning lights will switch on auto‐
matically if:
R the airbag has been deplo yed.
R theve hicle is heavily braked from a speed of
more than 70 km/h toast andstill.
When you pull away again, the hazard warning
light sy stem will switch off automatically at
appr oximately 10km/h. You can also swit choff
th e hazard warning light sy stem using but‐
to n1. Ad
aptive functions, MULTIBEAM LED Intelligent Light Sy
stem function
The MULTIBEAM LED headlamps adapt tothe
driving and weather situation and pr ovide exten‐
ded functions for impr oved illumination of the
ro ad.
The sy stem comprises thefo llowing functions:
R Active headla mps (/ page124)
R Cor nering light (/ page 124)
R Motorw ay mode (/ page125)
R Enhanced fog light function (/ page125) R
Bad weather light (/ page126)
R City lighting (/ page126)
Sy stem limits
R The sy stem is active only when it is dar k.
Ac tive headlamps function R
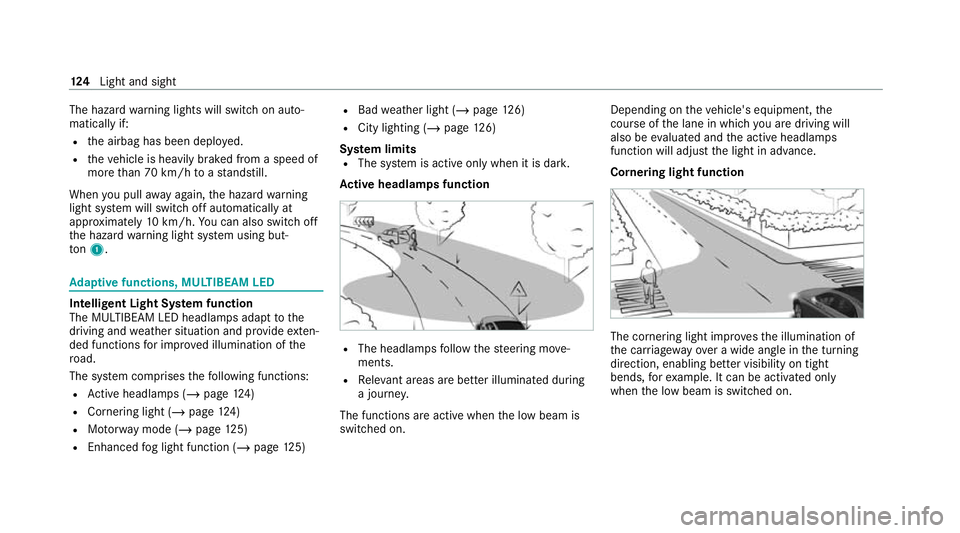
The headlamps follow thesteering mo ve‐
ments.
R Releva nt areas are better illumina ted during
a journe y.
The functions are active when the low beam is
switched on. Depending on
theve hicle's equipment, the
cou rse of the lane in which you are driving will
also be evaluated and the active headlamps
function will adjust the light in advance.
Cornering light function The cornering light impr
ovesth e illumination of
th e car riag ewa yove r a wide angle in the turning
direction, enabling better visibility on tight
bends, forex ample. It can be activated on ly
when the low beam is switched on. 124
Light and sight
Page 329 of 549
The Mercedes-Benz emer
gency call sy stem is
av ailable for at least tenye ars starting from the
manufacturing date.
The ignition must be switched on before an auto‐
matic emergency call can be made.
% The Mercedes-Benz emer gency call sy stem
is activated at thefa ctor y.
Overview of the Mercedes-Benz emer gency
call sy stem
The Mercedes-Benz emer gency call sy stem can
help todecisively reduce the time between an
accident and the ar riva l of emer gency services
at the site of the accident. It helps locate an
accident site in places that are dif ficult to
access.
The emer gency call can be made au tomatical ly
( / page 326) or manually (/ page 327). Only
make emer gency calls if you or others are in
need of rescue. Do not make an emergency call
in theeve nt of a breakdown or a similar situa‐
tion.
Displ ays in the media display
SOS READY : eCallavailable SOS NOT READY:
the ignition is not on or eCall
is not available.
During an active emer gency call, Gappears
in the displa y.
Yo u can find more information on there gional
av ailability of eCall at: https://www.mercedes-
benz-mobile.com/ext ra/ecall/
% Ifth ere is a malfunction in the emer gency
call sy stem (e.g. a fault with the speaker,
microphone, airbag, SOS button), a cor re‐
sponding message appears inthe multifunc‐
tion display of the instrument clus ter.
Tr iggering an automatic emer gency call
Re quirements:
R The ignition is switched on.
R The star ter battery is suf ficiently charge d.
If re stra int sy stems such as airbags or seat belt
te nsioners ha vebeen activated af ter an acci‐
dent, the Mercedes-Benz emer gency call sy stem
may automatically initiate an emer gency call. The emergency call has been made:
R
Avo ice connection is made tothe Mercedes-
Benz emer gency call centre.
R A messa gewith accident data is transmitted
to the Mercedes-Benz emer gency call centre.
The Mercedes-Benz emergency call centre
can transmit theve hicle position data toone
of the public emer gency services call cen‐
tres.
R In cer tain situations data is also transmitted
in thevo ice channel tothe Mercedes-Benz
emer gency call centre.
This allo wsmeasu resfo rre scue, reco very or
to wing toa Mercedes-Benz Service Cent reto
be initiated quickl y.
The SOS button in theov erhead control panel
fl ashes until the emer gency call is finished.
It is not possible toimmediately end an auto‐
matic emer gency call.
If th e Mercedes-Benz emer gency call sy stem
cann otconnect tothe Mercedes-Benz emer‐
ge ncy call centre, the emer gency call is au tomat‐ 326
Multimedia sy stem
Page 377 of 549
Re
versing camera and 360° Camera
R Open the camera co ver with the multimedia
sy stem (/ page216).
R Use clean water and a soft clo thtoclean the
came ralens.
R Do not use a high-pressure cleaner.
Ta ilpipes
R Clean with a cleaning agent recommended
fo r Mercedes-Benz, especially in the winter
and af terwa shing theve hicle.
R Do not use acidic cleaning agents.
Tr ailer hitch
R Obse rveth e no tes on care in the trailer hitch
manufacturer's operating instructions.
R Do not clean the ball neck with a high-pres‐
sure cleaner or solvent.
R Remo vetraces of rust on the ball, forex am‐
ple, with a wire brush.
R Remo vedirt with a lint-free clo th.
R After cleaning, lightly oil or grease the ball
head. %
Before using trailers with anti- torsional cou‐
pling, obser vethe manufacturer's operating
instructions. Note
s on care of the interior &
WARNING Risk of inju ryfrom pla stic
parts breaking off af terth e use of sol‐
ve nt-based care products
Ca reand cleaning products con taining sol‐
ve nts can cause su rfaces in the cockpit to
become porous. When the airbags are
deplo yed, plastic parts may break away. #
Do not use any care or cleaning prod‐
ucts containing sol vents toclean the
cockpit. &
WARNING Risk of inju ryor death from
bleached seat belts
Bleaching or dyeing seat belts can se verely
we aken them.
This can, forex ample, cause seat belts to
te ar or fail in an accident. #
Never blea chor dye seat belts. To
avo id damage totheve hicle, obser vethefo l‐
lowing no tes on cleaning and care:
Seat belts R Clean with luk ewarmand soapy water.
R Do not use chemical cleaning agents.
R Do not dry byheating them toove r 80°C or
ex posing them todirect sunlight.
Display
R Switch off the display and let it cool down.
R Clean the sur face carefully wi tha mic rofibre
clo thand a suitable display care product
(TF T-LC D).
R Do not use any other agents.
Plastic trim R Clean with a damp microfibre clo th.
R For heavy soiling: use a cleaner recommen‐
ded for Mercedes-Benz.
R Do not attach sticke rs,fi lms or similar mate‐
ri als. 374
Maintenance and care