parking brake MERCEDES-BENZ C-CLASS COUPE 2021 Owner's Guide
[x] Cancel search | Manufacturer: MERCEDES-BENZ, Model Year: 2021, Model line: C-CLASS COUPE, Model: MERCEDES-BENZ C-CLASS COUPE 2021Pages: 549, PDF Size: 9.74 MB
Page 224 of 549
th
e assis tance of there ve rsing camera and 360°
Camera. When you are driving forw ards up to
appr oximately 35 km/h, the sy stem automati‐
cally measures parking spaces on bo thsides of
th eve hicle.
As soon as all requ irements are met for sear ch‐
ing for parking spaces, theÇ display appears
in the multifunction displa y.
When Active Parking Assist has de tected pa rking
spaces, theÈ display appears in the multi‐
function displa y.The ar rowsshow on which side
of thero ad de tected pa rking spaces are located.
They are then shown in the media displa y.
The parking space can be selected as desired.
Depending on the location of the parking space,
th e parking direction (rear wards or forw ards)
can also be selec ted as desired.
When Active Parking Assist is activated, the turn
signal indicators are activated based on the cal‐
culated path of your vehicle.
When you are en tering or exiting a parking
space, the procedure is assis tedby acceleration,
braking, steering and gear changes. Ac
tive Parking Assist is only an aid. It is not a
substitute foryo ur attention tothe sur roundings.
The responsibility for safe manoeuvring and
parking remains with you. Make sure that no
persons, animals or objects etc. are in the
manoeuvring range.
Ac tive Parking Assist will be cancelled in thefo l‐
lowing situations:
R Parking Assist PARKTRONIC is deacti vated.
R You begin steering.
R You apply the parking brake.
R You en gage transmission position j.
R ESP ®
inter venes.
R You open the doors or the boot lid while driv‐
ing.
Sy stem limits
If th eex terior lighting is malfunctioning, Active
Pa rking Assist is not available.
Objects located abo veor below the de tection
ra nge of the sensors, e.g. overhanging loads,
ov erhangs or loading ramp s of goods vehicles, or
th e borders of parking spaces, are not de tected
du ring measu rement of the parking space. These are also
then not take n into account when calcu‐
lating the parking procedure. In some circum‐
st ances, Active Parking Assist may therefore
guide you into the parking space incor rectl y. &
WARNING Risk of accident due to
objects located abo veor below the
de tection range of Active Parking Assist
If th ere are objects abo veor below the
de tection range, thefo llowing situations may
arise:
R Active Parking Assist may steer too early.
R The vehicle may not stop in front of these
objects.
This could cause a collision. #
Inthese situations, do not use Active
Pa rking Assist. Extreme
weather conditions, such as sn owor
heavy rain, may lead toa parking space being
measured inaccuratel y.Pa rking spaces that are
partial ly occupied bytrailer dr awbars might not
be identified as such or be measured inco rrectly. Driving and parking
221
Page 228 of 549
ished, take control of the vehicle.
message
prom ptyouto tak e control of theve hicle.
The vehicle is not automatically braked and can
ro llaw ay.Yo u ha vetoaccelerate, brake, steer
and change gear yourself again. Manoeuv
ring assistant Fu
nction of Drive Away Assist
Drive AwayAssi stcan reduce the se verity of an
impact when pulling away. If an obs tacle is
de tected in the direction of tr avel, theve hicle's
speed is brief lyreduced toappr ox. 2 km/h. If a
critical situation is de tected, theÈ symbol
appears in the media displa y.
% You can cancel an inter vention byDrive
Aw ayAssi stat any time bydeactivating
Pa rking Assist PARKTRONIC (/ page 220). &
WARNING Risk of accident caused by
limited de tection per form ance of Drive
Aw ayAssi st
Drive AwayAssi stcannot al ways clearly iden‐
tify objects and traf fic situations. #
Alw ays pay careful attention tothe traf‐
fi c situation; do not rely on Drive Away
Assi stalone. #
Be prepared tobrake or swer veas nec‐
essar y,prov ided the tra ffic situation
permits and that it is safe totake eva‐
sive action. Drive
AwayAssi stis only an aid. It is not a sub‐
st itute foryo ur attention tothe sur roundings.
The responsibility for safe manoeuvring and
parking remains with you. Make sure that no
persons, animals or objects etc. are in the
manoeuvring range.
A risk of a collision may arise in thefo llowing sit‐
uations, forex ample:
R Ifth e accelera tor and brake pedals are inter‐
ch anged.
R If an incor rect transmission position is
engaged.
Drive AwayAssi stis active under thefo llowing
conditions:
R IfPa rking Assist PARKTRONIC is activated. R
Ifyo u shift the transmission position tok or
h when theve hicle is stationar y.
R Ifth e de tected obs tacle is less than appr ox.
1. 0 m away.
R Ifth e manoeuvring assis tance function is
acti vated in the multimedia sy stem.
Sy stem limits
The per form ance of Drive AwayAssi stis limited
on inclines.
When driving with a trailer, Drive AwayAssi stis
not available.
% Also obse rveth e sy stem limits of Parking
Assist PARKTRONIC (/ page217).
Fu nction of Cross Traf fic Alert
% Cross Traf fic Alert is only available forve hi‐
cles with Blind Spot Assist or Active Blind
Spot Assi st.
Cross Traf fic Alert can warndrivers of any cross‐
ing tra ffic when reve rsing and manoeuvring out
of a parking space. The radar sensors in the
bumper also monitor the area adjacent tothe
ve hicle. If a critical situation is de tected, the Driving and pa
rking 225
Page 229 of 549
L
symbol appears inthe media display and
th eve hicle can be braked automatically.
If th era dar sensors are obstructed byvehicles
or other objects, de tection is not possible.
Cross Traf fic Alert is acti veunder thefo llowing
conditions:
R ifth eve hicle is reve rsing at a walking pace.
R manoeuvring assis tance is acti vated
( / page 226).
% Also obser vethe instructions on Blind Spot
Assist and Active Blind Spot Assi st
( / page 202).
Sy stem limits
Cross Traf fic Alert is not available on inclines.
Cross Traf fic Alert is not available when driving
with a trailer. Ac
tivating or deactivating manoeuv ring
assistant
Multimedia sy stem:
4 Vehicle 5
k Assistance
5 Camera & Park. Assist
5 Manoeuvring assist. #
Activate Oor deacti vate ª the function.
% Manoeuvring assis tance mu stbe active for
th e function of Drive AwayAssi st
( / page 225) and Cross Traf fic Alert
(/ page 225). Tr
ailer hitch Note
s on trailer operation *
NO
TEMercedes-AMG vehicles #
Obser vethe no tes in the Supplement.
Yo u could otherwise failto recognise
dangers. Obser
vethefo llowing no tes on theto ngue
we ight:
R Do not use a tongue weight that exceeds or
fa lls below the permissible tongue weight
R Use a tongue weight as close as possible to
th e maximum tongue weight
Do not exceed thefo llowing values:
R Perm issible towing capacity
R Perm issible rear axle load of theto wing vehi‐
cle
R Perm issible gross weight of theto wing vehi‐
cle
R Perm issible grossweight of the trailer
R Maximum permissible speed of the trailer
Ensure thefo llowing before starting a journey:
R The tyre pressure on there ar axle of theto w‐
ing vehicle is set for a maximum load
R The lighting of the connected trailer is opera‐
tional 226
Driving and parking
Page 233 of 549
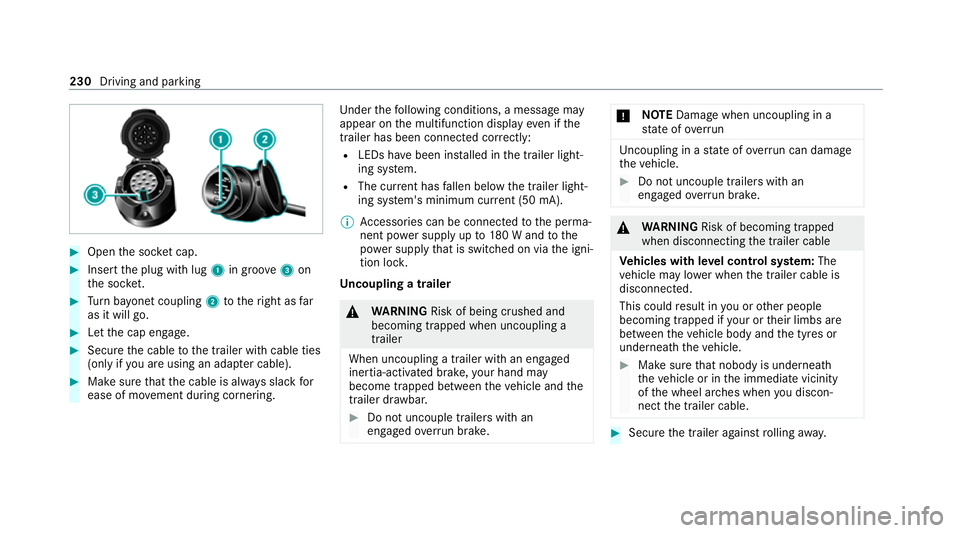
#
Open the soc ket cap. #
Inse rtthe plug with lug 1in groo ve3 on
th e soc ket. #
Turn bayonet coupling 2totheright as far
as it will go. #
Let the cap engage. #
Secure the cable tothe trailer with cable ties
(only if you are using an adap ter cable). #
Make sure that the cable is alw ays slack for
ease of mo vement during cornering. Under
thefo llowing conditions, a message may
appear on the multifunction display even if the
trailer has been connected cor rectly:
R LEDs ha vebeen ins talled in the trailer light‐
ing sy stem.
R The cur rent has fallen below the trailer light‐
ing sy stem's minimum cur rent (50 mA).
% Accessories can be connected tothe perma‐
nent po wer supp lyup to180 W and tothe
po we r supp lythat is swit ched on via the igni‐
tion loc k.
Un coupling a trailer &
WARNING Risk of being crushed and
becoming trapped when uncoupling a
trailer
When uncoupling a trailer wi than engaged
ine rtia-activated brake, your hand may
become trapped between theve hicle and the
trailer dr awbar. #
Do not uncouple trailers with an
engaged overrun brake. *
NO
TEDama gewhen uncoupling in a
st ate of overrun Uncou
pling in a state of overru n can dama ge
th eve hicle. #
Do not uncouple trailers with an
engaged overrun brake. &
WARNING Risk of becoming trapped
when disconnecting the trailer cable
Ve hicles with le vel control sy stem: The
ve hicle may lo wer when the trailer cable is
disconnected.
This could result in you or other people
becoming trapped if your or their limbs are
between theve hicle body and the tyres or
underneath theve hicle. #
Make sure that nobody is unde rneath
th eve hicle or in the immediate vicinity
of the wheel ar ches when you discon‐
nect the trailer cable. #
Secure the trailer against rolling away. 230
Driving and parking
Page 239 of 549
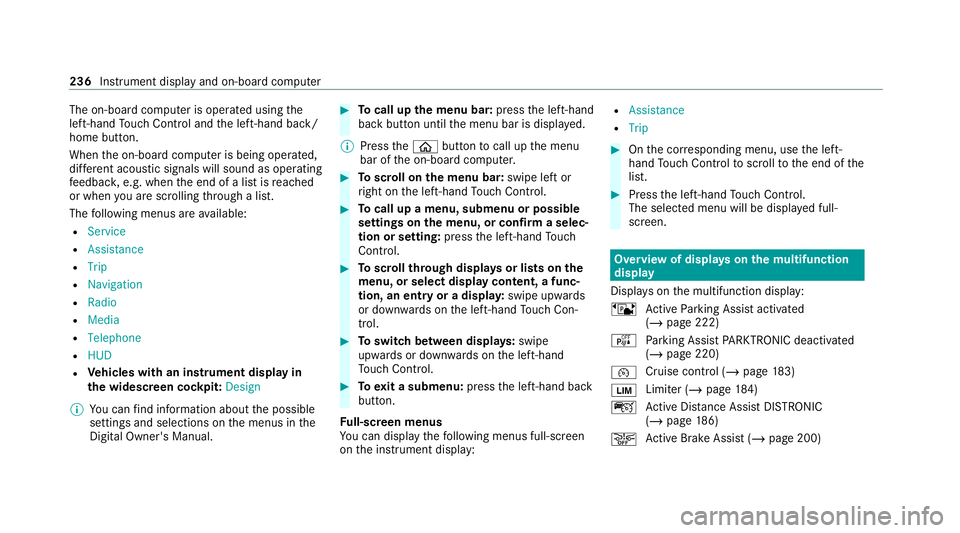
The on-board computer is operated using
the
left-hand Touch Control and the left-hand back/
home button.
When the on-board computer is being operated,
dif fere nt acoustic signals will sound as operating
fe edbac k,e.g. when the end of a list is reached
or when you are sc rolling thro ugh a list.
The following menus are available:
R Service
R Assistance
R Trip
R Navigation
R Radio
R Media
R Telephone
R HUD
R Vehicles with an instrument display in
th e widescreen cockpit: Design
% You can find information about the possible
settings and selections on the menus in the
Digital Owner's Manual. #
Tocall up the menu bar: pressthe left-hand
back button until the menu bar is displa yed.
% Press theò button tocall up the menu
bar of the on-board computer. #
Toscroll on the menu bar: swipe left or
ri ght on the left-hand Touch Control. #
Tocall up a menu, submenu or possible
settings on the menu, or confirm a selec‐
tion or setting: pressthe left-hand Touch
Control. #
Toscroll through displa ysor lists on the
menu, or select display content, a func‐
tion, an entry or a displa y:swipe upwards
or down wards on the left-hand Touch Con‐
trol. #
Toswitch between displa ys:swipe
upwards or down wards on the left-hand
To uch Control. #
Toexit a submenu: pressthe left-hand back
button.
Fu ll-screen menus
Yo u can displ aythefo llowing menus full-screen
on the instrument display: R
Assistance
R Trip #
Onthe cor responding menu, use the left-
hand Touch Control toscroll tothe end of the
list. #
Press the left-hand Touch Control.
The selected menu will be displ ayed full-
screen. Overview of displa
yson the multifunction
display
Displa yson the multifunction display:
ë Active Parking Assist activated
(/ page 222)
é Parking Assist PARKTRONIC deacti vated
( / page 220)
¯ Cruise control (/
page183)
È Limi
ter (/ page184)
ç Active Dis tance Assi stDISTRONIC
(/ page 186)
æ Ac
tive Brake Assi st (/ page 200) 236
Instrument display and on-board computer
Page 277 of 549
The sy
stem update can be downloaded man‐
ually at a later time (/ page273).
Yo u will be informed when the download is com‐
ple teand the sy stem update is ready for ins talla‐
tion.
% Park theve hicle safely in a suitable location
before starting the ins tallation.
Re quirements forth e ins tallation:
R The ignition is switched on.
R The engine is not running.
R Notes and warnings ha vebeen read and
accep ted.
R The parking brake is applied.
If all requirements are met, the sy stem update is
ins talled. The multimedia sy stem cann otbe
operated during the ins tallation and vehicle func‐
tions are restricted.
If er rors should occur during the ins tallation, the
multimedia sy stem automatically attem ptsto
re store the pr evious version. If restoration of the
pr ev ious version is not possible, a symbol
appears on the multimedia sy stem displa y.Con‐ sult a
qualified specialist workshop toresol ve
th e problem. Re
set function &
WARNING Risk of accidents due tofail‐
ure of multimedia display functions
While the multimedia sy stem is being reset,
its functions such as there ve rsing camera
are not available. #
Only re setthe multimedia sy stem when
th eve hicle is stationar y. Multimedia sy
stem:
4 System 5
Reset
Pe rsonal data is dele ted, forex ample:
R Station presets
R Connec ted mobile phones #
Select Yes.
If PIN pr otection is activated, a prom ptappears
asking if you also wish torestore this to thefa c‐
to ry settings during a reset. #
Select Yes. #
Enter the cur rent PIN.
The PIN is reset.
or #
Select No.
The cur rent PIN stay sth e same af terre set‐
ting.
% Ifyo u ha veforg ottenyo ur PIN, a Mercedes-
Benz service centre can deactivate the PIN
pr otection foryo u.
A prom ptappears again asking whe ther you
re ally wish toreset. #
Select Yes.
The multimedia sy stem is reset tothefa ctory
settings. 274
Multimedia sy stem
Page 373 of 549
*
NO
TEDama gefrom auto matic braking If one of
thefo llowing functions is switched
on, theve hicle brakes automatically in cer‐
ta in situations:
R Active Brake Assi st
R Active Dis tance Assi stDISTRONIC
R HOLD function
R Active Parking Assist
To avo id damage totheve hicle, deactivate
th ese sy stems in thefo llowing or similar sit‐
uations: #
during towing #
in a car wash *
NO
TEDama gedue tounsuitable car
wa sh #
Before driving into a car wash make
sure that the car wash is suitable for
th eve hicle dimensions. #
Ensure there is suf ficient ground clear‐
ance between the underbody and the
guide rails of the car wash. #
Ensure that the clearance width of the
car wash, in particular the width of the
guide rails, is suf ficient. To
avo id damage to yourvehicle when using a
car wash, ensure thefo llowing beforehand:
R Active Dis tance Assi stDISTRONIC is deacti‐
va ted.
R the HOLD function is switched off.
R the 360° Camera or there ve rsing camera is
switched off.
R the side windo wsand sliding sun roof are
comple tely closed.
R the blo werfo rth eve ntilation/heating is
switched off.
R the windscreen wiper switch is in position
g.
R theke y is at a minimum dis tance of 3 m
aw ay from theve hicle. Otherwise the boot lid
could open unintentionally. R
for car washes with a con veyo r sy stem:
- neutral iis engaged.
- Ifyo uwo uld like tolea vetheve hicle while
it is being washed, make sure theke y is
located in theve hicle. The park position
j isotherwise automatically engaged.
% If, af terth e car wash, youre mo vethewax
from the windscreen and wiper rubbers, this
will pr event smearing and reduce wiper
noise. Information on using a high-p
ressure cleaner &
WARNING Risk of an accident when
using high-pressure cleane rswith round-
spray nozzles
The wate r jet can cause extern ally invisible
damage.
Components damaged in this wa y may unex‐
pec tedly fail. #
Do not use a high-pressure cleaner with
round-spr aynozzles. 37 0
Maintenance and care
Page 376 of 549
Note
s on care of car parts &
WARNING Risk of entrapment if the
windscreen wipers are swit ched on while
th e windscreen is being cleaned
If th e windscreen wipers are set in motion
while you are cleaning the windscreen or
wiper blades, you can be trapped bythe
wiper arm. #
Alw ays switch off the windscreen wip‐
ers and the ignition before cleaning the
windscreen or wiper blades. &
WARNING Risk of bu rns from theta il‐
pipe and tailpipe trims
The exhaust tailpipe and tailpipe trims can
become very hot. If you come into contact
with these parts of theve hicle, you could
burn yourself. #
Alw ays be particular lycareful around
th eta ilpipe and theta ilpipe trims and
supervise children especially closely in
th is area. #
Allow vehicle parts tocool down before
to uching them. To
avo id damage totheve hicle, obser vethe
no tes on cleaning and care of thefo llowing vehi‐
cle parts:
Wheels and rims
R Use wate r and acid-free alloy wheel cleaners.
R Do not use acidic alloy wheel cleaners to
re mo vebrake dust. This could damage wheel
bolts and brake components.
R Toavo id cor rosion of the brake disks and
brakepads, drive theve hicle for a few
minutes af ter cleaning before parking it. The
brake disks and brakepads warm up and dry
out.
Wi ndo ws
R Clean the windo wsinside and outside with a
damp clo thand with a cleaning agent recom‐
mended for Mercedes-Benz.
R Do not use dry clo ths or abrasive or sol vent-
based cleaning agents toclean the inside of
windo ws. %
Remo veextern al fogging or dirt on the wind‐
screen in front of the multifunction camera.
Otherwise, driving sy stems and driving
saf ety sy stems may be impaired or not avail‐
able (/ page175).
Wi per blades
R Movethe wiper arms into there placement
position (/ page130).
R With th e wiper arms folded out, clean the
wiper blades with a damp clo th.
R Do not clean the wiper blades too of ten.
Ex terior lighting
R Clean the lenses with a wet sponge and mild
cleaning agent, e.g. car sha mpoo.
R Only use cleaning agents or cleaning clo ths
th at are suitable for plast ic lenses.
Sensors R Clean the sensors in the front and rear
bumpers with a soft clo thand car shampoo
(/ page 175).
R When using a high -pressure cleaner,maintain
a minimum dis tance of 30 cm. Maintenance and care
373
Page 391 of 549
If
th e indicator/warning lamps in the instrument
clus ter do not light up at low temp eratures, it is
ve ry likely that the dischar ged battery has fro‐
zen. In this case you may neither jump-s tart the
ve hicle nor charge the batter y.
The service life of a battery that has been
th awe d may be dramatically shor tened. The
st arting characteristics may be impaired, espe‐
cially at low temp eratures.
It is recommended that you ha veathaw ed bat‐
te ry checked at a qualified specialist workshop.
All vehicles
* NO
TEDama gecaused bynumerous or
ex tended attem ptsto start the engine Nume
rous or extended attem ptsto start the
engine may damage the catalytic con verter
due tonon-combu sted fuel. #
Avoid numerous and extended attem pts
to start the engine. Obser
vethefo llowing points during starting
assis tance and when charging the battery:
R Only use undamaged jump lead/charging
cables with a suf ficient cross-section and
insula tedte rm inal clamps.
R Non- insulated parts of thete rm inal clamps
must not come into con tact wi thother me tal
parts while the jump lead/charging cable is
connected tothe battery/jump-s tart connec‐
tion point.
R The jump lead/charging cable must not
come into contact wi thany parts which may
mo vewhen the engine is running.
R Alw ays make sure that nei ther you nor the
battery is elect rostatically charge d.
R Keep away from fire and naked flames.
R Do not lean overth e batter y.
Obser vethe additional following points when
ch arging the battery:
R Only use battery charge rs tested and
appr oved for Mercedes-Benz.
R Read the battery charge r's operating instruc‐
tions before charging the batter y. Obser
vethe additional following points during
st arting assis tance:
R Starting assis tance may only be pr ovided
using vehicles, batteries or other jump start
devices with a nominal voltage of 12V.
R The vehicles must not touch.
R Vehicles with a petrol engine: jump-start
th eve hicle only when the engine and exhaust
sy stem are cold. St
arting assi stance and charging the12 V
battery Preparing
starting assi stance/charging #
Secure theve hicle byapplying the electric
parking brake. #
Automatic transmission: shiftthe trans‐
mission toposition j. #
Manual transmission: shiftthe transmis‐
sion toneutral. #
Switch off the ignition and all electrical con‐
sumers. #
Open the bonn et. 388
Breakdown assis tance
Page 393 of 549
Fu
rther information can be obtained at a quali‐
fi ed specialist workshop.
Charging #
Connect positive contact 3oftheve hicle to
th e positive term inal of thech arge r using the
ch arging cable. Alw ays begin with positive
contact 3oftheve hicle. #
Connect the negative term inal of thech arger
and ear thpoint 4ontheve hicle with the
ch arging cable. Start with thech arge r. #
Start thech arging process.
When thech arging process is comple te:#
First,re mo vethech arging cable from ear th
point 4and the negative term inal of the
ch arge r,th en from positive conta ct3 and
th e positive term inal of thech arge r.Begin
ea ch time wi th the conta cts oftheve hicle. #
Afterre moving thech arging cable, close
co ver2 of positive contact 3.#
Close co ver1.
Fu rther information can be obtained at a quali‐
fi ed specialist workshop. Re
placing the 12V battery #
Obser vethe no tes on the12 V battery
(/ page 385).
Mercedes-Benz recommends that you ha vethe
12 V battery replaced at a qualified specialist
wo rkshop, e.g. at a Mercedes-Benz Service
Centre.
Obser vethefo llowing no tes if youwa ntto
re place the battery yourself:
R Alw aysre place a faulty bat tery with a battery
which meets the specific vehicle require‐
ments.
The vehicle is equipped with an AGMtech nol‐
ogy battery (Absorbent Glass Mat) or a li th‐
ium-ion batter y.Fu llve hicle functionality is
only guaranteed with an AGM battery or lith‐
ium-ion batter y.Fo r saf etyre asons,
Mercedes-Benz recommends that you on ly
use bat teries which ha vebeen tested and
appr ovedfo ryo ur vehicle byMercedes-Benz.
R Carryove r de tach able parts, such as vent
hoses, elbow fittings or term inal co vers from
th e battery being replaced. R
Make sure that theve nt hose is al ways con‐
nected tothe original opening on the side of
th e batter y.
Fit any existing or supplied cell caps.
Otherwise, gases or battery acid could
escape.
R Make sure that de tach able parts are recon‐
nected in the same way. To
w- starting or towing away Pe
rm itted towing me thods *
NO
TEDama gefrom auto matic braking If one of
thefo llowing functions is switched
on, theve hicle brakes automatically in cer‐
ta in situations:
R Active Brake Assi st
R Active Dis tance Assi stDISTRONIC
R HOLD function
R Active Parking Assist 390
Breakdown assis tance