turn signal bulb MERCEDES-BENZ C-CLASS ESTATE 2007 Owners Manual
[x] Cancel search | Manufacturer: MERCEDES-BENZ, Model Year: 2007, Model line: C-CLASS ESTATE, Model: MERCEDES-BENZ C-CLASS ESTATE 2007Pages: 377, PDF Size: 6.19 MB
Page 7 of 377
4 B
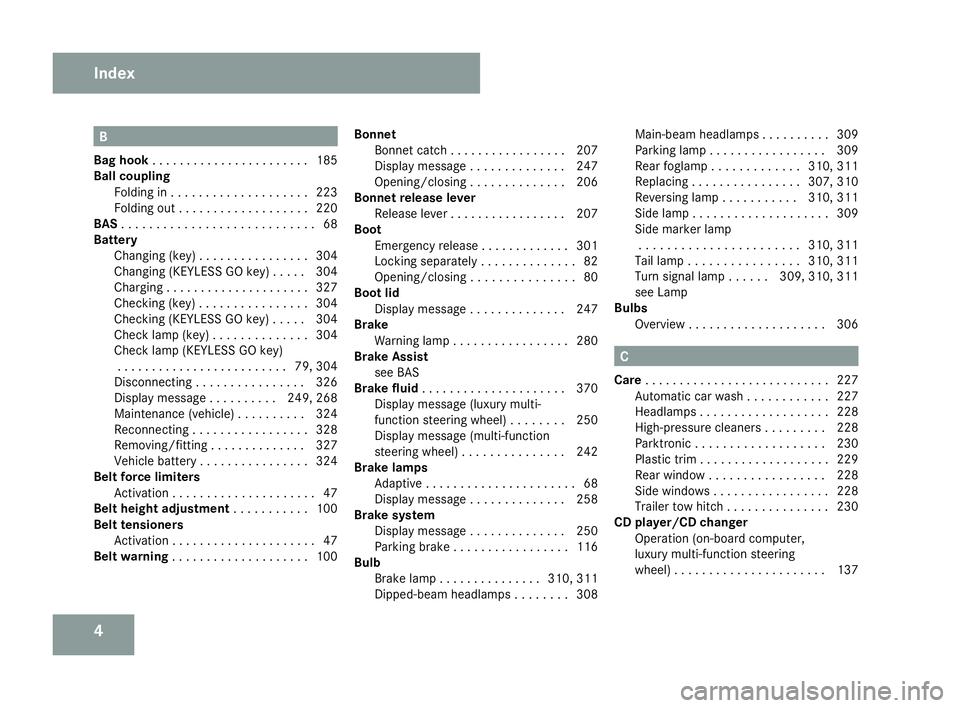
Bag hoo k. . . . . . . . . . . . . . . . . . . . . . .185
Ball couplin g
Folding in . . . . . . . . . . . . . . . . . . . .223
Folding out . . . . . . . . . . . . . . . . . . .220
BAS . . . . . . . . . . . . . . . . . . . . . . . . . . . .68
Battery Changing (key) . . . . . . . . . . . . . . . .304
Changing (KEYLESS GO key) . . . . .304
Charging . . . . . . . . . . . . . . . . . . . . .327
Checking (key ).. . . . . . . . . . . . . . .304
Checking (KEYLESS GO key) . . . . .304
Check lamp (key ).. . . . . . . . . . . . .304
Check lamp (KEYLESS GO key) . . . . . . . . . . . . . . . . . . . . . . . . .79, 304
Disconnecting . . . . . . . . . . . . . . . .326
Display message . . . . . . . . . .249, 268
Maintenance (vehicle ).. . . . . . . ..324
Reconnecting . . . . . . . . . . . . . . . . .328
Removing/fitting . . . . . . . . . . . . . .327
Vehicle battery . . . . . . . . . . . . . . . .324
Belt force limiters
Activatio n.. . . . . . . . . . . . . . . . . . . .47
Belt height adjustment . . . . . . . . . ..100
Belt tensioners Activatio n.. . . . . . . . . . . . . . . . . . . .47
Belt warnin g. . . . . . . . . . . . . . . . . . . .100 Bonnet
Bonnet catch . . . . . . . . . . . . . . . . .207
Display message . . . . . . . . . . . . . .247
Opening/closing . . . . . . . . . . . . . .206
Bonnet release lever
Release lever . . . . . . . . . . . . . . . . .207
Boot
Emergency release . . . . . . . . . . . . .301
Locking separatel y.. . . . . . . . . . . . .82
Opening/closing . . . . . . . . . . . . . . .80
Boot li d
Display message . . . . . . . . . . . . . .247
Brake
Warning lamp . . . . . . . . . . . . . . . . .280
Brake Assist
see BAS
Brake fluid . . . . . . . . . . . . . . . . . . . . .370
Display message (luxury multi-
function steering wheel) . . . . . . . .250
Display message (multi-function
steering wheel) . . . . . . . . . . . . . . .242
Brake lamps
Adaptive . . . . . . . . . . . . . . . . . . . . . .68
Display message . . . . . . . . . . . . . .258
Brake syste m
Display message . . . . . . . . . . . . . .250
Parking brake . . . . . . . . . . . . . . . . .116
Bulb
Brake lamp . . . . . . . . . . . . . . .310, 311
Dipped-beam headlamps . . . . . . . .308 Main-beam headlamps . . . . . . . . .
.309
Parking lamp . . . . . . . . . . . . . . . . .309
Rear foglamp . . . . . . . . . . . . .310, 311
Replacing . . . . . . . . . . . . . . . .307, 310
Reversing lamp . . . . . . . . . . .310, 311
Side lamp . . . . . . . . . . . . . . . . . . . .309
Side marker lamp . . . . . . . . . . . . . . . . . . . . . . .310, 311
Tail lamp . . . . . . . . . . . . . . . .310, 311
Turn signal lamp . . . . . .309, 310, 311
see Lamp
Bulbs
Overview . . . . . . . . . . . . . . . . . . . .306 C
Car e. . . . . . . . . . . . . . . . . . . . . . . . . . .227
Automatic car wash . . . . . . . . . . . .227
Headlamps . . . . . . . . . . . . . . . . . . .228
High-pressure cleaners . . . . . . . . .228
Parktroni c.. . . . . . . . . . . . . . . . . .230
Plastic trim . . . . . . . . . . . . . . . . . . .229
Rear window . . . . . . . . . . . . . . . . .228
Side windows . . . . . . . . . . . . . . . . .228
Trailer tow hitch . . . . . . . . . . . . . . .230
CD player/CD changer
Operation (on-board computer,
luxury multi-function steering
wheel) . . . . . . . . . . . . . . . . . . . . . .137 Index
204_AKB; 2; 3, en-GB
mkalafa,
2007-06-26T23:11:51+02:00 - Seite
4
Page 259 of 377
Display
messages 25
6 Display messages Possible cause/consequence Possible solution
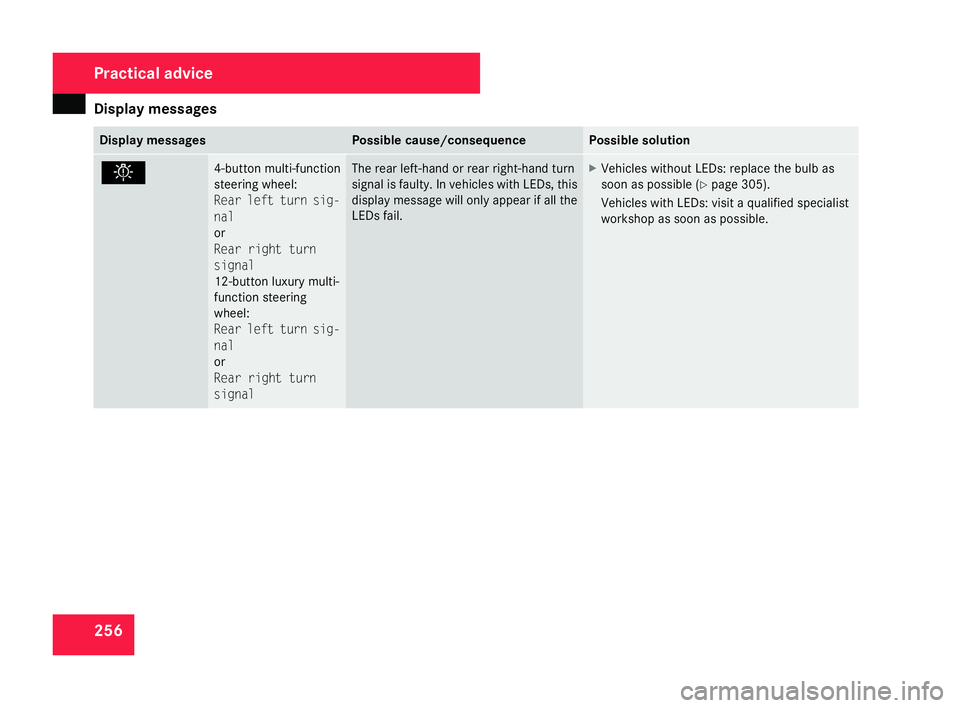
. 4-button multi-function
steering wheel:
Rear left turn sig-
nal
or
Rear right turn
signal
12-button luxury multi-
function steering
wheel:
Rear left turn sig-
nal
or
Rear right turn
signal The rear left-hand or rear right-hand turn
signal is faulty. In vehicles with LEDs, this
display message will only appear if all the
LEDs fail. X
Vehicles without LEDs: replace the bulb as
soon as possible (Y page 305).
Vehicles with LEDs: visit a qualified specialist
workshop as soon as possible. Practical advice
204_AKB; 2; 3, en-GB
mkalafa,
2007-06-26T23:11:51+02:00 - Seite 256
Page 261 of 377
Display
messages 25
8 Display messages Possible cause/consequence Possible solution
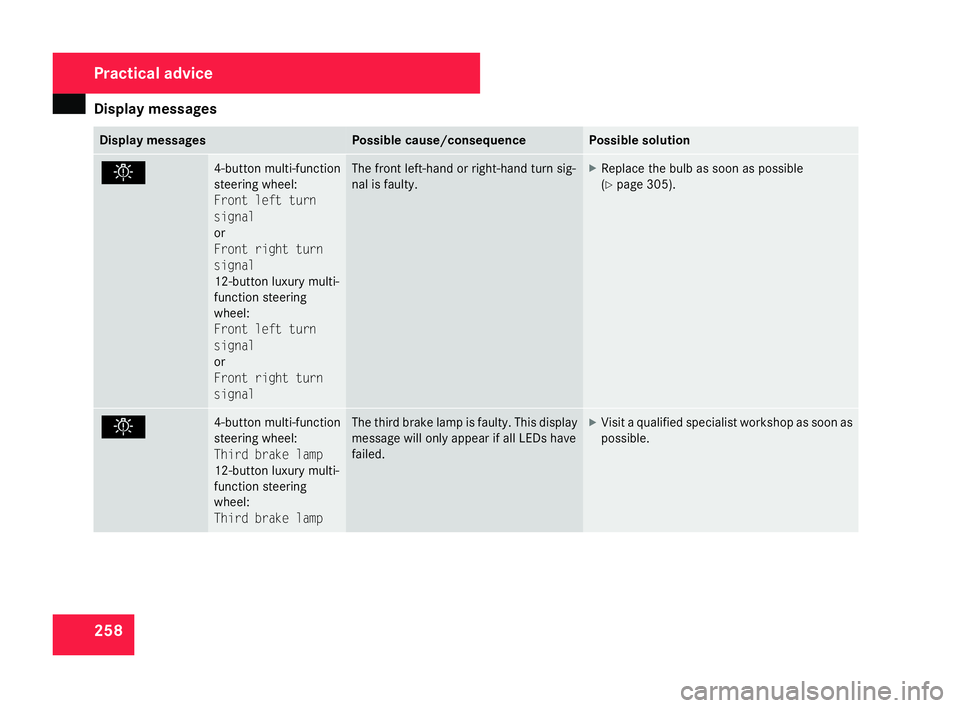
. 4-button multi-function
steering wheel:
Front left turn
signal
or
Front right turn
signal
12-button luxury multi-
function steering
wheel:
Front left turn
signal
or
Front right turn
signal The front left-hand or right-hand turn sig-
nal is faulty. X
Replace the bulb as soon as possibl e
( Y page 305). . 4-button multi-function
steering wheel:
Third brake lamp
12-button luxury multi-
function steering
wheel:
Third brake lamp The third brake lamp is faulty. This displa
y
message will only appear if all LEDs have
failed. X
Visit a qualified specialist workshop as soon as
possible. Practical advice
204_AKB; 2; 3, en-GB
mkalafa,
2007-06-26T23:11:51+02:00 - Seite 258
Page 309 of 377
Changing the bulbs
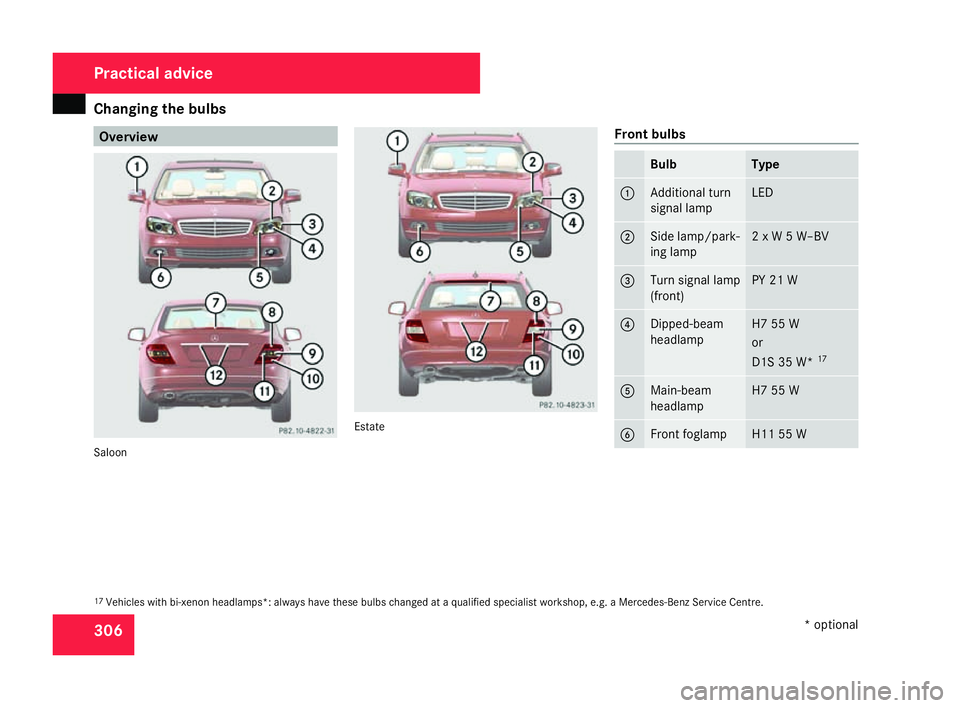
306 Overview
Saloon Estat
e Front bulbs Bulb Type
1 Additional tur
n
signal lamp LED
2 Side lamp/park-
ing lamp 2 x W 5 W–BV
3 Turn signal lamp
(front
) PY 21
W 4 Dipped-bea
m
headlamp H7 55
W
or
D1S 35 W* 17 5 Main-beam
headlamp H7 55
W 6 Front foglamp H11 55
W 17
Vehicles with bi-xenon headlamps*: always have these bulbs changed at a qualified specialist workshop, e.g. a Mercedes-Benz Service Centre. Practical advice
* optional
204_AKB; 2; 3, en-GB
mkalafa,
2007-06-26T23:11:51+02:00 - Seite 306
Page 310 of 377
Changing the bulbs
307
Rear bulbs Bulb Type
7 Third brake lamp LED
8 Side marker
lamp
Rear foglamp W 5
W
P 21 W 9 Turn signal
(rear) PY 21
W
or
LED* 18 a Brake lamp/tail
lamp 2 x P 21
W b Reversing lamp P 21
W
or
W 16 W19
(Estate) c Licence plate
lighting W 5
W Before changing bulbs
R
Use only the bulb types specified here.
R To prevent a short-circuit, switch off the
lights before changing a bulb.
R Only hold bulbs with a clean, lint-free cloth.
R Do not work with wet or greasy fingers.
R If the new bulb still does not light up, con-
sult a qualified specialist workshop, e.g. a
Mercedes-Benz Service Centre.
R Have the following bulbs changed at a
qualified specialist workshop, e.g. a
Mercedes-Benz Service Centre:
- the additional turn signal lamps in the
exterior mirrors
- the turn signal lamp* (vehicles with ligh t
package*)
- the third brake lamp
- the front foglamps
- the bi-xenon bulb s
- the licence plate lighting
i Due to the location of the front head -
lamps, it is best to have the bulbs changed at a qualified specialist workshop, e.g.
a
Mercedes-Benz Service Centre.
i Have the headlamp setting checked reg-
ularly at a qualified specialist workshop ,
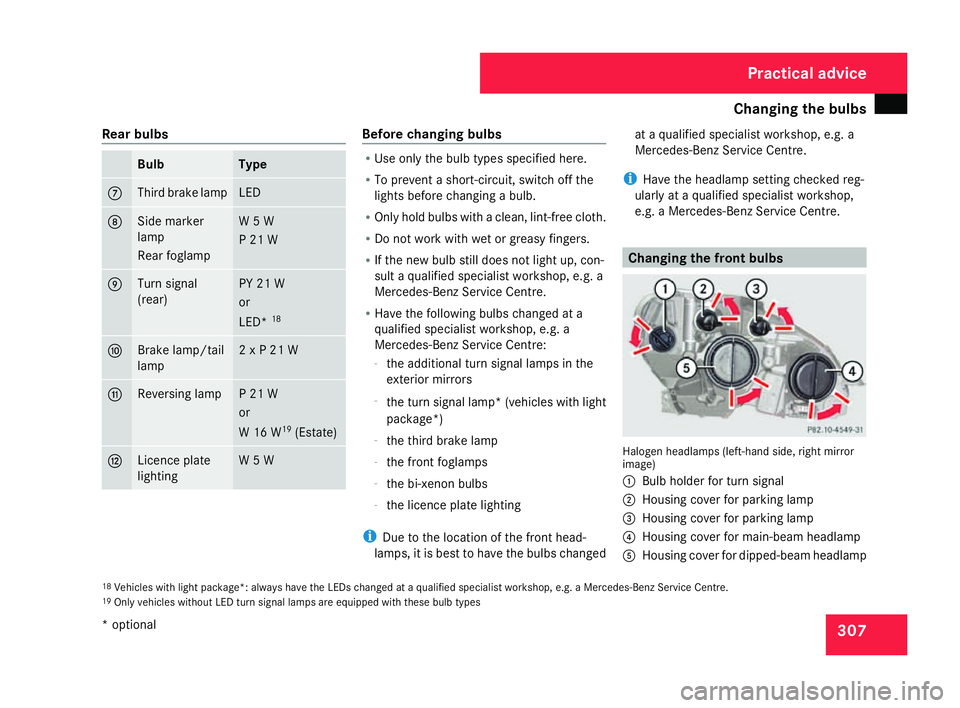
e.g. a Mercedes-Benz Service Centre. Changing the front bulbs
Halogen headlamps (left-hand side, right mirror
image)
1 Bulb holder for turn signal
2 Housing cover for parking lamp
3 Housing cover for parking lamp
4 Housing cover for main-beam headlamp
5 Housing cover for dipped-beam headlamp
18 Vehicles with light package*: always have the LEDs changed at a qualified specialist workshop, e.g. a Mercedes-Benz Service Centre.
19 Only vehicles without LED turn signal lamps are equipped with these bulb type s Practical advice
* optional
204_AKB; 2; 3, en-GB
mkalafa,
2007-06-26T23:11:51+02:00 - Seite 307
Page 311 of 377
Changing the bulbs
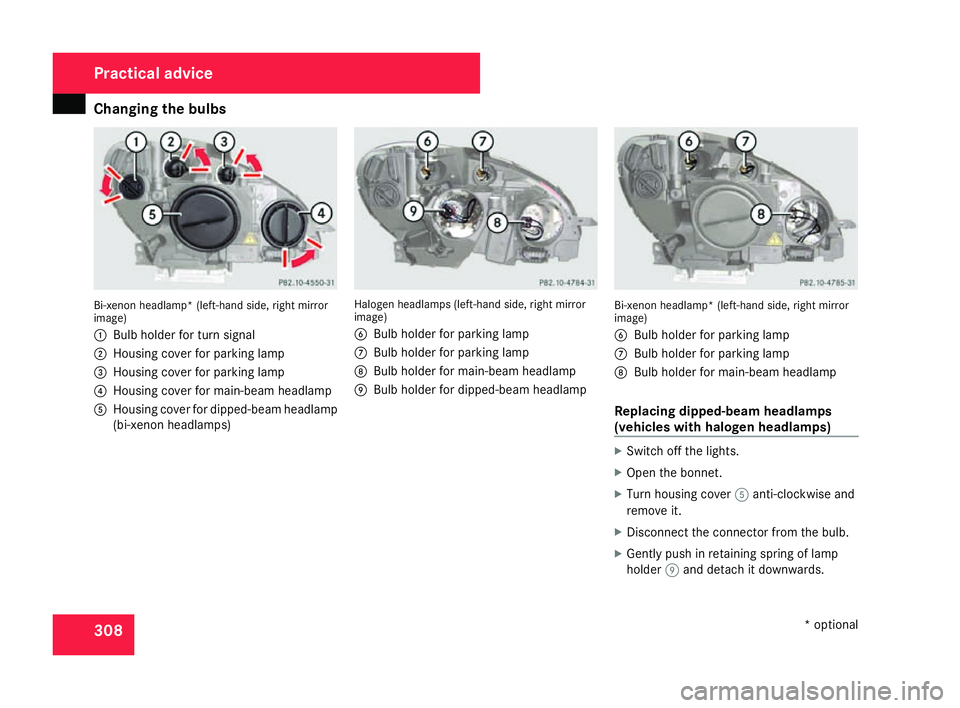
308Bi-xenon headlamp* (left-hand side, right mirror
image)
1
Bulb holder for turn signal
2 Housing cover for parking lamp
3 Housing cover for parking lamp
4 Housing cover for main-beam headlamp
5 Housing cover for dipped-beam headlamp
(bi-xenon headlamps) Halogen headlamps (left-hand side, right mirro
r
image)
6 Bulb holder for parking lamp
7 Bulb holder for parking lamp
8 Bulb holder for main-beam headlamp
9 Bulb holder for dipped-beam headlamp Bi-xenon headlamp* (left-hand side, right mirror
image)
6 Bulb holder for parking lamp
7 Bulb holder for parking lamp
8 Bulb holder for main-beam headlamp
Replacing dipped-beam headlamps
(vehicles with halogen headlamps) X
Switch off the lights .
X Open the bonnet.
X Turn housing cover 5anti-clockwise and
remove it.
X Disconnect the connector from the bulb .
X Gently push in retaining spring of lamp
holder 9and detach it downwards .Practical advice
* optional
204_AKB; 2; 3, en-GB
mkalafa,
2007-06-26T23:11:51+02:00 - Seite 308
Page 312 of 377
Changing the bulbs
309
X
Remove the bulb from the bulb holder,
holding the base (not the glass tube).
X Insert the new bulb so that the base fits flat
into the recess in the bulb holder.
X Clip in the retaining spring of bulb
holder 9.
X Attach the connector to the bulb .
X Put on the housing cover and turn it clock -
wise until it clips into place.
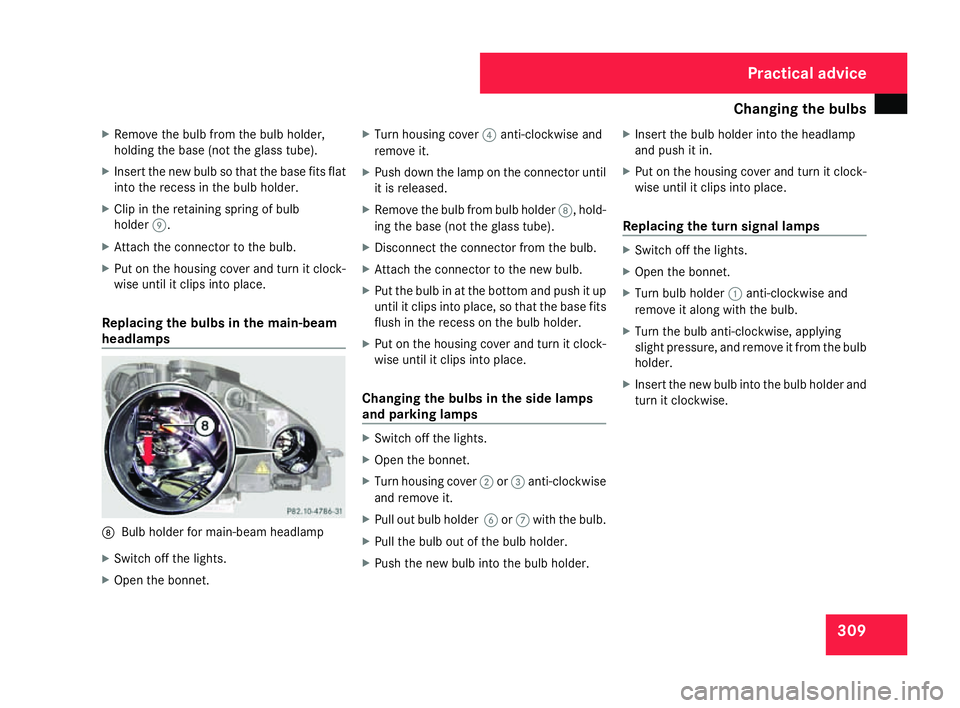
Replacing the bulbs in the main-beam
headlamp s 8
Bulb holder for main-beam headlamp
X Switch off the lights .
X Open the bonnet. X
Turn housing cover 4anti-clockwise and
remove it.
X Push down the lamp on the connector until
it is released.
X Remove the bulb from bulb holder 8, hold-
ing the base (not the glass tube).
X Disconnect the connector from the bulb .
X Attach the connector to the new bulb .
X Put the bulb in at the bottom and push it up
until it clips into place, so that the base fits
flush in the recess on the bulb holder.
X Put on the housing cover and turn it clock -
wise until it clips into place .
Changing the bulbs in the side lamps
and parking lamps X
Switch off the lights .
X Open the bonnet.
X Turn housing cover 2or3 anti-clockwis e
and remove it.
X Pull out bulb holder 6or7 with the bulb.
X Pull the bulb out of the bulb holder.
X Push the new bulb into the bulb holder. X
Insert the bulb holder into the headlamp
and push it in.
X Put on the housing cover and turn it clock -
wise until it clips into place.
Replacing the turn signal lamps X
Switch off the lights .
X Open the bonnet.
X Turn bulb holder 1anti-clockwise and
remove it along with the bulb.
X Turn the bulb anti-clockwise, applying
slight pressure, and remove it from the bulb
holder.
X Insert the new bulb into the bulb holder and
turn it clockwise. Practical advice
204_AKB; 2; 3, en-GB
mkalafa
, 2007-06-26T23:11:51+02:00 - Seite 309
Page 313 of 377
Changing the bulbs
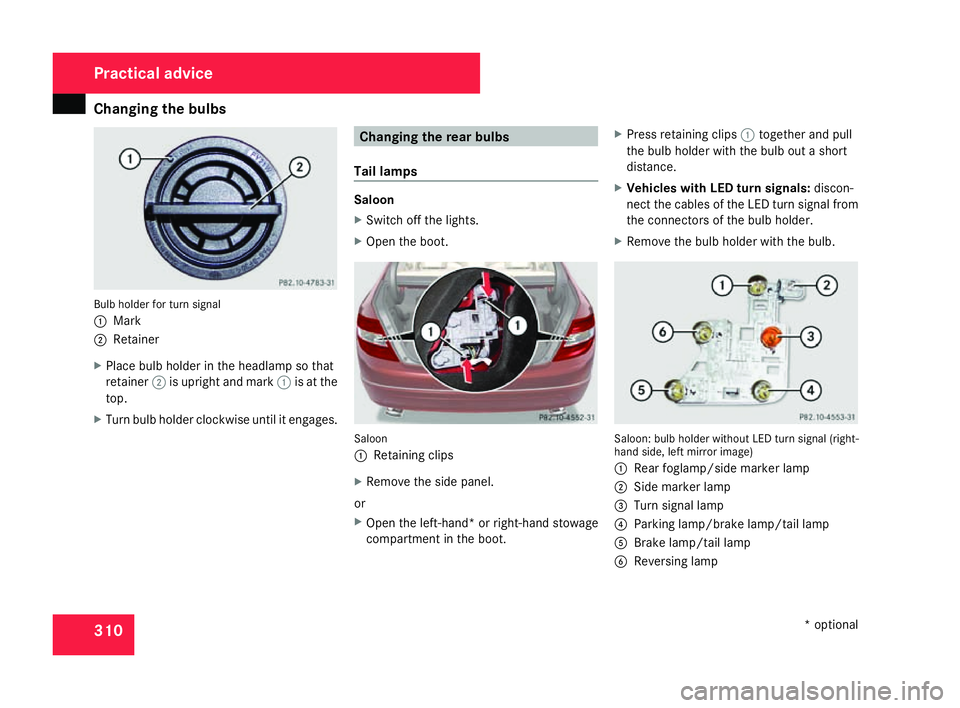
310Bulb holder for turn signal
1
Mark
2 Retainer
X Place bulb holder in the headlamp so that
retainer 2is upright and mark 1is at the
top .
X Turn bulb holder clockwise until it engages. Changing the rear bulbs
Tail lamps Saloon
X
Switch off the lights .
X Open the boot. Saloon
1
Retaining clips
X Remove the side panel.
or
X Open the left-hand* or right-hand stowage
compartment in the boot. X
Press retaining clips 1together and pull
the bulb holder with the bulb out a short
distance.
X Vehicles with LED turn signals: discon-
nect the cables of the LED turn signal from
the connectors of the bulb holder.
X Remove the bulb holder with the bulb. Saloon: bulb holder without LED turn signal (right
-
hand side, left mirror image)
1 Rear foglamp/side marker lamp
2 Side marker lamp
3 Turn signal lamp
4 Parking lamp/brake lamp/tail lamp
5 Brake lamp/tail lamp
6 Reversing lamp Practical advice
* optional
204_AKB; 2; 3, en-GB
mkalafa,
2007-06-26T23:11:51+02:00 - Seite 31
0
Page 314 of 377
Changing the bulbs
311
X
Rear foglamp/turn signal/parkin g
lamp/brake lamp/tail lamp/reversing
lamp: press the respective lamp back -
wards and turn it out of the bulb holder in
an anti-clockwise direction.
X Side marker lamp: pull bulb2out of the
bulb holder.
X Rear foglamp/turn signal/parkin g
lamp/brake lamp/tail lamp/reversing
lamp: insert the new bulb in the bulb holder
and turn in a clockwise direction .
X Side marker lamp: insert the new bulb in
the bulb holder and press in.
X Vehicles with LED turn signals: connect
the cables of the LED turn signal to the
connectors of the bulb holder.
X Reinsert the bulb holder and lock in posi-
tion .
X Close the side trim panel.
Estat e
X Switch off the lights .
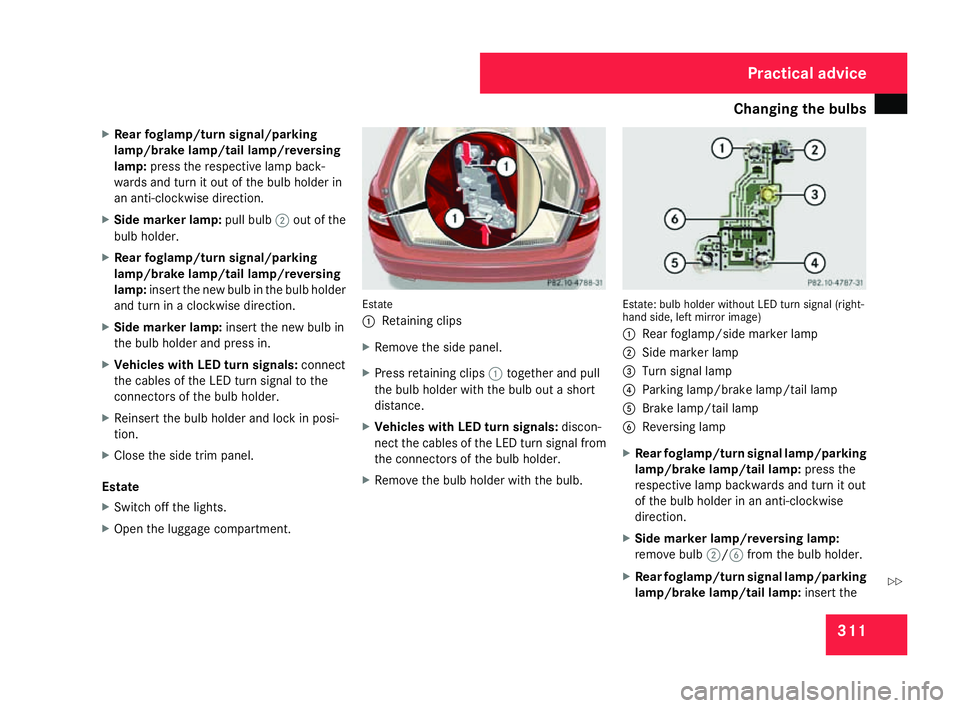
X Open the luggage compartment. Estate
1
Retaining clips
X Remove the side panel.
X Press retaining clips 1together and pull
the bulb holder with the bulb out a short
distance.
X Vehicles with LED turn signals: discon-
nect the cables of the LED turn signal from
the connectors of the bulb holder.
X Remove the bulb holder with the bulb. Estate: bulb holder without LED turn signal (right
-
hand side, left mirror image)
1 Rear foglamp/side marker lamp
2 Side marker lamp
3 Turn signal lamp
4 Parking lamp/brake lamp/tail lamp
5 Brake lamp/tail lamp
6 Reversing lamp
X Rear foglamp/turn signal lamp/parkin g
lamp/brake lamp/tail lamp: press the
respective lamp backwards and turn it out
of the bulb holder in an anti-clockwise
direction .
X Side marker lamp/reversing lamp:
remove bulb 2/6 from the bulb holder.
X Rear foglamp/turn signal lamp/parkin g
lamp/brake lamp/tail lamp: insert the Practical advice
204_AKB; 2; 3, en-GB
mkalafa,
2007-06-26T23:11:51+02:00 - Seite 311 Z
Page 315 of 377
Replacing the wiper blades
31
2
new bulb in the bulb holder and turn in
a
clockwise direction.
X Side marker lamp/reversing lamp:
insert the new bulb in the bulb holder and
press in.
X Vehicles with LED turn signals: connect
the cables of the LED turn signal to the
connectors of the bulb holder.
X Reinsert the bulb holder and lock in posi-
tion .
X Close the side trim panel. Replacing the wiper blades
Windscreen wiper blades
G
Risk of accident
The windscreen will no longer be properly
wiped if the wiper blades are worn. Thi s
may prevent you from observing the traffic
conditions, thereby causing an accident.
Replace the wiper blades twice a year, ide-
ally in spring and autumn. G
Risk of accident
The wiper arms could start moving and
cause an injury if you leave the windscreen
wipers switched on.
Remove the key from the ignition lock
before replacing the wiper blades.
! Make sure you touch only the wiper arm
of the windscreen wiper to avoid damaging
the windscreen wiper blades.
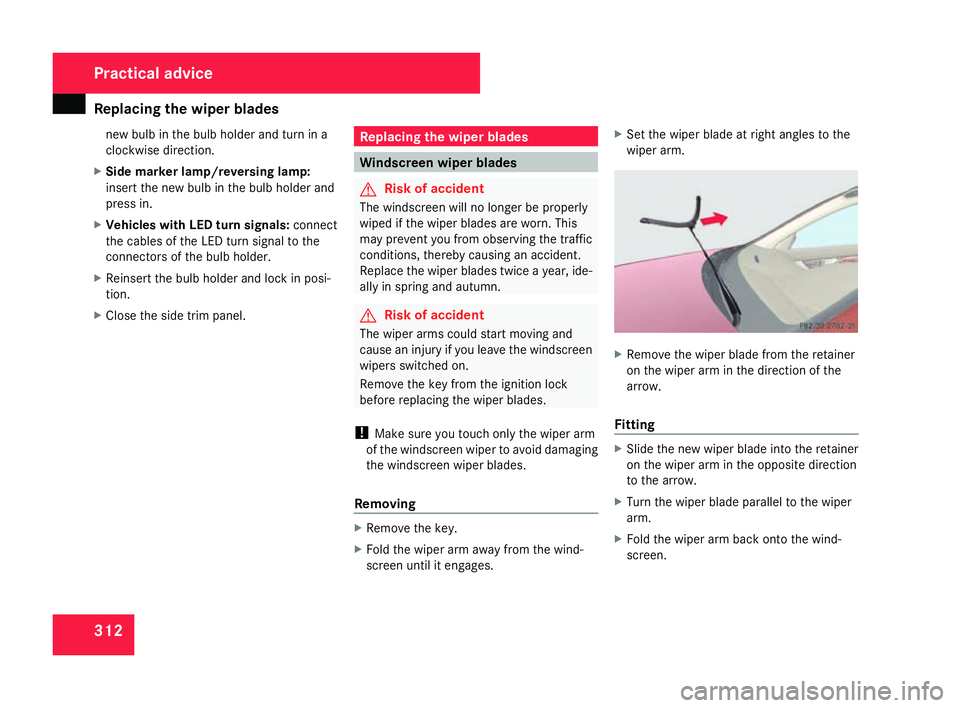
Removin g X
Remove the key.
X Fold the wiper arm away from the wind-
screen until it engages . X
Set the wiper blade at right angles to the
wiper arm . X
Remove the wiper blade from the retainer
on the wiper arm in the direction of th e
arrow.
Fitting X
Slide the new wiper blade into the retaine r
on the wiper arm in the opposite direction
to the arrow.
X Turn the wiper blade parallel to the wiper
arm.
X Fold the wiper arm back onto the wind-
screen. Practical advic
e
204_AKB; 2; 3, en-GB
mkalafa,
2007-06-26T23:11:51+02:00 - Seite 312