rear view mirror MERCEDES-BENZ C-CLASS ESTATE 2011 Owners Manual
[x] Cancel search | Manufacturer: MERCEDES-BENZ, Model Year: 2011, Model line: C-CLASS ESTATE, Model: MERCEDES-BENZ C-CLASS ESTATE 2011Pages: 401, PDF Size: 9.74 MB
Page 19 of 401
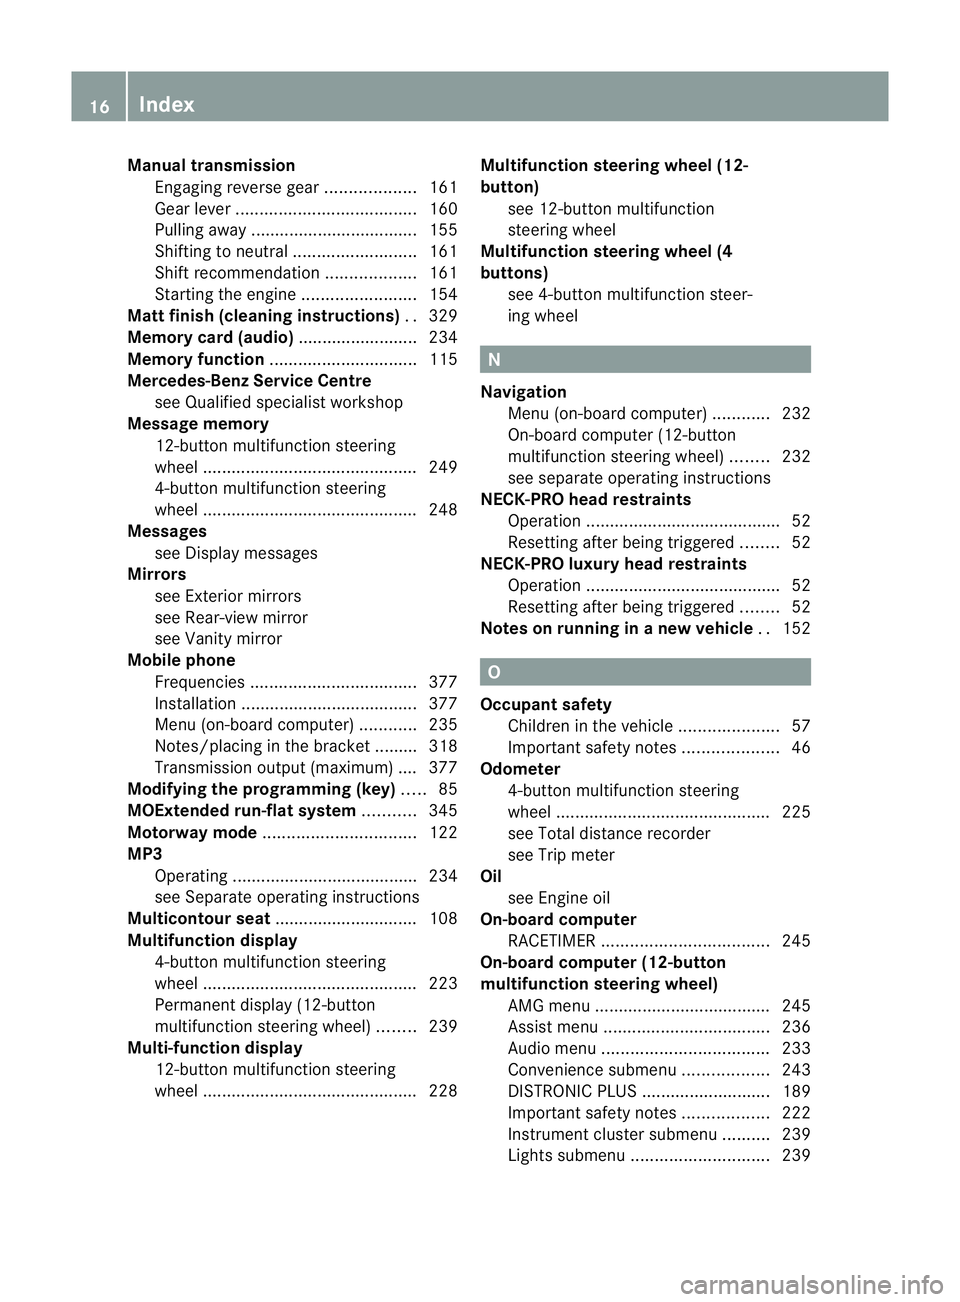
Manual transmission
Engaging reverse gear. ..................161
Gea rlever ...................................... 160
Pulling away ................................... 155
Shifting to neutra l.......................... 161
Shift recommendatio n................... 161
Starting the engine ........................154
Matt finish (cleaning instructions) ..329
Memory card (audio) .........................234
Memory function ............................... 115
Mercedes-Benz Service Centre see Qualified specialist workshop
Message memory
12-button multifunction steering
wheel ............................................. 249
4-button multifunction steering
wheel ............................................. 248
Messages
see Display messages
Mirrors
see Exterior mirrors
see Rear-view mirror
see Vanity mirror
Mobile phone
Frequencies ................................... 377
Installatio n..................................... 377
Menu (on-board computer) ............235
Notes/placing in the bracket ......... 318
Transmission output (maximum) .... 377
Modifying the programming (key) .....85
MOExtended run-flat system ...........345
Motorway mode ................................ 122
MP3 Operating ...................................... .234
see Separate operating instructions
Multicontour seat .............................. 108
Multifunction display 4-button multifunction steering
wheel ............................................. 223
Permanent display (12-button
multifunctio nsteering wheel) ........239
Multi-function display
12-button multifunction steering
wheel ............................................. 228Multifunction steering wheel (12-
button)
see 12-button multifunction
steering wheel
Multifunction steering wheel (4
buttons)
see 4-button multifunction steer-
ing wheel N
Navigation Menu (on-board computer) ............232
On-board computer (12-button
multifunctio nsteering wheel) ........232
see separate operating instructions
NECK-PRO head restraints
Operation ........................................ .52
Resetting after being triggered ........52
NECK-PRO luxury head restraints
Operation ........................................ .52
Resetting after being triggered ........52
Notes on running in anew vehicle ..152 O
Occupant safety Childre ninthe vehicle ..................... 57
Important safety notes ....................46
Odometer
4-button multifunction steering
wheel ............................................. 225
see Total distance recorder
see Trip meter
Oil
see Engine oil
On-board computer
RACETIMER ................................... 245
On-board computer (12-button
multifunction steering wheel)
AMG menu ..................................... 245
Assist menu ................................... 236
Audi omenu ................................... 233
Convenience submenu ..................243
DISTRONI CPLUS ........................... 189
Important safety notes ..................222
Instrument cluster submenu ..........239
Lights submenu ............................. 23916
Index
Page 22 of 401
Rear foglamp
Display message (12-button mul-
tifunction steering wheel) ..............266
Display message (4-button multi-
function steering wheel) ................263
Switching on/off ........................... 119
Rear seat
Display message (12-button mul-
tifunctio nsteering wheel) ..............286
Display message (4-button multi-
function steering wheel) ................284
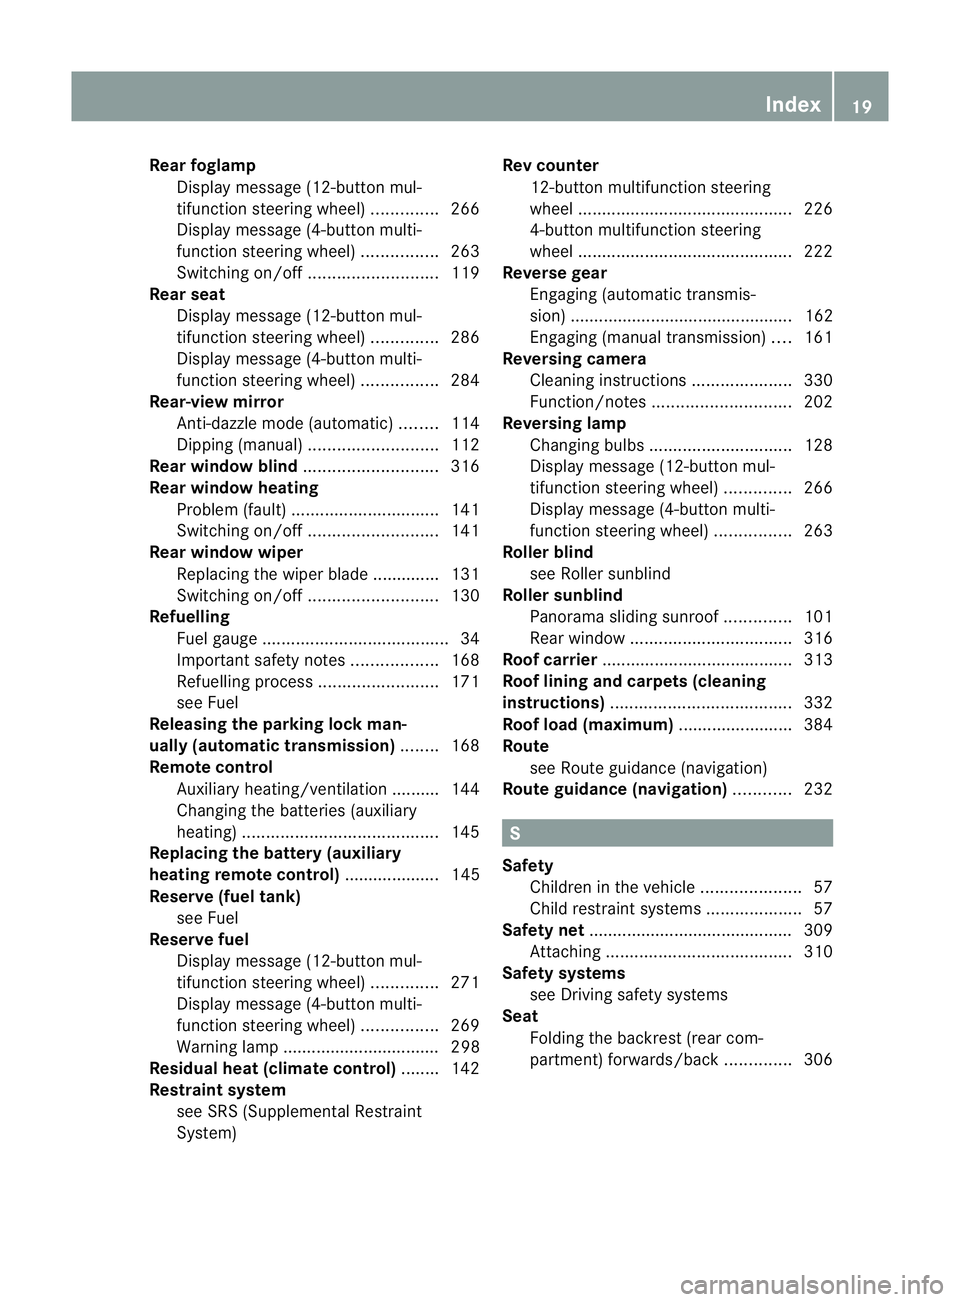
Rear-view mirror
Anti-dazzle mode (automatic) ........114
Dipping (manual )........................... 112
Rear window blind ............................316
Rear window heating Problem (fault) ............................... 141
Switching on/off ........................... 141
Rear window wiper
Replacing the wiper blade .............. 131
Switching on/off ........................... 130
Refuelling
Fuel gauge ....................................... 34
Important safety notes ..................168
Refuelling proces s......................... 171
see Fuel
Releasing the parking loc kman-
ually (automatic transmission) ........168
Remote control Auxiliary heating/ventilation .......... 144
Changing the batteries (auxiliary
heating) ......................................... 145
Replacing the battery (auxiliary
heating remote control) .................... 145
Reserve (fuel tank) see Fuel
Reserve fuel
Display message (12-button mul-
tifunctio nsteering wheel) ..............271
Display message (4-button multi-
function steering wheel) ................269
Warning lamp ................................. 298
Residual heat (climate control) ........142
Restraint system see SRS (Supplemental Restraint
System) Rev counter
12-button multifunction steering
wheel ............................................. 226
4-button multifunction steering
wheel ............................................. 222
Reverse gear
Engaging (automatic transmis-
sion) ............................................... 162
Engaging (manual transmission) ....161
Reversing camera
Cleaning instructions .....................330
Function/notes ............................. 202
Reversing lamp
Changing bulbs .............................. 128
Display message (12-button mul-
tifunctio nsteering wheel) ..............266
Display message (4-button multi-
function steering wheel) ................263
Roller blind
see Roller sunblind
Roller sunblind
Panorama sliding sunroo f.............. 101
Rea rwindow .................................. 316
Roof carrier ........................................ 313
Roof lining and carpets (cleaning
instructions) ...................................... 332
Roof load (maximum) ........................384
Route see Route guidance (navigation)
Route guidance (navigation) ............232 S
Safety Childre ninthe vehicle ..................... 57
Child restraint systems ....................57
Safety net .......................................... .309
Attaching ....................................... 310
Safety systems
see Driving safety systems
Seat
Folding the backres t(rear com-
partment) forwards/back ..............306 Index
19
Page 46 of 401
Overhea
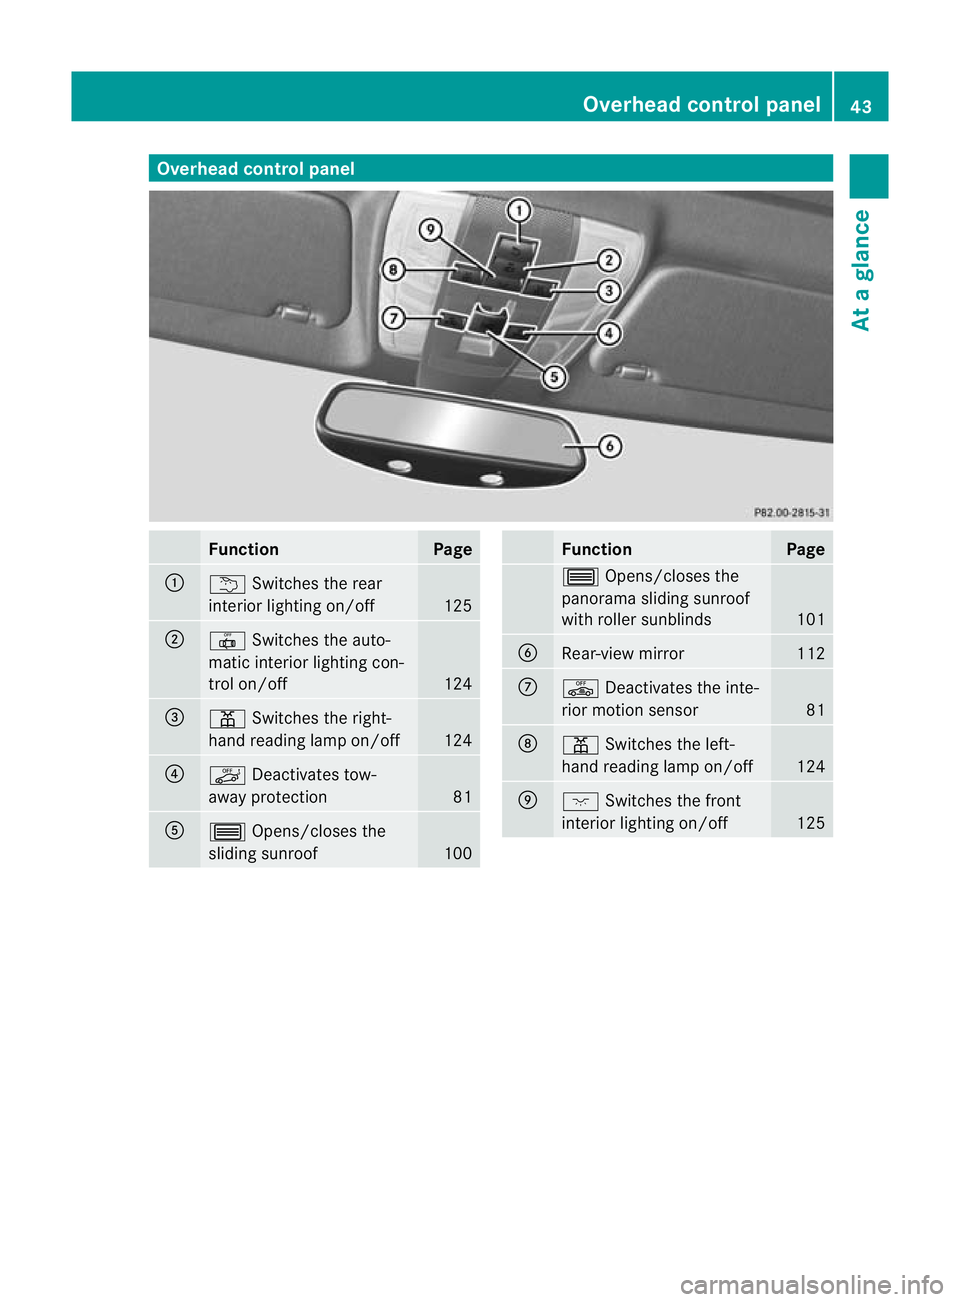
dcontrol panel Function Page
:
u
Switches the rear
interio rlighting on/off 125
;
|
Switches the auto-
matic interior lighting con-
trol on/off 124
=
p
Switches the right-
hand reading lamp on/off 124
?
ë
Deactivates tow-
away protection 81
A
3
Opens/closes the
sliding sunroof 100 Function Page
3
Opens/closes the
panorama sliding sunroof
with roller sunblinds 101
B
Rear-view mirror 112
C
ê
Deactivates the inte-
rior motion sensor 81
D
p
Switches the left-
hand reading lamp on/off 124
E
c
Switches the front
interior lighting on/off 125Overhead control panel
43At a glance
Page 84 of 401
X
To stop the alarm using the key: insert
the key into the ignition lock.
The alar mis switched off.
or
X Press the %or& button on the key.
The alarm is switched off.
X To stop the alarm using KEYLESS-GO:
grasp the outside door handle. The key
must be outside the vehicle.
The alarm is switched off.
or
X Press the Start/Stop button on the dash-
board. The key must be inside the vehicle.
The alarm is switched off. Tow-away protection
An audible and visual alarm is triggered if your
vehicle's angle of inclination is altered while
tow-away protection is primed. This occurs if
the vehicle is jacked up on one side, for exam-
ple.
X To prime: lock the vehicle with the key or
KEYLESS-GO.
Tow-away protection is primed after
approximately 30 seconds.
X To deactivate: unlock the vehicle with the
key or KEYLESS-GO.
Tow-away protection is deactivated auto-
matically.
To prevent a false alarm, deactivate tow-away
protection manually if your vehicle:
R is being transported
R is being loaded onto a ferry or car trans-
porter, for example
R is parked on a movable surface, e.g. in a
split-level garage
Deactivating:
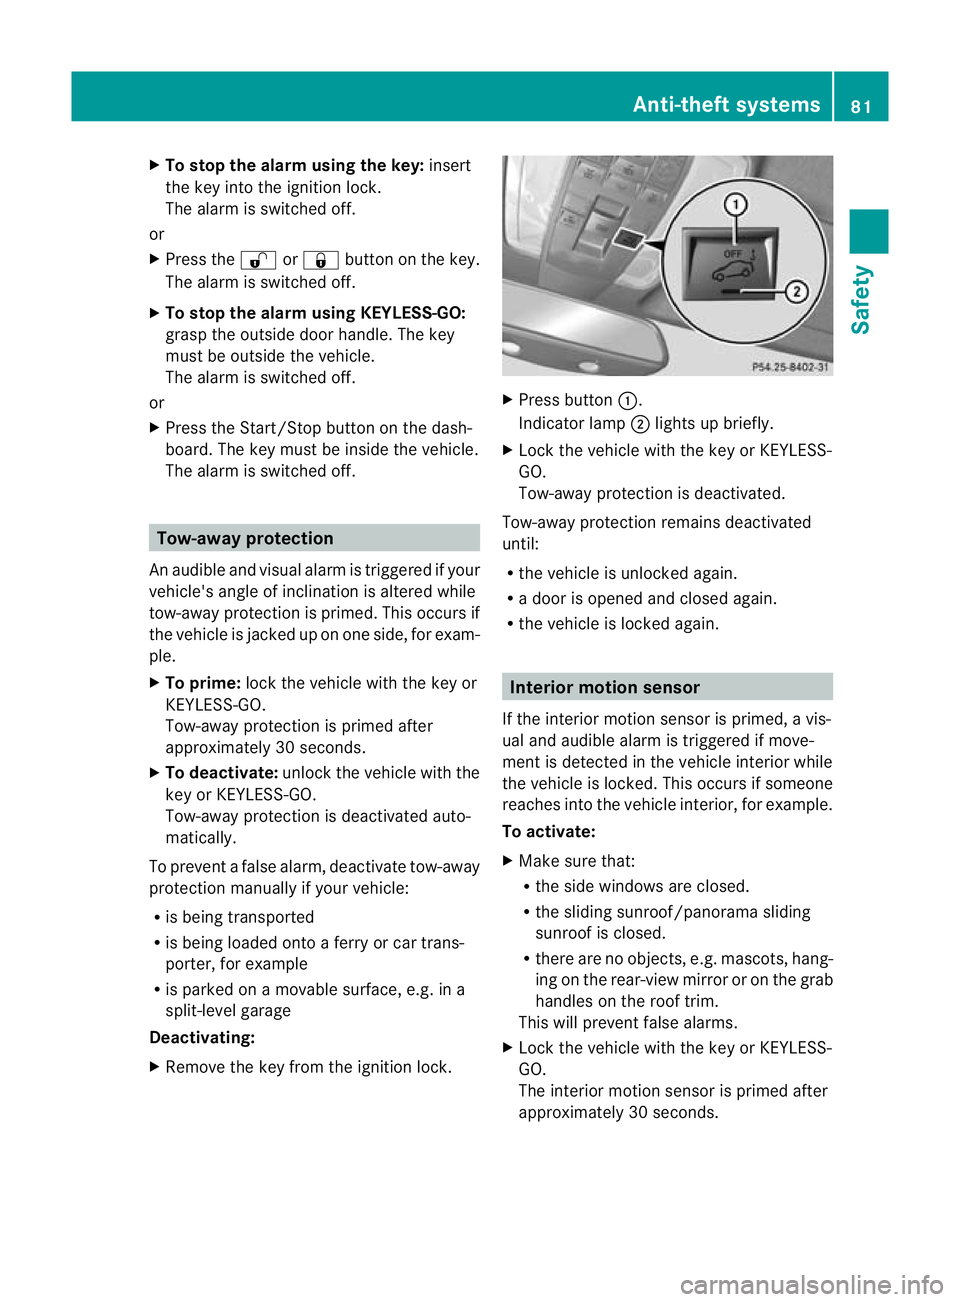
X Remove the key from the ignition lock. X
Press button :.
Indicator lamp ;lights up briefly.
X Lock the vehicle with the key or KEYLESS-
GO.
Tow-away protection is deactivated.
Tow-away protection remains deactivated
until:
R the vehicle is unlocked again.
R a door is opened and closed again.
R the vehicle is locked again. Interior motion sensor
If the interior motion sensor is primed, a vis-
ual and audible alarm is triggered if move-
ment is detected in the vehicle interior while
the vehicle is locked. This occurs if someone
reaches into the vehicle interior, for example.
To activate:
X Make sure that:
R
the side windows are closed.
R the sliding sunroof/panorama sliding
sunroof is closed.
R there are no objects, e.g. mascots, hang-
ing on the rear-view mirror or on the grab
handles on the roof trim.
This will prevent false alarms.
X Lock the vehicle with the key or KEYLESS-
GO.
The interior motion sensor is primed after
approximately 30 seconds. Anti-theft systems
81Safety Z
Page 107 of 401
Useful information
i This Owner's Manual describes all models
and all standard and optional equipment
available to your vehicle at the time of pub-
lication of the Owner's Manual. Country-
specific deviations are possible. Please
note that your vehicle may not be equipped
with all features described. This also
applies to safety-relevan tsystems and
functions.
i Please read the information on qualified
specialist workshops (Y page 28).Correct driver's sea
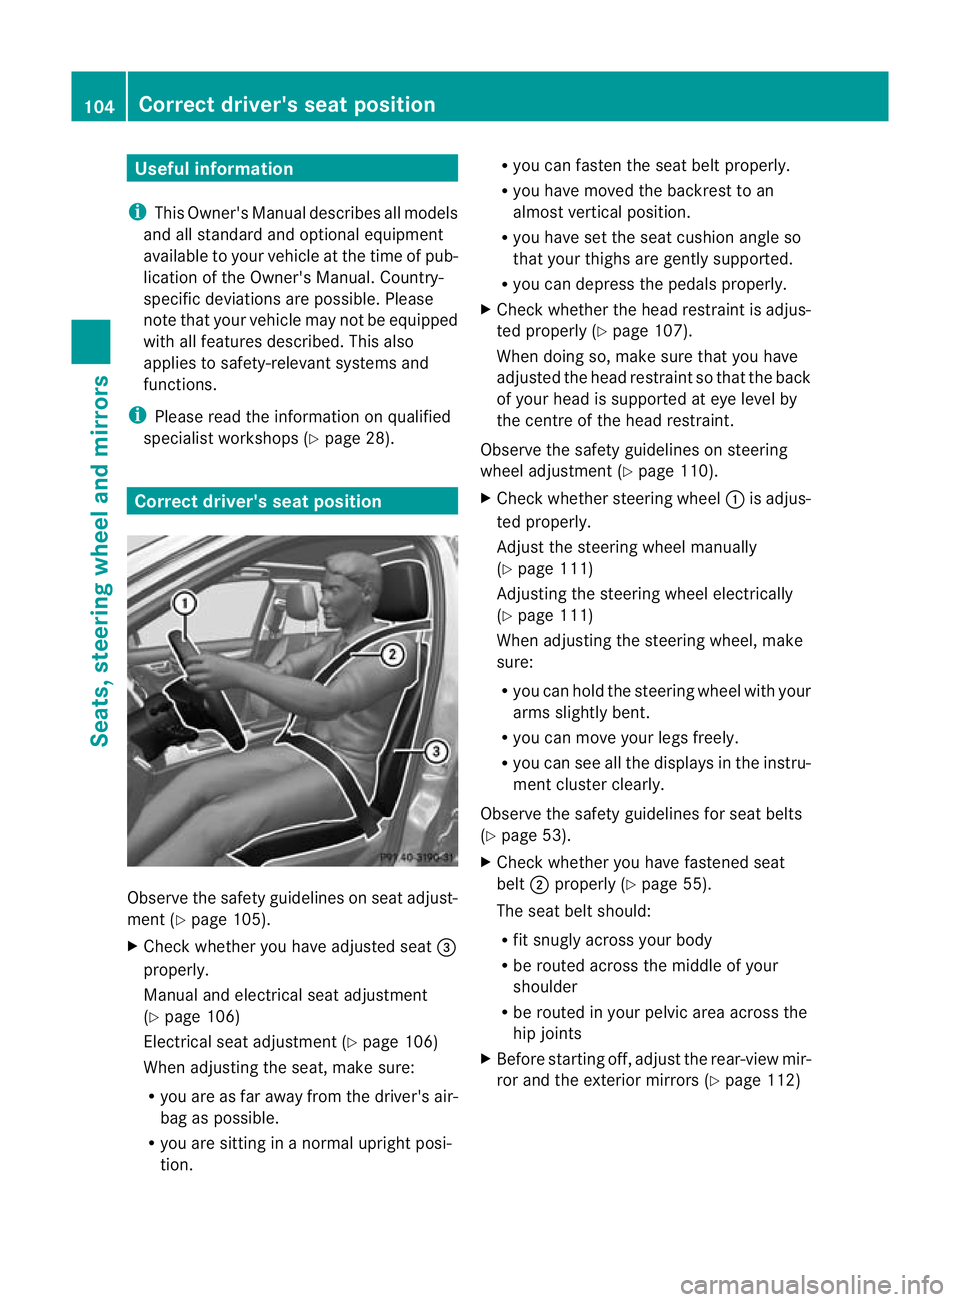
tposition Observe the safety guidelines on seat adjust-
ment (Y
page 105).
X Chec kwhether you have adjusted seat =
properly.
Manual and electrical seat adjustment
(Y page 106)
Electrical seat adjustment (Y page 106)
When adjusting the seat, make sure:
R you are as far away from the driver's air-
bag as possible.
R you are sitting in a normal upright posi-
tion. R
you can fasten the seat belt properly.
R you have moved the backrest to an
almost vertical position.
R you have set the seat cushion angle so
that your thighs are gently supported.
R you can depress the pedals properly.
X Check whether the head restraint is adjus-
ted properly (Y page 107).
When doing so, make sure that you have
adjusted the head restraint so that the back
of your head is supported at eye level by
the centre of the head restraint.
Observe the safety guidelines on steering
wheel adjustment (Y page 110).
X Check whether steering wheel :is adjus-
ted properly.
Adjust the steering wheel manually
(Y page 111)
Adjusting the steering wheel electrically
(Y page 111)
When adjusting the steering wheel, make
sure:
R you can hold the steering wheel with your
arms slightly bent.
R you can move your legs freely.
R you can see all the displays in the instru-
ment cluster clearly.
Observe the safety guidelines for seat belts
(Y page 53).
X Check whether you have fastened seat
belt ;properly (Y page 55).
The seat belt should:
R fit snugly across your body
R be routed across the middle of your
shoulder
R be routed in your pelvic area across the
hip joints
X Before starting off, adjust the rear-view mir-
ror and the exterior mirrors (Y page 112)104
Correct driver's seat positionSeats, steering wheel and mirrors
Page 111 of 401
X
To lower: press release catch :and push
the head restraint down until it is in the
desired position.
Adjusting the rear seat head restraint
angle
Adjust the head restraints so tha tthey are as
close as possible to your head.
You can only adjust the two outer head
restraints. X
Pull or push the bottom of the head
restraint until it is in the desired position.
Fitting/removing the rear seat head
restraints 7 G
WARNING
Occupants should only travel sitting on seats
which have the head restraints installed. This
reduces the risk of injury to the passengers in
the rear in the event of an accident. X
Release the rear seat backrest and fold it
slightly forwards (Y page 305).
X To remove: pull the head restraint up to
the stop.
X Press release catch :and pull the head
restraint out of the guides.
X To refit: insert the head restraint so that
the notches on the bar are on the left when
viewed in the direction of travel.
X Push the head restraint down until you hear
it engage in position.
X Fold back the rear seat backrest until it
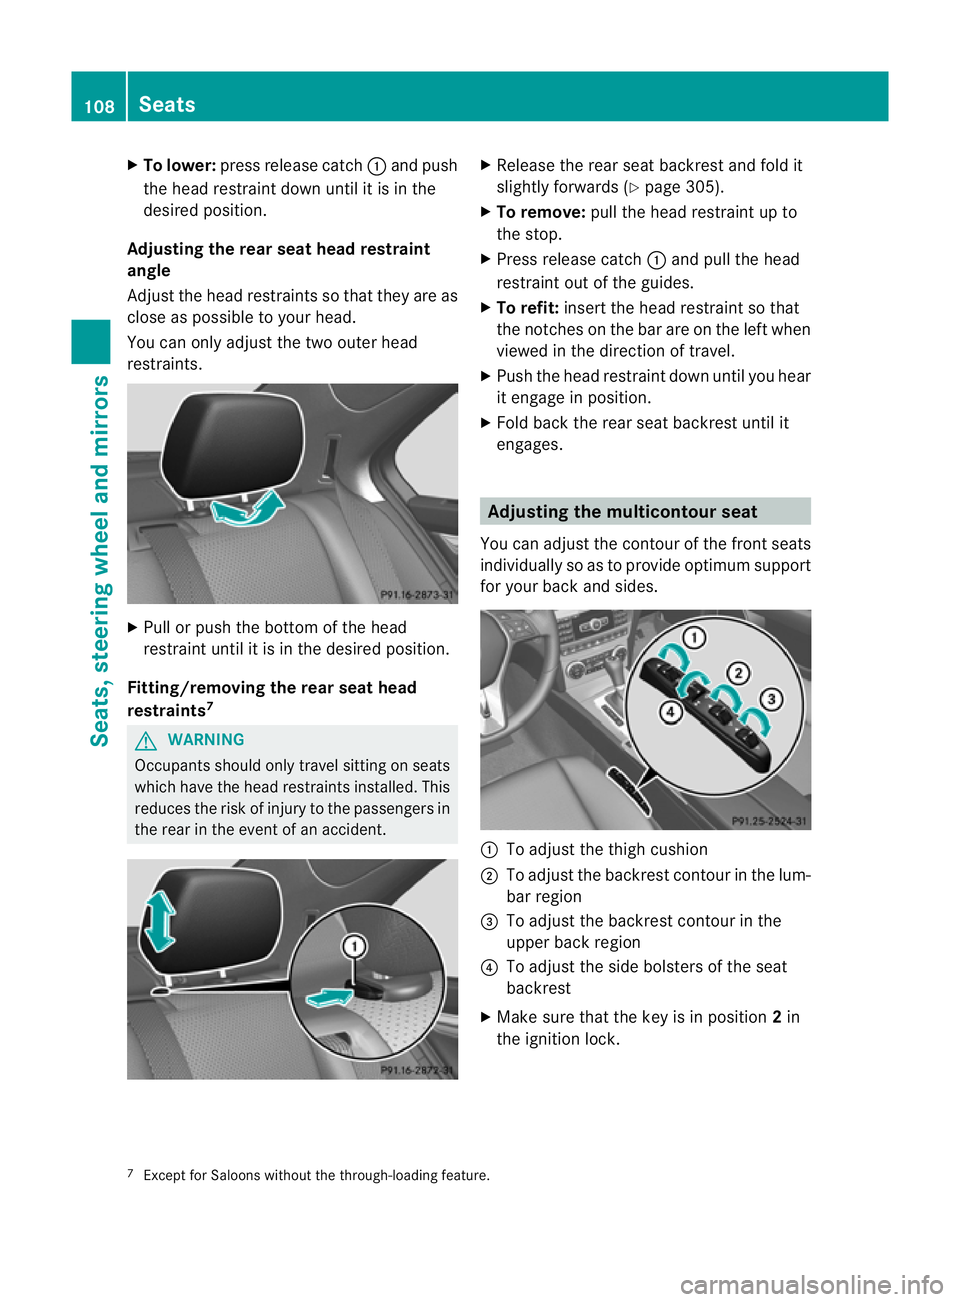
engages. Adjusting the multicontour seat
You can adjust the contour of the front seats
individually so as to provide optimum support
for your back and sides. :
To adjust the thigh cushion
; To adjust the backrest contour in the lum-
bar region
= To adjust the backrest contour in the
upper back region
? To adjust the side bolsters of the seat
backrest
X Make sure that the key is in position 2in
the ignition lock.
7 Except for Saloons without the through-loading feature. 108
SeatsSeats, steering wheel and mirrors
Page 115 of 401
Position of the steering wheel when the
EASY-ENTRY/EXIT featurei
s activeThe steering wheel tilts upwards if you:
R
remove the key from the ignition lock
R open the driver's door and KEYLESS-GO is
in position 1
R open the driver's door and the key is in
position 0or 1in the ignition lock
i The steering wheel only moves upwards if
it has not already reached the upper end
stop.
If you insert the key into the ignition lock with
the driver's door closed, the steering wheel is
automatically moved to the previously set
position.
Position of the steering wheel for driv-
ing The steering wheel is moved to the previously
set position if:
R
the driver's door is closed
R you insert the key into the ignition lock
or
R you press the Start/Stop button once on
vehicles with KEYLESS-GO.
If you close the driver's door with the key
inserted into the ignition lock, the steering
wheel is automatically moved to the previ-
ously set position.
The last position of the steering wheel is
stored after each manual setting or when you
store the setting with the memory function
(Y page 115).
Crash-responsive EASY-EXIT feature If the crash-responsive EASY-EXIT feature is
triggered in an accident, the steering column
will move upwards when the driver's door is
opened. This occurs irrespective of the posi-
tion of the key in the ignition lock. This makes
it easier to exit the vehicle and rescue the
occupants. The crash-responsive EASY-EXIT feature is
only operational if the EASY-EXIT/ENTRY fea-
ture is activated in the on-board computer. Mirrors
Rear-view mirror
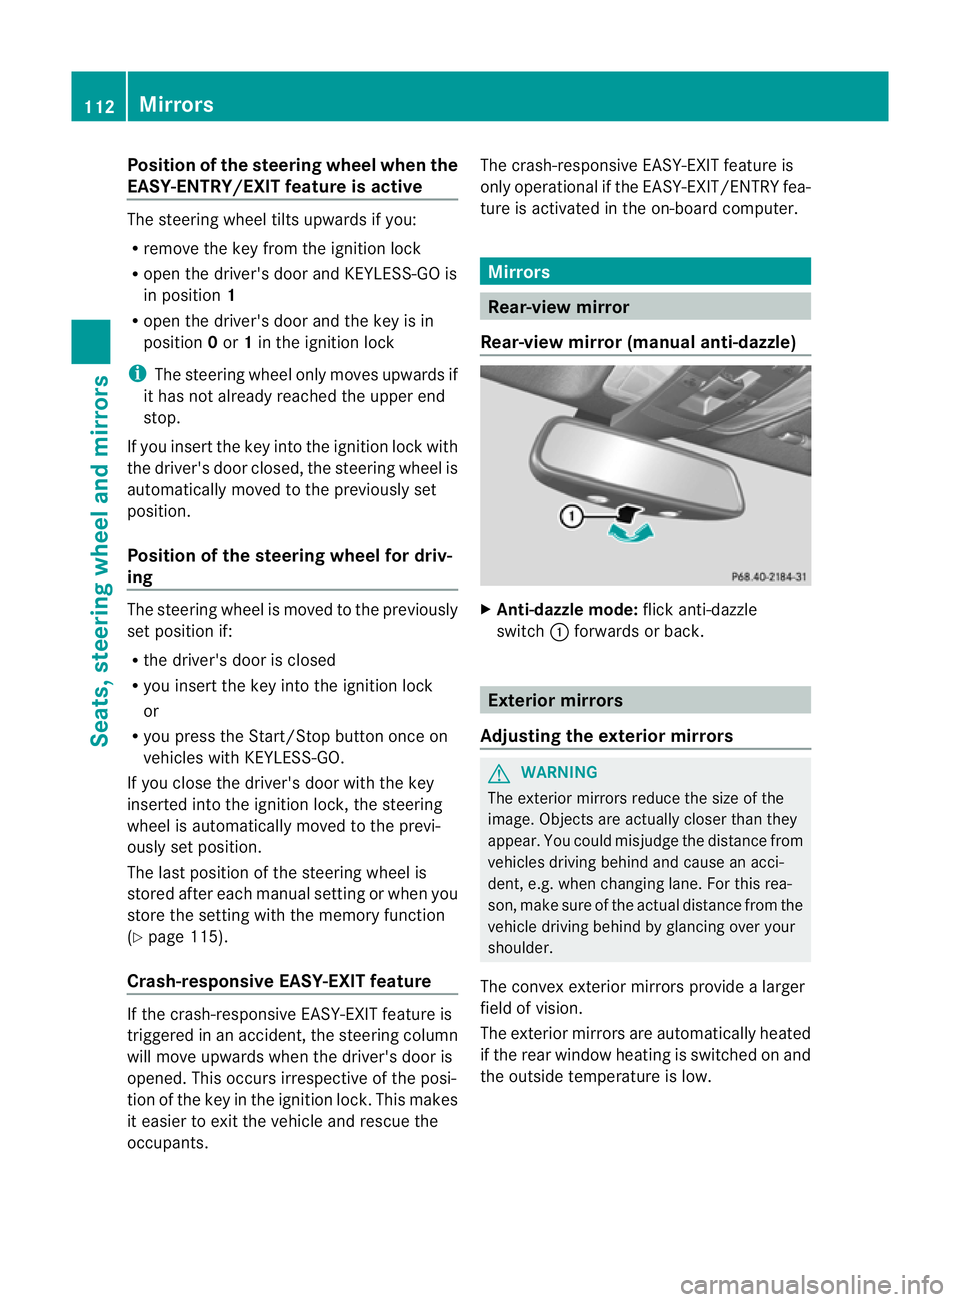
Rear-view mirror (manual anti-dazzle) X
Anti-dazzle mode: flick anti-dazzle
switch :forwards or back. Exterior mirrors
Adjusting the exterior mirrors G
WARNING
The exterior mirrors reduce the size of the
image. Objects are actually closer than they
appear. You could misjudge the distance from
vehicles driving behind and cause an acci-
dent, e.g. when changin glane. For this rea-
son, make sure of the actual distance from the
vehicle driving behind by glancing ove ryour
shoulder.
The convex exterior mirrors provide a larger
field of vision.
The exterior mirrors are automatically heated
if the rear window heating is switched on and
the outside temperature is low. 112
MirrorsSeats, steering wheel and mirrors
Page 117 of 401
Automatic anti-dazzle mirrors
G
WARNING
If inciden tlight fro mheadlamps is prevented
from striking the sensor in the rear-view mir-
ror, for instance, by luggage piled too high in
the vehicle, the mirror's automatic anti-dazzle
function will not operate.
Incident light could then blind you. This may
distract you from the traffic conditions and,
as a result, you may cause an accident.
The rear-view mirror and the exterior mirror
on the driver's side automatically go into anti-
dazzle mode if the ignition is switched on and
inciden tlight fro mheadlamps strikes the sen-
sor in the rear-view mirror.
The mirrors do not go into anti-dazzle mode if
reverse gear is engaged or the interior lighting
is switched on. Parking position for the exterior mir-
ror on the front-passenger side
Setting and storing the parking position You can position the front-passenger side
exterior mirror in such a way that you can see
the rear wheel on that side as soon as you
engage reverse gear. You can store this posi-
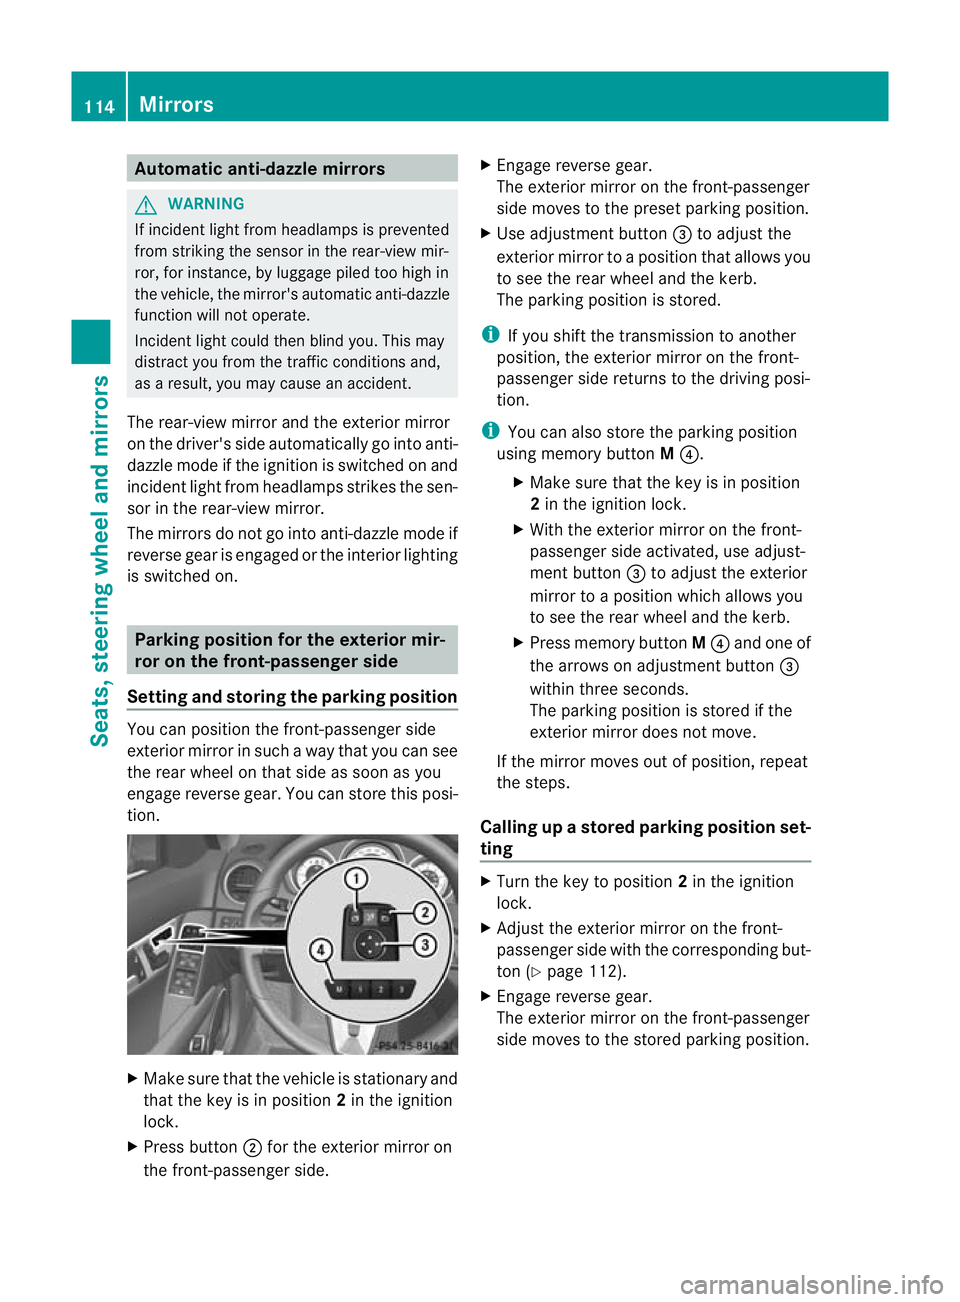
tion. X
Make sure that the vehicle is stationary and
that the key is in position 2in the ignition
lock.
X Press button ;for the exterior mirror on
the front-passenger side. X
Engage reverse gear.
The exterior mirror on the front-passenger
side moves to the preset parking position.
X Use adjustment button =to adjust the
exterior mirror to a position that allows you
to see the rear wheel and the kerb.
The parking position is stored.
i If you shift the transmission to another
position, the exterior mirror on the front-
passenger side returns to the driving posi-
tion.
i You can also store the parking position
using memory button M?.
X Make sure that the key is in position
2in the ignition lock.
X With the exterior mirror on the front-
passenger side activated, use adjust-
ment button =to adjust the exterior
mirror to a position which allows you
to see the rear wheel and the kerb.
X Press memory button M? and one of
the arrows on adjustment button =
within three seconds.
The parking position is stored if the
exterior mirror does not move.
If the mirror moves out of position, repeat
the steps.
Calling up astore dparking position set-
ting X
Tur nthe key to position 2in the ignition
lock.
X Adjust the exterior mirror on the front-
passenger side with the corresponding but-
ton (Y page 112).
X Engage reverse gear.
The exterior mirror on the front-passenger
side moves to the stored parking position. 114
MirrorsSeats, steering wheel and mirrors
Page 205 of 401
X
To reverse into the parking space: main-
tai nt he steering wheel angle and reverse
carefully.
X Stop as soon as you hear a warning tone,
at the latest when PARKTRONIC sounds the
continuous warning tone.
The Parking Guidance finished mes-
sage appears in the multifunction display
and a warning tone sounds. You may be
asked to steer in adifferent direction and
the nchange gear. In this case, further dis-
plays in the multifunction display will direct
you to the final position.
X Manoeuvre if necessary.
X Always observe the warning messages dis-
played by PARKTRONIC (Y page 197).
Cancelling Parking Guidance X
Press the PARKTRONIC button on the
centre console (Y page 198).
Parking Guidance is cancelled immediately
and PARKTRONIC is deactivated.
Parking Guidance is cancelled automatically
if it is no longer possible to guide you into the
parking space, or if a malfunction occurs.
The parking space symbol goes out and a
warning tone sounds. The Parking Guid‐ance cancelled message appears in the
multifunction display.
Towing atrailer For vehicles with a trailer tow hitch, the min-
imum length for parking spaces is slightly
increased.
If you have attached a trailer to your vehicle,
you should not use Parking Guidance. When
the electrical connectio
nis established
between your vehicle and the trailer, Parking
Guidance ceases to be available. PARK-
TRONIC is deactivated for the rear area. Reversing camera
Important safety notes The reversing camera is an optical parking
aid. It shows the area behind your vehicle in
the COMAND Online display.
G
WARNING
Make sure that no persons or animals are in
the manoeuvring range. Otherwise, they
could be injured.
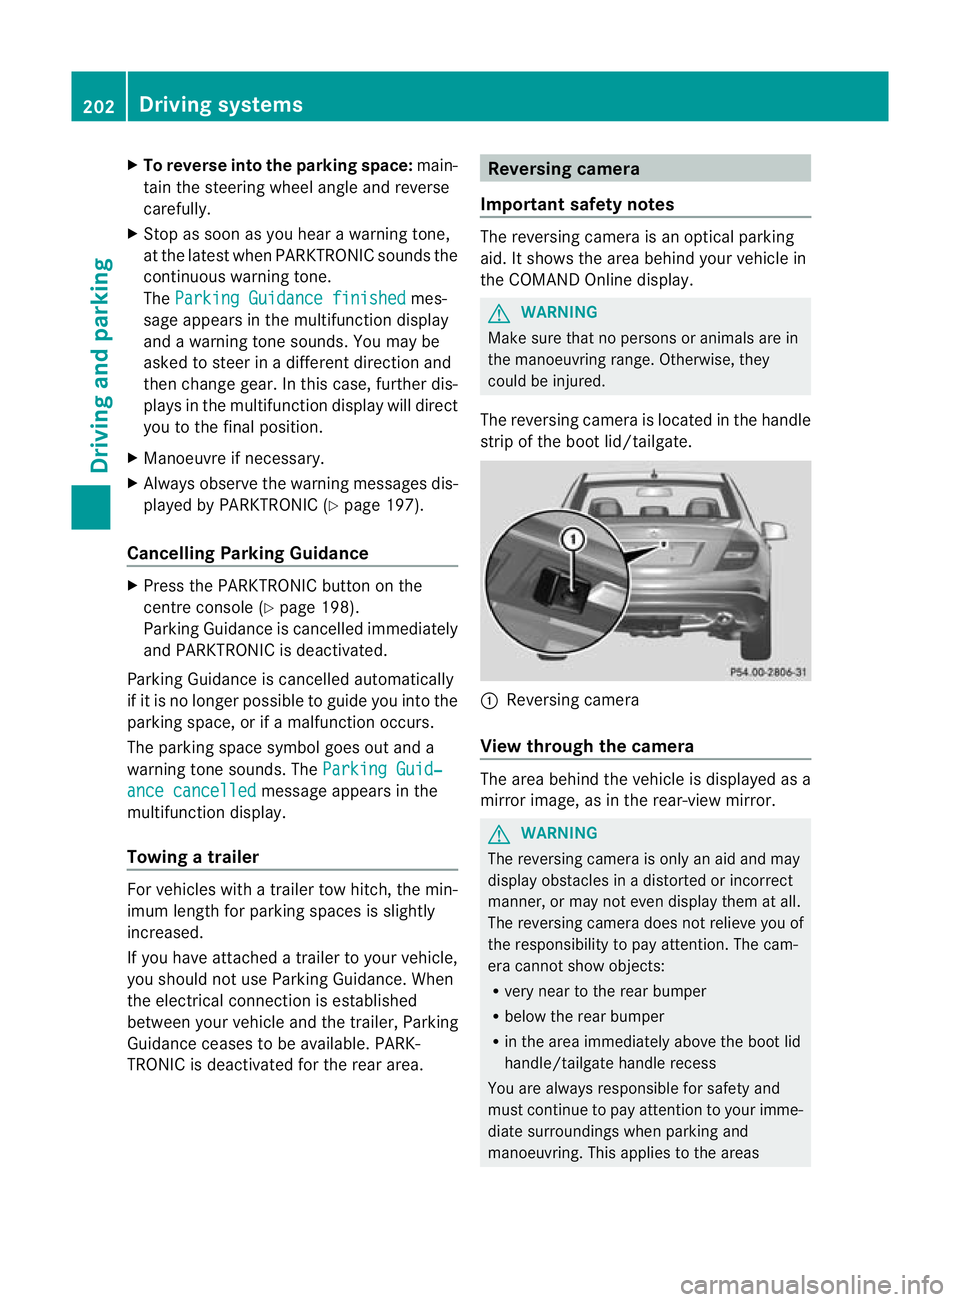
The reversing camera is located in the handle
strip of the boot lid/tailgate. :
Reversing camera
View through the camera The area behind the vehicle is displayed as a
mirror image, as in the rear-view mirror.
G
WARNING
The reversing camera is only an aid and may
display obstacles in a distorted or incorrect
manner, or may not even display them at all.
The reversing camera does not relieve you of
the responsibility to pay attention. The cam-
era cannot show objects:
R very near to the rear bumper
R below the rear bumper
R in the area immediately above the boot lid
handle/tailgate handle recess
You are always responsible for safety and
must continue to pay attention to your imme-
diate surroundings when parking and
manoeuvring. This applies to the areas 202
Driving systemsDriving and parking
Page 318 of 401
the uppe
rsection of cup holder :faces
forwards.
X Press the cup holder downwards until it
engages on the front-passenger side.
Cup holder in the rear seat armrest !
Do not sit on or support your body weight
on the rear seat armrest when it is folded
down, as you could otherwise damage it.
! Close the cup holder before folding the
rear seat armrest up. Otherwise, the cup
holder could be damaged. X
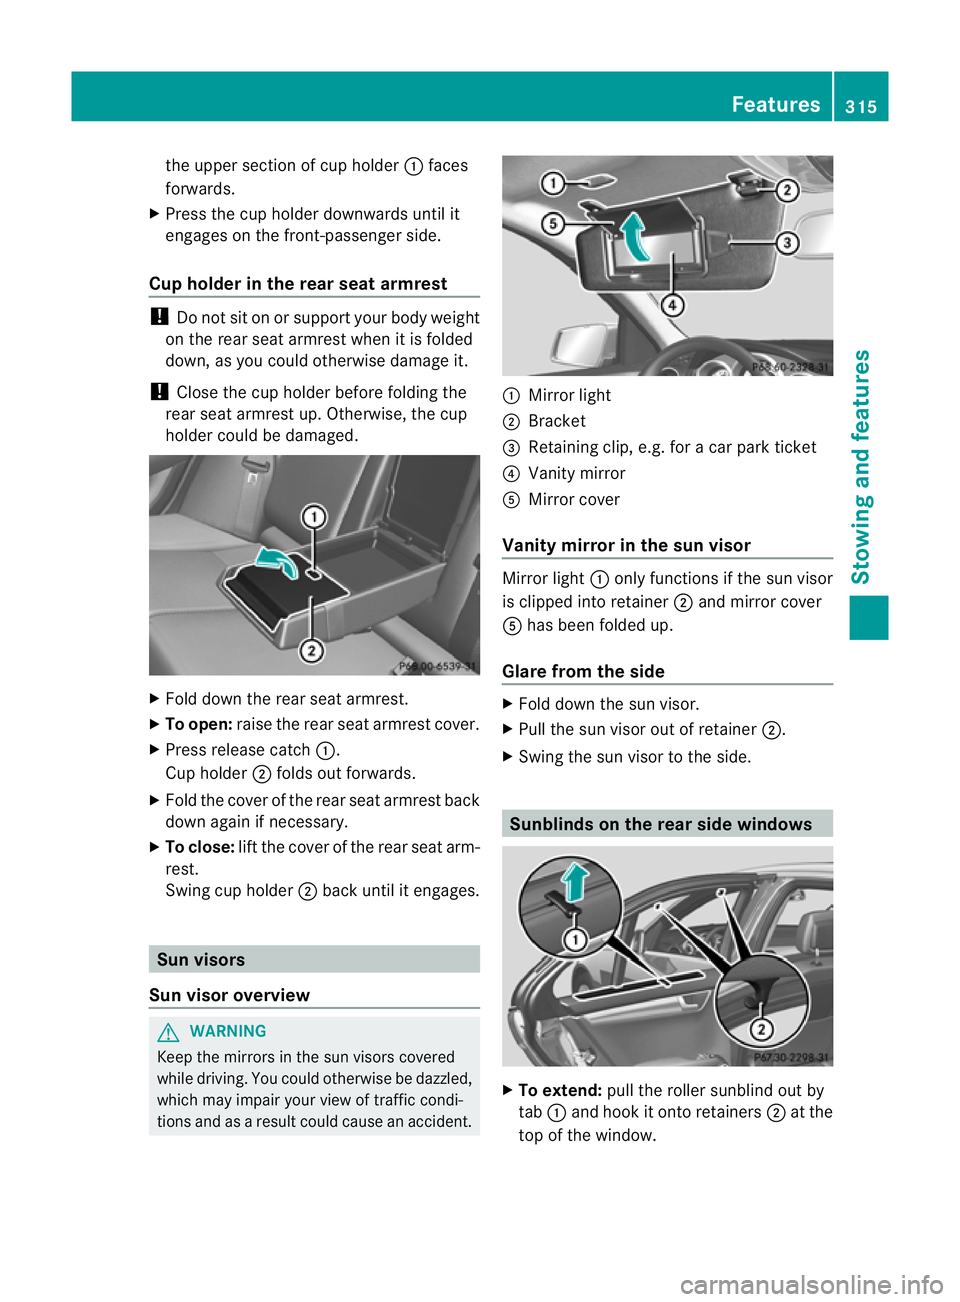
Fold down the rear seat armrest.
X To open: raise the rear seat armrest cover.
X Press release catch :.
Cup holder ;folds out forwards.
X Fold the cover of the rear seat armrest back
down again if necessary.
X To close: lift the cover of the rear seat arm-
rest.
Swing cup holder ;back until it engages. Sun visors
Sun visor overview G
WARNING
Keep the mirrors in the sun visors covered
while driving. You could otherwise be dazzled,
which may impair your view of traffic condi-
tions and as a result could cause an accident. :
Mirror light
; Bracket
= Retaining clip, e.g. for a car park ticket
? Vanity mirror
A Mirror cover
Vanity mirror in the sun visor Mirror light
:only functions if the sun visor
is clipped into retainer ;and mirror cover
A has been folded up.
Glare from the side X
Fold down the sun visor.
X Pull the sun visor out of retainer ;.
X Swing the sun visor to the side. Sunblinds on the rear side windows
X
To extend: pull the roller sunblind out by
tab :and hook it onto retainers ;at the
top of the window. Features
315Stowing and features Z