start stop button MERCEDES-BENZ C-CLASS SALOON 2014 Owners Manual
[x] Cancel search | Manufacturer: MERCEDES-BENZ, Model Year: 2014, Model line: C-CLASS SALOON, Model: MERCEDES-BENZ C-CLASS SALOON 2014Pages: 489, PDF Size: 14.88 MB
Page 17 of 489
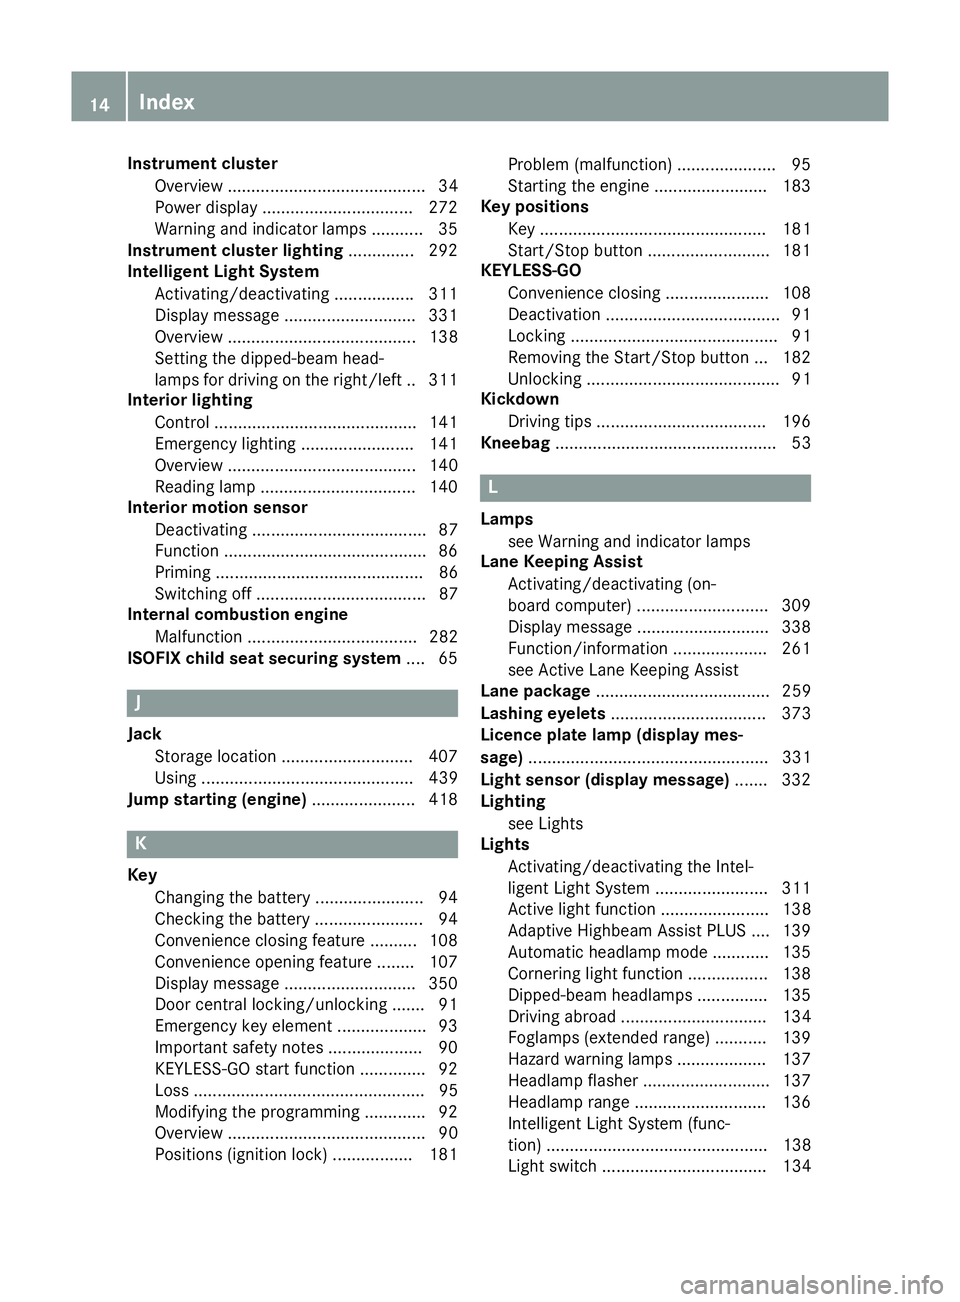
Instrument cluster
Overview .......................................... 34
Power display ................................ 272
Warning and indicator lamps .......... .35
Instrument cluster lighting .............. 292
Intelligent Light System
Activating/deactivating ................ .311
Display message ............................ 331
Overview ........................................ 138
Setting the dipped-beam head-
lamps for driving on the right/left .. 311
Interior lighting
Control .......................................... .141
Emergency lighting ........................ 141
Overview ........................................ 140
Reading lamp ................................. 140
Interior motion sensor
Deactivating ..................................... 87
Function .......................................... .86
Priming ............................................ 86
Switching off .................................... 87
Internal combustion engine
Malfunction .................................... 282
ISOFIX child seat securing system ....65J
Jack Storage location ............................4 07
Using ............................................. 439
Jump starting (engine) ......................418 K
Key Changing the battery ....................... 94
Checking the battery ....................... 94
Convenience closing feature .......... 108
Convenience opening feature ....... .107
Display message ............................ 350
Door central locking/unlocking ....... 91
Emergency key element ................... 93
Important safety notes .................... 90
KEYLESS-GO start function .............. 92
Loss ................................................. 95
Modifying the programming ............. 92
Overview .......................................... 90
Positions (ignition lock) ................. 181 Problem (malfunction) ..................... 95
Starting the engine ........................ 183
Key positions
Key ................................................ 181
Start/Stop button .......................... 181
KEYLESS-GO
Convenience closing ..................... .108
Deactivation ..................................... 91
Locking ............................................ 91
Removing the Start/Stop button ... 182
Unlocking ......................................... 91
Kickdown
Driving tips ................................... .196
Kneebag ............................................... 53 L
Lamps see Warning and indicator lamps
Lane Keeping Assist
Activating/deactivating (on-
board computer) ............................ 309
Display message ............................ 338
Function/informatio n.................... 261
see Active Lane Keeping Assist
Lane package ..................................... 259
Lashing eyelets ................................. 373
Licence plate lamp (display mes-
sage) ................................................... 331
Light sensor (display message) ....... 332
Lighting
see Lights
Lights
Activating/deactivating the Intel-
ligent Light System ........................ 311
Active light function ....................... 138
Adaptive Highbeam Assist PLUS .... 139
Automatic headlamp mode ............ 135
Cornering light function ................. 138
Dipped-beam headlamp s............... 135
Driving abroad ............................... 134
Foglamps (extended range) ........... 139
Hazard warning lamps ................... 137
Headlamp flashe r........................... 137
Headlamp range ............................ 136
Intelligent Light System (func-
tion) ............................................... 138
Light switch ................................... 134 14
Index
Page 18 of 489
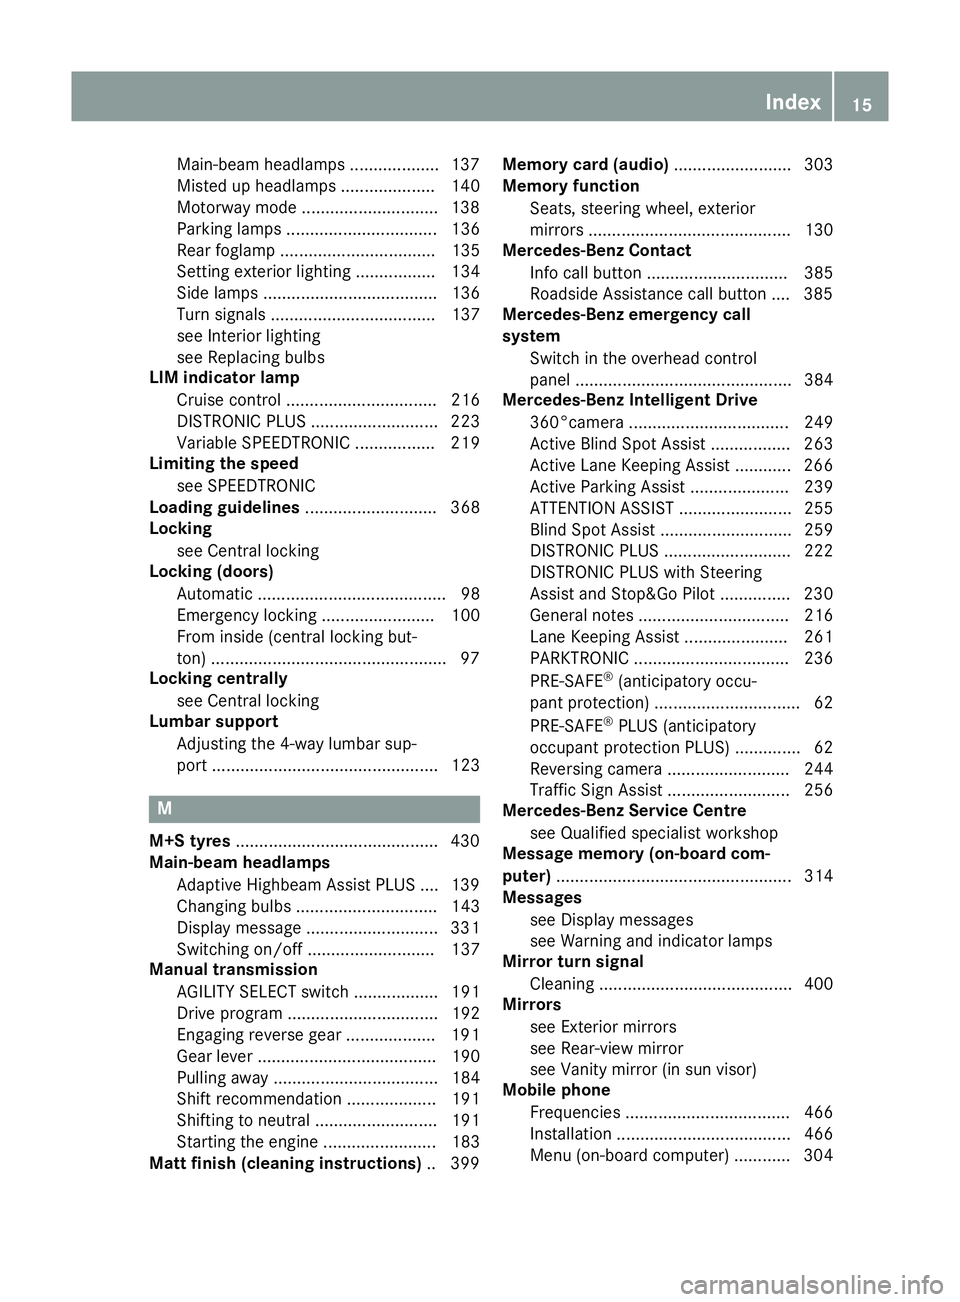
Main-beam headlamps ...................1
37
Misted up headlamps .................... 140
Motorway mode ............................ .138
Parking lamps ................................ 136
Rear foglamp ................................. 135
Setting exterior lighting ................. 134
Side lamps ..................................... 136
Turn signals ................................... 137
see Interior lighting
see Replacing bulbs
LIM indicator lamp
Cruise control ................................ 216
DISTRONIC PLUS ........................... 223
Variable SPEEDTRONIC ................. 219
Limiting the speed
see SPEEDTRONIC
Loading guidelines ............................ 368
Locking
see Central locking
Locking (doors)
Automatic ........................................ 98
Emergency locking ........................ 100
From inside (central locking but-
ton) ................................................. .97
Locking centrally
see Central locking
Lumbar support
Adjusting the 4-way lumbar sup-
port ................................................ 123 M
M+S tyres .......................................... .430
Main-beam headlamps
Adaptive Highbeam Assist PLUS .... 139
Changing bulbs .............................. 143
Display message ............................ 331
Switching on/off ........................... 137
Manual transmission
AGILITY SELECT switch .................. 191
Drive program ................................ 192
Engaging reverse gear ................... 191
Gear leve r...................................... 190
Pulling away ................................... 184
Shift recommendation ................... 191
Shifting to neutral .......................... 191
Starting the engine ........................ 183
Matt finish (cleaning instructions) .. 399Memory card (audio)
......................... 303
Memory function
Seats, steering wheel, exterior
mirrors ........................................... 130
Mercedes-Benz Contact
Info call button .............................. 385
Roadside Assistance call button .... 385
Mercedes-Benz emergency call
system
Switch in the overhead control
panel .............................................. 384
Mercedes-Benz Intelligent Drive
360°camera .................................. 249
Active Blind Spot Assist ................. 263
Active Lane Keeping Assist ............ 266
Active Parking Assist ..................... 239
ATTENTION ASSIST ........................ 255
Blind Spot Assist ............................ 259
DISTRONIC PLUS ........................... 222
DISTRONIC PLUS with Steering
Assist and Stop&Go Pilot ............... 230
General notes ................................ 216
Lane Keeping Assist ...................... 261
PARKTRONIC ................................. 236
PRE-SAFE ®
(anticipatory occu-
pant protection) ............................... 62
PRE-SAFE ®
PLUS (anticipatory
occupant protection PLUS) .............. 62
Reversing camera .......................... 244
Traffic Sign Assist .......................... 256
Mercedes-Benz Service Centre
see Qualified specialist workshop
Message memory (on-board com-
puter) .................................................. 314
Messages
see Display messages
see Warning and indicator lamps
Mirror turn signal
Cleaning ......................................... 400
Mirrors
see Exterior mirrors
see Rear-view mirror
see Vanity mirror (in sun visor)
Mobile phone
Frequencies ................................... 466
Installation ..................................... 466
Menu (on-board computer) ............ 304 Index
15
Page 23 of 489
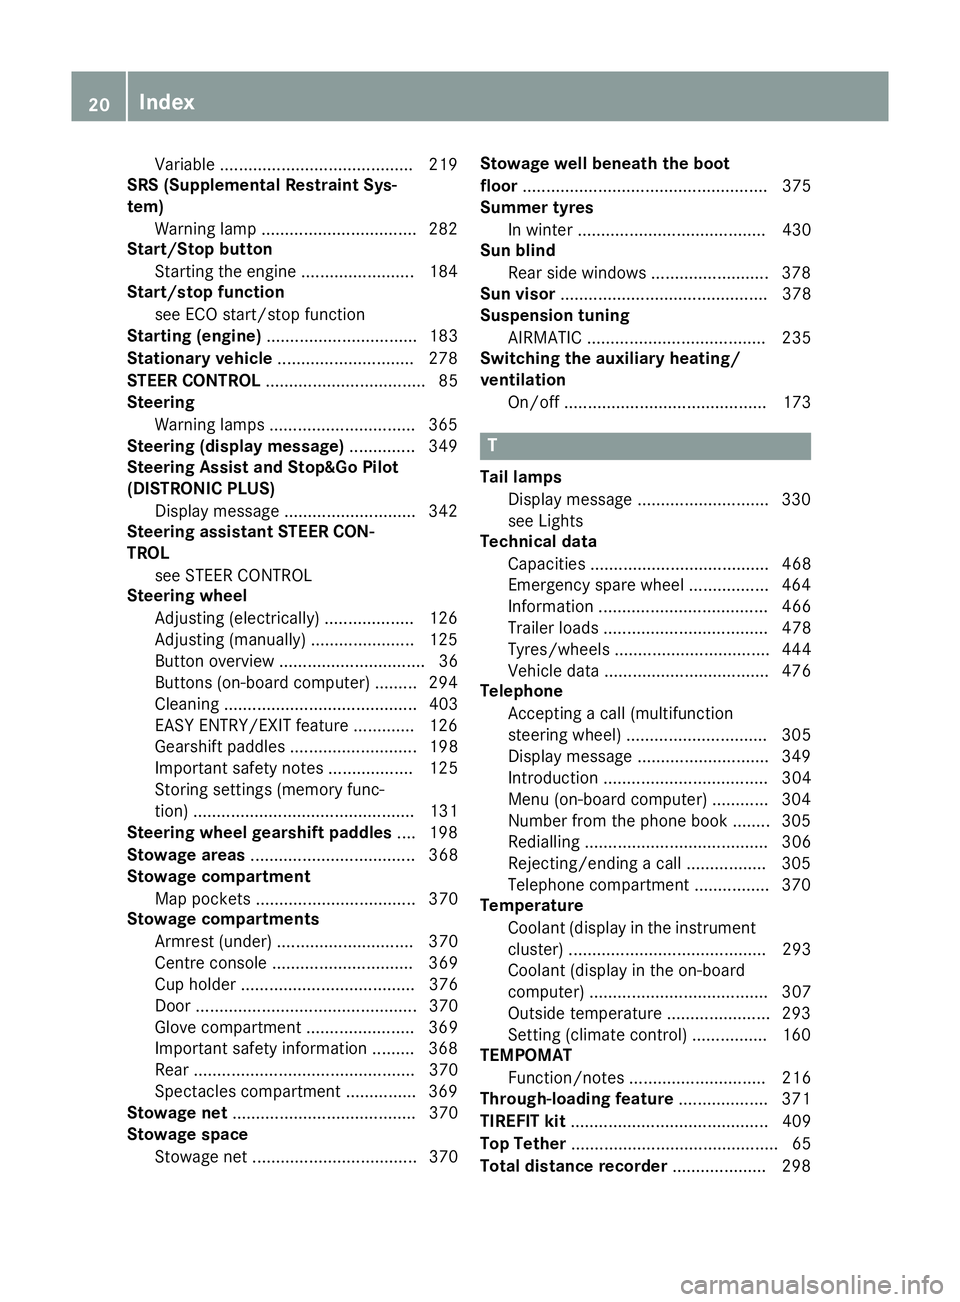
Variable .........................................2
19
SRS (Supplemental Restraint Sys-
tem)
Warning lamp ................................. 282
Start/Stop button
Starting the engine ........................ 184
Start/stop function
see ECO start/stop function
Starting (engine) ................................ 183
Stationary vehicle .............................278
STEER CONTROL .................................. 85
Steering
Warning lamps ............................... 365
Steering (display message) .............. 349
Steering Assist and Stop&Go Pilot
(DISTRONIC PLUS)
Display message ............................ 342
Steering assistant STEER CON-
TROL
see STEER CONTROL
Steering wheel
Adjusting (electrically) ................... 126
Adjusting (manually) ...................... 125
Button overview ............................... 36
Buttons (on-board computer) ......... 294
Cleaning ......................................... 403
EASY ENTRY/EXIT feature ............. 126
Gearshift paddle s........................... 198
Important safety notes .................. 125
Storing settings (memory func-
tion) ............................................... 131
Steering wheel gearshift paddles .... 198
Stowage areas ................................... 368
Stowage compartment
Map pockets .................................. 370
Stowage compartments
Armrest (under) ............................. 370
Centre console .............................. 369
Cup holde r..................................... 376
Door ............................................... 370
Glove compartment ....................... 369
Important safety information ......... 368
Rear ............................................... 370
Spectacles compartment ............... 369
Stowage net ....................................... 370
Stowage space
Stowage net ................................... 370 Stowage well beneath the boot
floor
.................................................... 375
Summer tyres
In winter ........................................ 430
Sun blind
Rear side window s......................... 378
Sun visor ............................................ 378
Suspension tuning
AIRMATIC ...................................... 235
Switching the auxiliary heating/
ventilation
On/off ........................................... 173 T
Tail lamps Display message ............................ 330
see Lights
Technical data
Capacities ...................................... 468
Emergency spare wheel ................. 464
Information .................................... 466
Trailer load s................................... 478
Tyres/wheels ................................. 444
Vehicle data ................................... 476
Telephone
Accepting a call (multifunction
steering wheel) .............................. 305
Display message ............................ 349
Introduction ................................... 304
Menu (on-board computer) ............ 304
Number from the phone book ........ 305
Redialling ....................................... 306
Rejecting/ending a call ................. 305
Telephone compartment ................ 370
Temperature
Coolant (display in the instrumentcluster) .......................................... 293
Coolant (display in the on-board
computer) ...................................... 307
Outside temperature ...................... 293
Setting (climate control )................ 160
TEMPOMAT
Function/note s............................. 216
Through-loading feature ................... 371
TIREFIT kit .......................................... 409
Top Tether ............................................ 65
Total distance recorder .................... 29820
Index
Page 35 of 489
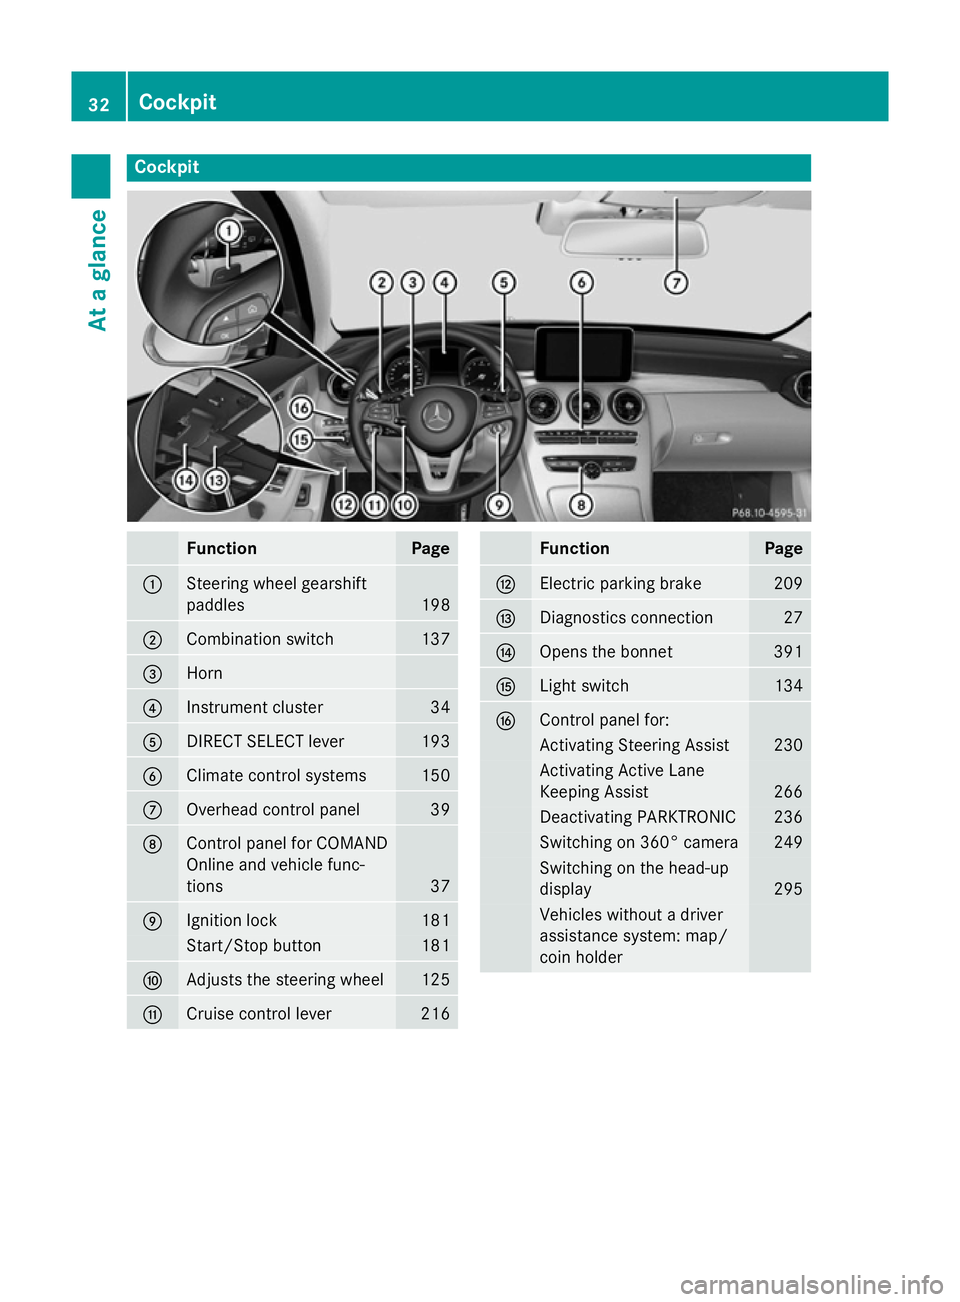
Cockpit
Function Page
:
Steering wheel gearshift
paddles
198
;
Combination switch 137
=
Horn
?
Instrument cluster 34
A
DIRECT SELECT lever 193
B
Climate control systems 150
C
Overhead control panel 39
D
Control panel for COMAND
Online and vehicle func-
tions
37
E
Ignition lock 181
Start/Stop button 181
F
Adjusts the steering wheel 125
G
Cruise control lever 216 Function Page
H
Electric parking brake 209
I
Diagnostics connection 27
J
Opens the bonnet 391
K
Light switch 134
L
Control panel for:
Activating Steering Assist 230
Activating Active Lane
Keeping Assist 266
Deactivating PARKTRONIC 236
Switching on 360° camera 249
Switching on the head-up
display
295
Vehicles without a driver
assistance system: map/
coin holder32
CockpitAt a glance
Page 36 of 489
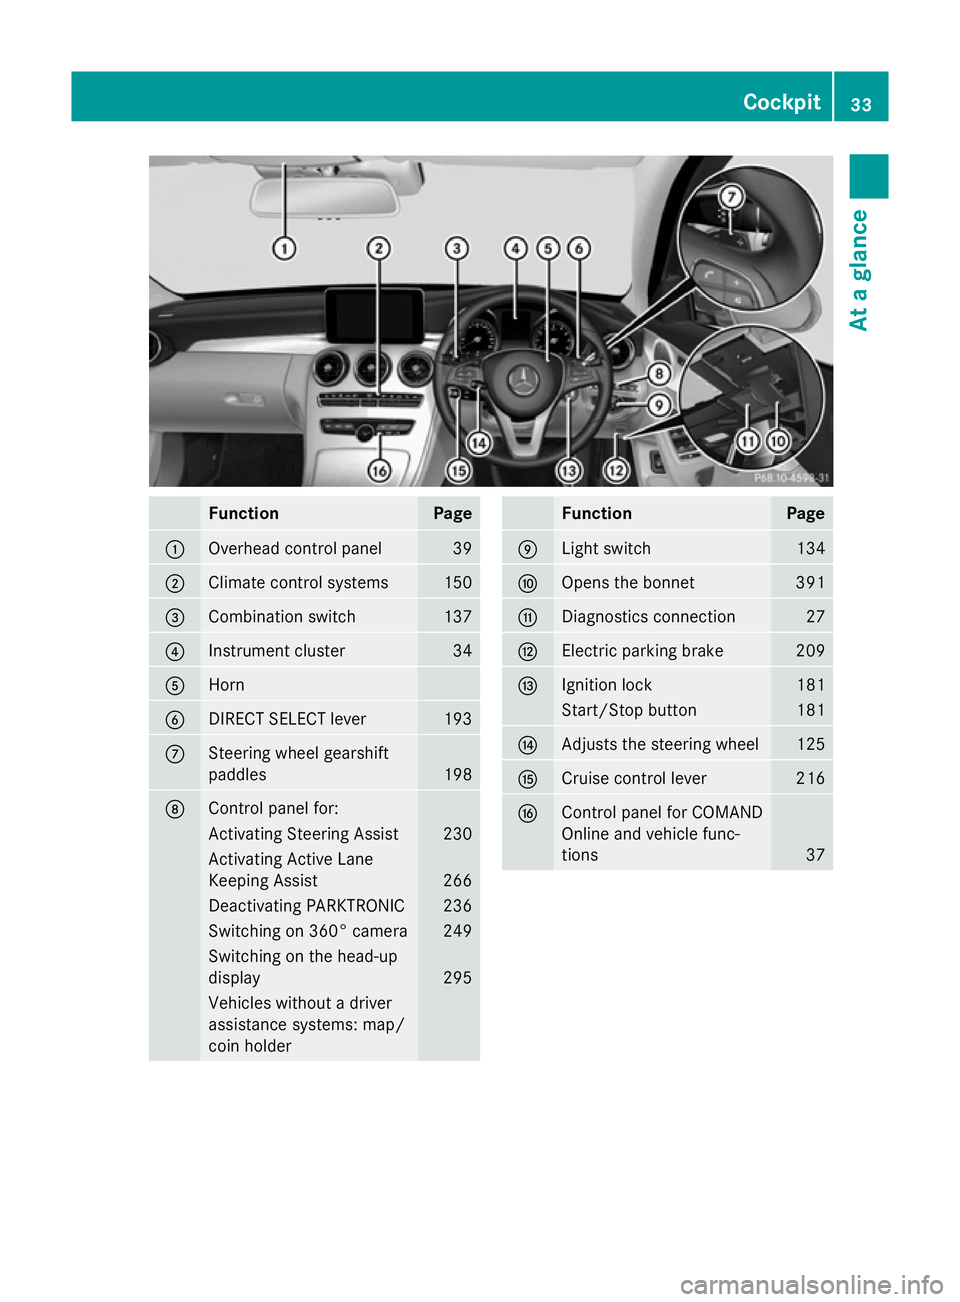
Function Page
:
Overhead control panel 39
;
Climate control systems 150
=
Combination switch 137
?
Instrument cluster 34
A
Horn
B
DIRECT SELECT lever 193
C
Steering wheel gearshift
paddles
198
D
Control panel for:
Activating Steering Assist 230
Activating Active Lane
Keeping Assist
266
Deactivating PARKTRONIC 236
Switching on 360° camera 249
Switching on the head-up
display
295
Vehicles without a driver
assistance systems: map/
coin holder Function Page
E
Light switch 134
F
Opens the bonnet 391
G
Diagnostics connection 27
H
Electric parking brake 209
I
Ignition lock 181
Start/Stop button 181
J
Adjusts the steering wheel 125
K
Cruise control lever 216
L
Control panel for COMAND
Online and vehicle func-
tions
37Cockpit
33At a glance
Page 41 of 489
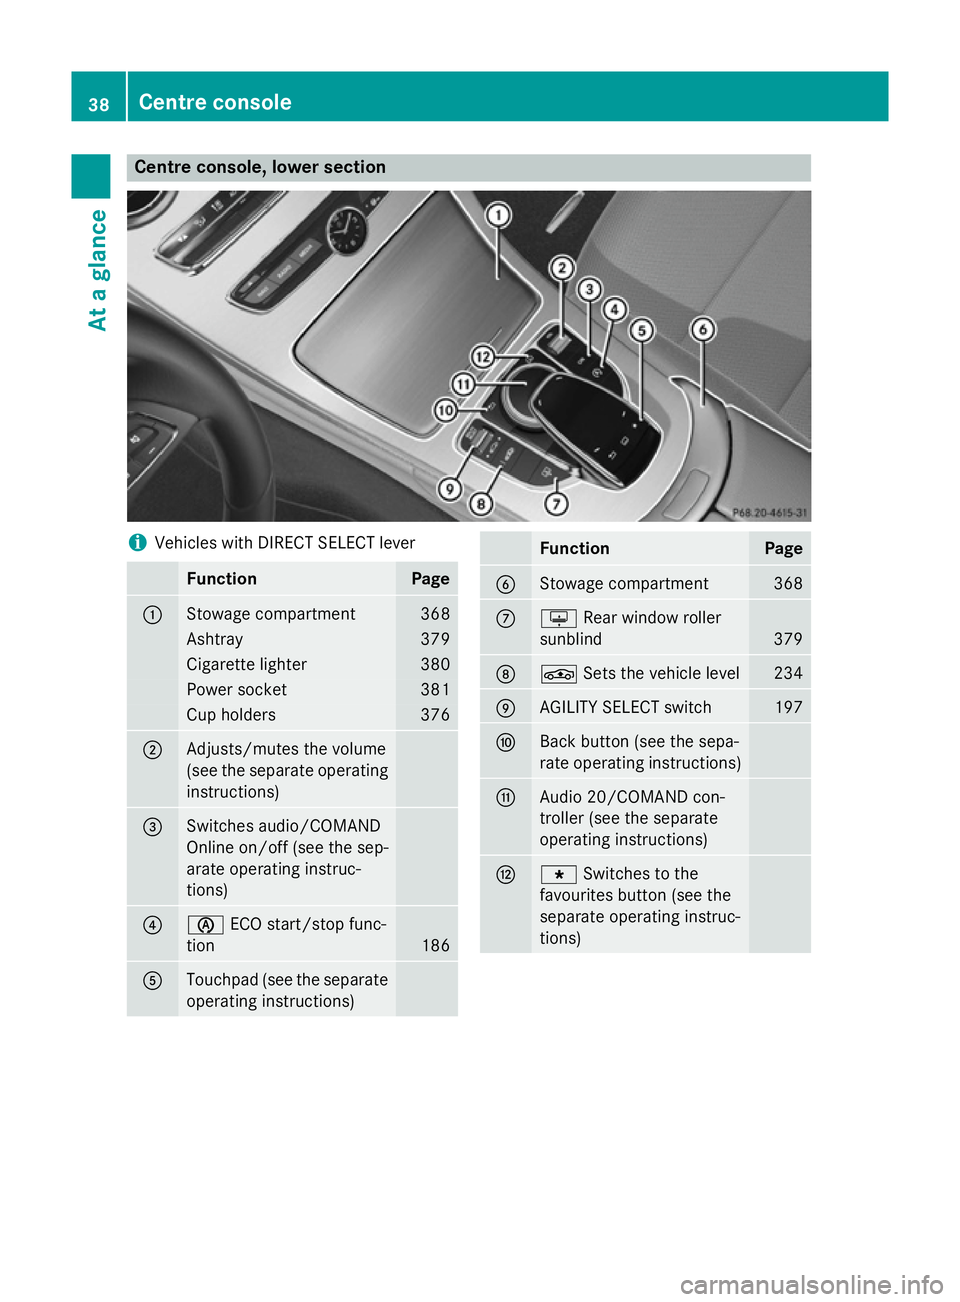
Centre console, lower section
i
Vehicles with DIRECT SELECT lever Function Page
:
Stowage compartment 368
Ashtray 379
Cigarette lighter 380
Power socket 381
Cup holders 376
;
Adjusts/mutes the volume
(see the separate operating
instructions) =
Switches audio/COMAND
Online on/off (see the sep-
arate operating instruc-
tions)
?
è
ECO start/stop func-
tion 186
A
Touchpad (see the separate
operating instructions) Function Page
B
Stowage compartment 368
C
u
Rear window roller
sunblind 379
D
É
Sets the vehicle level 234
E
AGILITY SELECT switch 197
F
Back button (see the sepa-
rate operating instructions)
G
Audio 20/COMAND con-
troller (see the separate
operating instructions)
H
g
Switches to the
favourites button (see the
separate operating instruc-
tions) 38
Centre consoleAt a glance
Page 47 of 489
G
WARNING
If the housing of the high-voltage battery has
been damaged, electrolyte and gases may
leak out. These are poisonous and caustic.
There is a risk of injury.
Avoid contact with the skin, eyes or clothing. Immediately rinse electrolyte splashes off
with water and seek medical attention
straight away.
! Exhaustive discharge caused by the vehi-
cle standing idle for lengthy periods can
damage the high-voltage battery.
If the vehicle is idle for lengthy periods, run
it for a few minutes once every six weeks to
charge up the high-voltage battery.
During the charging process, switch off all
electrical consumers, e.g. the automatic
climate control or the seat heating.
Information on charging the high-voltage bat-
tery (Y page 416).
Engine compartment Before opening the bonnet:
X Apply the electric parking brake.
X Shift the automatic transmission to park
position P.
X Switch the ignition off.
X Remove the key from the ignition lock.
or, in vehicles with KEYLESS-GO start-func-
tion or KEYLESS ‑GO
X Remove the Start/Stop button from the
ignition lock.
X Observe the warning notes on the risk of
electric shock (Y page 42).
X Observe the warning notes about the bon-
net (Y page 391). RBS driving safety system (Recupera-
tive Brake System)
RBS supports you when braking with an elec-
tronically-controlled brake boost mode and enables the recovery of kinetic energy (recu-
peration).
For further information on the RBS system
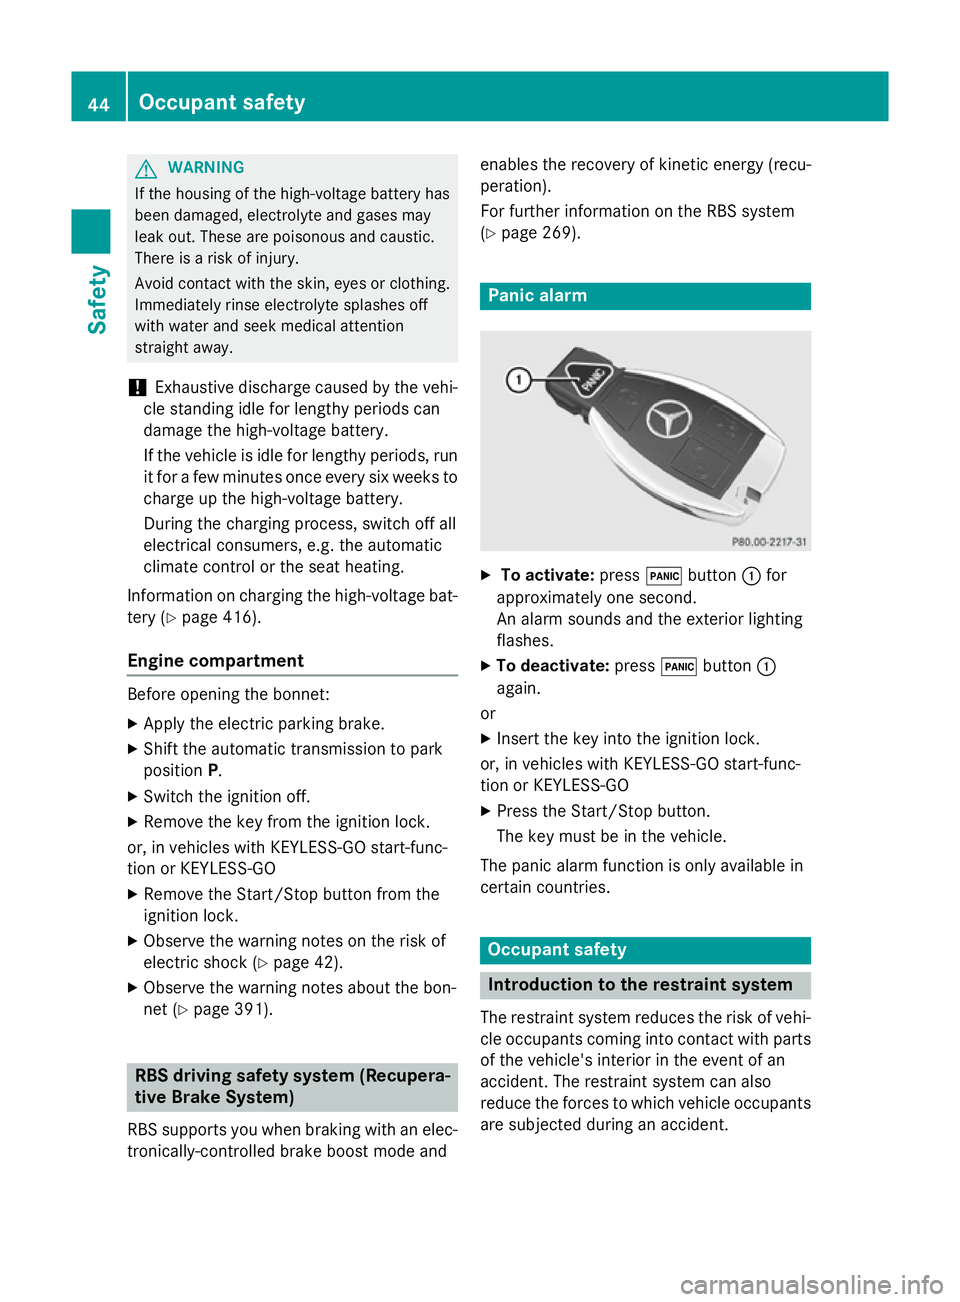
(Y page 269). Panic alarm
X
To activate: press!button :for
approximately one second.
An alarm sounds and the exterior lighting
flashes.
X To deactivate: press!button :
again.
or
X Insert the key into the ignition lock.
or, in vehicles with KEYLESS-GO start-func-
tion or KEYLESS ‑GO
X Press the Start/Stop button.
The key must be in the vehicle.
The panic alarm function is only available in
certain countries. Occupant safety
Introduction to the restraint system
The restraint system reduces the risk of vehi- cle occupants coming into contact with parts
of the vehicle's interior in the event of an
accident. The restraint system can also
reduce the forces to which vehicle occupants
are subjected during an accident. 44
Occupant safetySafety
Page 57 of 489
In the event of a side impact, the windowbag
is deployed on the side on which the impact
occurs.
If the system determines that they can offer
additional protection to that provided by the
seat belt, a windowbag may be deployed in
other accident situations (Y page 60).Automatic front-passenger front air-
bag deactivation
Introduction In order to recognise a child restraint system
on the front-passenger seat, the automatic
front-passenger front airbag deactivation sys- tem categorises the person in the front-
passenger seat. Depending on that result, the
front-passenger front airbag is either enabled or disabled. If a rearward-facing child
restraint system is fitted to the front-
passenger seat, the PASSENGER AIR BAG
OFF indicator lamp must light up after the
system self-test and remain lit. The front-
passenger front airbag is disabled.
The system does not disable:
R the sidebag
R the windowbag
R the seat belt tensioner
Make sure that your vehicle is equipped with
the automatic front-passenger front airbag
deactivation system (Y page 66). If this is
not the case, always fit the child restraint sys- tem on a suitable rear seat (Y page 68).
If it is absolutely necessary to install a child
restraint system on the front-passenger seat,
be sure to observe the correct positioning of
the child restraint system. Never place
objects under or behind the child restraint
system, e.g. cushions. Fully retract the seat
cushion length. The entire base of the child
restraint system must always rest on the seat cushion of the front-passenger seat. The
backrest of the forwards-facing child restraint
system must, as far as possible, be resting on the backrest of the front-passenger seat. The child restraint system must not touch the roof
or be put under strain by the head restraint.
Adjust the angle of the seat backrest and the
head restraint position accordingly. Only then is the correct function of the automatic front- passenger front airbag deactivation system
guaranteed. Always observe the information
on suitable positioning of the child restraint
system (Y page 68) in addition to the child
restraint system manufacturer's installation
instructions.
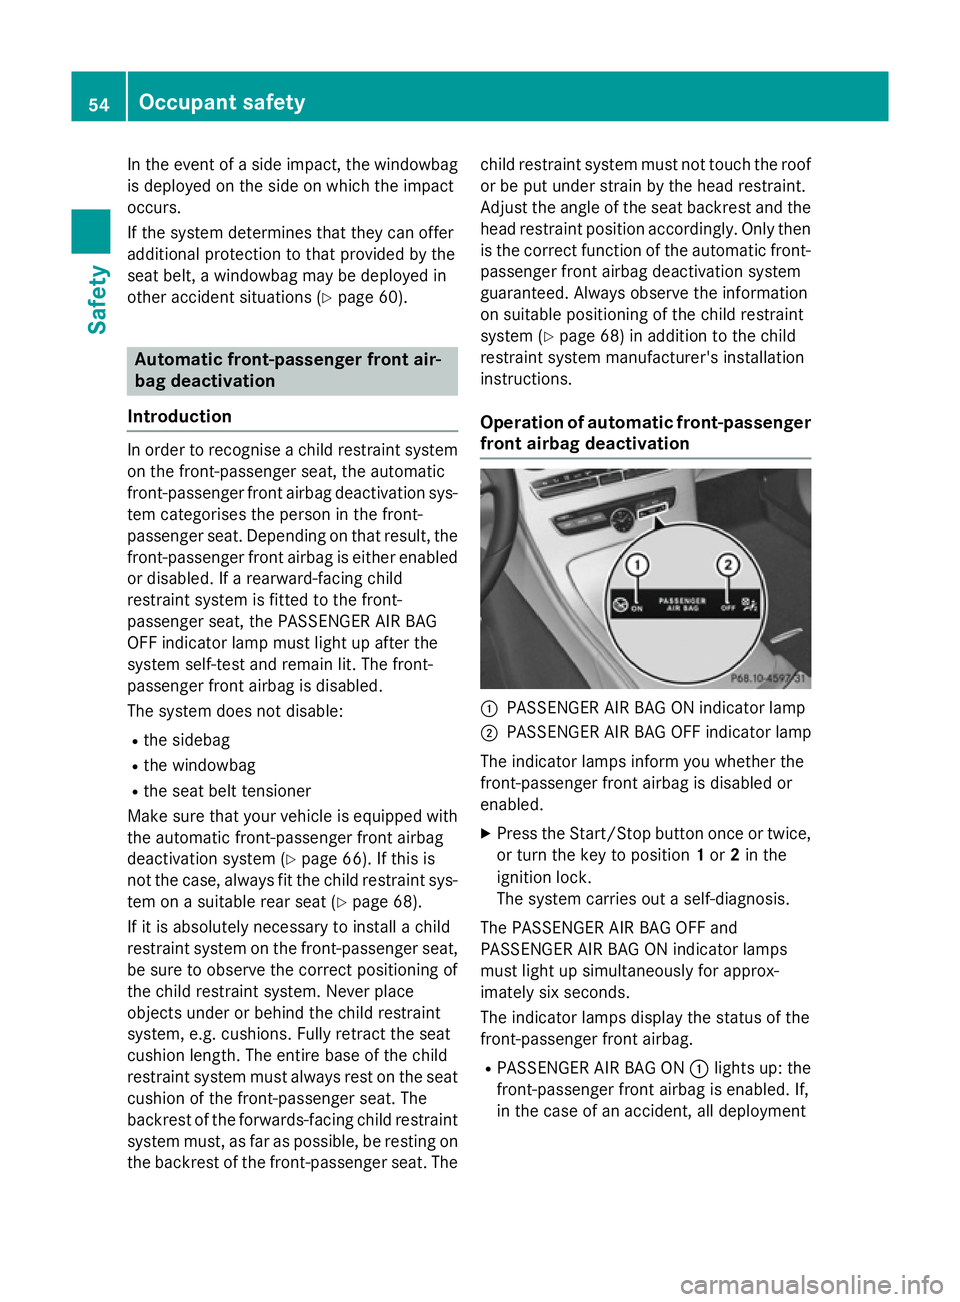
Operation of automatic front-passenger front airbag deactivation :
PASSENGER AIR BAG ON indicator lamp
; PASSENGER AIR BAG OFF indicator lamp
The indicator lamps inform you whether the
front-passenger front airbag is disabled or
enabled.
X Press the Start/Stop button once or twice,
or turn the key to position 1or 2in the
ignition lock.
The system carries out a self-diagnosis.
The PASSENGER AIR BAG OFF and
PASSENGER AIR BAG ON indicator lamps
must light up simultaneously for approx-
imately six seconds.
The indicator lamps display the status of the
front-passenger front airbag.
R PASSENGER AIR BAG ON :lights up: the
front-passenger front airbag is enabled. If,
in the case of an accident, all deployment 54
Occupant safetySafety
Page 83 of 489

Adaptive brake lamps
The adaptive brake lights warn following traf- fic in an emergency braking situation:
R by flashing brake lamps
R by activating the hazard warning lamps
If you brake sharply from a speed of more
than 50 km/h or if braking is assisted by BAS
or BAS PLUS, the brake lamps flash rapidly. In this way, traffic travelling behind you is
warned in an even more noticeable manner.
If you brake sharply from a speed of more
than 70 km/h to a standstill, the hazard warn-
ing lamps are activated automatically. If the
brakes are applied again, the brake lamps
light up continuously. The hazard warning
lamps switch off automatically if you travel
faster than 10 km/h. You can also switch off the hazard warning lamps using the hazard
warning button (Y page 137).ESP
®
(Electronic Stability Program)
General notes i
Observe the "Important safety notes" sec-
tion (Y page 74).
ESP ®
monitors driving stability and traction,
i.e. power transmission between the tyres
and the road surface.
If ESP ®
detects that the vehicle is deviating
from the direction desired by the driver, one
or more wheels are braked to stabilise the
vehicle. The engine output is also modified to keep the vehicle on the desired course within
physical limits. ESP ®
assists the driver when
pulling away on wet or slippery roads. ESP ®
can also stabilise the vehicle during braking.
ETS/4ETS (Electronic Traction System) i
Observe the "Important safety notes" sec-
tion (Y page 74).
ETS traction control is part of ESP ®
. On vehi-
cles with 4MATIC, 4ETS is a component of
ESP ®
. Traction control brakes the drive wheels indi-
vidually if they spin. This enables you to pull
away and accelerate on slippery surfaces, for example if the road surface is slippery on one
side. In addition, more drive torque is trans-
ferred to the wheel or wheels with traction.
Traction control remains active if you deacti-
vate ESP ®
.
Important safety notes i
Observe the "Important safety notes" sec-
tion (Y page 74). G
WARNING
If ESP ®
is malfunctioning, ESP ®
is unable to
stabilise the vehicle. In addition, other driving
safety systems are switched off. This increa-
ses the risk of skidding and an accident.
Drive on carefully. Have ESP ®
checked at a
qualified specialist workshop.
! If you test the parking brake using a brake
dynamometer, switch the ignition off.
Application of the brakes by ESP ®
may oth-
erwise destroy the brake system.
When towing your vehicle with the rear axle
raised, observe the notes on ESP ®
(Y page 422).
ESP ®
is deactivated if the åwarning lamp
in the instrument cluster lights up and:
R the vehicle is moving
R the ECO start/stop function is activated
If the ÷ warning lamp lights up continu-
ously, ESP ®
is not available due to a malfunc-
tion.
Observe the information on warning lamps
(Y page 357) and display messages which
may be shown in the instrument cluster
(Y page 315).
Only use wheels with the recommended tyre
sizes. Only then will ESP ®
function properly. 80
Driving safety systemsSafety
Page 89 of 489
X
To turn the alarm off with the key: press
the % or& button on the key.
The alarm is switched off.
or
X Vehicles with KEYLESS-GO start-func-
tion or KEYLESS-GO: remove the Start/
Stop button from the ignition lock
(Y page 181).
X Insert the key into the ignition lock.
The alarm is switched off.
X To stop the alarm using KEYLESS-GO:
grasp the outside door handle. The key
must be outside the vehicle.
The alarm is switched off.
or X Press the Start/Stop button on the dash-
board. The key must be inside the vehicle.
The alarm is switched off.
The alarm is not switched off, even if you
close the open door that has triggered it, for
example.
i If the alarm stays on for more than
30 seconds, the Mercedes‑Benz emer-
gency call system automatically sends a
message to the Customer Assistance
Centre. This is done by means of a text
message or a data connection. The emer-
gency call system sends a message or
establishes a data connection provided
that:
R you have subscribed to the
Mercedes‑Benz emergency call system
R the Mercedes‑ Benz emergency call sys-
tem has been activated properly
R the necessary mobile phone network is
available Tow-away protection
Function An audible and visual alarm is triggered if your
vehicle's angle of inclination is altered while
tow-away protection is primed. This can occur if the vehicle is jacked up on one side, for
example.
Priming X
Make sure that:
R the doors are closed
R the boot lid is closed
Only then is the tow-away protection
primed.
X Lock the vehicle with the key or KEYLESS-
GO.
Tow-away protection is primed after
approximately 60 second s.
Switching off X
Unlo ck the vehicle with the key or KEY-
LESS-GO.
or X Insert the key into the ignition lock.
Tow-away protection is switched off auto-
matically.
Deactivating You can deactivate the tow-away protection
using COMAND Online or Audio 20. You can
find information about deactivating the tow-
away protection in the separate COMAND
Online or Audio 20 operating instructions. Interior motion sensor
Function When the interior motion sensor is primed, a
visual and audible alarm is triggered if move-
ment is detected in the vehicle interior. This
can occur if someone reaches into the vehicle
interior, for example.
Priming X
Make sure that: 86
Protection against theftSafety