turn signal MERCEDES-BENZ C-Class SEDAN 2012 W204 Owner's Manual
[x] Cancel search | Manufacturer: MERCEDES-BENZ, Model Year: 2012, Model line: C-Class SEDAN, Model: MERCEDES-BENZ C-Class SEDAN 2012 W204Pages: 356, PDF Size: 13.49 MB
Page 13 of 356
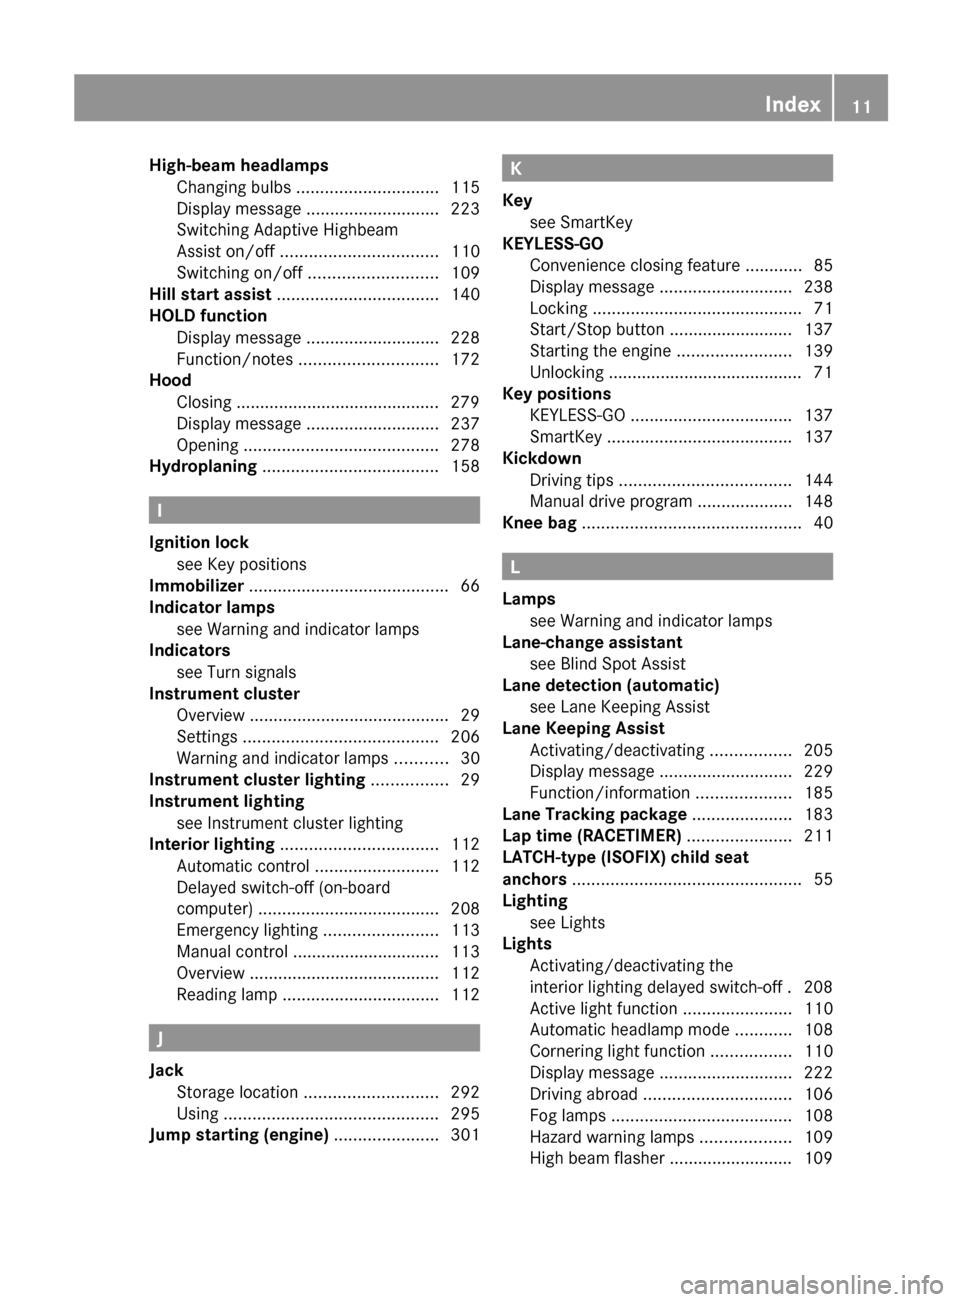
High-beam headlampsChanging bulbs .............................. 115
Display message ............................ 223
Switching Adaptive Highbeam
Assist on/off ................................. 110
Switching on/off ........................... 109
Hill start assist .................................. 140
HOLD function Display message ............................ 228
Function/notes ............................. 172
Hood
Closing ........................................... 279
Display message ............................ 237
Opening ......................................... 278
Hydroplaning ..................................... 158
I
Ignition lock see Key positions
Immobilizer .......................................... 66
Indicator lamps see Warning and indicator lamps
Indicators
see Turn signals
Instrument cluster
Overview .......................................... 29
Settings ......................................... 206
Warning and indicator lamps ...........30
Instrument cluster lighting ................ 29
Instrument lighting see Instrument cluster lighting
Interior lighting ................................. 112
Automatic control ..........................112
Delayed switch-off (on-board
computer) ...................................... 208
Emergency lighting ........................113
Manual control ............................... 113
Overview ........................................ 112
Reading lamp ................................. 112
J
Jack Storage location ............................ 292
Using ............................................. 295
Jump starting (engine) ...................... 301
K
Key see SmartKey
KEYLESS-GO
Convenience closing feature ............85
Display message ............................ 238
Locking ............................................ 71
Start/Stop button .......................... 137
Starting the engine ........................139
Unlocking ......................................... 71
Key positions
KEYLESS-GO .................................. 137
SmartKey ....................................... 137
Kickdown
Driving tips .................................... 144
Manual drive program ....................148
Knee bag .............................................. 40
L
Lamps see Warning and indicator lamps
Lane-change assistant
see Blind Spot Assist
Lane detection (automatic)
see Lane Keeping Assist
Lane Keeping Assist
Activating/deactivating .................205
Display message ............................ 229
Function/information ....................185
Lane Tracking package ..................... 183
Lap time (RACETIMER) ...................... 211
LATCH-type (ISOFIX) child seat
anchors ................................................ 55
Lighting see Lights
Lights
Activating/deactivating the
interior lighting delayed switch-off . 208
Active light function .......................110
Automatic headlamp mode ............108
Cornering light function .................110
Display message ............................ 222
Driving abroad ............................... 106
Fog lamps ...................................... 108
Hazard warning lamps ...................109
High beam flasher .......................... 109
Index11
Page 14 of 356
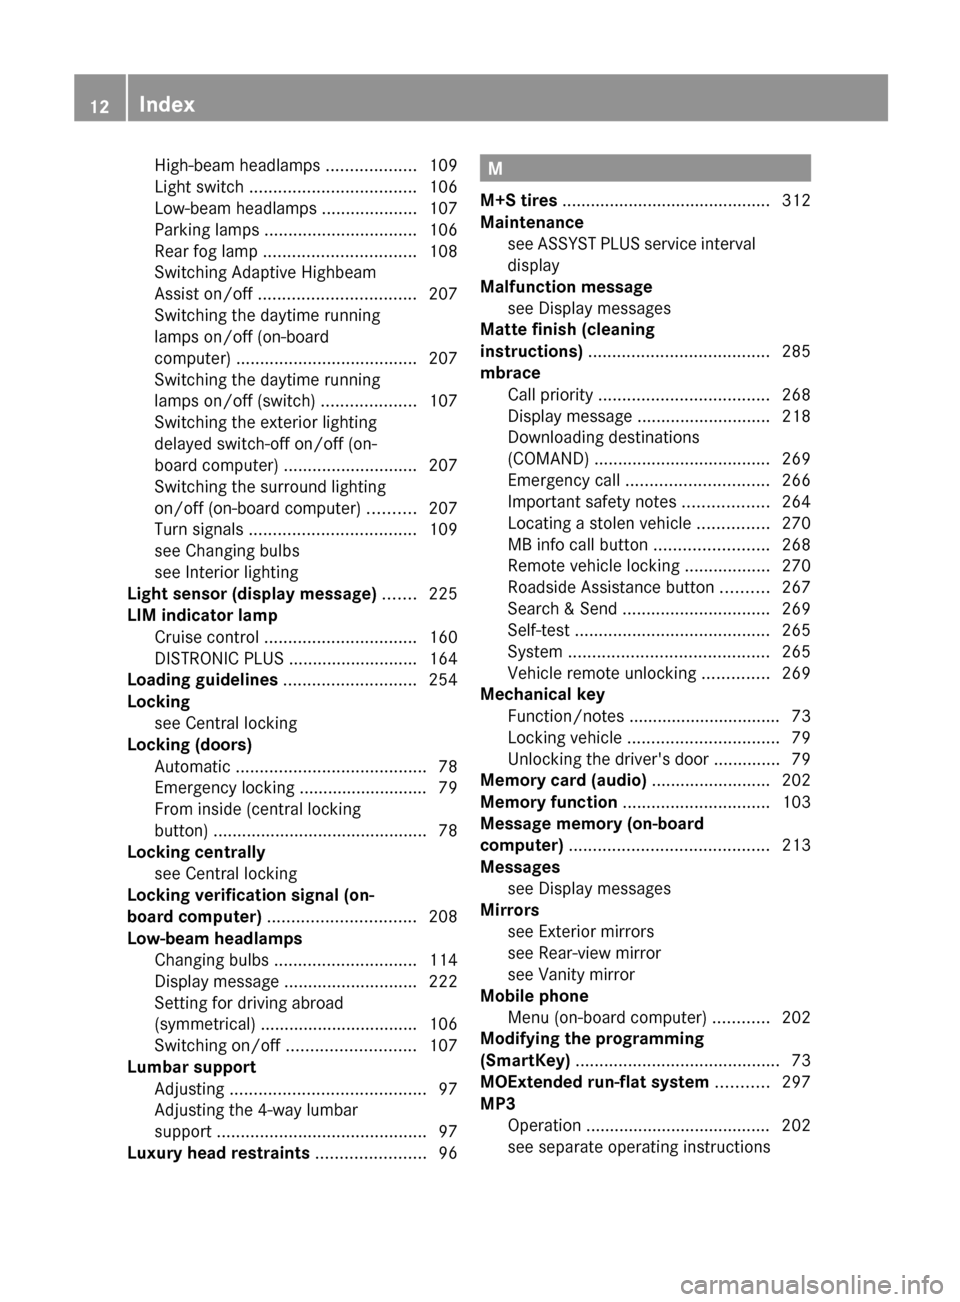
High-beam headlamps ...................109
Light switch ................................... 106
Low-beam headlamps ....................107
Parking lamps ................................ 106
Rear fog lamp ................................ 108
Switching Adaptive Highbeam
Assist on/off ................................. 207
Switching the daytime running
lamps on/off (on-board
computer) ...................................... 207
Switching the daytime running
lamps on/off (switch) ....................107
Switching the exterior lighting
delayed switch-off on/off (on-
board computer) ............................ 207
Switching the surround lighting
on/off (on-board computer) ..........207
Turn signals ................................... 109
see Changing bulbs
see Interior lighting
Light sensor (display message) ....... 225
LIM indicator lamp Cruise control ................................ 160
DISTRONIC PLUS ........................... 164
Loading guidelines ............................ 254
Locking see Central locking
Locking (doors)
Automatic ........................................ 78
Emergency locking ........................... 79
From inside (central locking
button) ............................................. 78
Locking centrally
see Central locking
Locking verification signal (on-
board computer) ............................... 208
Low-beam headlamps Changing bulbs .............................. 114
Display message ............................ 222
Setting for driving abroad
(symmetrical) ................................. 106
Switching on/off ........................... 107
Lumbar support
Adjusting ......................................... 97
Adjusting the 4-way lumbar
support ............................................ 97
Luxury head restraints ....................... 96M
M+S tires ............................................ 312
Maintenance see ASSYST PLUS service interval
display
Malfunction message
see Display messages
Matte finish (cleaning
instructions) ...................................... 285
mbrace Call priority .................................... 268
Display message ............................ 218
Downloading destinations
(COMAND) ..................................... 269
Emergency call .............................. 266
Important safety notes ..................264
Locating a stolen vehicle ...............270
MB info call button ........................268
Remote vehicle locking ..................270
Roadside Assistance button ..........267
Search & Send ............................... 269
Self-test ......................................... 265
System .......................................... 265
Vehicle remote unlocking ..............269
Mechanical key
Function/notes ................................ 73
Locking vehicle ................................ 79
Unlocking the driver's door ..............79
Memory card (audio) ......................... 202
Memory function ............................... 103
Message memory (on-board
computer) .......................................... 213
Messages see Display messages
Mirrors
see Exterior mirrors
see Rear-view mirror
see Vanity mirror
Mobile phone
Menu (on-board computer) ............202
Modifying the programming
(SmartKey) ........................................... 73
MOExtended run-flat system ........... 297
MP3 Operation ....................................... 202
see separate operating instructions 12Index
Page 20 of 356
GVW (Gross Vehicle Weight)
(definition) ..................................... 332
GVWR (Gross Vehicle Weight
Rating) (definition) .........................332
Important safety notes ..................310
Increased vehicle weight due to
optional equipment (definition) ......332
Kilopascal (kPa) (definition) ...........332
Labeling (overview) ........................327
Load bearing index (definition) ......333
Load index ..................................... 330
Load index (definition) ...................332
Maximum loaded vehicle weight
(definition) ..................................... 332
Maximum load on a tire
(definition) ..................................... 333
Maximum permissible tire
pressure (definition) ....................... 333
Maximum tire load .........................325
Maximum tire load (definition) .......333
Optional equipment weight
(definition) ..................................... 333
PSI (pounds per square inch)
(definition) ..................................... 333
Replacing ....................................... 334
Service life ..................................... 311
Sidewall (definition) .......................333
Speed rating (definition) ................332
Storing ........................................... 335
Structure and characteristics
(definition) ..................................... 331
Temperature .................................. 327
TIN (Tire Identification Number)
(definition) ..................................... 333
Tire bead (definition) ......................333
Tire pressure (definition) ................333
Tire pressures (recommended) ......331
Tire size (data) ............................... 335
Tire size designation, load-bearing
capacity, speed rating .................... 328
Tire tread ....................................... 311
Tire tread (definition) .....................333
Total load limit (definition) .............334
Traction ......................................... 326
Traction (definition) .......................334
Tread wear ..................................... 326
Uniform Tire Quality Grading
Standards ...................................... 326Uniform Tire Quality Grading
Standards (definition) ....................331
Unladen weight (definition) ............332
Wear indicator (definition) .............334
Wheel rim (definition) ....................332
see Flat tire
Top Tether ............................................ 56
Towing Important safety guidelines ...........302
Installing the towing eye ................303
Removing the towing eye ...............304
With the rear axle raised ................304
Towing away
With both axles on the ground .......304
Tow-starting
Emergency engine starting ............305
Important safety notes ..................302
Transmission
see Automatic transmission
Transporting the vehicle .................. 304
Trim pieces (cleaning instructions) . 288
Trip computer (on-board
computer) .......................................... 199
Trip meter see Trip odometer
Trip odometer
Calling up ....................................... 199
Resetting (on-board computer) ......200
Trunk
Emergency release ..........................82
Important safety guidelines .............80
Locking separately ...........................82
Opening (automatically from
inside) .............................................. 81
Opening (automatically from
outside) ............................................ 81
Trunk lid
Display message ............................ 236
Opening/closing .............................. 80
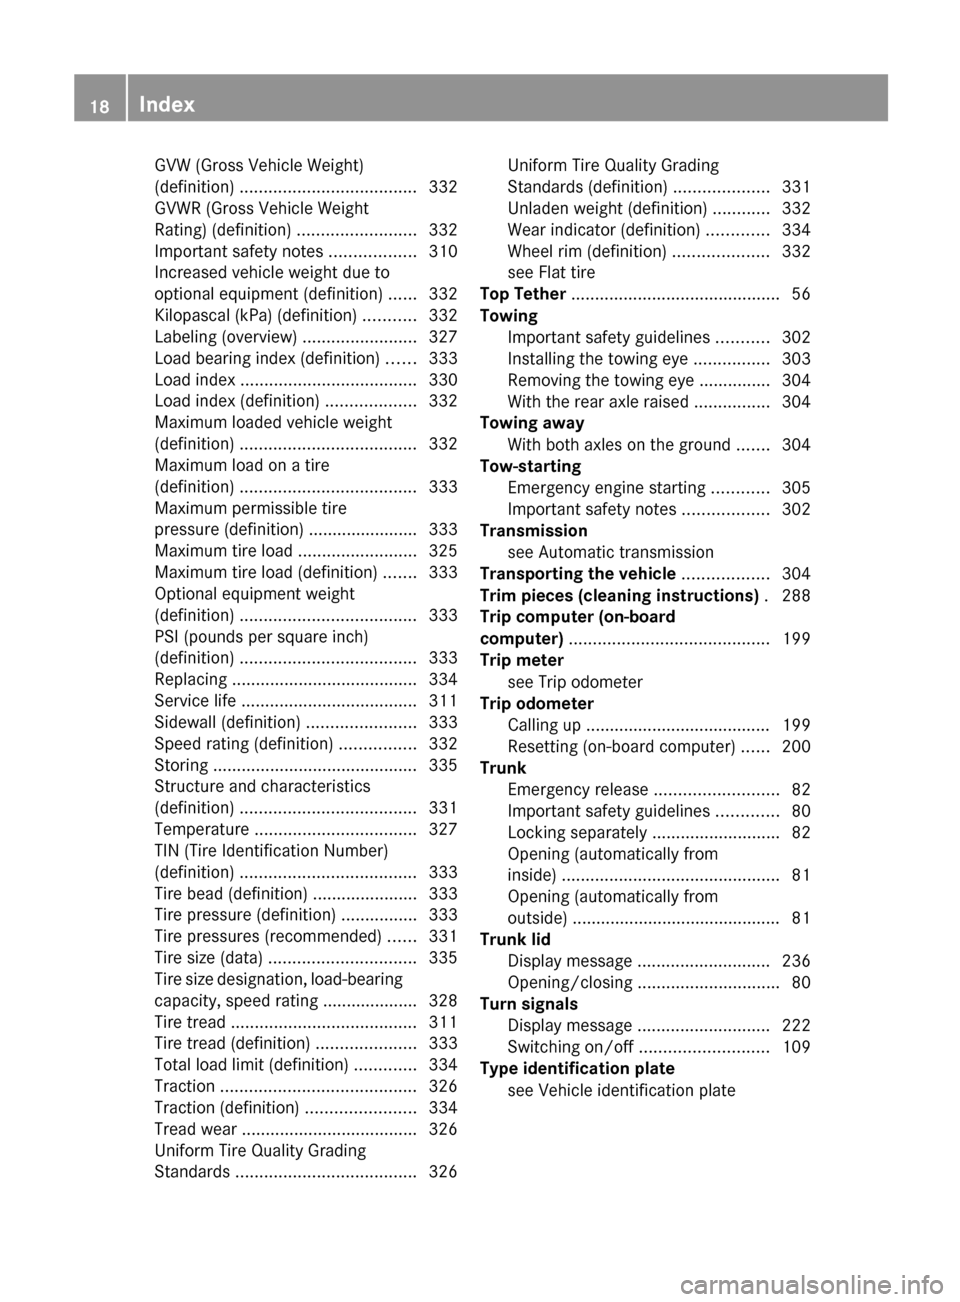
Turn signals
Display message ............................ 222
Switching on/off ........................... 109
Type identification plate
see Vehicle identification plate 18Index
Page 32 of 356
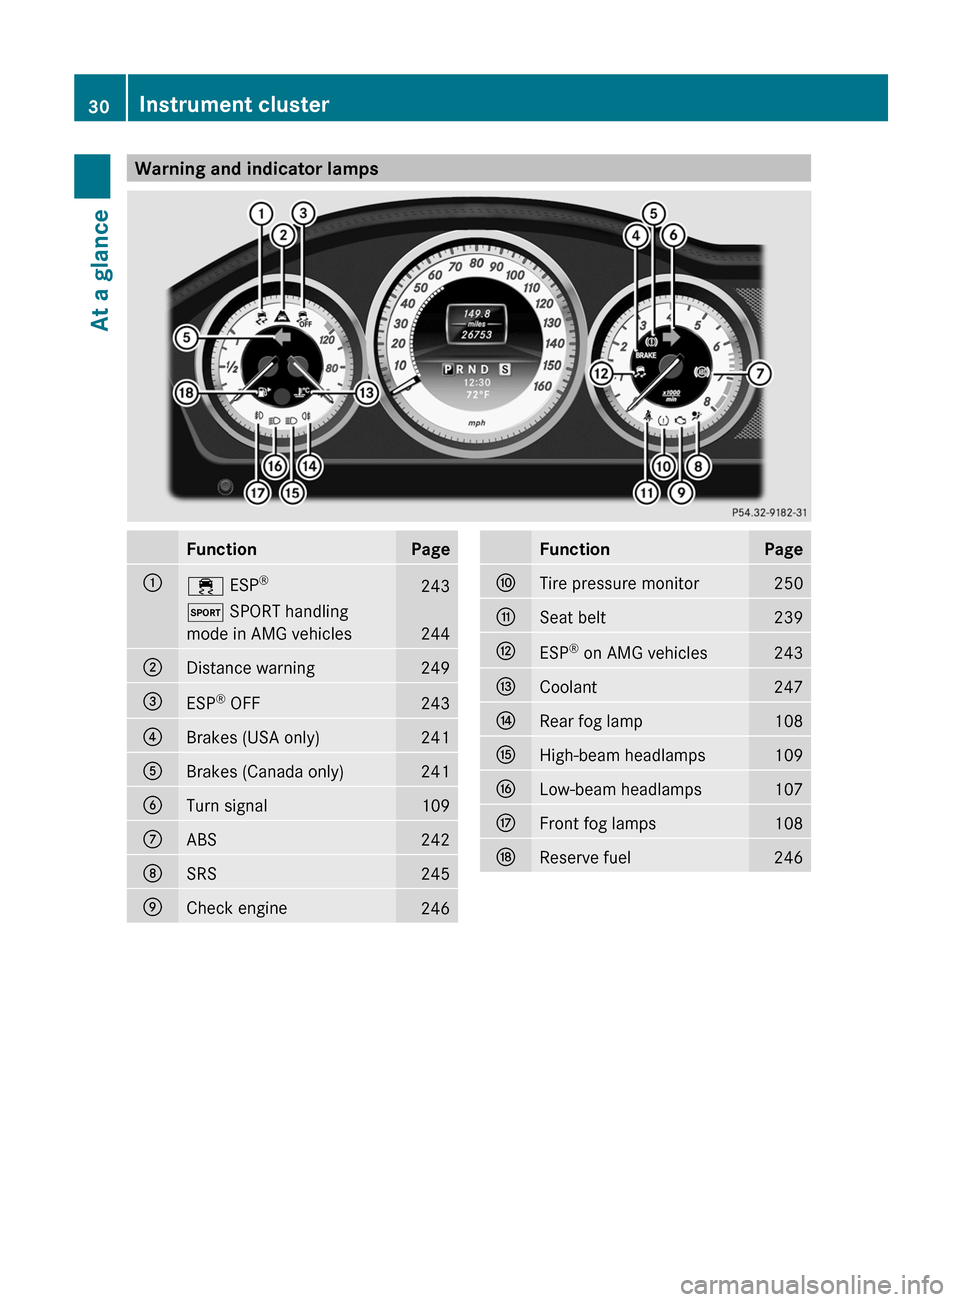
Warning and indicator lampsFunctionPage:÷ ESP®243M
SPORT handling
mode in AMG vehicles
244
;Distance warning249=ESP ®
OFF243?Brakes (USA only)241ABrakes (Canada only)241BTurn signal109CABS242DSRS245ECheck engine246FunctionPageFTire pressure monitor250GSeat belt239HESP ®
on AMG vehicles243ICoolant247JRear fog lamp108KHigh-beam headlamps109LLow-beam headlamps107MFront fog lamps108NReserve fuel24630Instrument clusterAt a glance
Page 73 of 356
Any unauthorized modification to this
device could void the user’s authority to
operate the equipment.
The Product label with FCC ID and IC
certification number can be found in the
battery case of the SmartKey.
i Canada only:
This device complies with RSS-210 of
Industry Canada. Operation is subject to
the following two conditions:
1. This device may not cause interference,
and
2. this device must accept any interference
received, including interference that may
cause undesired operation of the device.
Any unauthorized modification to this
device could void the user’s authority to
operate the equipment.
The Product label with FCC ID and IC
certification number can be found in the
battery case of the SmartKey.
Locking and unlocking centrally
The SmartKey centrally locks/unlocks:
R the doors
R the trunk lid
R the fuel filler flap
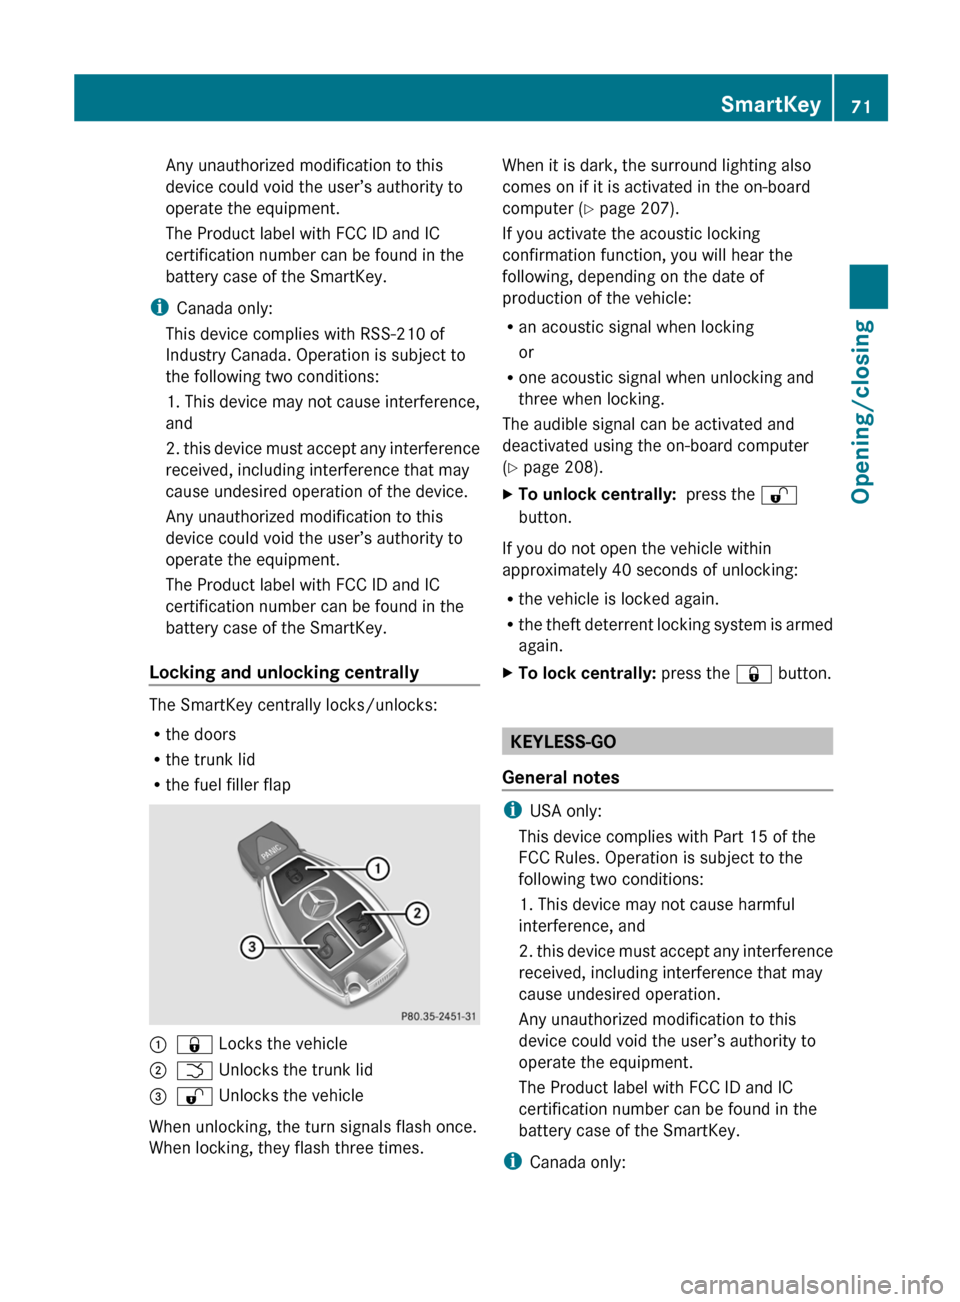
:& Locks the vehicle;F Unlocks the trunk lid=% Unlocks the vehicle
When unlocking, the turn signals flash once.
When locking, they flash three times.
When it is dark, the surround lighting also
comes on if it is activated in the on-board
computer ( Y page 207).
If you activate the acoustic locking
confirmation function, you will hear the
following, depending on the date of
production of the vehicle:
R an acoustic signal when locking
or
R one acoustic signal when unlocking and
three when locking.
The audible signal can be activated and
deactivated using the on-board computer
( Y page 208).XTo unlock centrally: press the %
button.
If you do not open the vehicle within
approximately 40 seconds of unlocking:
R the vehicle is locked again.
R the theft deterrent locking system is armed
again.
XTo lock centrally: press the & button.
KEYLESS-GO
General notes
i USA only:
This device complies with Part 15 of the
FCC Rules. Operation is subject to the
following two conditions:
1. This device may not cause harmful
interference, and
2. this device must accept any interference
received, including interference that may
cause undesired operation.
Any unauthorized modification to this
device could void the user’s authority to
operate the equipment.
The Product label with FCC ID and IC
certification number can be found in the
battery case of the SmartKey.
i Canada only:
SmartKey71Opening/closingZ
Page 75 of 356
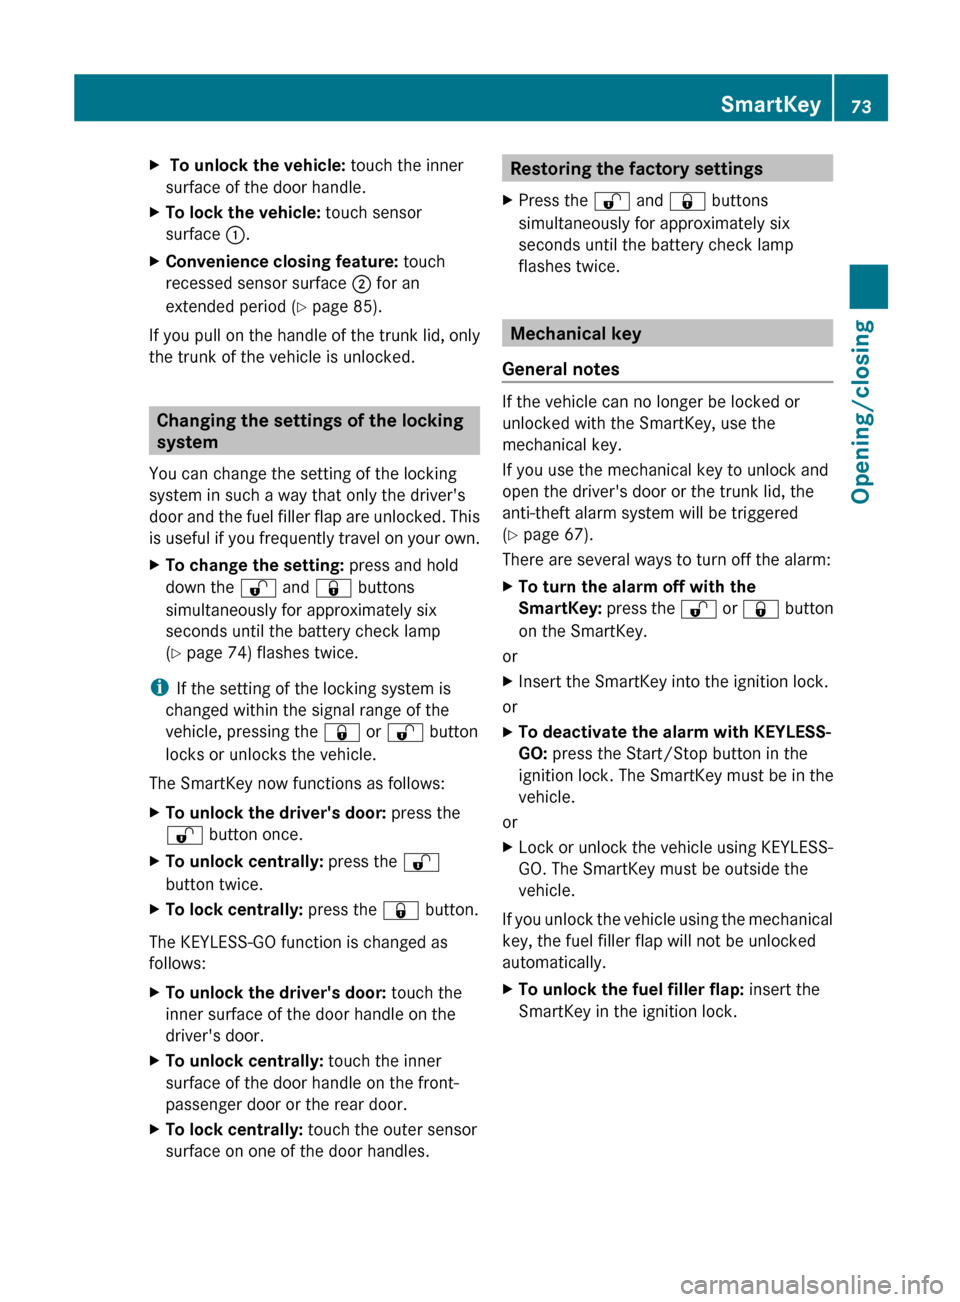
X To unlock the vehicle: touch the inner
surface of the door handle.XTo lock the vehicle: touch sensor
surface :.XConvenience closing feature: touch
recessed sensor surface ; for an
extended period ( Y page 85).
If you pull on the handle of the trunk lid, only
the trunk of the vehicle is unlocked.
Changing the settings of the locking
system
You can change the setting of the locking
system in such a way that only the driver's
door and the fuel filler flap are unlocked. This
is useful if you frequently travel on your own.
XTo change the setting: press and hold
down the % and & buttons
simultaneously for approximately six
seconds until the battery check lamp
( Y page 74) flashes twice.
i
If the setting of the locking system is
changed within the signal range of the
vehicle, pressing the & or % button
locks or unlocks the vehicle.
The SmartKey now functions as follows:
XTo unlock the driver's door: press the
% button once.XTo unlock centrally: press the %
button twice.XTo lock centrally: press the & button.
The KEYLESS-GO function is changed as
follows:
XTo unlock the driver's door: touch the
inner surface of the door handle on the
driver's door.XTo unlock centrally: touch the inner
surface of the door handle on the front-
passenger door or the rear door.XTo lock centrally: touch the outer sensor
surface on one of the door handles.Restoring the factory settingsXPress the % and & buttons
simultaneously for approximately six
seconds until the battery check lamp
flashes twice.
Mechanical key
General notes
If the vehicle can no longer be locked or
unlocked with the SmartKey, use the
mechanical key.
If you use the mechanical key to unlock and
open the driver's door or the trunk lid, the
anti-theft alarm system will be triggered
( Y page 67).
There are several ways to turn off the alarm:
XTo turn the alarm off with the
SmartKey: press the % or & button
on the SmartKey.
or
XInsert the SmartKey into the ignition lock.
or
XTo deactivate the alarm with KEYLESS-
GO: press the Start/Stop button in the
ignition lock. The SmartKey must be in the
vehicle.
or
XLock or unlock the vehicle using KEYLESS-
GO. The SmartKey must be outside the
vehicle.
If you unlock the vehicle using the mechanical
key, the fuel filler flap will not be unlocked
automatically.
XTo unlock the fuel filler flap: insert the
SmartKey in the ignition lock.SmartKey73Opening/closingZ
Page 109 of 356
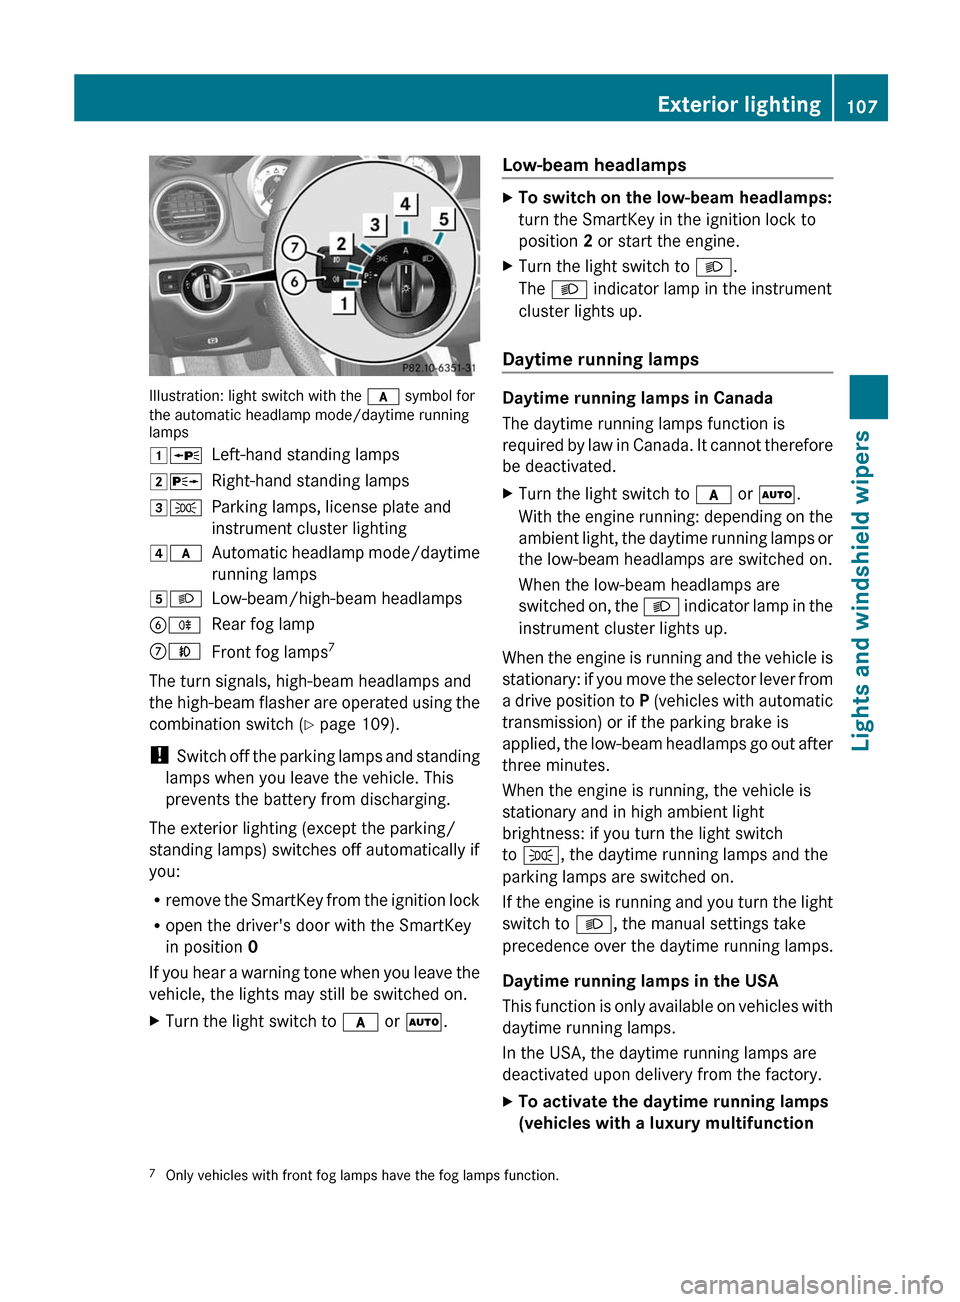
Illustration: light switch with the c symbol for
the automatic headlamp mode/daytime running
lamps
1 WLeft-hand standing lamps2XRight-hand standing lamps3TParking lamps, license plate and
instrument cluster lighting4 cAutomatic headlamp mode/daytime
running lamps5 LLow-beam/high-beam headlampsBRRear fog lampCNFront fog lamps 7
The turn signals, high-beam headlamps and
the high-beam flasher are operated using the
combination switch ( Y page 109).
! Switch off the parking lamps and standing
lamps when you leave the vehicle. This
prevents the battery from discharging.
The exterior lighting (except the parking/
standing lamps) switches off automatically if
you:
R remove the SmartKey from the ignition lock
R open the driver's door with the SmartKey
in position 0
If you hear a warning tone when you leave the
vehicle, the lights may still be switched on.
XTurn the light switch to c or à .Low-beam headlampsXTo switch on the low-beam headlamps:
turn the SmartKey in the ignition lock to
position 2 or start the engine.XTurn the light switch to L.
The L indicator lamp in the instrument
cluster lights up.
Daytime running lamps
Daytime running lamps in Canada
The daytime running lamps function is
required by law in Canada. It cannot therefore
be deactivated.
XTurn the light switch to c or à .
With the engine running: depending on the
ambient light, the daytime running lamps or
the low-beam headlamps are switched on.
When the low-beam headlamps are
switched on, the L indicator lamp in the
instrument cluster lights up.
When the engine is running and the vehicle is
stationary: if you move the selector lever from
a drive position to P (vehicles with automatic
transmission) or if the parking brake is
applied, the low-beam headlamps go out after
three minutes.
When the engine is running, the vehicle is
stationary and in high ambient light
brightness: if you turn the light switch
to T , the daytime running lamps and the
parking lamps are switched on.
If the engine is running and you turn the light
switch to L, the manual settings take
precedence over the daytime running lamps.
Daytime running lamps in the USA
This function is only available on vehicles with
daytime running lamps.
In the USA, the daytime running lamps are
deactivated upon delivery from the factory.
XTo activate the daytime running lamps
(vehicles with a luxury multifunction 7 Only vehicles with front fog lamps have the fog lamps function.Exterior lighting107Lights and windshield wipers
Page 111 of 356
XPress the R button.
The yellow R indicator lamp in the
instrument cluster lights up.XTo switch off the rear fog lamp: press the
R button.
The yellow R indicator lamp in the
instrument cluster goes out.
Headlamp cleaning system
The headlamps are cleaned automatically if
the "Wipe with washer fluid" function is
operated ten times while the lights are on and
the engine is running ( Y page 116).
Combination switch
Turn signals
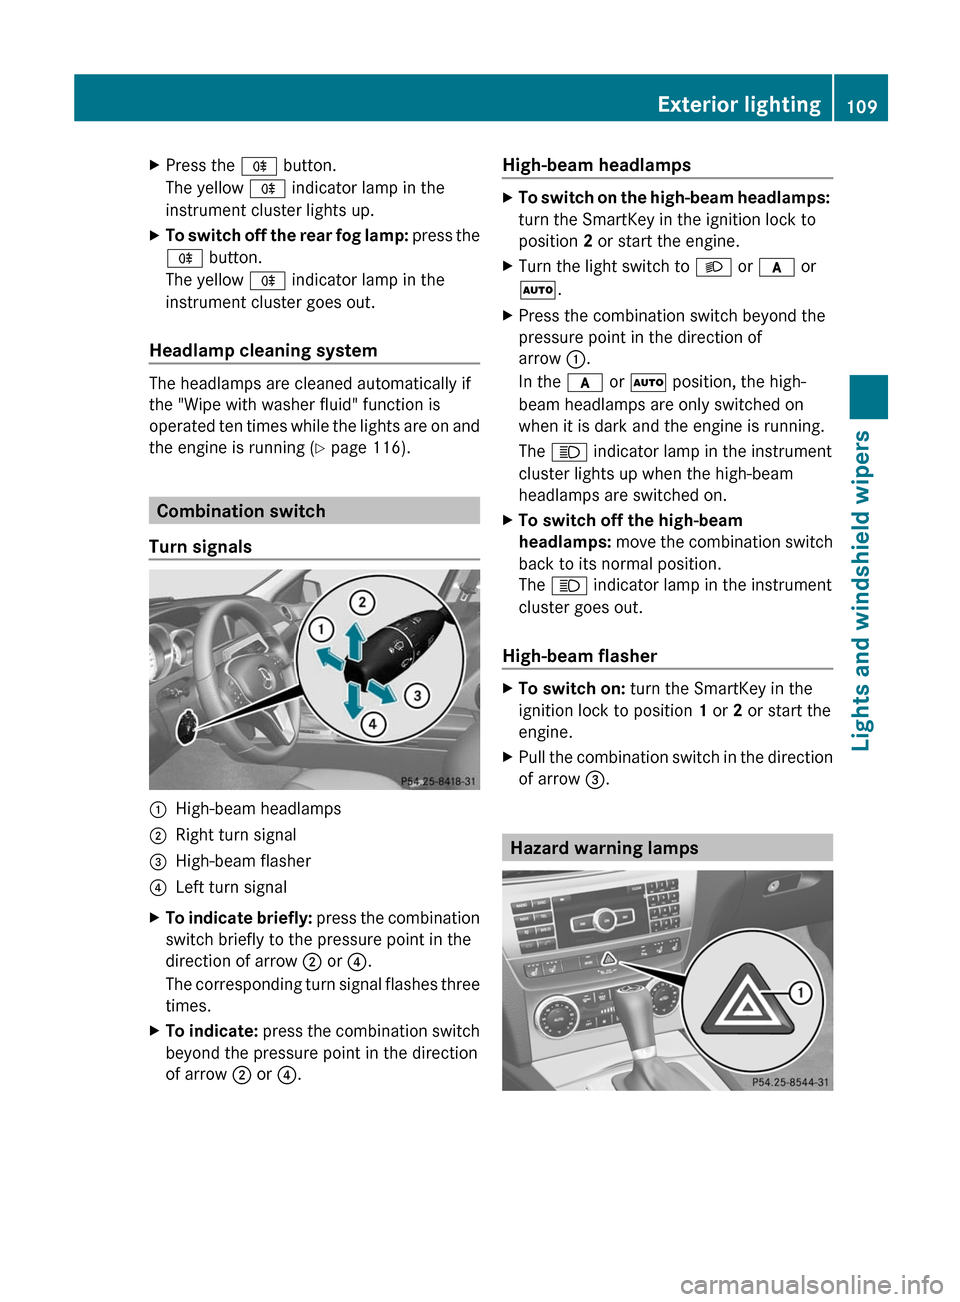
:High-beam headlamps;Right turn signal=High-beam flasher?Left turn signalXTo indicate briefly: press the combination
switch briefly to the pressure point in the
direction of arrow ; or ?.
The corresponding turn signal flashes three
times.XTo indicate: press the combination switch
beyond the pressure point in the direction
of arrow ; or ?.High-beam headlampsXTo switch on the high-beam headlamps:
turn the SmartKey in the ignition lock to
position 2 or start the engine.XTurn the light switch to L or c or
à .XPress the combination switch beyond the
pressure point in the direction of
arrow :.
In the c or à position, the high-
beam headlamps are only switched on
when it is dark and the engine is running.
The K indicator lamp in the instrument
cluster lights up when the high-beam
headlamps are switched on.XTo switch off the high-beam
headlamps: move the combination switch
back to its normal position.
The K indicator lamp in the instrument
cluster goes out.
High-beam flasher
XTo switch on: turn the SmartKey in the
ignition lock to position 1 or 2 or start the
engine.XPull the combination switch in the direction
of arrow =.
Hazard warning lamps
Exterior lighting109Lights and windshield wipersZ
Page 112 of 356
The hazard warning lamps automatically
switch on if:
R an air bag is deployed.
R the vehicle is slowed down severely from a
speed of over 45 mph (70 km/h) and
comes to a halt.XTo switch on the hazard warning lamps:
press button :.
All turn signals flash. If you now switch on
a turn signal using the combination switch,
only the turn signal lamp on the
corresponding side of the vehicle will flash.XTo switch off the hazard warning
lamps: press button :.
The hazard warning lamps are deactivated
automatically if the vehicle returns to a speed
of over 6 mph (10 km/h) after a full
application of the brakes.
i The hazard warning lamps still operate if
the ignition is switched off.
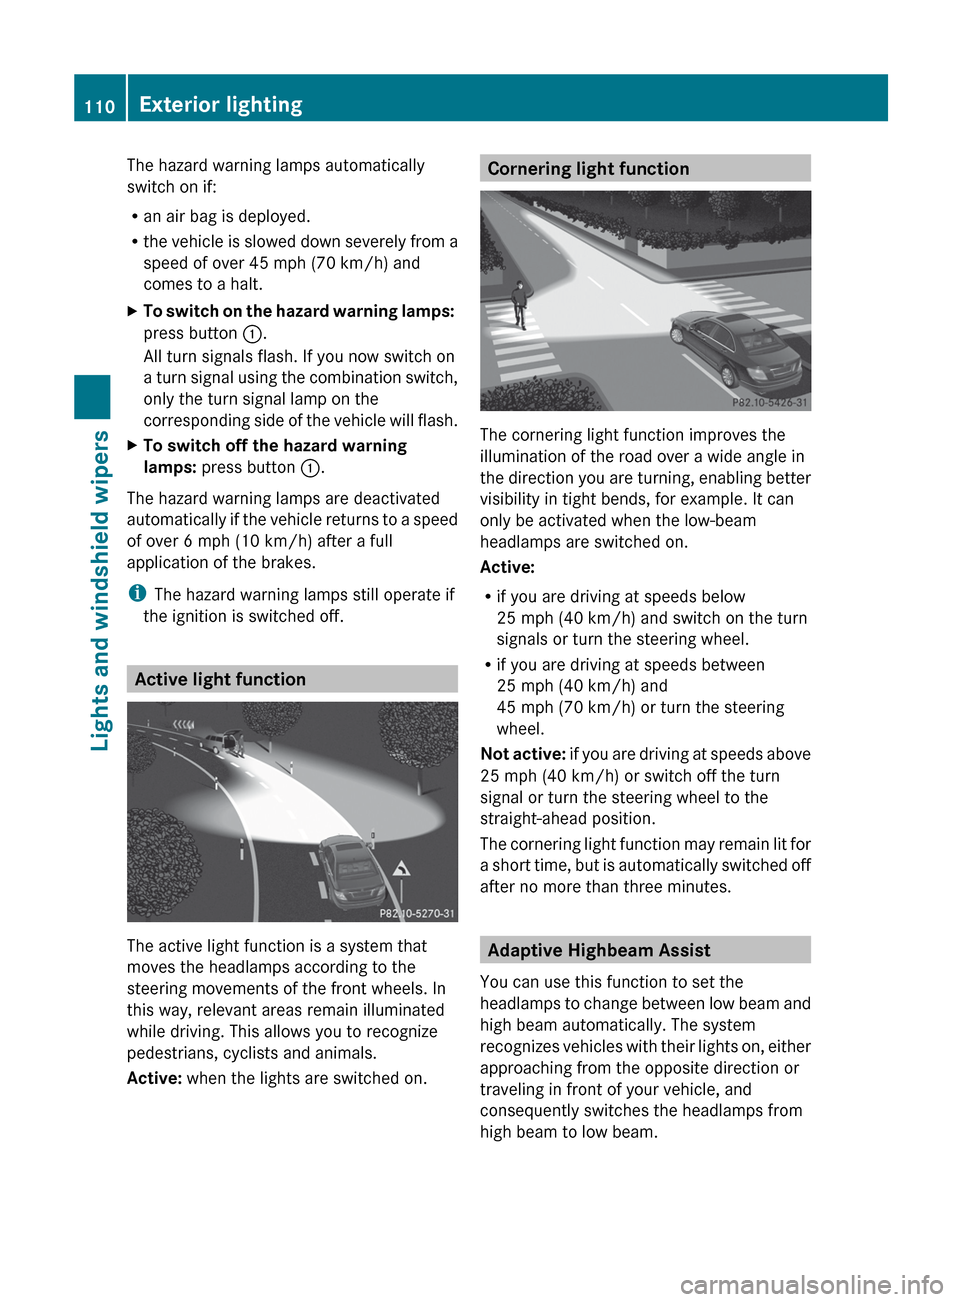
Active light function
The active light function is a system that
moves the headlamps according to the
steering movements of the front wheels. In
this way, relevant areas remain illuminated
while driving. This allows you to recognize
pedestrians, cyclists and animals.
Active: when the lights are switched on.
Cornering light function
The cornering light function improves the
illumination of the road over a wide angle in
the direction you are turning, enabling better
visibility in tight bends, for example. It can
only be activated when the low-beam
headlamps are switched on.
Active:
R if you are driving at speeds below
25 mph (40 km/h) and switch on the turn
signals or turn the steering wheel.
R if you are driving at speeds between
25 mph (40 km/h) and
45 mph (70 km/h) or turn the steering
wheel.
Not active: if you are driving at speeds above
25 mph (40 km/h) or switch off the turn
signal or turn the steering wheel to the
straight-ahead position.
The cornering light function may remain lit for
a short time, but is automatically switched off
after no more than three minutes.
Adaptive Highbeam Assist
You can use this function to set the
headlamps to change between low beam and
high beam automatically. The system
recognizes vehicles with their lights on, either
approaching from the opposite direction or
traveling in front of your vehicle, and
consequently switches the headlamps from
high beam to low beam.
110Exterior lightingLights and windshield wipers
Page 167 of 356
you determine by the position of the
accelerator pedal.
Activating when driving towards a
stationary vehicle
If the vehicle in front of you is stationary, you
can only activate DISTRONIC PLUS once your
vehicle is stationary as well.XBriefly pull the cruise control lever towards
you ?, or briefly press up : or down ;.
DISTRONIC PLUS is selected.
i DISTRONIC PLUS can only be activated at
under 20 mph (30 km/h) if a vehicle in front
has been detected. Therefore, the
DISTRONIC PLUS distance display in the
instrument cluster should be activated
( Y page 204).
XKeep the cruise control lever pressed
up : or down ; until the desired speed
is set.
i You can use the cruise control lever to set
the stored speed and the control on the
cruise control lever to set the specified
minimum distance ( Y page 168).
Pulling away
XIf the vehicle in front pulls away: remove
your foot from the brake pedal.XBriefly pull the cruise control lever towards
you ?.
or
XAccelerate briefly.
Your vehicle pulls away and adapts its
speed to that of the vehicle in front.
Driving
If there is no vehicle in front, DISTRONIC
PLUS operates in the same way as cruise
control.
If a slower-moving vehicle is detected in front,
DISTRONIC causes your vehicle to brake. This
maintains the preset distance to the vehicle
in front.
If DISTRONIC PLUS detects a faster-moving
vehicle in front, it increases the driving speed
of your vehicle, but only up to the desired
speed you have stored.GWARNING
If you depress the brake, DISTRONIC PLUS is
deactivated unless your vehicle is stationary.
DISTRONIC PLUS then no longer brakes your
vehicle. In such cases, control the distance
from vehicles travelling in front with the brake
alone. You could otherwise cause an accident
and thereby injure yourself and others. The
driver remains fully responsible for the
vehicle's distance from other vehicles, the
speed being driven and for braking in good
time.
Changing lanes
If you wish to change to the passing lane (in
left-hand-drive vehicles, the passing lane is
the left-hand lane), DISTRONIC PLUS
supports you if:
R you are driving faster than 40 mph
(60 km/h).
R DISTRONIC PLUS is maintaining the
distance to a vehicle in front.
R you switch on the appropriate turn signals.
R DISTRONIC PLUS does not detect a danger
of collision.
If these conditions are met, your vehicle is
accelerated. Acceleration will be interrupted
if changing lanes takes too long or if the
distance between your vehicle and the
vehicle in front becomes too small.
GWARNING
DISTRONIC PLUS and Active Blind Spot Assist
are only aids designed to assist driving.
They do not relieve you of the responsibility
of paying attention. The driver remains fully
responsible for the vehicle's distance from
other vehicles, the vehicle's speed and for
braking in good time. Always pay attention to
traffic conditions and your surroundings.
Otherwise, you may fail to recognize dangers
in time, cause an accident and injure yourself
and others.
Driving systems165Driving and parkingZ