clock MERCEDES-BENZ C240 2002 W203 User Guide
[x] Cancel search | Manufacturer: MERCEDES-BENZ, Model Year: 2002, Model line: C240, Model: MERCEDES-BENZ C240 2002 W203Pages: 406
Page 356 of 406
353 Exterior lamps
Te ch n i c a l
data Instruments
and controlsOperation DrivingInstrument
cluster displayPractical hintsCar care Index Bulbs for high and low beam
H7 (55 W)
Open hood.
Press the clamp and remove headlamp cover (1 or 2).
Pull electrical connector off.
Unclip the retainer spring and take out the bulb.
Insert the new bulb so that the base locates in the
recess on the holder.
Clip in retainer springs and plug the connector onto the
bulb.
Align headlamp cover (1 or 2) and click into place.
Xenon (optional)
Bulb for low beamTurn signal lamp
1156 NA (26.9 / 5 W/32/4 cp)
Open hood.
Twist bulb socket (3) counterclockwise and pull out.
Push bulb into socket, turn counterclockwise and
remove.
Insert new bulb in socket, push in and twist clockwise.
Reinstall bulb socket.
Parking and standing lamp
W5W
Open hood.
Press the clamp and remove headlamp cover (2).
Pull out bulb socket (6). Remove bulb from socket.
Insert new bulb in socket and push in. Reinstall bulb
socket.
Align headlamp cover (2) and click into place.
Wa r n i n g !
Because of high voltage in Xenon lamps, it is
dangerous to replace the bulb or repair the lamp
and its components. We recommend that you have
such work done by a qualified technician.
OM_203.book Seite 353 Donnerstag, 31. Mai 2001 11:57 11
Page 357 of 406
354 Exterior lamps
Te ch n i c a l
data Instruments
and controlsOperation DrivingInstrument
cluster displayPractical hintsCar care Index
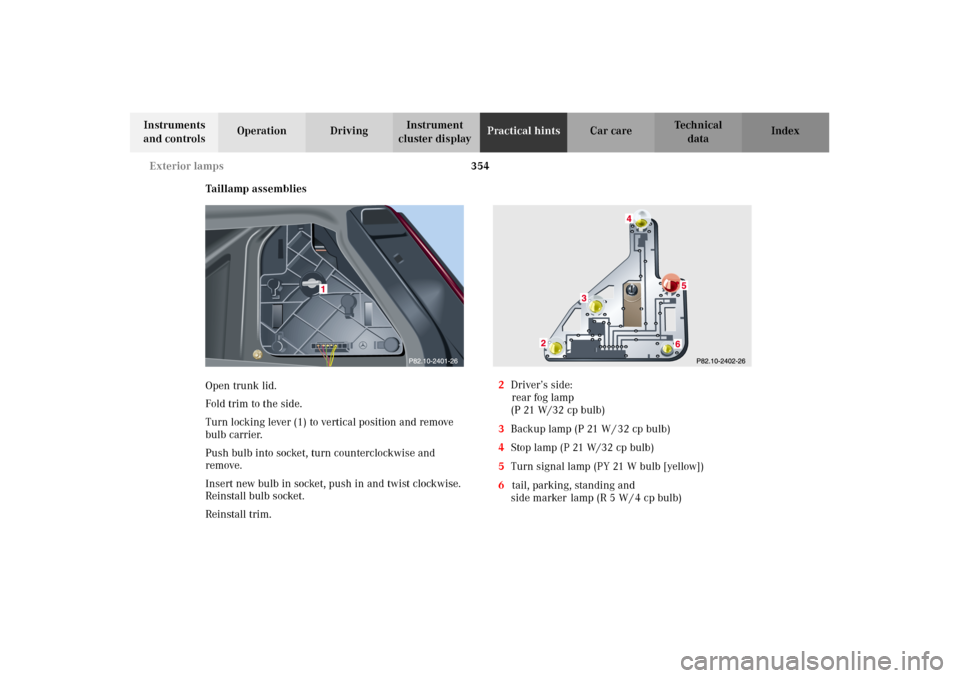
Taillamp assemblies
Open trunk lid.
Fold trim to the side.
Turn locking lever (1) to vertical position and remove
bulb carrier.
Push bulb into socket, turn counterclockwise and
remove.
Insert new bulb in socket, push in and twist clockwise.
Reinstall bulb socket.
Reinstall trim.2Driver’s side:
rear fog lamp
(P 21 W/32 cp bulb)
3Backup lamp (P 21 W / 32 cp bulb)
4Stop lamp (P 21 W/32 cp bulb)
5Turn signal lamp (PY 21 W bulb [yellow])
6tail, parking, standing and
side marker lamp (R 5 W / 4 cp bulb)
OM_203.book Seite 354 Donnerstag, 31. Mai 2001 11:57 11
Page 358 of 406
355 Exterior lamps
Te ch n i c a l
data Instruments
and controlsOperation DrivingInstrument
cluster displayPractical hintsCar care Index License plate lamp
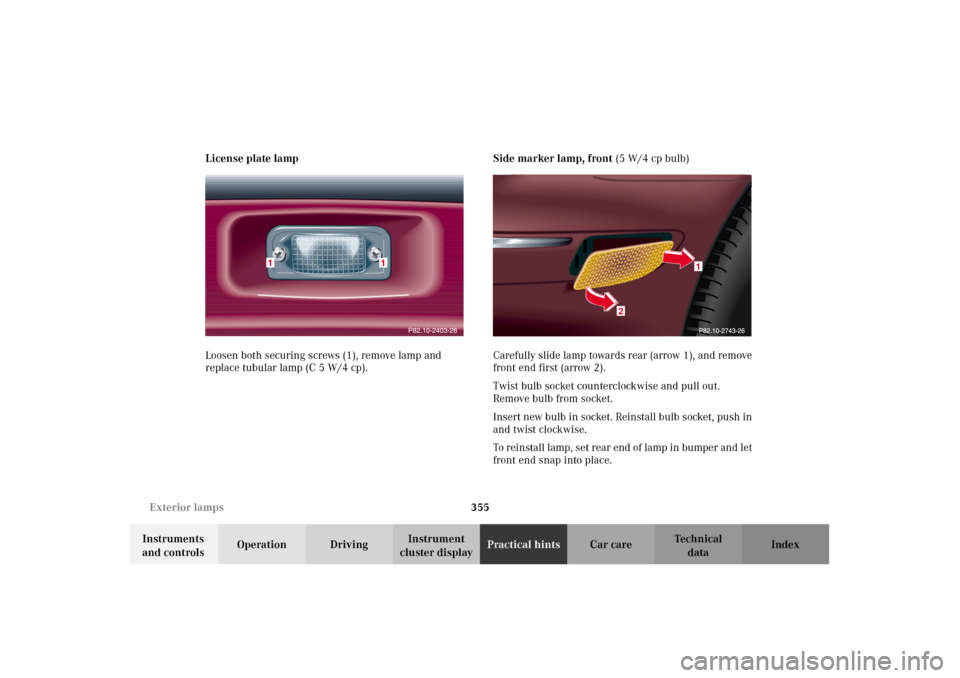
Loosen both securing screws (1), remove lamp and
replace tubular lamp (C 5 W/4 cp).Side marker lamp, front (5 W/4 cp bulb)
Carefully slide lamp towards rear (arrow 1), and remove
front end first (arrow 2).
Twist bulb socket counterclockwise and pull out.
Remove bulb from socket.
Insert new bulb in socket. Reinstall bulb socket, push in
and twist clockwise.
To reinstall lamp, set rear end of lamp in bumper and let
front end snap into place.
2
1
OM_203.book Seite 355 Donnerstag, 31. Mai 2001 11:57 11
Page 363 of 406
360 Fuel filler flap, manual release
Te ch n i c a l
data Instruments
and controlsOperation DrivingInstrument
cluster displayPractical hintsCar care Index
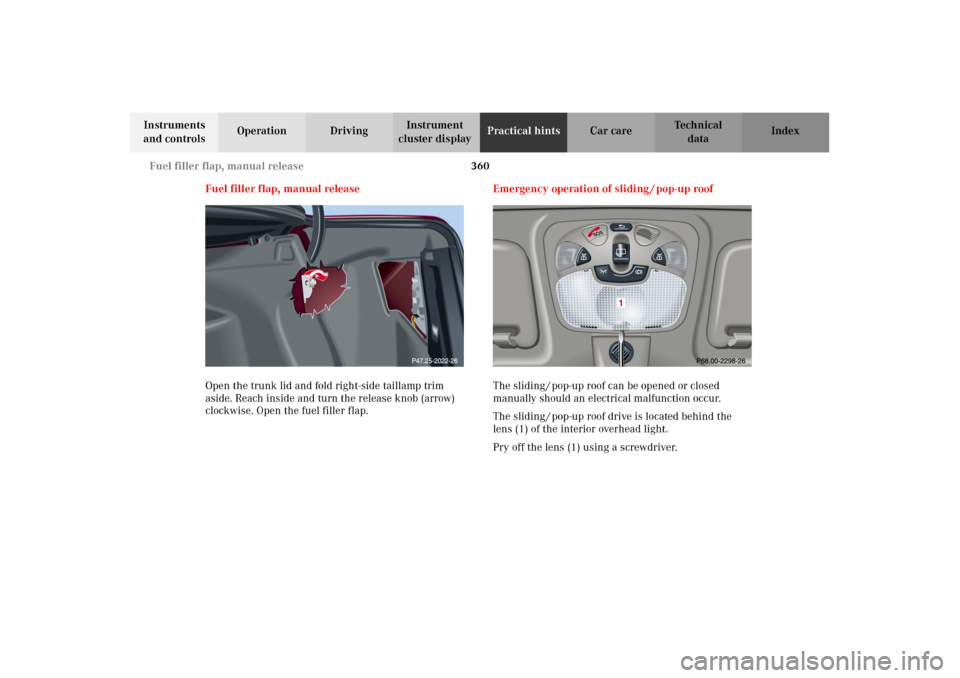
Fuel filler flap, manual release
Open the trunk lid and fold right-side taillamp trim
aside. Reach inside and turn the release knob (arrow)
clockwise. Open the fuel filler flap.Emergency operation of sliding / pop-up roof
The sliding / pop-up roof can be opened or closed
manually should an electrical malfunction occur.
The sliding / pop-up roof drive is located behind the
lens (1) of the interior overhead light.
Pry off the lens (1) using a screwdriver.
OM_203.book Seite 360 Donnerstag, 31. Mai 2001 11:57 11
Page 364 of 406
361 Emergency operation of sliding / pop-up roof
Te ch n i c a l
data Instruments
and controlsOperation DrivingInstrument
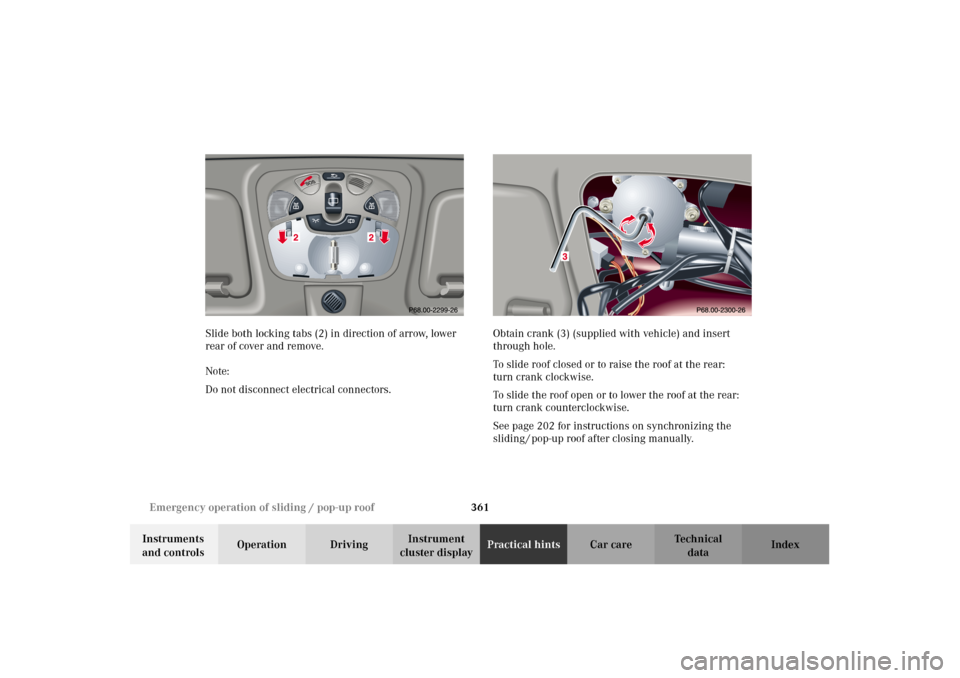
cluster displayPractical hintsCar care Index Slide both locking tabs (2) in direction of arrow, lower
rear of cover and remove.
Note:
Do not disconnect electrical connectors.Obtain crank (3) (supplied with vehicle) and insert
through hole.
To slide roof closed or to raise the roof at the rear:
turn crank clockwise.
To slide the roof open or to lower the roof at the rear:
turn crank counterclockwise.
See page 202 for instructions on synchronizing the
sliding / pop-up roof after closing manually.
OM_203.book Seite 361 Donnerstag, 31. Mai 2001 11:57 11