Exterior lamp switch MERCEDES-BENZ C240 2002 W203 Owner's Manual
[x] Cancel search | Manufacturer: MERCEDES-BENZ, Model Year: 2002, Model line: C240, Model: MERCEDES-BENZ C240 2002 W203Pages: 406
Page 5 of 406

2 Contents
Instrument cluster ........................... 98
Multifunction steering wheel,
multifunction display ............... 102
Trip and main odometer
and sub menu ............................ 106
Audio systems ................................ 108
Radio ............................................ 108
CD player ..................................... 109
Cassette player ............................110
Telephone .........................................111
Navigation system ...........................116
Trip computer ..................................117
Malfunction/warning
message memory .......................119
Individual settings ......................... 121
Setting the audio volume .............. 136
Coolant temperature gauge .......... 137
Flexible service system
(FSS) ............................................ 138
Engine oil level indicator .............. 141
Engine oil consumption ................ 142
Exterior lamp switch ..................... 143
Headlamp mode ............................. 144Night security illumination ......... 146
Locator lighting .......................... 147
Headlamp cleaning system .......... 147
Combination switch ...................... 148
Hazard warning flasher
switch .......................................... 151
Climate control ...............................152
Automatic climate control .............160
Front center console storage
compartment ventilation .......... 171
Rear passenger compartment
adjustable air outlets ............... 172
Operation Audio and telephone .. 173
Operating safety ............................ 173
Operating and display elements .. 174
Button and soft key operation ...... 176
Operation ......................................... 176
Switching on and off ...................... 176
Adjusting the volume ................... 177
Audio functions ............................. 177
Bass ................................................. 177
Treble .............................................. 177
Balance ............................................ 178
Centering all audio functions ...... 178Audio system
tone level selection ................... 179
Radio mode ..................................... 179
Selecting radio mode ..................... 179
Selecting the band ......................... 179
Manual tuning ................................ 180
Seek tuning ..................................... 180
Scan tuning ..................................... 180
Weather Band ................................. 181
Station memory .............................. 181
Storing stations automatically
(Autostore) ................................. 181
Storing stations .............................. 182
Retrieving a station
from memory ............................. 182
Direct frequency input
AM and FM only ....................... 182
Cassette mode ................................ 182
Playing cassettes ............................ 182
Cassette eject .................................. 183
Track selection ............................... 184
Track search
forwards/backwards ................. 184
Fast forward/reverse ..................... 184
OM_203.book Seite 2 Donnerstag, 31. Mai 2001 11:57 11
Page 26 of 406
23 Instruments and controls
Te ch n i c a l
data Instruments
and controlsOperation DrivingInstrument
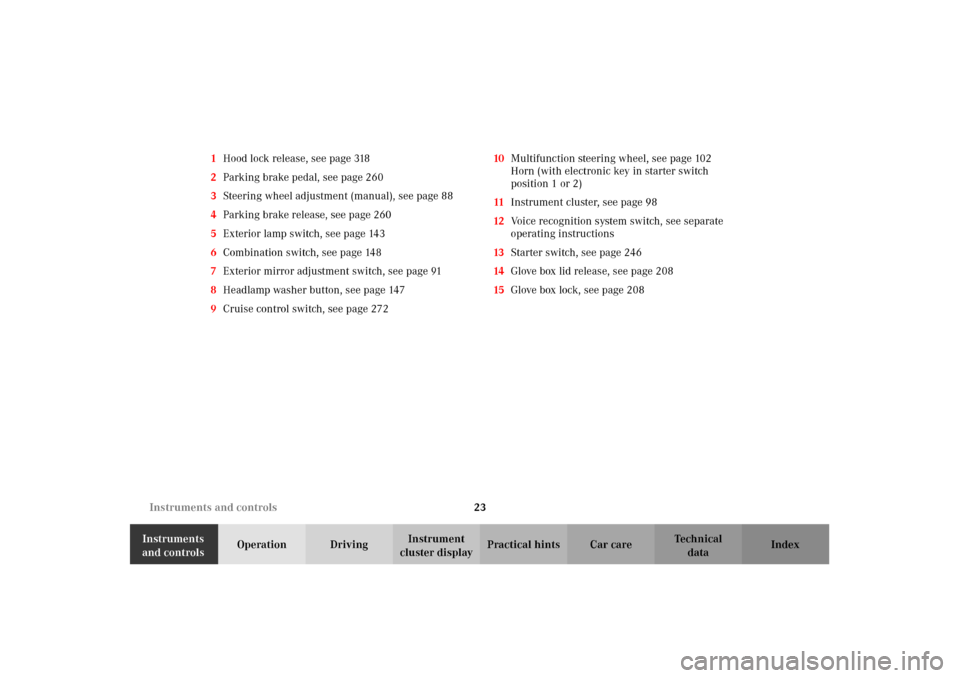
cluster displayPractical hints Car care Index 1Hood lock release, see page 318
2Parking brake pedal, see page 260
3Steering wheel adjustment (manual), see page 88
4Parking brake release, see page 260
5Exterior lamp switch, see page 143
6Combination switch, see page 148
7Exterior mirror adjustment switch, see page 91
8Headlamp washer button, see page 147
9Cruise control switch, see page 27210Multifunction steering wheel, see page 102
Horn (with electronic key in starter switch
position 1 or 2)
11Instrument cluster, see page 98
12Voice recognition system switch, see separate
operating instructions
13Starter switch, see page 246
14Glove box lid release, see page 208
15Glove box lock, see page 208
OM_203.book Seite 23 Donnerstag, 31. Mai 2001 11:57 11
Page 30 of 406
27 Contents - Operation
Te ch n i c a l
data Instruments
and controlsOperationDrivingInstrument
cluster displayPractical hints Car care Index Malfunction/warning
message memory .......................119
Individual settings ......................... 121
Setting the audio volume .............. 136
Coolant temperature gauge .......... 137
Flexible service system
(FSS) ............................................ 138
Engine oil level indicator .............. 141
Engine oil consumption ................ 142
Exterior lamp switch ..................... 143
Headlamp mode ............................. 144
Night security illumination ......... 146
Locator lighting .......................... 147
Headlamp cleaning system .......... 147
Combination switch ...................... 148
Hazard warning flasher
switch .......................................... 151Climate control ...............................152
Automatic climate control .............160
Front center console storage
compartment ventilation .......... 171
Rear passenger compartment
adjustable air outlets ............... 172
Operation Audio and telephone .. 173
Operating safety ............................ 173
Operating and display elements .. 174
Button and soft key operation ...... 176
Component malfunctions ..............195
Power windows ...............................197
Sliding/pop-up roof ....................... 200
Interior lighting ............................. 203
Rear window sunshade ................ 205
Sun visors ....................................... 206
Vanity mirrors ............................... 206Interior ............................................207
Storage compartments
and armrests ..............................207
Glove box .....................................208
Cup holder ...................................... 211
Ashtrays .......................................... 213
Lighter ............................................. 215
Parcel net in
front passenger footwell .......... 216
Ski sack ........................................... 216
Enlarged cargo area ....................... 221
Split folding rear seat bench ........ 221
Loading instructions
(vehicle with
enlarged cargo area) .................223
Cellular telephone .........................224
Telephone, general ........................225
Garage door opener .......................226
OM_203.book Seite 27 Donnerstag, 31. Mai 2001 11:57 11
Page 33 of 406
30 Central locking system
Te ch n i c a l
data Instruments
and controlsOperationDrivingInstrument
cluster displayPractical hints Car care Index
Start lock-out
Important!
Removing the electronic key from the starter switch
activates the start lock-out. The engine cannot be
started.
Inserting the electronic key in the starter switch
deactivates the start lock-out.
Note:
In case the engine cannot be started (vehicle’s battery is
in order), the system is not operational. Contact an
authorized Mercedes-Benz Center or call 1-800-FOR-
MERCedes (in the USA), or 1-800-387-0100 (in Canada).General notes on the central locking system
If the electronic key is inserted in the starter switch, the
vehicle cannot be locked or unlocked with the remote
control.
If the vehicle cannot be locked or unlocked:
•Aim transmitter eye at a receiver of either front door
handle. Check the batteries of the electronic key, see
page 357, or synchronize the electronic key, see
page 359.
•Use the mechanical key to unlock the vehicle. To
start engine, insert the electronic key in the starter
switch. There could be a slight delay until the
electronic key can be turned in the starter switch.
Important!
When unlocking the driver’s door with the mechanical
key, the exterior lamps will flash and the alarm will
sound.
To cancel the alarm, insert the electronic key in the
starter switch or press buttonŒ or‹ on the
electronic key.
OM_203.book Seite 30 Donnerstag, 31. Mai 2001 11:57 11
Page 39 of 406
36 Central locking system
Te ch n i c a l
data Instruments
and controlsOperationDrivingInstrument
cluster displayPractical hints Car care Index
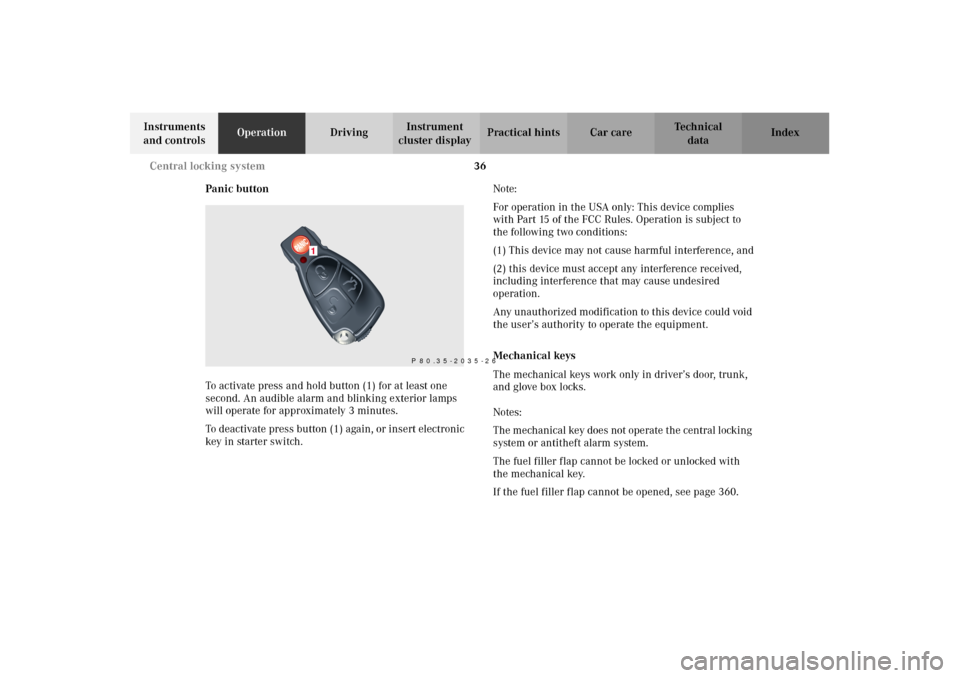
Panic button
To activate press and hold button (1) for at least one
second. An audible alarm and blinking exterior lamps
will operate for approximately 3 minutes.
To deactivate press button (1) again, or insert electronic
key in starter switch.Note:
For operation in the USA only: This device complies
with Part 15 of the FCC Rules. Operation is subject to
the following two conditions:
(1) This device may not cause harmful interference, and
(2) this device must accept any interference received,
including interference that may cause undesired
operation.
Any unauthorized modification to this device could void
the user’s authority to operate the equipment.
Mechanical keys
The mechanical keys work only in driver’s door, trunk,
and glove box locks.
Notes:
The mechanical key does not operate the central locking
system or antitheft alarm system.
The fuel filler flap cannot be locked or unlocked with
the mechanical key.
If the fuel filler flap cannot be opened, see page 360.
P 80.35-2035-26
1
OM_203.book Seite 36 Donnerstag, 31. Mai 2001 11:57 11
Page 41 of 406
38 Central locking system
Te ch n i c a l
data Instruments
and controlsOperationDrivingInstrument
cluster displayPractical hints Car care Index
If the vehicle has previously been locked from the
outside, opening a door from the inside will trigger the
alarm. When opening a front door while the central
locking system is in the:
•selective unlocking mode, only that individual door
is unlocked. The remaining doors, the trunk and
fuel filler flap remain locked.
•global unlocking mode, all doors, the trunk and fuel
filler flap are unlocked.
Notes:
In case of a malfunction in the central locking system
the doors can be locked and unlocked individually.
To lock, push down lock buttons or turn mechanical key
in driver’s door lock to position 3. In addition lock the
trunk.To unlock, pull inside door handles or turn mechanical
key in driver’s door lock to position 2.
Rear doors can only be opened from inside by first
pulling up the door lock button.
When unlocking the driver’s door with the mechanical
key, the exterior lamps will flash and the alarm will
sound.
To cancel the alarm, insert the electronic key in the
starter switch or press buttonŒ or‹ on the
electronic key.
OM_203.book Seite 38 Donnerstag, 31. Mai 2001 11:57 11
Page 44 of 406
41 Central locking system
Te ch n i c a l
data Instruments
and controlsOperationDrivingInstrument
cluster displayPractical hints Car care Index Trunk
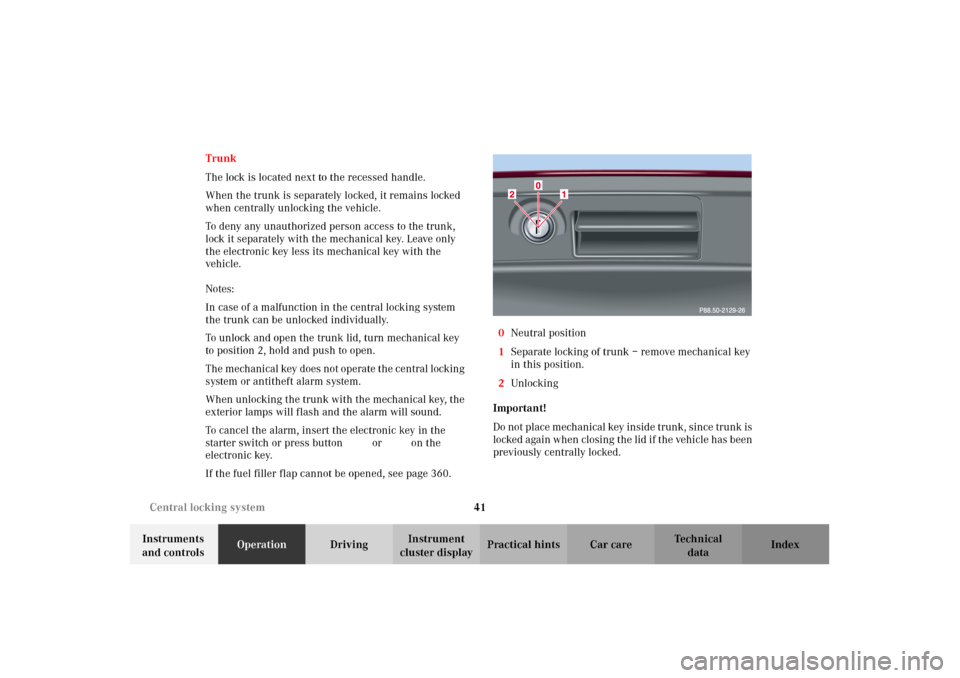
The lock is located next to the recessed handle.
When the trunk is separately locked, it remains locked
when centrally unlocking the vehicle.
To deny any unauthorized person access to the trunk,
lock it separately with the mechanical key. Leave only
the electronic key less its mechanical key with the
vehicle.
Notes:
In case of a malfunction in the central locking system
the trunk can be unlocked individually.
To unlock and open the trunk lid, turn mechanical key
to position 2, hold and push to open.
The mechanical key does not operate the central locking
system or antitheft alarm system.
When unlocking the trunk with the mechanical key, the
exterior lamps will flash and the alarm will sound.
To cancel the alarm, insert the electronic key in the
starter switch or press buttonŒ or‹ on the
electronic key.
If the fuel filler flap cannot be opened, see page 360.0Neutral position
1Separate locking of trunk – remove mechanical key
in this position.
2Unlocking
Important!
Do not p lac e m echan ical key in sid e tr un k , s in ce tr unk is
locked again when closing the lid if the vehicle has been
previously centrally locked.
OM_203.book Seite 41 Donnerstag, 31. Mai 2001 11:57 11
Page 49 of 406
46 Antitheft alarm system
Te ch n i c a l
data Instruments
and controlsOperationDrivingInstrument
cluster displayPractical hints Car care Index
Antitheft alarm system
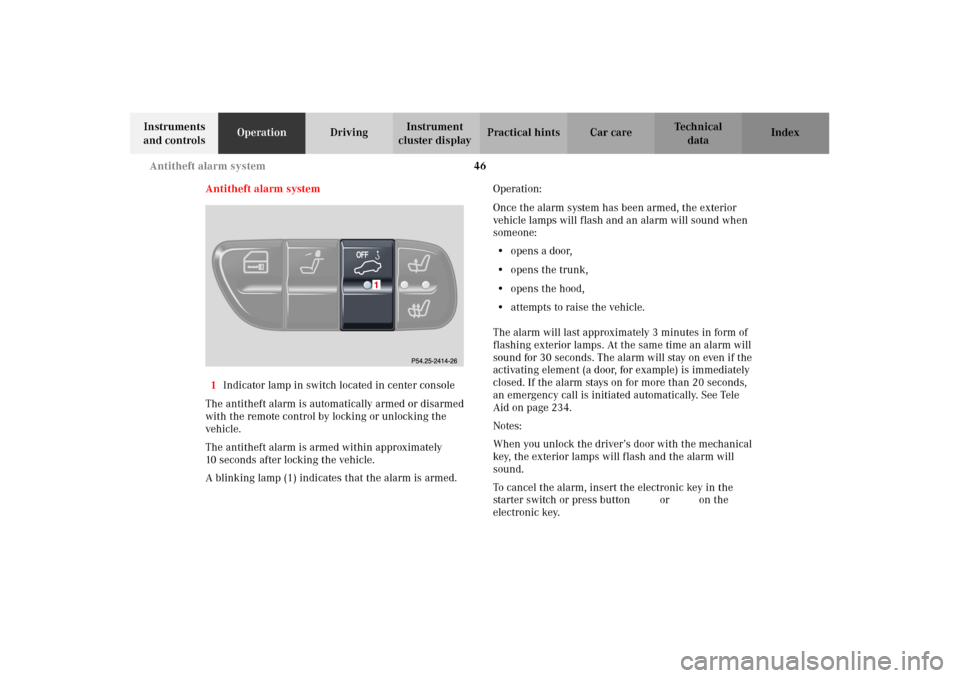
1Indicator lamp in switch located in center console
The antitheft alarm is automatically armed or disarmed
with the remote control by locking or unlocking the
vehicle.
The antitheft alarm is armed within approximately
10 seconds after locking the vehicle.
A blinking lamp (1) indicates that the alarm is armed.Operation:
Once the alarm system has been armed, the exterior
vehicle lamps will flash and an alarm will sound when
someone:
•opens a door,
•opens the trunk,
•opens the hood,
•attempts to raise the vehicle.
The alarm will last approximately 3 minutes in form of
flashing exterior lamps. At the same time an alarm will
sound for 30 seconds. The alarm will stay on even if the
activating element (a door, for example) is immediately
closed. If the alarm stays on for more than 20 seconds,
an emergency call is initiated automatically. See Tele
Aid on page 234.
Notes:
When you unlock the driver’s door with the mechanical
key, the exterior lamps will flash and the alarm will
sound.
To cancel the alarm, insert the electronic key in the
starter switch or press buttonŒ or‹ on the
electronic key.
OM_203.book Seite 46 Donnerstag, 31. Mai 2001 11:57 11
Page 50 of 406
47 Tow-away alarm
Te ch n i c a l
data Instruments
and controlsOperationDrivingInstrument
cluster displayPractical hints Car care Index Tow - away a l a r m
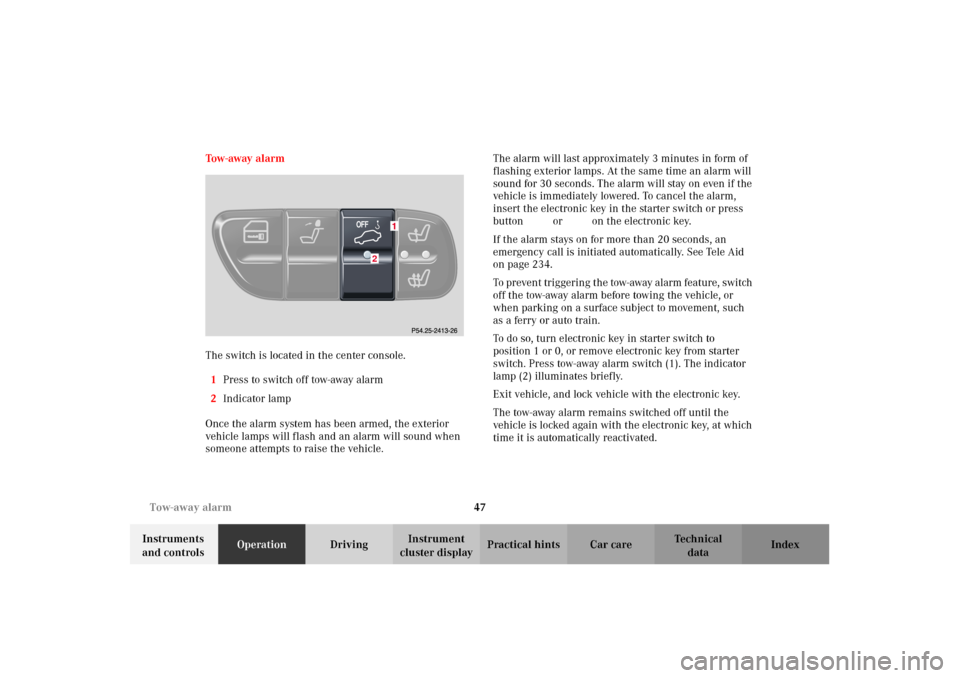
The switch is located in the center console.
1Press to switch off tow-away alarm
2Indicator lamp
Once the alarm system has been armed, the exterior
vehicle lamps will flash and an alarm will sound when
someone attempts to raise the vehicle.The alarm will last approximately 3 minutes in form of
flashing exterior lamps. At the same time an alarm will
sound for 30 seconds. The alarm will stay on even if the
vehicle is immediately lowered. To cancel the alarm,
insert the electronic key in the starter switch or press
buttonŒ or‹ on the electronic key.
If the alarm stays on for more than 20 seconds, an
emergency call is initiated automatically. See Tele Aid
on page 234.
To pr even t tr igger in g t he tow-away alarm feature, switch
off the tow-away alarm before towing the vehicle, or
when parking on a surface subject to movement, such
as a ferry or auto train.
To do so, turn electronic key in starter switch to
position 1 or 0, or remove electronic key from starter
switch. Press tow-away alarm switch (1). The indicator
lamp (2) illuminates briefly.
Exit vehicle, and lock vehicle with the electronic key.
The tow-away alarm remains switched off until the
vehicle is locked again with the electronic key, at which
time it is automatically reactivated.
2
OM_203.book Seite 47 Donnerstag, 31. Mai 2001 11:57 11
Page 94 of 406
91 Rear view mirrors
Te ch n i c a l
data Instruments
and controlsOperationDrivingInstrument
cluster displayPractical hints Car care Index Exterior rear view mirrors
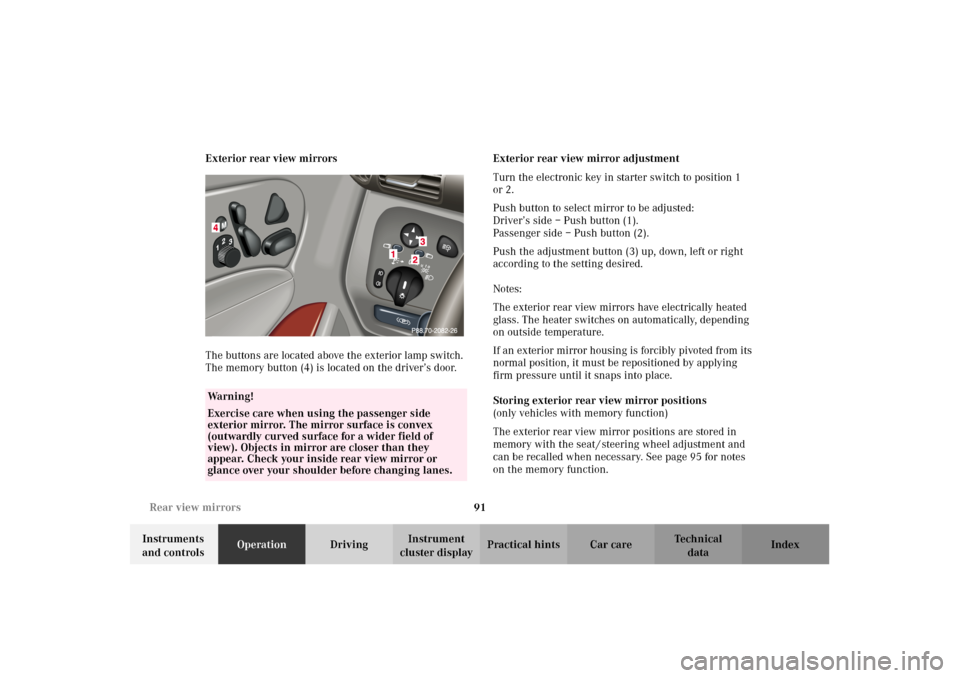
The buttons are located above the exterior lamp switch.
The memory button (4) is located on the driver’s door.Exterior rear view mirror adjustment
Turn the electronic key in starter switch to position 1
or 2.
Push button to select mirror to be adjusted:
Driver’s side – Push button (1).
Passenger side – Push button (2).
Push the adjustment button (3) up, down, left or right
according to the setting desired.
Notes:
The exterior rear view mirrors have electrically heated
glass. The heater switches on automatically, depending
on outside temperature.
If an exterior mirror housing is forcibly pivoted from its
normal position, it must be repositioned by applying
firm pressure until it snaps into place.
Storing exterior rear view mirror positions
(only vehicles with memory function)
The exterior rear view mirror positions are stored in
memory with the seat / steering wheel adjustment and
can be recalled when necessary. See page 95 for notes
on the memory function.
Wa r n i n g !
Exercise care when using the passenger side
exterior mirror. The mirror surface is convex
(outwardly curved surface for a wider field of
view). Objects in mirror are closer than they
appear. Check your inside rear view mirror or
glance over your shoulder before changing lanes.
0
PAuto
OM_203.book Seite 91 Donnerstag, 31. Mai 2001 11:57 11