lock MERCEDES-BENZ C300LUX 4MATIC 2010 W204 Workshop Manual
[x] Cancel search | Manufacturer: MERCEDES-BENZ, Model Year: 2010, Model line: C300LUX 4MATIC, Model: MERCEDES-BENZ C300LUX 4MATIC 2010 W204Pages: 364, PDF Size: 8.23 MB
Page 107 of 364
XAllow the engine and coolant to cool off.XCheck the coolant level and add coolant if
necessary ( Y page 227).
In case of accident
If the vehicle is leaking fuel:
XDo not start the engine under any
circumstances.XExit the vehicle at a safe distance from the
roadway.XNotify local fire and/or police authorities.
If the extent of the damage cannot be
determined:
XContact an authorized Mercedes-Benz
Center or call Roadside Assistance.
If no damage on major assemblies, fuel
system, and engine mount can be
determined:
XStart the engine in the usual manner.
Parking
GWarning!
Do not park this vehicle in areas where
combustible materials such as grass, hay or
leaves can come into contact with the hot
exhaust system. These materials could be
ignited and cause a vehicle fire.
Vehicle movement can cause serious
personal injury or damage to the vehicle or
the vehicle drivetrain. Therefore, always do
the following before turning off the engine and
leaving the vehicle:
R Keep right foot on the brake pedal.
R Engage the parking brake.
R Manual transmission: Shift the manual
transmission into 1st gear or reverse gear
R .
R
Automatic transmission: Shift the
automatic transmission into park position
P .
R Slowly release the brake pedal.
R When parked on an incline, always turn the
front wheels towards the road curb.
R Turn the SmartKey in the starter switch to
position 0 and remove the SmartKey from
the starter switch, or press the KEYLESS-
GO start/stop button.
R Take the SmartKey with you and lock the
vehicle when leaving.GWarning!
Manual transmission:
Wait until the vehicle is stationary before
removing the SmartKey from the starter
switch. The vehicle cannot be steered when
the SmartKey is removed from the starter
switch.
Parking brake
GWarning!
Engaging the parking brake while the vehicle
is in motion can cause the rear wheels to lock
up. You could lose control of the vehicle and
cause an accident. In addition, the vehicle’s
brake lights do not light up when the parking
brake is engaged.
GWarning!
When leaving the vehicle, always remove the
SmartKey from the starter switch, take it with
you, and lock the vehicle. Do not leave
children unattended in the vehicle, or with
access to an unlocked vehicle. Children could
release the parking brake and/or shift the
automatic transmission out of park position
P (manual transmission: shift into the neutral
position), either of which could result in an
accident and/or serious personal injury.
Driving and parking105Controls in detail204_AKB; 5; 23, en-USd2ureepe,Version: 2.11.8.12009-07-16T17:54:06+02:00 - Seite 105Z
Page 110 of 364
Shifting into reverse gear R
! Only shift the manual transmission into
reverse gear R when the vehicle is stopped.
Otherwise the manual transmission could
be damaged.
XStop the vehicle completely.XFully depress the clutch pedal.XShift the manual transmission into the
neutral position (no gear selected).
XMove the gearshift lever to the left until you
feel a certain resistance.
XPush the gearshift lever past this resistance
and hold.
XMove the gearshift lever forward to select
reverse gear R.
Automatic transmission
Introduction
For information on driving with an automatic
transmission, see “Driving and parking”
(Y page 101).
GWarning!
Make sure absolutely no objects are
obstructing the pedals’ range of movement.
Keep the driver’s footwell clear of all
obstacles. If there are any floormats or
carpets in the footwell, make sure the pedals
still have sufficient clearance.
During sudden driving or braking maneuvers
the objects could get caught between or
under the pedals. You could then no longer
brake or accelerate. This could lead to
accidents and injury.
! Allow the engine to warm up under low
load use. Do not place full load on the
engine until the operating temperature has
been reached.
Avoid spinning of a drive wheel for an
extended period when driving off on
slippery road surfaces.
This may cause serious damage to the
engine and the drivetrain which is not
covered by the Mercedes-Benz Limited
Warranty.
iDuring the brief warm-up, transmission
upshifting is delayed. This allows the
catalytic converter to heat up more quickly
to operating temperature.
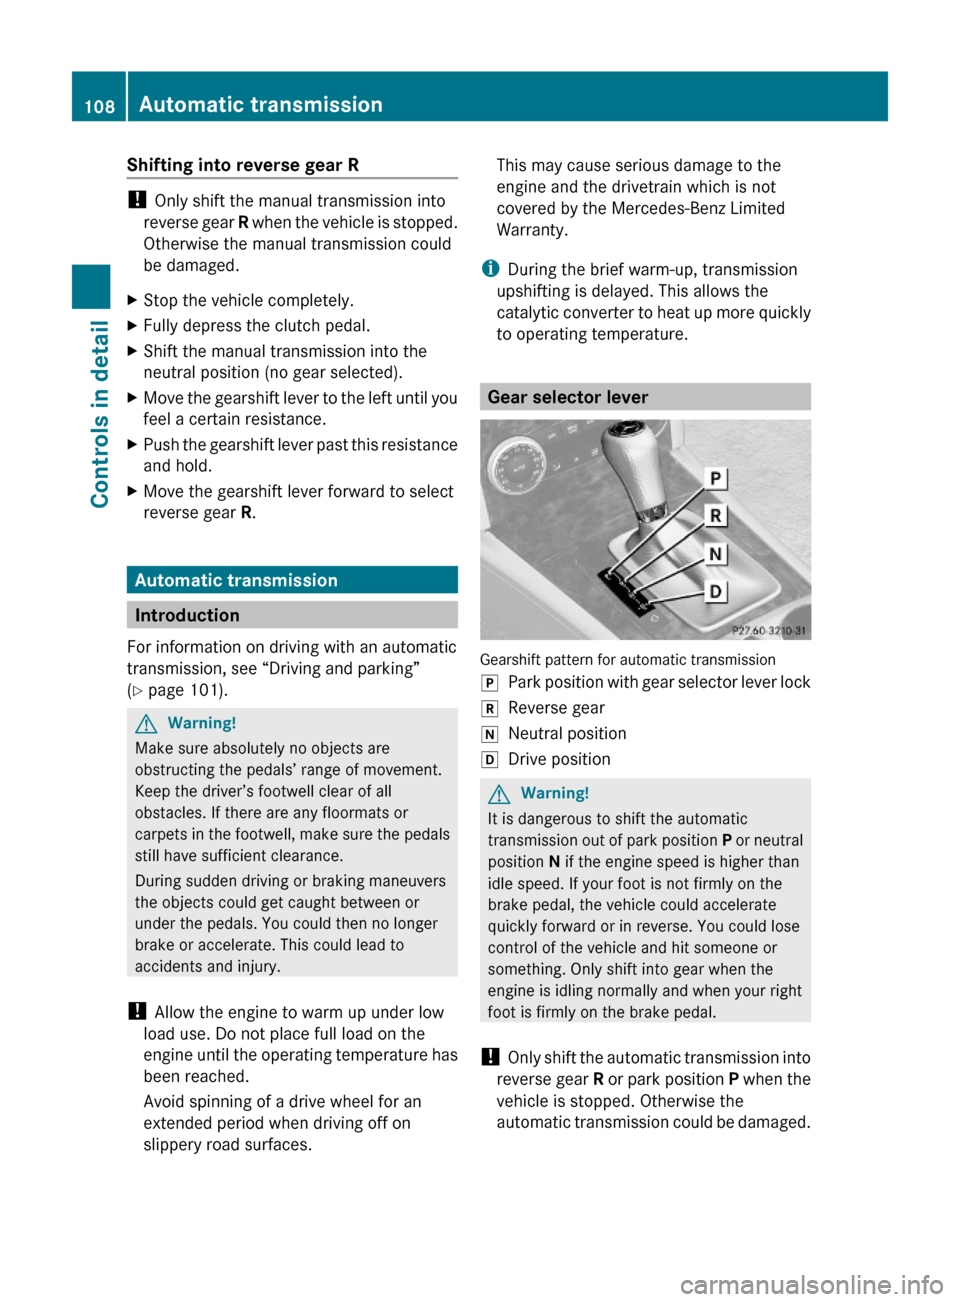
Gear selector lever
Gearshift pattern for automatic transmission
jPark position with gear selector lever lockkReverse geariNeutral positionhDrive positionGWarning!
It is dangerous to shift the automatic
transmission out of park position P or neutral
position N if the engine speed is higher than
idle speed. If your foot is not firmly on the
brake pedal, the vehicle could accelerate
quickly forward or in reverse. You could lose
control of the vehicle and hit someone or
something. Only shift into gear when the
engine is idling normally and when your right
foot is firmly on the brake pedal.
! Only shift the automatic transmission into
reverse gear R or park position P when the
vehicle is stopped. Otherwise the
automatic transmission could be damaged.
108Automatic transmissionControls in detail
204_AKB; 5; 23, en-USd2ureepe,Version: 2.11.8.12009-07-16T17:54:06+02:00 - Seite 108
Page 111 of 364
iShifting the automatic transmission out of
park position P is only possible with the
brake pedal depressed.
Only depressing the brake pedal releases
the gear selector lever lock.
iThe current gear selector lever position
corresponds with the current transmission
position.
The current transmission position P, R, N,
or D appears in the multifunction display
(Y page 109).
There are additional indicators on the cover
of the shifting gate showing the current gear
selector lever position.
The indicators come on when you insert the
SmartKey into the starter switch, and go out
when you remove the SmartKey from the
starter switch.
Shifting procedure
The automatic transmission selects individual
gears automatically, depending onRthe selected gear range (Y page 111)
Rthe selected program mode:
C/S (Y page 111)
or
M (vehicles with dynamic handling package
and C 63 AMG only) (Y page 113)
Rthe position of the accelerator pedal
Rthe vehicle speed
With drive position D selected, you can
influence transmission shifting by
Rlimiting the gear range
Rextending the gear range
Rchanging the gears manually (vehicles with
dynamic handling package and C 63 AMG
only)
C 63 AMG:
Double-clutching is active when downshifting
in all program modes. Double-clutching
reduces load-alteration effects and supports
sporty driving. The degree to which you
perceive double-clutching acoustically varies
depending on the selected program mode.
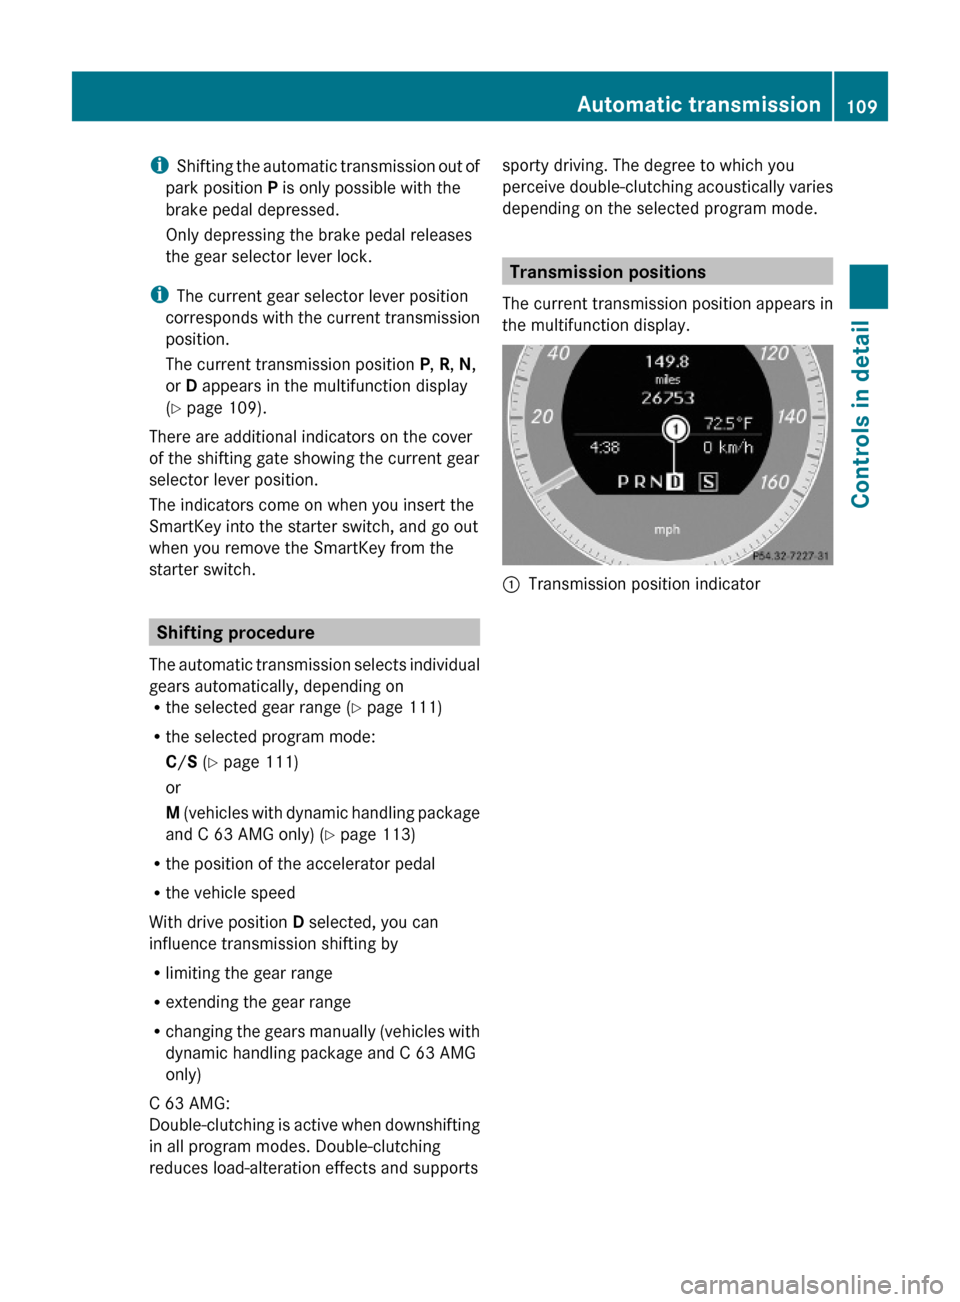
Transmission positions
The current transmission position appears in
the multifunction display.
:Transmission position indicator Automatic transmission109Controls in detail204_AKB; 5; 23, en-USd2ureepe,Version: 2.11.8.12009-07-16T17:54:06+02:00 - Seite 109Z
Page 112 of 364
EffectBPark position
Shift the automatic transmission
into park position P only when the
vehicle is stopped. The park position
is not intended to serve as a brake
when the vehicle is parked. Rather,
the driver should always engage the
parking brake in addition to shifting
the automatic transmission into
park position P to secure the
vehicle.
The SmartKey can only be removed
from the starter switch with the gear
selector lever in park position P.
With the SmartKey removed from
the starter switch, the gear selector
lever is locked in park position P.
If the vehicle’s electrical system is
malfunctioning, the gear selector
lever could remain locked in park
position P. To unlock the gear
selector lever manually, see
“Manually unlocking the gear
selector lever” ( Y page 311).CReverse gear
Shift the automatic transmission
into reverse gear R only when the
vehicle is stopped.EffectANeutral position
No power is transmitted from the
engine to the drive axle. When the
brakes are released, the vehicle can
be moved freely (pushed or towed).
To avoid damage to the
transmission, never shift the
automatic transmission into neutral
position N while driving.
Exception: If the ESP ®
is switched
off or malfunctioning, shift the
automatic transmission into neutral
position N if the vehicle is in danger
of skidding.
! Coasting the vehicle, or driving
for any other reason with the
automatic transmission in neutral
position N can result in
transmission damage that is not
covered by the Mercedes-Benz
Limited Warranty.7Drive position
The automatic transmission shifts
automatically. All forward gears are
available.
Driving tips
Kickdown
Use the kickdown when you want maximum
acceleration.
XU.S. vehicles except AMG vehicles:
Fully depress the accelerator pedal.
Depending on the engine speed the
automatic transmission shifts into a lower
gear.XCanada vehicles and AMG vehicles:
Depress the accelerator pedal past the
point of resistance.
Depending on the engine speed the
automatic transmission shifts into a lower
gear.110Automatic transmissionControls in detail
204_AKB; 5; 23, en-USd2ureepe,Version: 2.11.8.12009-07-16T17:54:06+02:00 - Seite 110
Page 119 of 364
Rmalfunction/warning messages
Rfailure of any systems
Driving characteristics may be impaired.
If you must continue to drive, do so with added
caution. Contact an authorized Mercedes-
Benz Center as soon as possible.
The language setting for the multifunction
display can be changed with the audio system
(Y page 148) or with the COMAND system.
Vehicles with COMAND system: Refer to
separate operating instructions.
Activating the instrument cluster
The instrument cluster is activated when you
Ropen the driver’s door
Rswitch on the ignition
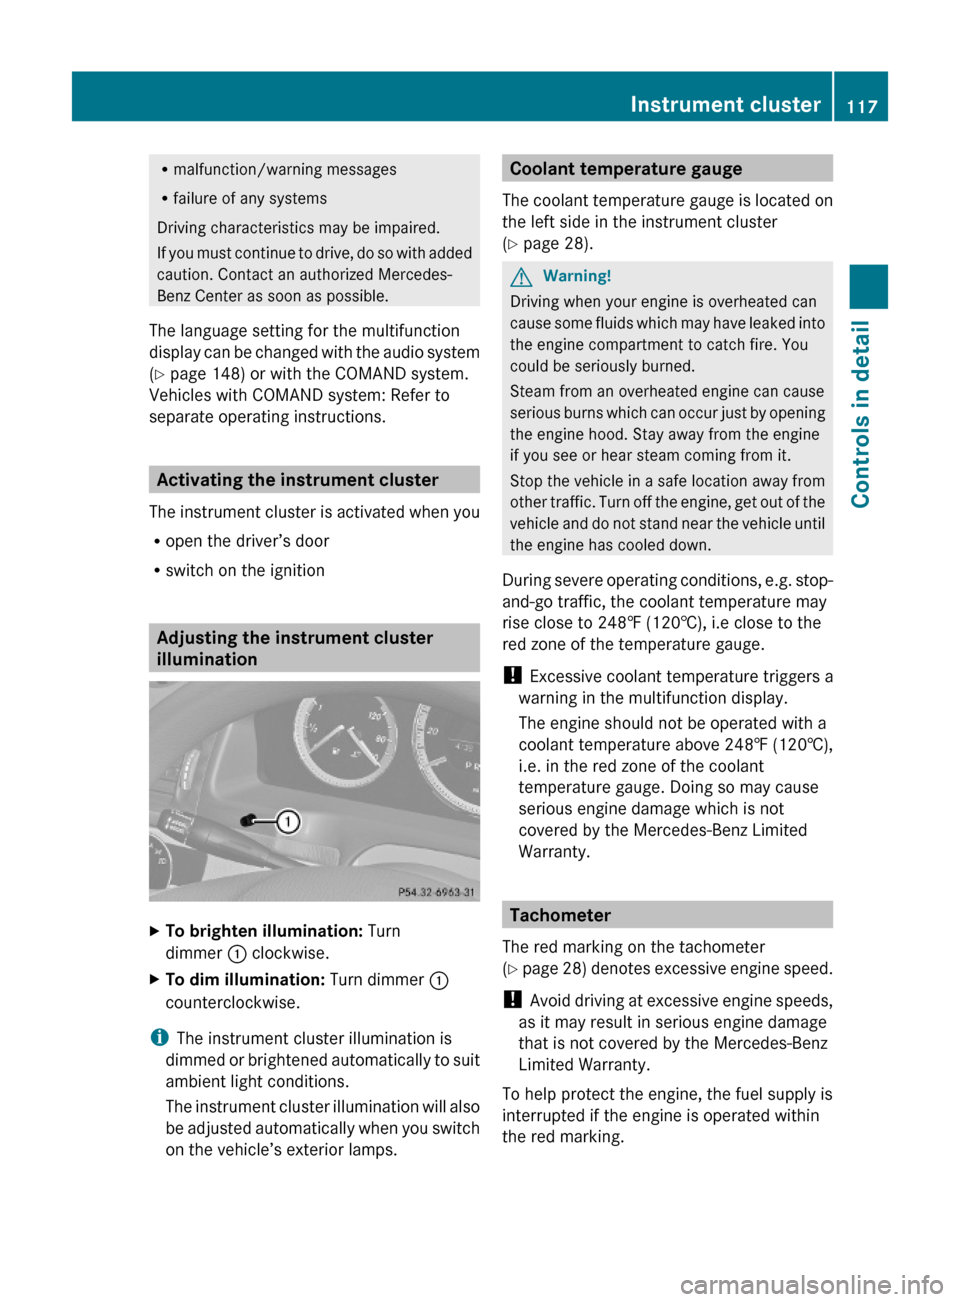
Adjusting the instrument cluster
illumination
XTo brighten illumination: Turn
dimmer : clockwise.
XTo dim illumination: Turn dimmer :
counterclockwise.
iThe instrument cluster illumination is
dimmed or brightened automatically to suit
ambient light conditions.
The instrument cluster illumination will also
be adjusted automatically when you switch
on the vehicle’s exterior lamps.
Coolant temperature gauge
The coolant temperature gauge is located on
the left side in the instrument cluster
(Y page 28).
GWarning!
Driving when your engine is overheated can
cause some fluids which may have leaked into
the engine compartment to catch fire. You
could be seriously burned.
Steam from an overheated engine can cause
serious burns which can occur just by opening
the engine hood. Stay away from the engine
if you see or hear steam coming from it.
Stop the vehicle in a safe location away from
other traffic. Turn off the engine, get out of the
vehicle and do not stand near the vehicle until
the engine has cooled down.
During severe operating conditions, e.g. stop-
and-go traffic, the coolant temperature may
rise close to 248‡ (120†), i.e close to the
red zone of the temperature gauge.
! Excessive coolant temperature triggers a
warning in the multifunction display.
The engine should not be operated with a
coolant temperature above 248‡ (120†),
i.e. in the red zone of the coolant
temperature gauge. Doing so may cause
serious engine damage which is not
covered by the Mercedes-Benz Limited
Warranty.
Tachometer
The red marking on the tachometer
(Y page 28) denotes excessive engine speed.
! Avoid driving at excessive engine speeds,
as it may result in serious engine damage
that is not covered by the Mercedes-Benz
Limited Warranty.
To help protect the engine, the fuel supply is
interrupted if the engine is operated within
the red marking.
Instrument cluster117Controls in detail204_AKB; 5; 23, en-USd2ureepe,Version: 2.11.8.12009-07-16T17:54:06+02:00 - Seite 117Z
Page 122 of 364
Using the control systemXTo select a menu: Press button =
or ;.
XTo select a submenu: Press button :
or 9.
XTo go to the next higher menu level:
Press button %.
XTo select the standard display: Press
button % repeatedly until the standard
display featuring the odometer and
speedometer appears.
or
XPress and hold button % until the
standard display featuring the trip
odometer and the main odometer appears.
XTo confirm selection: Press button a.XTo confirm display message: Press
button a or %.
The control system saves certain display
messages. Calling up display messages
(Y page 129).
For information about warning and
malfunction messages appearing in the
multifunction display (Y page 270).
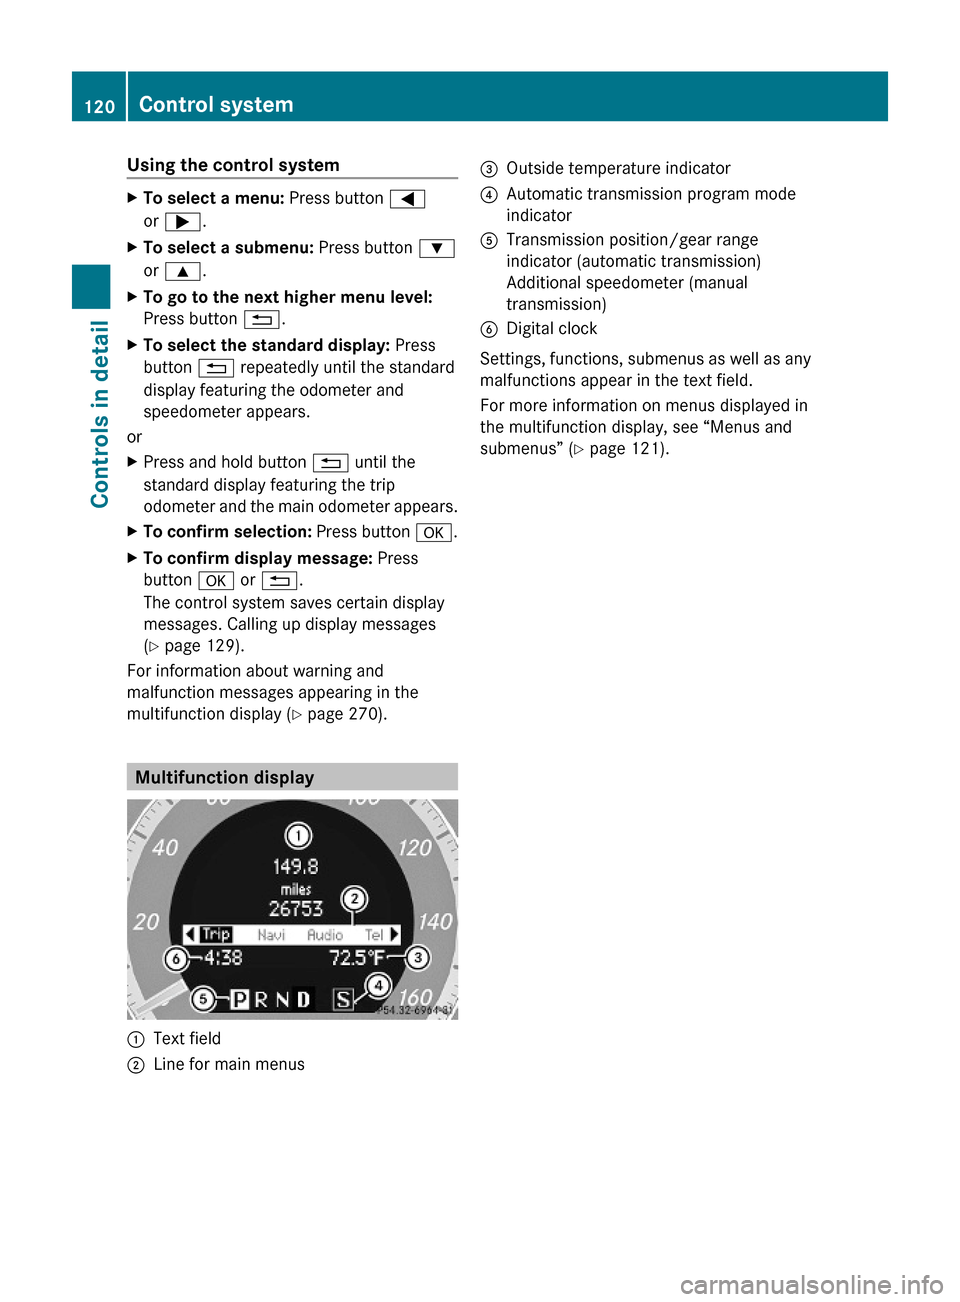
Multifunction display
:Text field;Line for main menus=Outside temperature indicator?Automatic transmission program mode
indicator
ATransmission position/gear range
indicator (automatic transmission)
Additional speedometer (manual
transmission)
BDigital clock
Settings, functions, submenus as well as any
malfunctions appear in the text field.
For more information on menus displayed in
the multifunction display, see “Menus and
submenus” (Y page 121).
120Control systemControls in detail
204_AKB; 5; 23, en-USd2ureepe,Version: 2.11.8.12009-07-16T17:54:06+02:00 - Seite 120
Page 125 of 364
Remaining driving range and current
fuel consumption
XPress button = or ; to select the
Trip menu.
XPress button : or 9 to select the
estimated remaining driving range and
current fuel consumption display.
Note that the values are calculated based
on the current fuel tank level and the
current driving style. Make sure to refuel in
time.
If only very little fuel is left in the tank, a
vehicle at the fuel pump C appears
instead of the estimated remaining driving
range.
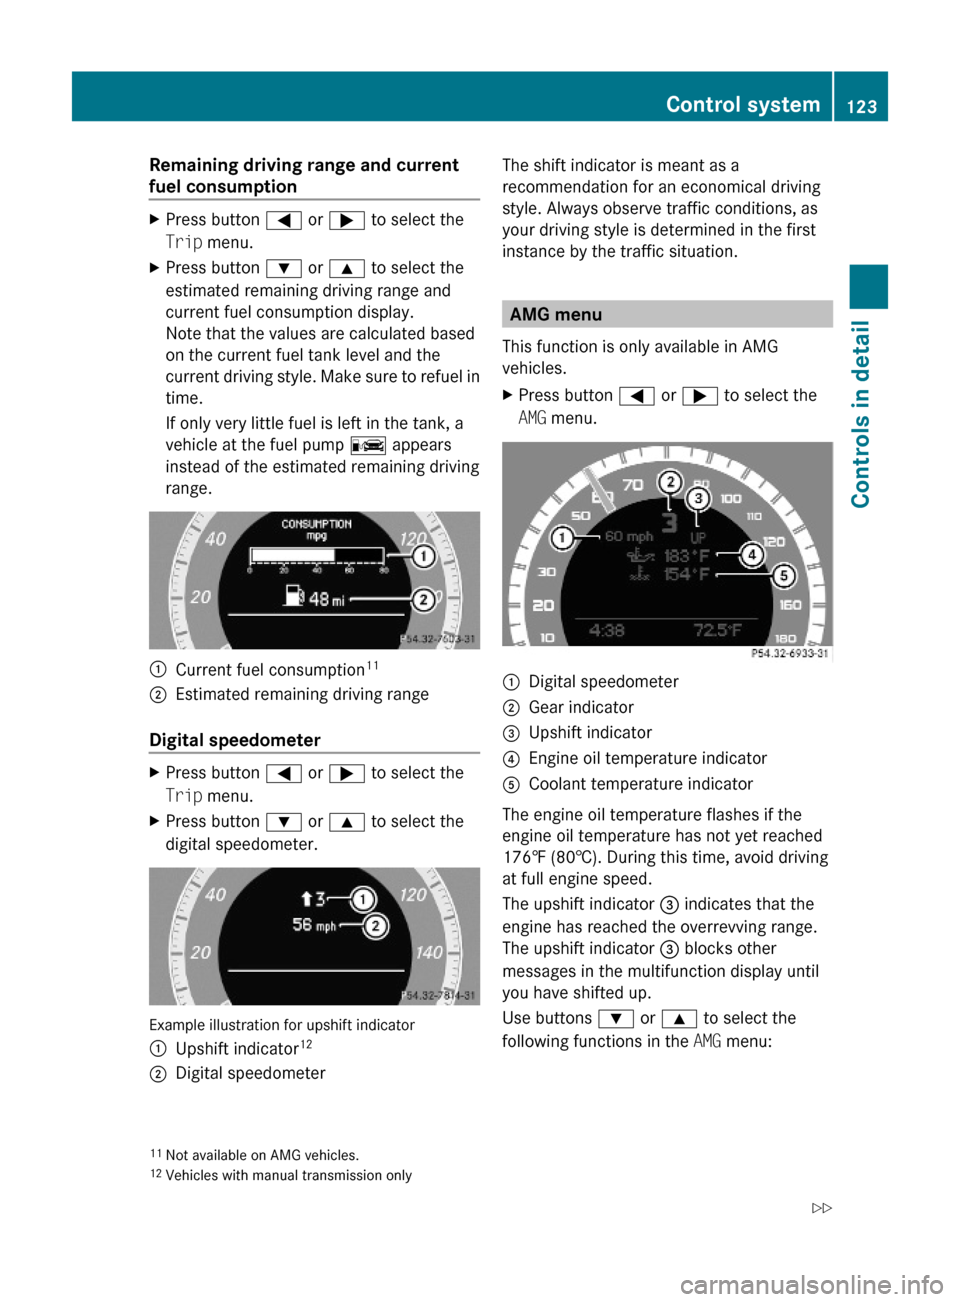
:Current fuel consumption11;Estimated remaining driving range
Digital speedometer
XPress button = or ; to select the
Trip menu.
XPress button : or 9 to select the
digital speedometer.
Example illustration for upshift indicator
:Upshift indicator12;Digital speedometerThe shift indicator is meant as a
recommendation for an economical driving
style. Always observe traffic conditions, as
your driving style is determined in the first
instance by the traffic situation.
AMG menu
This function is only available in AMG
vehicles.
XPress button = or ; to select the
AMG menu.
:Digital speedometer;Gear indicator=Upshift indicator?Engine oil temperature indicatorACoolant temperature indicator
The engine oil temperature flashes if the
engine oil temperature has not yet reached
176‡ (80†). During this time, avoid driving
at full engine speed.
The upshift indicator = indicates that the
engine has reached the overrevving range.
The upshift indicator = blocks other
messages in the multifunction display until
you have shifted up.
Use buttons : or 9 to select the
following functions in the AMG menu:
11Not available on AMG vehicles.12Vehicles with manual transmission only
Control system123Controls in detail204_AKB; 5; 23, en-USd2ureepe,Version: 2.11.8.12009-07-16T17:54:06+02:00 - Seite 123Z
Page 133 of 364
XPress button : or 9 to select a
submenu.
Scroll down with button :, scroll up with
button 9.
With the selection marker on the desired
submenu, use the button a to access the
individual functions within that submenu.
Once within the submenu, you can use button
9 to move to the next function or
button : to move to the previous function
within that submenu.
The following lists show what settings can be
changed within the various menus. Detailed
instructions on making individual settings can
be found on the following pages.
Instrument cluster submenu
RSelecting speedometer display mode
(Y page 131)
RShowing or hiding additional
speedometer13 (Y page 132)
RPermanent display14 (speed display or
outside temperature) (Y page 132)
Time/Date submenu
RSetting the time (Y page 132)
RSetting the date (Y page 133)
Lights submenu
RSwitching daytime running lamp mode on
or off (USA only) (Y page 133)
RSwitching locator lighting on or off
(Y page 134)
RSwitching interior lighting delayed shut-off
on or off (Y page 135)
Vehicle submenu
RSwitching automatic central locking on or
off (Y page 135)
Convenience submenu
RActivating easy-entry/exit feature
(Y page 136)
RSwitching fold-in function for exterior rear
view mirrors on or off (Canada only)
(Y page 136)
Instrument cluster submenu
Access the Instr. Cluster submenu via
the Settings menu. Use the Instr.
Cluster submenu to change the instrument
cluster display settings.
The following functions are available:
RSelecting speedometer display mode
(Y page 131)
RShowing or hiding additional
speedometer15 (Y page 132)
RPermanent display16 (speed display or
outside temperature) (Y page 132)
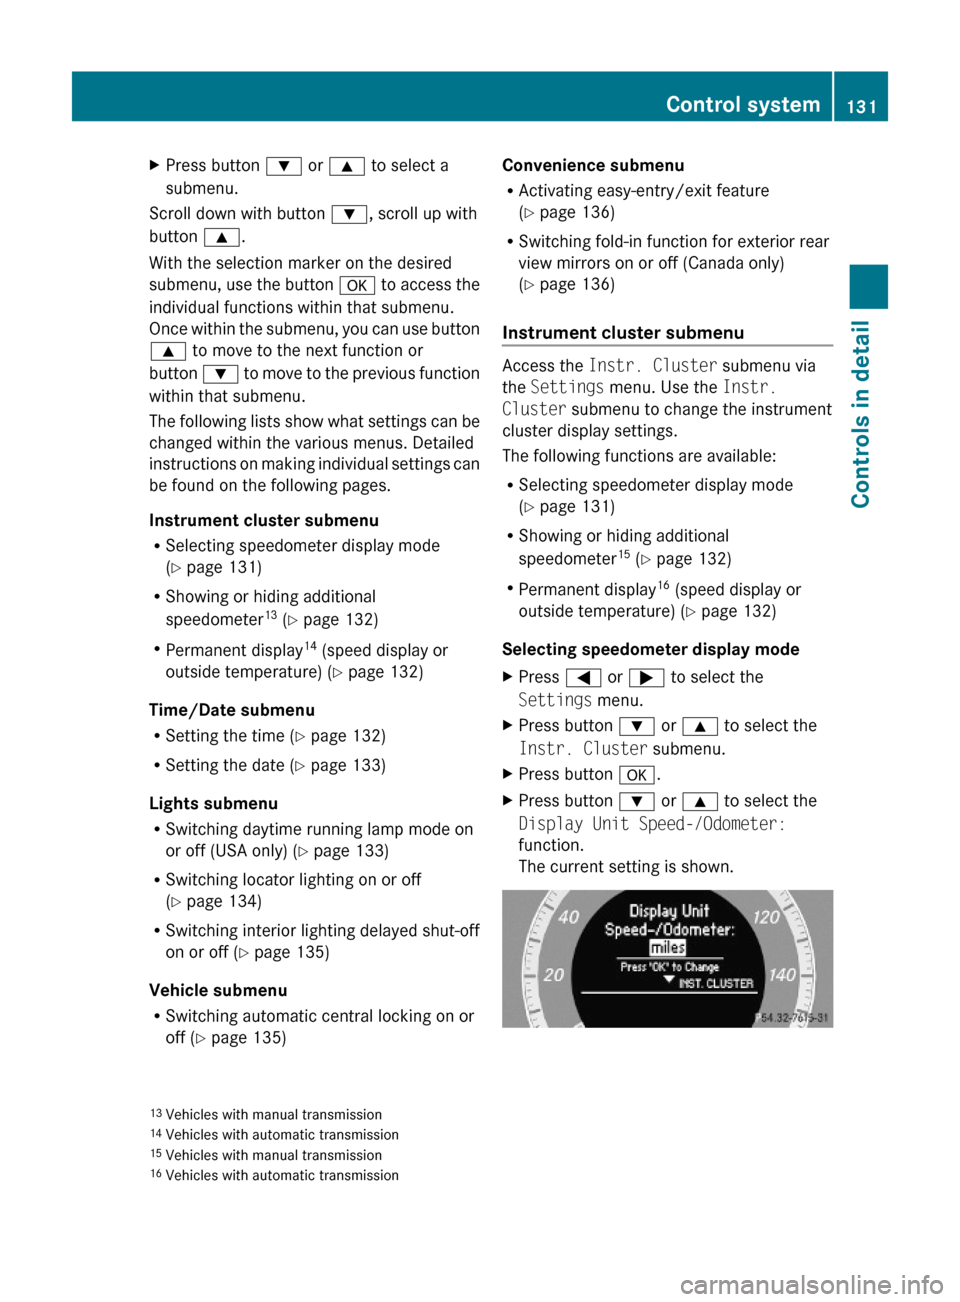
Selecting speedometer display mode
XPress = or ; to select the
Settings menu.
XPress button : or 9 to select the
Instr. Cluster submenu.
XPress button a.XPress button : or 9 to select the
Display Unit Speed-/Odometer:
function.
The current setting is shown.
13Vehicles with manual transmission14Vehicles with automatic transmission15Vehicles with manual transmission16Vehicles with automatic transmission
Control system131Controls in detail204_AKB; 5; 23, en-USd2ureepe,Version: 2.11.8.12009-07-16T17:54:06+02:00 - Seite 131Z
Page 136 of 364
XPress button a.XPress button : or 9 to select the
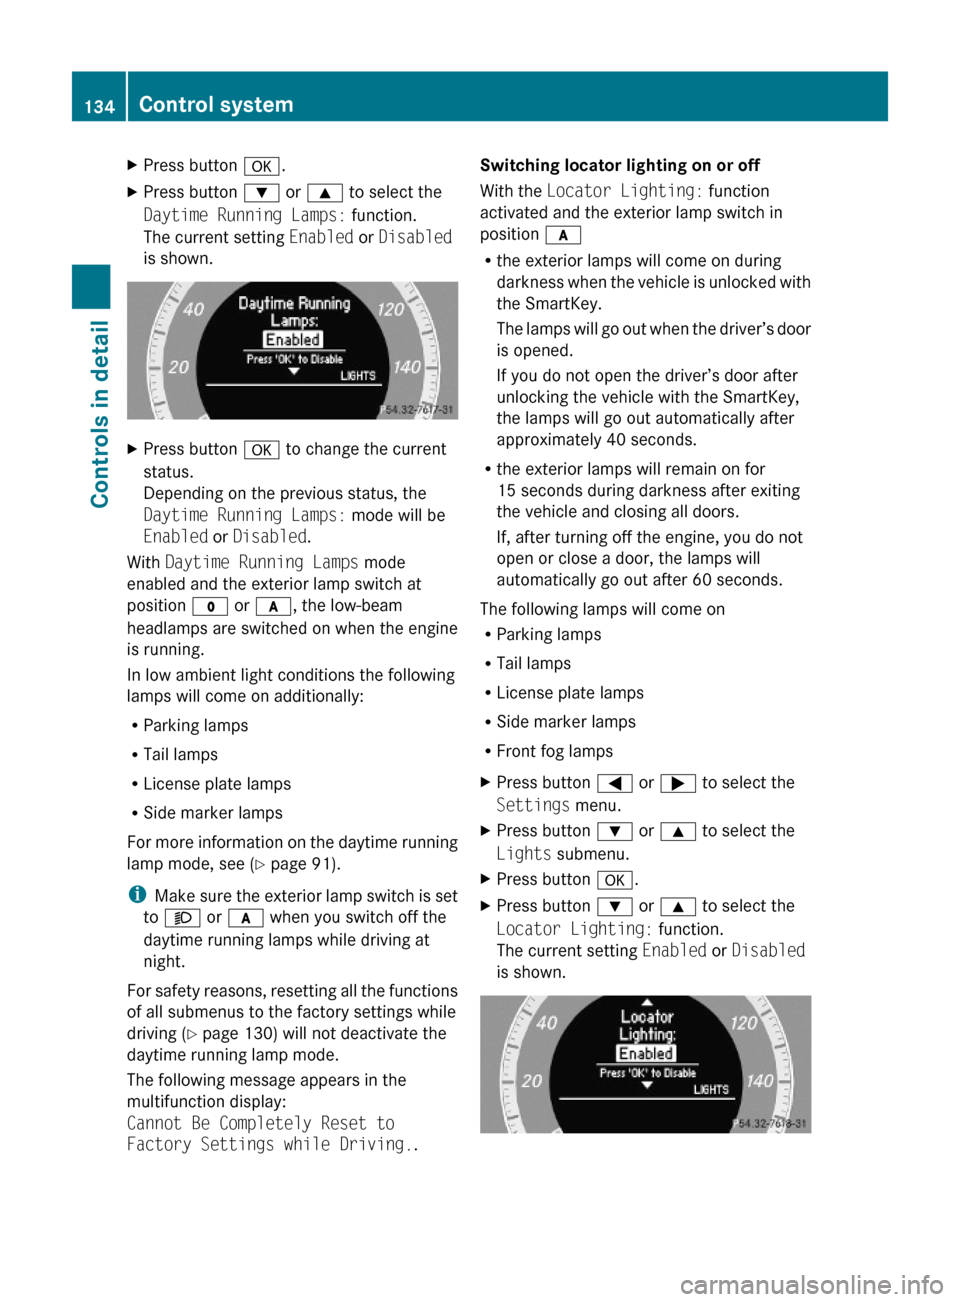
Daytime Running Lamps: function.
The current setting Enabled or Disabled
is shown.
XPress button a to change the current
status.
Depending on the previous status, the
Daytime Running Lamps: mode will be
Enabled or Disabled.
With Daytime Running Lamps mode
enabled and the exterior lamp switch at
position $ or c, the low-beam
headlamps are switched on when the engine
is running.
In low ambient light conditions the following
lamps will come on additionally:
RParking lamps
RTail lamps
RLicense plate lamps
RSide marker lamps
For more information on the daytime running
lamp mode, see (Y page 91).
iMake sure the exterior lamp switch is set
to M or c when you switch off the
daytime running lamps while driving at
night.
For safety reasons, resetting all the functions
of all submenus to the factory settings while
driving (Y page 130) will not deactivate the
daytime running lamp mode.
The following message appears in the
multifunction display:
Cannot Be Completely Reset to
Factory Settings while Driving..
Switching locator lighting on or off
With the Locator Lighting: function
activated and the exterior lamp switch in
position c
Rthe exterior lamps will come on during
darkness when the vehicle is unlocked with
the SmartKey.
The lamps will go out when the driver’s door
is opened.
If you do not open the driver’s door after
unlocking the vehicle with the SmartKey,
the lamps will go out automatically after
approximately 40 seconds.
Rthe exterior lamps will remain on for
15 seconds during darkness after exiting
the vehicle and closing all doors.
If, after turning off the engine, you do not
open or close a door, the lamps will
automatically go out after 60 seconds.
The following lamps will come on
RParking lamps
RTail lamps
RLicense plate lamps
RSide marker lamps
RFront fog lamps
XPress button = or ; to select the
Settings menu.
XPress button : or 9 to select the
Lights submenu.
XPress button a.XPress button : or 9 to select the
Locator Lighting: function.
The current setting Enabled or Disabled
is shown.
134Control systemControls in detail
204_AKB; 5; 23, en-USd2ureepe,Version: 2.11.8.12009-07-16T17:54:06+02:00 - Seite 134
Page 137 of 364
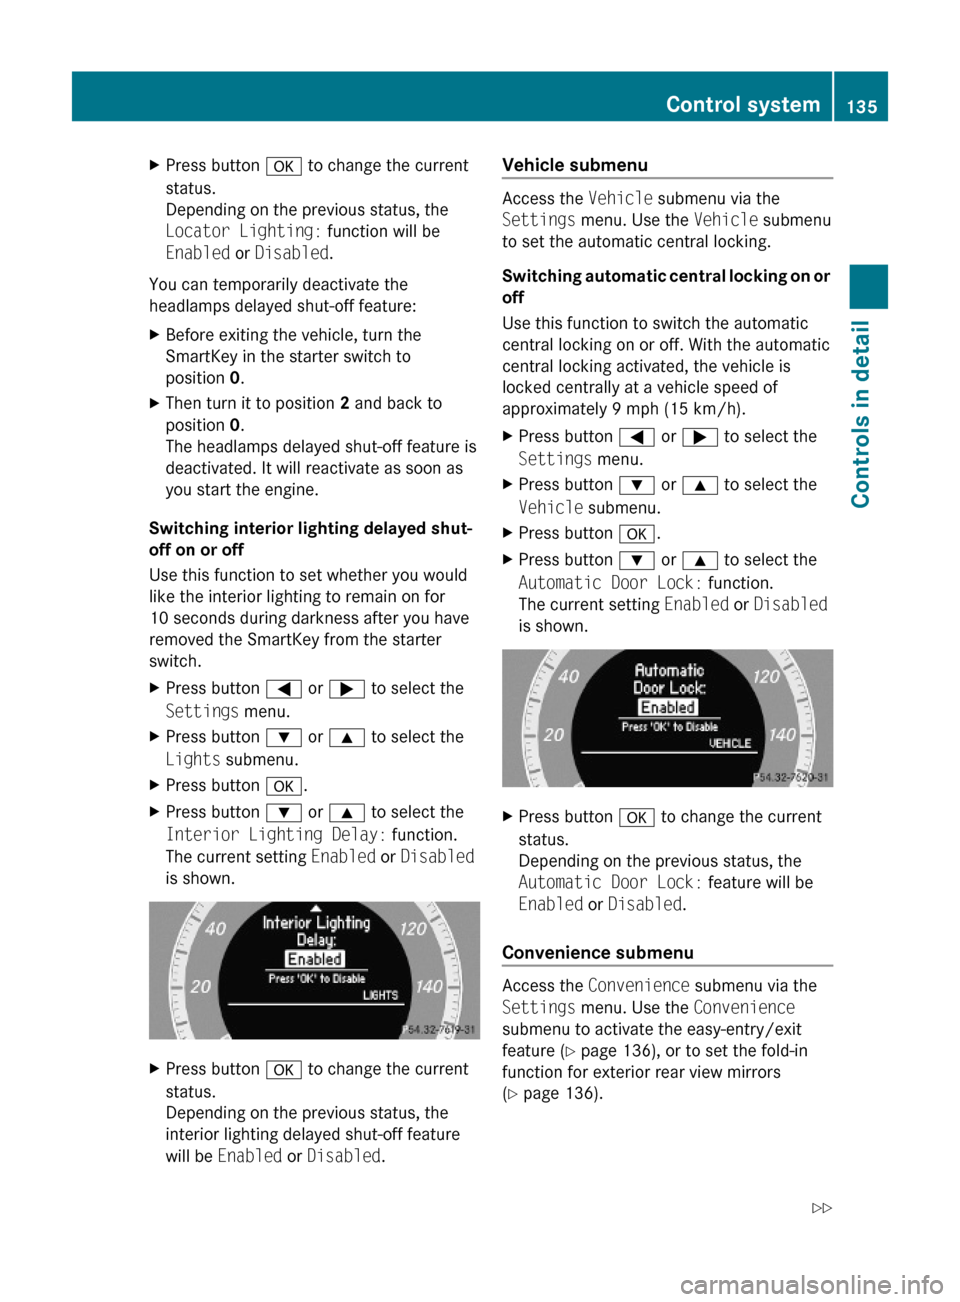
XPress button a to change the current
status.
Depending on the previous status, the
Locator Lighting: function will be
Enabled or Disabled.
You can temporarily deactivate the
headlamps delayed shut-off feature:
XBefore exiting the vehicle, turn the
SmartKey in the starter switch to
position 0.
XThen turn it to position 2 and back to
position 0.
The headlamps delayed shut-off feature is
deactivated. It will reactivate as soon as
you start the engine.
Switching interior lighting delayed shut-
off on or off
Use this function to set whether you would
like the interior lighting to remain on for
10 seconds during darkness after you have
removed the SmartKey from the starter
switch.
XPress button = or ; to select the
Settings menu.
XPress button : or 9 to select the
Lights submenu.
XPress button a.XPress button : or 9 to select the
Interior Lighting Delay: function.
The current setting Enabled or Disabled
is shown.
XPress button a to change the current
status.
Depending on the previous status, the
interior lighting delayed shut-off feature
will be Enabled or Disabled.
Vehicle submenu
Access the Vehicle submenu via the
Settings menu. Use the Vehicle submenu
to set the automatic central locking.
Switching automatic central locking on or
off
Use this function to switch the automatic
central locking on or off. With the automatic
central locking activated, the vehicle is
locked centrally at a vehicle speed of
approximately 9 mph (15 km/h).
XPress button = or ; to select the
Settings menu.
XPress button : or 9 to select the
Vehicle submenu.
XPress button a.XPress button : or 9 to select the
Automatic Door Lock: function.
The current setting Enabled or Disabled
is shown.
XPress button a to change the current
status.
Depending on the previous status, the
Automatic Door Lock: feature will be
Enabled or Disabled.
Convenience submenu
Access the Convenience submenu via the
Settings menu. Use the Convenience
submenu to activate the easy-entry/exit
feature (Y page 136), or to set the fold-in
function for exterior rear view mirrors
(Y page 136).
Control system135Controls in detail204_AKB; 5; 23, en-USd2ureepe,Version: 2.11.8.12009-07-16T17:54:06+02:00 - Seite 135Z