MERCEDES-BENZ C320 2001 W203 Owner's Manual
Manufacturer: MERCEDES-BENZ, Model Year: 2001, Model line: C320, Model: MERCEDES-BENZ C320 2001 W203Pages: 381, PDF Size: 19.92 MB
Page 141 of 381
132 Exterior lamp switch
Te ch n i c a l
data Instruments
and controlsOperationDrivingInstrument
cluster displayPractical hints Car care Index
Daytime running lamp mode
Turn exterior lamp switch to positionM.
When the engine is running, the low beam headlamps
(includes parking lamps and license plate lamps) are
automatically switched on.
Canada only:
When shifting from a driving position to position “N”
or “P”, the low beam switches off (3 minutes delay).
For nighttime driving the exterior lamp switch should
be turned to position B to permit activation of the
high beam headlamps.
USA only:
The high beam headlamps can also be activated when
driving with the daytime running lamp mode activated
and exterior lamp switch in positionM.
See page 130 for notes on the exterior lamp switch.
To activate the daytime running lamp mode, see
“Individual settings” – “LIGHTING” on page 117.Night security illumination
When turning off the engine, the exterior lamps switch
on for added illumination, if they were previously
switched on (except in daytime running mode). After
the last door has been closed the lamp-on time period
commences.
The lamp-on time period for night security illumination
can be set at several different timed levels from 0 (off) to
60 seconds, see “Individual settings” - “LIGHTING” on
page 117.
Notes:
Within 10 minutes after closing the last door the night
security illumination can be reactivated by opening a
door.
See “Individual settings” – “LIGHTING” on page 117 for
instructions on how to activate the function.
Deactivating night security illumination temporarily:
Turn the electronic key in starter switch to position 0
then to position 2 and back to position 0 again before
getting out of the vehicle. The night security
illumination will not be activated when the door is
opened.
Page 142 of 381
133 Exterior lamp switch
Te ch n i c a l
data Instruments
and controlsOperationDrivingInstrument
cluster displayPractical hints Car care Index Locator lighting
After unlocking the vehicle with the electronic main key
during darkness, the fog lamps, parking lamps,
taillamps and license plate lamps switch on for
approximately 40 seconds.
The exterior lamps will be switched off when opening
the driver’s door.
See “Individual settings” – “LIGHTING” on page 117 for
instructions on how to activate the function. Headlamp cleaning system
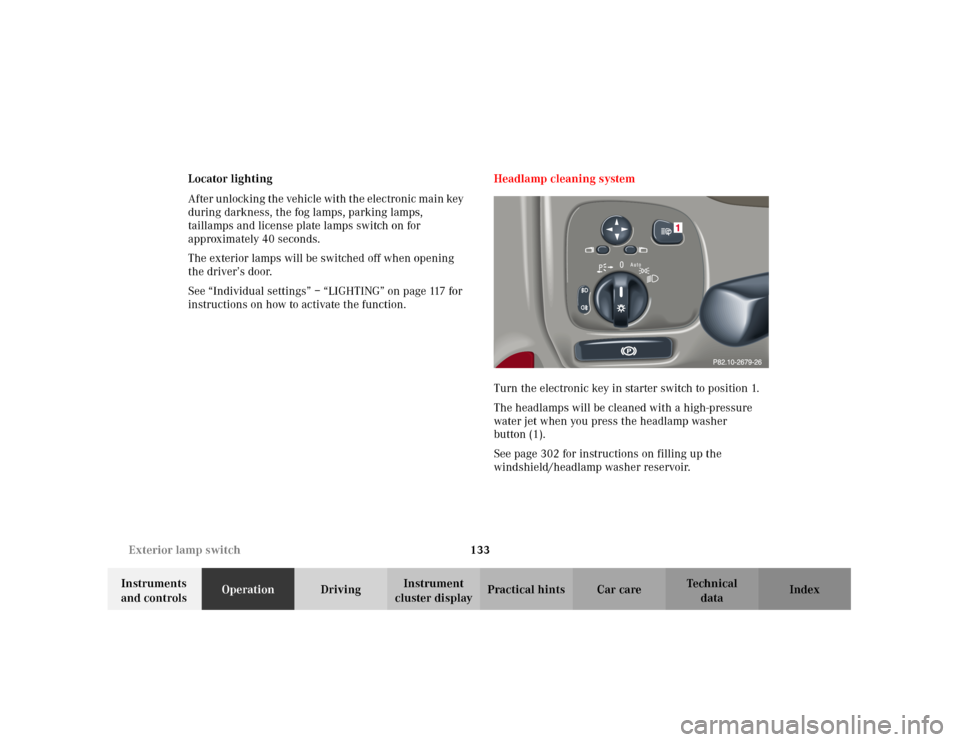
Turn the electronic key in starter switch to position 1.
The headlamps will be cleaned with a high-pressure
water jet when you press the headlamp washer
button (1).
See page 302 for instructions on filling up the
windshield/headlamp washer reservoir.
Page 143 of 381
134 Combination switch
Te ch n i c a l
data Instruments
and controlsOperationDrivingInstrument
cluster displayPractical hints Car care Index
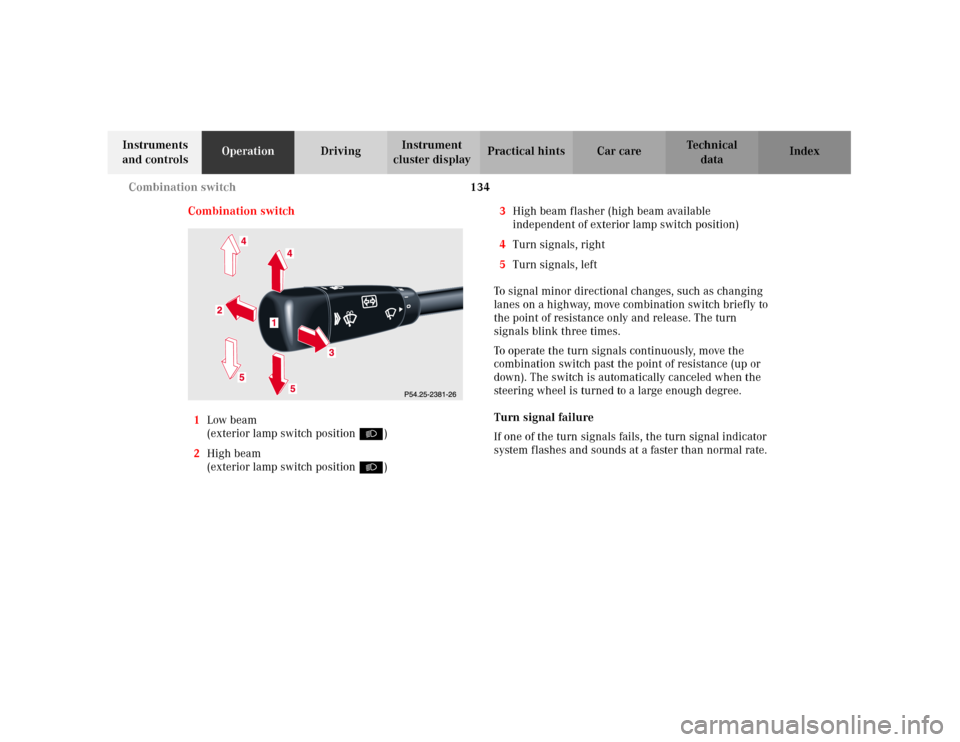
Combination switch
1Low beam
(exterior lamp switch position B)
2High beam
(exterior lamp switch position B)3High beam flasher (high beam available
independent of exterior lamp switch position)
4Turn signals, right
5Turn signals, left
To signal minor directional changes, such as changing
lanes on a highway, move combination switch briefly to
the point of resistance only and release. The turn
signals blink three times.
To operate the turn signals continuously, move the
combination switch past the point of resistance (up or
down). The switch is automatically canceled when the
steering wheel is turned to a large enough degree.
Turn signal failure
If one of the turn signals fails, the turn signal indicator
system flashes and sounds at a faster than normal rate.
Page 144 of 381
135 Combination switch
Te ch n i c a l
data Instruments
and controlsOperationDrivingInstrument
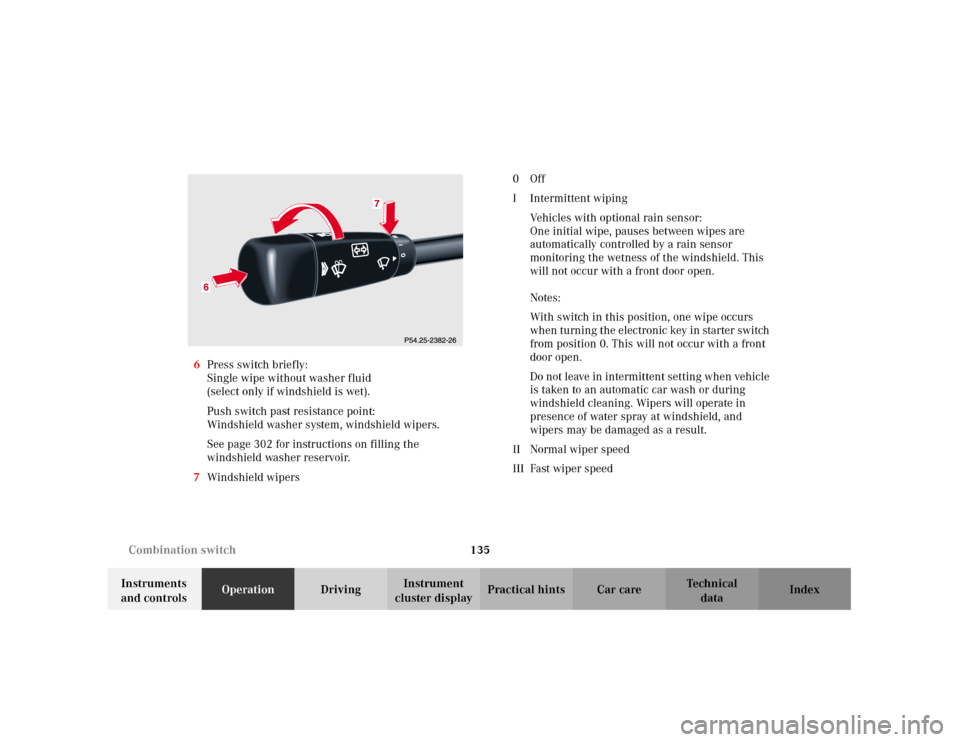
cluster displayPractical hints Car care Index 6Press switch briefly:
Single wipe without washer fluid
(select only if windshield is wet).
Push switch past resistance point:
Windshield washer system, windshield wipers.
See page 302 for instructions on filling the
windshield washer reservoir.
7Windshield wipers0Off
I Intermittent wiping
Vehicles with optional rain sensor:
One initial wipe, pauses between wipes are
automatically controlled by a rain sensor
monitoring the wetness of the windshield. This
will not occur with a front door open.
Notes:
With switch in this position, one wipe occurs
when turning the electronic key in starter switch
from position 0. This will not occur with a front
door open.
Do not leave in intermittent setting when vehicle
is taken to an automatic car wash or during
windshield cleaning. Wipers will operate in
presence of water spray at windshield, and
wipers may be damaged as a result.
II Normal wiper speed
III Fast wiper speed
Page 145 of 381
136 Combination switch
Te ch n i c a l
data Instruments
and controlsOperationDrivingInstrument
cluster displayPractical hints Car care Index
Blocked windshield wipers
If the windshield wipers become blocked (for example,
due to snow), switch off the wipers.
For safety reasons before removing ice or snow, remove
electronic key from starter switch. Remove blockage.
Activate combination switch again (electronic key in
starter switch position 1).
Emergency operation of windshield wipers
In case of windshield wiper malfunction in switch
positions I or III, turn combination switch to wiper
setting II. Have the system checked at your authorized
Mercedes-Benz Center as soon as possible.Windshield wipers smear
If the windshield wipers smear the windshield, even
during rain, activate the washer system as often as
necessary. The fluid in the washer reservoir should be
mixed in the correct ratio.
See page 302 for instructions on filling up the
windshield washer reservoir.
Windshield and headlamp washer fluid mixing ratio
For temperatures above freezing:
MB Windshield Washer Concentrate “S” and water.
1 part “S” to 100 parts water
(40 ml “S” to 1 gallon water).
For temperature below freezing:
MB Windshield Washer Concentrate “S” and
commercially available premixed windshield washer
solvent / antifreeze
1 part “S” to 100 parts solvent
(40 ml “S” to 1 gallon solvent).
Page 146 of 381
137 Hazard warning flasher
Te ch n i c a l
data Instruments
and controlsOperationDrivingInstrument
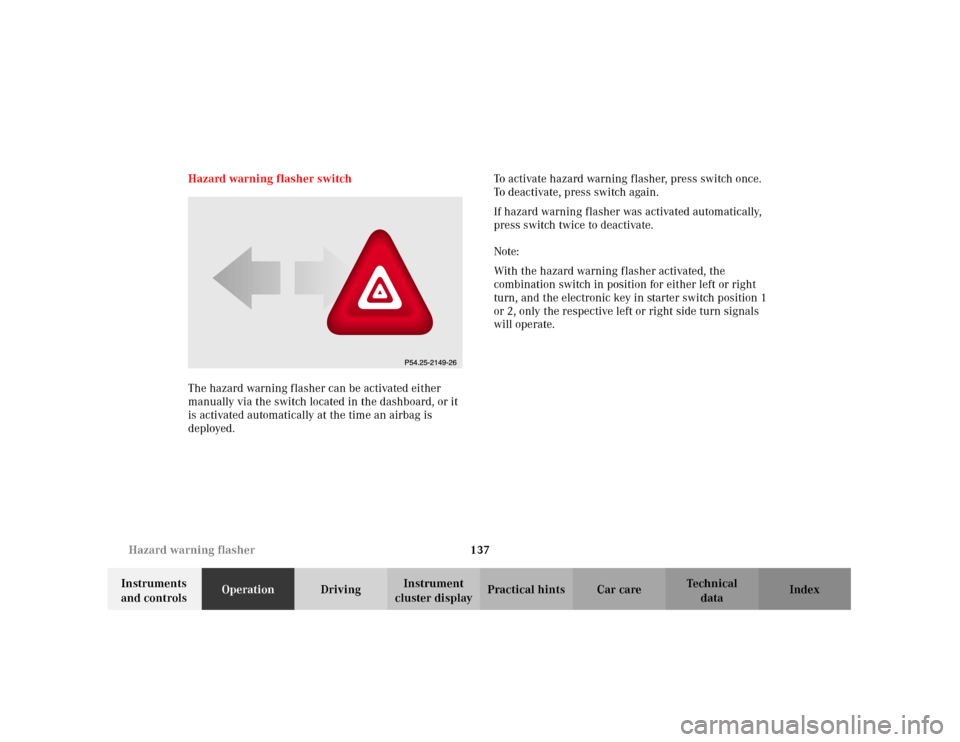
cluster displayPractical hints Car care Index Hazard warning flasher switch
The hazard warning flasher can be activated either
manually via the switch located in the dashboard, or it
is activated automatically at the time an airbag is
deployed.To activate hazard warning flasher, press switch once.
To deactivate, press switch again.
If hazard warning flasher was activated automatically,
press switch twice to deactivate.
Note:
With the hazard warning flasher activated, the
combination switch in position for either left or right
turn, and the electronic key in starter switch position 1
or 2, only the respective left or right side turn signals
will operate.
Page 147 of 381
138 Climate control
Te ch n i c a l
data Instruments
and controlsOperationDrivingInstrument
cluster displayPractical hints Car care Index
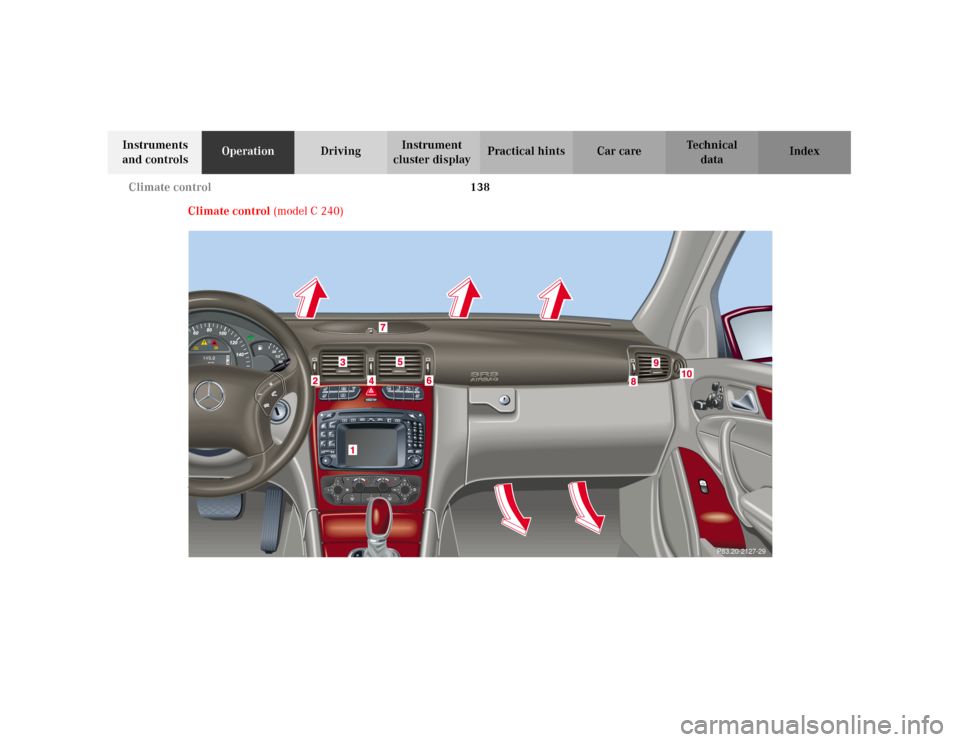
Climate control (model C 240)
P83.20-2127-29
Page 148 of 381
139 Climate control
Te ch n i c a l
data Instruments
and controlsOperationDrivingInstrument
cluster displayPractical hints Car care Index 1Display and controls
2Air volume control for left center air outlet
3Center air outlet, left, adjustable
4Thumbwheel for adding outside air at air outlets for
center, left and right sides, as well as dashboard top
center and rear passenger compartment
5Center air outlet, right, adjustable6Air volume control for right center air outlet
7Air volume control and air outlet on dashboard top
center
8Air volume control for side air outlet
9Side air outlet, adjustable
10Side defroster outlet, fixed
Page 149 of 381
140 Climate control
Te ch n i c a l
data Instruments
and controlsOperationDrivingInstrument
cluster displayPractical hints Car care Index
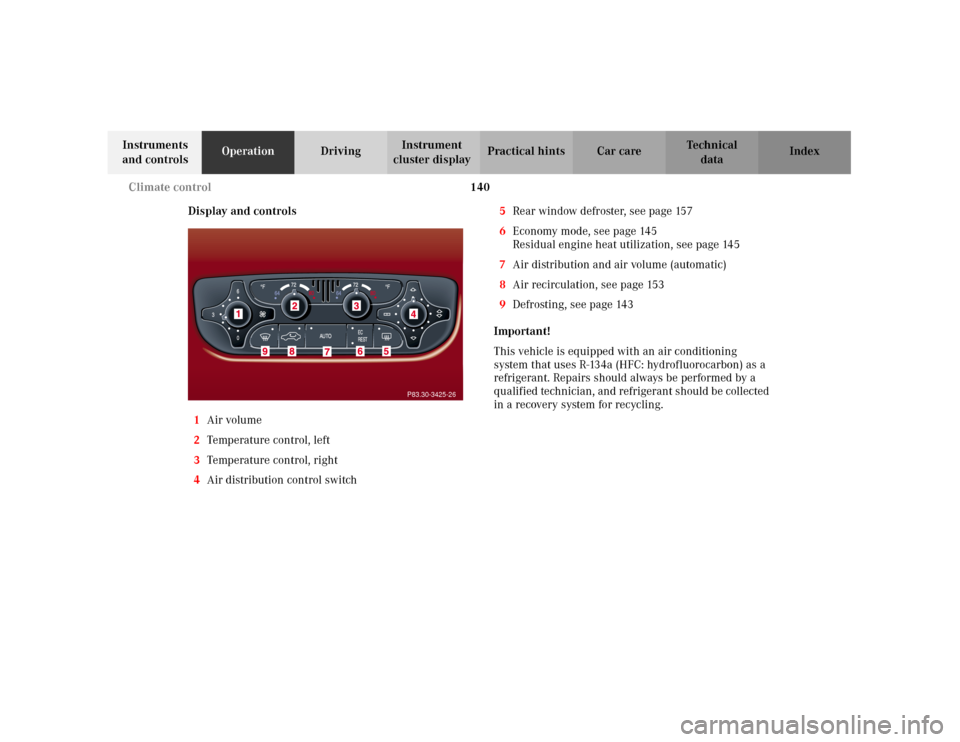
Display and controls
1Air volume
2Temperature control, left
3Temperature control, right
4Air distribution control switch5Rear window defroster, see page 157
6Economy mode, see page 145
Residual engine heat utilization, see page 145
7Air distribution and air volume (automatic)
8Air recirculation, see page 153
9Defrosting, see page 143
Important!
This vehicle is equipped with an air conditioning
system that uses R-134a (HFC: hydrofluorocarbon) as a
refrigerant. Repairs should always be performed by a
qualified technician, and refrigerant should be collected
in a recovery system for recycling.
P83.30-3425-26
Page 150 of 381
141 Climate control
Te ch n i c a l
data Instruments
and controlsOperationDrivingInstrument
cluster displayPractical hints Car care Index Climate control
The system is always at operational readiness, except
when manually switched off.
The climate control only operates with the engine
running.
The temperature selector should be left at the desired
temperature setting. The temperature selected is
reached as quickly as possible.
The system will not heat or cool any quicker by setting a
higher or lower temperature.
The desired interior temperature can be selected
separately for the left and right side of the passenger
compartment.
The climate control removes considerable moisture from
the air during operation in the cooling mode. It is
normal for water to drip on the ground through ducts in
the underbody.
The air conditioning will not engage (no cooling) if the
economy mode S is selected, see page 145. Notes:
Do not obstruct the air flow by placing objects on the air
flow-through exhaust slots below the rear window.
Also keep the air intake grill in front of the windshield
free of snow and debris.
The storage compartment between the front seats can be
ventilated. See page 158 for notes on ventilating the
storage space under the armrest in the center console.
The air conditioner switches itself off for its own
protection if refrigerant is lost. No cooling will then take
pl ac e. Ec on omy mod e S cann ot be switched of f . Have
the air conditioner checked by a Mercedes-Benz Center
should this happen.
Dust filter
Nearly all dust particles and pollen are filtered out
before outside air enters the passenger compartment
through the air distribution system.