steering wheel adjustment MERCEDES-BENZ C320 2002 W203 User Guide
[x] Cancel search | Manufacturer: MERCEDES-BENZ, Model Year: 2002, Model line: C320, Model: MERCEDES-BENZ C320 2002 W203Pages: 406
Page 94 of 406
91 Rear view mirrors
Te ch n i c a l
data Instruments
and controlsOperationDrivingInstrument
cluster displayPractical hints Car care Index Exterior rear view mirrors
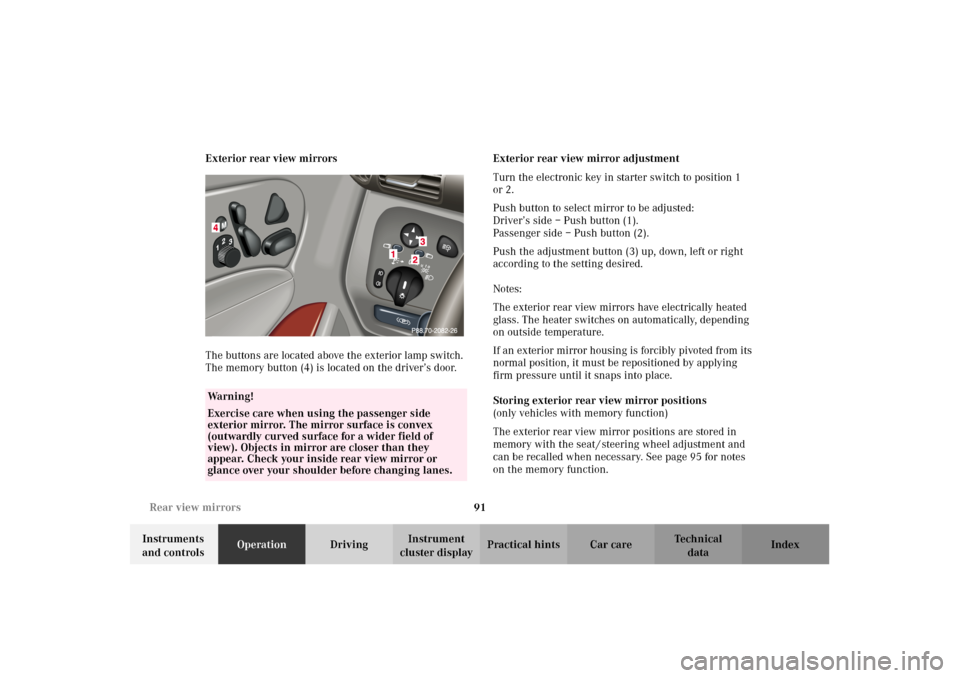
The buttons are located above the exterior lamp switch.
The memory button (4) is located on the driver’s door.Exterior rear view mirror adjustment
Turn the electronic key in starter switch to position 1
or 2.
Push button to select mirror to be adjusted:
Driver’s side – Push button (1).
Passenger side – Push button (2).
Push the adjustment button (3) up, down, left or right
according to the setting desired.
Notes:
The exterior rear view mirrors have electrically heated
glass. The heater switches on automatically, depending
on outside temperature.
If an exterior mirror housing is forcibly pivoted from its
normal position, it must be repositioned by applying
firm pressure until it snaps into place.
Storing exterior rear view mirror positions
(only vehicles with memory function)
The exterior rear view mirror positions are stored in
memory with the seat / steering wheel adjustment and
can be recalled when necessary. See page 95 for notes
on the memory function.
Wa r n i n g !
Exercise care when using the passenger side
exterior mirror. The mirror surface is convex
(outwardly curved surface for a wider field of
view). Objects in mirror are closer than they
appear. Check your inside rear view mirror or
glance over your shoulder before changing lanes.
0
PAuto
OM_203.book Seite 91 Donnerstag, 31. Mai 2001 11:57 11
Page 99 of 406
96 Memory function
Te ch n i c a l
data Instruments
and controlsOperationDrivingInstrument
cluster displayPractical hints Car care Index
Storing positions into memory:
With the electronic key in starter switch position 1 or 2
or with the relevant door open and the electronic key
inserted in the starter switch.
Adjust the seat to the desired position.
Driver’s seat:
You can also adjust the steering wheel and the exterior
rear view mirrors electrically for the driver’s seat. See
page 91 for exterior rear view mirror adjustment and
page 89 for steering wheel adjustment.
Turn button (2) to selected memory position.
Push memory button (1), release and push the position
button (2) within 3 seconds.Recalling positions from memory:
To recall a seat / steering wheel / exterior rear view
mirror position, turn button (2) to selected memory
position and press to recall.
The seat / steering wheel / exterior rear view mirror
movement stops when the button is released.
Caution!
Do not operate the power seats using the memory
button if the backrest is in an excessively reclined
position. Doing so could cause damage to front or rear
seats.
First move backrest to an upright position.
OM_203.book Seite 96 Donnerstag, 31. Mai 2001 11:57 11
Page 100 of 406
97 Memory function
Te ch n i c a l
data Instruments
and controlsOperationDrivingInstrument
cluster displayPractical hints Car care Index Important!
Prior to operating the vehicle, the driver should check
and adjust if necessary the seat height, seat position
fore and aft, and backrest angle to insure adequate
control, reach and comfort. The head restraint should
also be adjusted for proper height. See also airbag
section for proper seat positioning.
In addition, also adjust the steering wheel to ensure
ad eq uate con tr ol, r each, operation and com fort. B ot h the
inside and outside rear view mirrors should be adjusted
for adequate rearward vision.
Fasten seat belts. Infants and small children should be
seated in a properly secured restraint system that
complies with U.S. Federal Motor Vehicle Safety
Standard 213 and Canadian Motor Vehicle Safety
Standard 213.
All seat, head restraint, steering wheel, and rear view
mirror adjustments as well as fastening of seat belts
should be done before the vehicle is put into motion.
Wa r n i n g !
Children 12 years old and under must never ride in
the front seat, except in a Mercedes-Benz
authorized BabySmart
TM compatible child seat,
which operates with the BabySmart
TM system
installed in the vehicle to deactivate the passenger
side front airbag when it is properly installed.
Otherwise they will be struck by the airbag when it
inflates in a crash. If this happens, serious or fatal
injury can result.
According to accident statistics, children are safer
when properly restrained in the rear seating
positions than in the front seating positions.
Infants and small children must ride in back seats
and be seated in an appropriate infant or child
restraint system, which is properly secured with
the vehicle’s seat belt, fully in accordance with the
child seat manufacturer’s instructions.A child’s risk of serious or fatal injuries is
significantly increased if the child restraints are
not properly secured in the vehicle and the child is
not properly secured in the child restraint.
OM_203.book Seite 97 Donnerstag, 31. Mai 2001 11:57 11
Page 135 of 406
132 Multifunction steering wheel, multifunction display
Te ch n i c a l
data Instruments
and controlsOperationDrivingInstrument
cluster displayPractical hints Car care Index
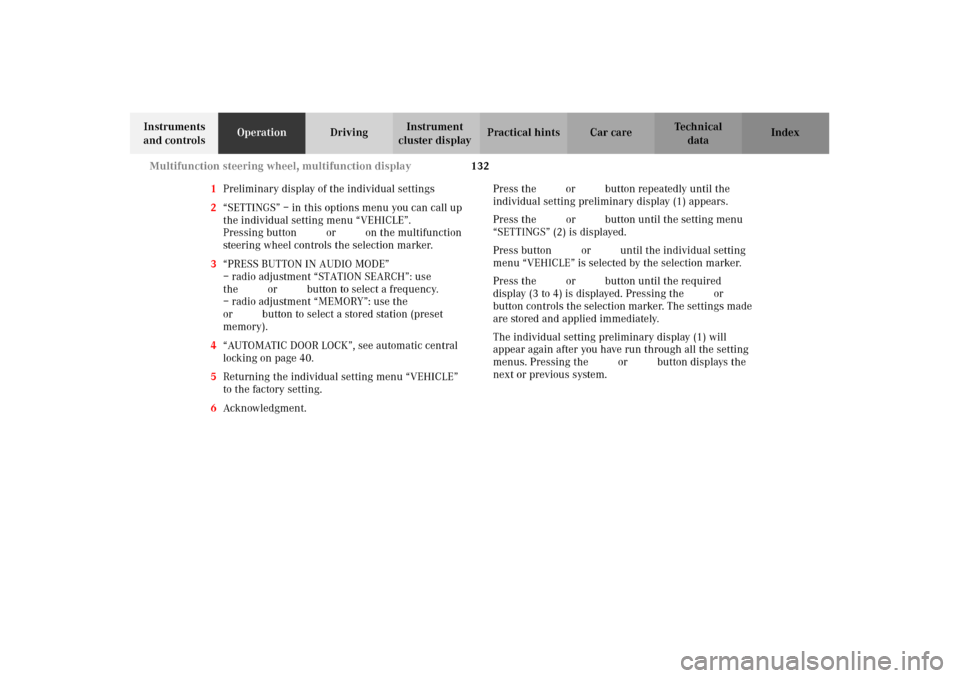
1Preliminary display of the individual settings
2“SETTINGS” – in this options menu you can call up
the individual setting menu “VEHICLE”.
Pressing buttonæ orç on the multifunction
steering wheel controls the selection marker.
3“PRESS BUTTON IN AUDIO MODE”
– radio adjustment “STATION SEARCH”: use
thej ork button to select a frequency.
– radio adjustment “MEMORY”: use the j
ork button to select a stored station (preset
memory).
4“AUTOMATIC DOOR LOCK”, see automatic central
locking on page 40.
5Returning the individual setting menu “VEHICLE”
to the factory setting.
6Acknowledgment.Press the è or ÿ button repeatedly until the
individual setting preliminary display (1) appears.
Press the j or k button until the setting menu
“SETTINGS” (2) is displayed.
Press buttonæ orç until the individual setting
menu “VEHICLE” is selected by the selection marker.
Press the j or k button until the required
display (3 to 4) is displayed. Pressing the æ orç
button controls the selection marker. The settings made
are stored and applied immediately.
The individual setting preliminary display (1) will
appear again after you have run through all the setting
menus. Pressing the è or ÿ button displays the
next or previous system.
OM_203.book Seite 132 Donnerstag, 31. Mai 2001 11:57 11
Page 315 of 406
312 Malfunction and warning messages
Te ch n i c a l
data Instruments
and controlsOperation DrivingInstrument
cluster displayPractical hints Car care Index
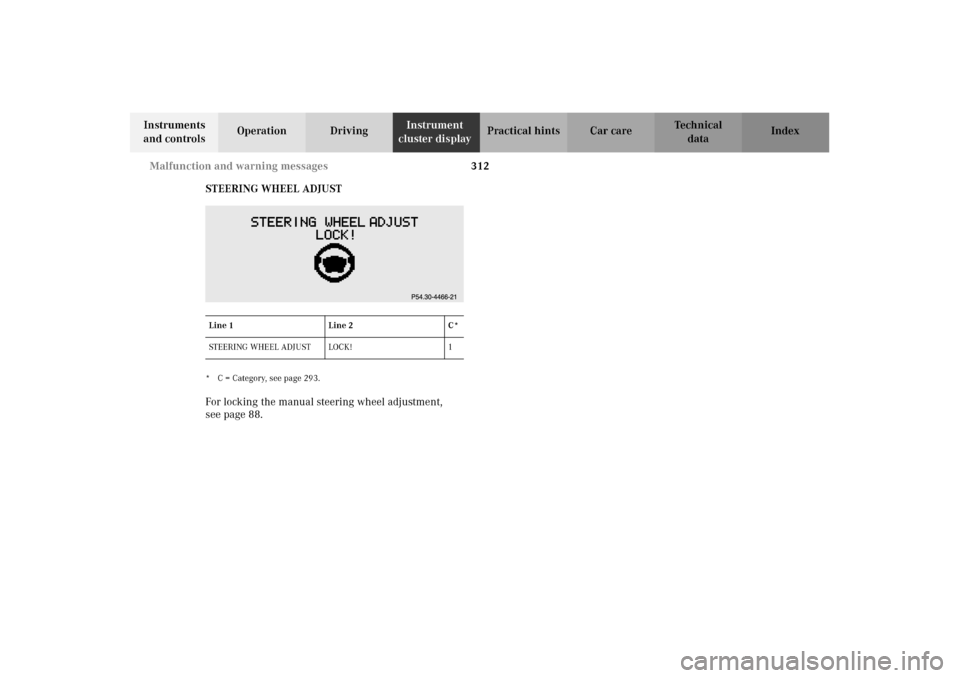
STEERING WHEEL ADJUST
* C = Category, see page 293.For locking the manual steering wheel adjustment,
seepage88.Line 1 Line 2 C*
STEERING WHEEL ADJUST LOCK! 1
OM_203.book Seite 312 Donnerstag, 31. Mai 2001 11:57 11
Page 399 of 406
396 Index
Te ch n i c a l
data Instruments
and controlsOperation DrivingInstrument
cluster displayPractical hints Car careIndex
Starter switch .................................................................246
Starting and turning off the engine ............................248
STEER. WHEEL ADJUST. -
malfunction and warning messages ...................... 312
Steering lock
See starter switch ......................................................246
Steering wheel
Easy-entry/exit feature .............................................. 48
Steering wheel adjustment
electrical ....................................................................... 89
manual .......................................................................... 88
Storage compartments and armrests .......................... 207
Storing mirror positions ................................................. 91
Storing seat positions ...................................................... 51
Stowing things in the vehicle ...................................... 314
Sun visors .......................................................................206
Supplemental Restraint System (SRS) ......................... 71
TTechnical data ................................................................ 377
Tele Aid ........................................................................... 234
Emergency calls ........................................................ 235
Information ................................................................ 239
Initiating an emergency call ...................................237Roadside Assistance ................................................ 238
Telephone .........................................................................111
Incoming call ............................................................. 115
Redialing .................................................................... 113
Telephone book ..........................................................111
Telephone, general ........................................................ 225
Telephones and two-way radios .................................. 232
Telescoping steering column -
malfunction and warning messages ...................... 312
The first 1 000 miles (1 500 km) ............................... 233
Tire inflation pressure .................................................. 341
TIREFIT ...................................................................326, 337
Sealing tire with TIREFIT ........................................ 338
Tool kit ............................................................................ 325
Tool kit (C 32 AMG only) ............................................. 326
Tow-away alarm ................................................................47
Towing the vehicle ........................................................ 347
Transmission selector lever,
manually unlocking ................................................. 350
Trip computer ................................................................. 117
Trunk ................................................................................. 41
Opening ........................................................................ 34
Release switch ............................................................. 45
Trunk lamp ....................................................................... 45
OM_203.book Seite 396 Donnerstag, 31. Mai 2001 11:57 11